It's no secret that the bearings use durable, wear-resistant steel, thanks to this the bearing lasts a long time. These wonderful qualities of steel bearings make it possible to produce high-quality, strong knives from them. Today we will figure out how this is done.
I note right away that the manufacturing process of a knife from a bearing requires a forge. The fact is that in order to obtain a workpiece, steel will have to be leveled, and for this it will be necessary to warm it up red-hot and work with a hammer. As for other tools, their availability will depend on how well you make the knife and how fast. For example, you can quickly and accurately grind a blade with, this machine is indispensable in the manufacture of knives.
Materials and tools used by the author:
Material List:
- bearing cage;
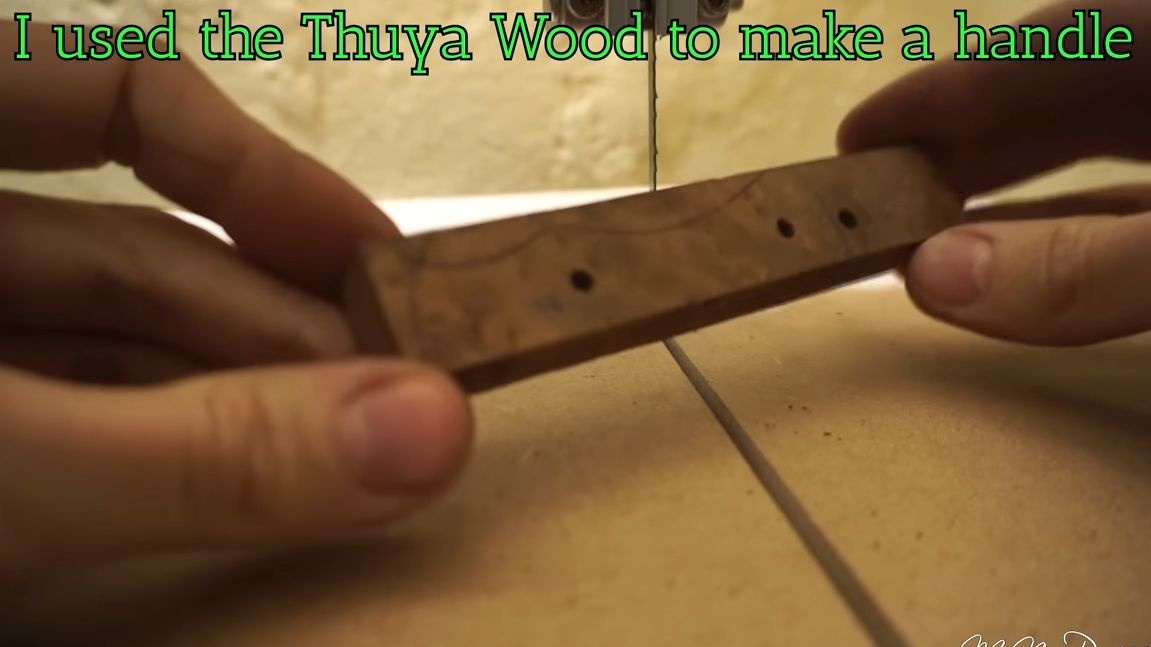
- wood for linings;
- brass rods or other material for pins;
- epoxy adhesive;
- oil for wood impregnation.
Tool List:
- grinder;
- vise;
- bake;
- domestic oven;
- drilling machine;
- sandpaper;
- polishing machine;
- hammer and anvil;
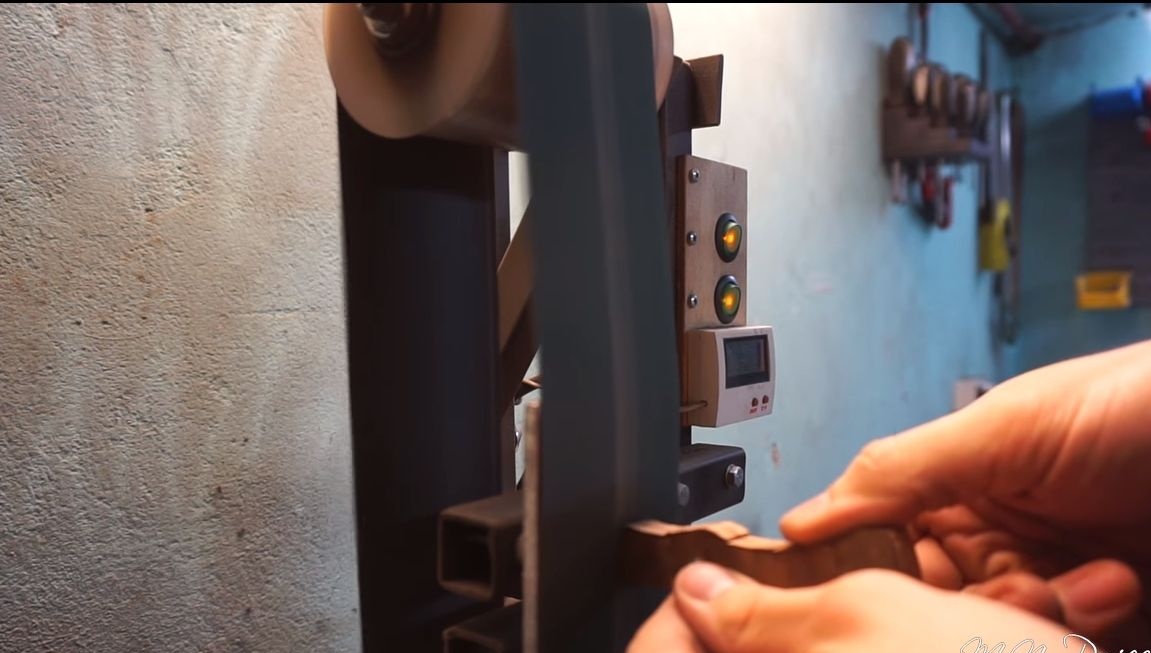
- belt sander ();
- "dremel";
- clamps;
- jigsaw;
- set for etching (optional);
- electrical tape, paper, marker and other little things.
The process of making a knife:
Step one. We get the workpiece
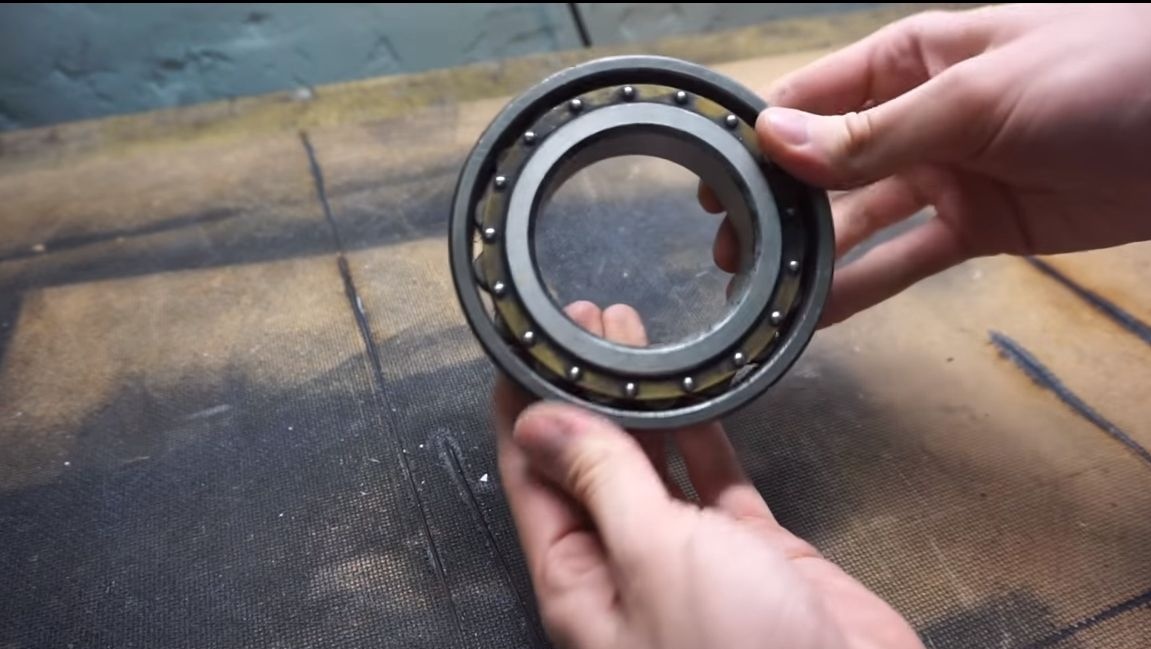
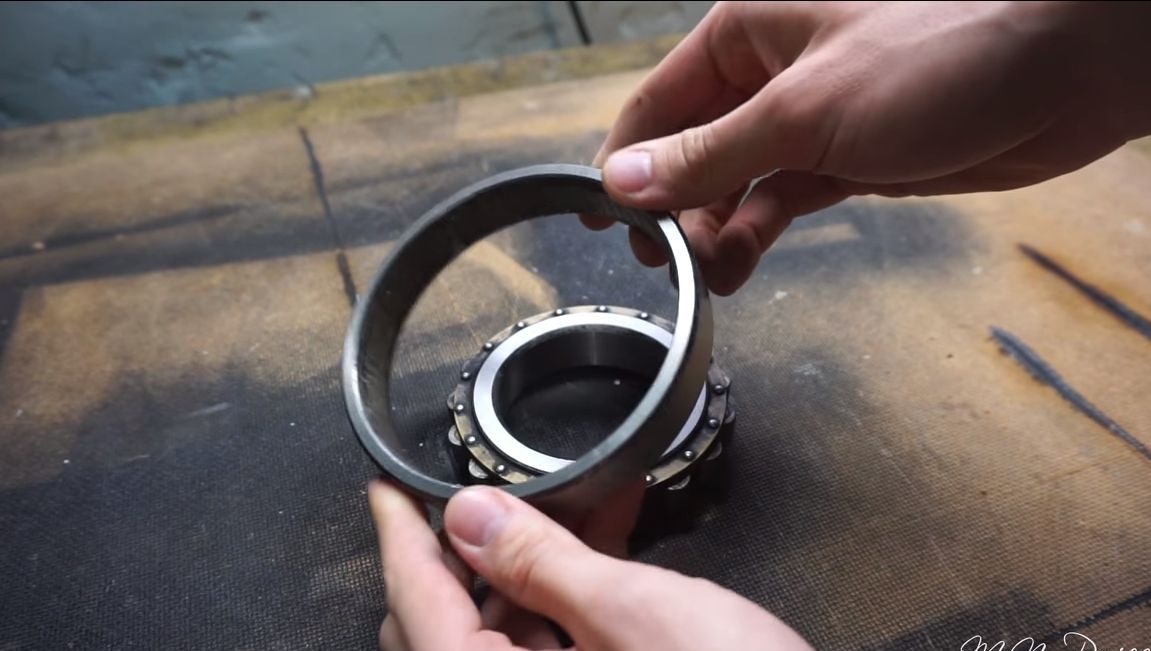
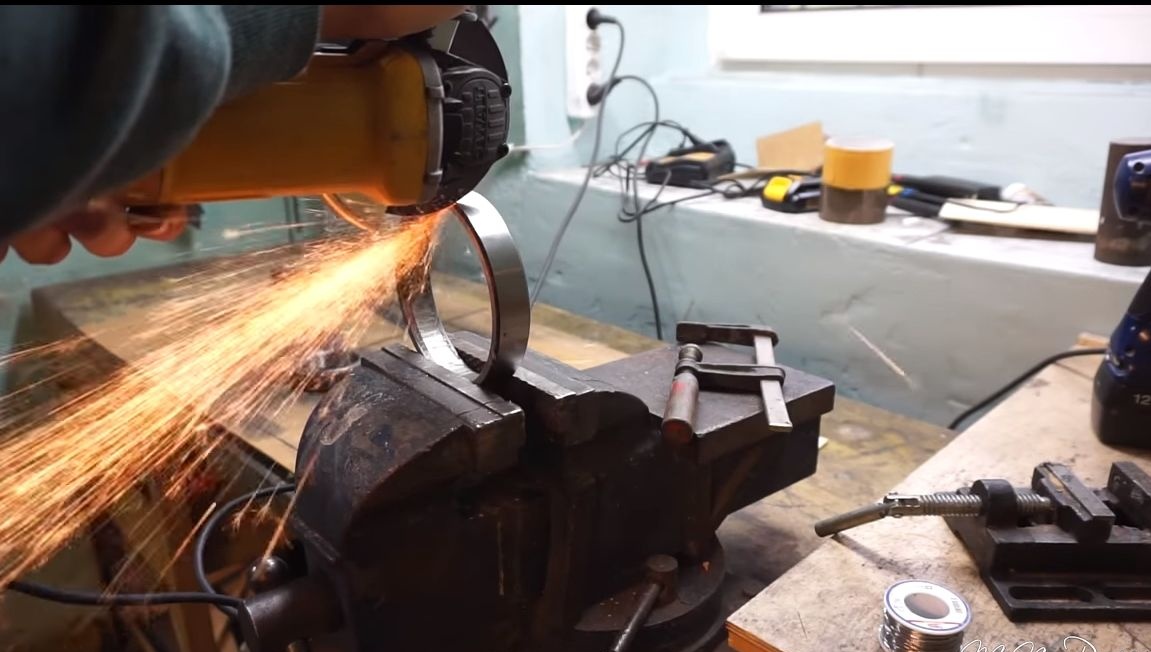
First of all, you will need to disassemble the bearing, from it the author used the cage (outer part). Bearings are different, as well as ways to disassemble them. Clamp the clip in a vice and cut it with a grinder.
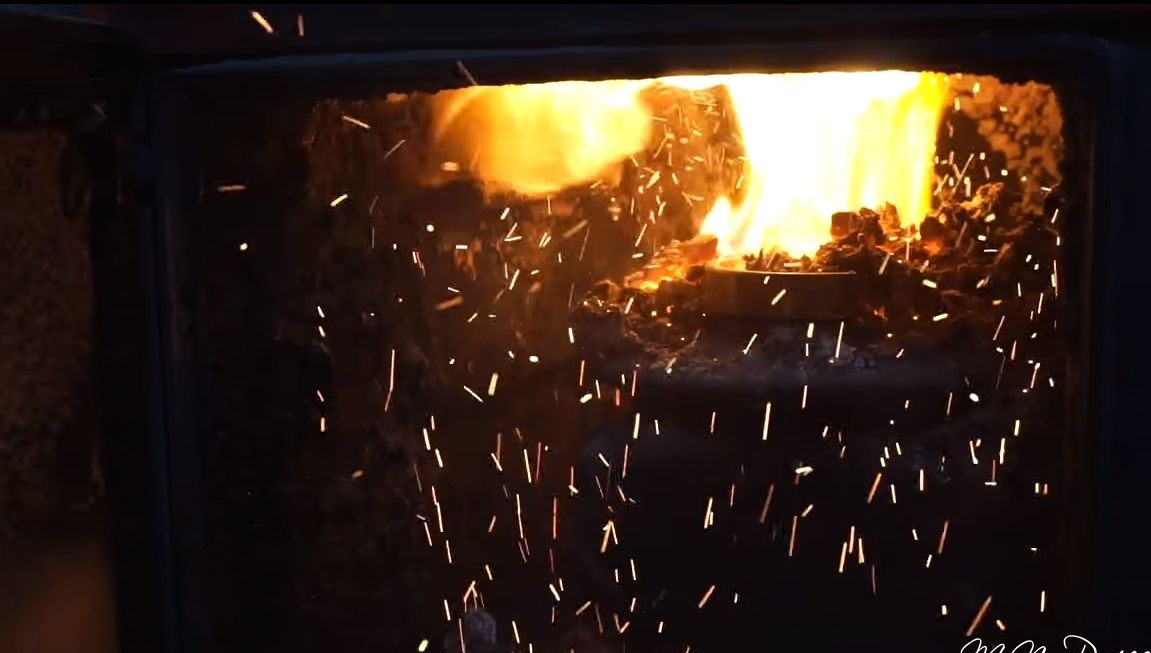
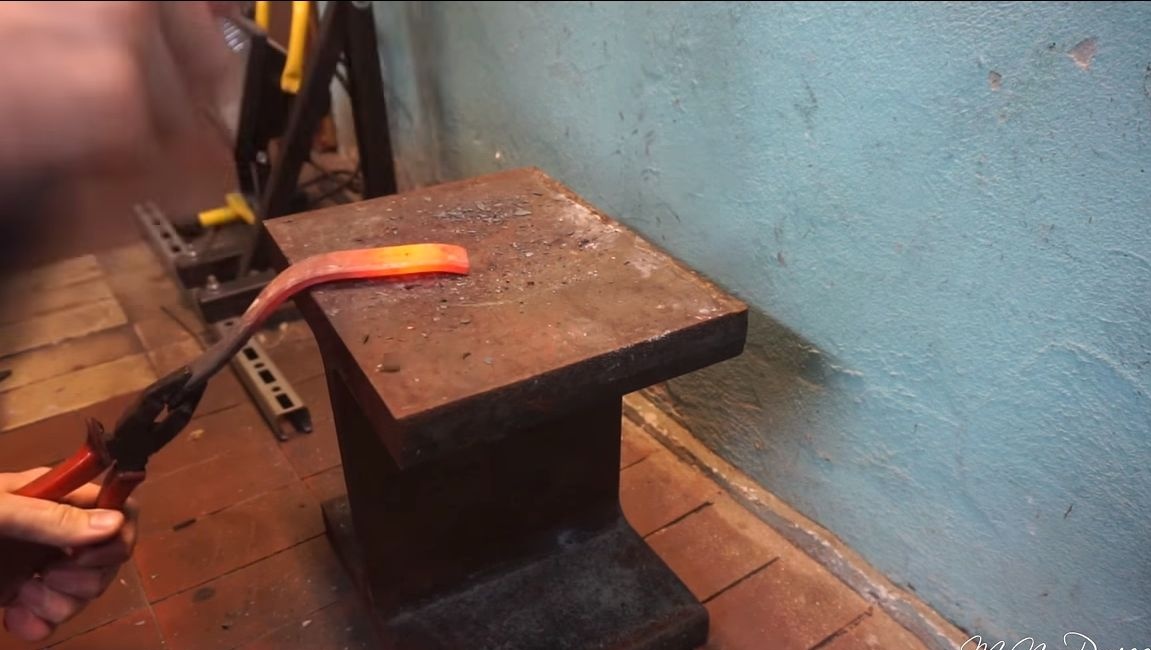
Now you need a furnace, the steel needs to be heated to red. We get it and while hot we align it with a hammer on the anvil. In principle, after annealing, it should be machinable and cold. But it is easier to level the metal if it is hot.

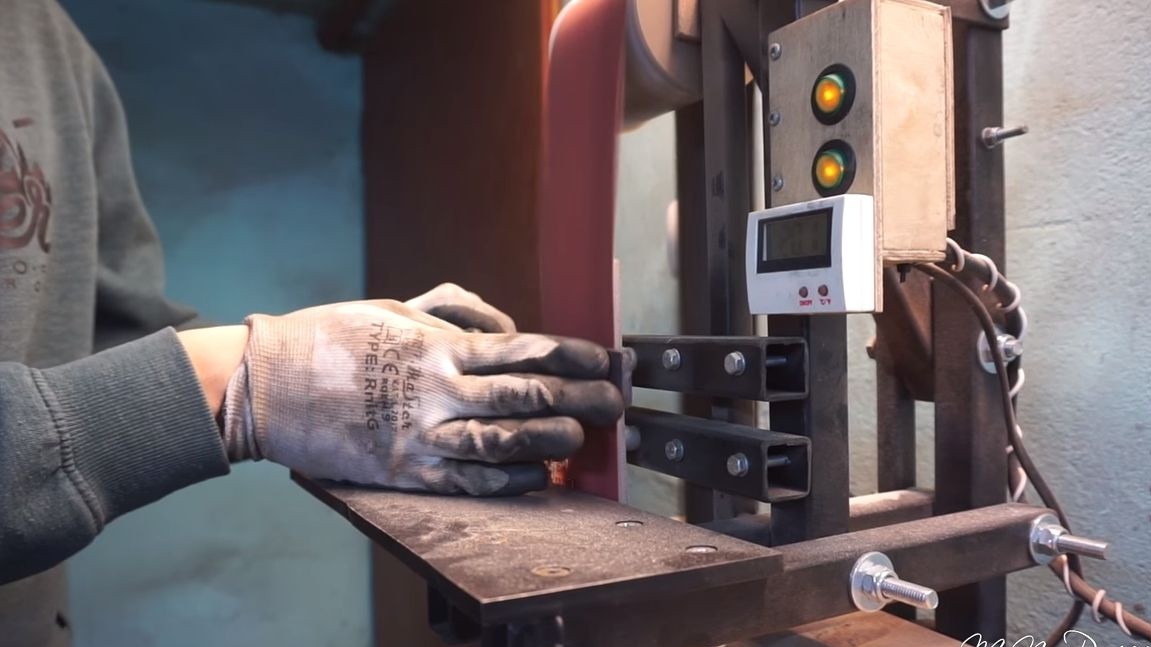
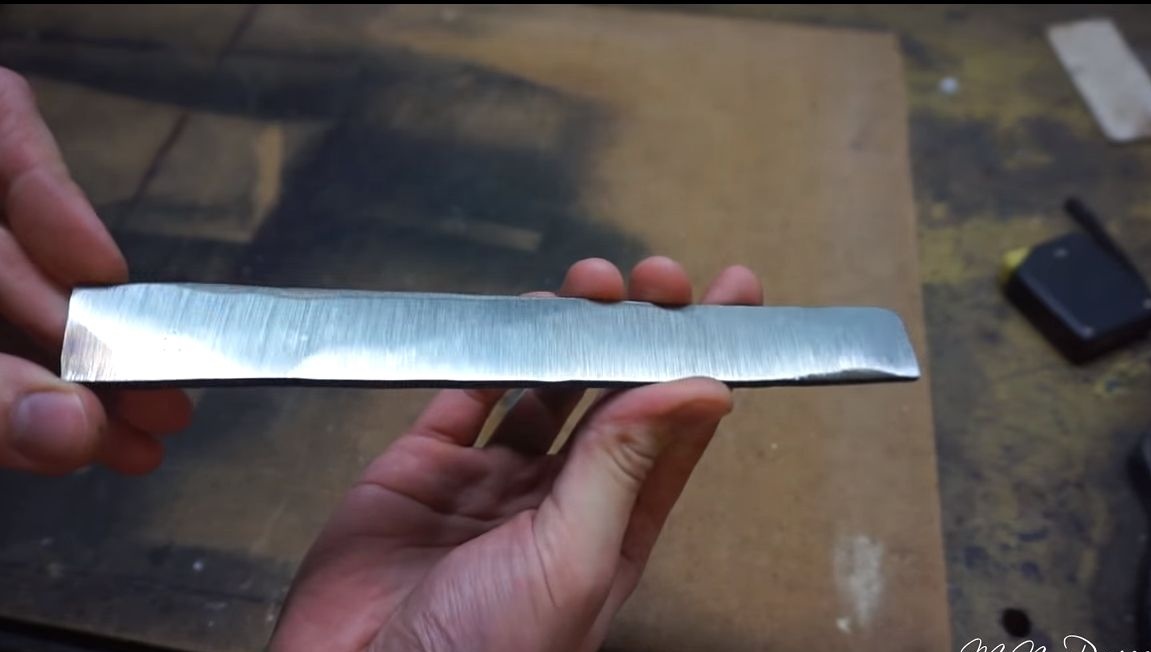
The workpiece is almost ready, it remains to grind it. A belt sander will come to your aid. After processing, you will get an excellent workpiece that is not much different from the purchased metal, or maybe even better.
Step Two Cut out the pattern
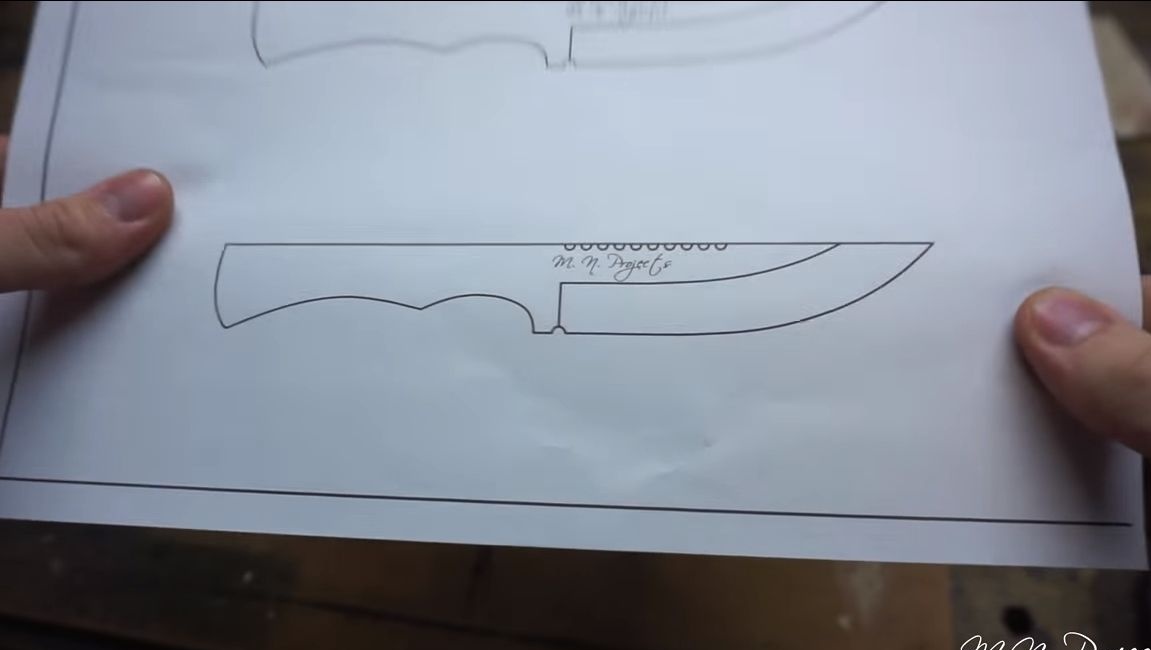
To make a knife, you have to come up with a template in advance, or you can download a ready-made one from the Internet and print it on paper. Next, cut out the template from paper with scissors and glue to the workpiece. If you need a template in the future, you can simply circle it with a marker.


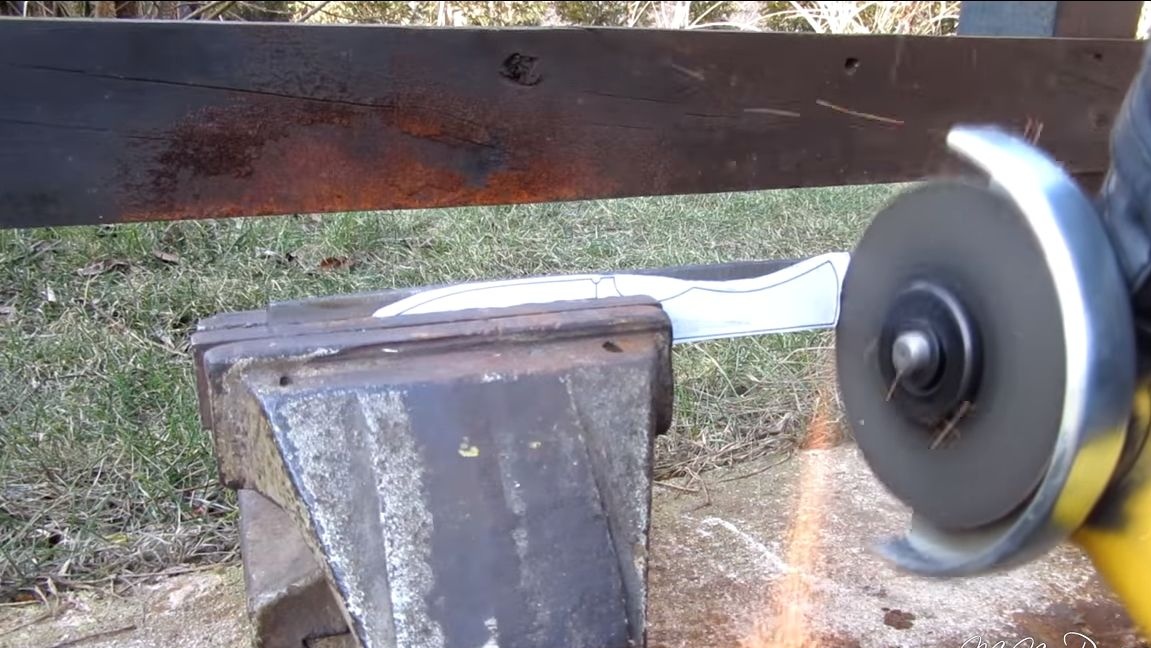
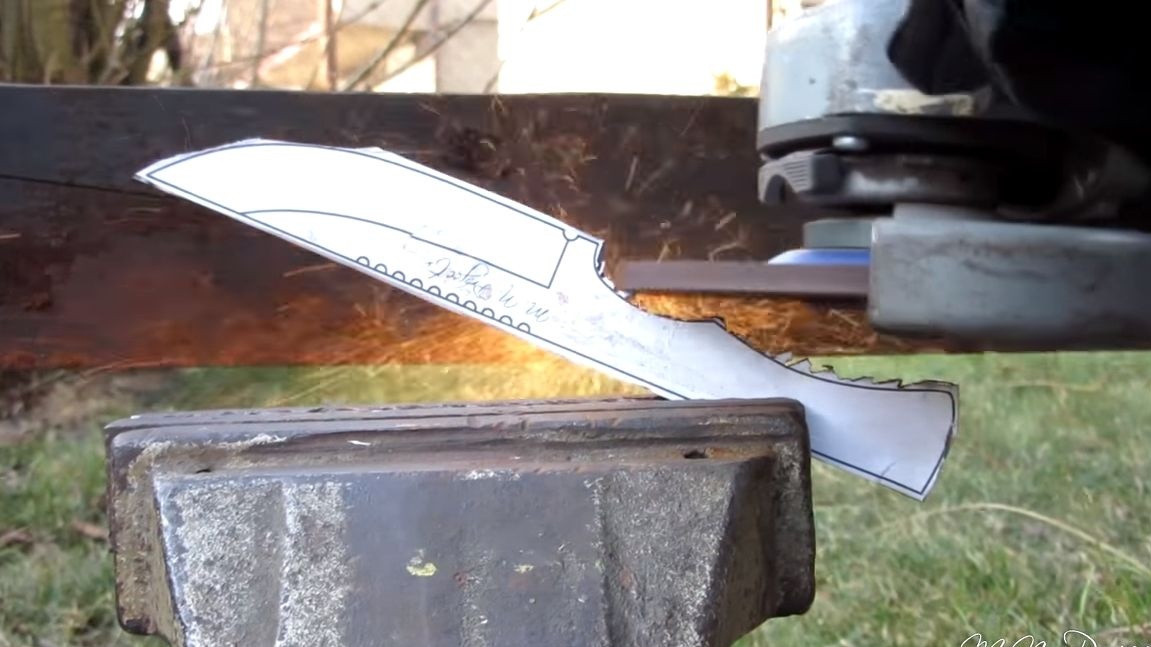
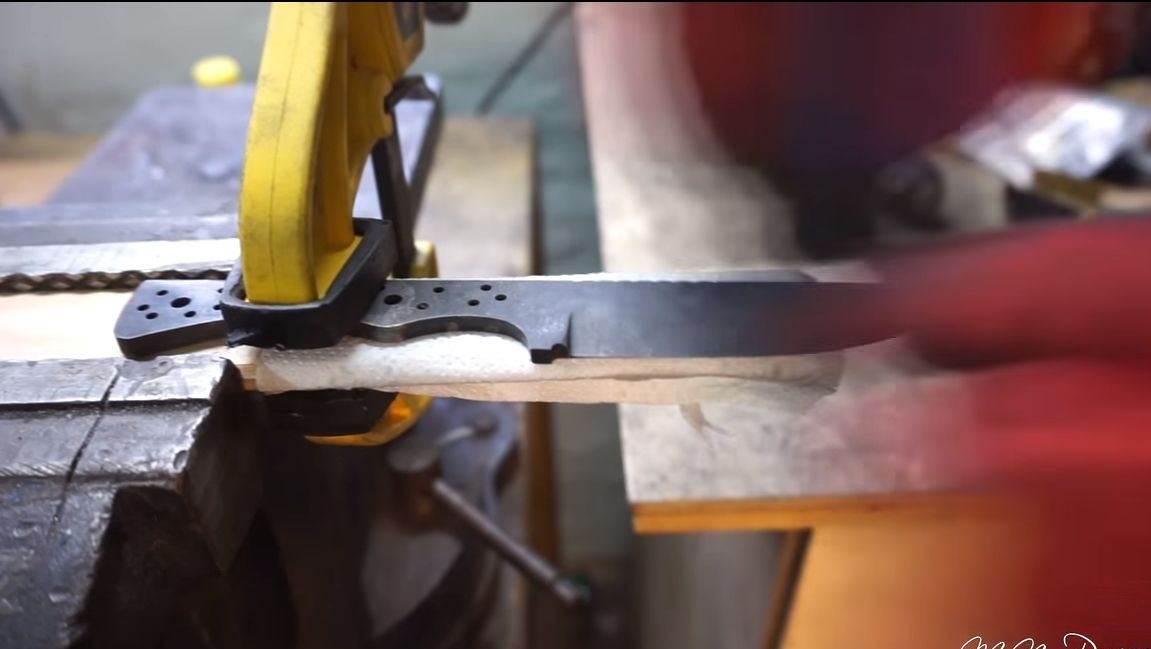
Getting to cutting the blade.The author does not have a bandsaw, he does this with the usual grinder. We clamp the workpiece in a vise and slowly begin to cut it. As for the problem areas where you need to cut along the curve, we make a lot of cuts there, and then cut out a piece. At the end, we put a grinding wheel on the grinder and grind the profile in a circle to remove coarse pieces, nicks and so on.
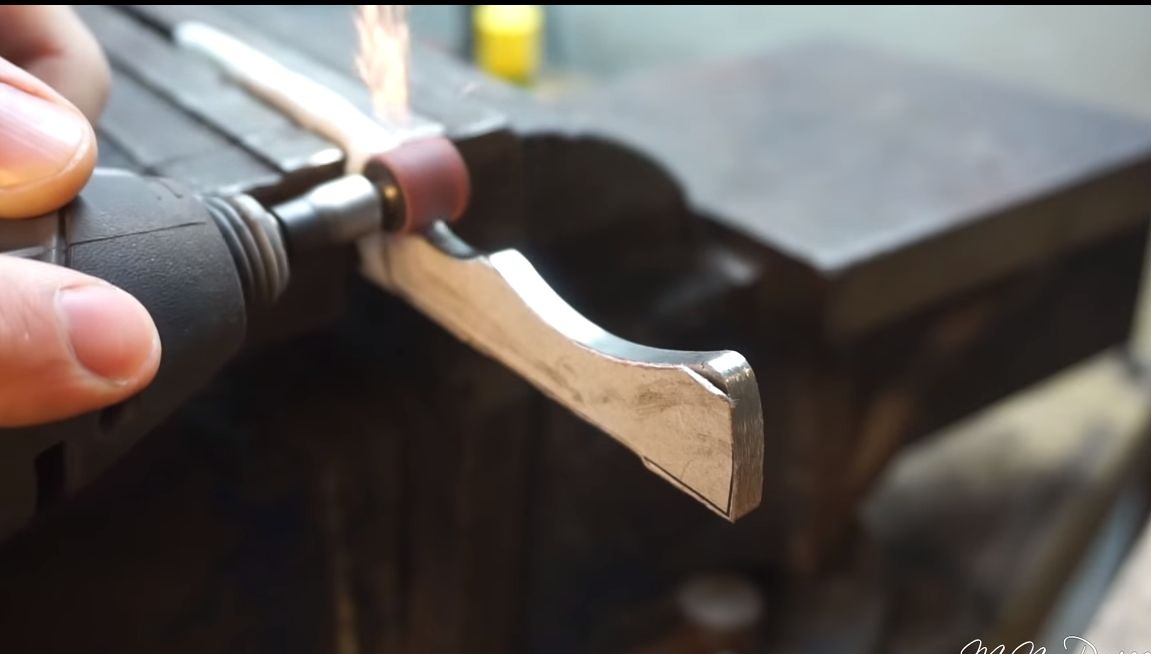
Step Three Grinding
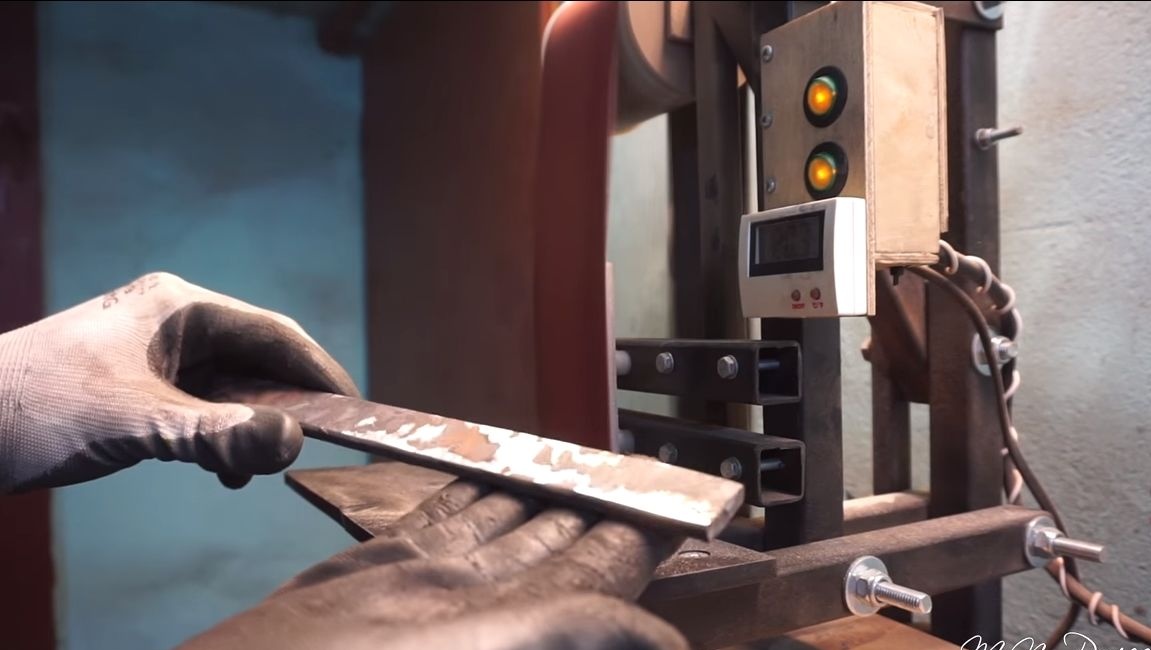
Rough forming of the blade is over, proceed to finer processing. We go to and modify the profile of the blade. As for hard-to-reach places where the belt of the car cannot reach, we take a dremel with the appropriate nozzle.

Step Four Blade finishing
At this stage, the author completes all work with metal, not taking into account the sharpening and polishing of the blade. Ahead will be hardening, and after it the metal will be too strong for processing.

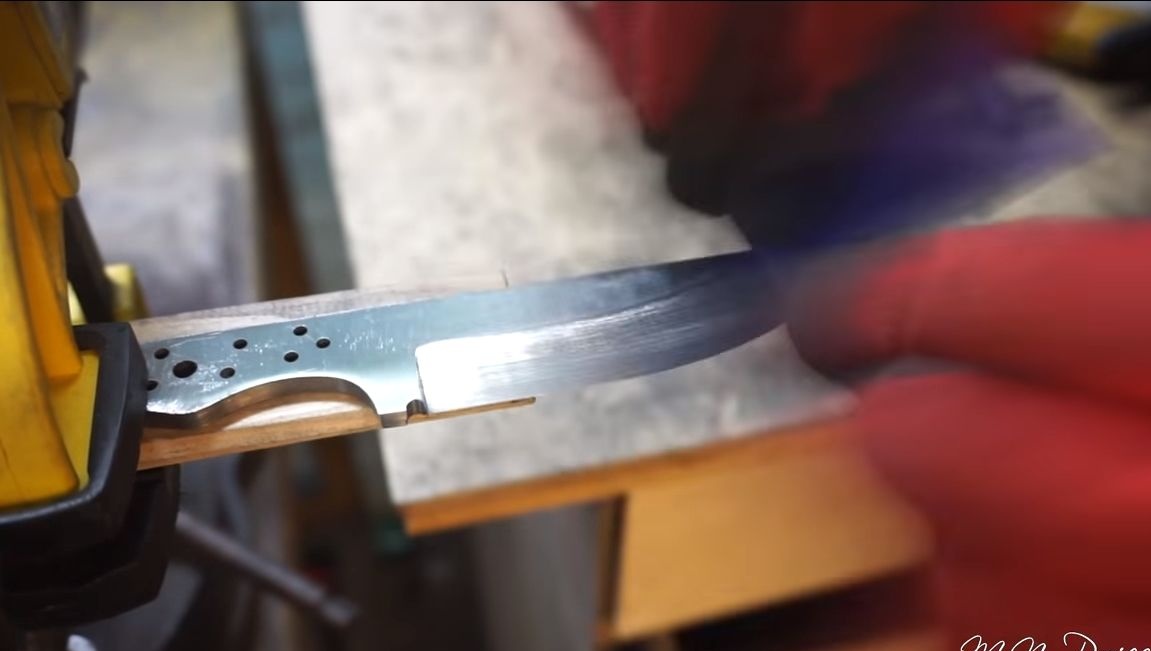
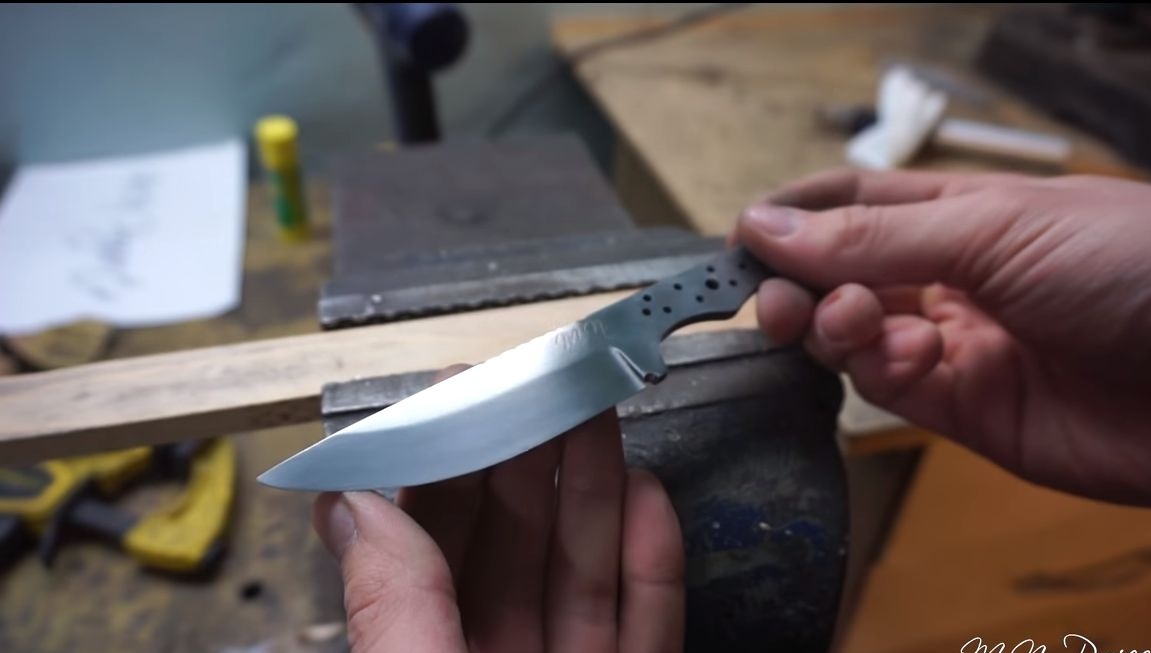
We go to the drilling machine and drill holes for the pins. You can also drill a number of non-through holes so that the pads adhere well to the metal.

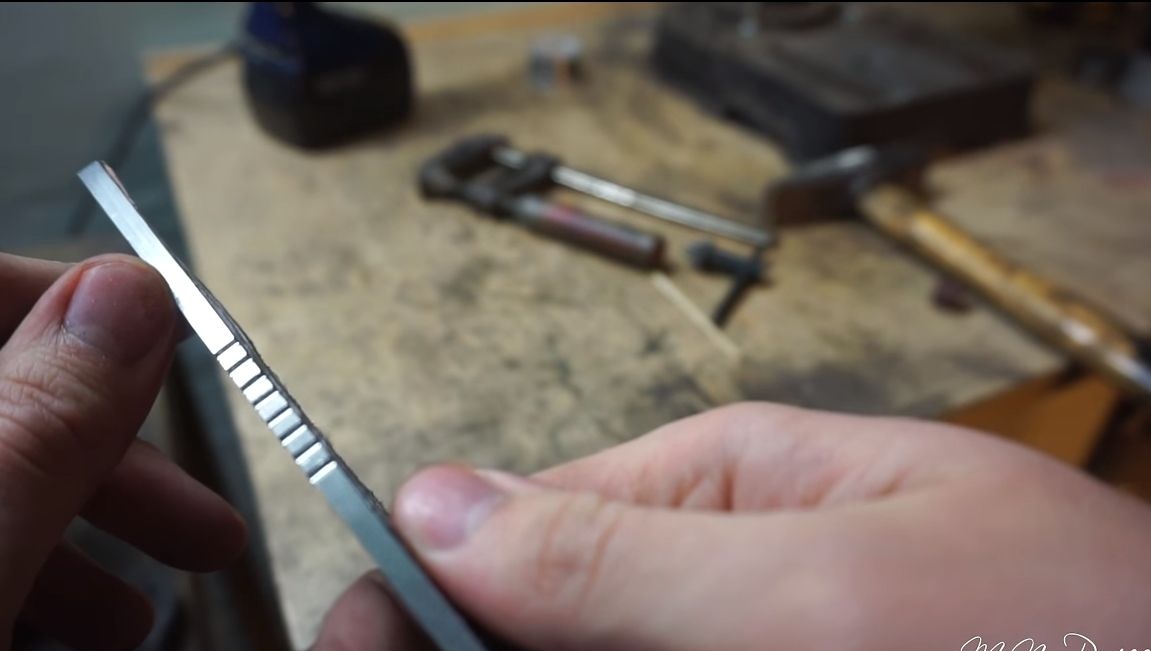
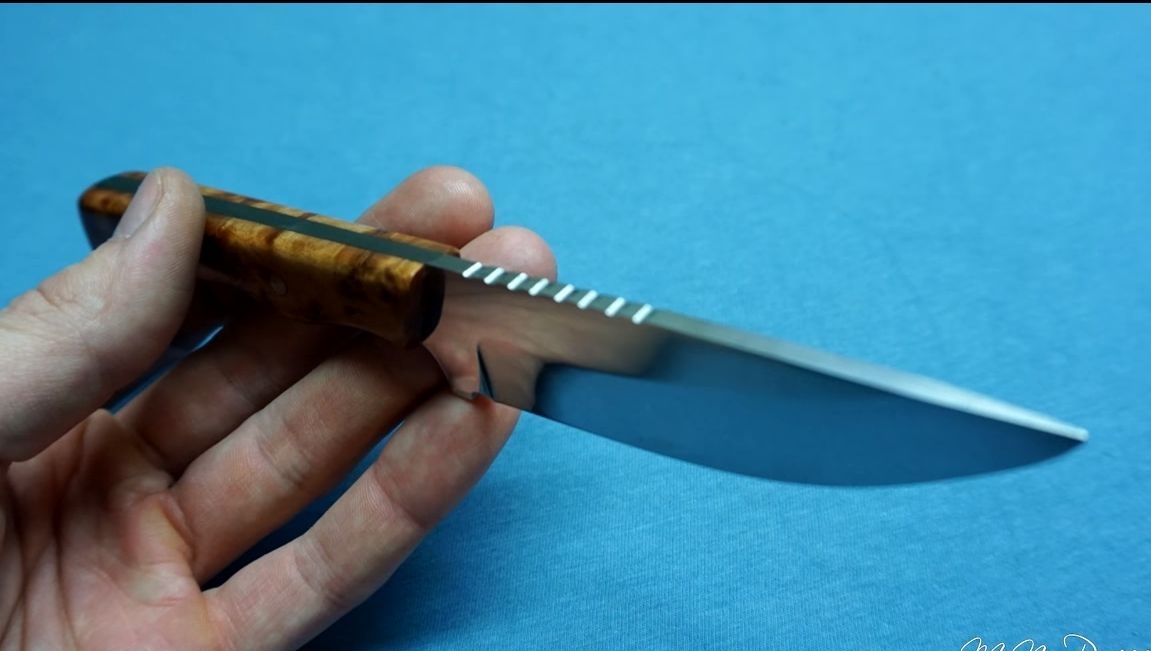
The author makes cloves on the blade, it is convenient to rest on them with the thumb when cutting hard materials. Such cloves can be formed with a dremel or ordinary files.

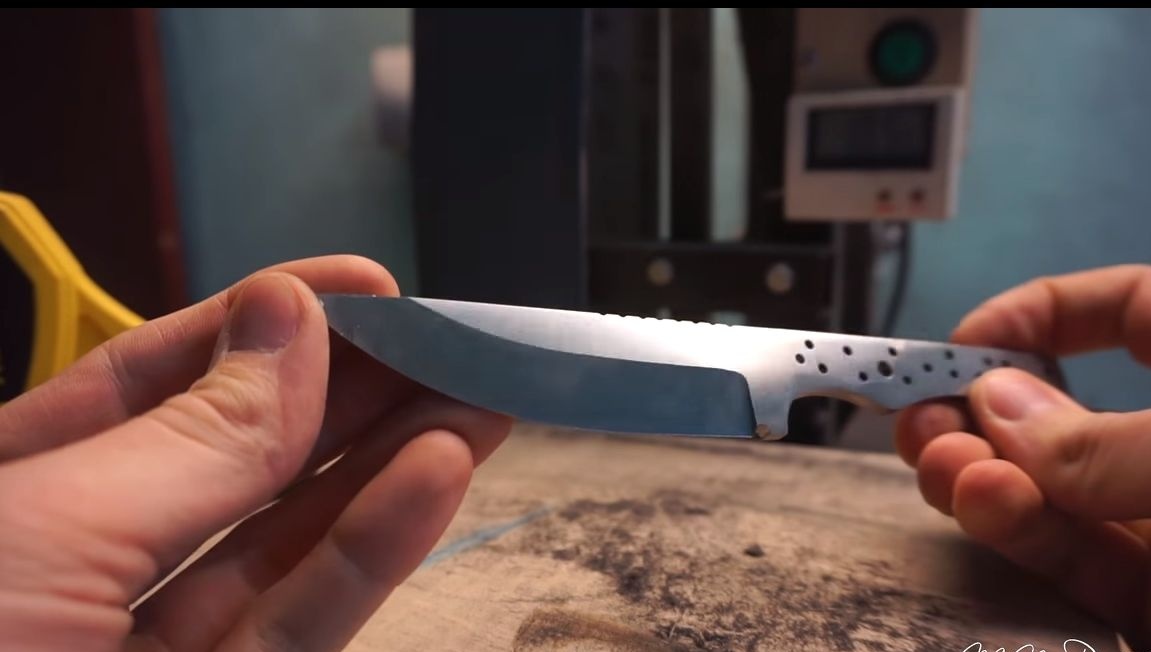
And finally, there will be another such important point as the manufacture of bevels. You can do this manually, though you will have to spend a lot of time and effort. This is most easily done, and with high quality, on a belt sander. The bevels should be as symmetrical as possible.
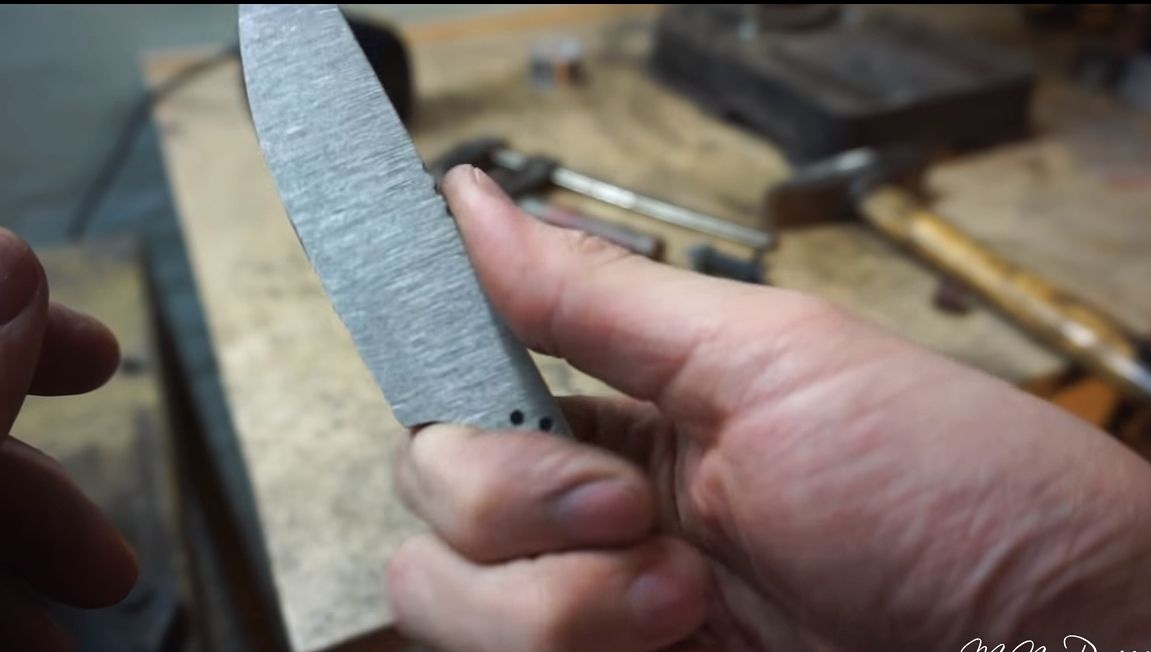
At the end, sand the entire surface of the blade, you need to remove all gross scratches after grinding. We take fine sandpaper and proceed to fine sanding. The paper can be wetted in water, so it polishes better.
Step Five Quenching
Tempering the metal, we make it hard, this allows the blade to stay sharp for a long time. The hardening process should always consist of at least two stages. The very first stage is hardening, we heat the blade to a yellow glow, while the metal should not be attracted by a magnet. Although there is one point, for each steel the temperature is quenched and the color of heating is individual.
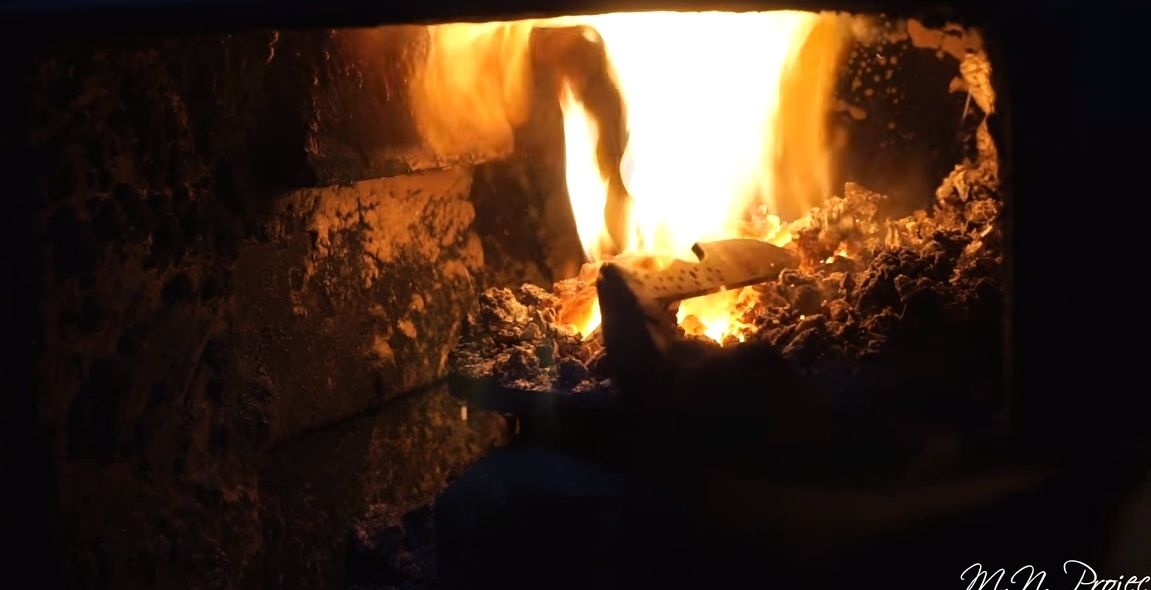
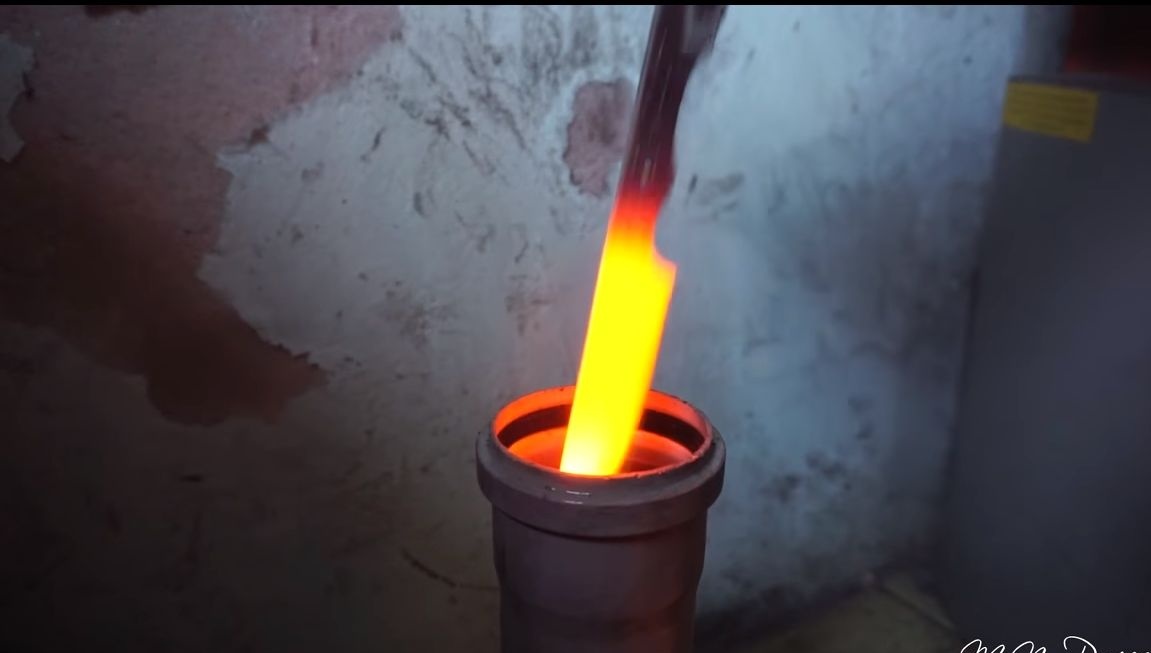
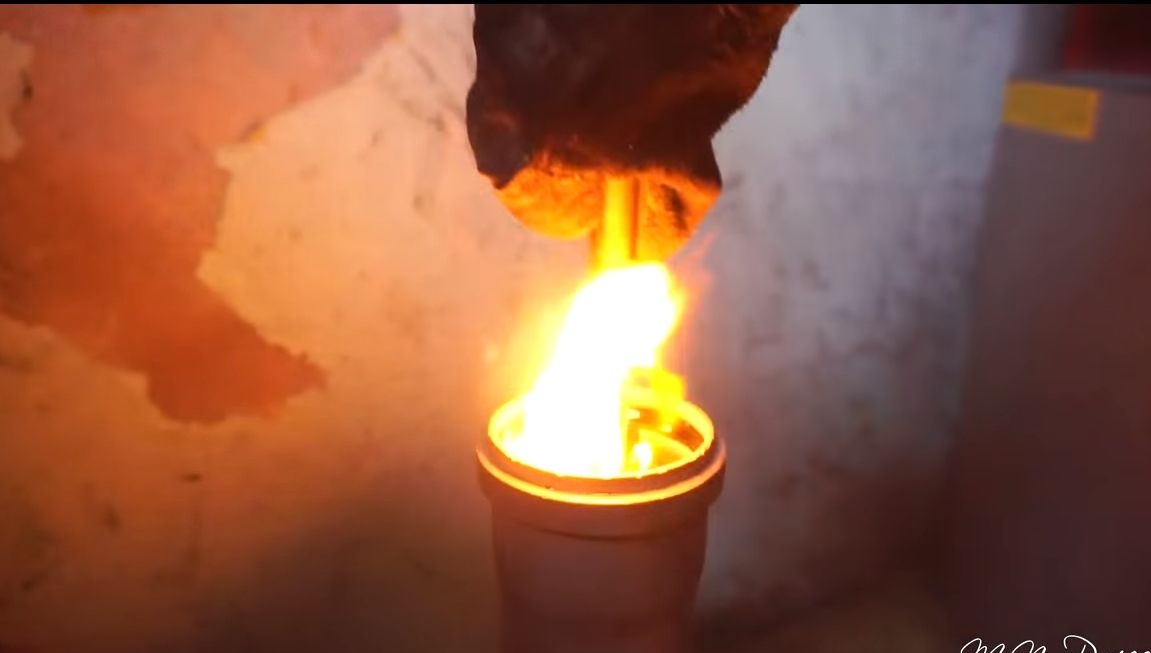
Now we cool the blade in oil, it will suit vegetable or mineral. Be careful, as the oil ignites when immersed in hot metal. As seen in the photo, auto only the blade warms up for hardening, and the tail part, where the handle is, remains dark in color.
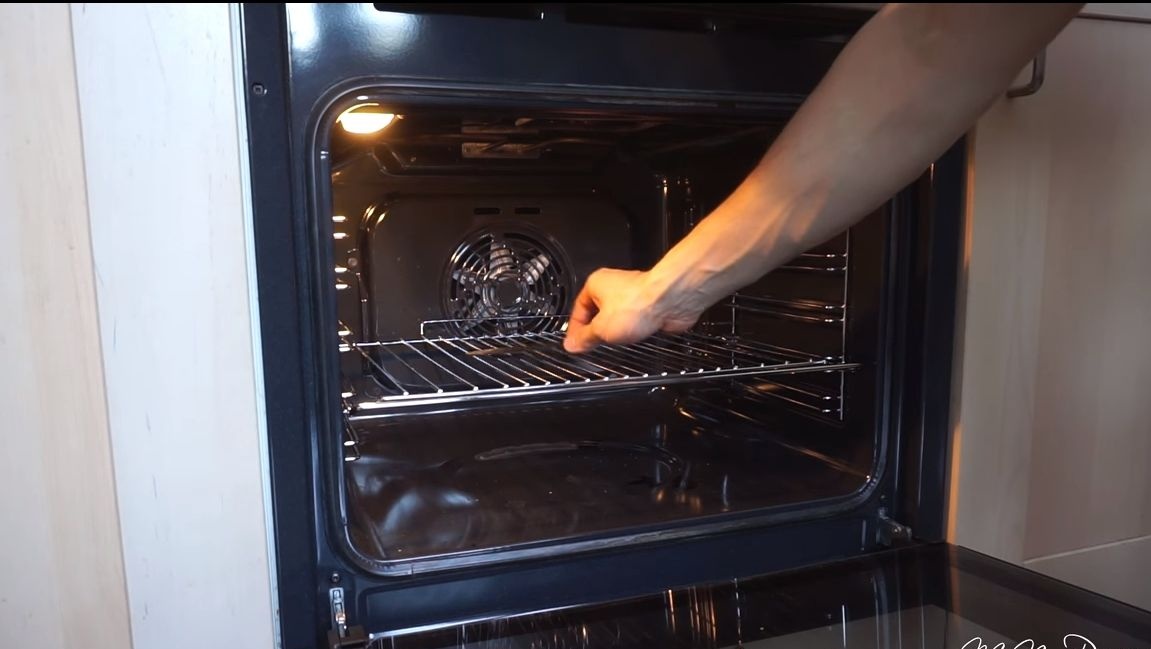
The second stage of quenching is the tempering of the metal, it must be heated to a certain temperature and allowed to cool smoothly. This is done so that the metal is not brittle as it is after quenching. For these purposes, a domestic oven is usually used. The temperature for heating for tempering is also individual for different metals. On average, steel is heated for about an hour at a temperature of 200-250 degrees Celsius, and then allowed to cool smoothly with the oven. The higher the heating temperature, the stronger the tempering of the metal.
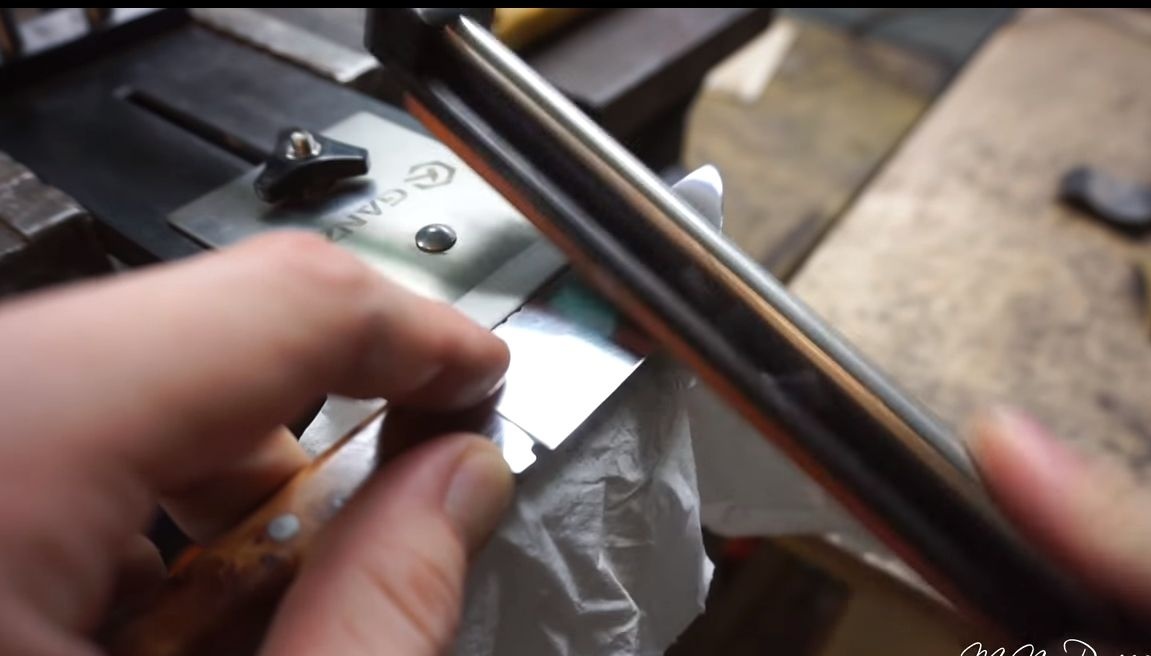
Step Six Cleaning and pickling
After tempering, the metal will be dark, it may have scale and trace burnt oil. To remove all this, take a fine sandpaper and grind the surface. To increase efficiency, you can use WD-40 or plain water.
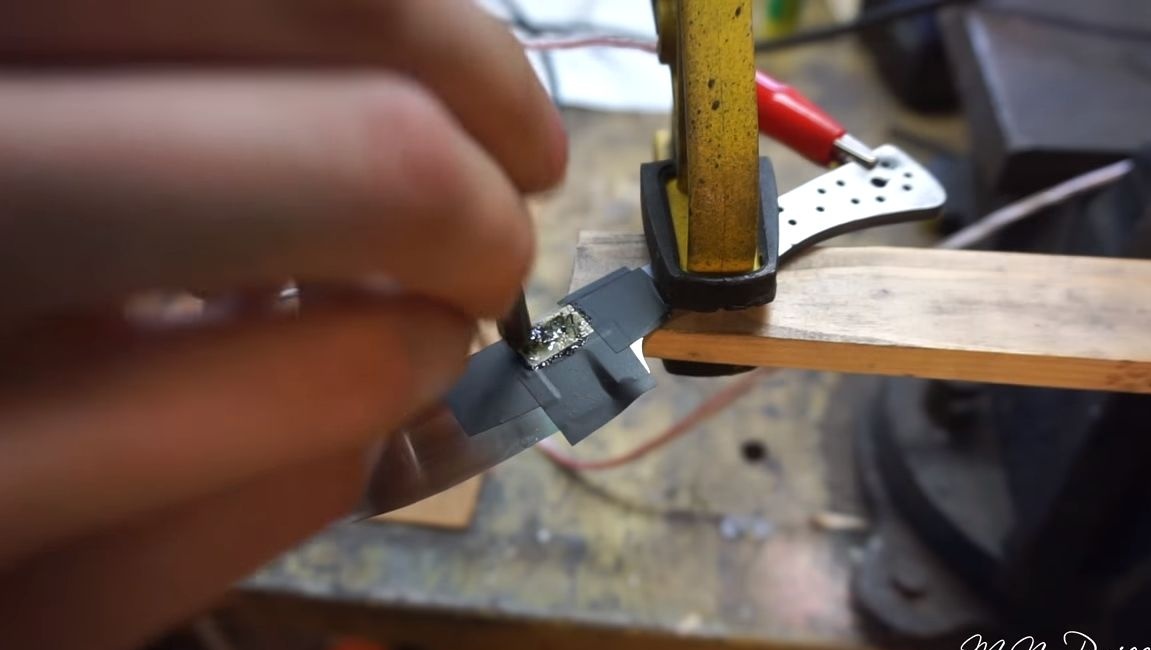
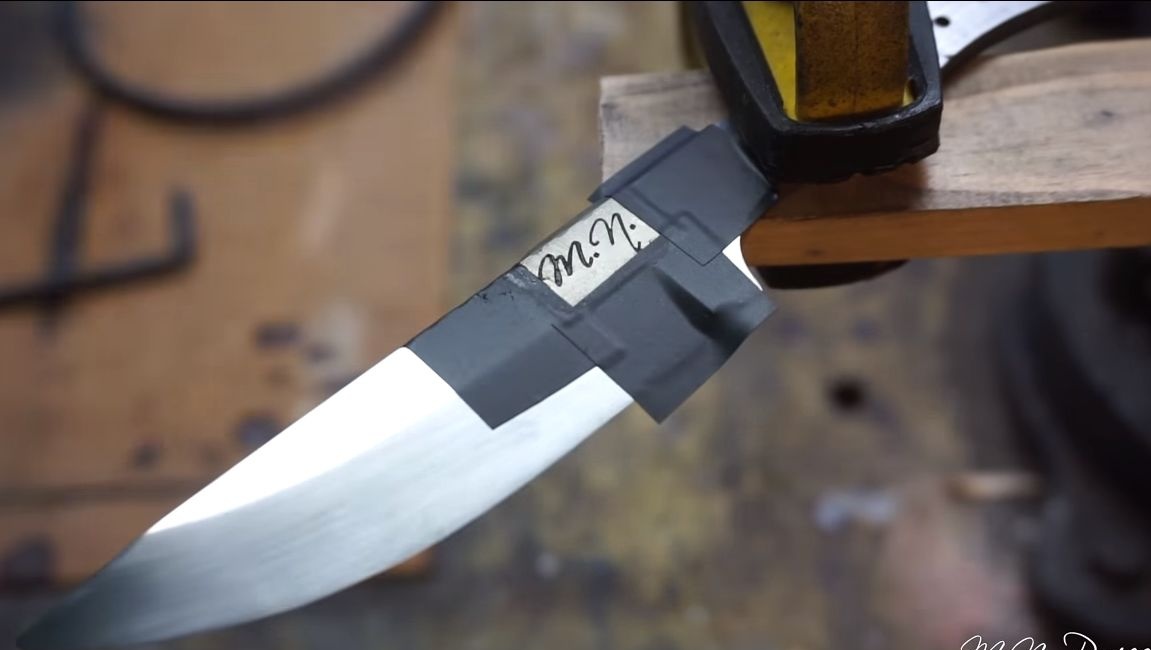
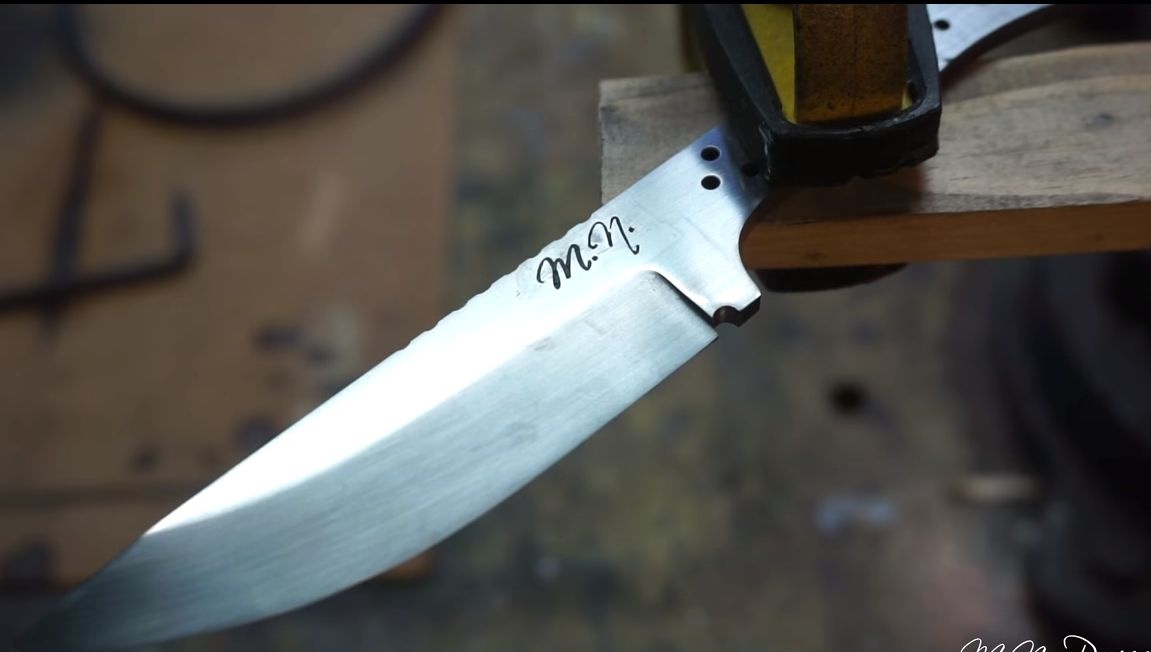
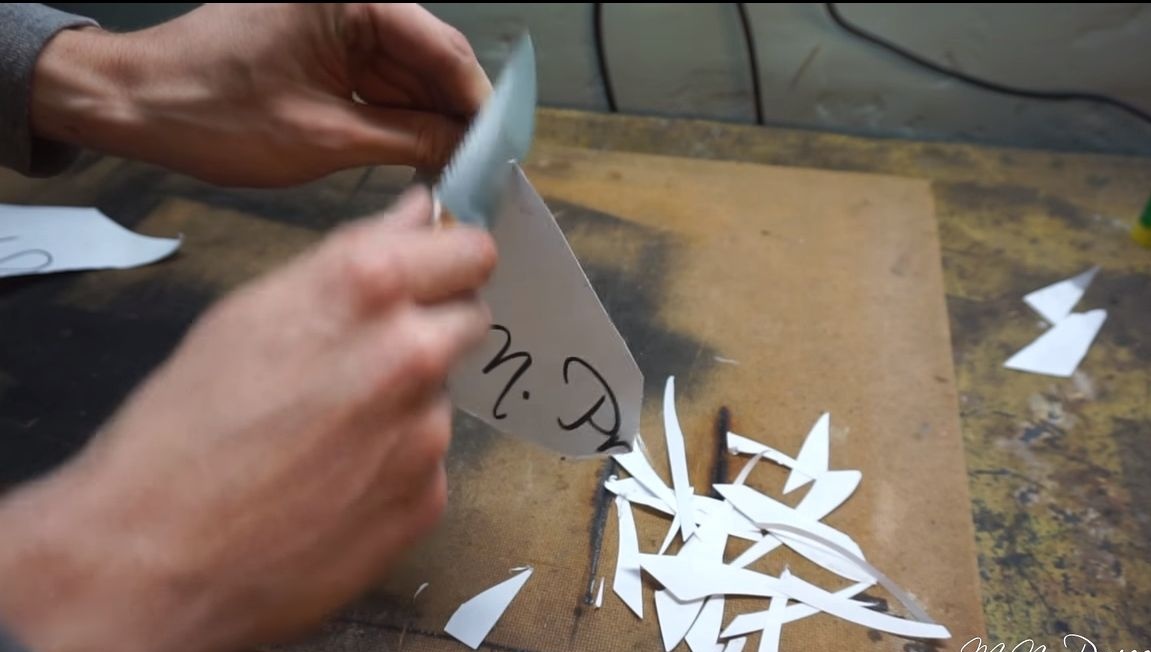
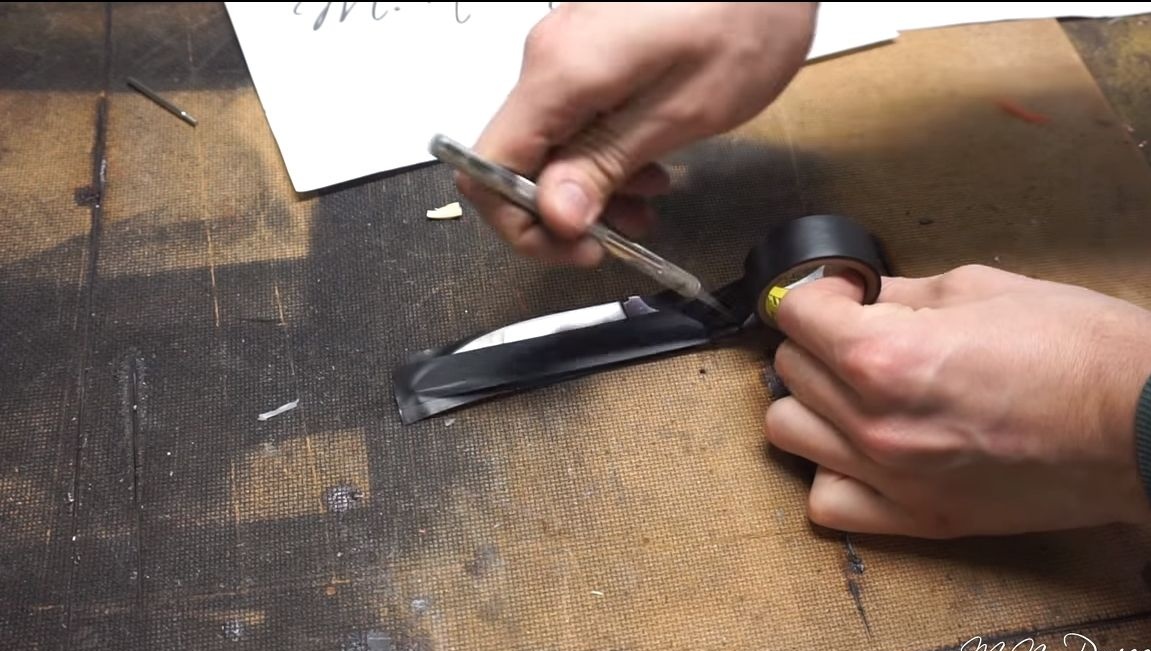
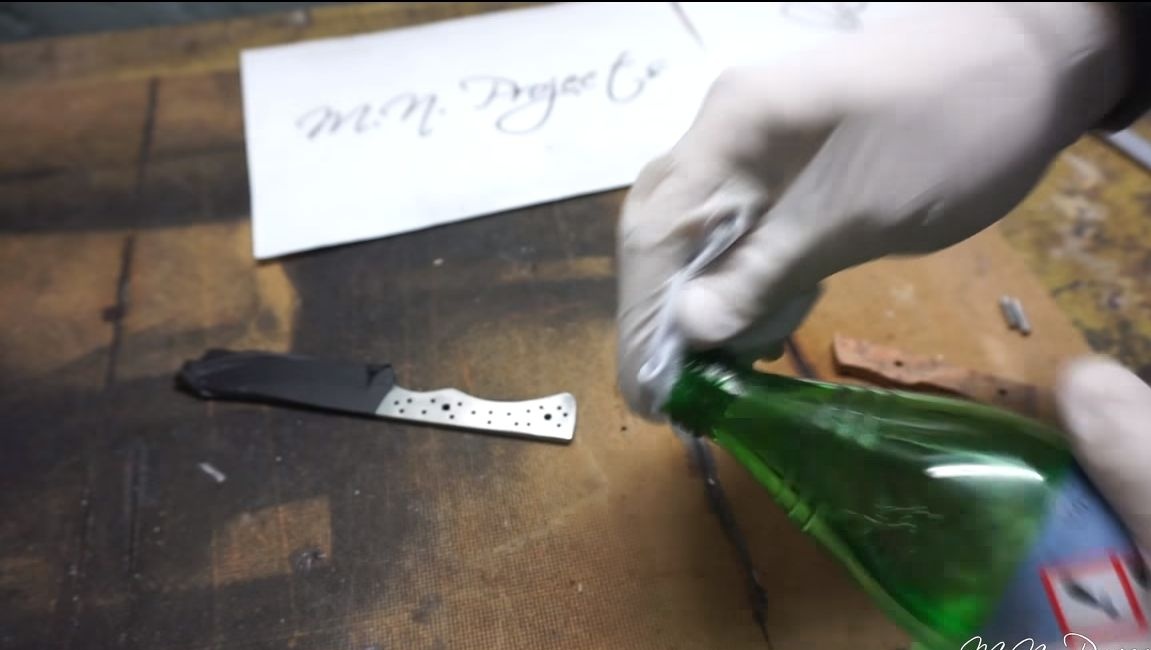
Now you can begin to etch the picture or inscription, as in this case. We glue the stencil, glue the area around the electrical tape and apply the reagent at the right time. Wash steel well in water.
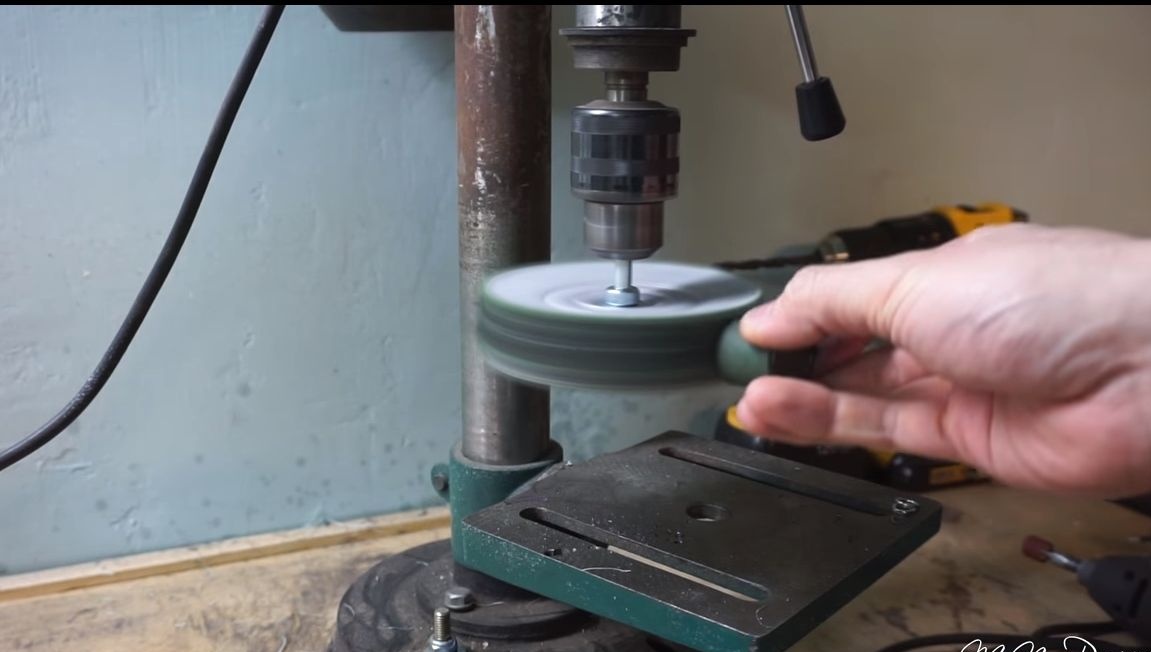

In the end, the author polishes the metal to a mirror shine. You will need a polishing wheel and GOI paste, or the like.
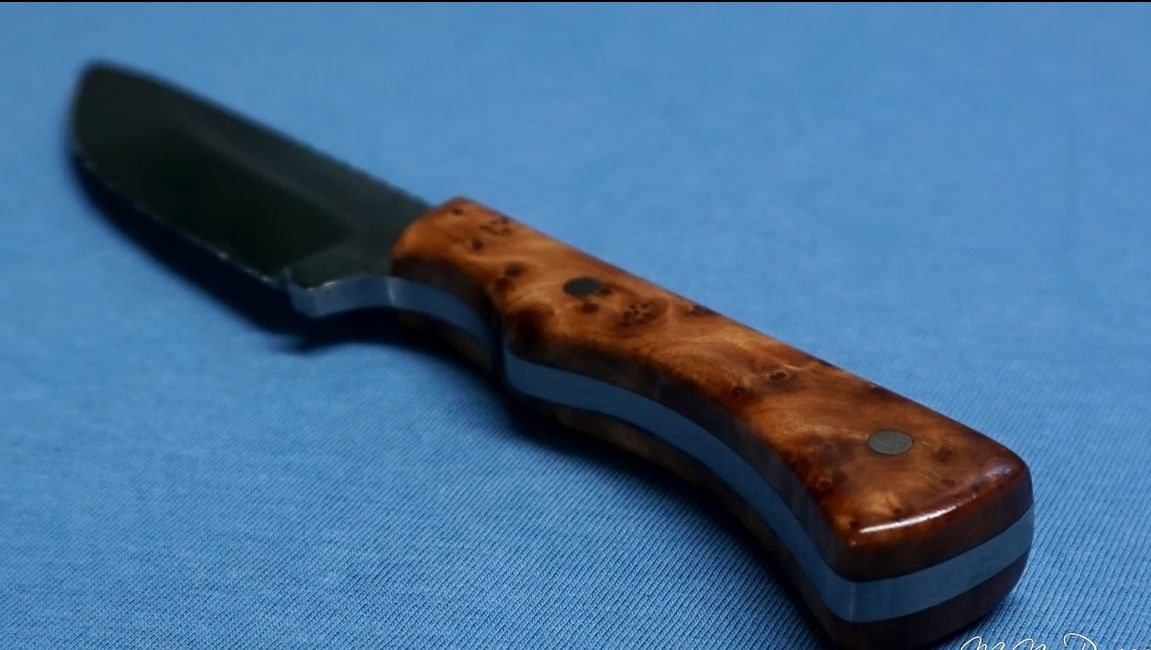
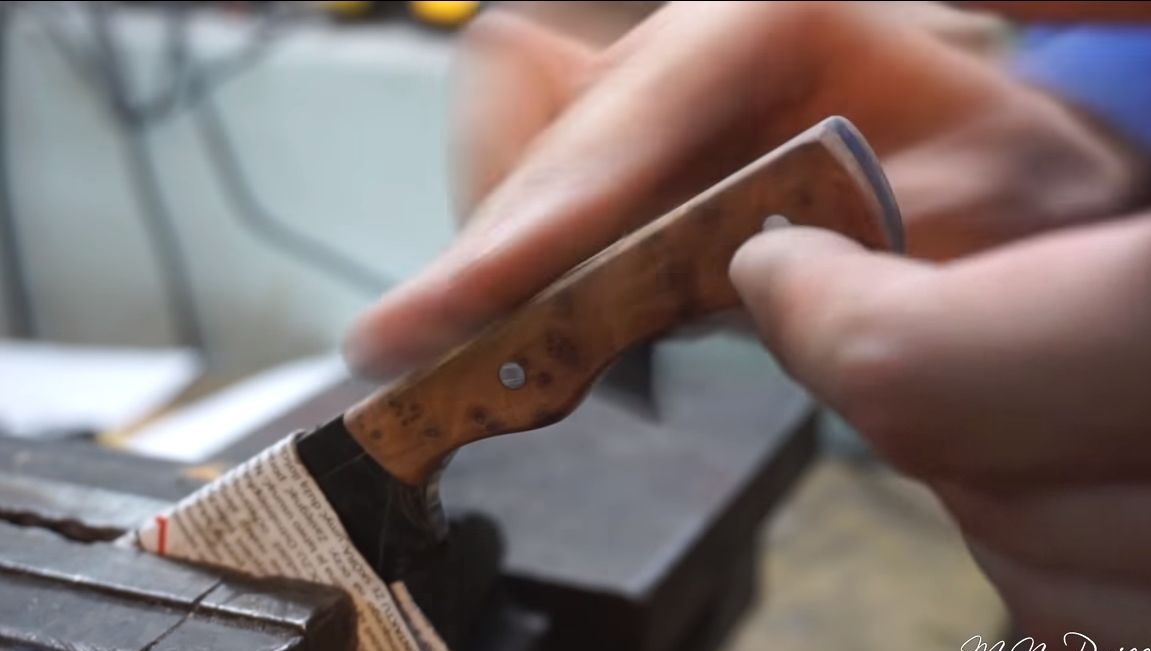
Step seven Lining
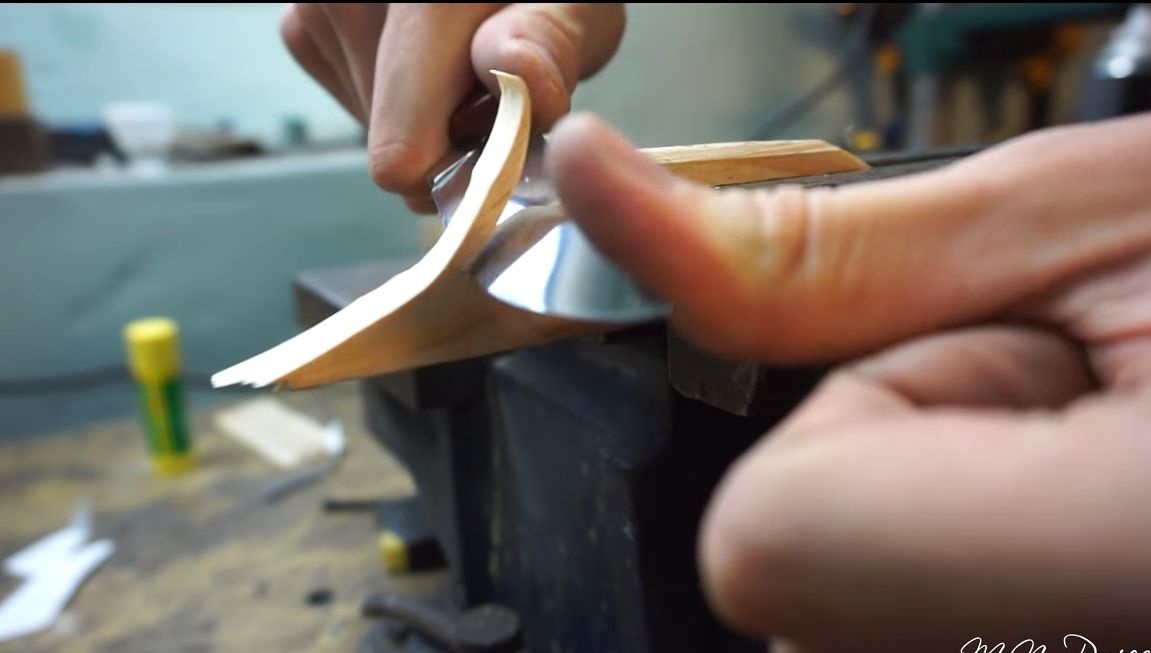
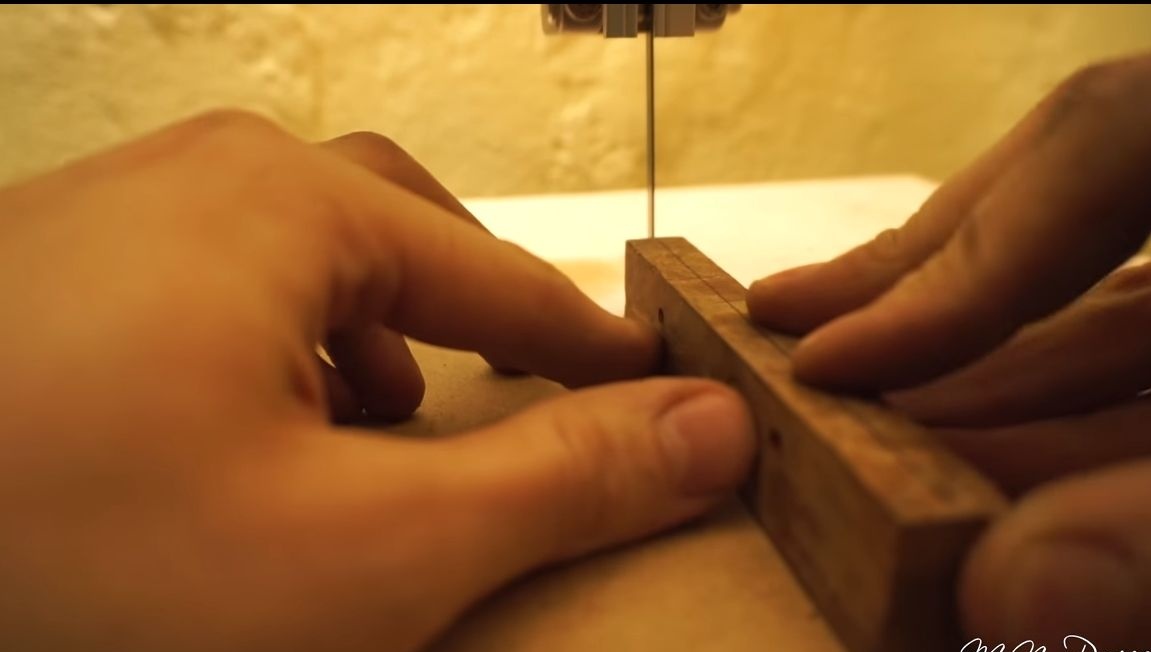
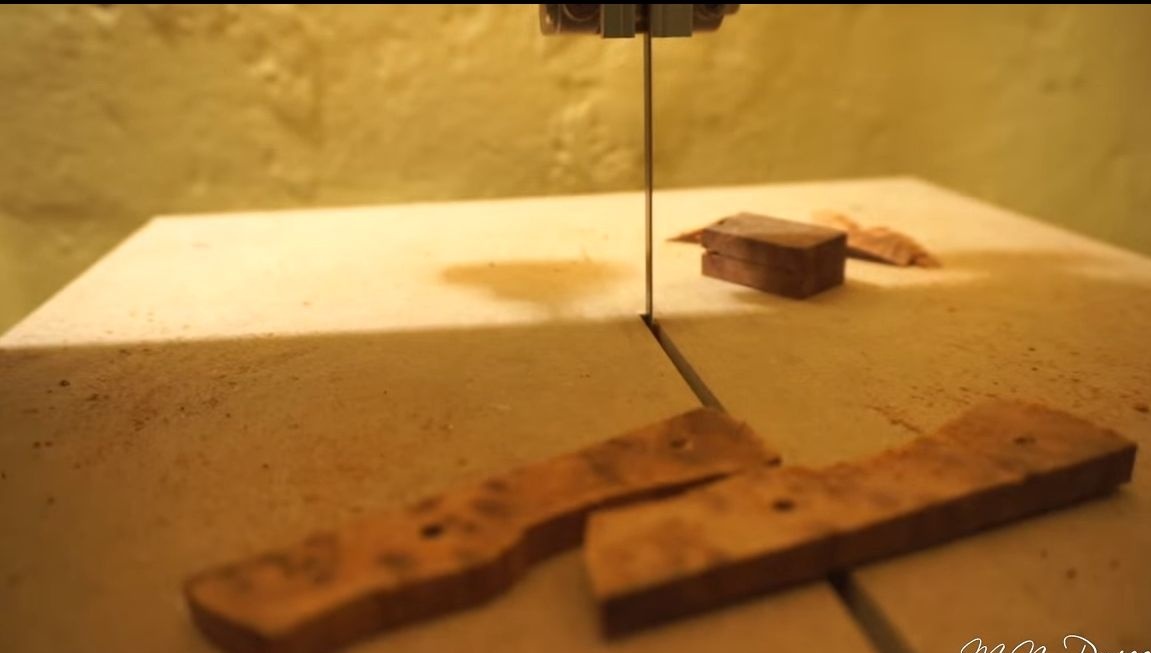
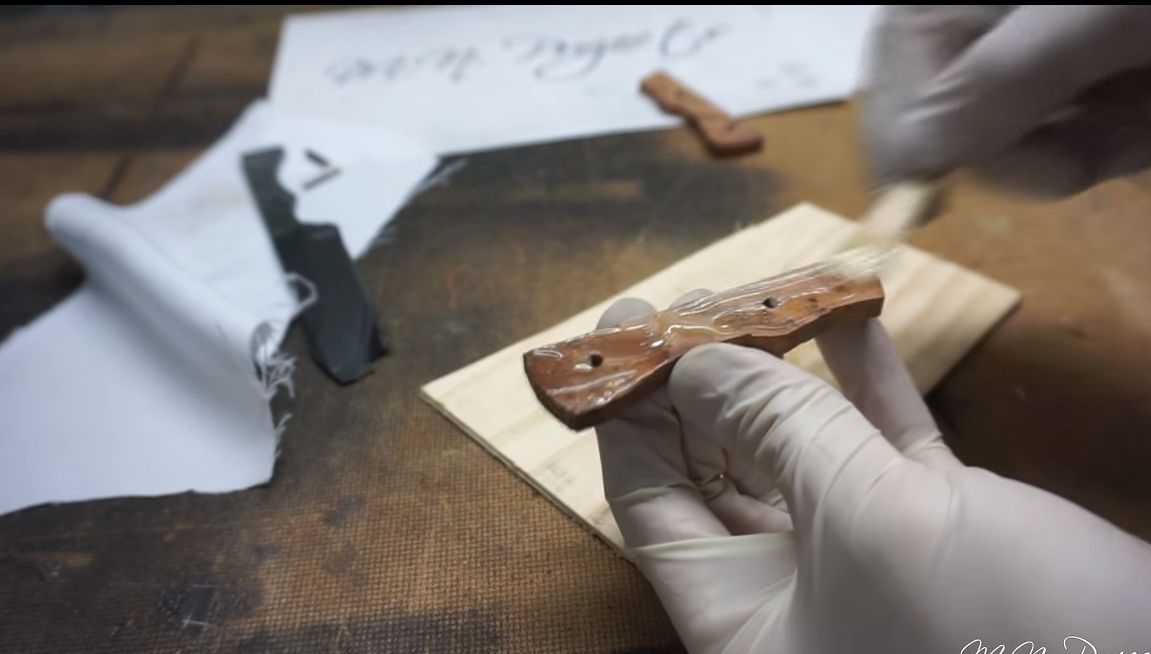
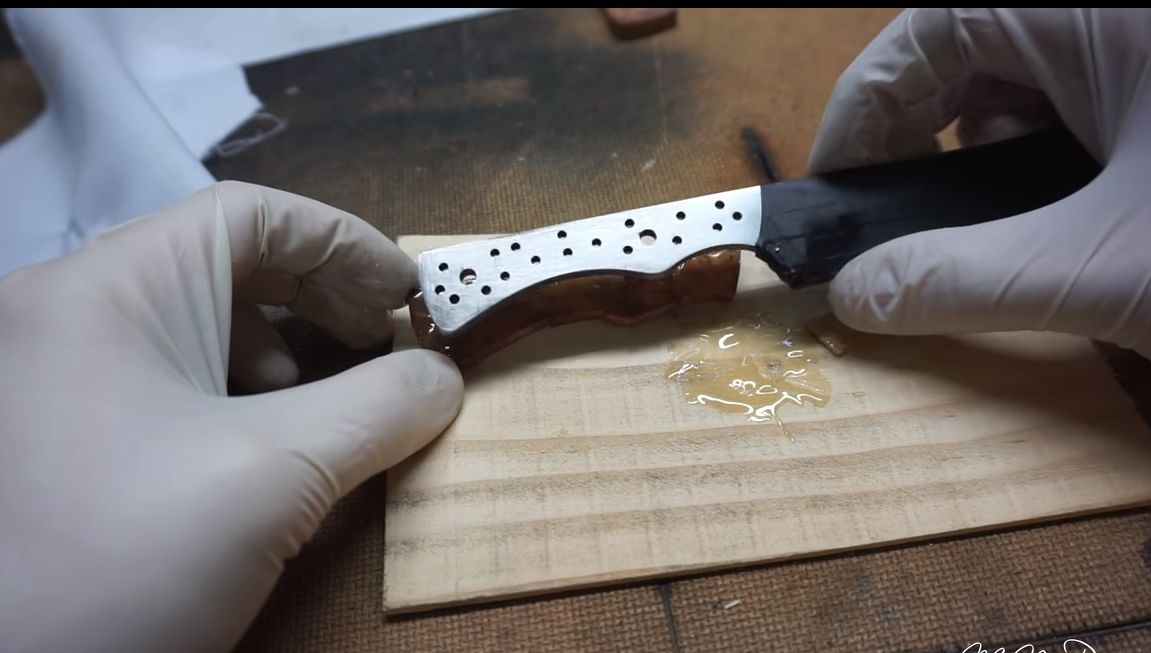
For further work, cover the blade with electrical tape. This will protect it from epoxy glue and also reduce the risk of cuts. We proceed to the manufacture of pads on the handle. Draw the contour of the pen on a wooden block and cut it out.Then we cut the workpiece lengthwise and as a result we get two absolutely identical halves.
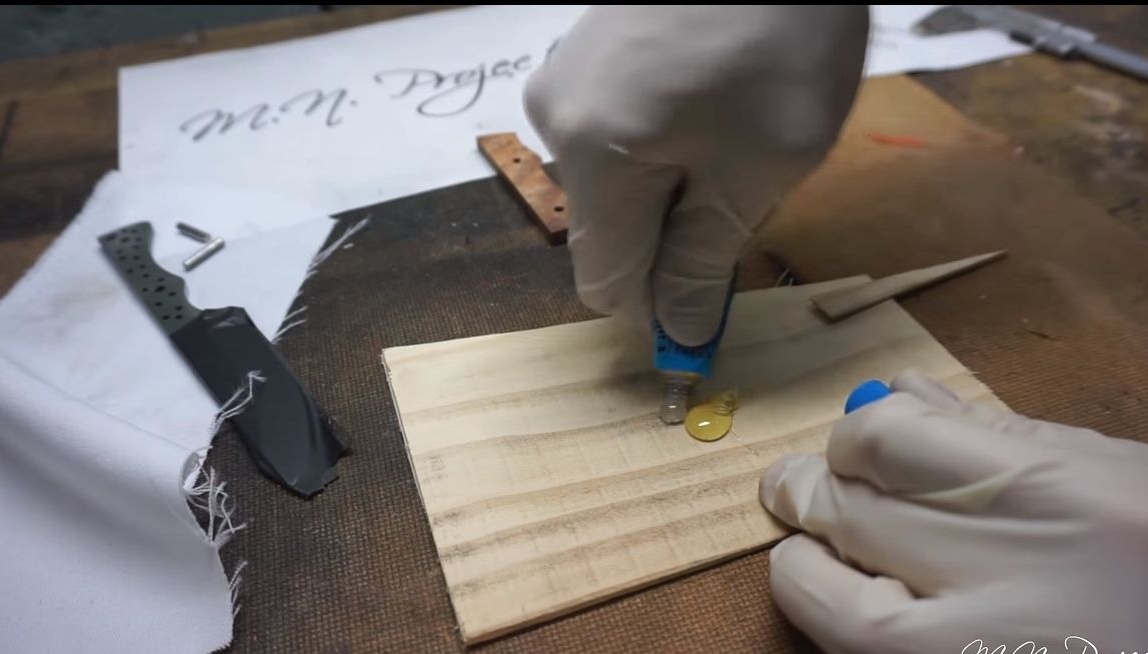
We drill holes in the pads and spread epoxy glue. We assemble the handle on the pins using glue. Hold the handle firmly in a vise or clamps until the glue completely dries.

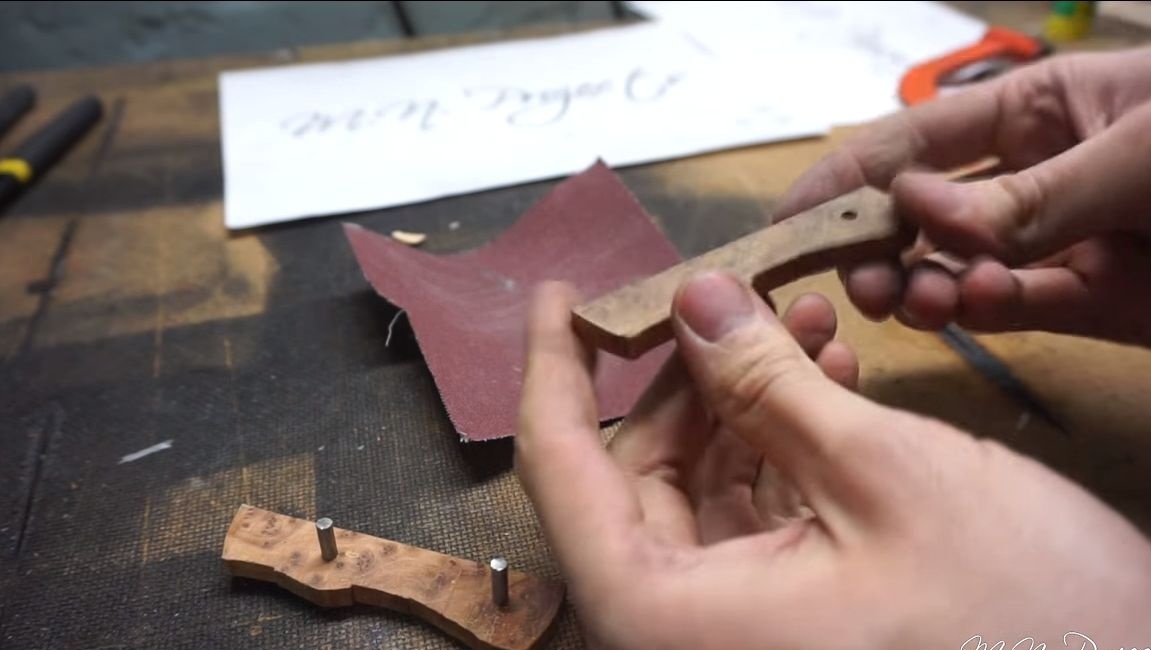

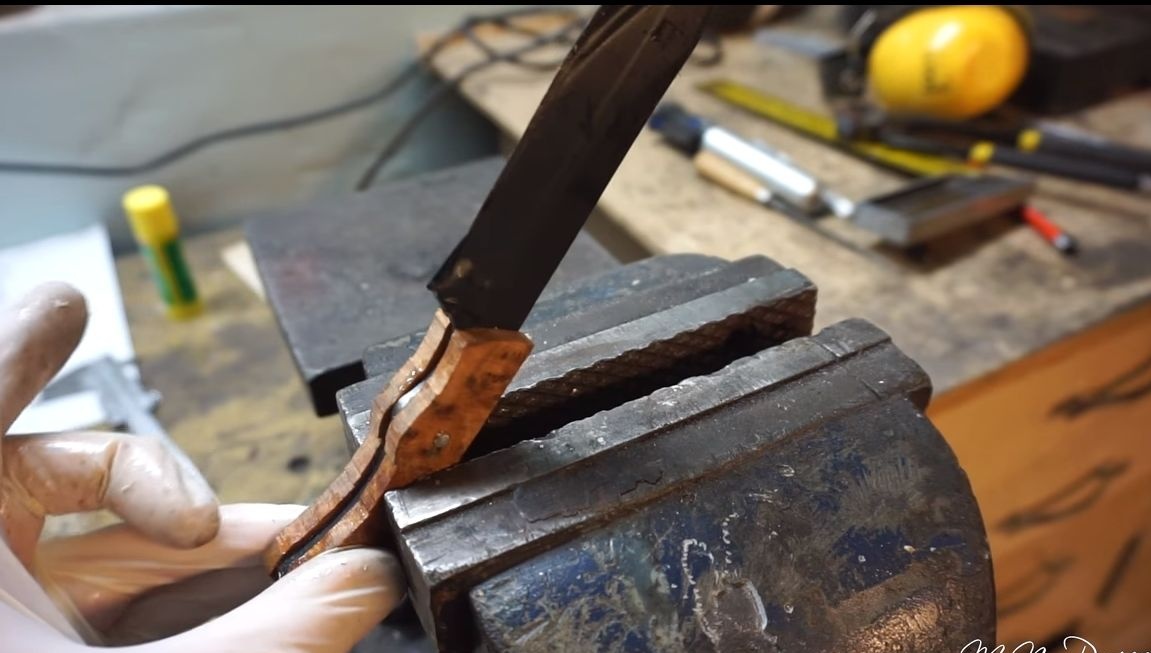
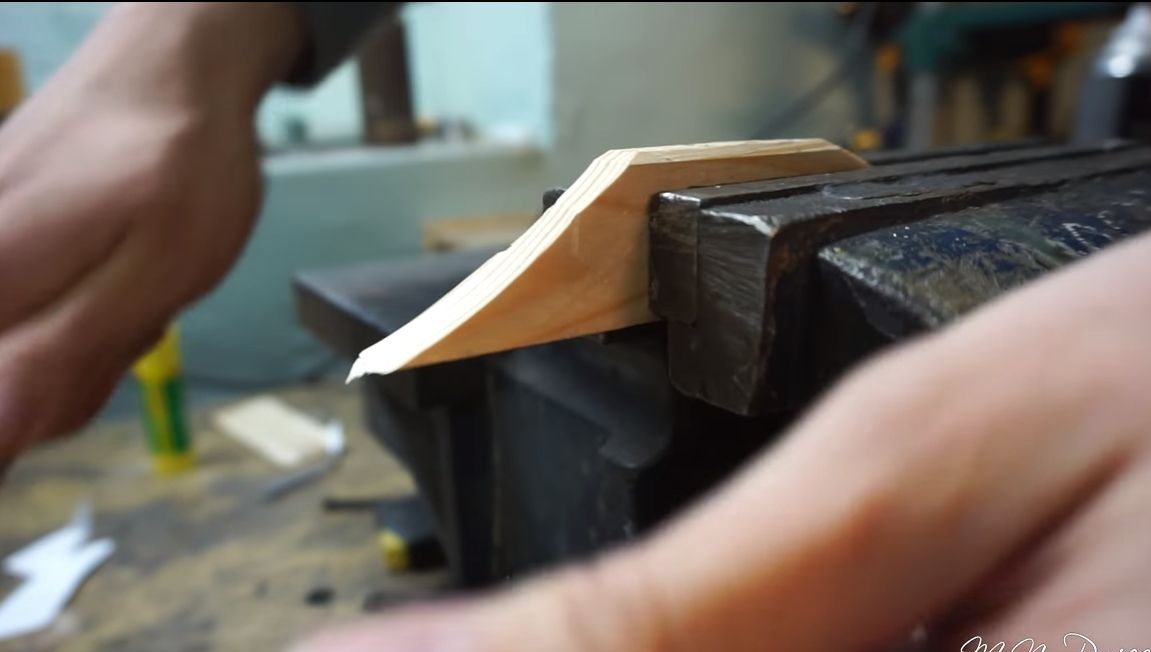
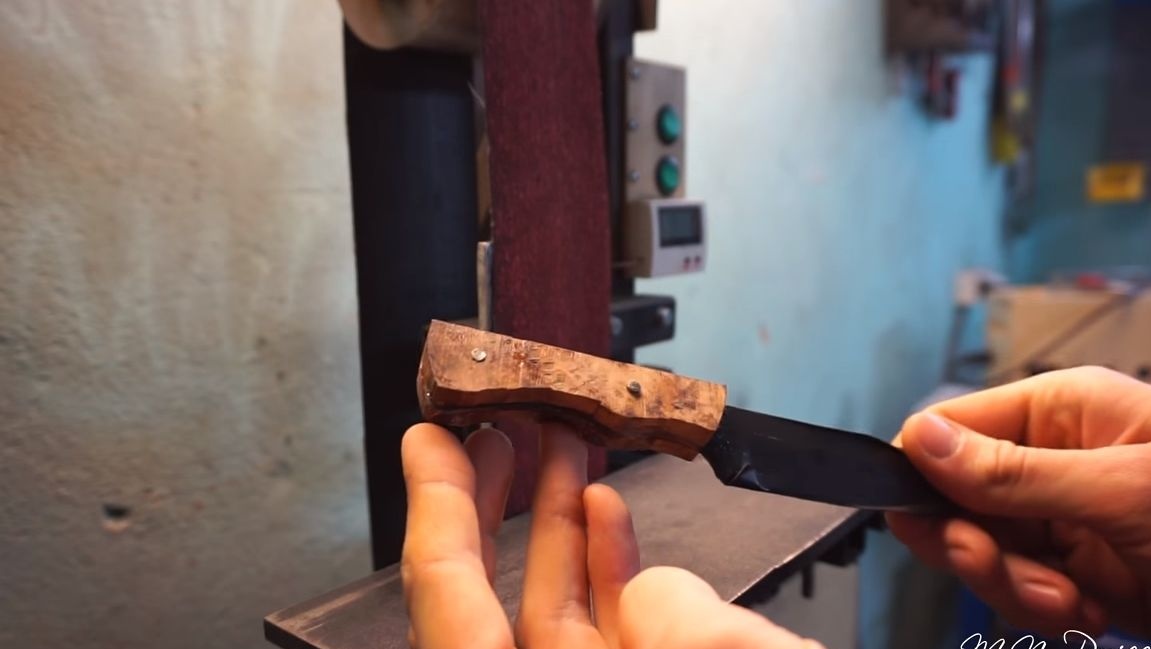
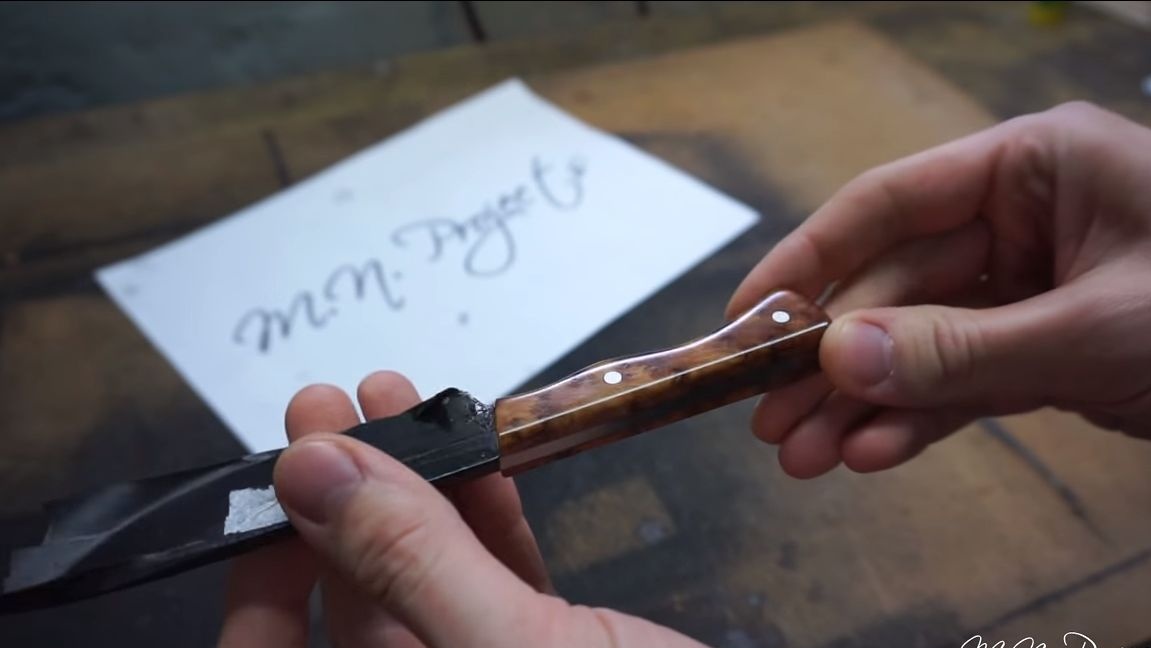
When the glue dries, we process the handle on a belt sander. The most delicate work is done manually using sandpaper.
Step eight. Completion
Finishing work can be considered impregnation of a pen with oil or other similar substance. This is done to protect the tree sweat moisture absorption. Classic knives use linseed oil.
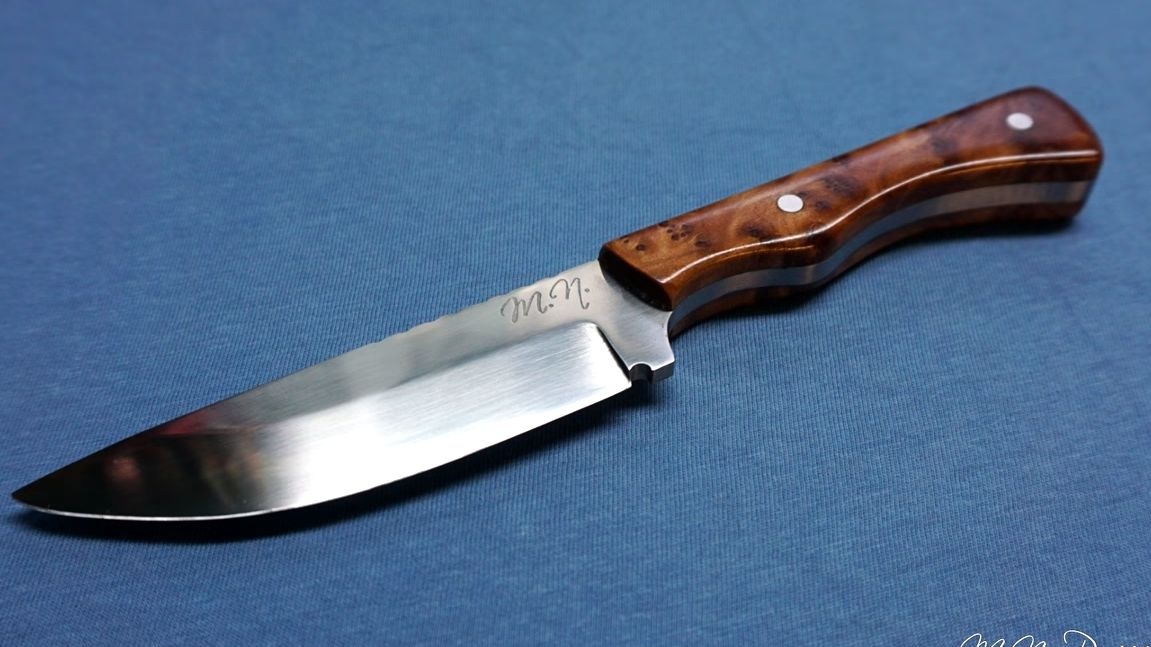
The knife is ready, sharpen it to the state of the blade! This can be done using fine sandpaper or special grinding devices.