

When evening comes, typing on the keyboard becomes problematic. I can’t type blindly. My early designs are outdated and pretty battered by a child. I decided to build a new keyboard backlight. It's always nice to use a device made do it yourself. It will be height adjustment in a small limit, but a lot is not needed.
For homemade we will need:
- plywood, OSB, chipboard;
- printer shaft;
- two-wire wire;
- halogen bulb;
- LED strip or LED bulb;
- clothespin;
- hard copper wire;
- switch;
- soldering iron, epoxy.
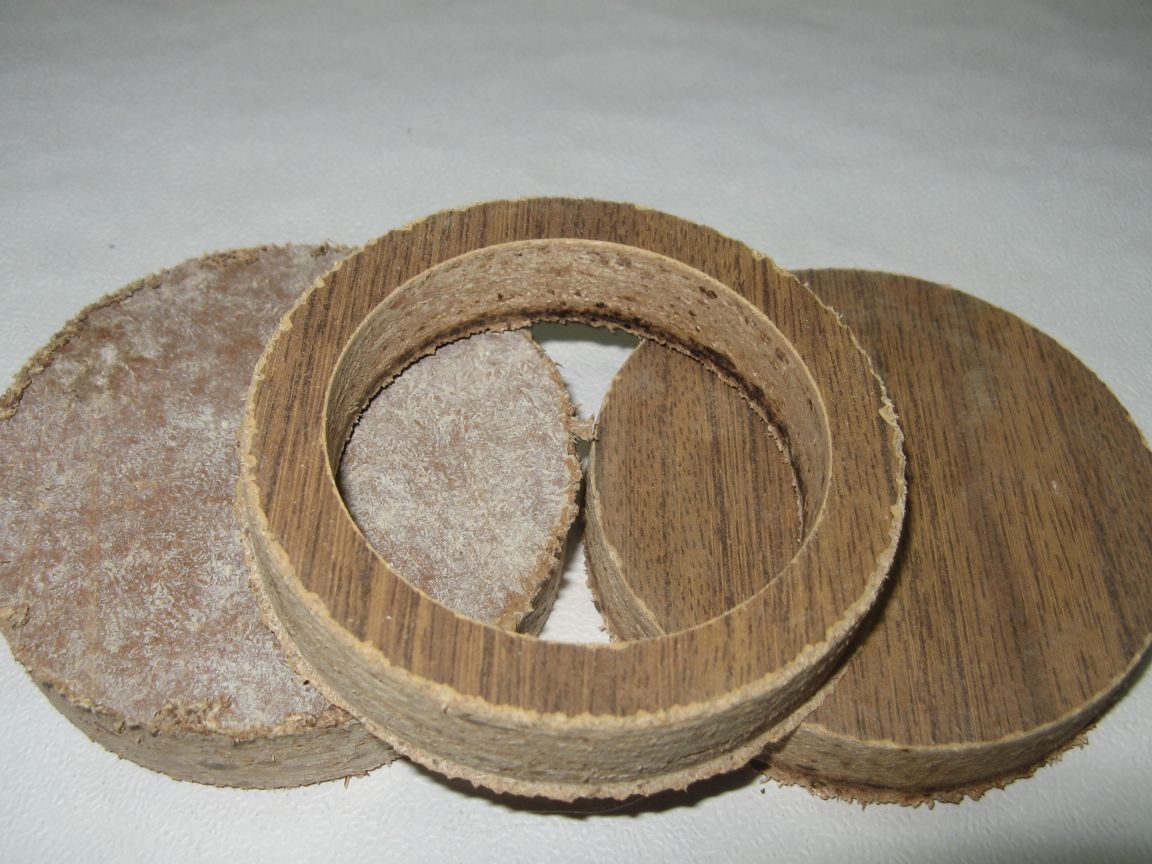
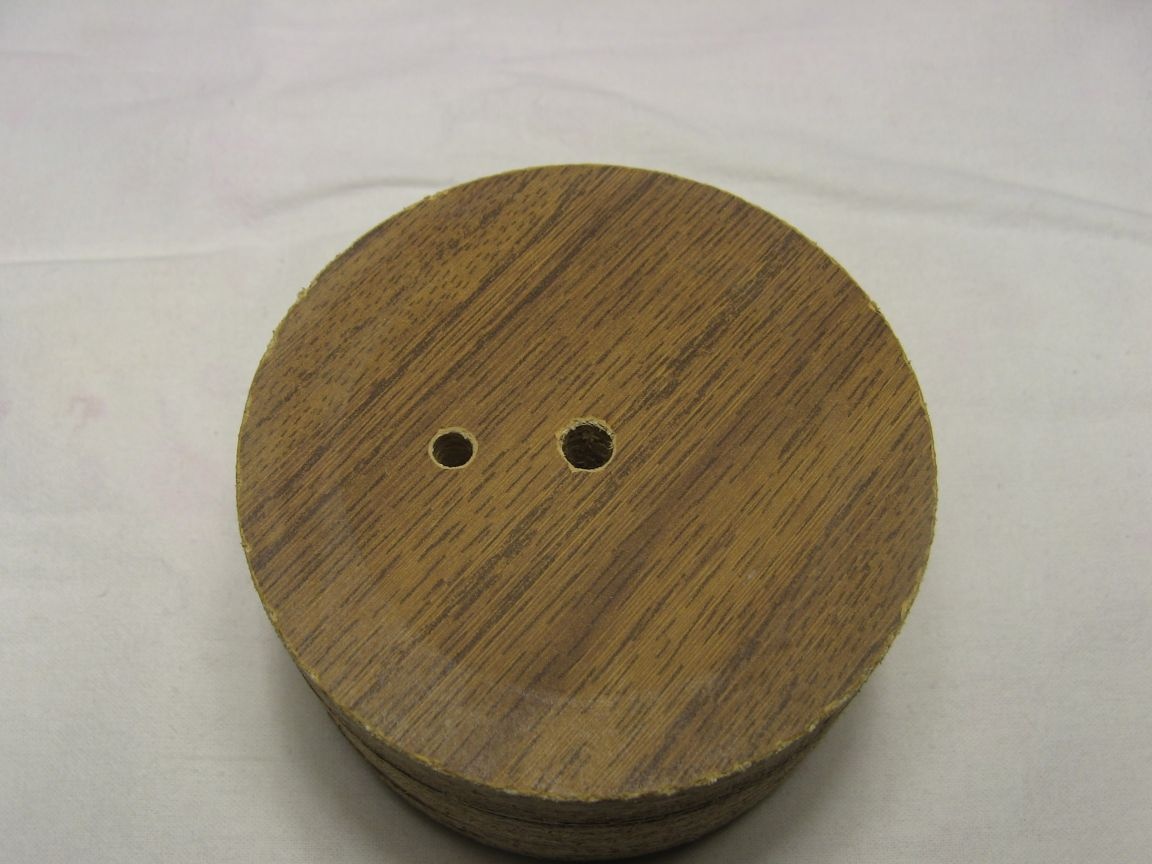
We cut out the elements of the base, chipboard from the old cabinet. Made the base round. I cut it with a crown on wood, and you can use a jigsaw. Two pancakes turned out solid, one in the form of a "donut". In the "steering wheel" will be located wires and a switch. Grind the burrs with sandpaper.
The rubber rollers must be removed from the printer shaft. They are removed with difficulty, but it is easy to remove with a hammer. You can cut it with a hacksaw for metal, the main thing is not to scratch the shaft, it will rust.
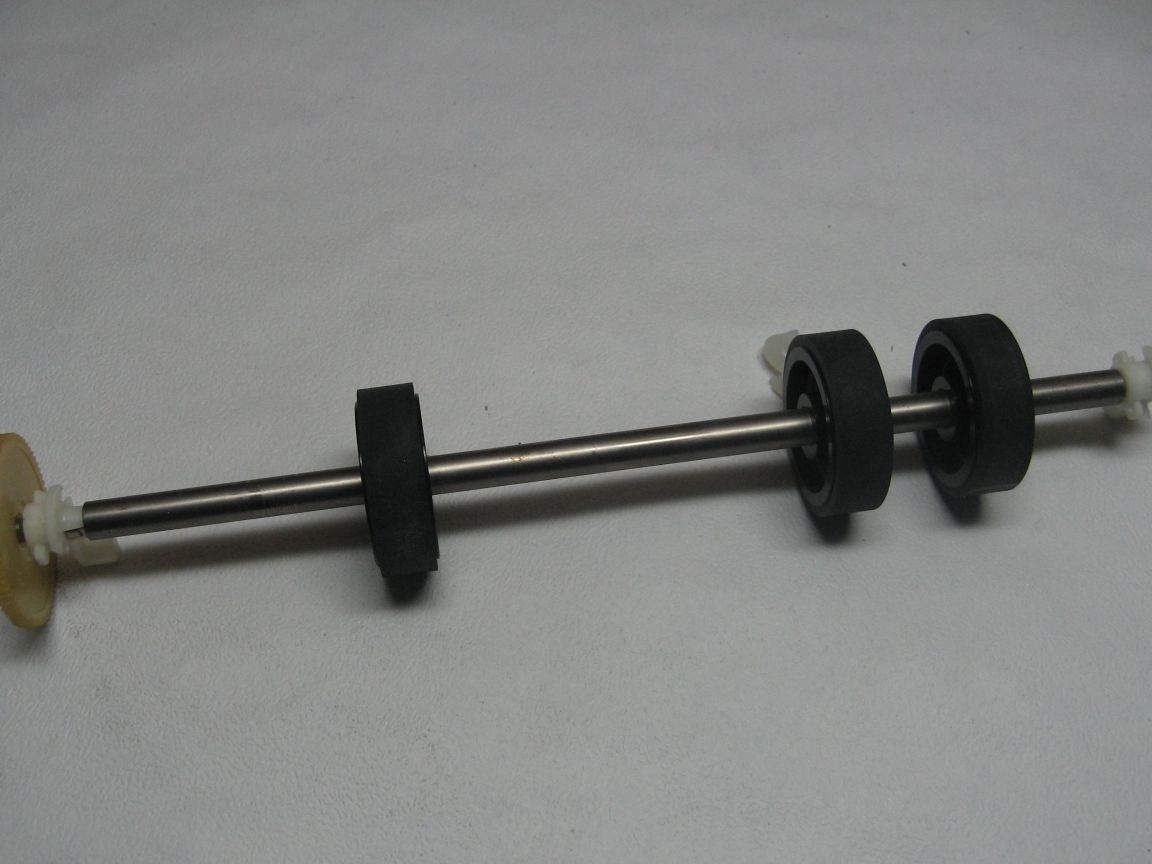
As the backlight was made, another shaft was used. At the initial there were transitions of diameters, I did not want to cut. Therefore, the hole in the base is drilled under another shaft. In the lower base, holes were drilled in the potty. All base blanks are temporarily twisted together. In the side of the "donut" made a cut under the power switch.
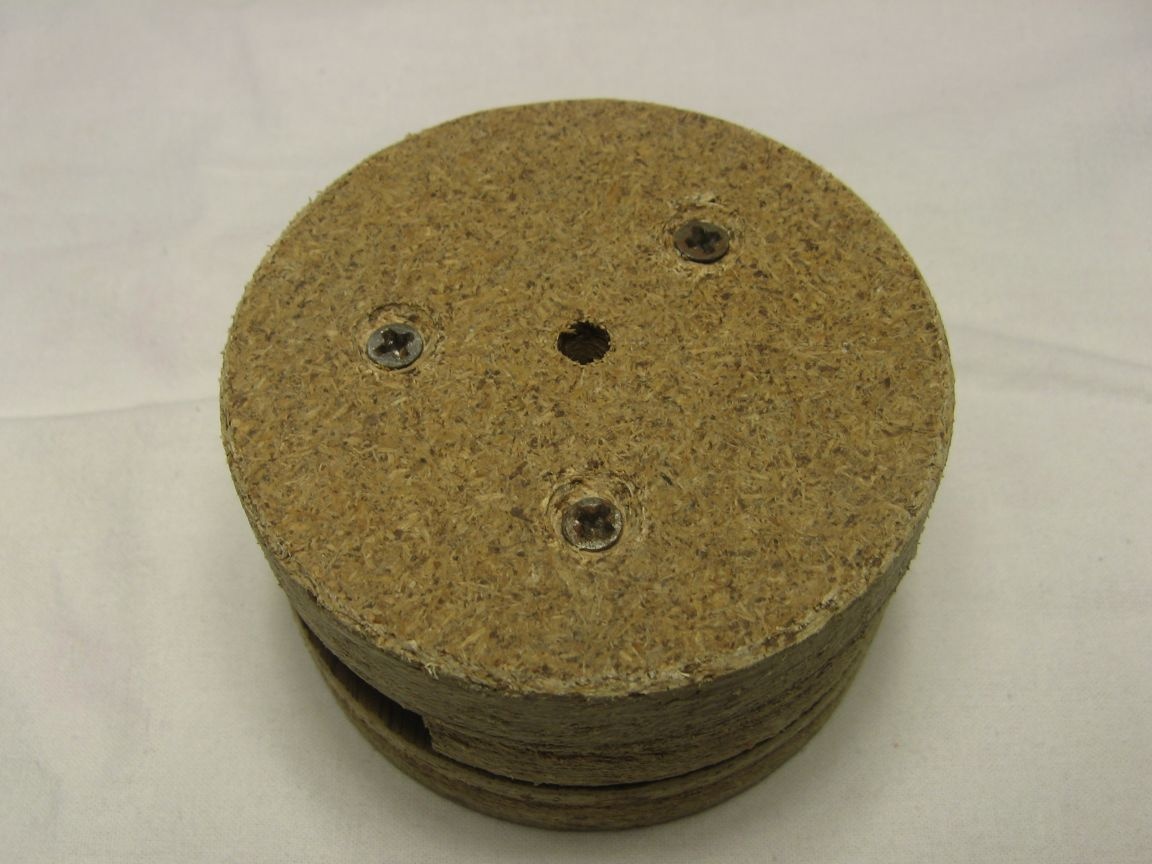
In the upper pancake, next to the shaft hole, I drilled a hole for the power wire. I drilled an inclined hole between the "donut" and the lower pancake. When twisting, I will output the power wire to it.
Putting the foundation aside. Later I want to paint it, but more on that later.
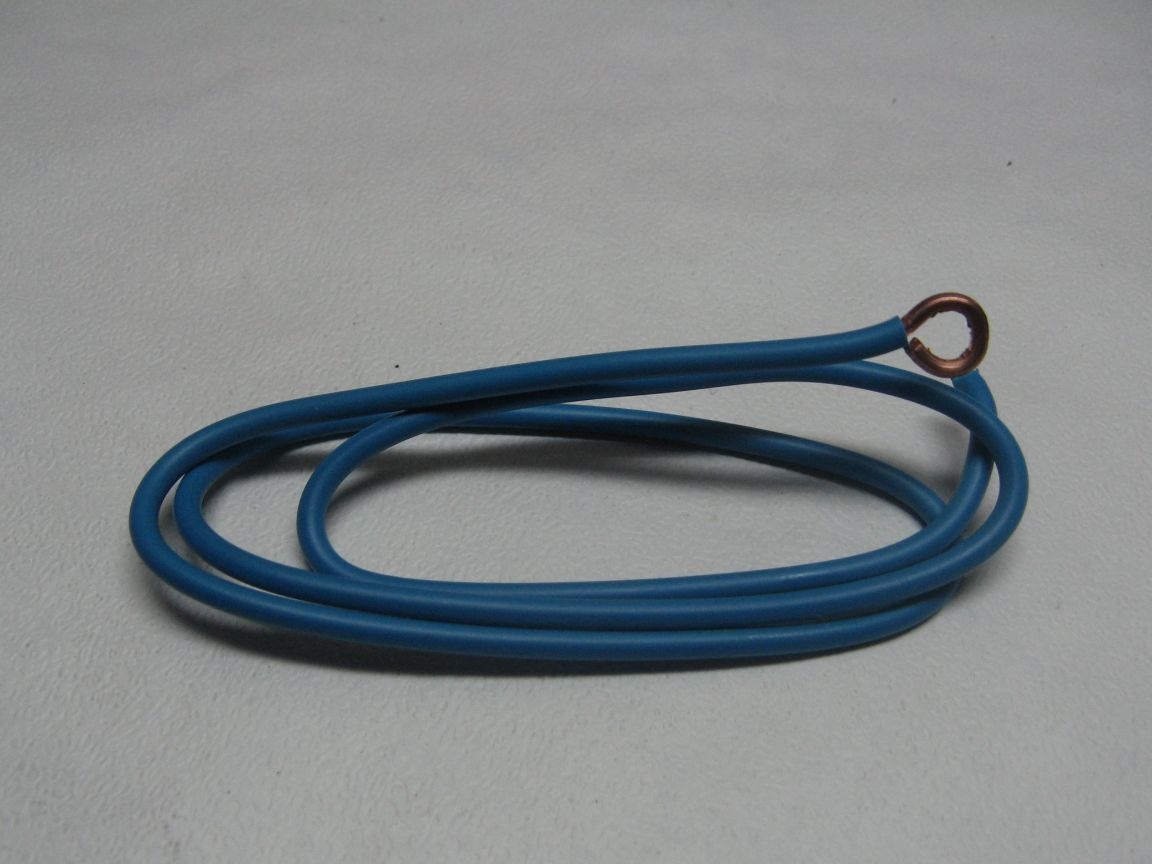
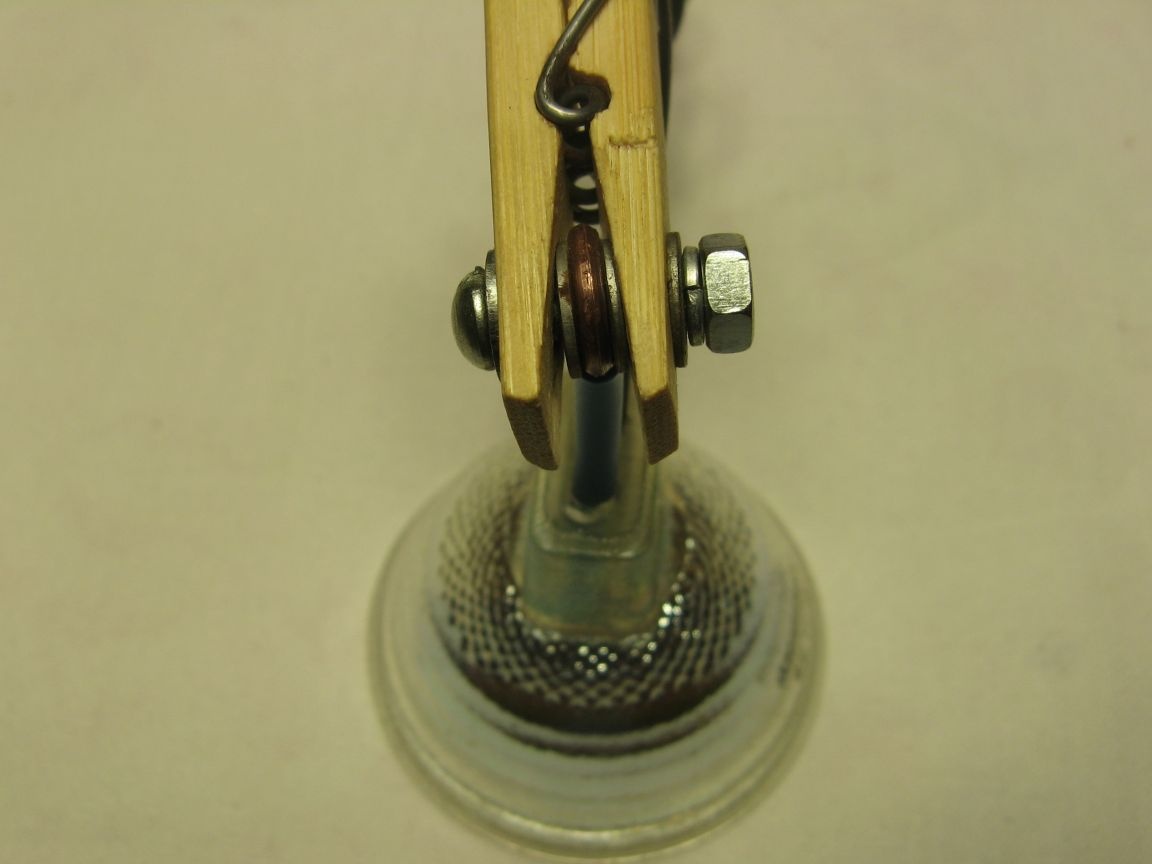
We take our copper wire. I took 2.5 squares in isolation, you can remove the insulation from the wire, but this is at the discretion of everyone. We make a ring for a 4 mm screw.
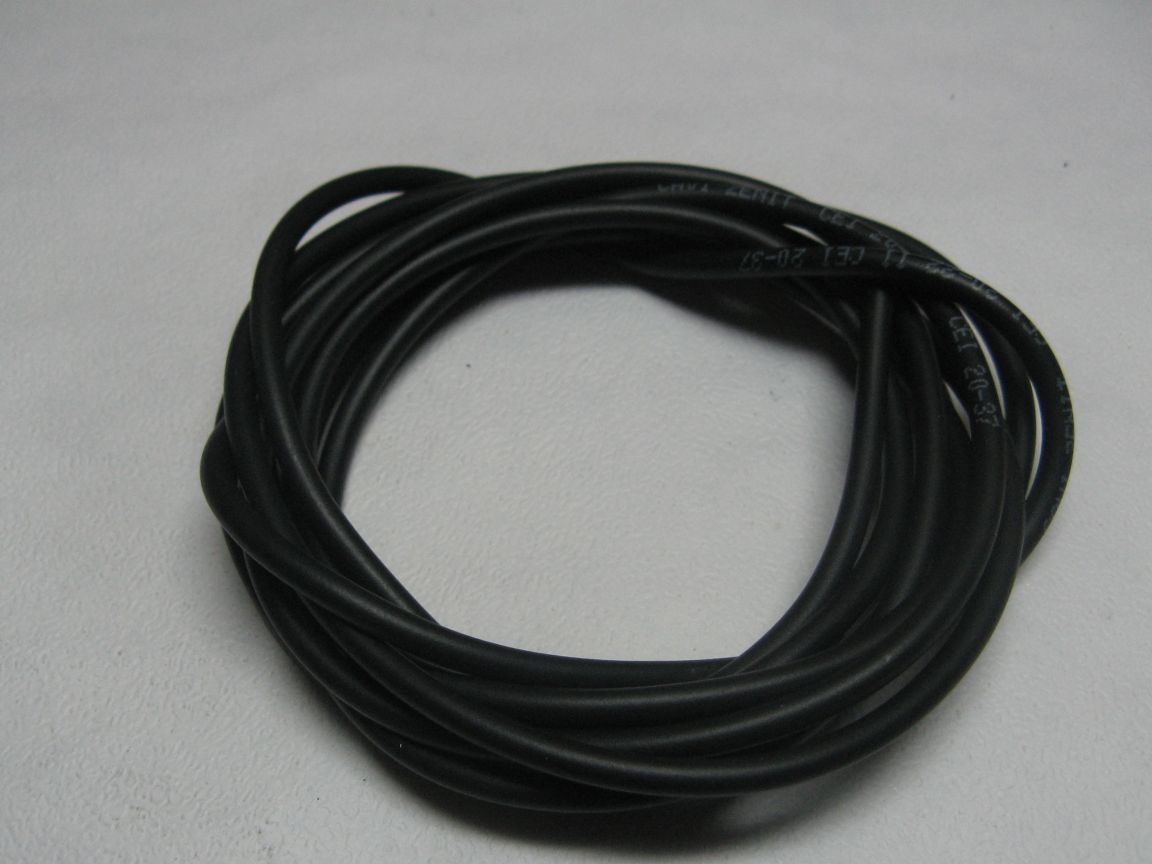
The power wire I have is about 0.25 square in double insulation. You can use a different section, the main thing is that the wire is of good flexibility.
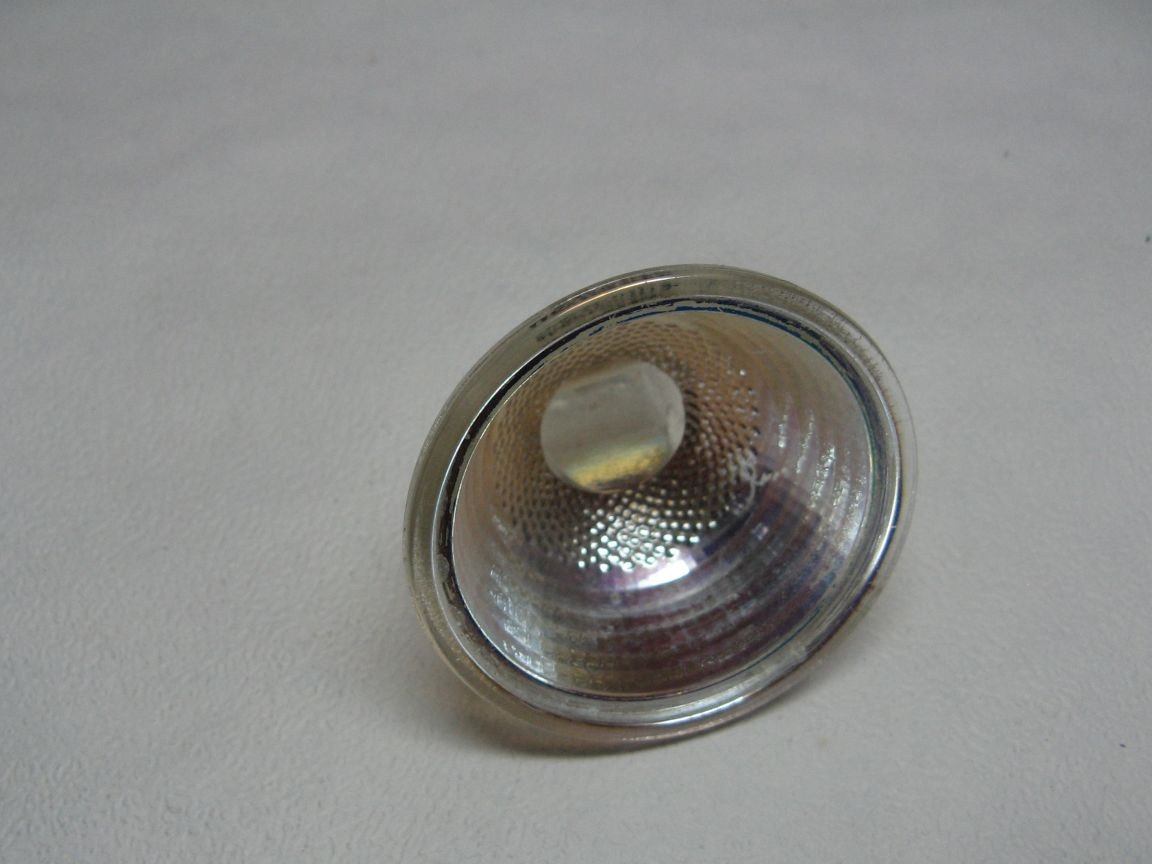
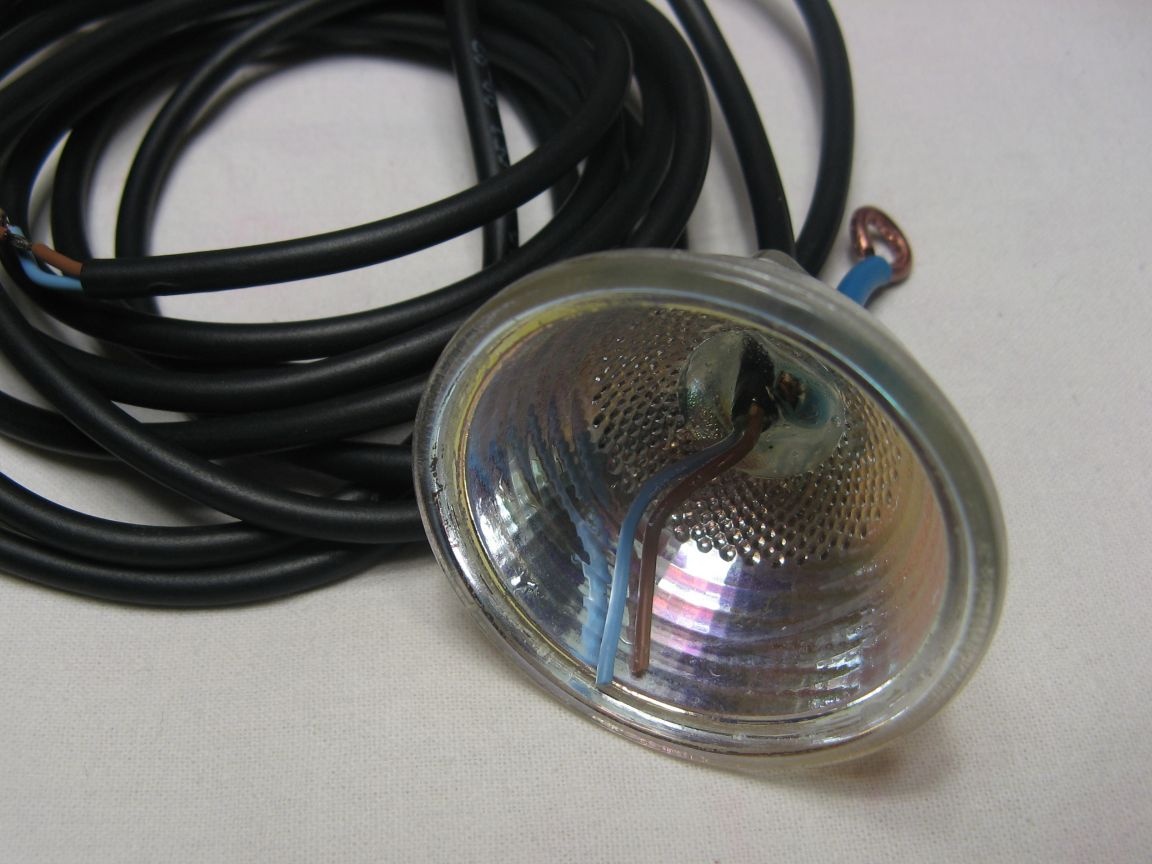
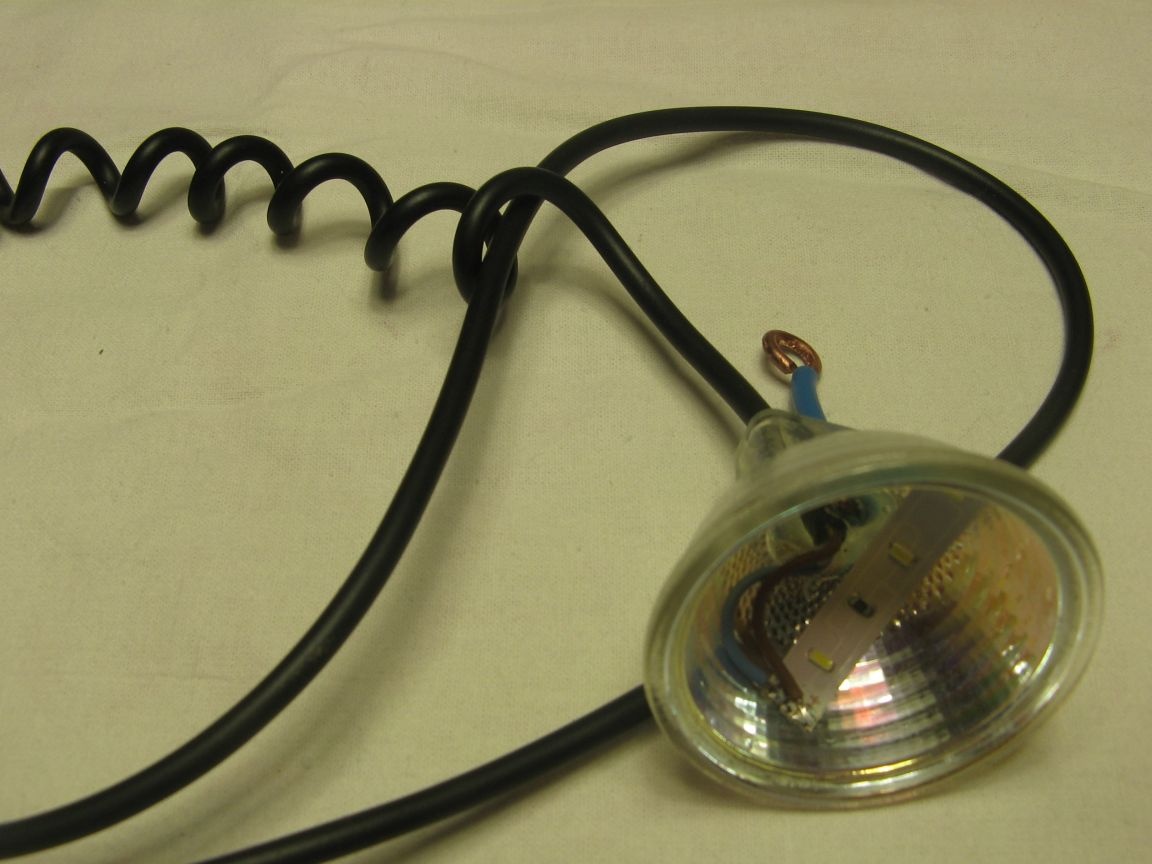
He used a burnt halogen lamp as a reflector.Pre-removed glass and entrails. Glass is removed by simply hammering the center of the glass. The main thing to be careful, fragments can fly off.
Cut off a piece of copper wire of the desired length. Threaded through the hole in the lamp, where the connection pins used to be. I’m threading the power wire there. I fill both wires with epoxy. It is possible with hot-melt adhesive, but it will not withstand mechanical stress.
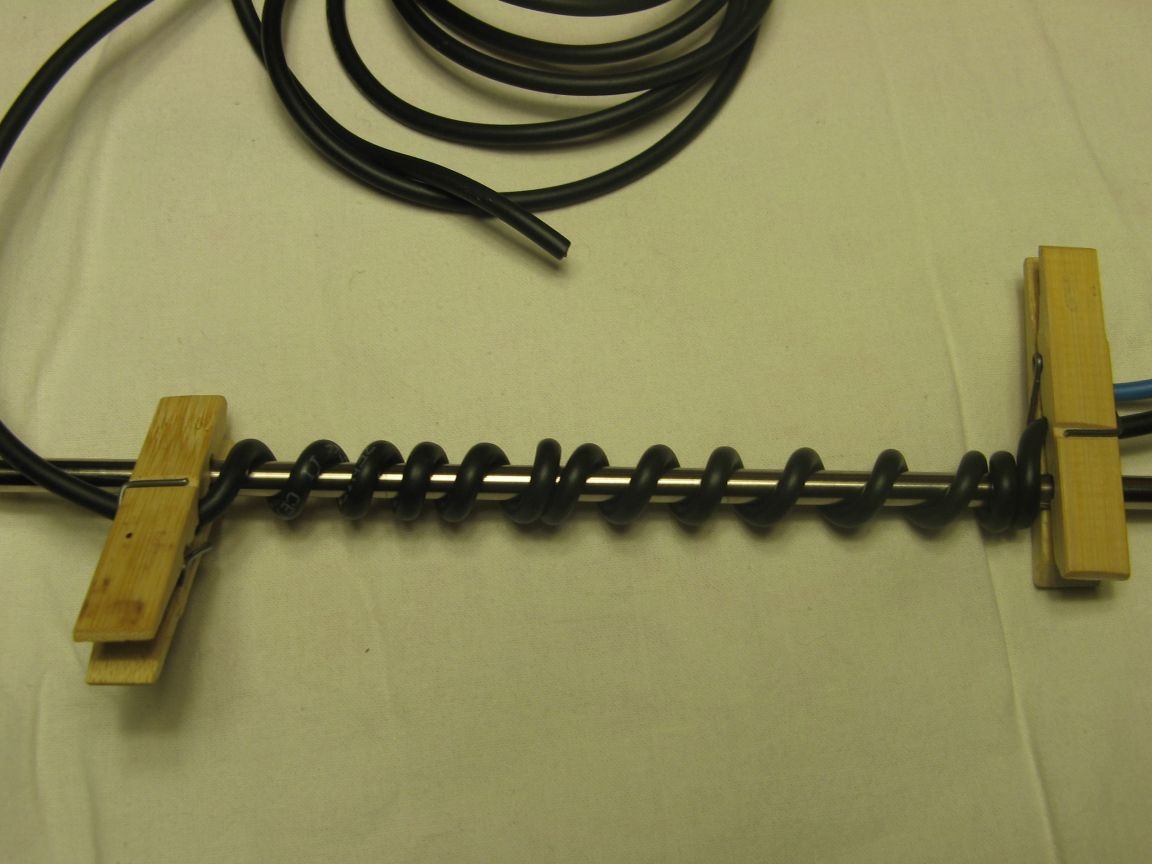
The power cord will be twisted. Making it so very simple. We wind the wire tightly and heat it with a building hair dryer. If there is no hairdryer, you can heat it over a gas stove. Leave to cool.
We cut off a piece of the LED strip, we get 3 LEDs. The tape is powered by 12 volts. You can power it from a separate power supply, but I will connect it from the computer's power supply. Our segment does not consume much, the load on the computer will not be noticeable. We glue the tape to the reflector immediately on super glue, since double-sided tape is extremely terrible stickiness.
We drill a 4 mm hole in the clothespin. Through hole. Clamp the wire loop in the clothespin with washers.
I decided to paint the basis of the design. There was matte black paint in the spray can. It dries quickly and the coating is excellent.

The upper pancake of the base and the "donut" are assembled in a single design. It is necessary to glue with PVA glue, but I drove pieces of nail into the holes (visible in the photo). We glue our switch on the epoxy, along the way two parts of the structure are glued together. Leave to freeze.
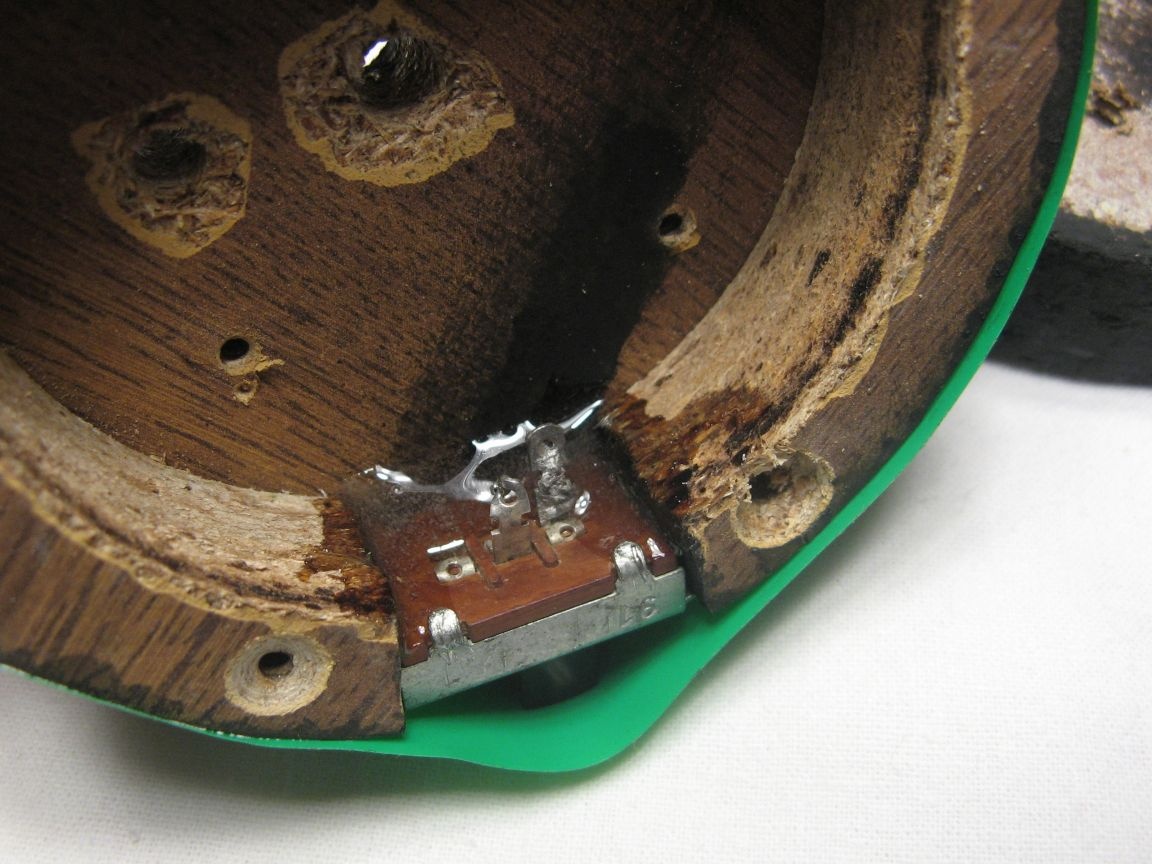
The frozen epoxy holds the switch securely.
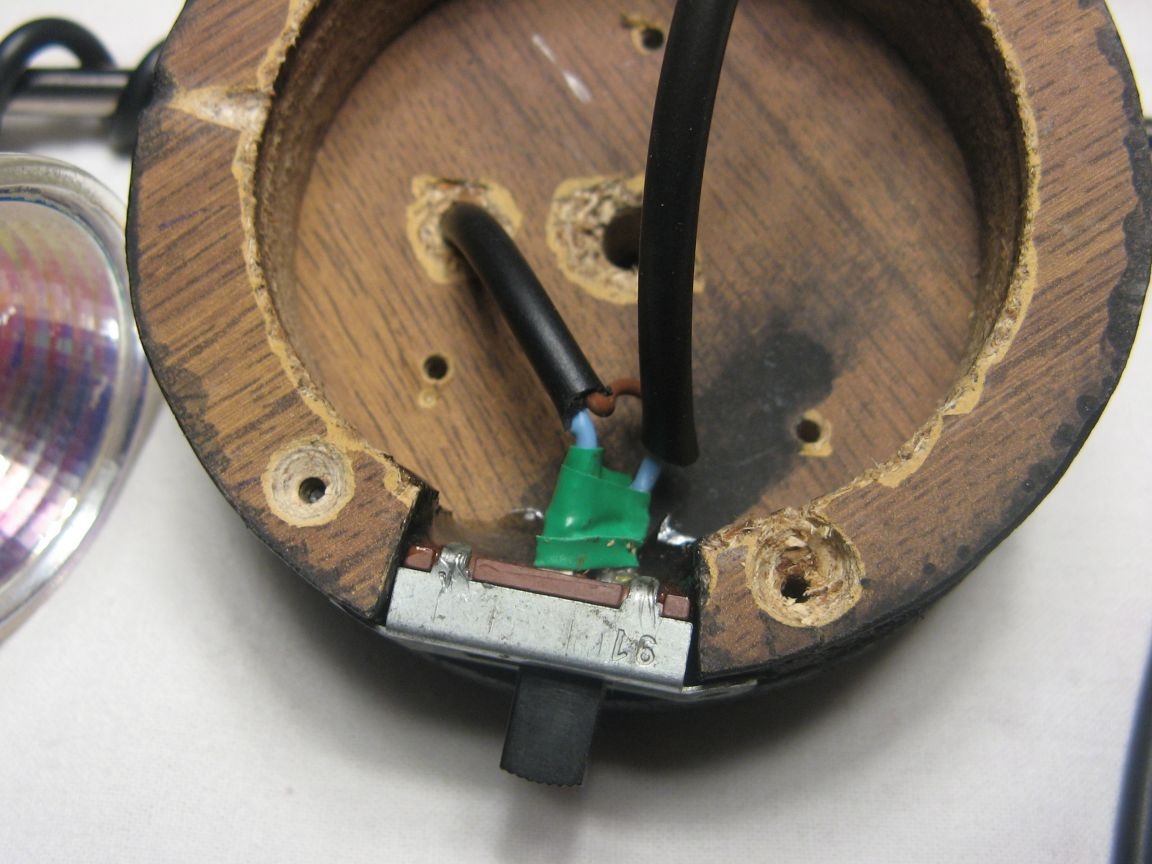
We put the power wire into the hole drilled next to the shaft hole.
On the power wire, remove part of the insulation. Cut one wire, let it be a minus.
Solder the wires to the switch. We isolate the places of soldering with electrical tape, alas, there was no blue one.
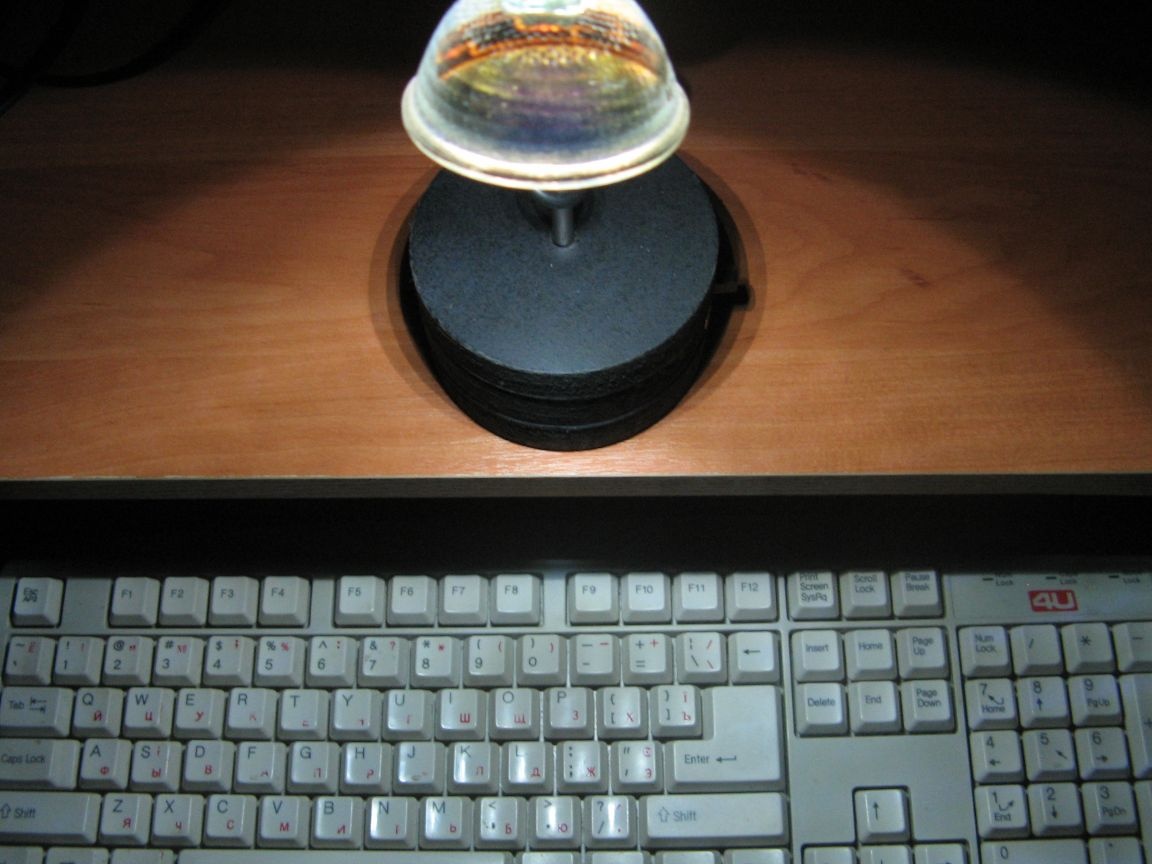
The shaft is firmly inserted into the base of the backlight. Stability is excellent.
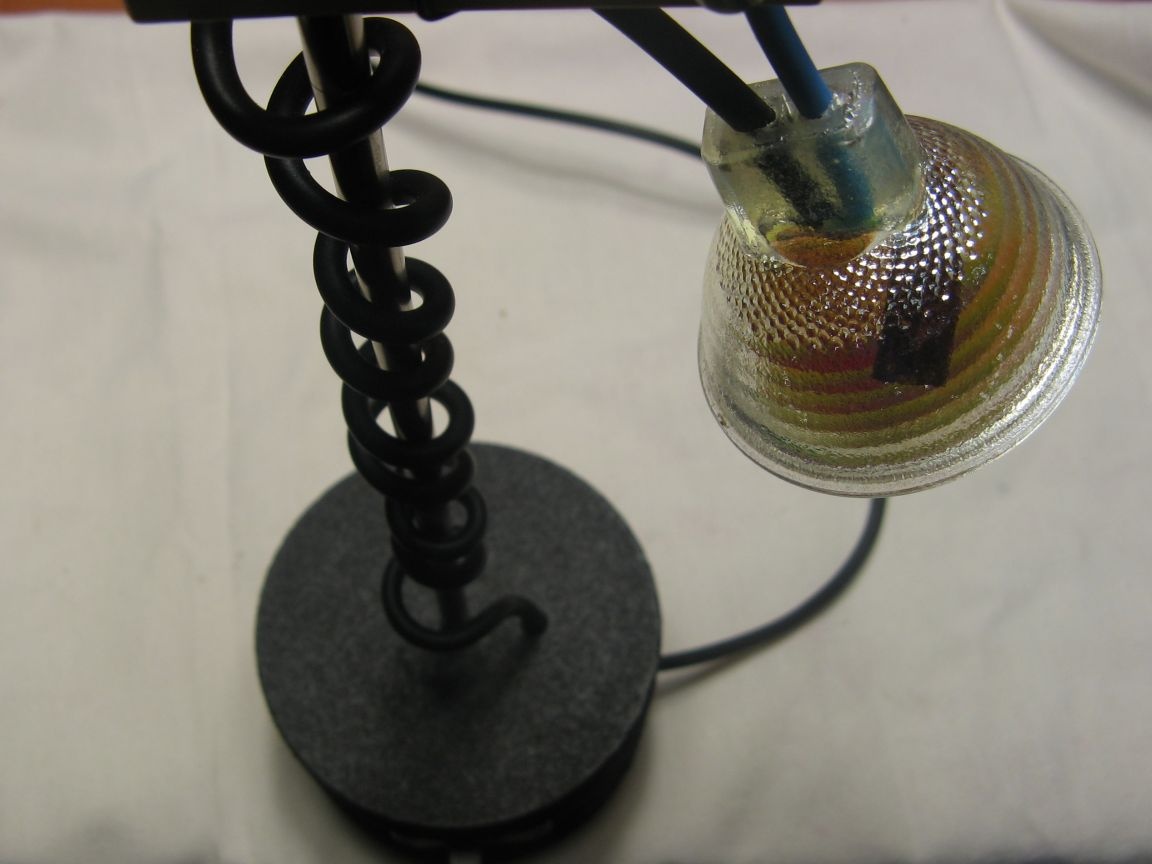
Here's the highlight I got. Adjustable in height. The reflector holds well. By adjusting the height we achieve full keyboard illumination.
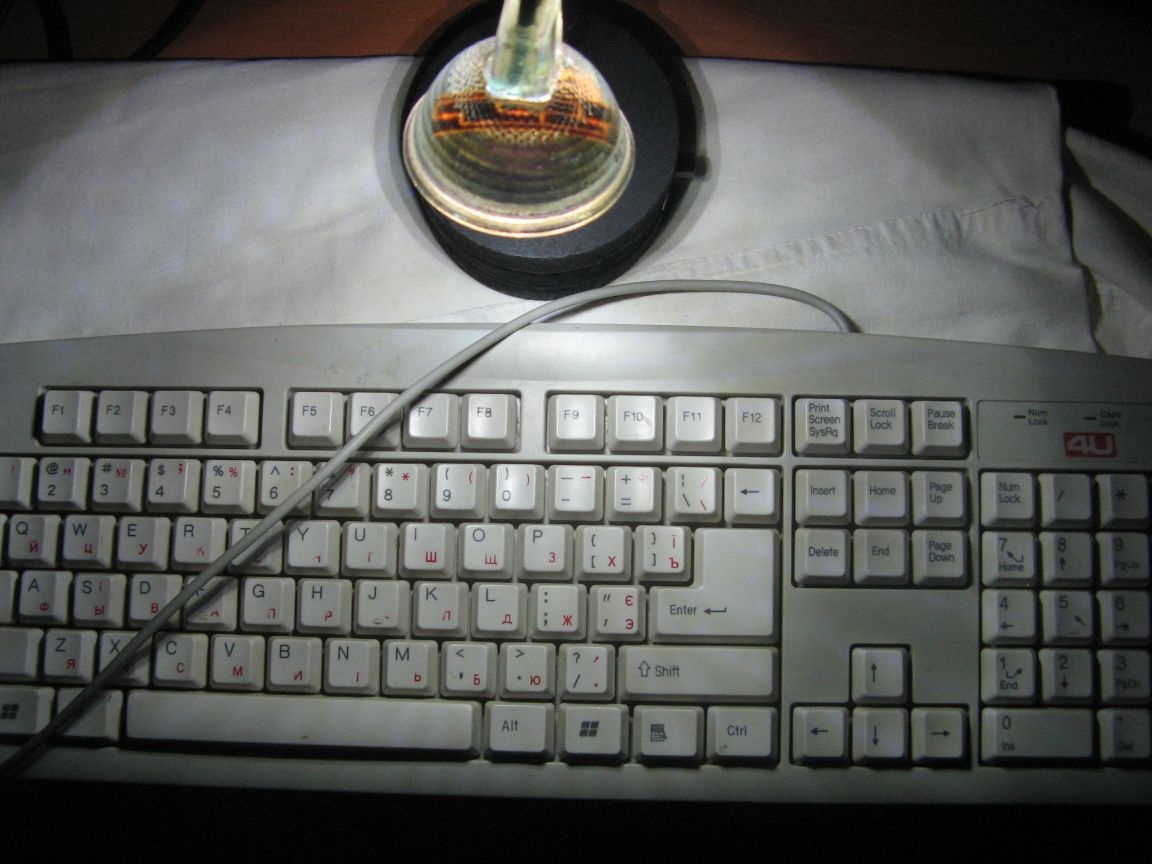
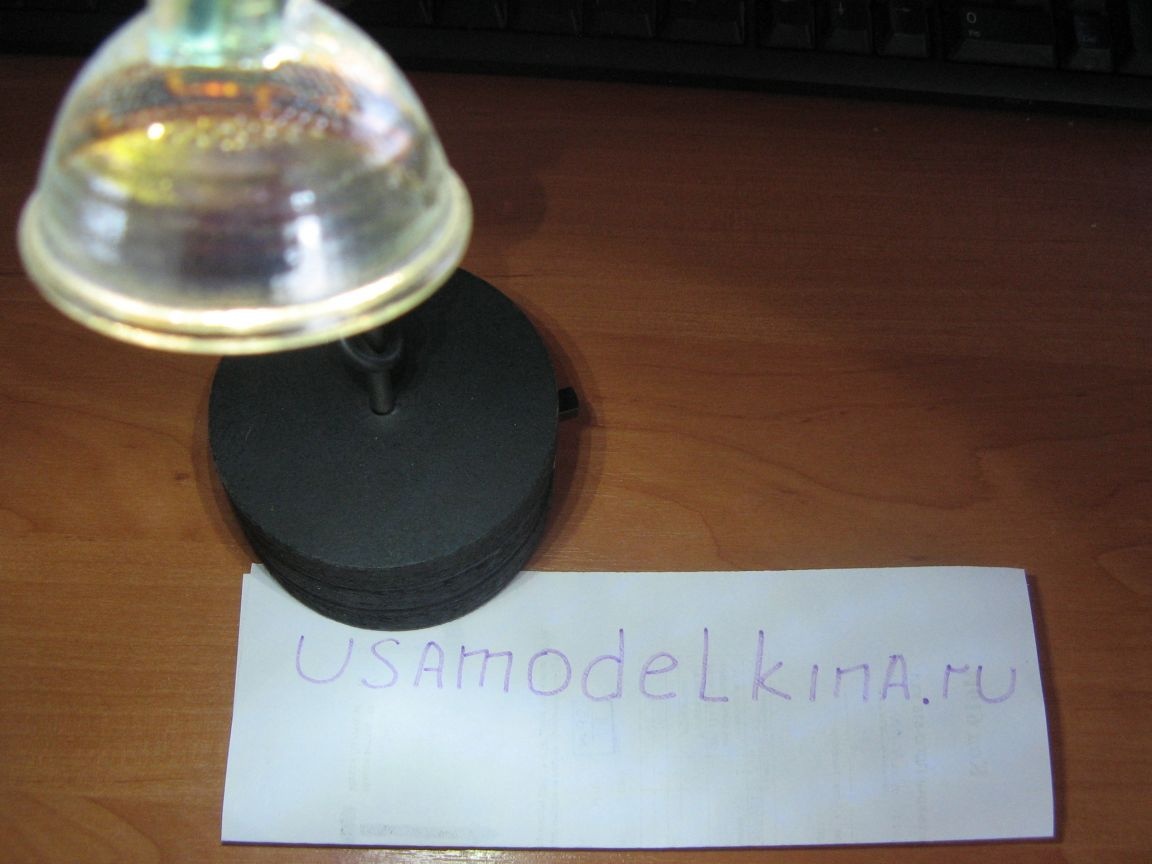
Such is the keyboard backlight I got. The costs are minimal, and the result is wonderful.
Detailed instructions as always can be seen in the video: