

Records, in addition to some nostalgic charm, also sound very good. Of course, we are talking about players of a fairly high class, allowing you to fully realize the potential of mechanical recording. Mechanical sound recording does not involve the conversion of the original analog signal into a digital code, which implies its simplification. It is clear that at the same time, part of the information is simply lost. Lost, greatly contributes to the natural sound of reproduced phonograms and gives the listener a certain emotional response. Of course, we are talking about a more or less “live” performance and instruments.
But you have to tinker. A decent class vinyl player is a very complex product with precise and therefore expensive mechanics, the pickup reads the microvibrations of the needle sliding along the sound groove and various parasitic vibrations and resonances can play a significant role here, and it is not easy to remove them. Yes, and handling the player and records implies a fair amount of accuracy, caution and imposes some restrictions. For example, you cannot listen to the record again immediately - its resource is reduced. And eternal dust trouble? Uh, what’s there.
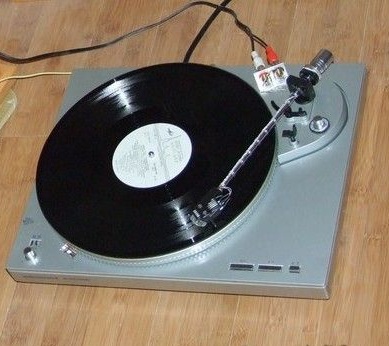
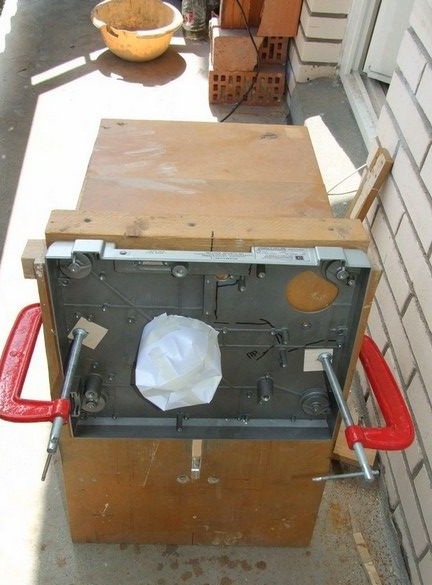
Below, an example of refinement in this sense, of a domestic player of the highest complexity group “Electronics EF-17 stereo. " Without granite or glass slabs and other fanaticism, from those materials that were at hand, using a full-time housing.
The player itself is very good - direct drive, hitchhiking with a micro-lift, push-button tonearm control so that it is not put on the track with trembling hands. Cast duralumin “pallet” of the body, soft vibration isolation springs in the legs. The amplifier-corrector is absent, in the sense - the design is not provided.
The player went into a somewhat inoperative state, fortunately, after a simple repair, everything worked. I had to replace several dried electrolytic capacitors and a blown strobe light-emitting diode.
What was needed for work.
Tools, equipment.
Tool kit for radio installation, multimeter. Low power soldering iron with accessories. Electric drill, drill. Handy milling machine came in handy.Construction or special hair dryer for working with heat pipes, several clamps. Squeezer for sealant, "gun" for polyurethane foam. Sharp knife. Device for installation of "exhaust" rivets.
Materials
Acrylic and neutral silicone sealant, masking tape, thermotubes. Polyurethane foam. The wire in the screen is perhaps thinner. A pair of speaker jacks. Solder, soldering flux. Solvent (alcohol-gasoline mixture). Epoxy adhesive, blind rivets. A piece of aluminum corner.
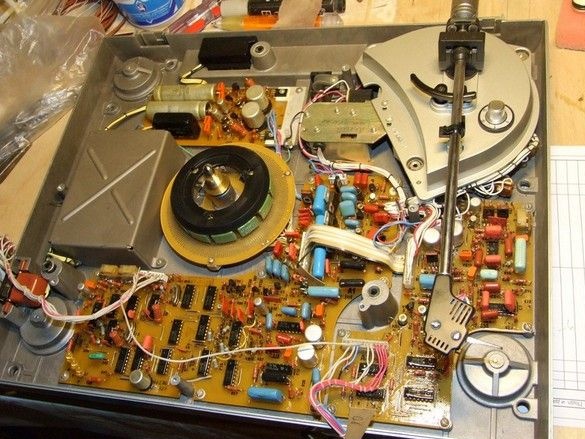
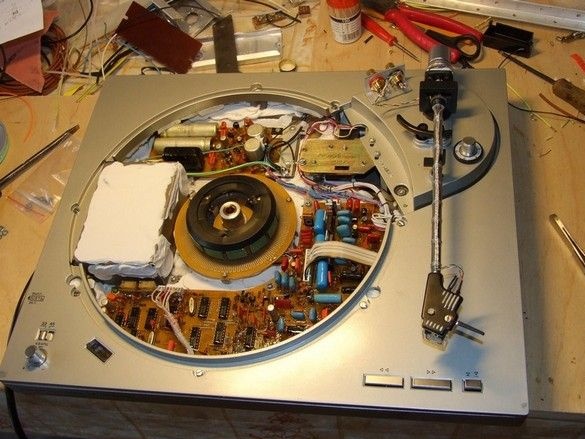
An autopsy showed a very decent construct - neat installation and harnesses, all under varnish. After revitalization, the player was immediately tested in the case, through just the time, the vinyl corrector, which had just arrived, mounted on a live thread. The aluminum “weight” on the axis, pressing the plate, is also intended to reduce a fraction of undesirable resonances, although I did not notice a special difference.
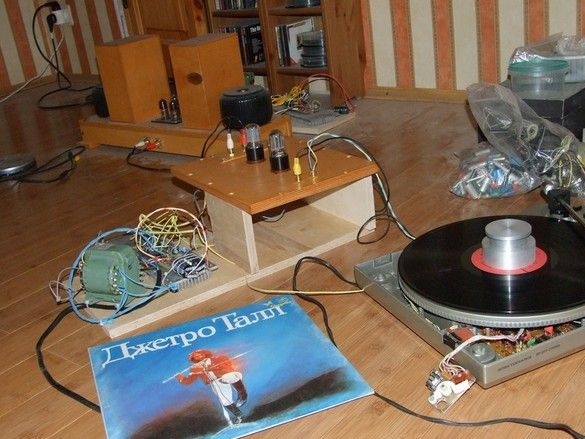
What can I say - in general, not bad, not bad. Immediately, so as not to get up twice, it was decided to slightly modify the design - to dampen the case, where possible, to exclude relay contacts from the signal circuit (opening the circuit when the plate stops, it must be to reduce the background in pauses). At the same time, replace the DIN5 output connector with RCA jacks. Well and on trifles - a power cord, a safety lock block, the ground terminal.
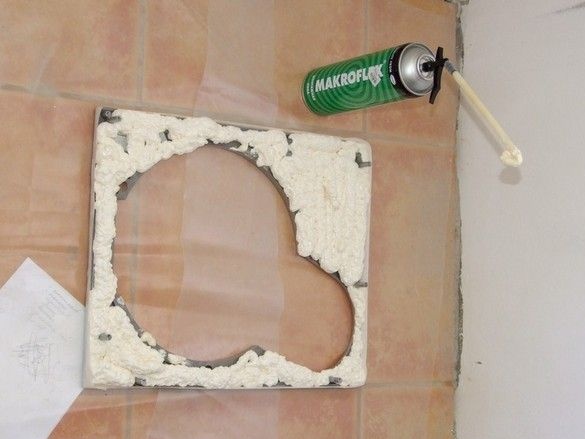
A strong-willed decision was made - to use the standard player case, if possible, damping it. The upper plastic deck was trimmed inside with a layer of mounting foam. A balloon was used without a dosing "gun" - a layer of about 20 mm was obtained. The smooth edges of the panel were covered just in case with paper masking tape, but in general, the measure turned out to be unnecessary - with some accuracy, nothing got to where it was not needed.
The lower, duralumin part of the body, which is much more solid - cast, rather massive. As a matter of fact, all nodes and boards of the player are mounted on it. After dismantling the elements of the player (only the motor remained, it seemed difficult and unnecessary to remove it), the lower part was finalized. The block of the network connector with the built-in fuse has been removed, the unit has been replaced by a powerful integral cord with a plug and a separate block for the fuse on the case. Also, a ground terminal has been added. After marking, small holes were drilled, the hole for the fuse holder was then milled to increase the diameter. Before this - the casing was fixed with two clamps in an upright position, the engine is protected from possible metal sawdust.
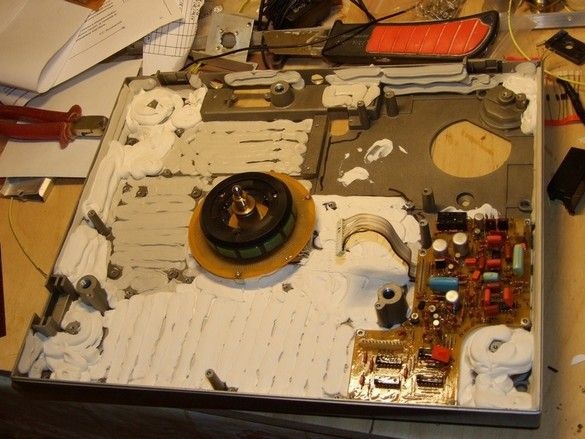
After drilling, the “pan” is thoroughly degreased with acetone and coated with a layer of sealant. In general, acrylic - it seemed more suitable, and it costs less, but when it was over, it was covered with silicone, neutral is clear - you shouldn’t use acid, it “eats” aluminum.
Before smearing, with an alcohol felt-tip pen, after trying on elements and knots, the “area” was outlined where my damping could fit. I smeared thicker, but so that the boards and other elements fell into place. I tried on more often, neatly, so as not to peg in the sealant. The installation of the player elements is best done until the sealant has completely cured. Acrylic, after a while it becomes covered with a sort of dry, completely non-dirty crust, but inside it does not harden. In the case of excess sealant, in any place, the installed unit will squeeze out the excess into the free space, organizing itself a sort of orthopedic seat, without even getting dirty.
After assembling the main part of the player, we adjust the top panel, removing the excess hardened foam. It’s a dreary business, but there’s no place to go. With a sharp knife, trying every second to the place of "service", cut off the excess layers, cut out the space for the elements. It is worth remembering that damping is better, the thicker the layer of porous material - do not cut off excess. After the final trimming and installation of elements on the upper panel, we restore and check all connections, check the player’s performance as a whole. After, we assemble the case.
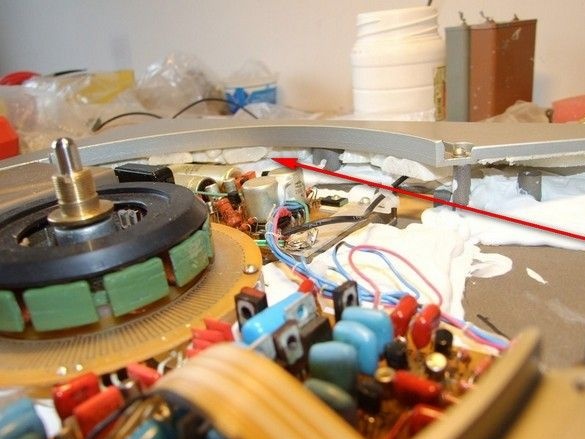
The photo shows that the damping layers of the lower and upper panel of the housing assembly practically close. Here, you can assess the degree of damping - listen to the sound of tapping the player’s body, well, say, with the handle of a small screwdriver. The sound comes out completely deaf, instantly damping, without any “ringing”. And in general, the player began to feel like a kind of monolithic brick.
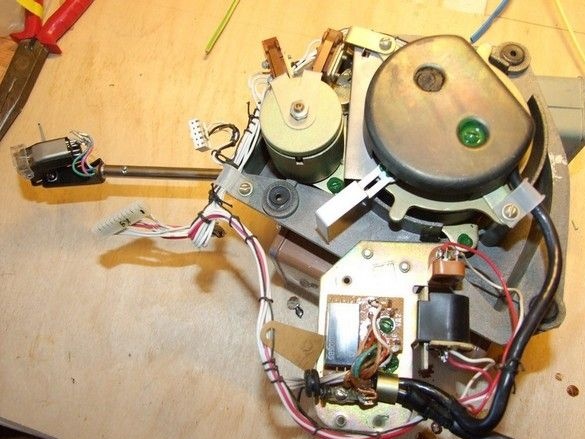
Finalization of the tonearm assembly. Well, let's get started with a prayer. A responsible node, with fine mechanics. The lift, anti-skidding and hitchhiking did not touch. The tonearm itself, should be as light and tough as possible, should not have resonances at operating frequencies and “ring”. The tube was filled with polyurethane foam, pre-wrapped with paper tape so that later it would not peel off the frozen foam from the outer surface. The pickup holder also got a little hit. After the foam was completely cured, its excess was cut off with a sharp knife, the assembly was assembled. The wiring inside the tonearm tube was replaced by an external one. For her, several pieces of the thinnest, silver wires in the screen in pairs were useful, what is needed. From some kind of sensor. The wiring was fixed over the tonearm tube with thin pieces of thermotube, the ends of the screens were cut and sealed.

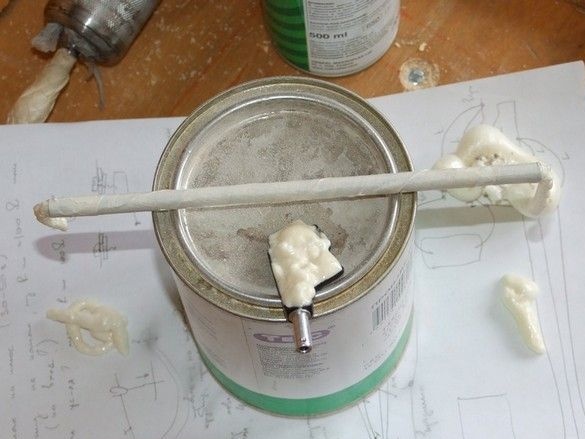
In order not to lead wires into the housing, where it will be convenient to install the output signal connectors, the latter are installed on the top panel of the tonearm assembly itself. An open way, so to speak, on a piece of aluminum corner. The corner is attached to the panel with exhaust rivets.
The signal wire from the pickup head, from the stick of the arm comes out already without a screen, for less rigidity, and in front of the connectors, is molded into a sort of Moebius loop to reduce the obstacle to the rotation of the arm. The loop turned out to be quite soft, hanging in the air, touching nothing in any position of the tonearm. Please note - the wires after soldering to the terminals of the connector are secured to the insulation with epoxy adhesive droplets to remove the mechanical load from the solder points, otherwise the wires will quickly break off near the solder joints - they are fragile there, during soldering, solder is sucked into the woven veins by capillary forces and makes these places stiff, and our wires also move. The connection used excluded the standard relay switching the output signal. Practice has shown that no background increase is observed. Apparently, its general, low level is affecting.

In the same photo, one more sort of “modernization” is visible - the used pickup head is slightly heavier than the standard one, so the counterweight could not cope, I had to weight it with two drilled five-ruble coins glued onto neutral silicone sealant - if necessary, they can be removed.
In the transparent, removable cover of the player, a window was cut for the release of the signal cable in the closed state.

I remember listening to the most interesting records all night. Do not come off.
This concludes the description. home "Systems". In general, I am satisfied with the result. The sound of the records varies greatly, from, "almost the same as on the CD", to "close your eyes and Kinchev sings nearby." Indeed, among the collected records there were several unusual copies, the music from which is reproduced extremely naturally.

Description and circuit diagram of the player.