
This homemade is a vivid example that not only foreign masters can issue masterpiece projects. I present for consideration a very interesting table of domestic production, which you can make do it yourself!
As expected, the starting material was oak, this wood has a beautiful pattern, not to mention the strong energy that many of us believe in. Regarding epoxy, the author used the usual inexpensive glue. We don’t really need perfect transparency here, but the selected resin copes well with light scattering.
If the project interests you, I propose to familiarize yourself with it in more detail!
Materials and tools used by the author:
Material List:
- oak logs;
- epoxy adhesive;
- blue dye (ampoules from writing pens);
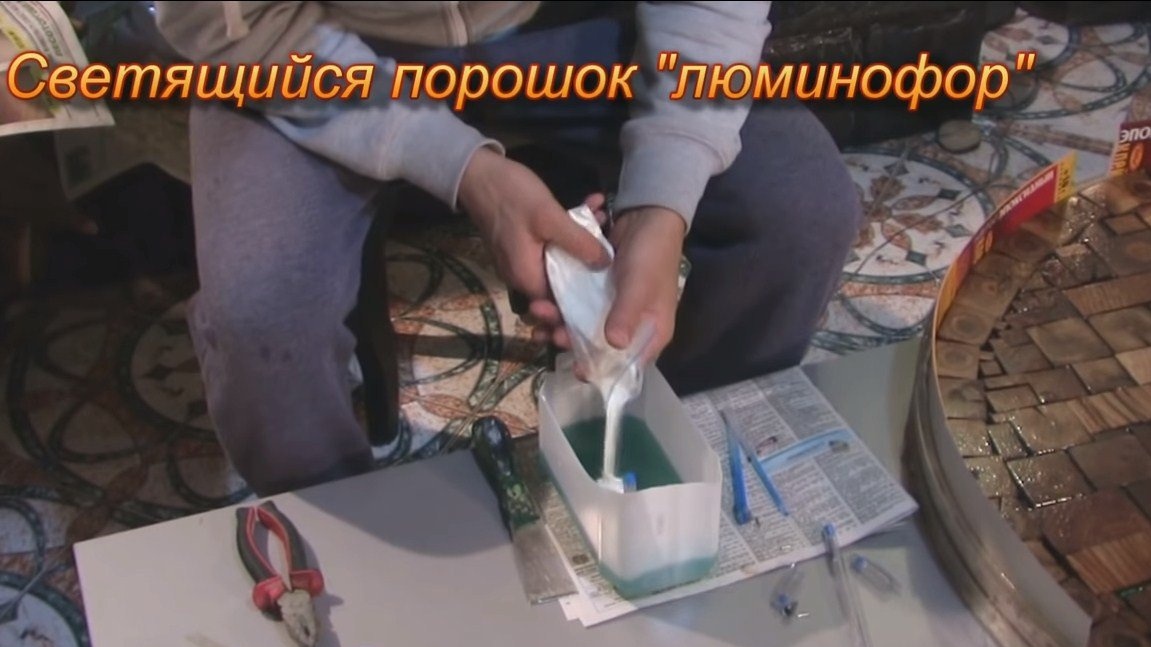
- luminous powder "phosphor";
- varnish or special epoxy for finish coating;
- carpentry glue
- lamps, LEDs or other lighting device;
- sheet material for formwork (plastic or the like);
- dowels for of furniture.
Tool List:
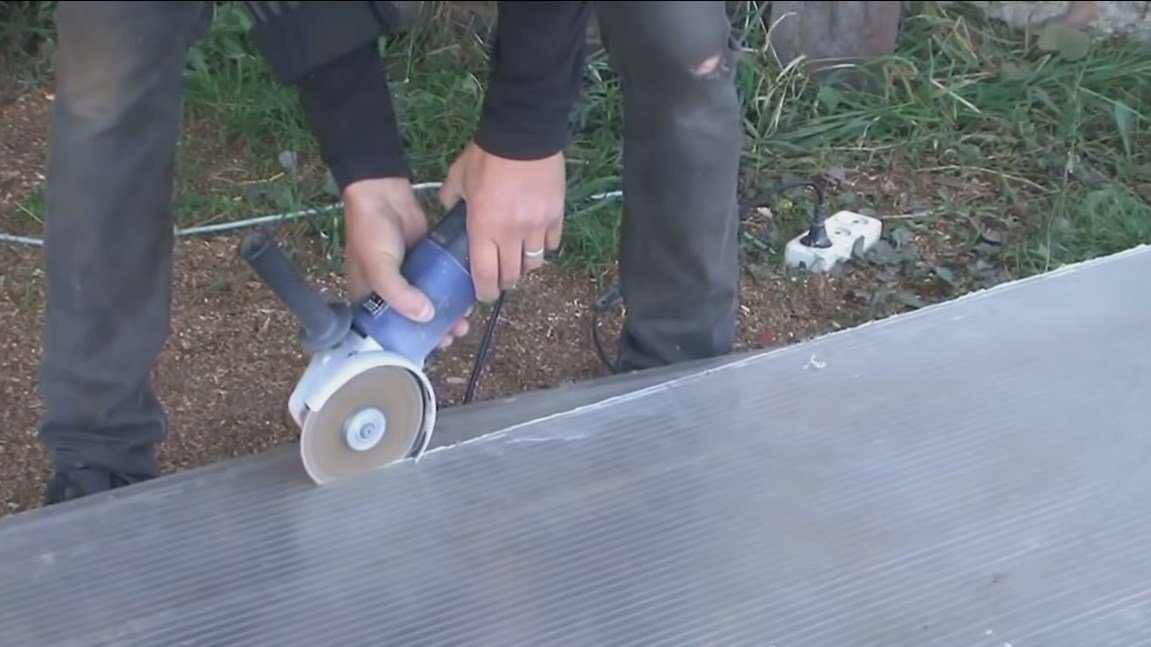
- Bulgarian with a disk grinding nozzle);
- pendulum saw;
- jigsaw;
- screwdriver;
- chainsaw.
Homemade manufacturing process:
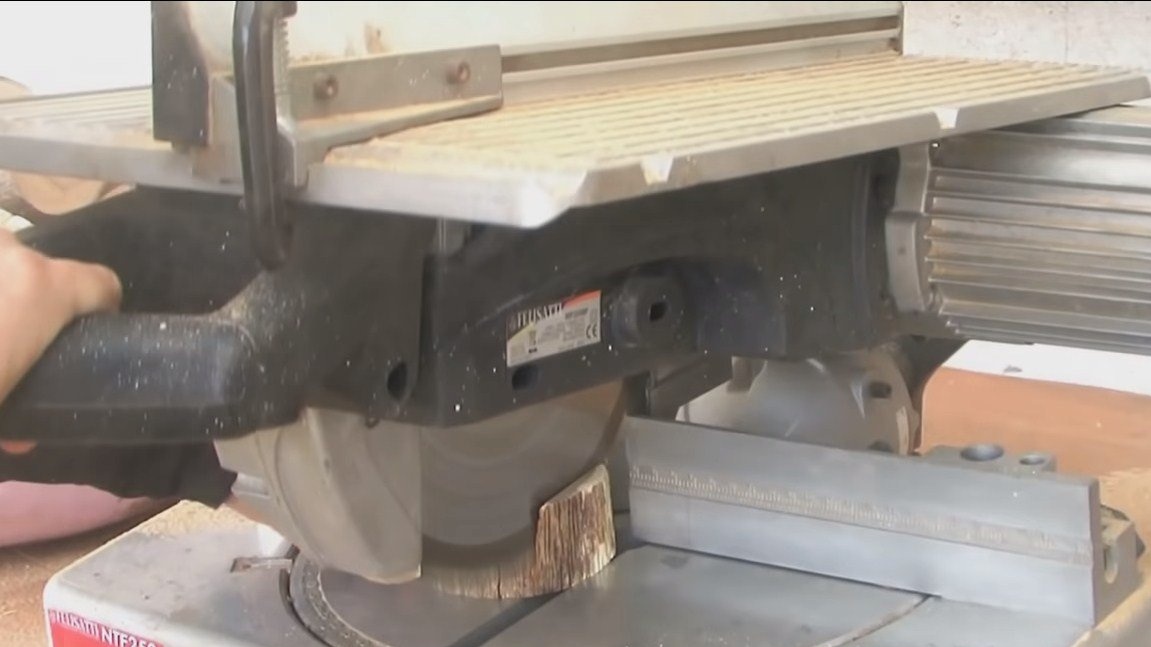
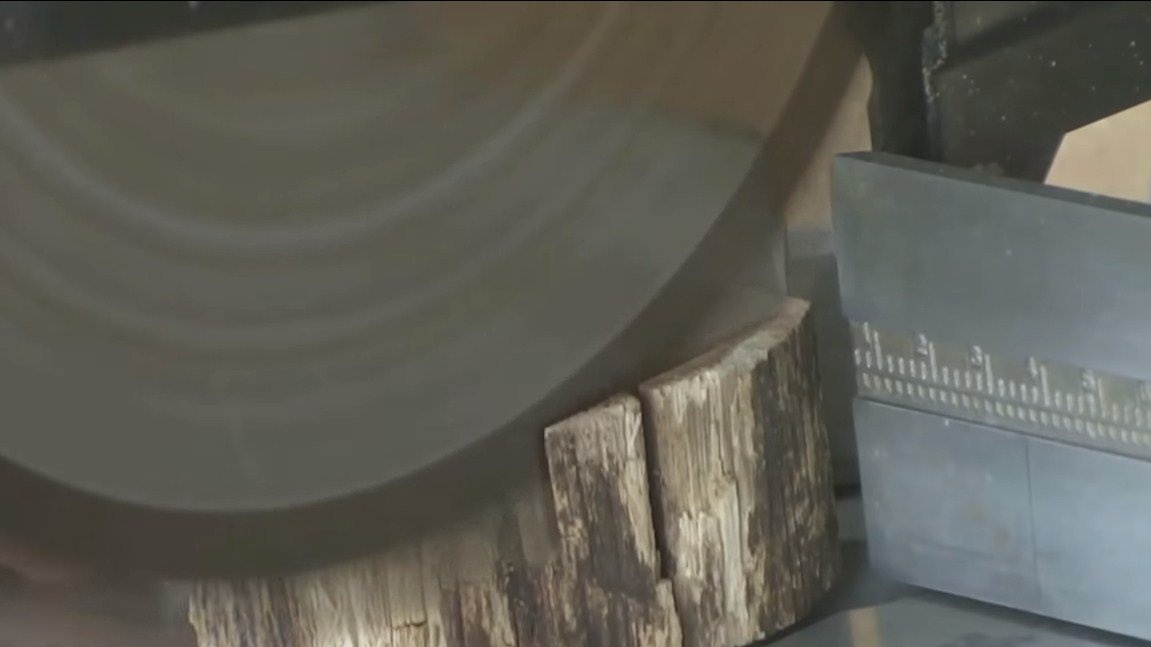
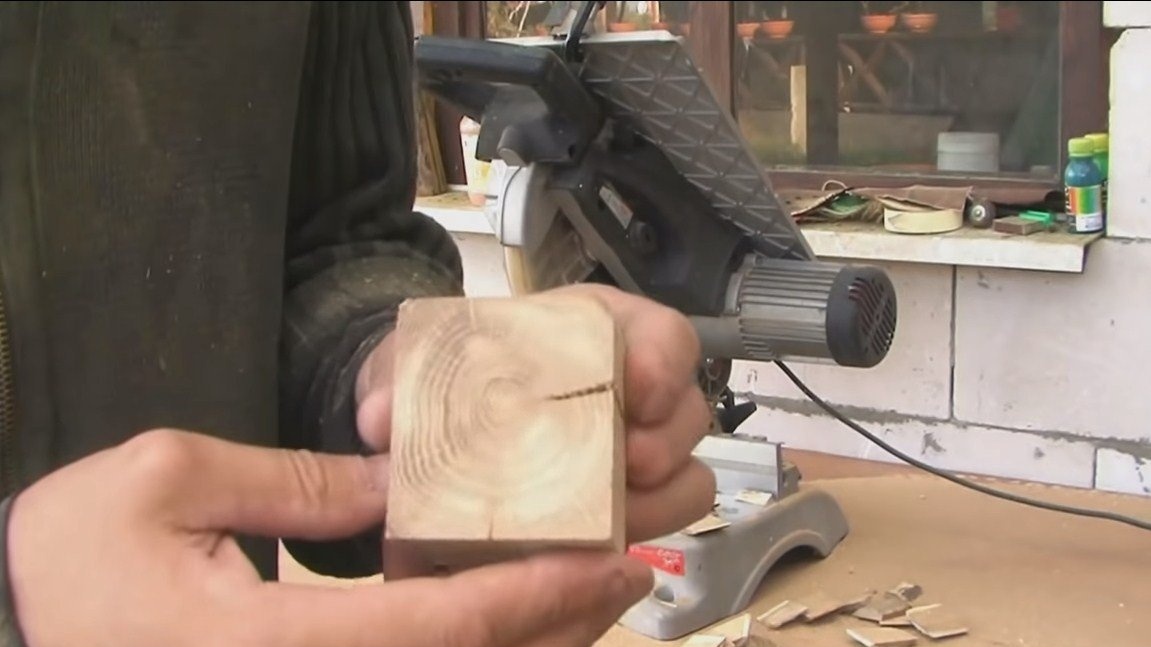
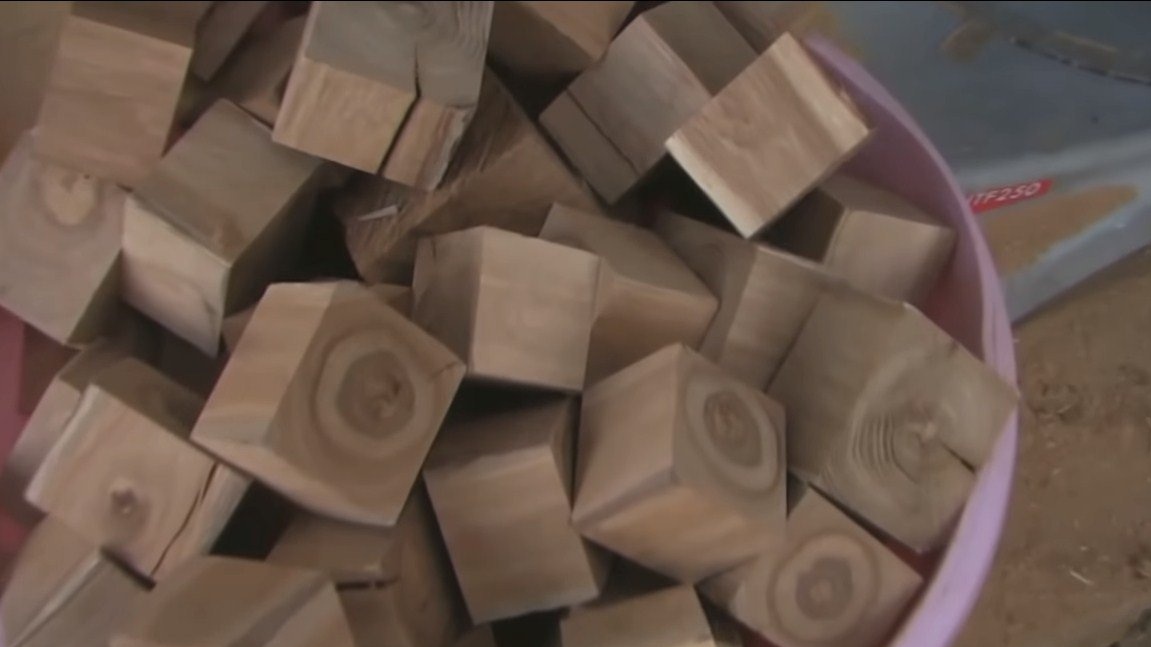
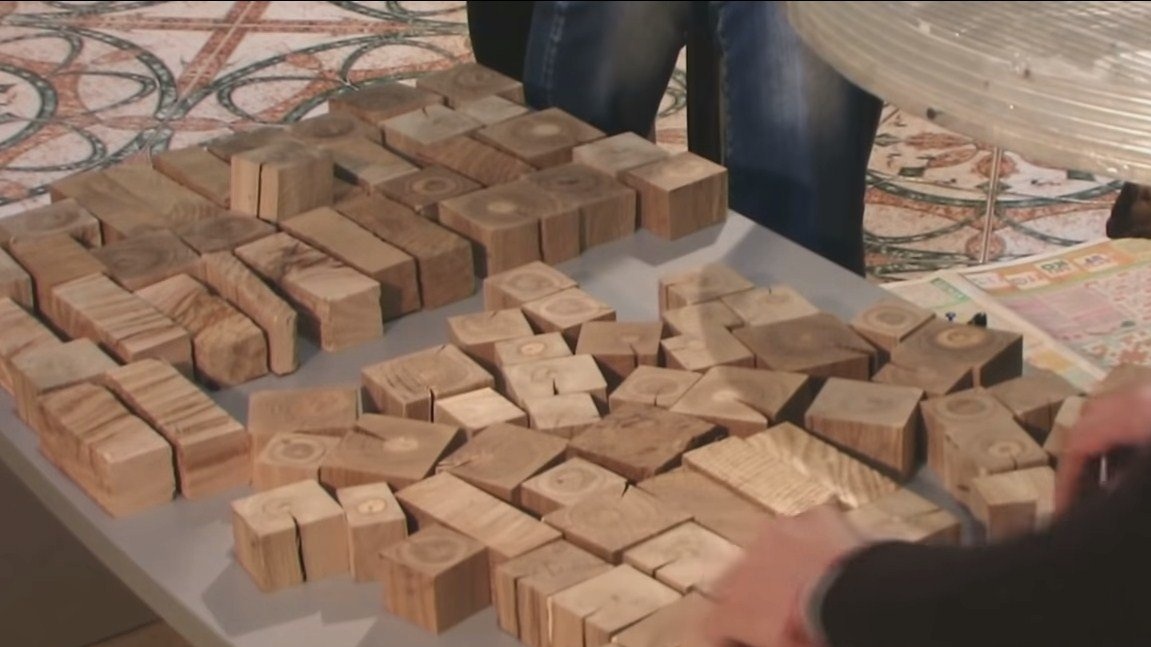
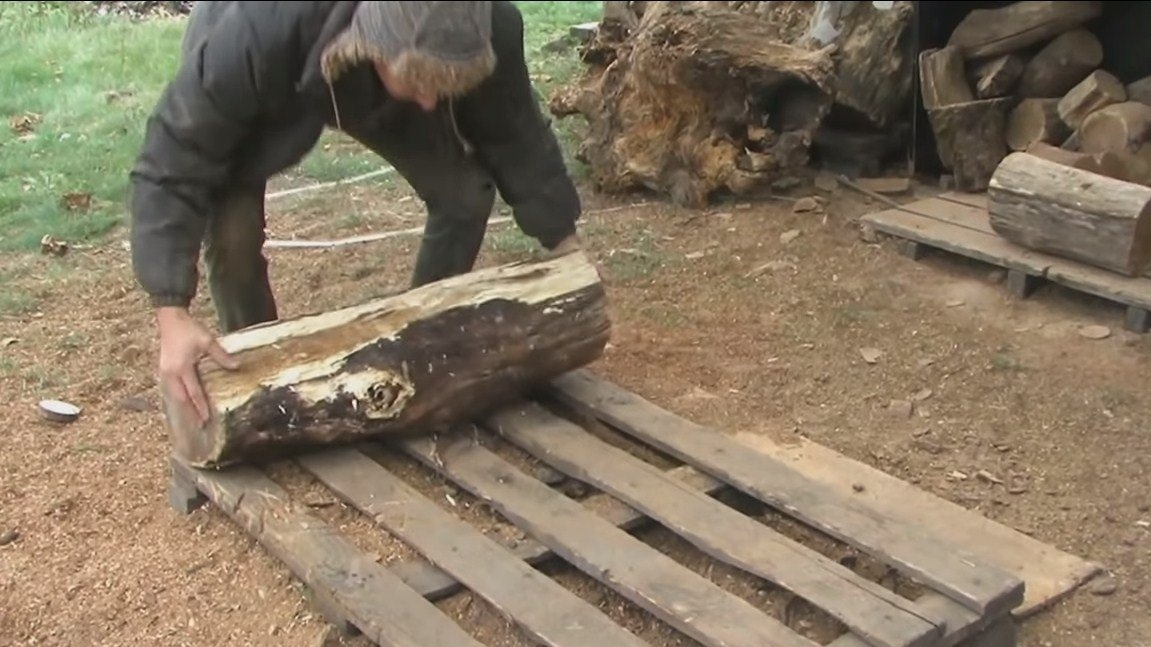
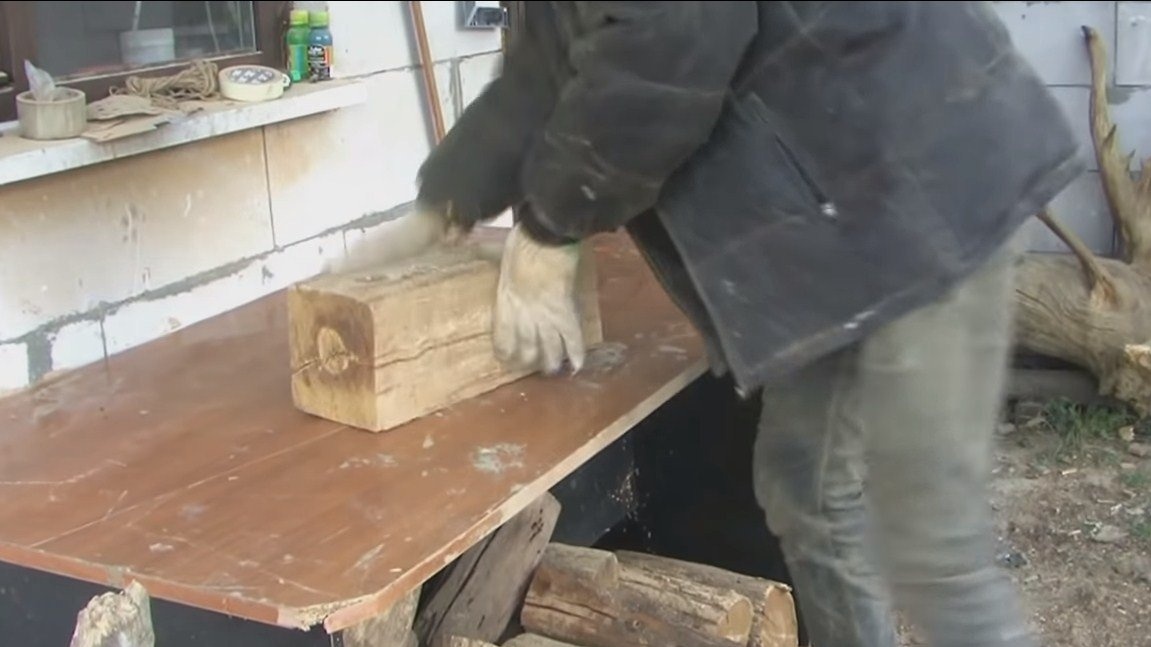
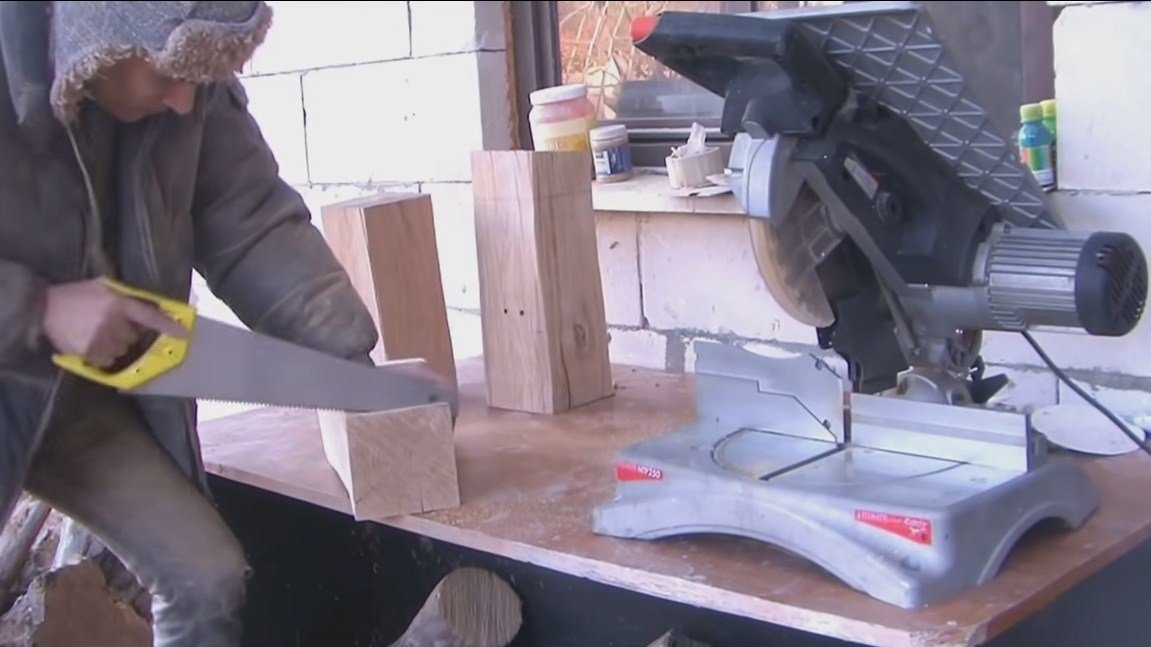
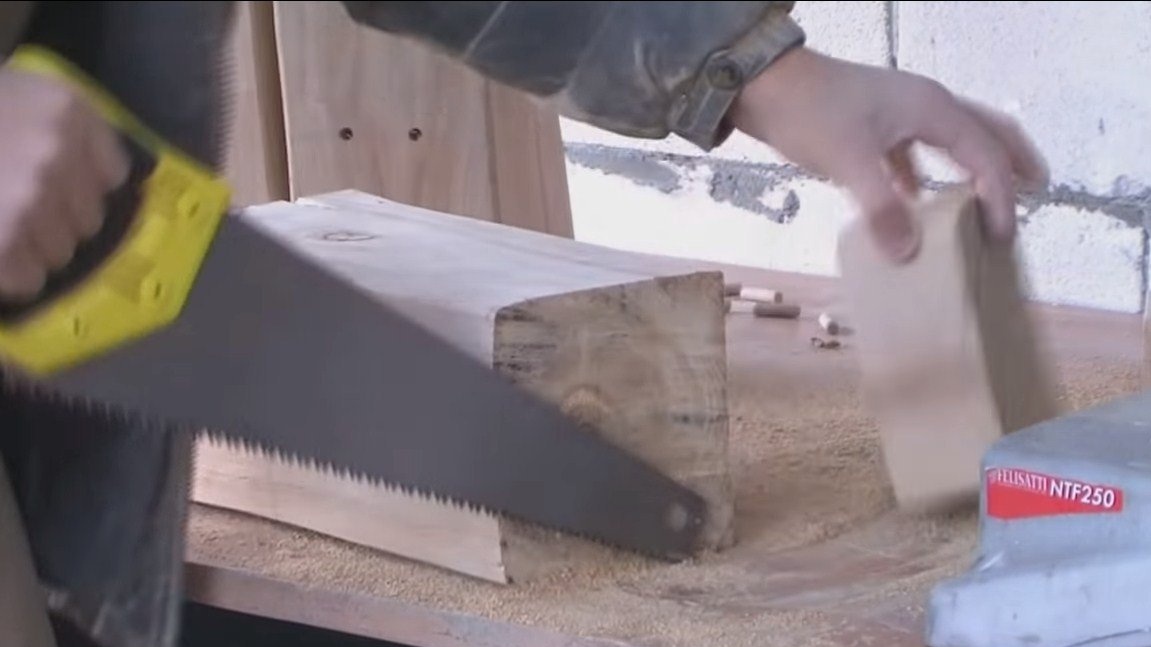
Step one. Cut the workpiece
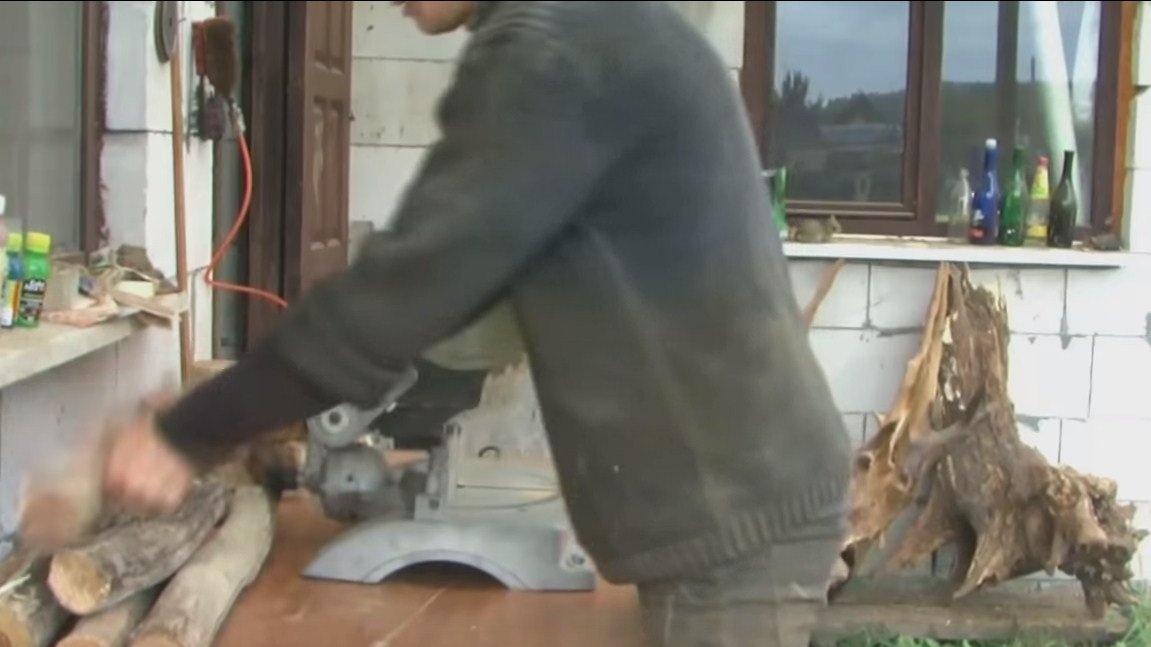
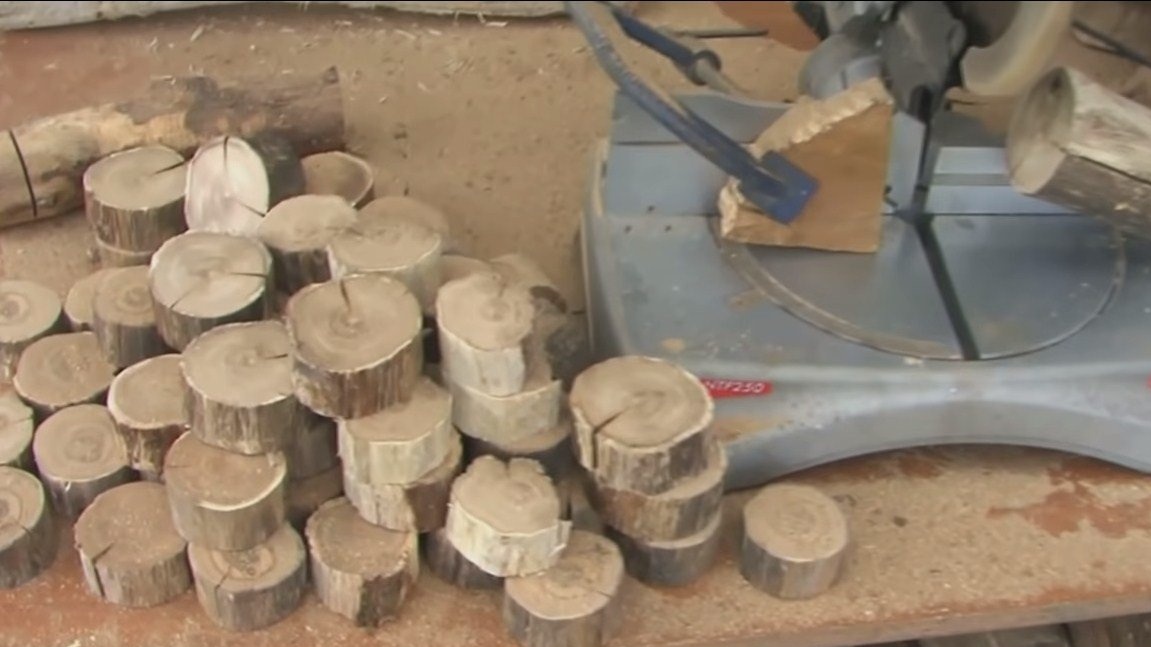
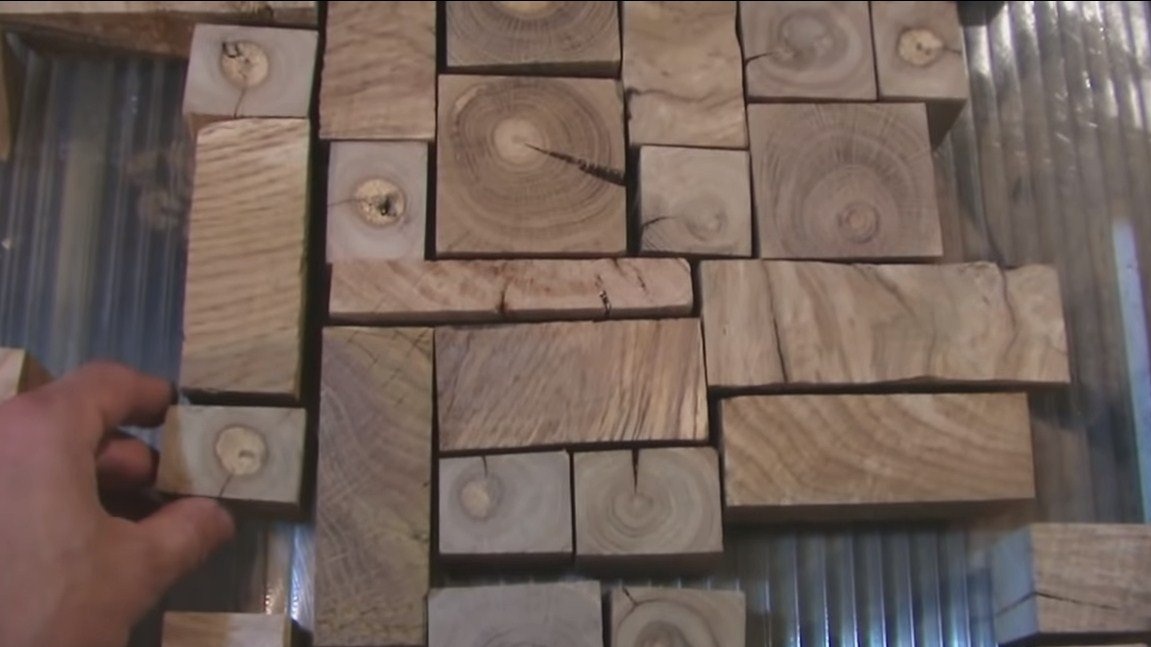
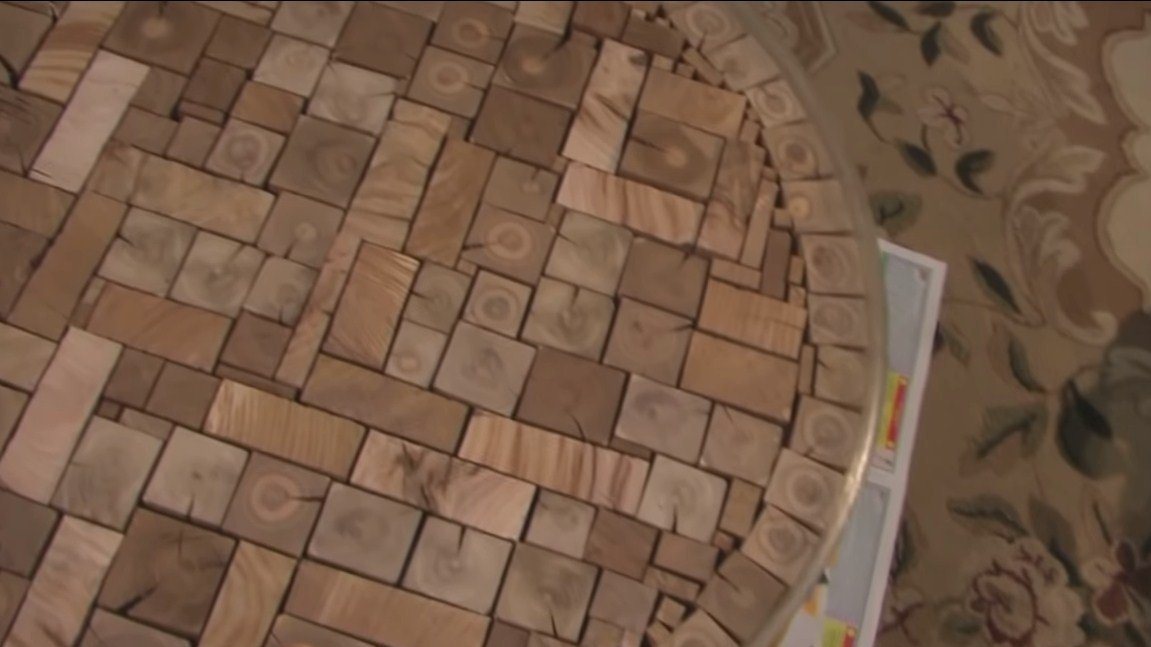
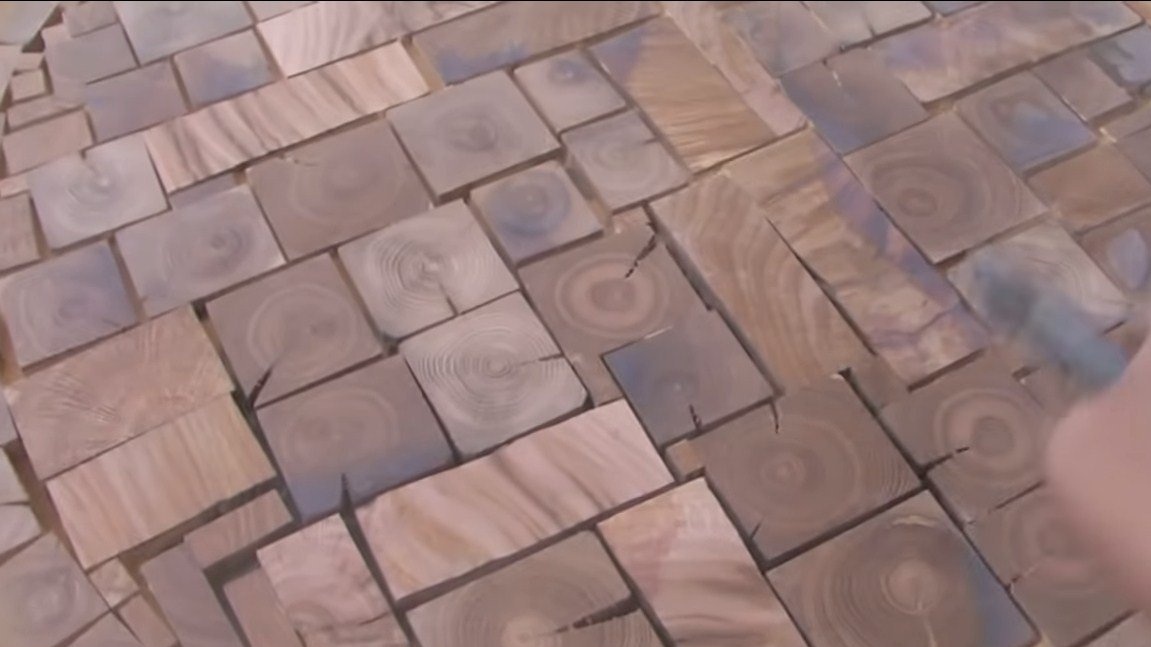
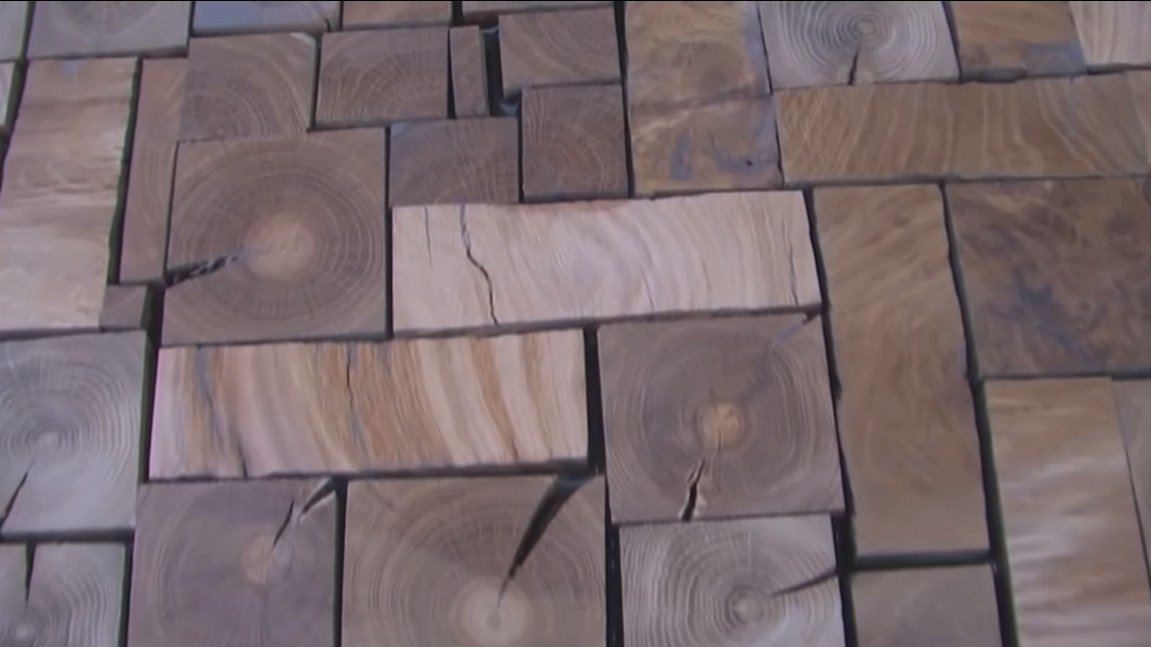
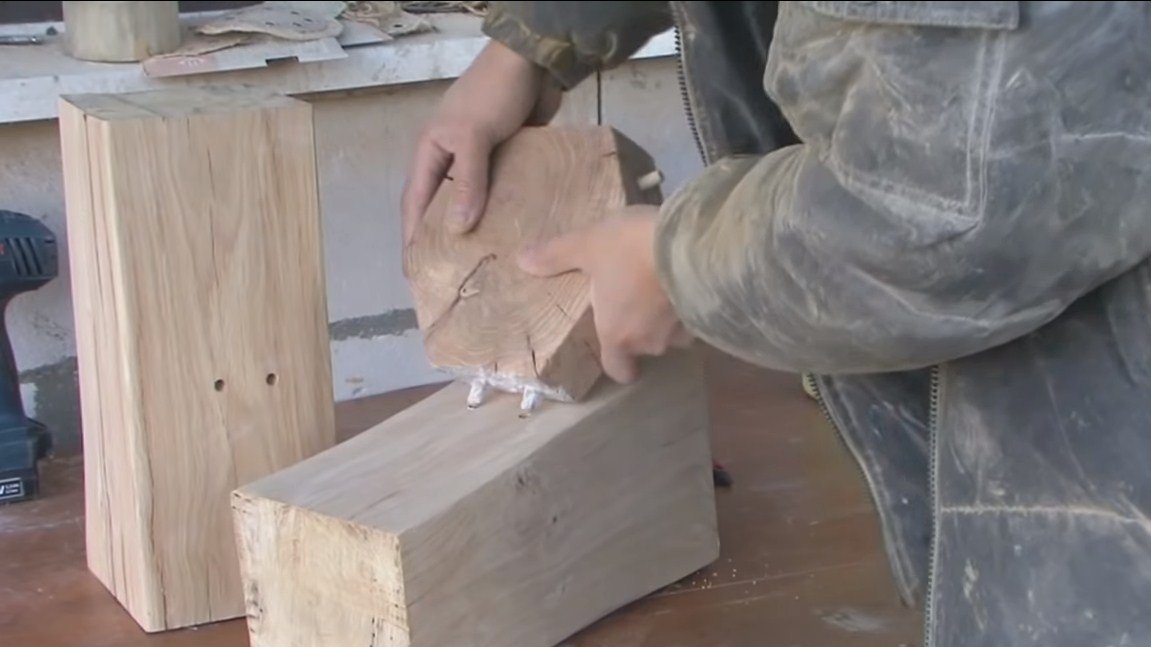
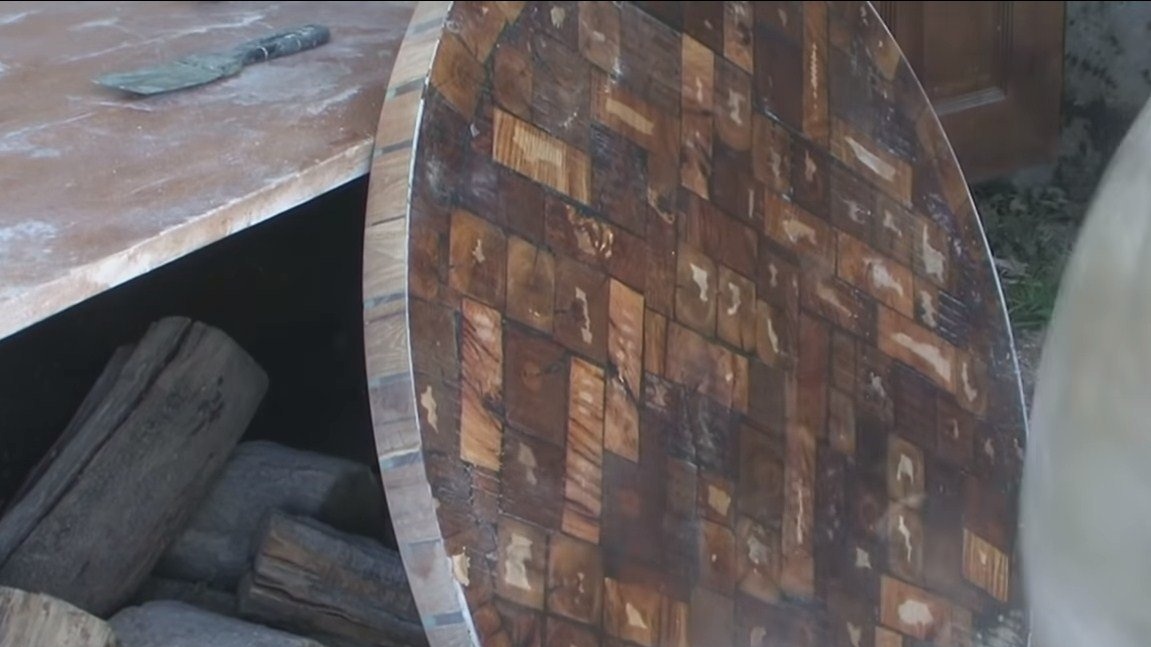
To begin with, we need to cut a lot of blanks, which we will then fill. The author chose oak for pouring, it can be not only tree trunks, but also branches. Of course, the material must be dry, otherwise good adhesion is not guaranteed after pouring, and the glue will turn white.
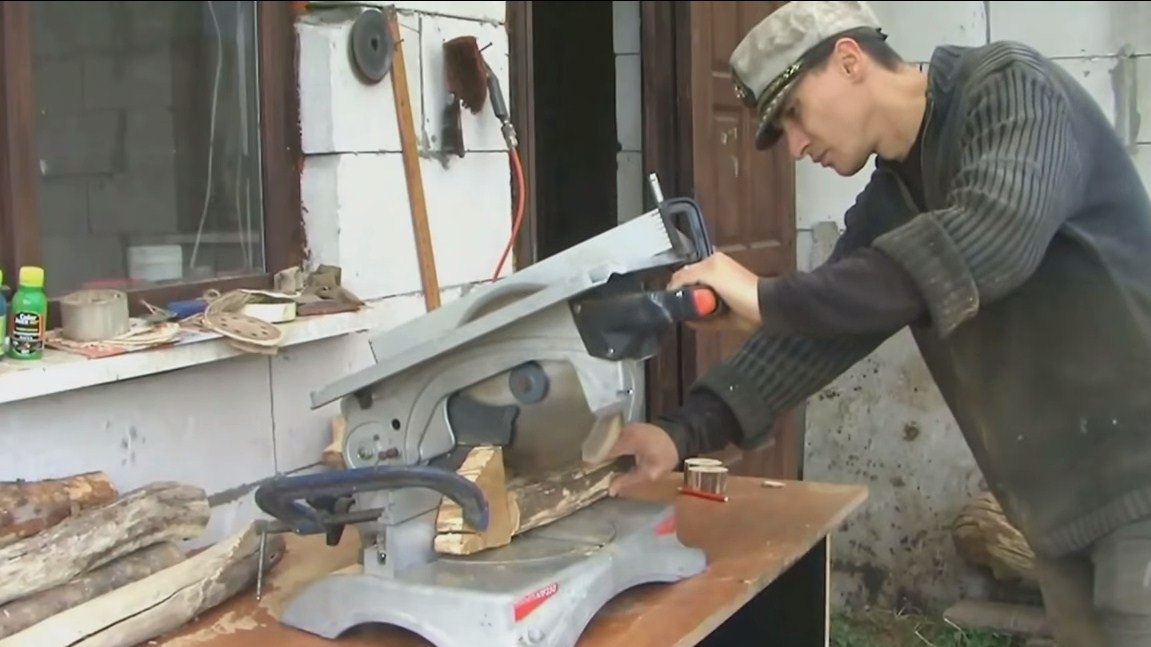
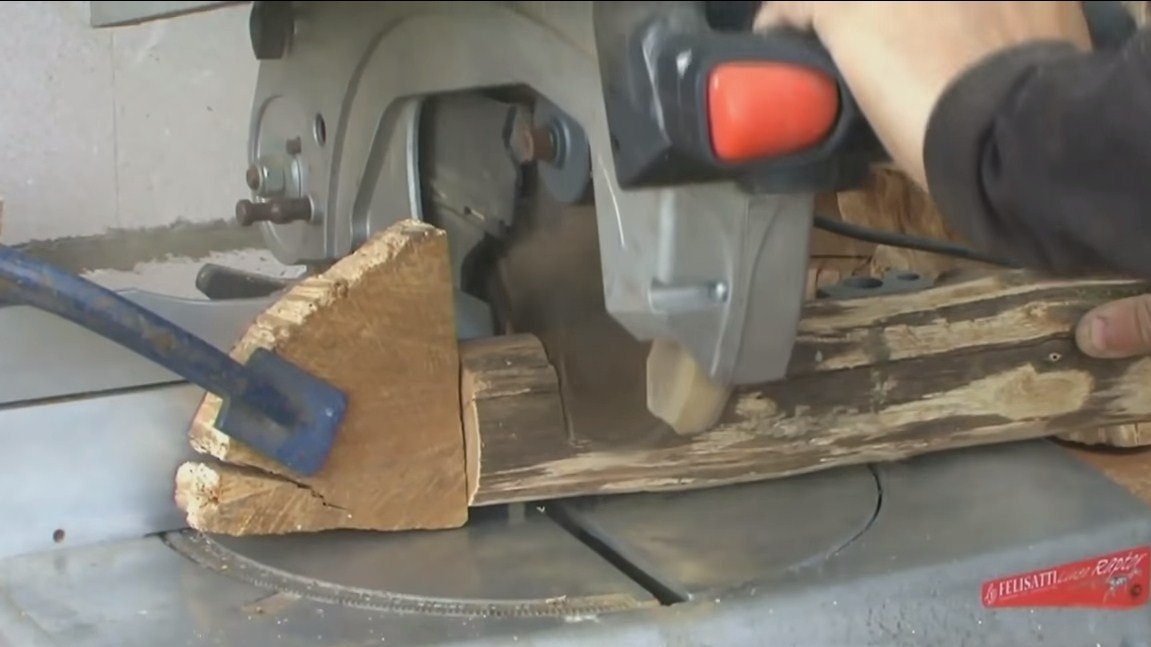
You can cut this number of blanks with a pendulum saw. First we cut the rounds, and then give them a rectangular shape. Grinding is not necessary, then we will still grind the front side.
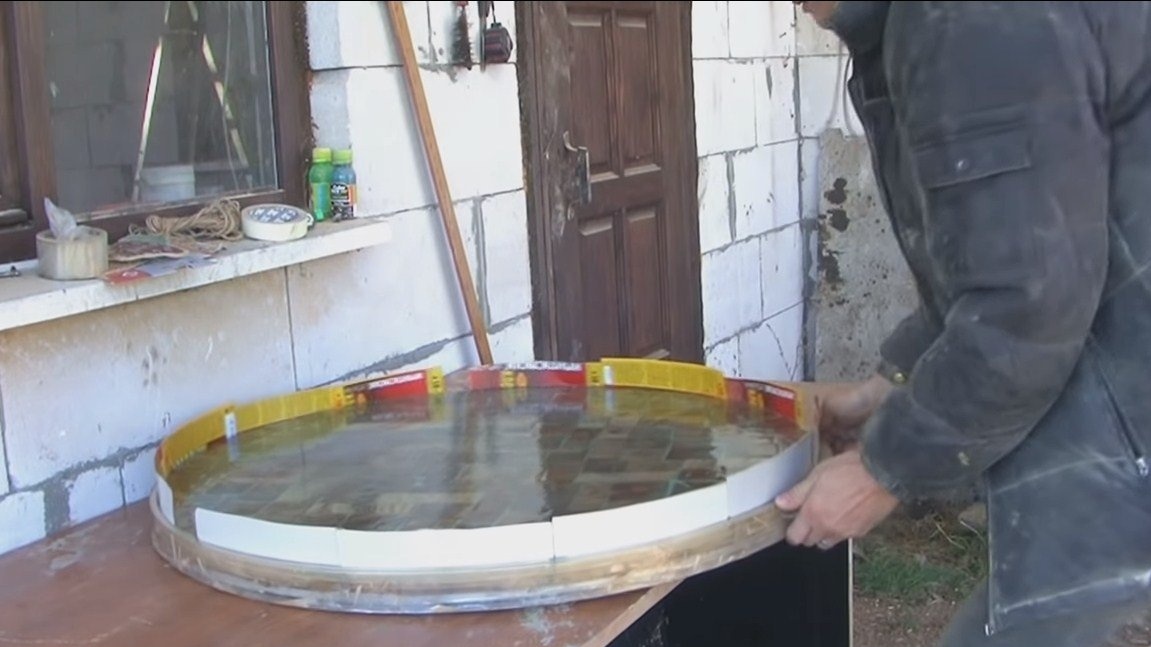
Step Two Formwork and casting
We need to make a reliable formwork through which the resin will not be able to leak. It is also advisable to use a material to which the resin cannot adhere. By the way, there are special silicone greases that prevent the resin from sticking to surfaces. You can try using Vaseline for this.
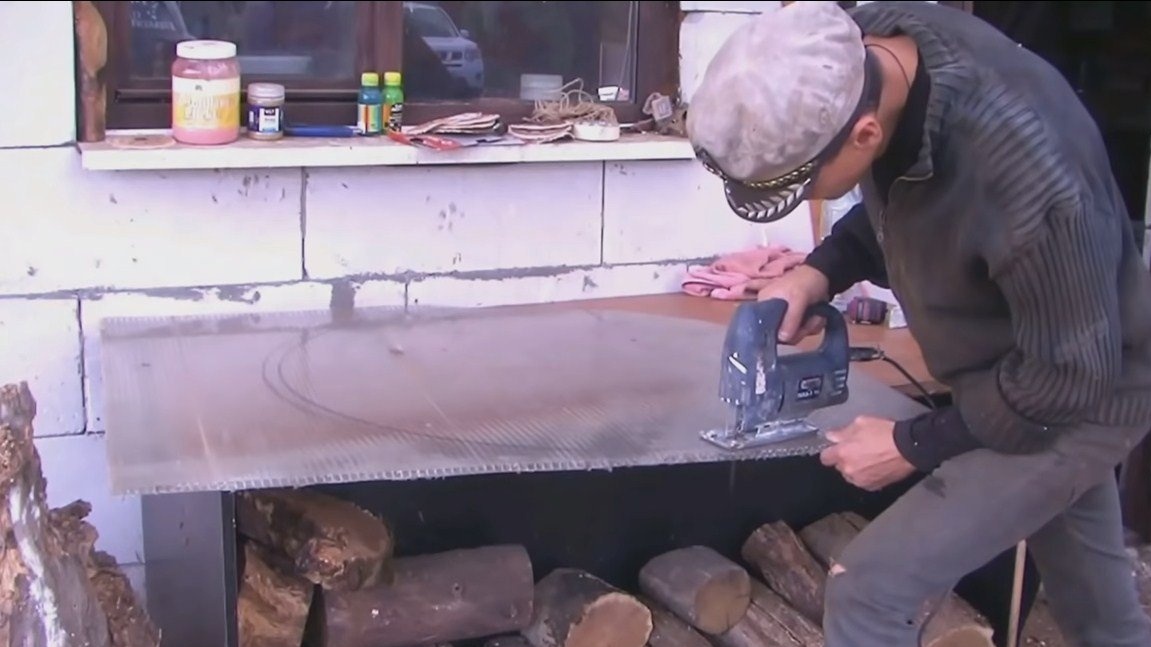
I could not identify the material that the author used, but this is probably something for construction. First we need to cut out the circle of the shape we need, the author cuts the material with a jigsaw.
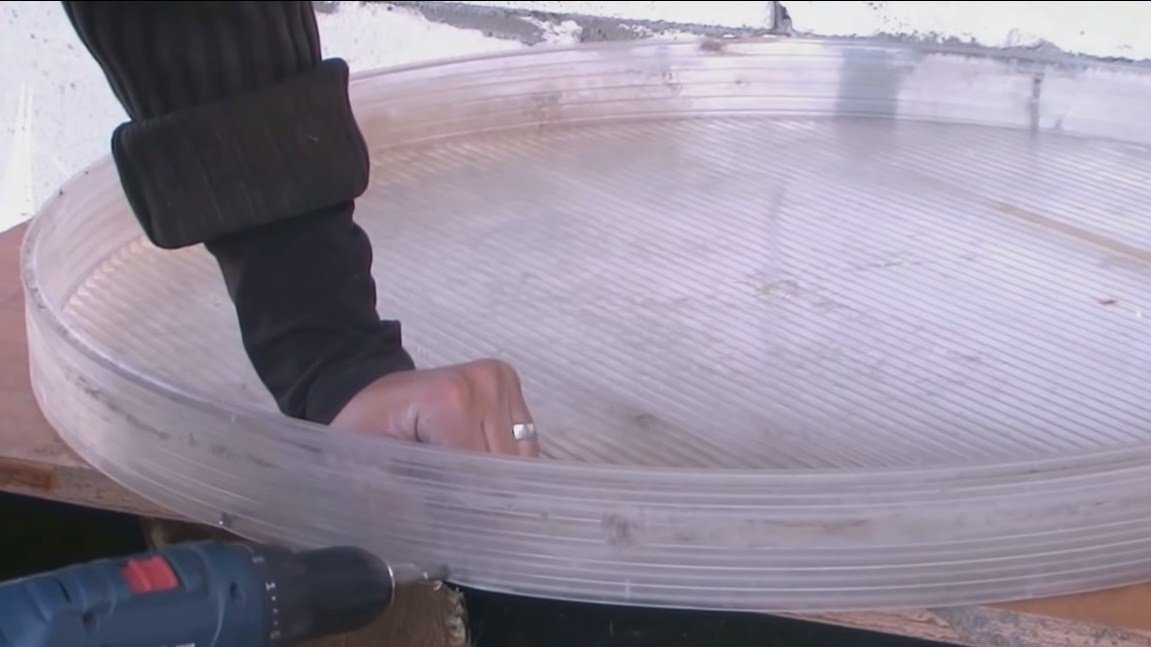
And then you need to cut a segment of such a length from which it would be possible to make a side. The author fastens this side with screws, and uses tape for sealing. If you are afraid for tightness, inside the joints can be coated with plumbing silicone or pour hot glue.
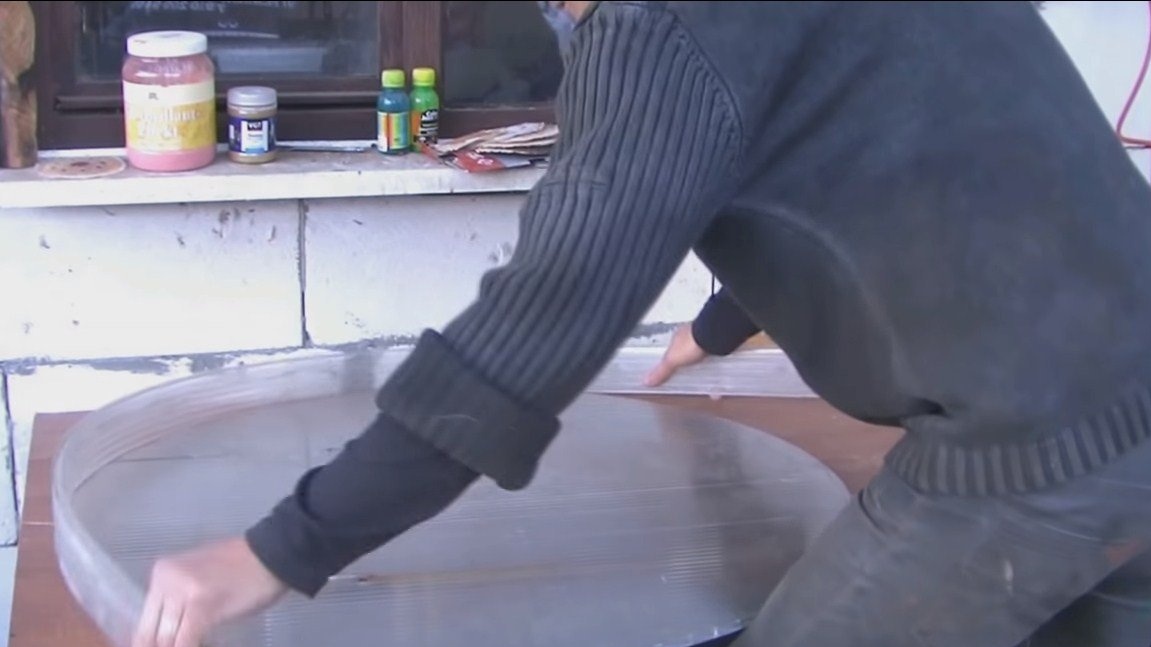
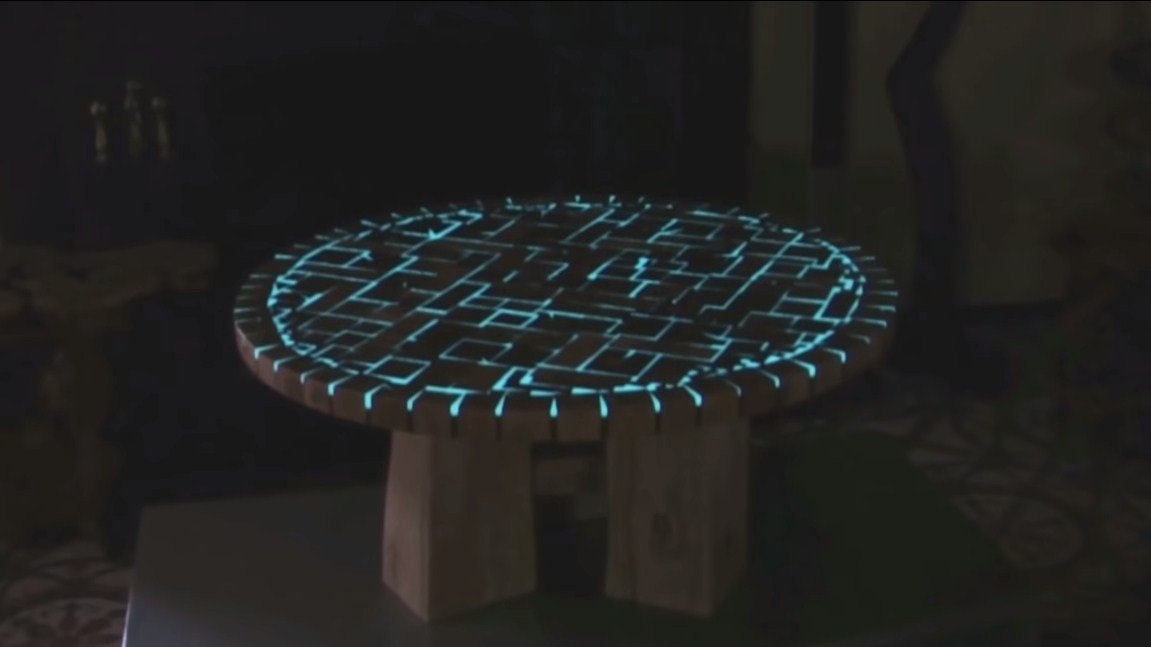
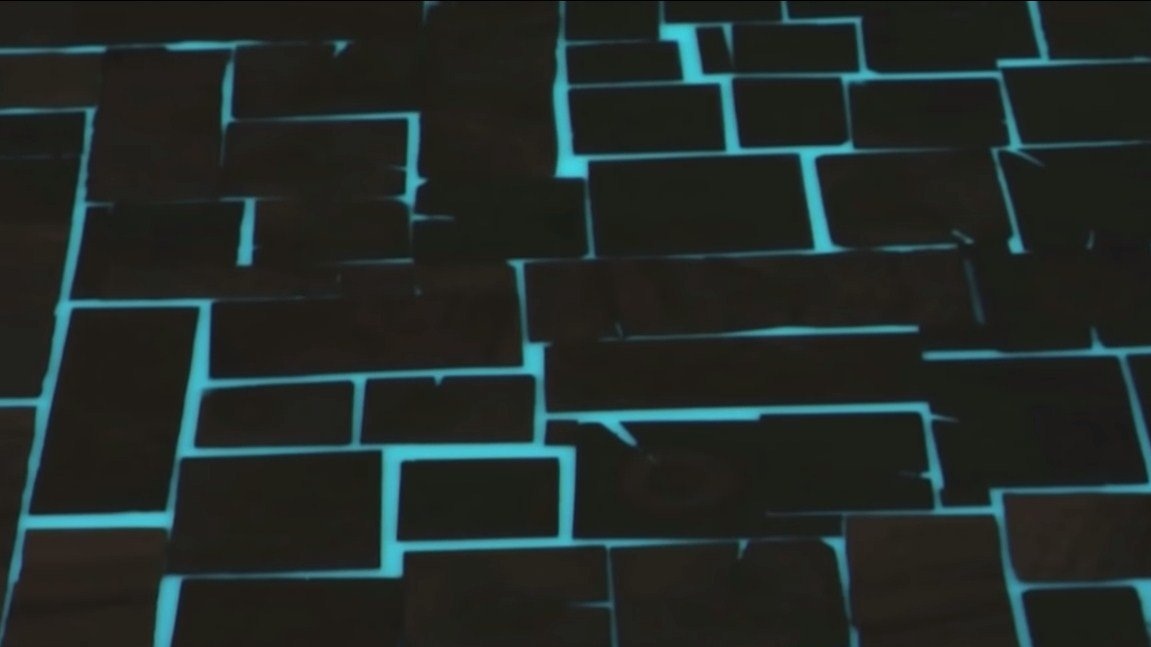
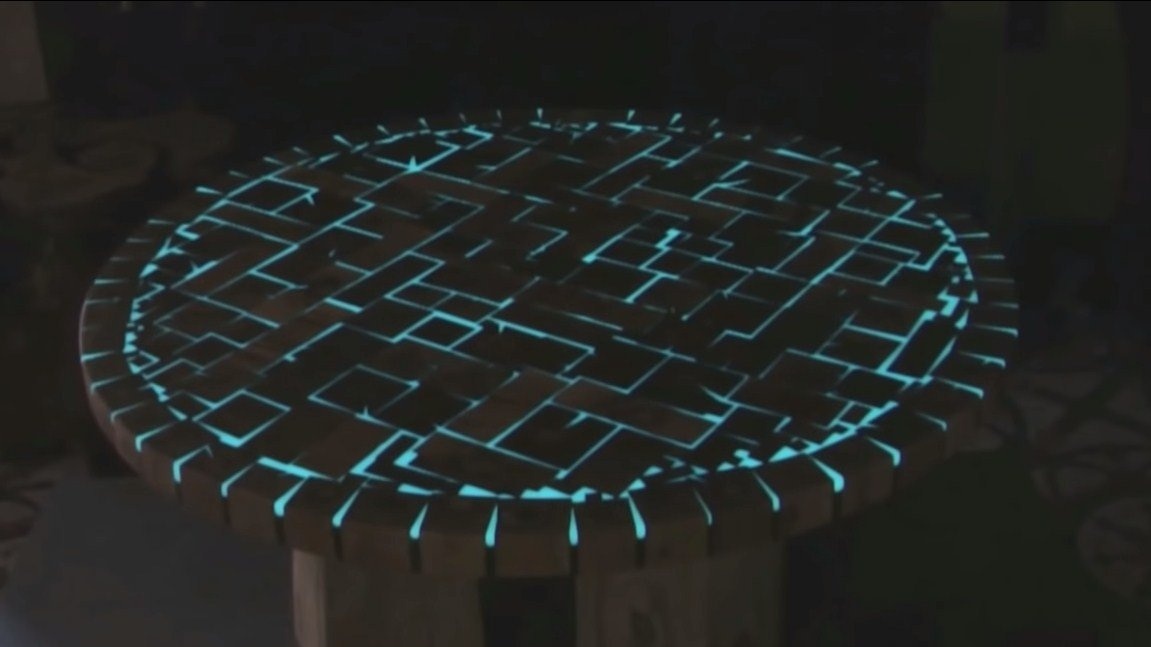
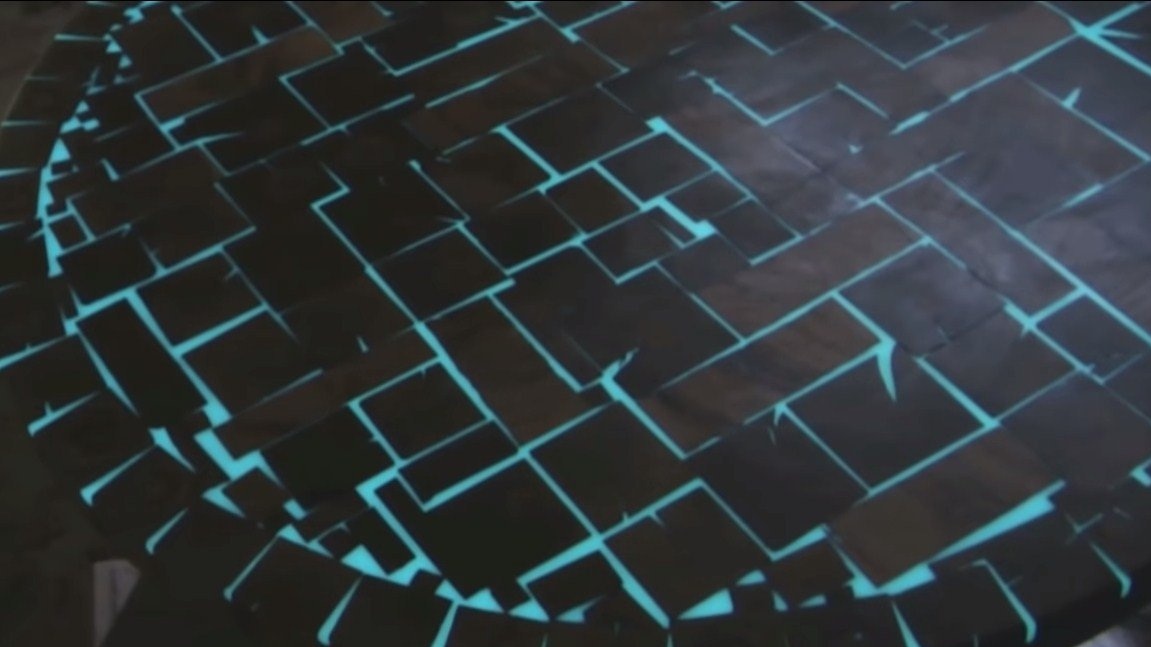
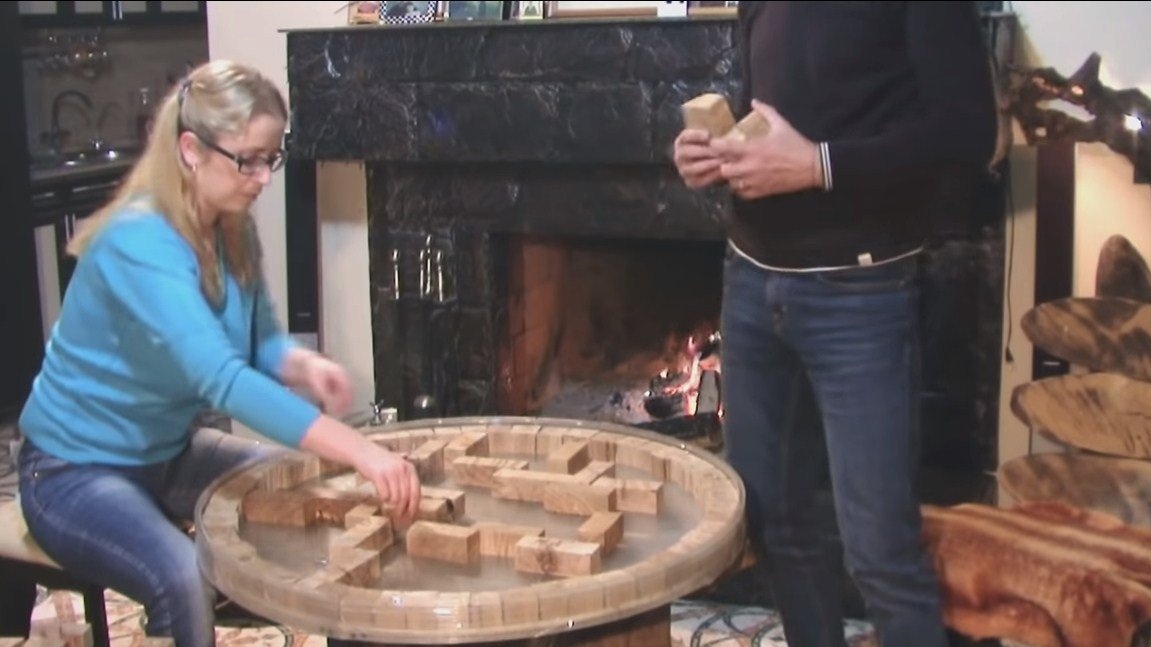
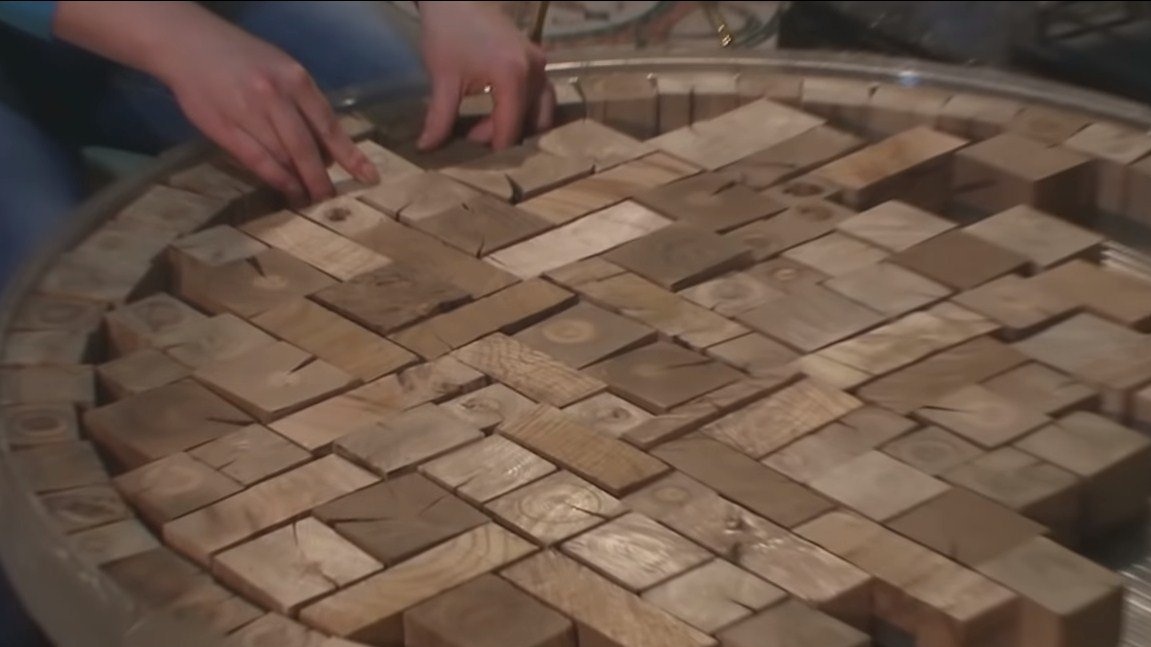
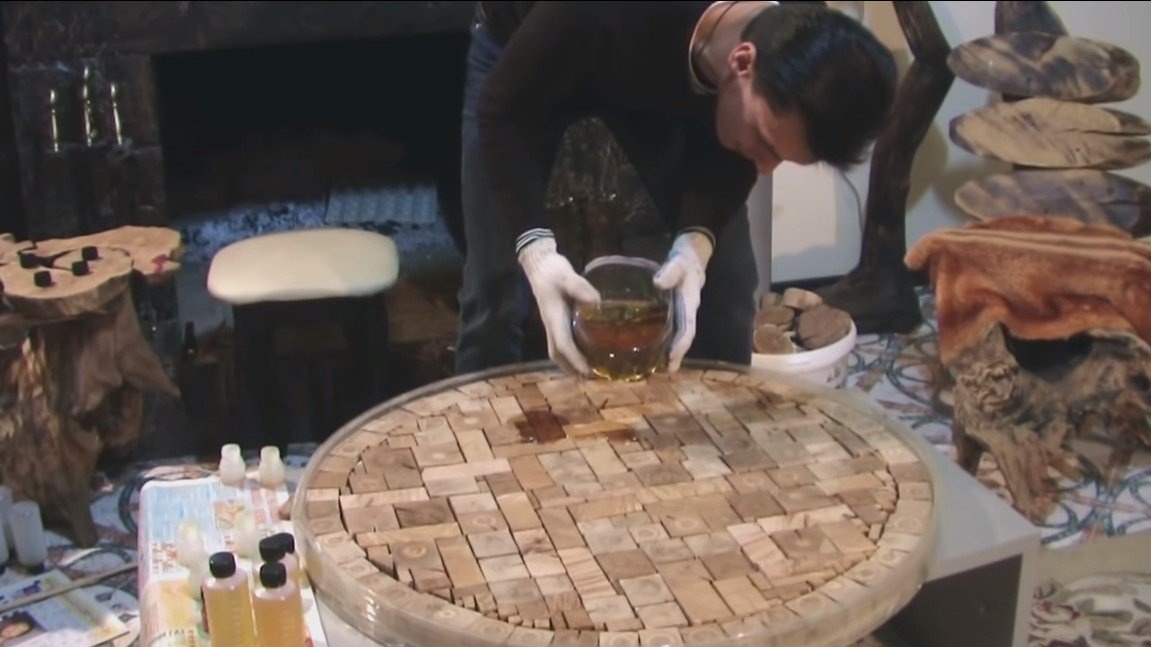
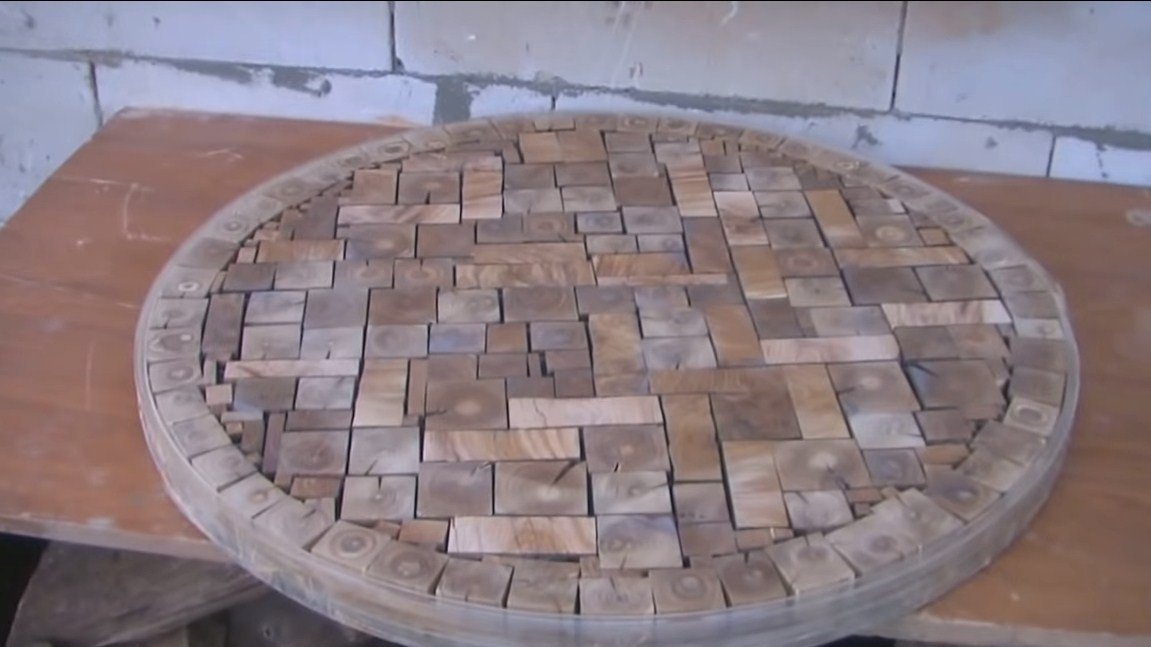
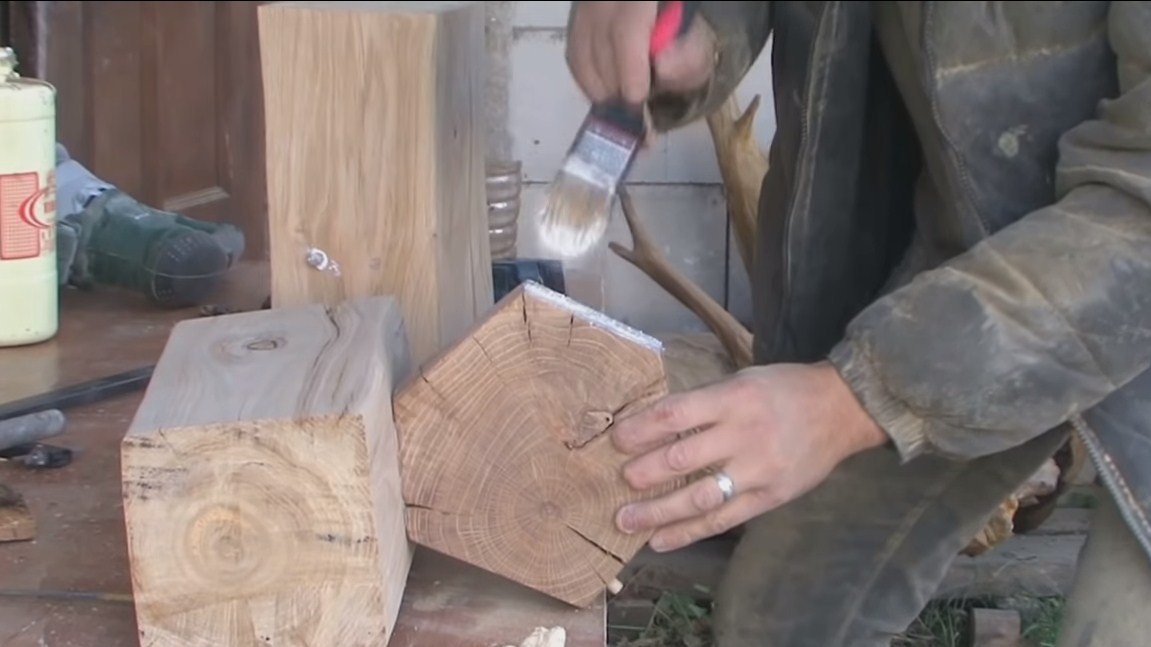
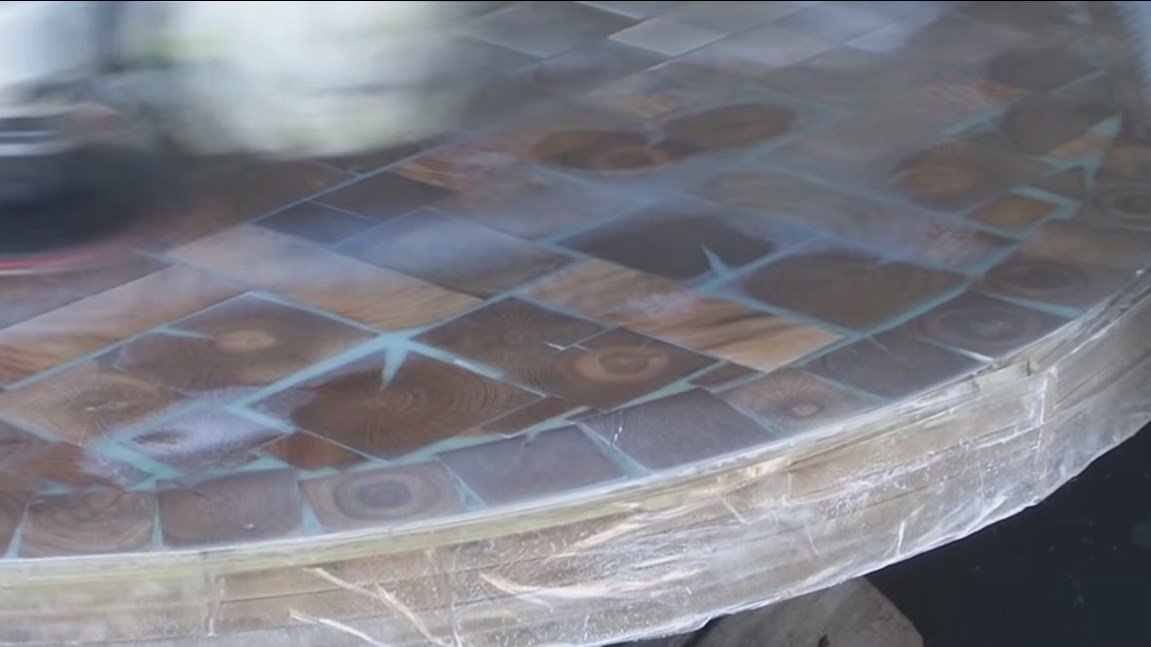
When the formwork was ready, the author dragged her into the house, as it was cold outside. Now you need to lay the blanks in the formwork. Here you can show your imagination and form an interesting maze. The denser the workpieces are laid, the less glue will be needed. But remember that the slots and gaps left will then glow, and all this will look beautiful.
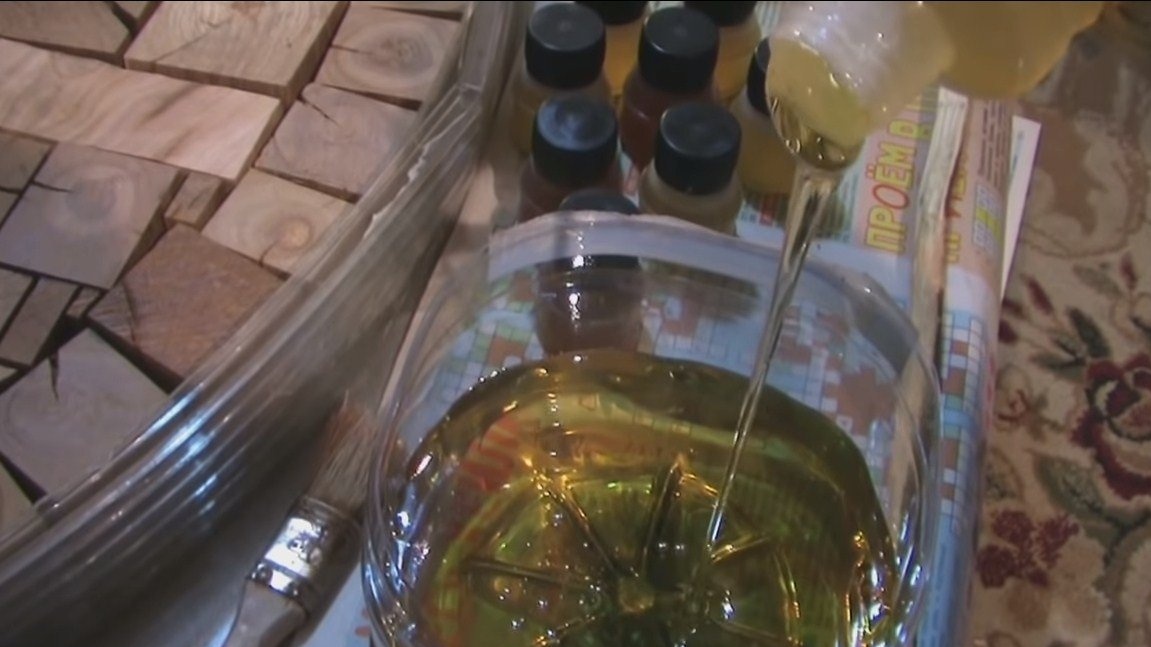
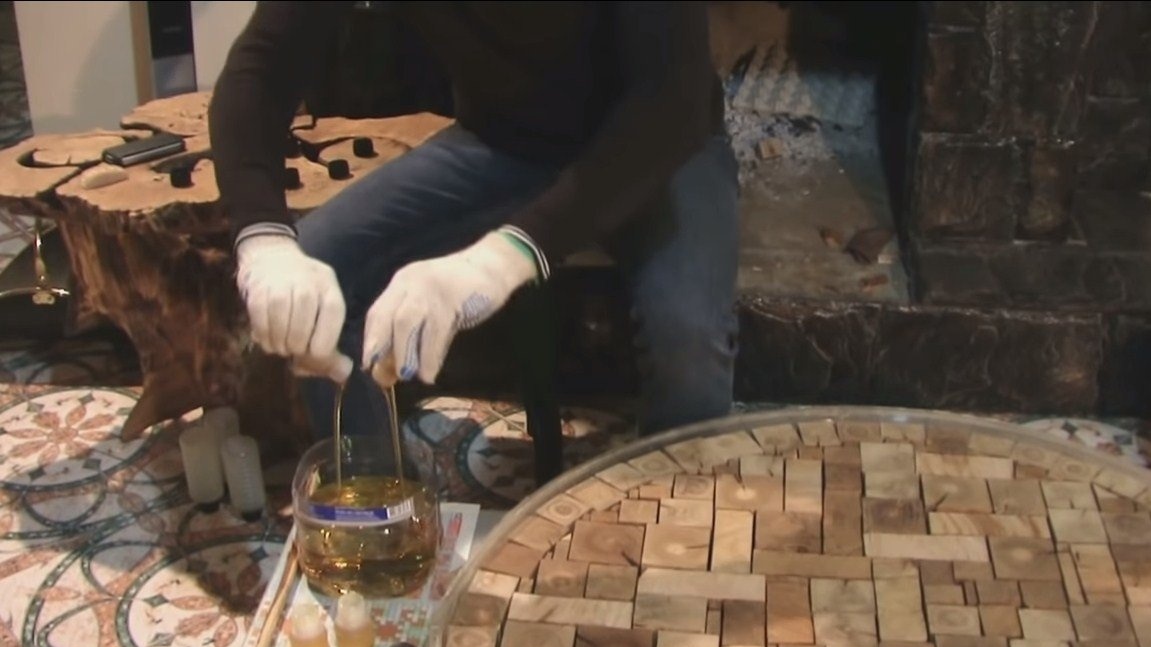
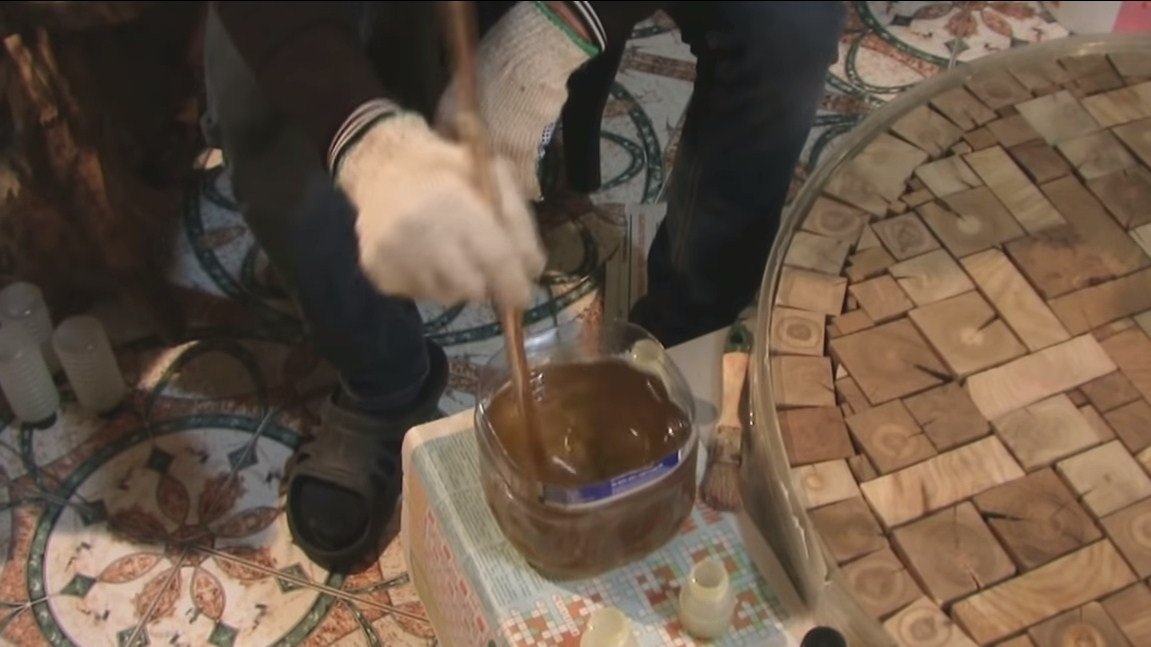
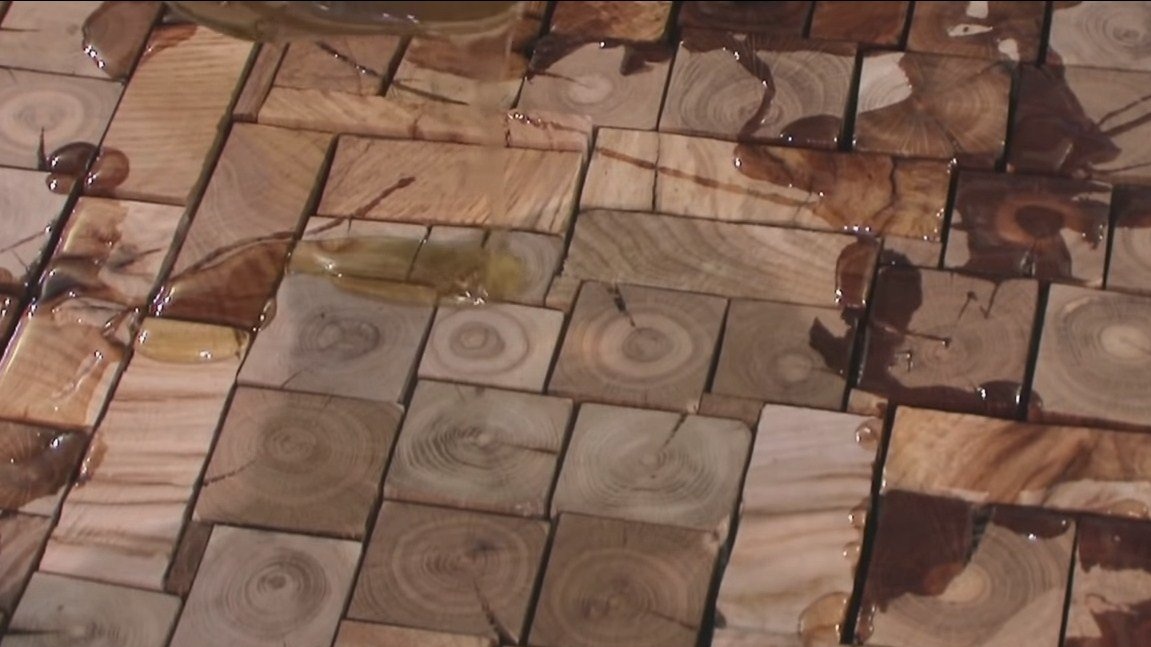
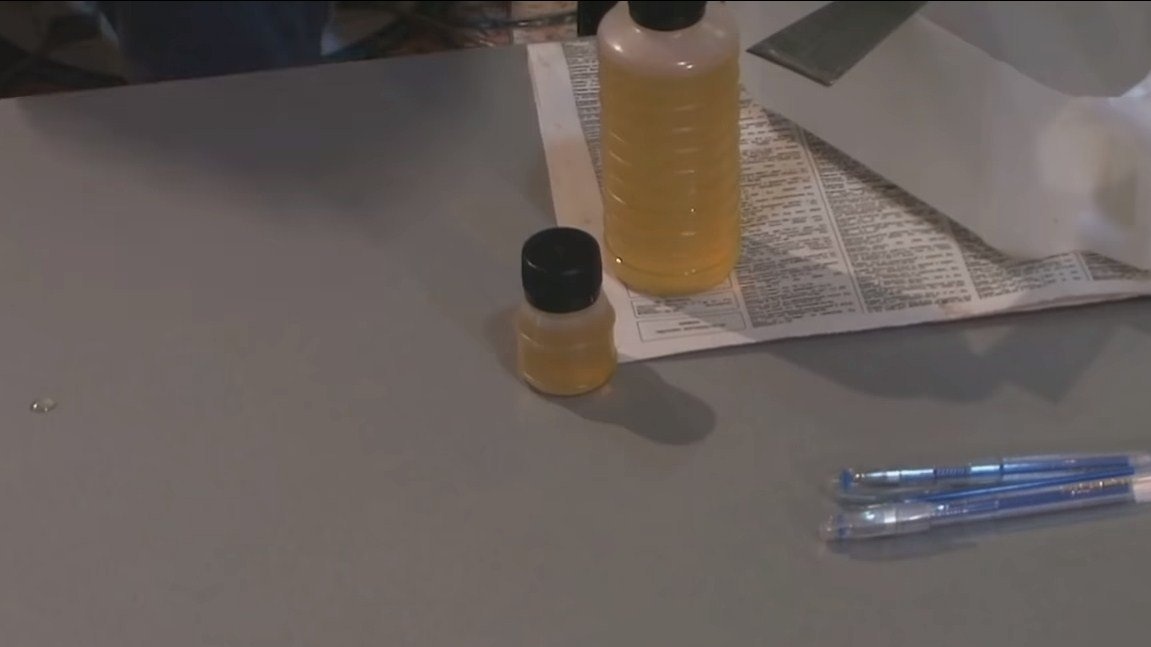
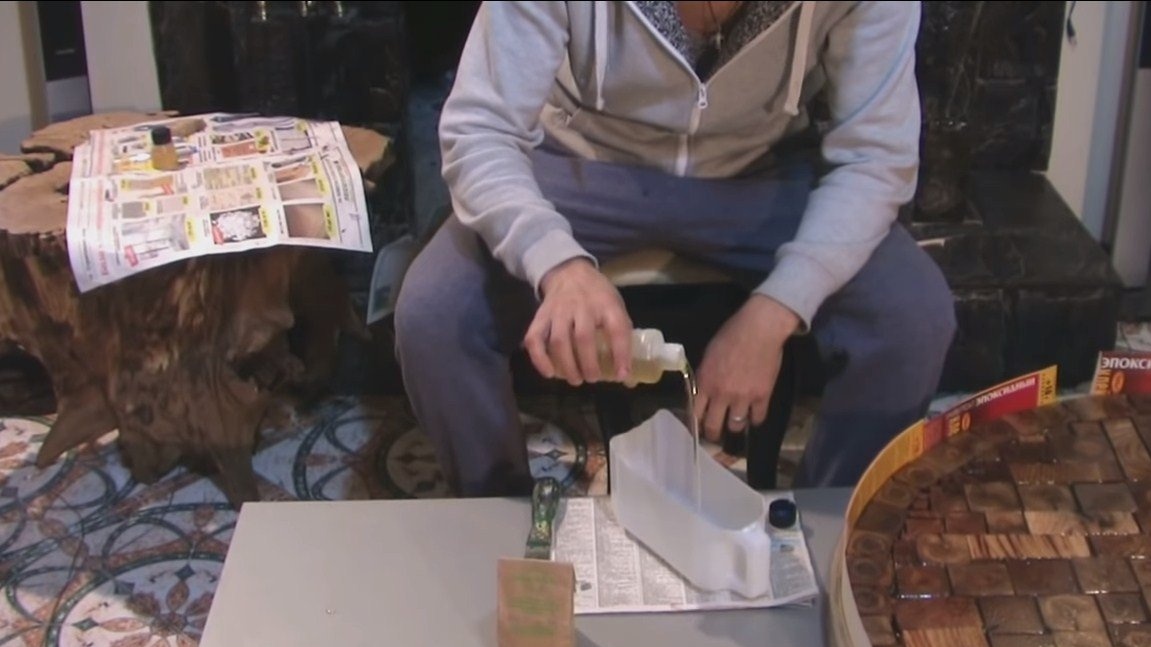
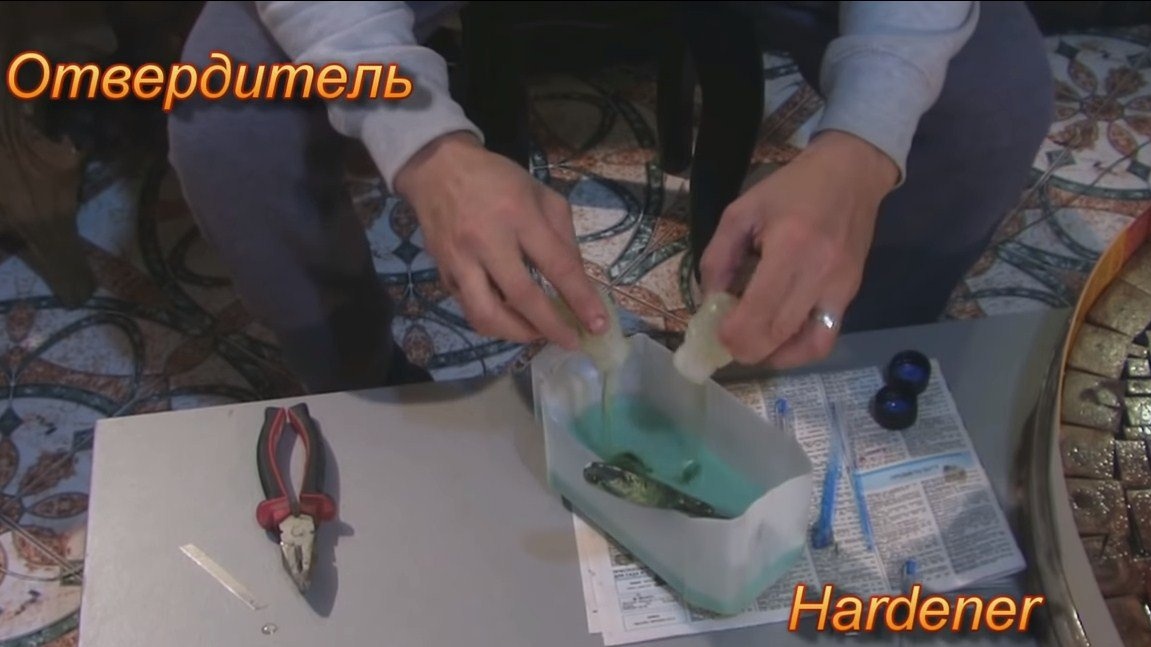
You can start pouring, the author uses the usual inexpensive glue. Stir it well with the hardener and pour it into the mold. Glue needs to be poured not to the very top, you need to leave a little space for another fill with dye and phosphor.

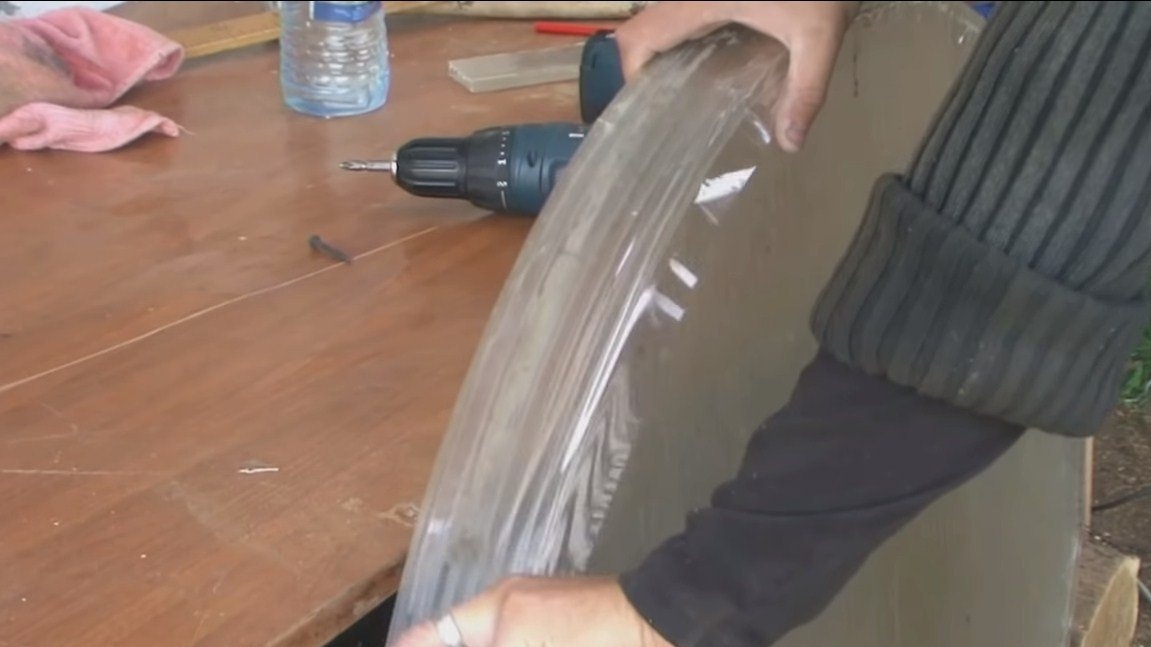
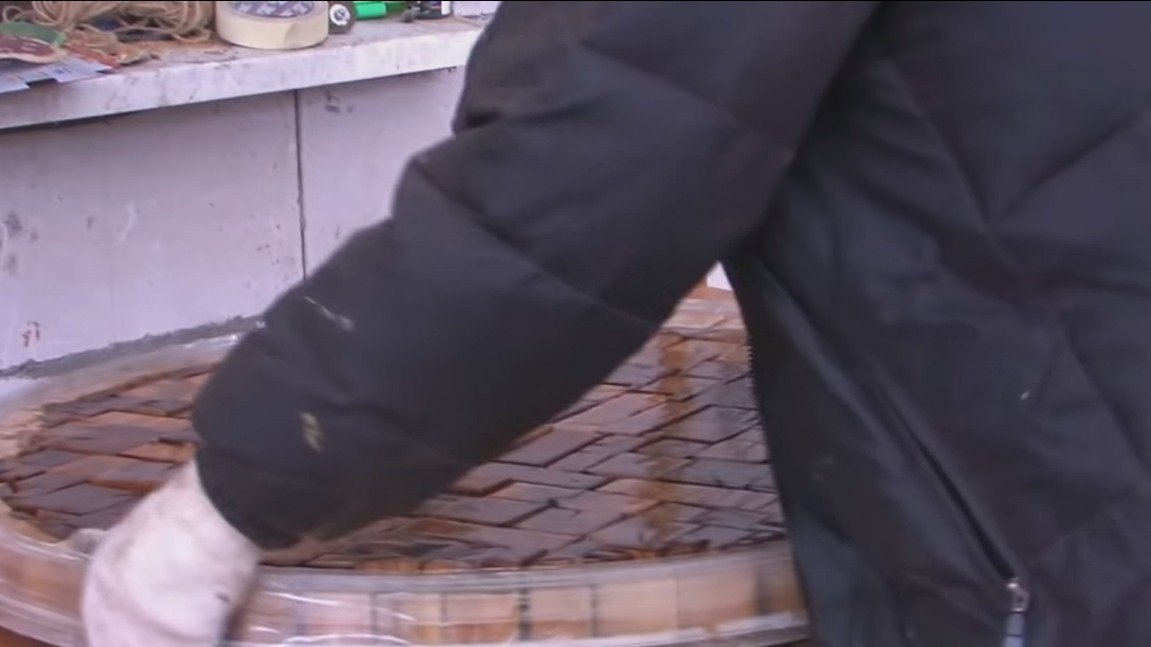
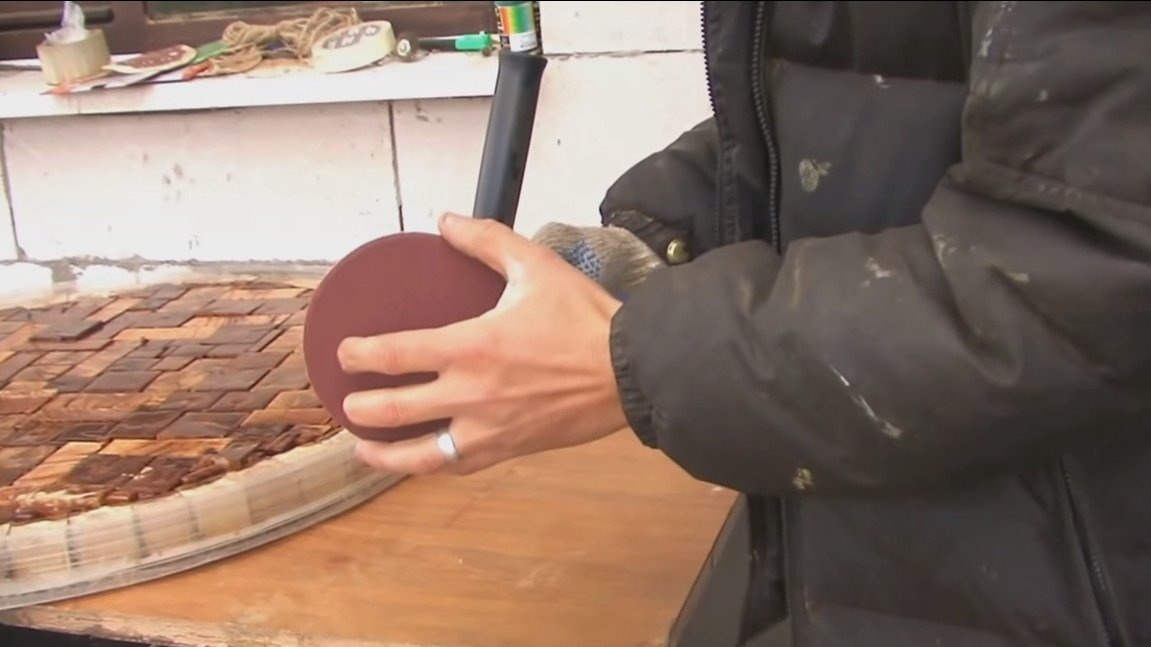
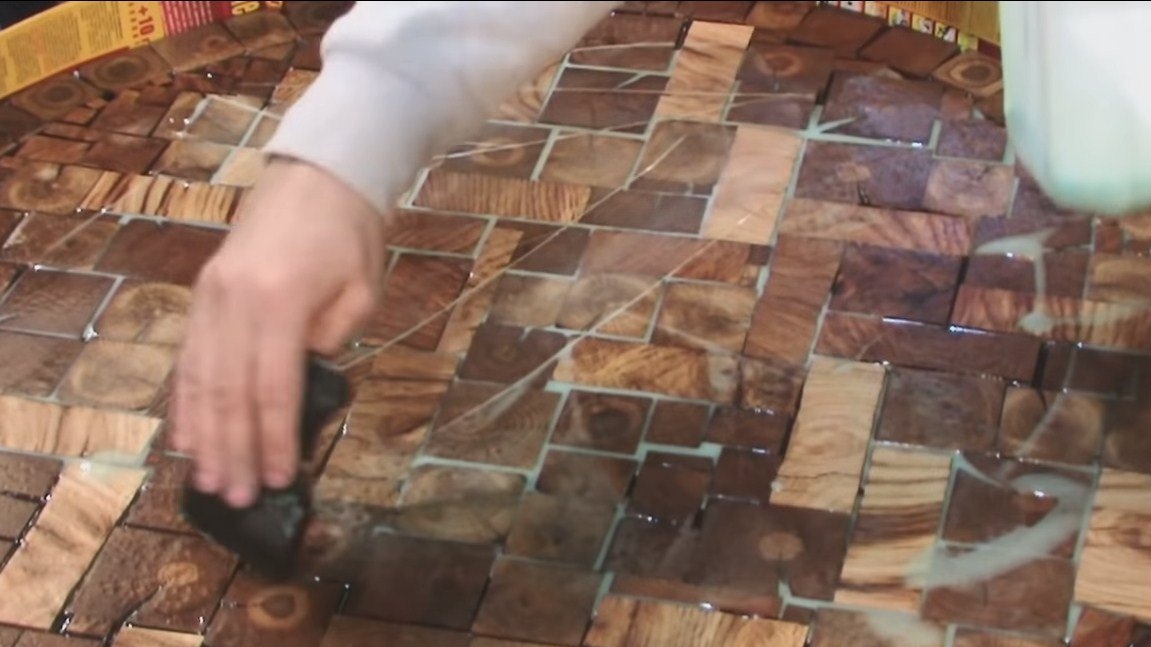
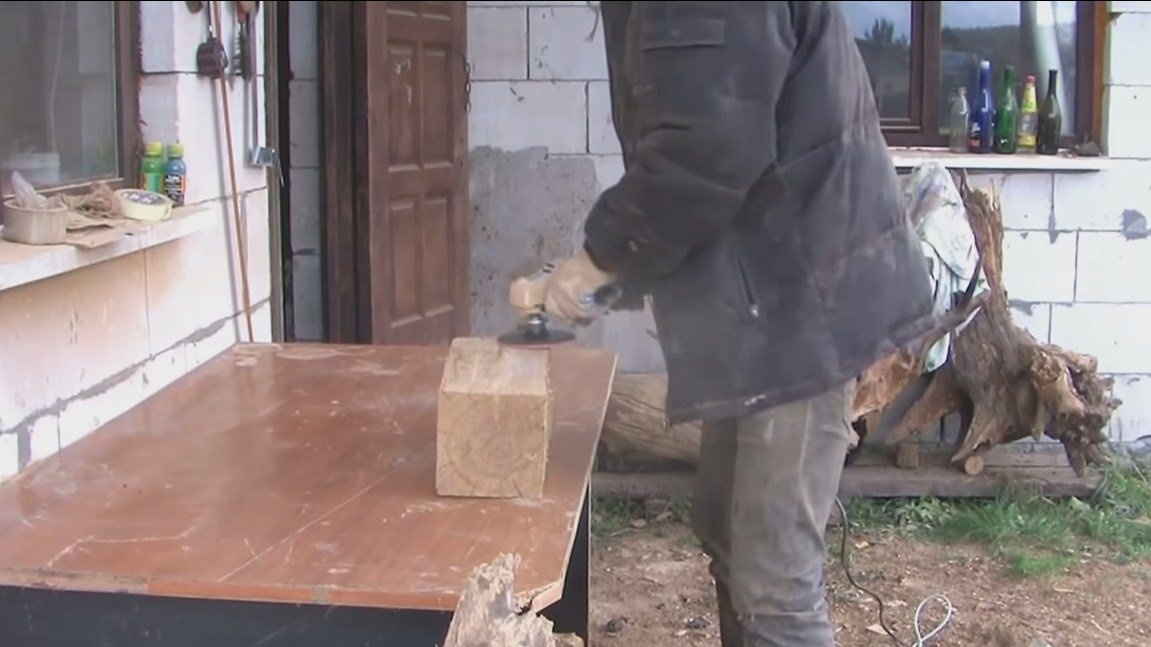
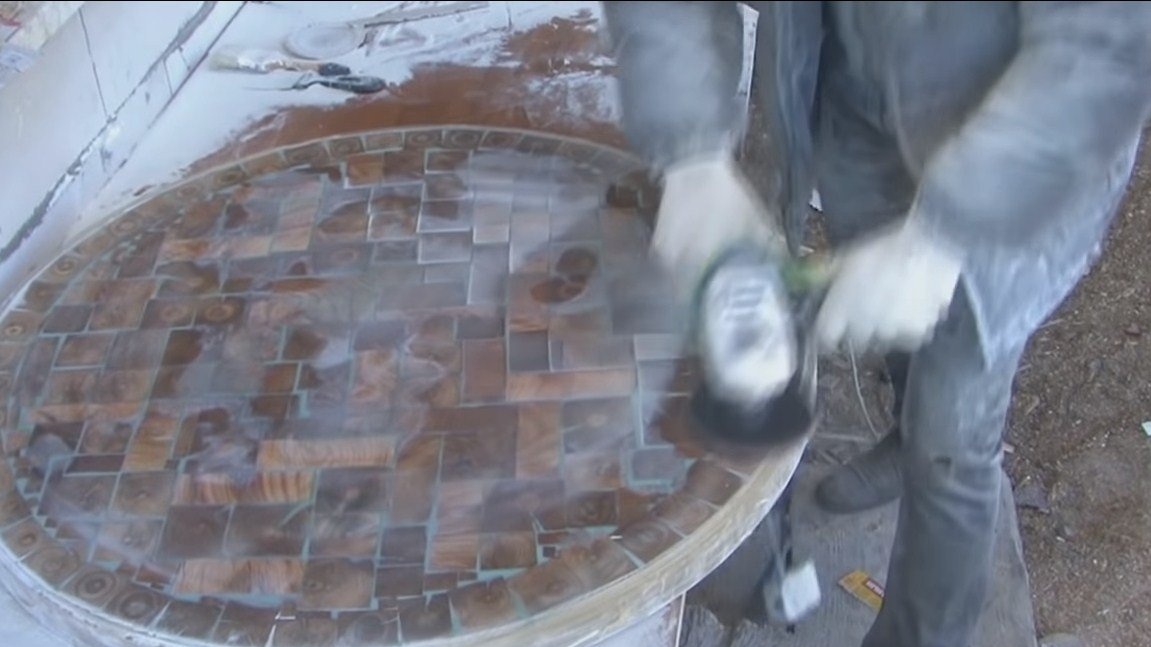
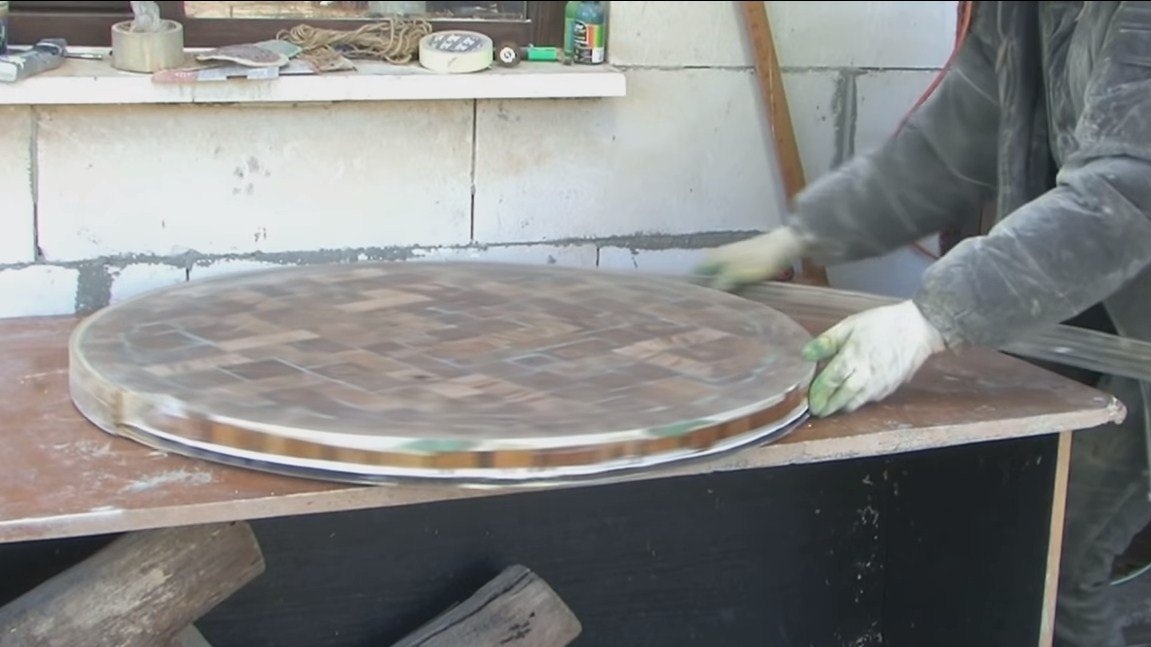
Step Three Primary grinding
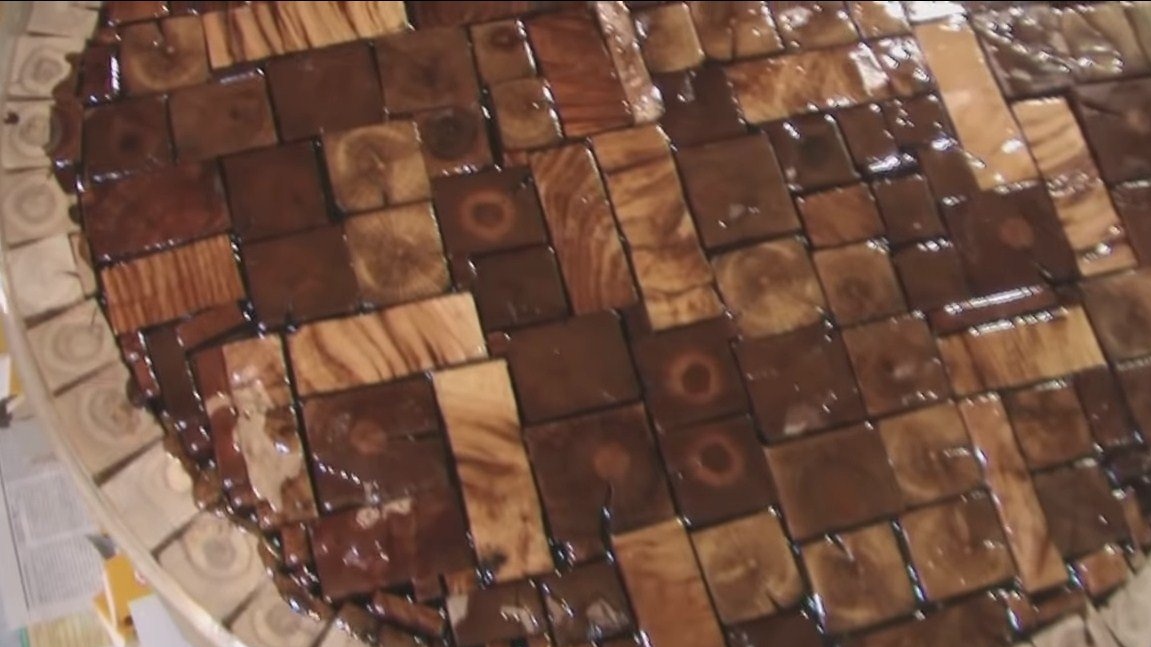
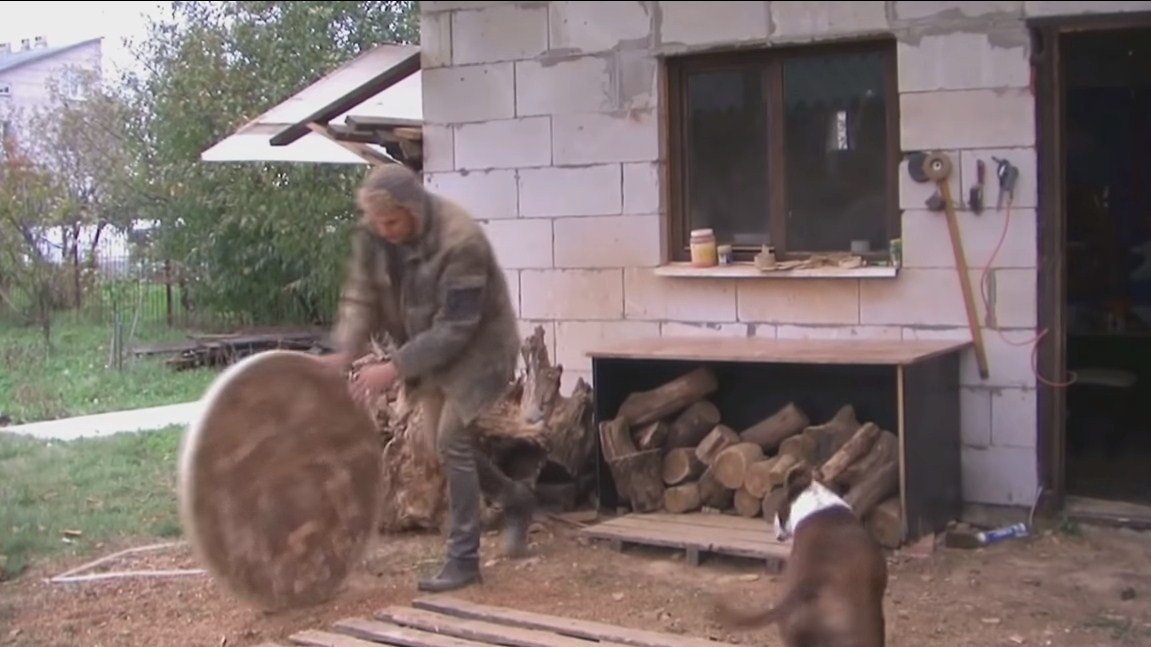
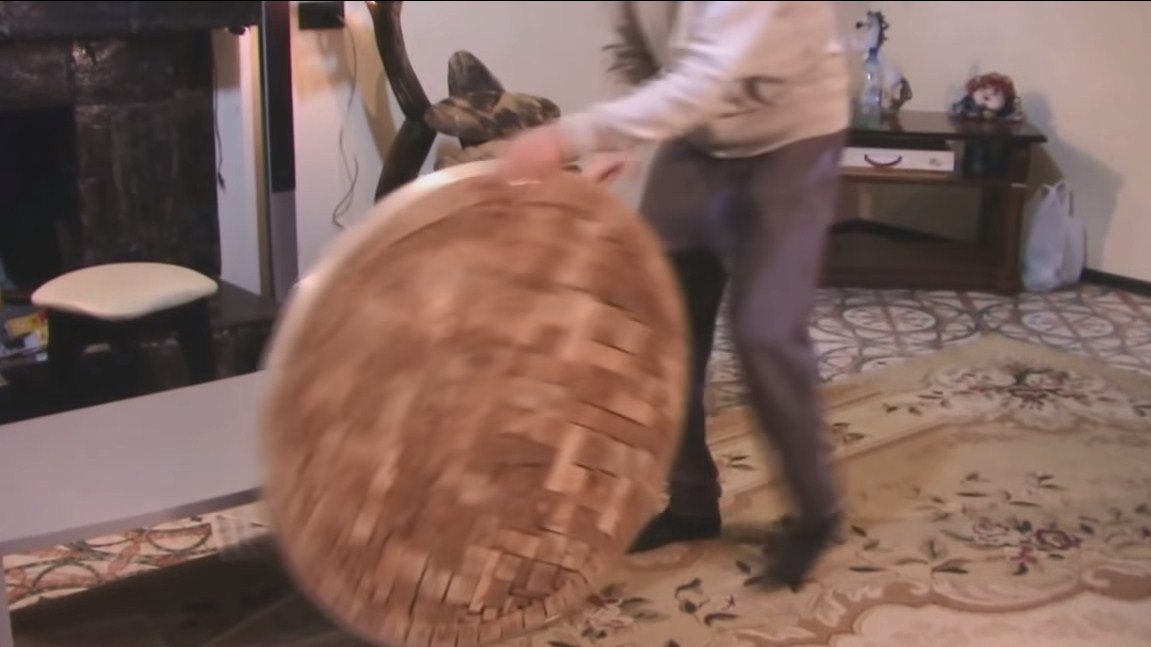
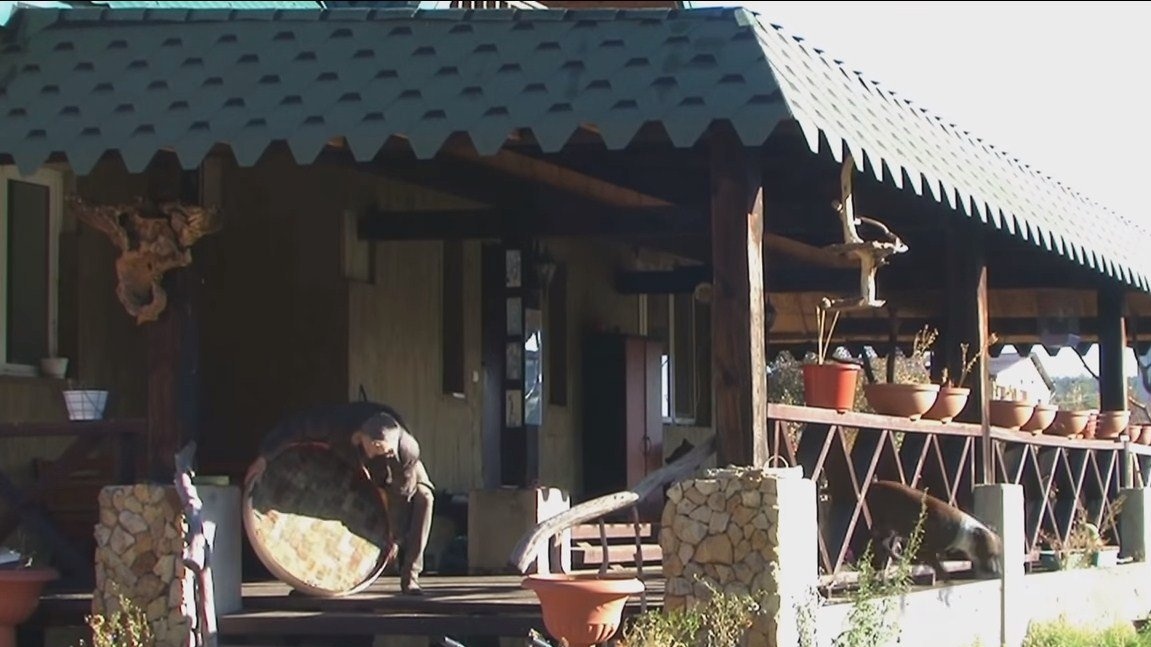
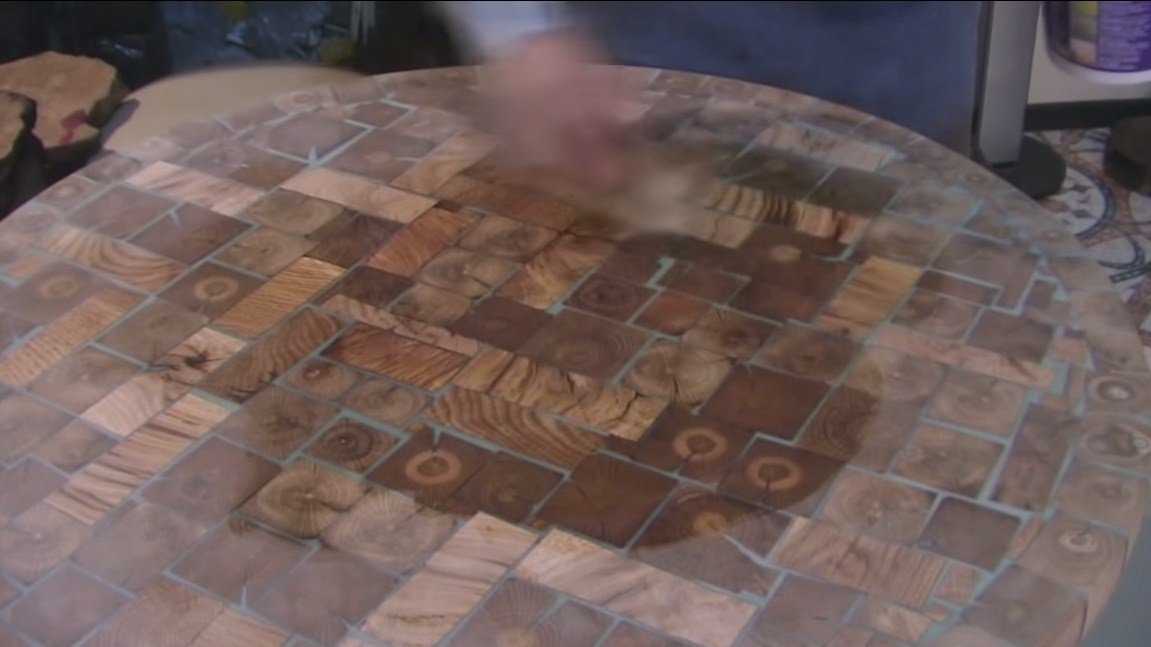
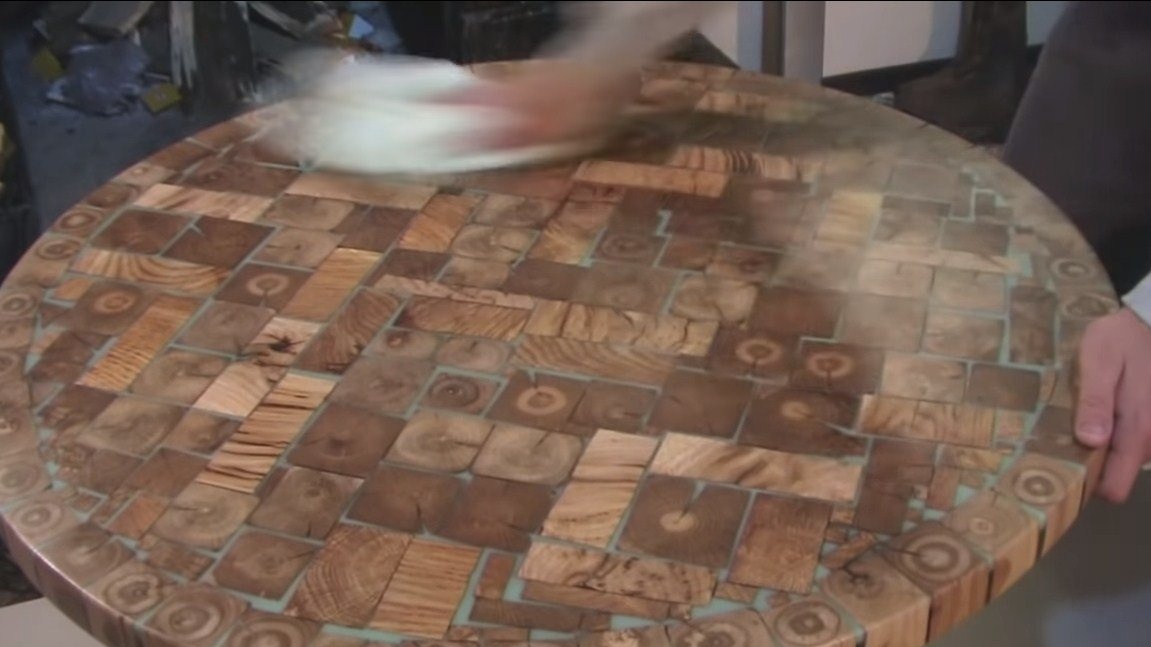
We wait until the glue dries, it will take 24 hours. Then we take this wheel and roll through the woods, through the fields and put it on the table. The author performs grinding using a grinder with Velcro for sandpaper. After grinding, we roll the wheel back home.


Step Four Second fill
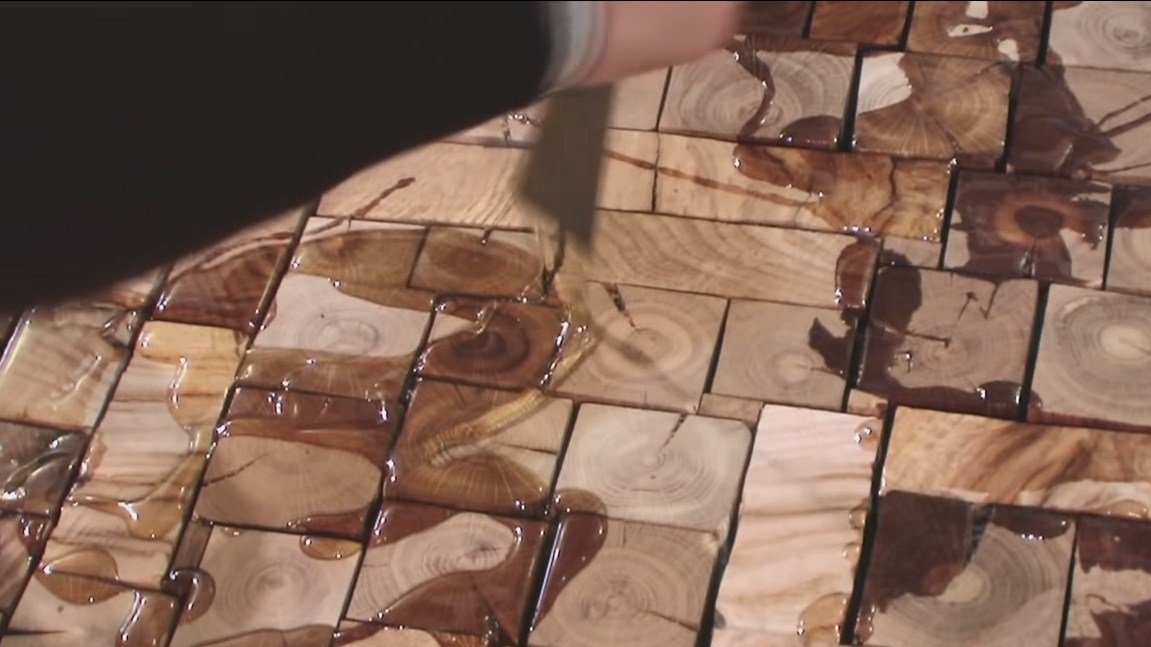
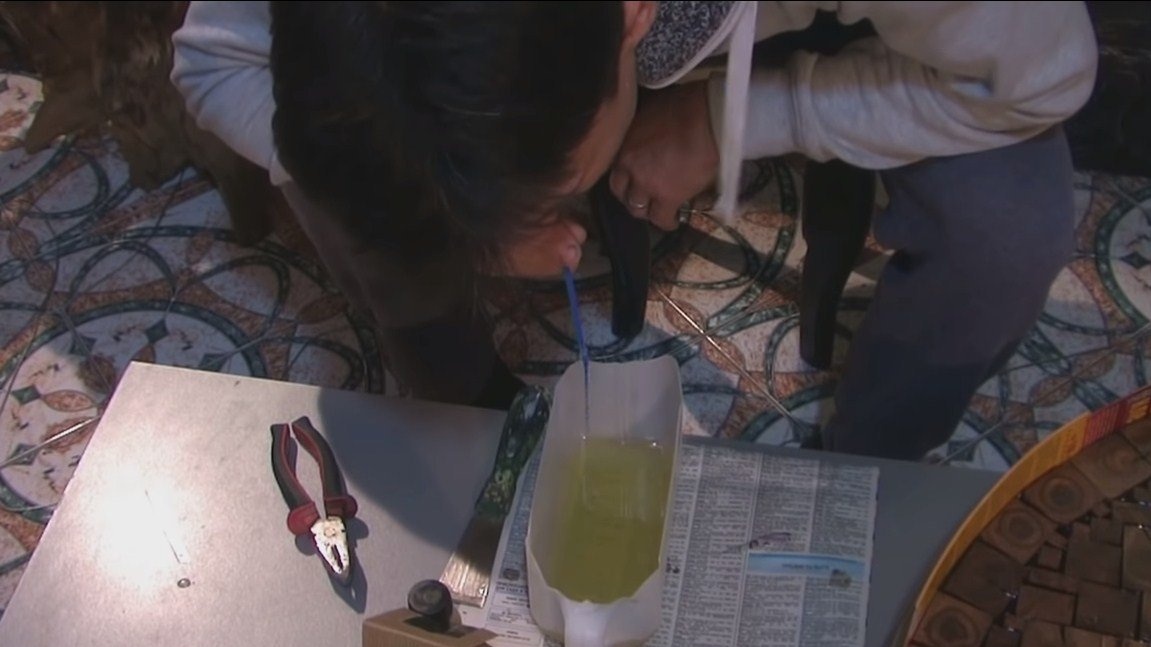
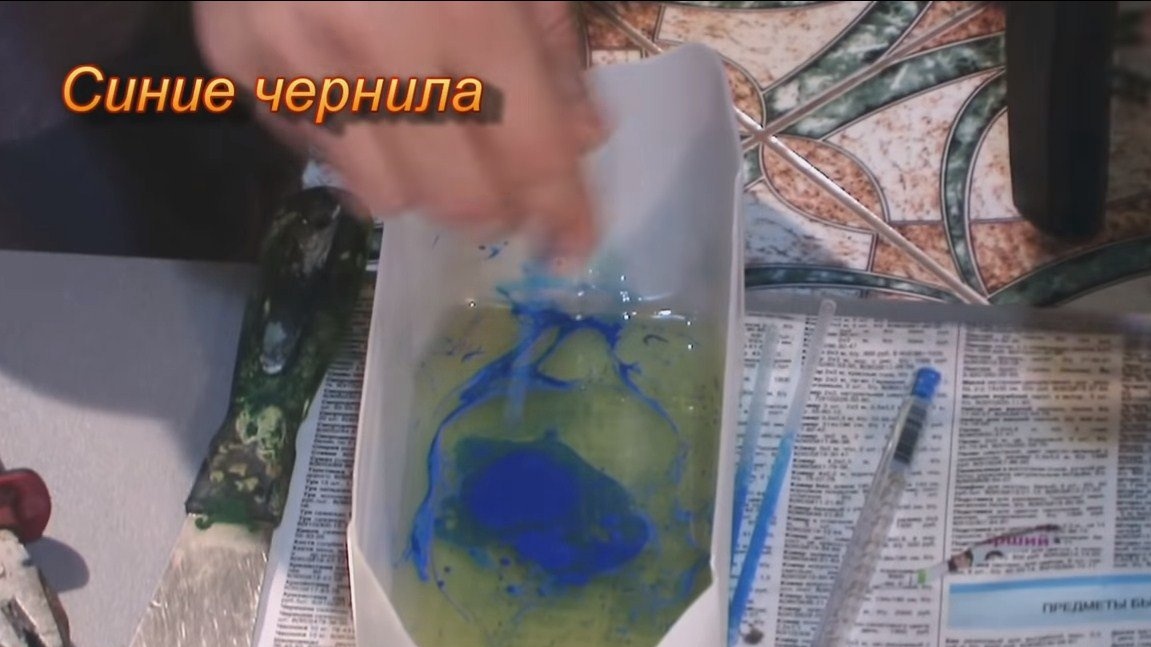
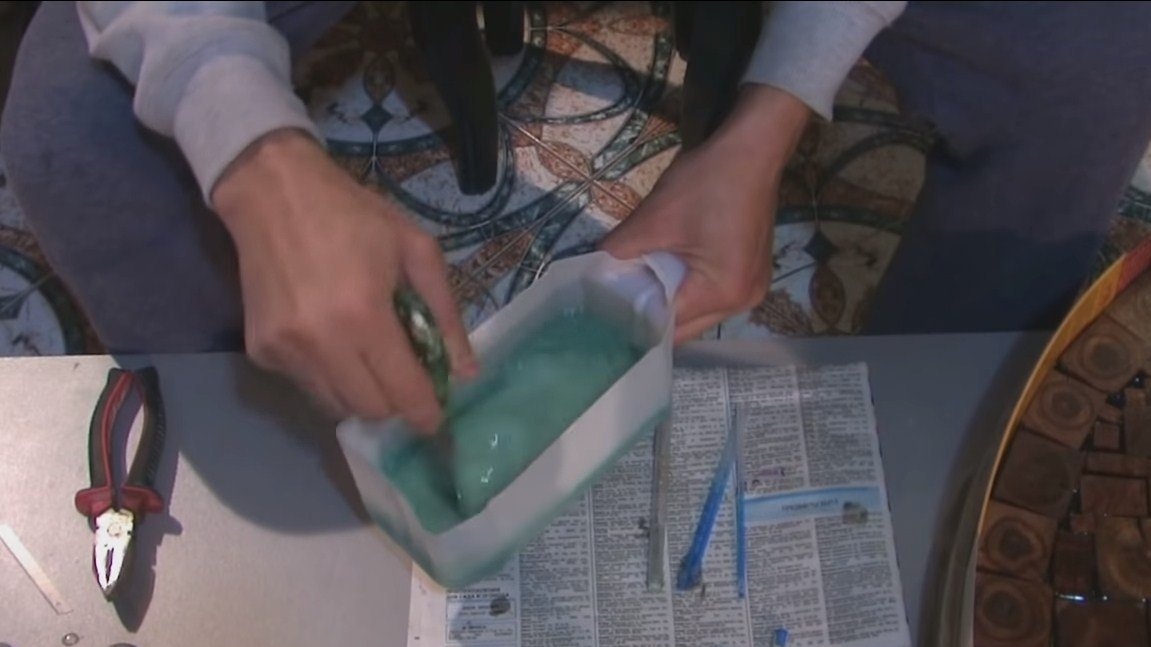
The second layer we will fill the coating that will glow. As a dye, the author uses ink from a writing pen. Stir them well with resin. As ink, you can still use ink from an inkjet and laser printer, as well as colors for paints. At the end, we fill in the luminous powder and mix everything with a hardener. Fill the top layer, level it evenly with a spatula and let dry.
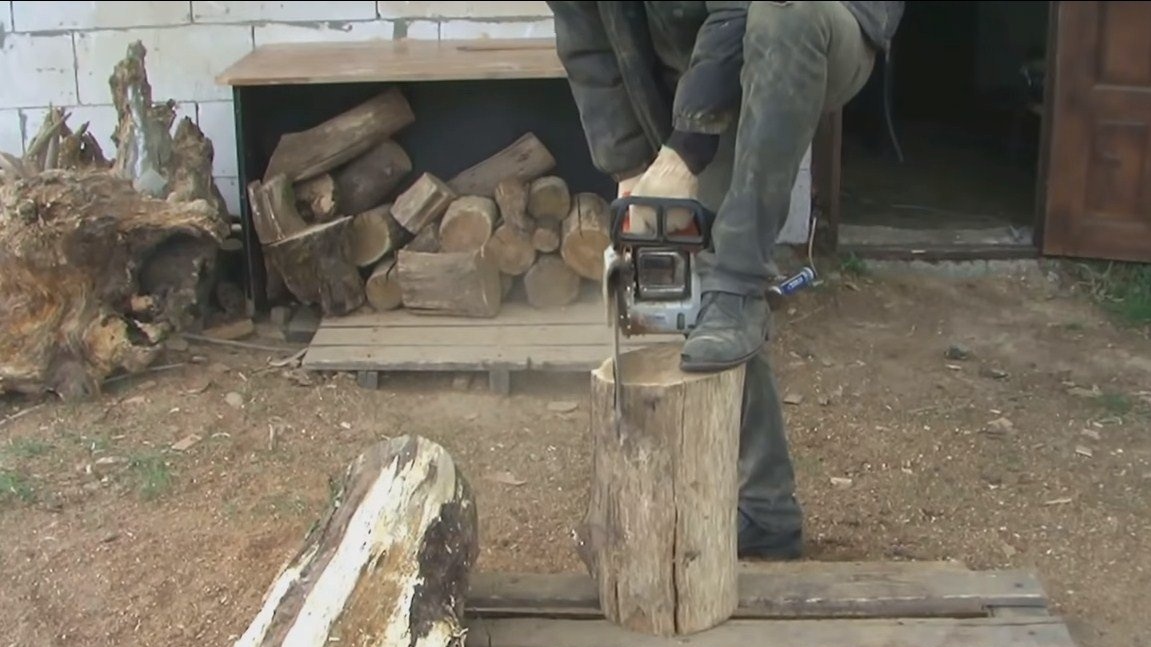
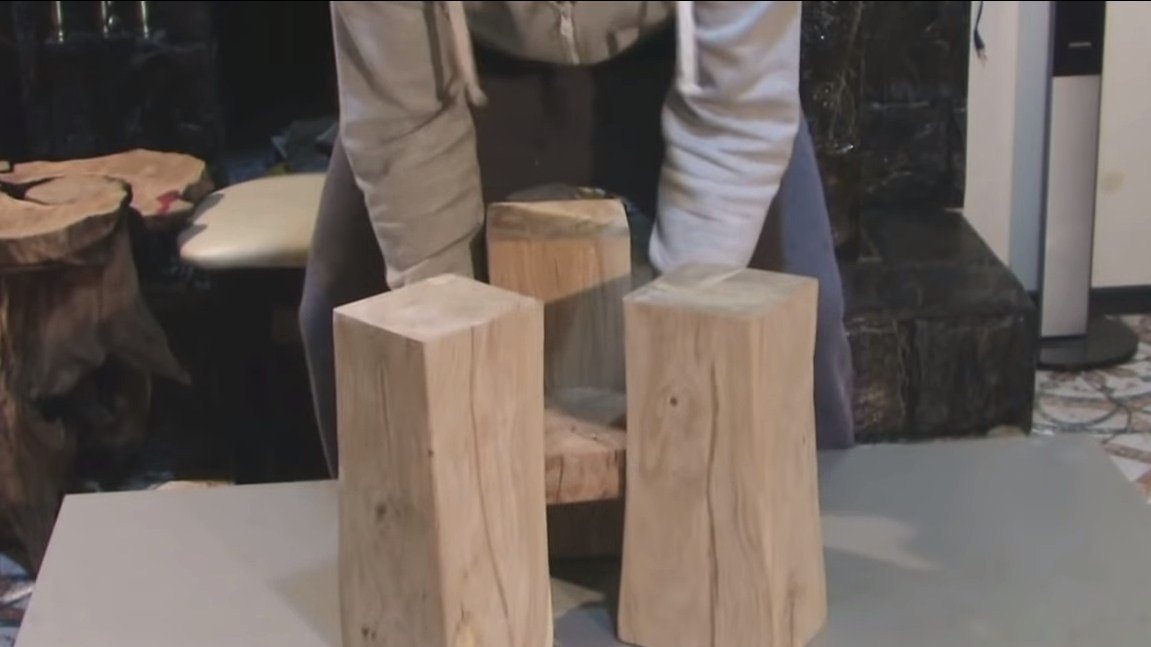
Step Five Legs
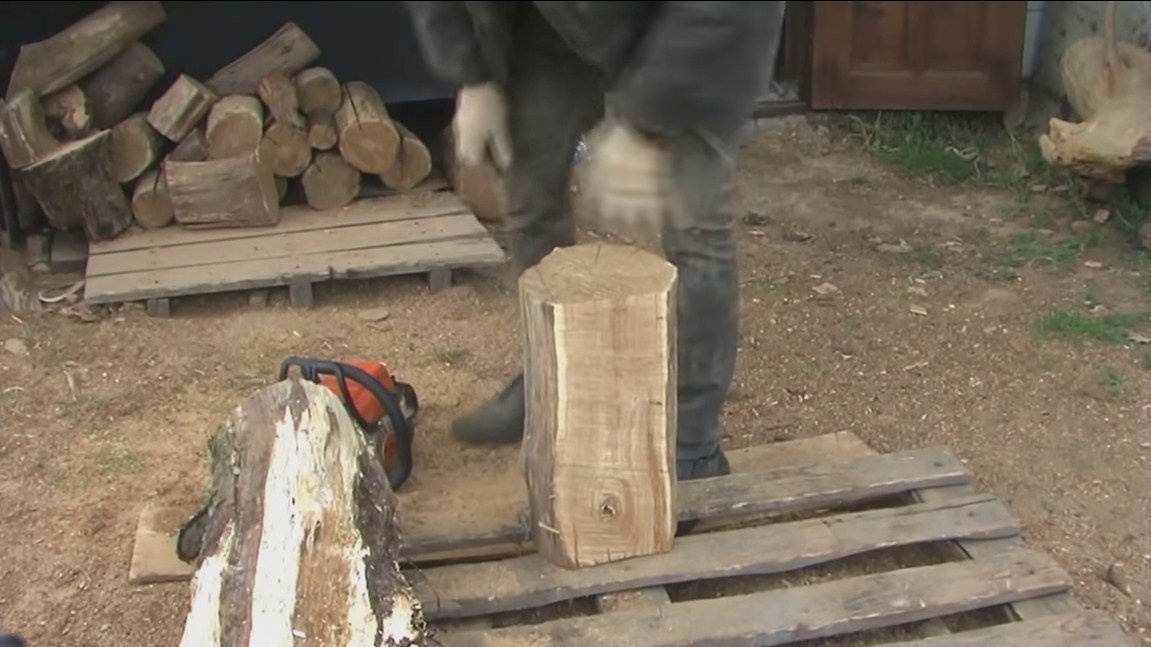
The legs at our table will be quite massive, they are also made of oak. We go outside and cut the log into three parts. Next, with the help of a chainsaw we give them a rectangular shape.
The resulting workpieces are well grinded using a grinder with Velcro.
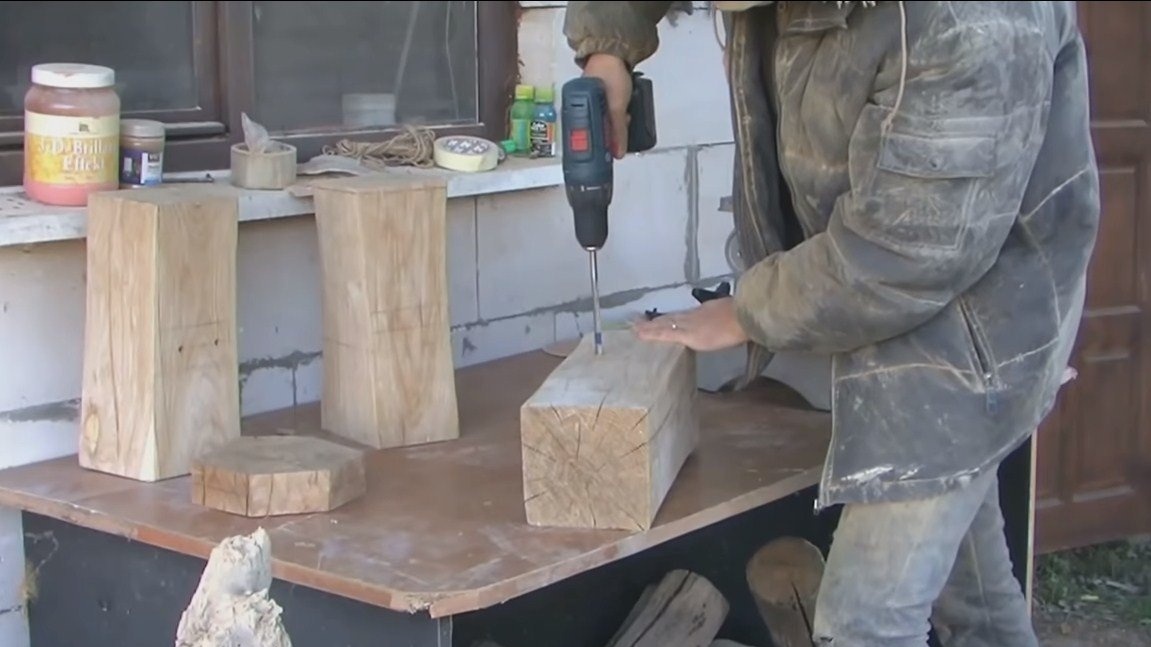
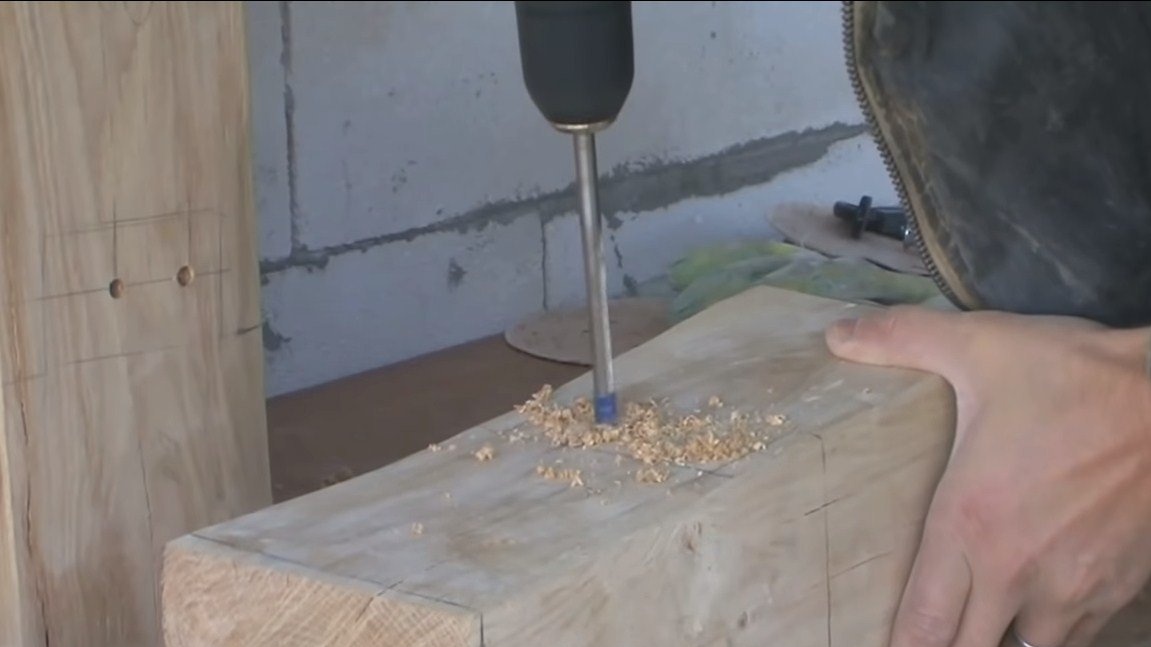
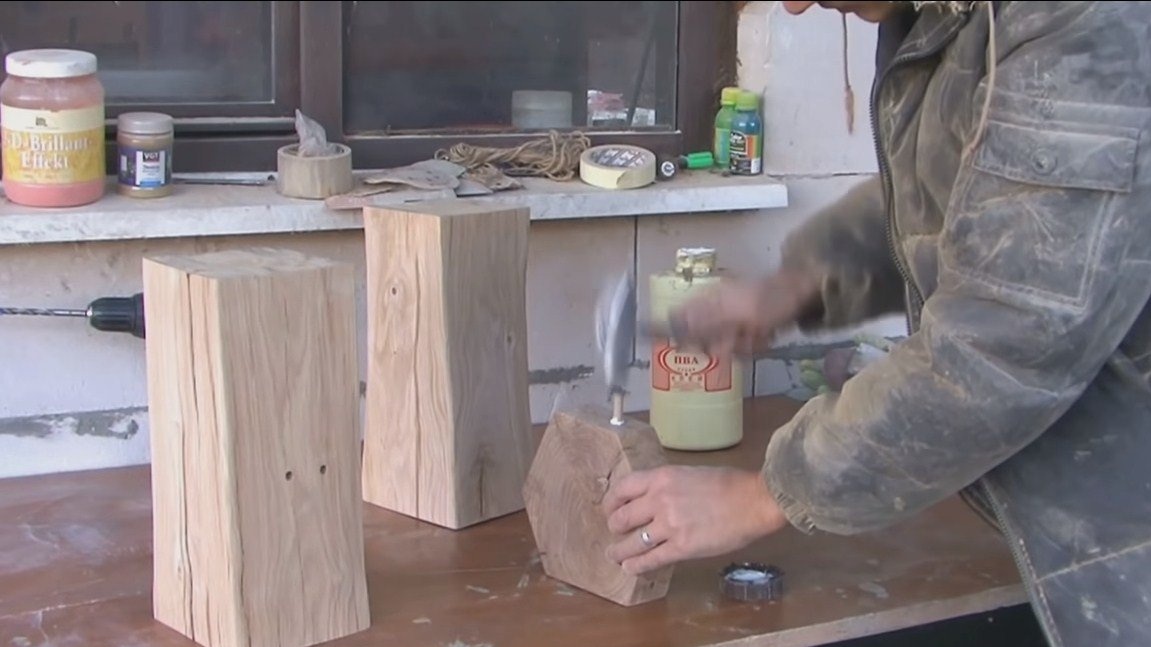
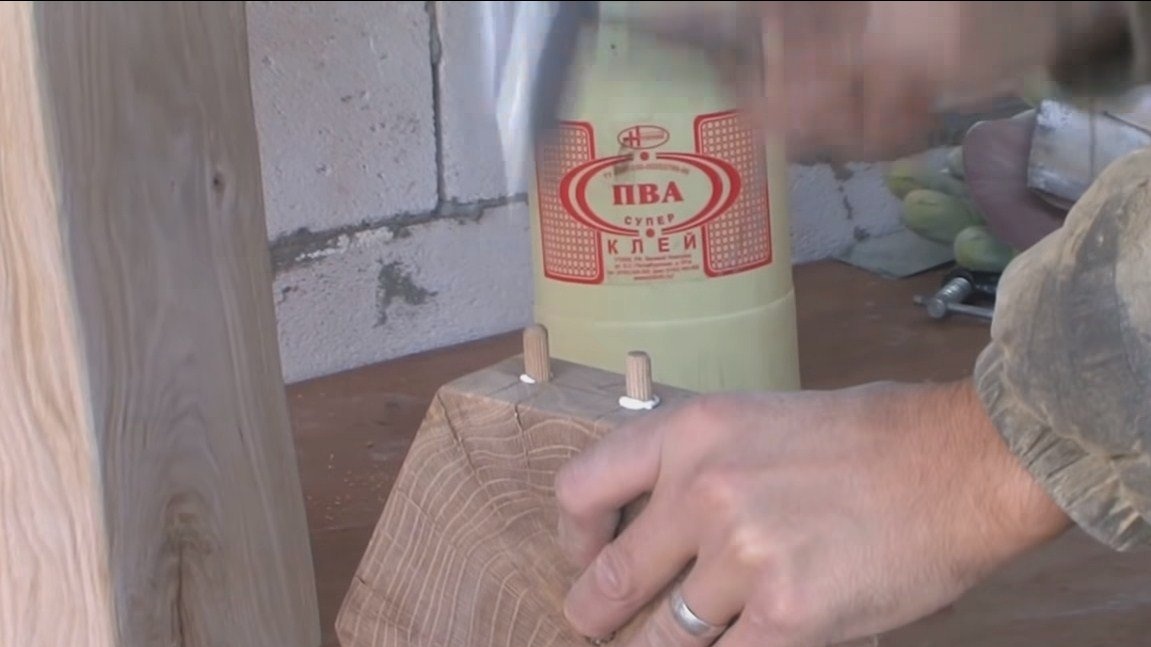
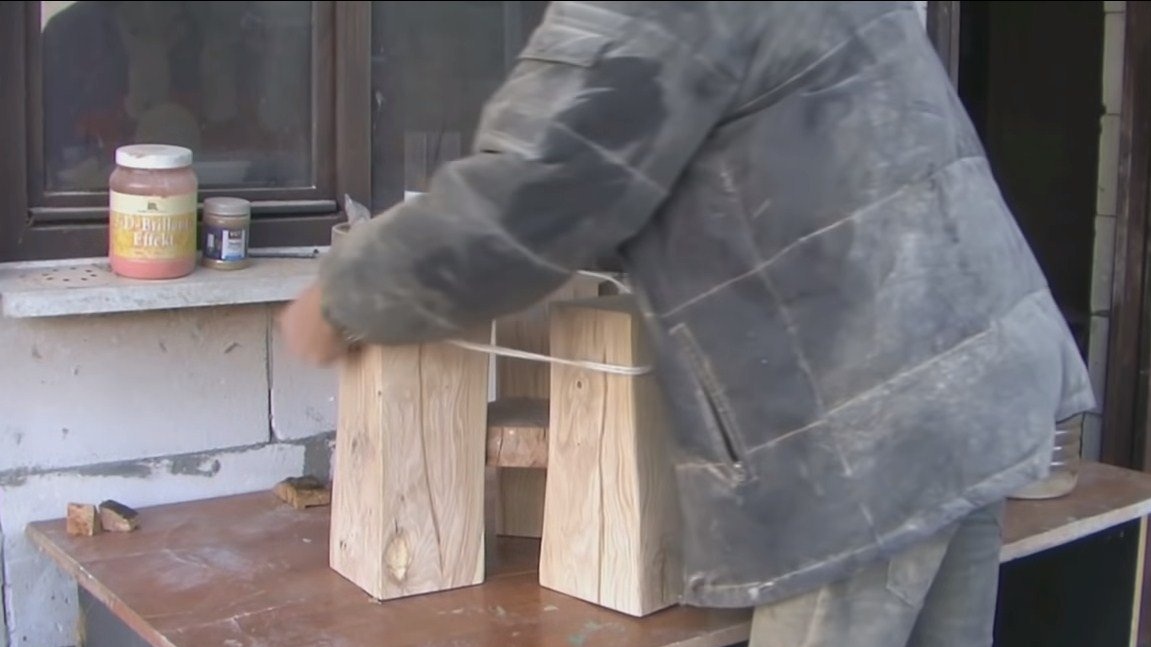
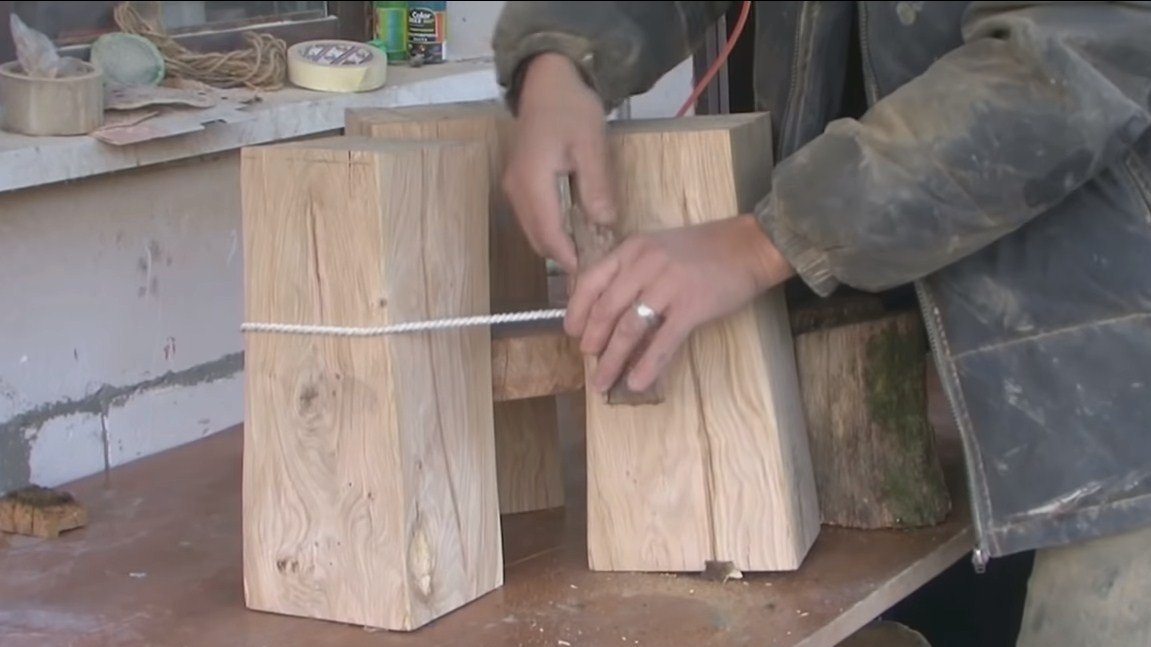
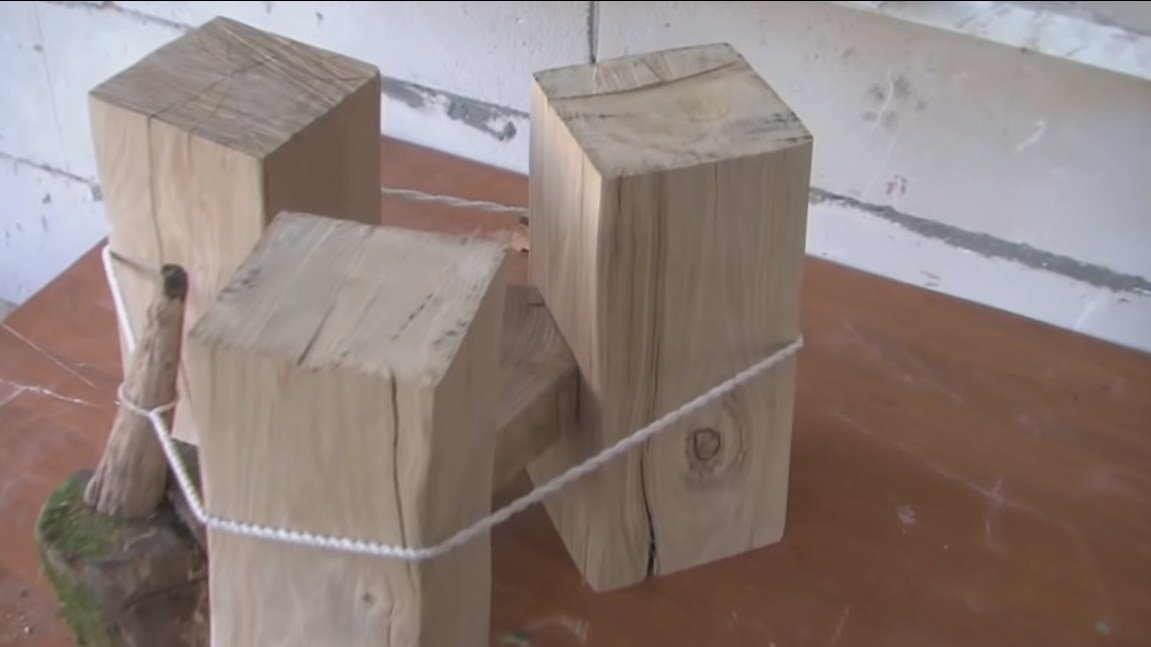
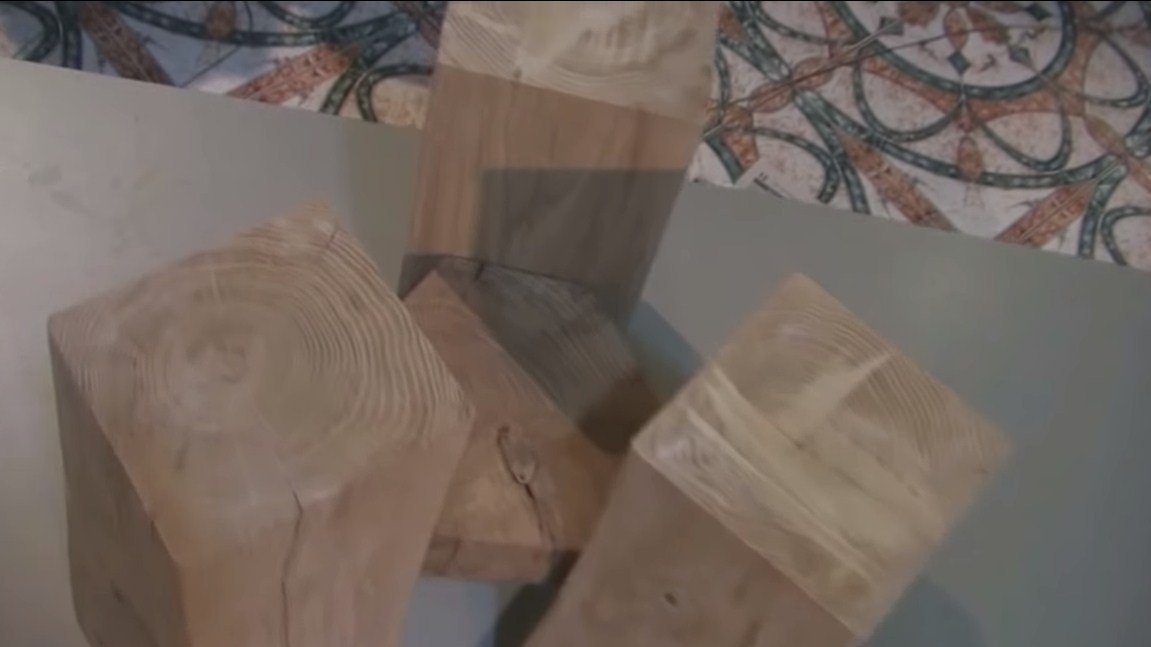
To connect all three legs, you will need to make an intermediate part, it has the shape of a hexagon. We glue everything together using wood glue and dowels. So that everything sticks together well, we tighten the structure with a rope.
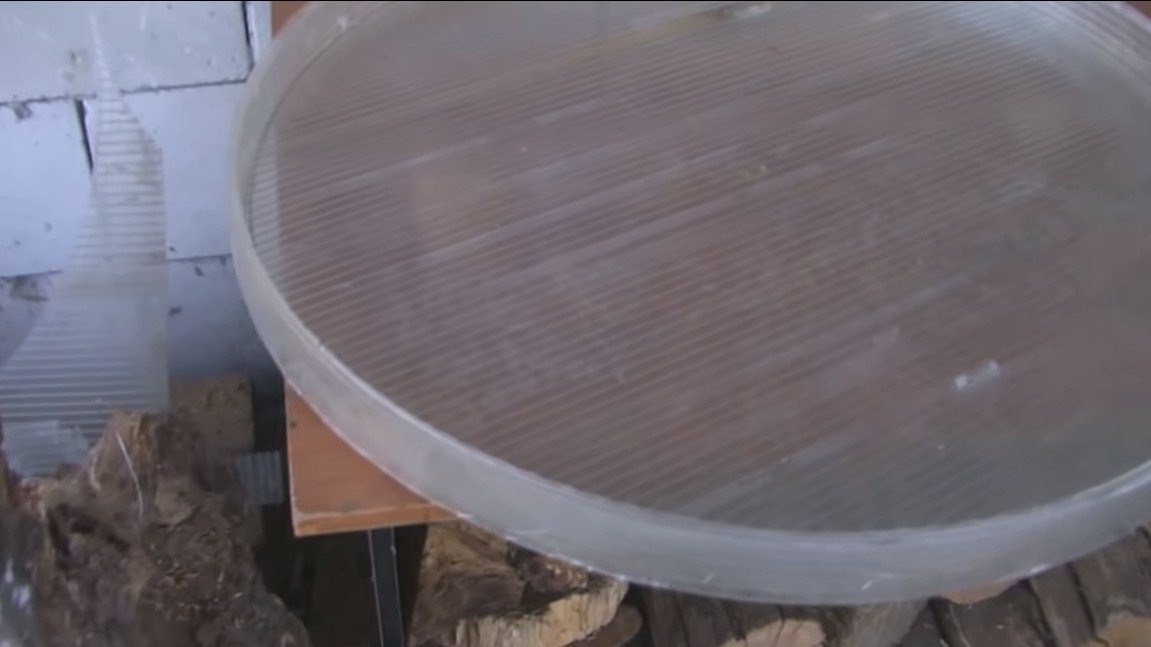
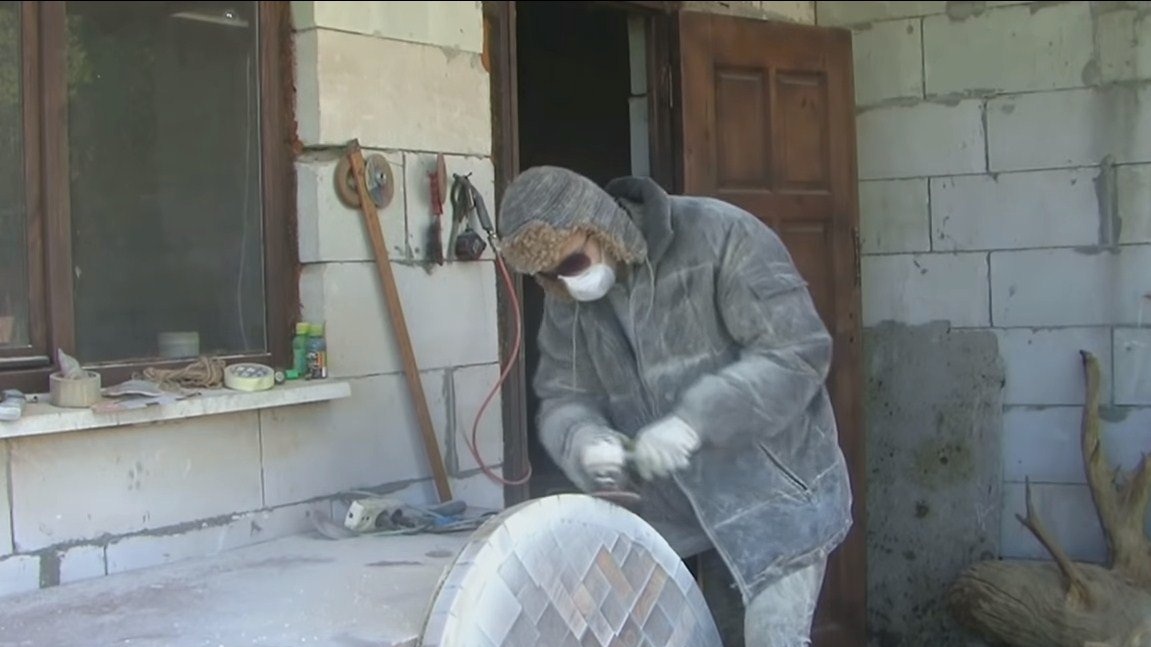
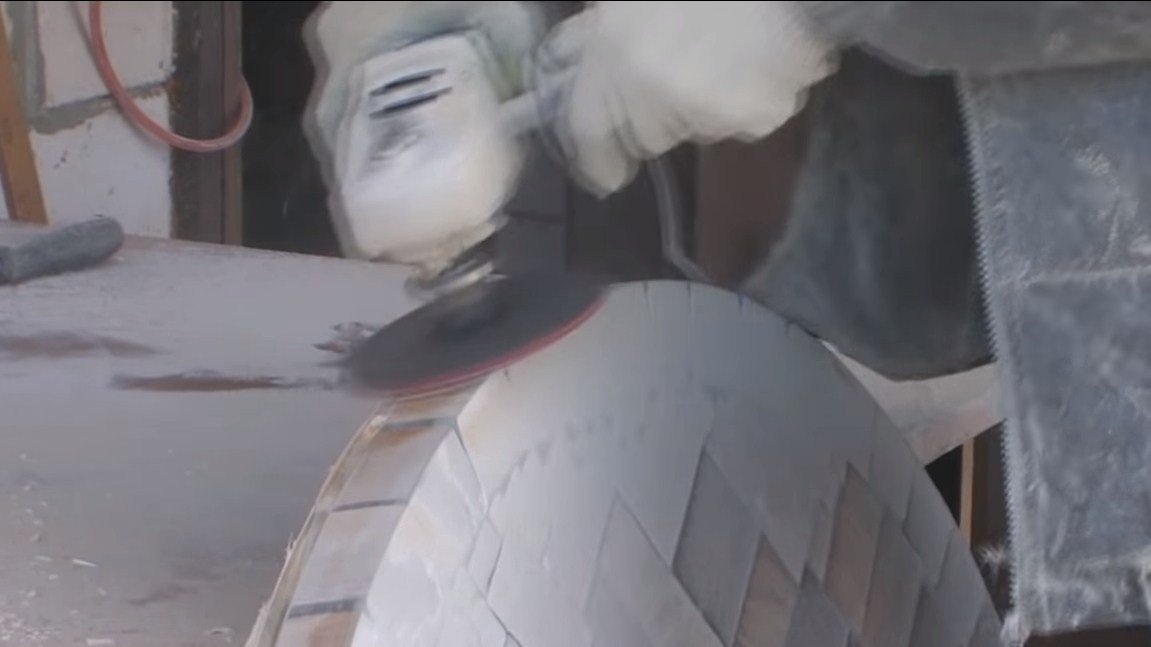
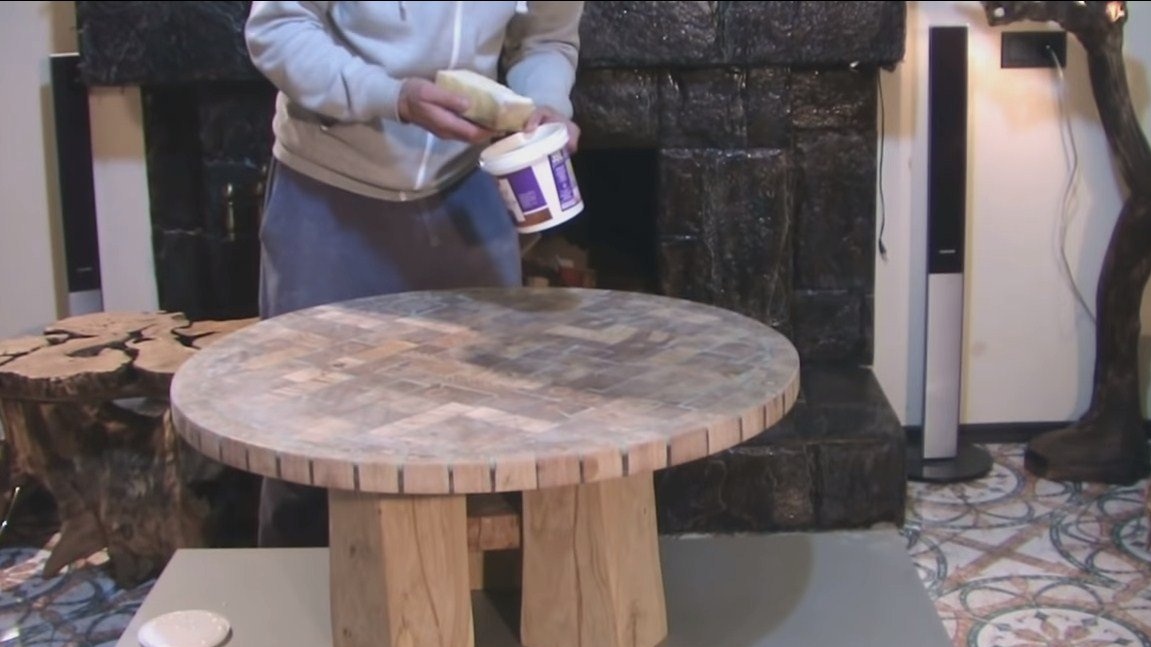
Step Six Final grinding of countertops
Again, we roll our wheel into the street and polish the front part as well as the end face well. At the end, we process everything with fine sandpaper and roll back home. We have almost everything ready for assembling the table, we grind the legs and cover them with oil or varnish as desired.
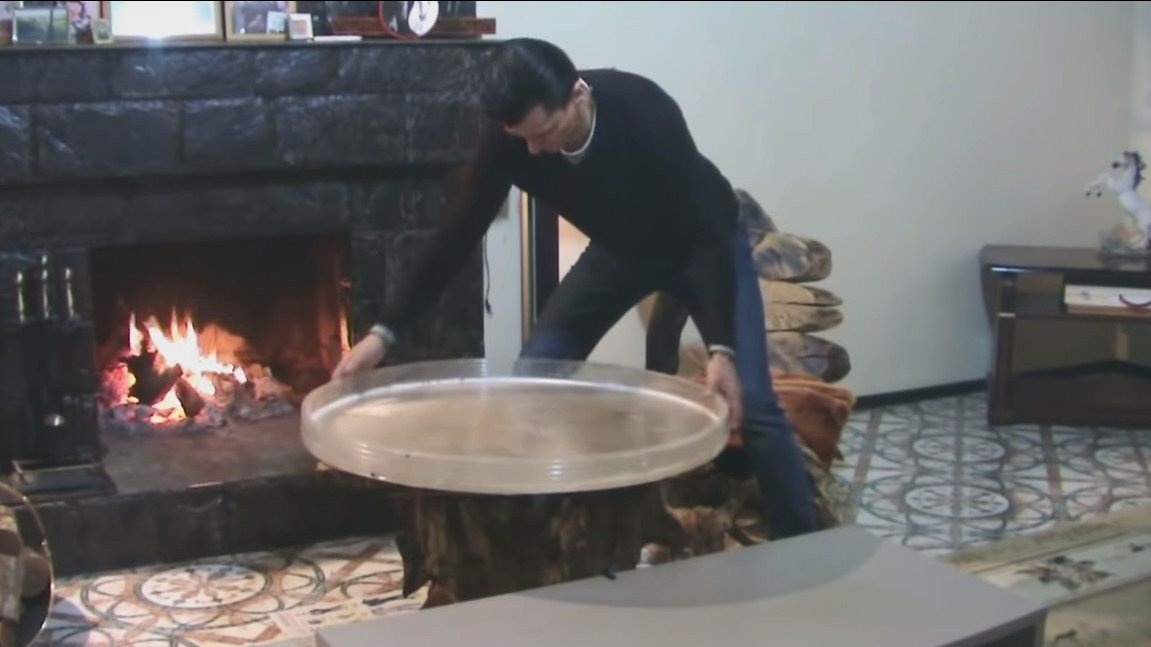
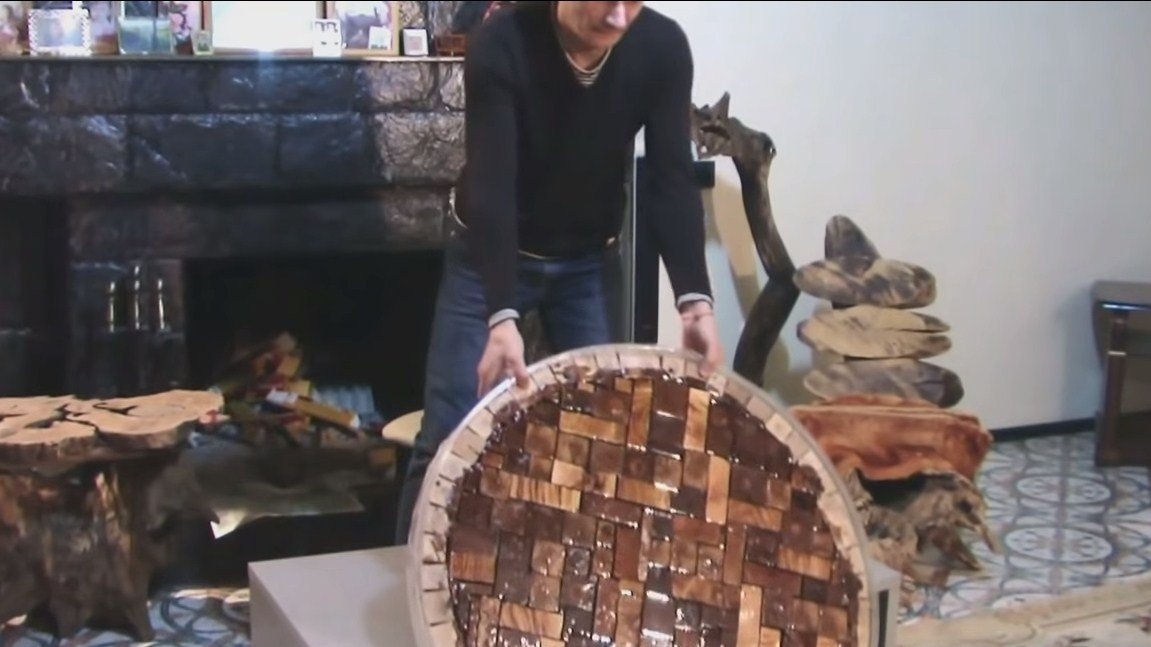
Seventh step. Final touches
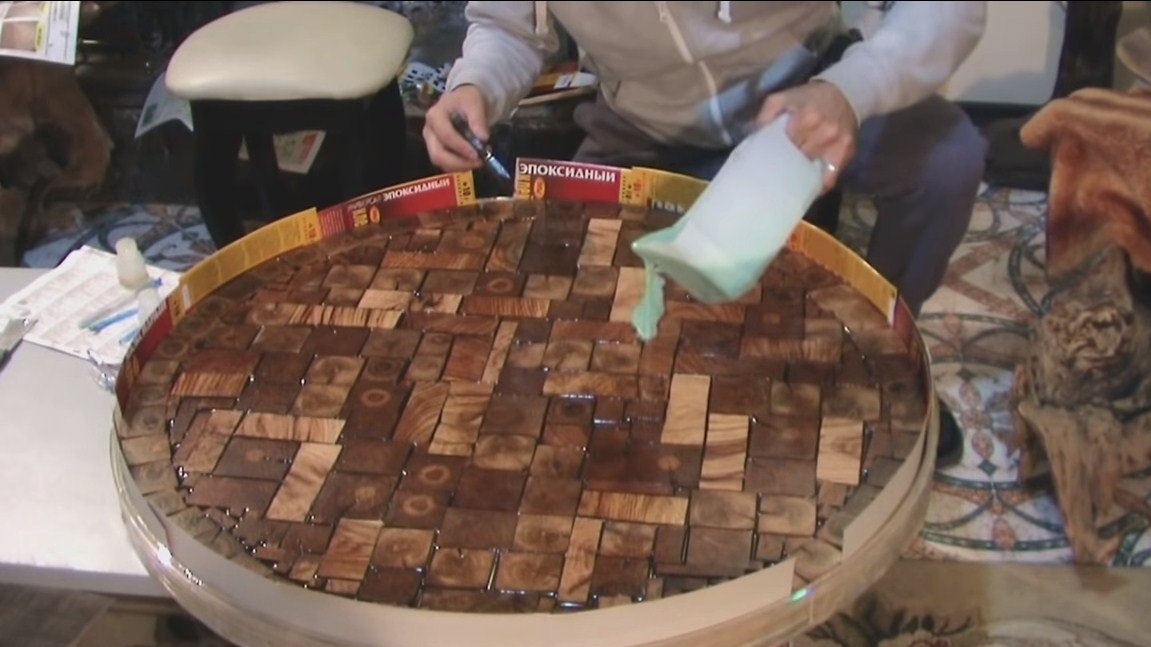
The table is ready, you can assemble. In order for the countertop to become glossy and the resin to be transparent, it must be varnished or a special epoxy resin. Next, set the tabletop legs. The author did not show how the tabletop is attached, but it is quite possible, dowels and glue are also used here. However, you can collect everything without glue. On spikes, then the table will be collapsible, which is useful, because it weighs a lot.
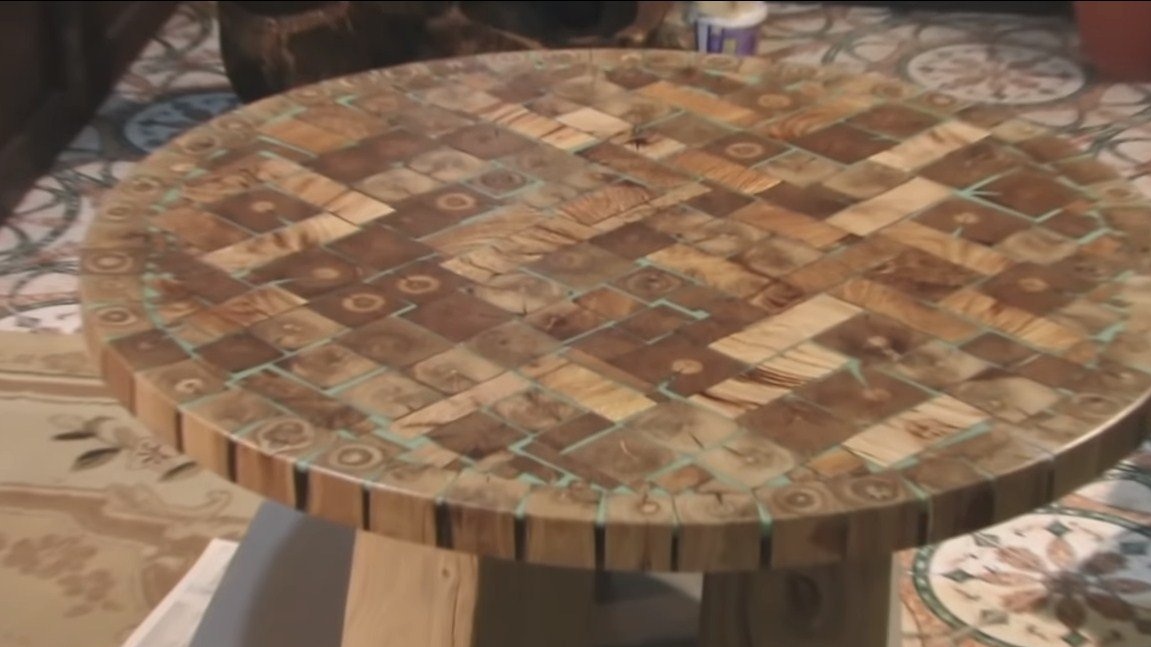
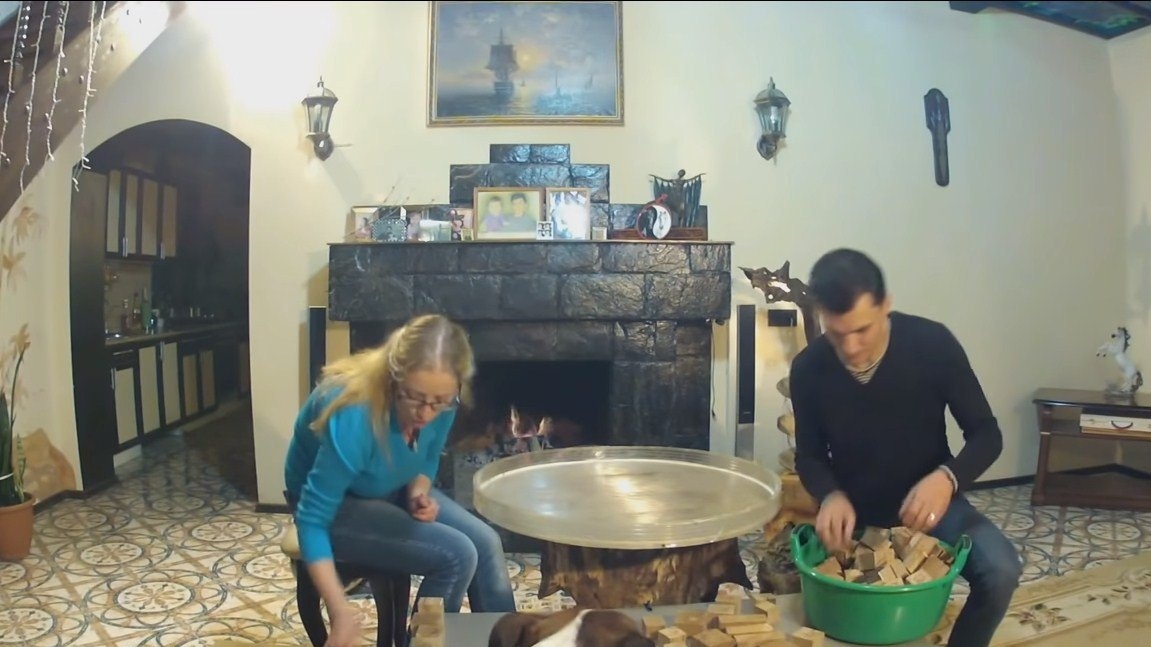
The final highlight is the backlight. But the author did not show how he made it. Here you can use LED strip or other equipment at your discretion. The backlit table looks very beautiful and interesting. However, without backlight in daylight, it also looks very beautiful.
I hope you enjoyed the project. Good luck and creative inspiration, if you decide to repeat this. Do not forget to share your ideas and homemade things with us!