

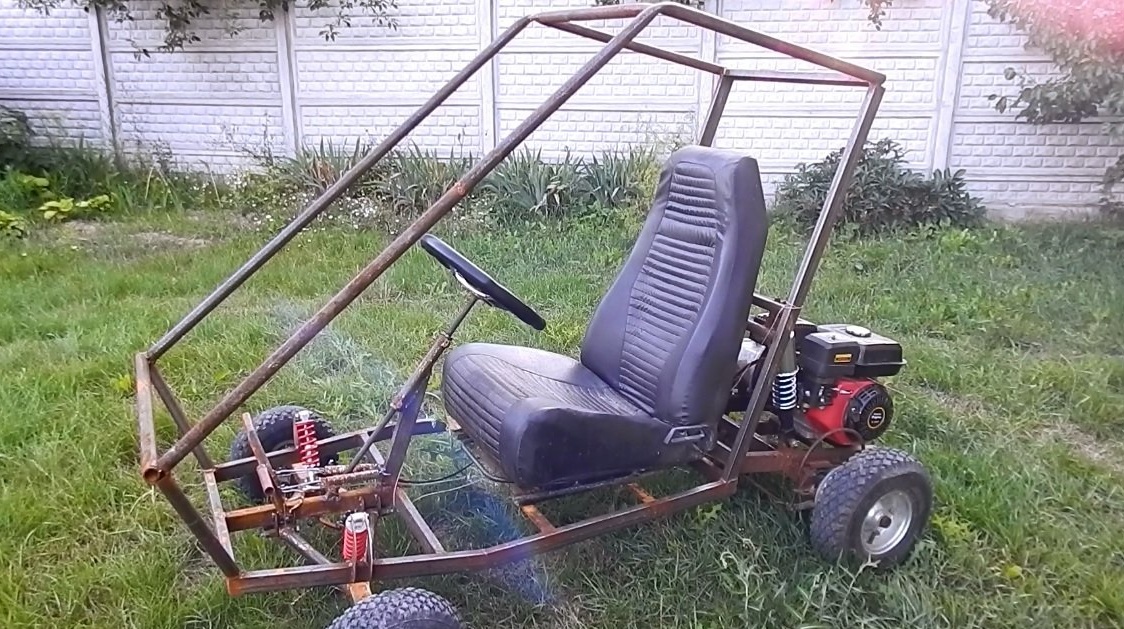
Hello! There are a huge number of buggy options on the Internet, and I decided to share my design with you. See what I got in the end. If you liked my idea and interested you, then I will be happy to tell you how I did it in stages.
Perhaps I'll start with the background to the creation of such a project. Earlier, I made a Go-Kart and having driven a little on it, I realized that I did not like the stiff suspension very much. I love to ride over rough terrain and through the forest, so I decided to use parts from Go-Kart and make buggies. So that there are no questions where these or other spare parts came from, I advise you to see the previous article Home-made Go-Kart, or a childhood dream!, there I described how I did everything.
Materials and components
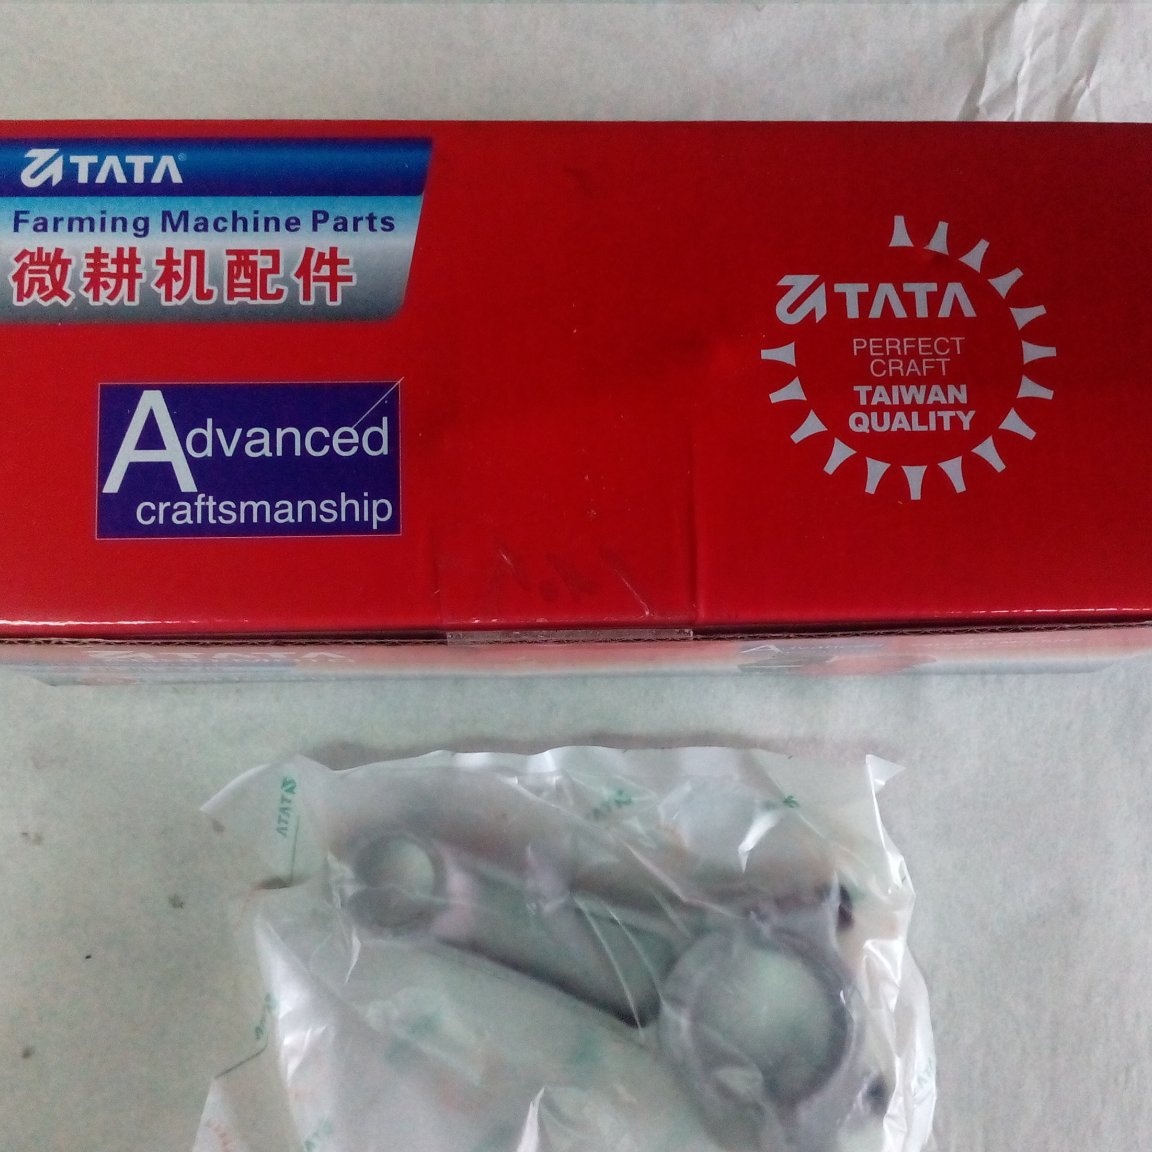
1. The engine from the walk-behind tractor, an analog of the Honda GX200
2. Rear axle 30 mm thickness, 900 mm length
3. Gearbox from the motorcycle M-72
4. Wheels from a garden car - front 4 inches (300 mm on the outside), rear 6 inches (350 mm on the outside)
5. Profile pipe 40X20x2 mm for the frame
6. Housing bearings UCP206 2 pcs. for rear axle
7. Water round pipe 26.8x2.5 mm
8. Shock absorbers from a mountain bike 2 pcs, for front suspension
9. Silent blocks of the pendulum Delta 35x23x10 mm 4 pcs, for front suspension
10. Rear shock absorbers from a Dnepr motorcycle 2 pcs. for the rear suspension.
11. Car seat (driver)
Tool and consumables
1. Bulgarian
2. Cutting and grinding wheels
3. Welding machine and electrodes
4. Drill
5. Set of drills
6. Round and flat file
7. Rivet gun with rivets
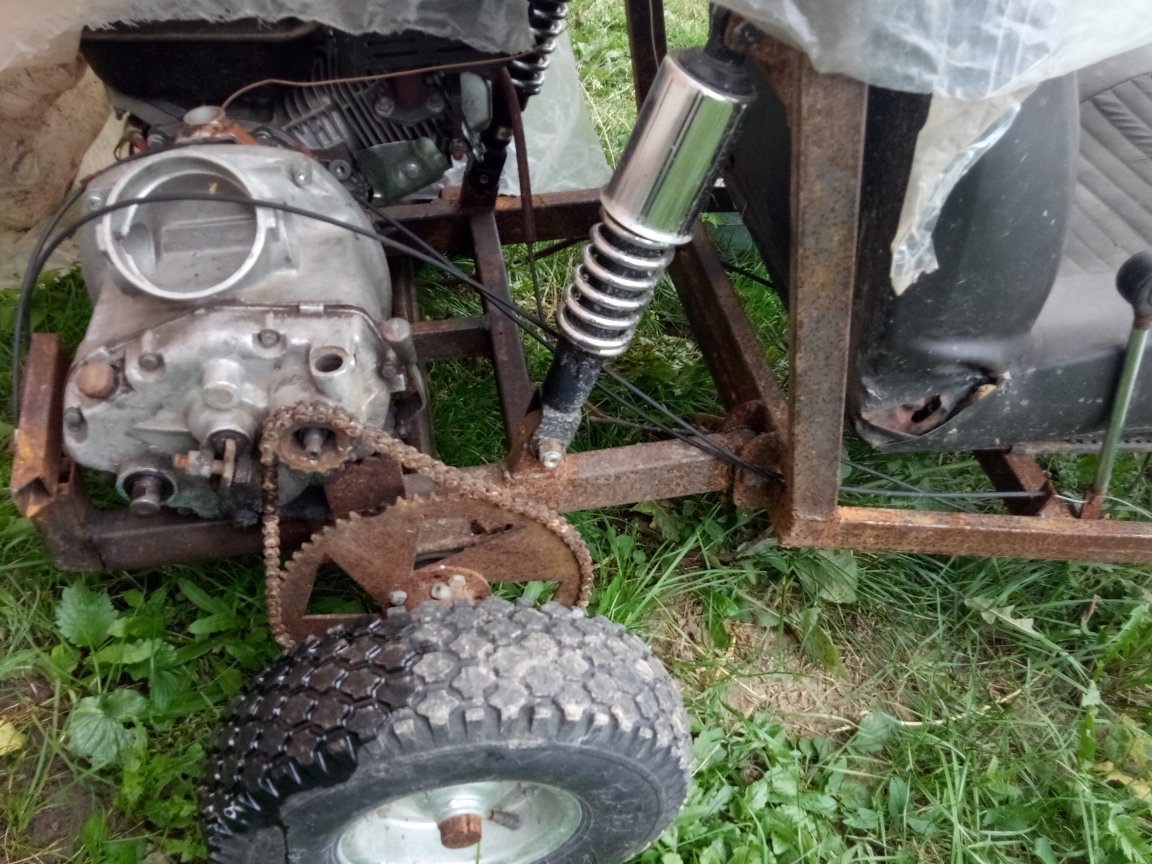
Step one: docking the gearbox with the engine block engine.
As I said earlier, I will use parts from the previous Go-Kart project.
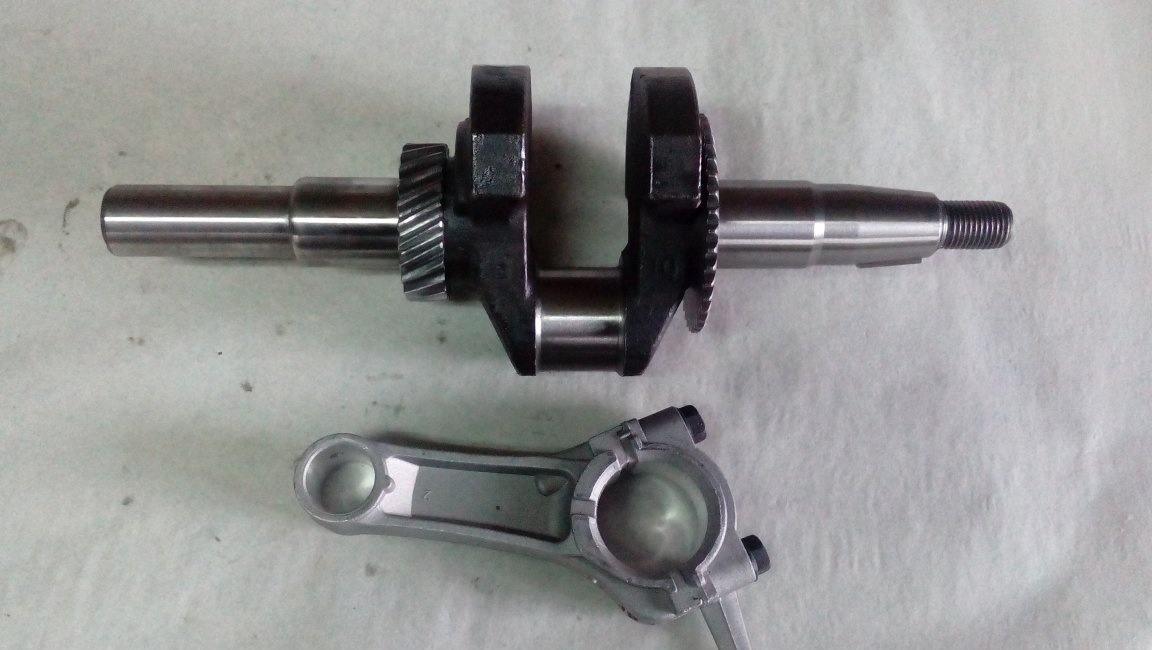
The buggy will have a pendulum suspension at the back. In order not to complicate my life, I decided to cut off the back of the Go-Kart frame from which I will make the pendulum. I decided to change the engine and put on a walk-behind tractor. I bought a used engine, complete, but inoperative for little money. Having disassembled it, I saw that the connecting rod was scattered, and there were a lot of badass on the crankshaft neck.
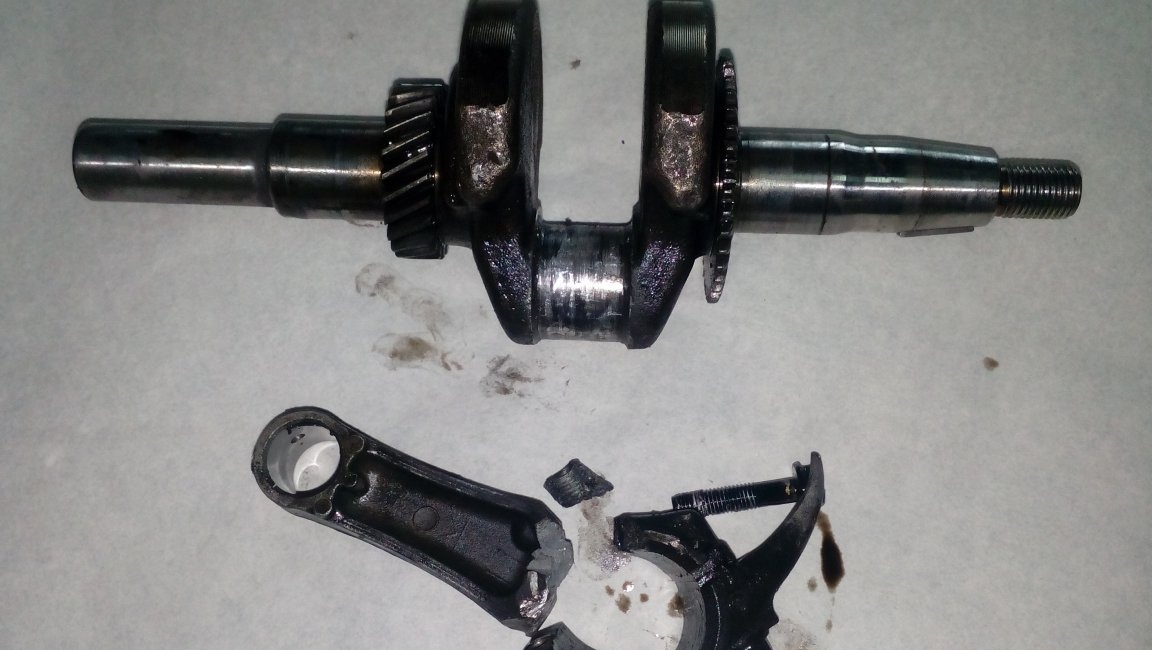
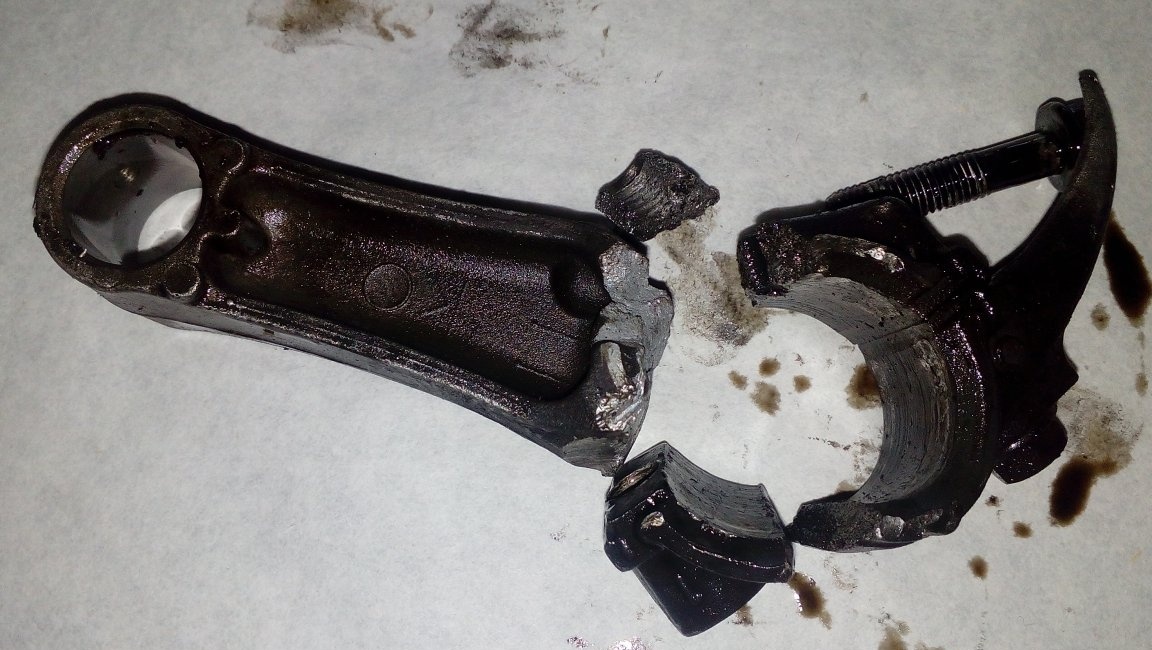
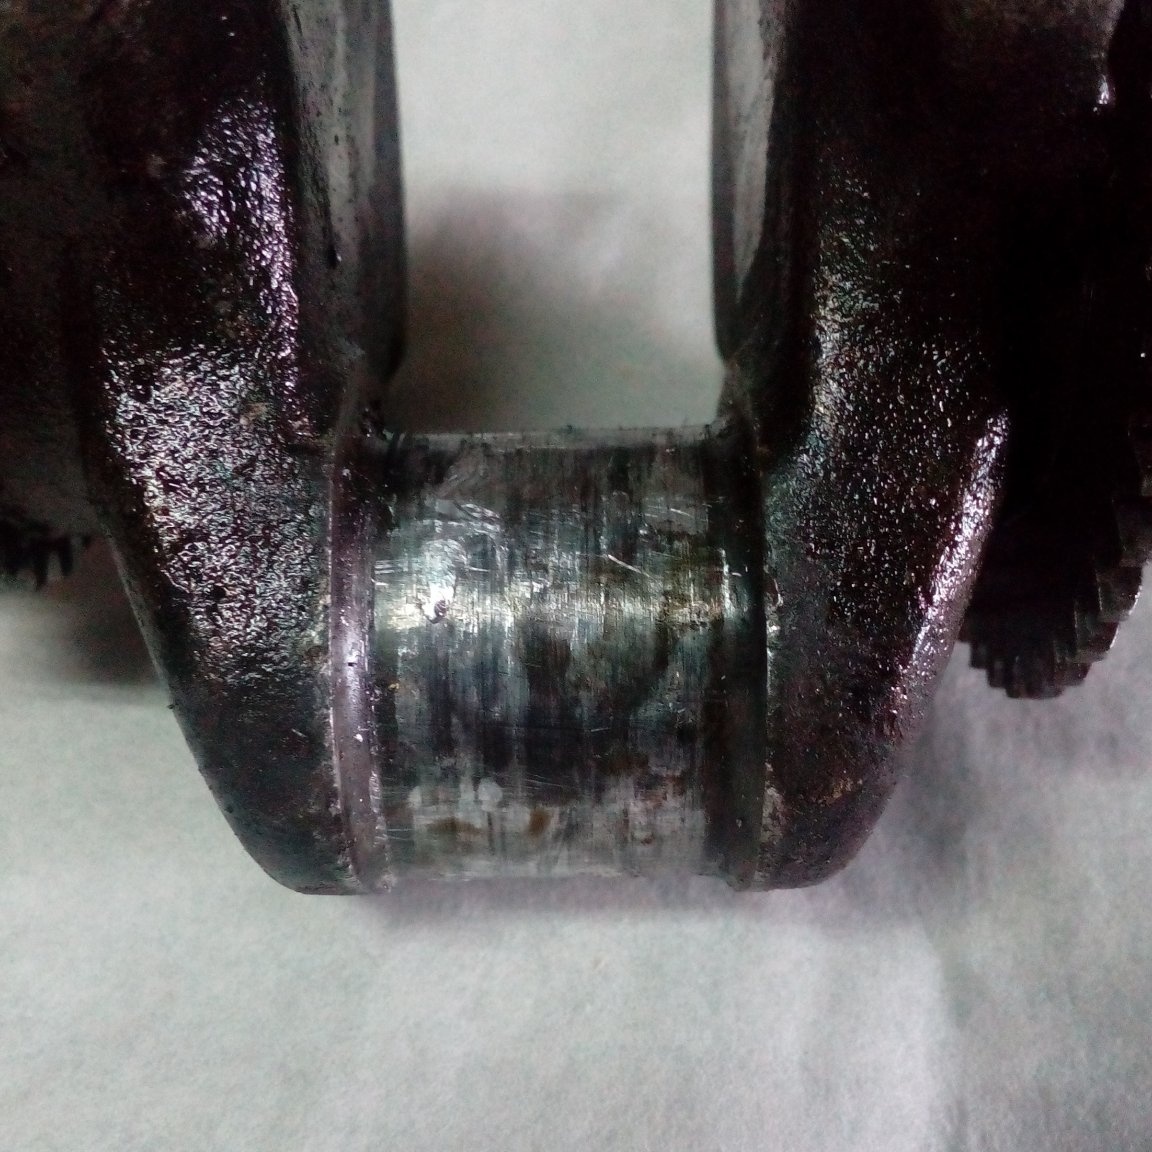
The piston was hooked and needed to be replaced, but I decided to start changing only the crankshaft with the connecting rod. Spare parts ordered in the online store.
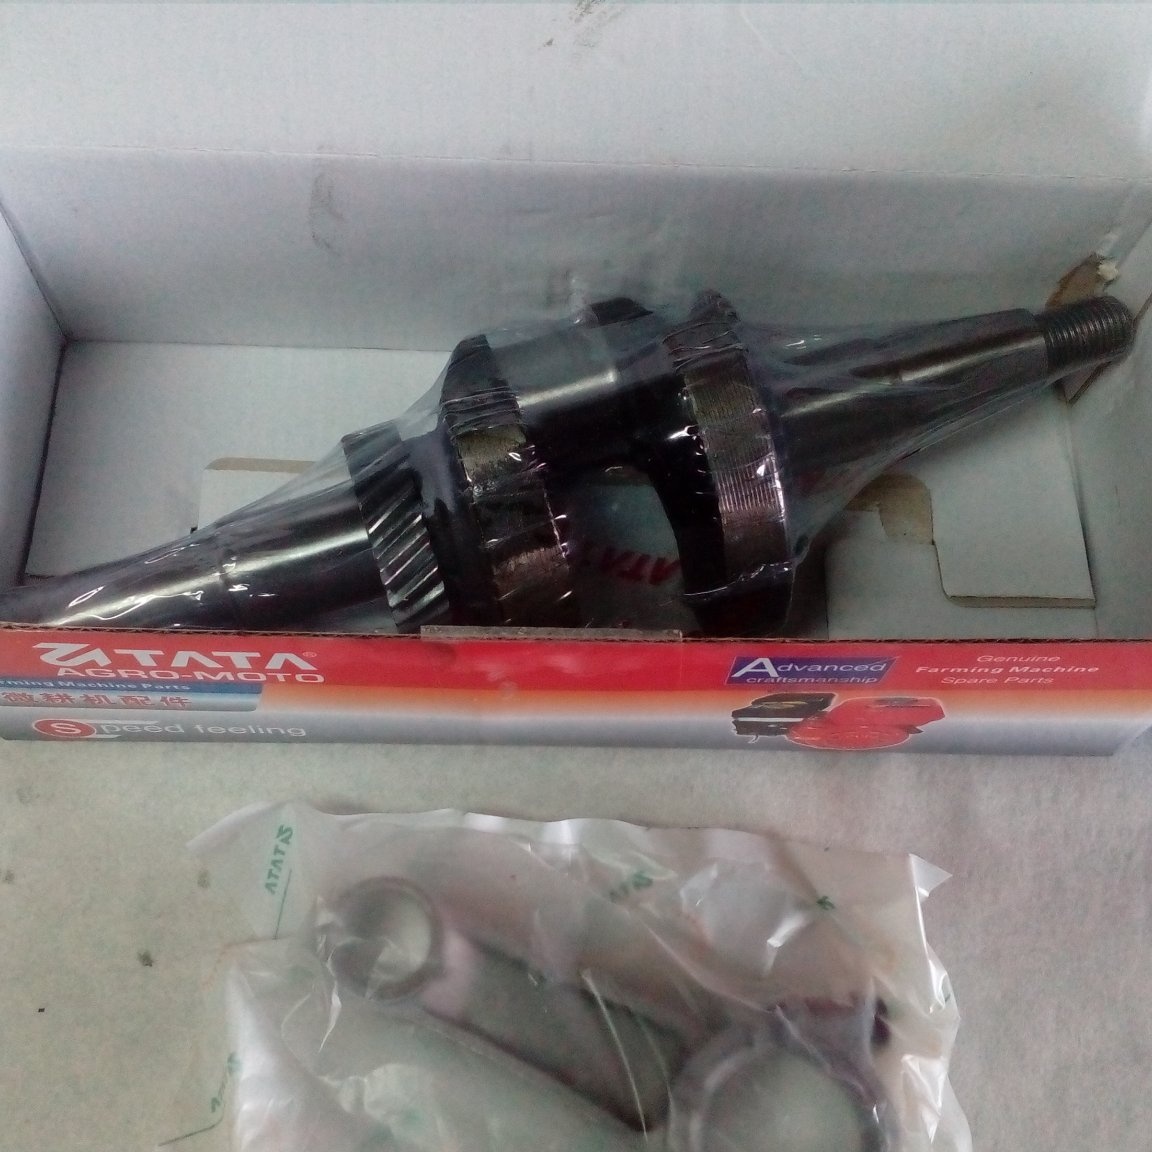
Put new engine parts and put everything together. The first launch confirmed my fears and I saw that the engine was smoking a lot.After that, I already threw aside such savings, and bought the rest of the spare parts for a full repair. Now I ordered a piston with rings and a finger, a set of gaskets and a valve.

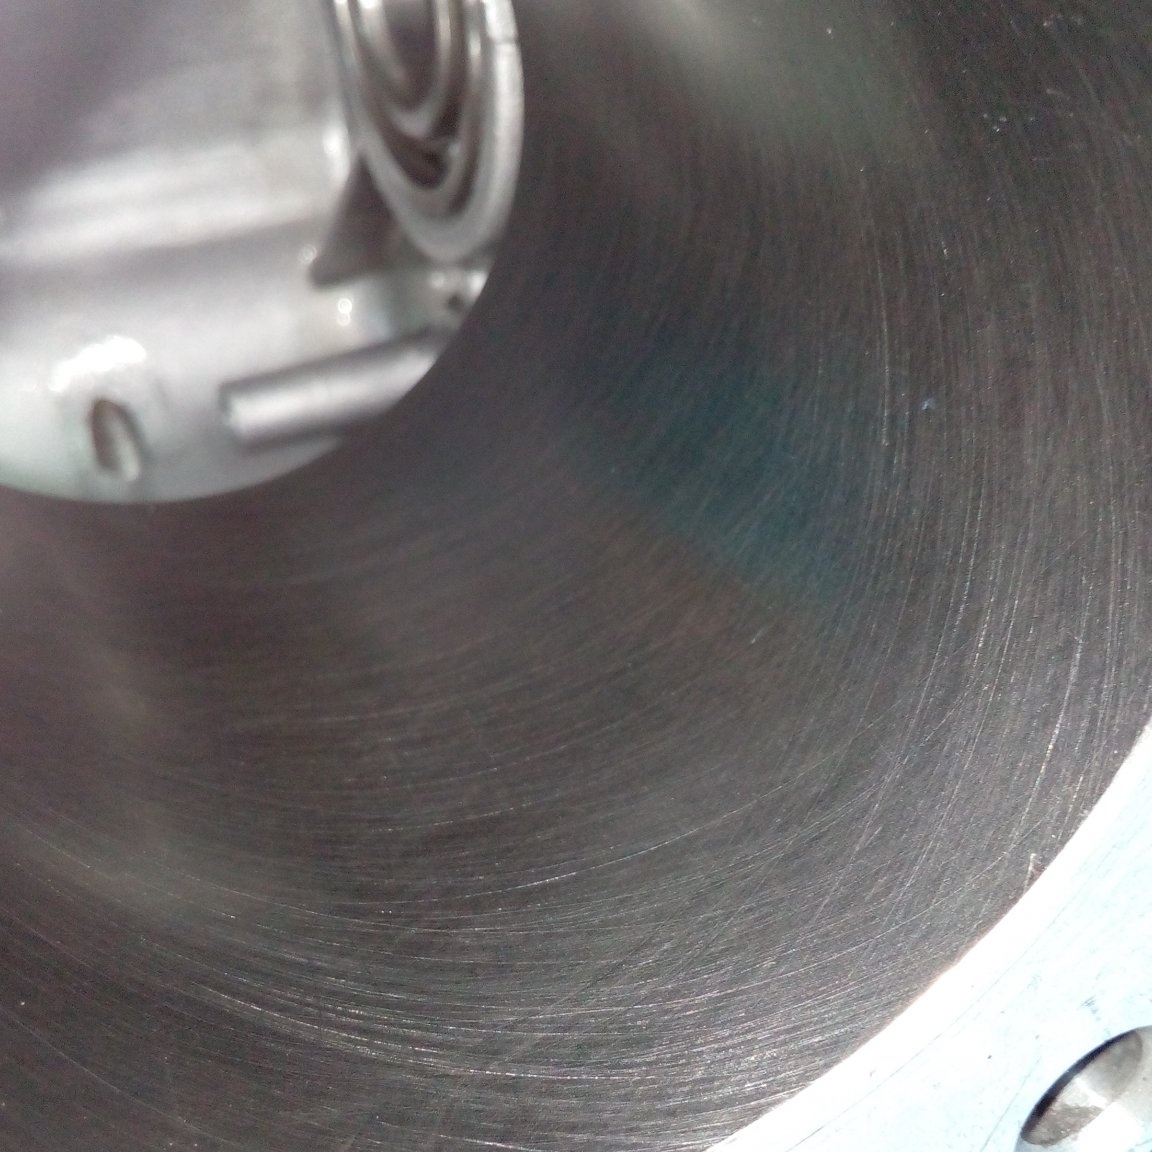
The valves were all in the sinks and had a slight clearance in the guides. I rubbed the valve and removed the carbon from the head. Block gave to the bore.
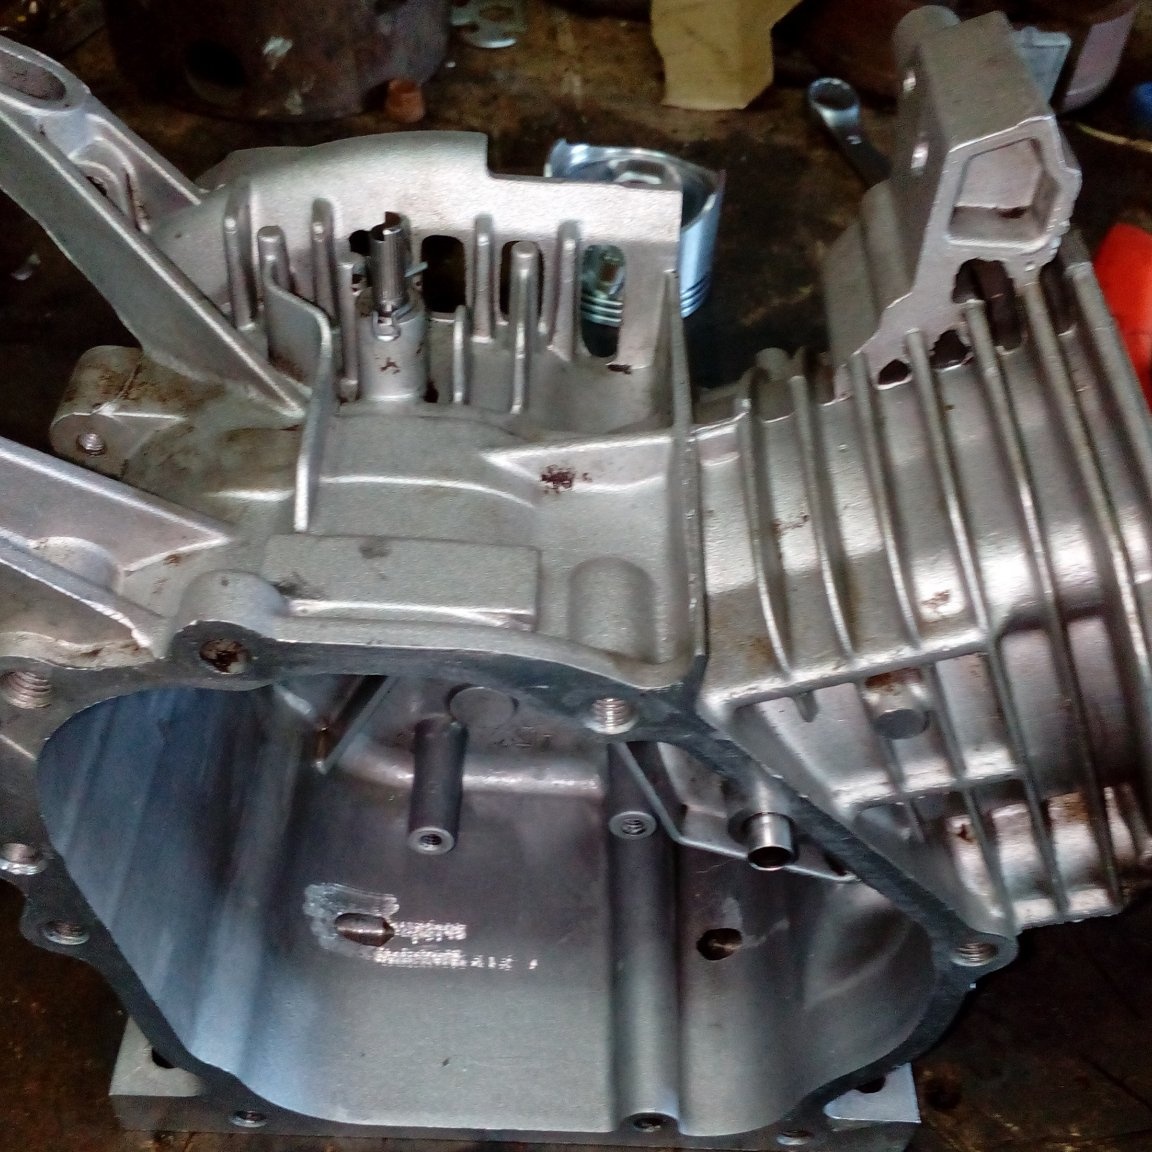
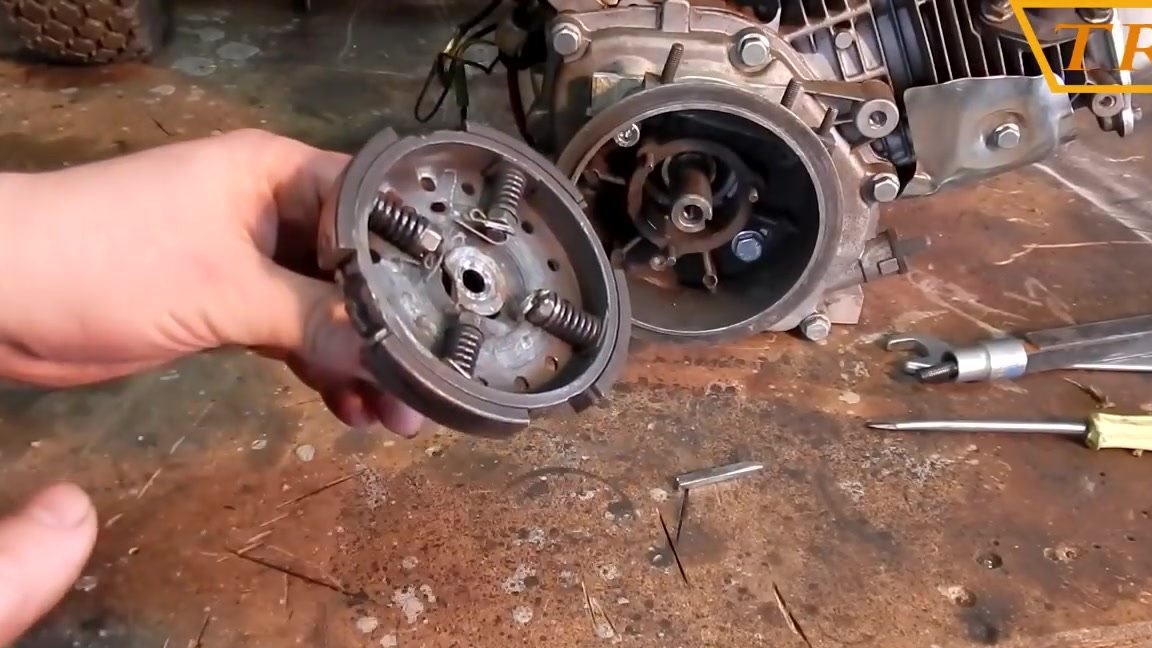
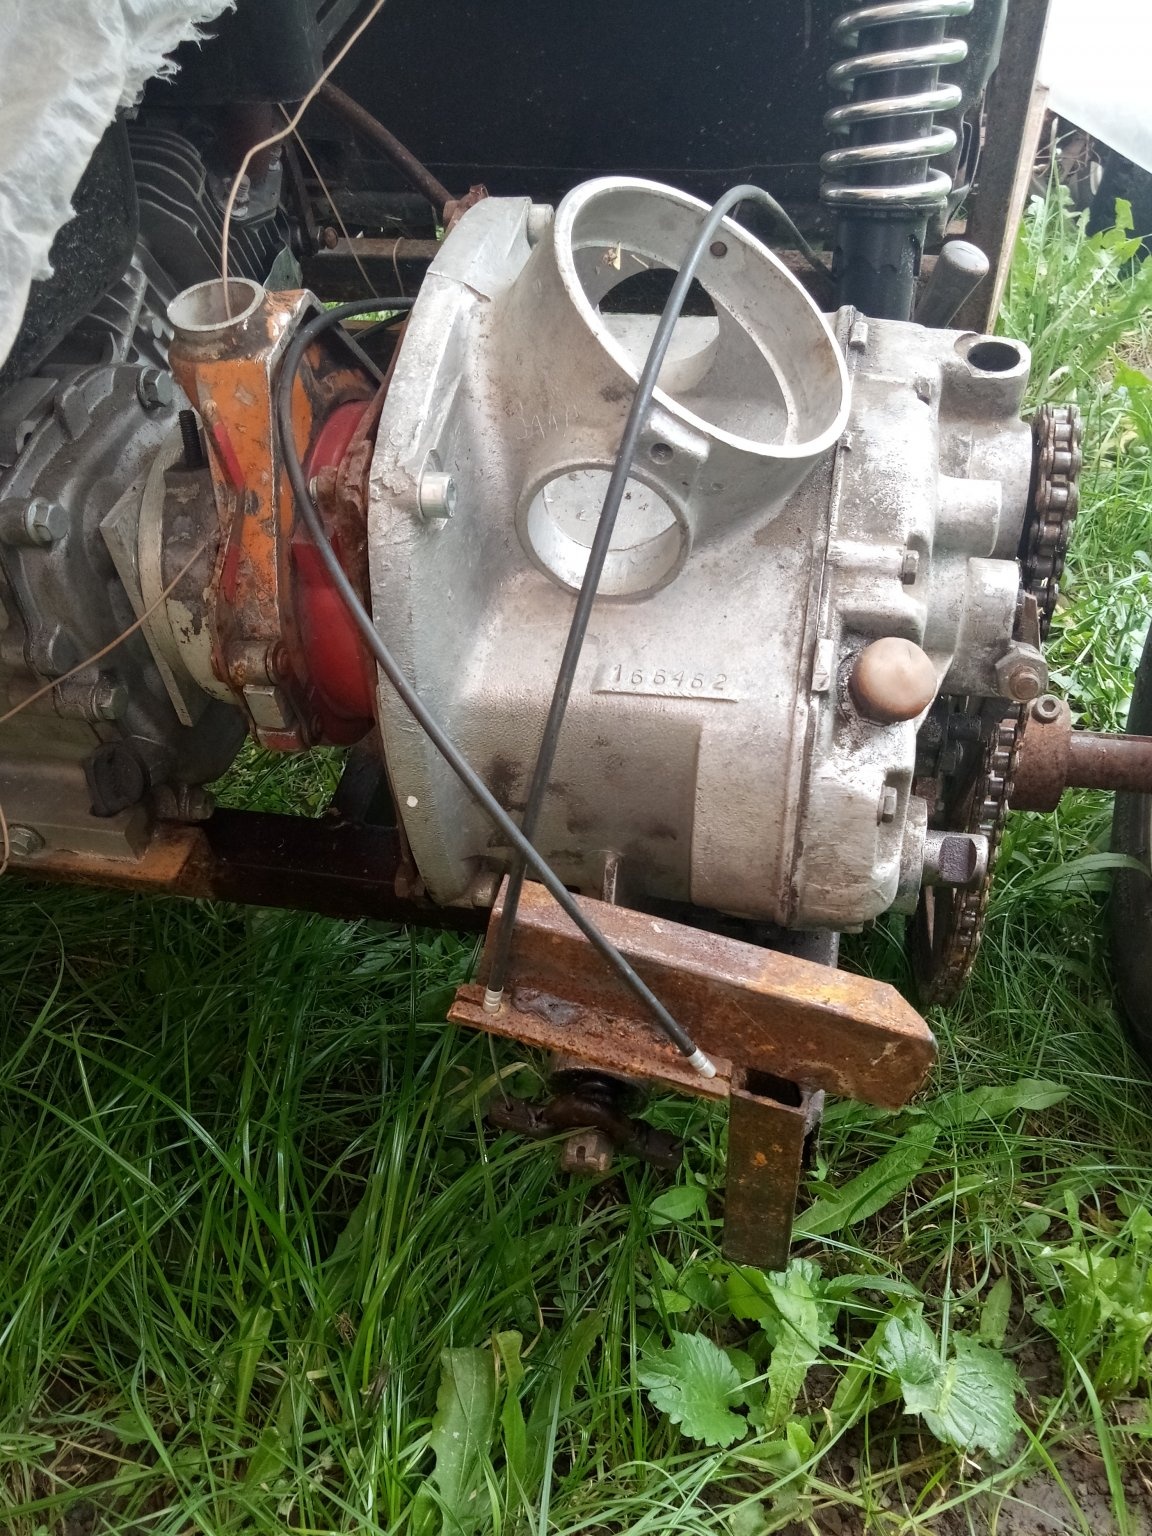
After assembling the engine, I started it for the first time, and now the engine worked like a new one, now I was absolutely sure of it. Now we will deal with the very docking of the gearbox with the engine. I decided to leave the clutch off the chainsaw, measured all the necessary sizes and gave the spare parts to the turner. After turning, I got such details.
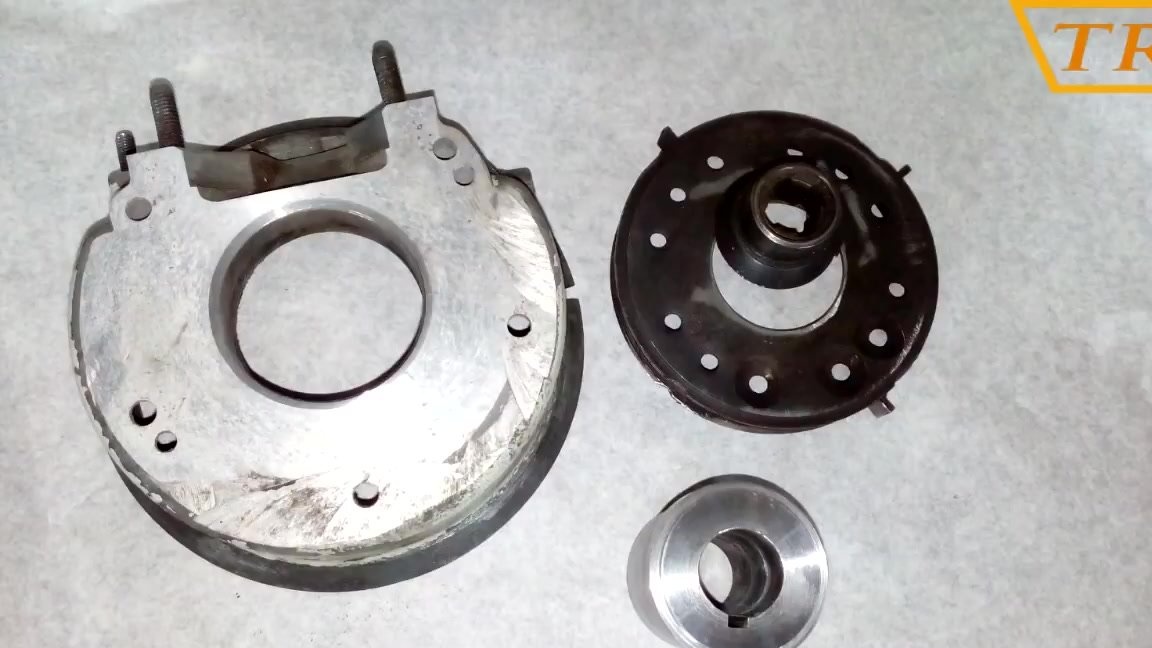
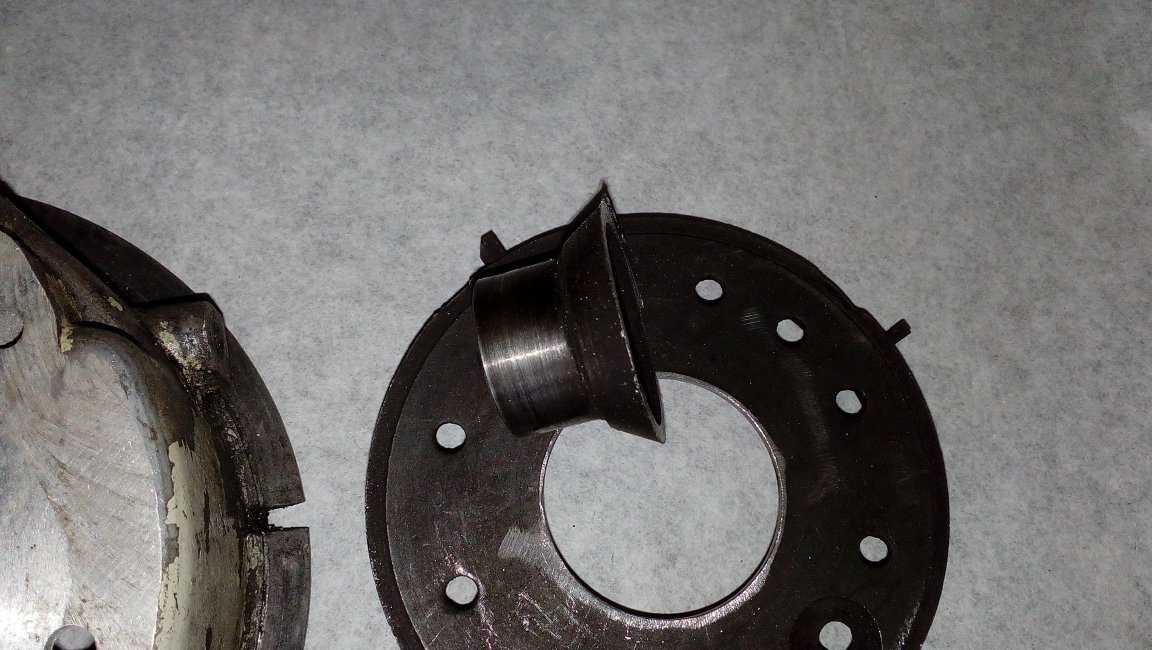
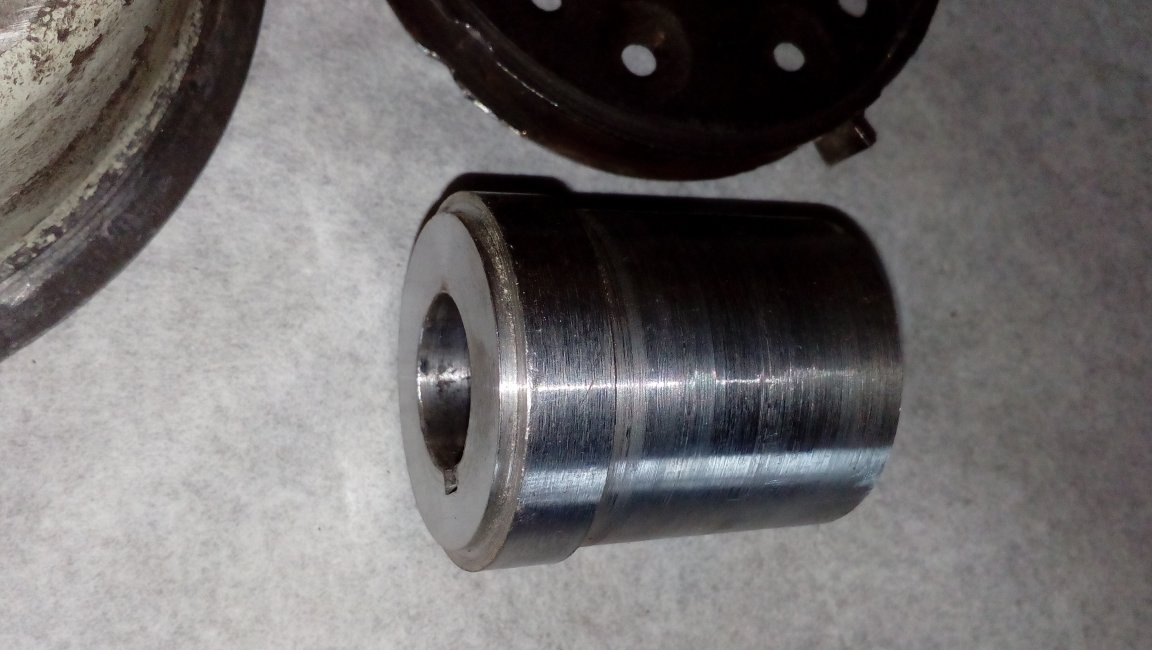

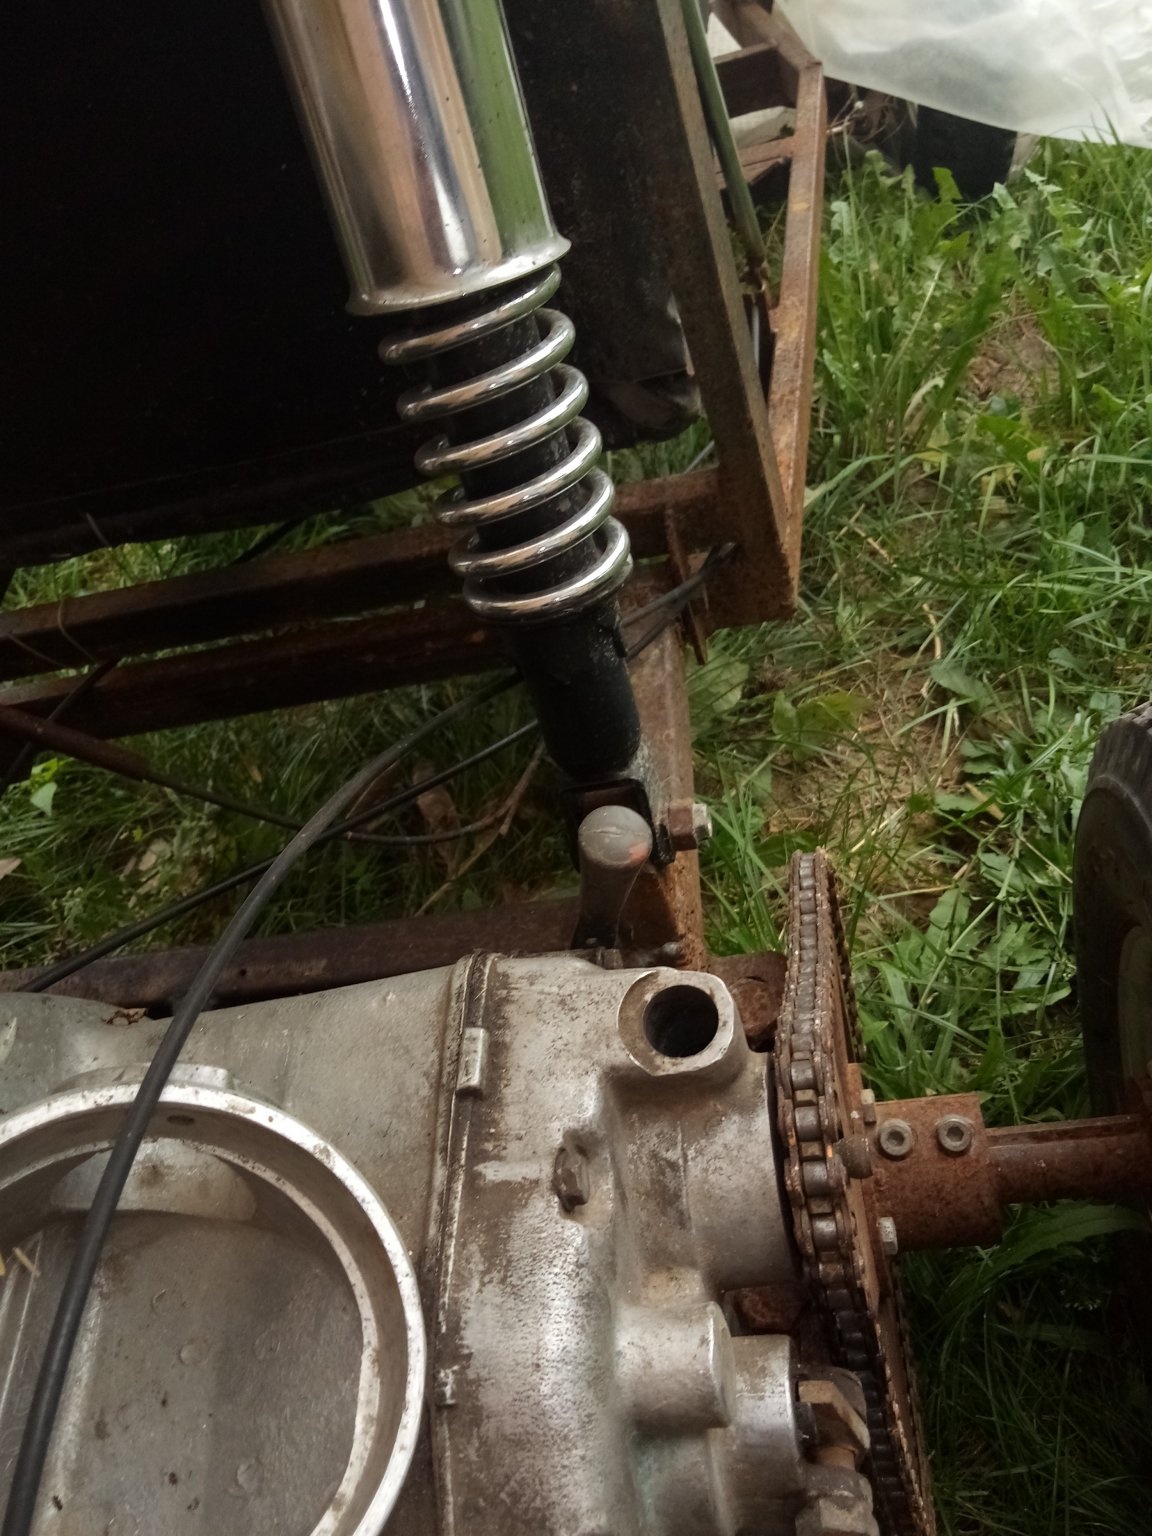
Clutch welded to the sleeve. The sleeve has a keyway and sits on the motor shaft.

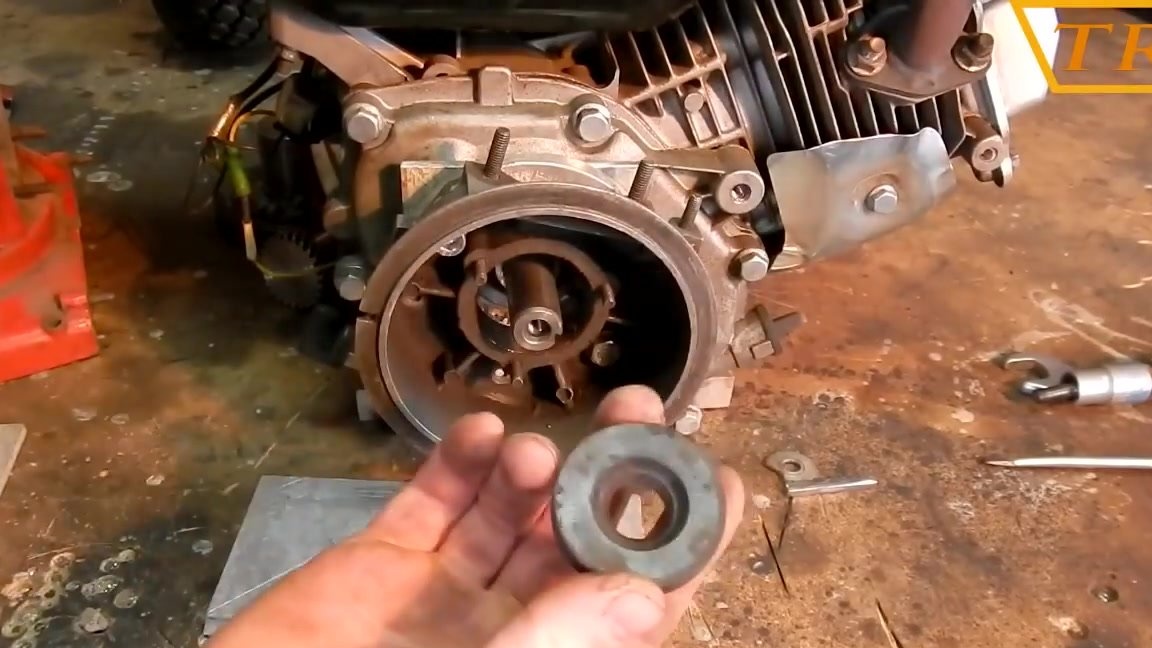
In order for the clutch to be at the right distance from the edge, an intermediate washer was cut from an aluminum plate, which was installed between the engine and the crankcase. To put the crankcase exactly in the center of the crankcase I put an oil seal and put it on the engine shaft.
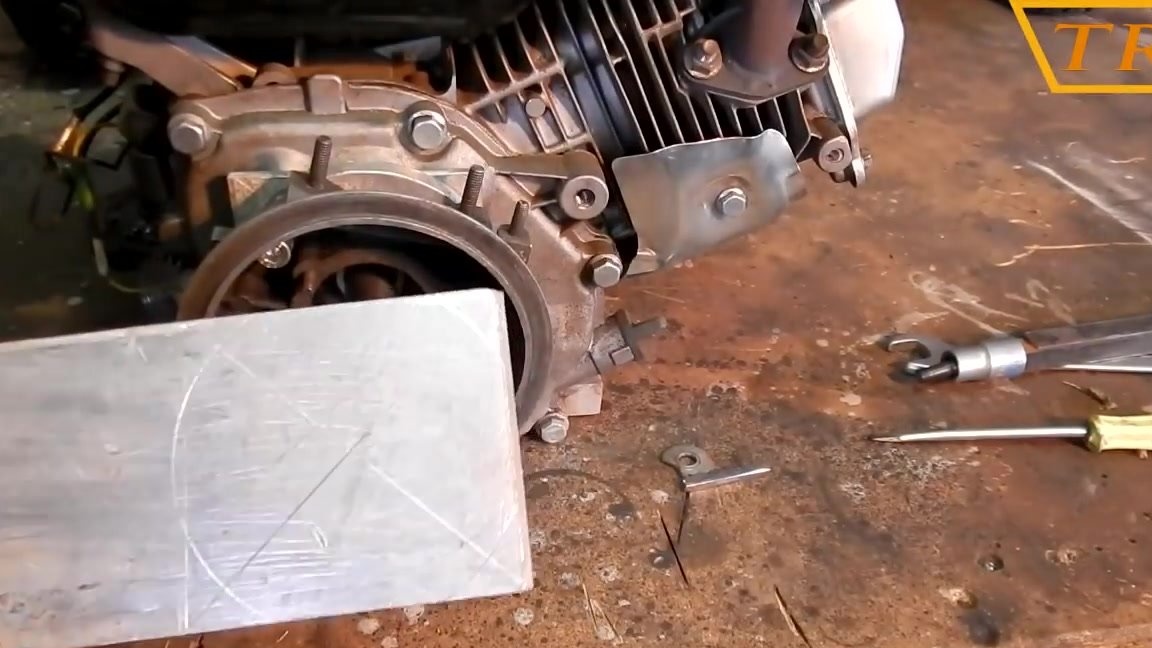
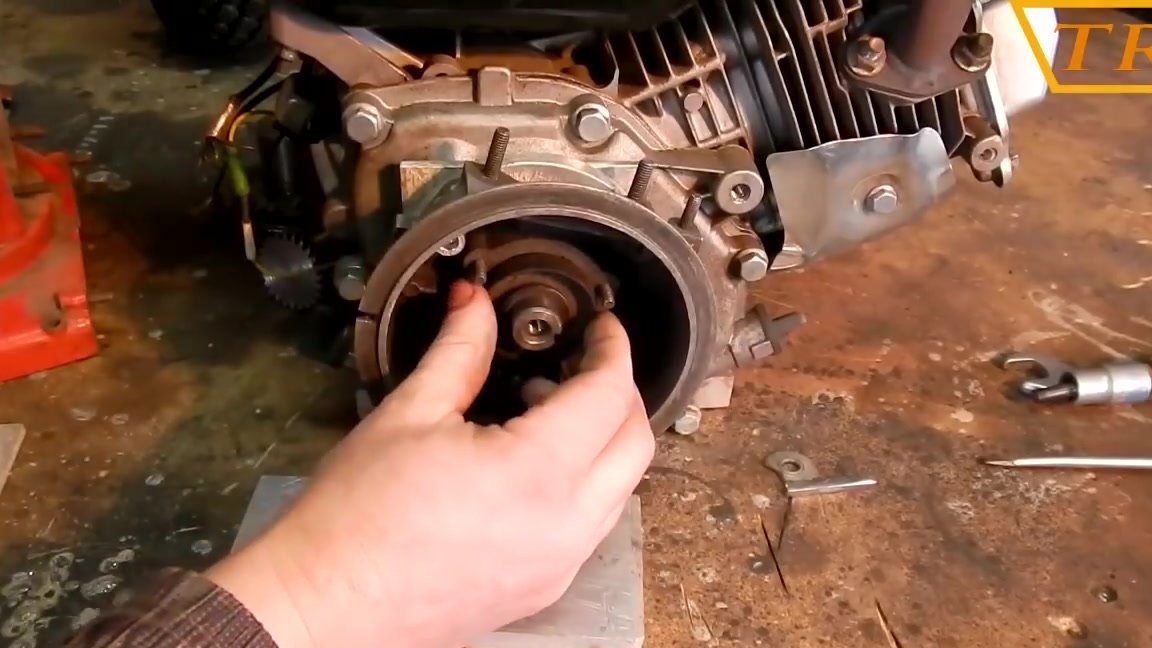
Now, after alignment, I tighten the crankcase with two bolts. The engine is ready for connection, and I install it on the frame.

I tighten the engine and gearbox with a clamp and cook the mount for the engine in fact.
Video instruction
Of course, the idle speed of the engine from the chainsaw and motoblock is different and in order for the clutch to work at the right speed, I had to adjust the clutch in a new way.
Video instruction
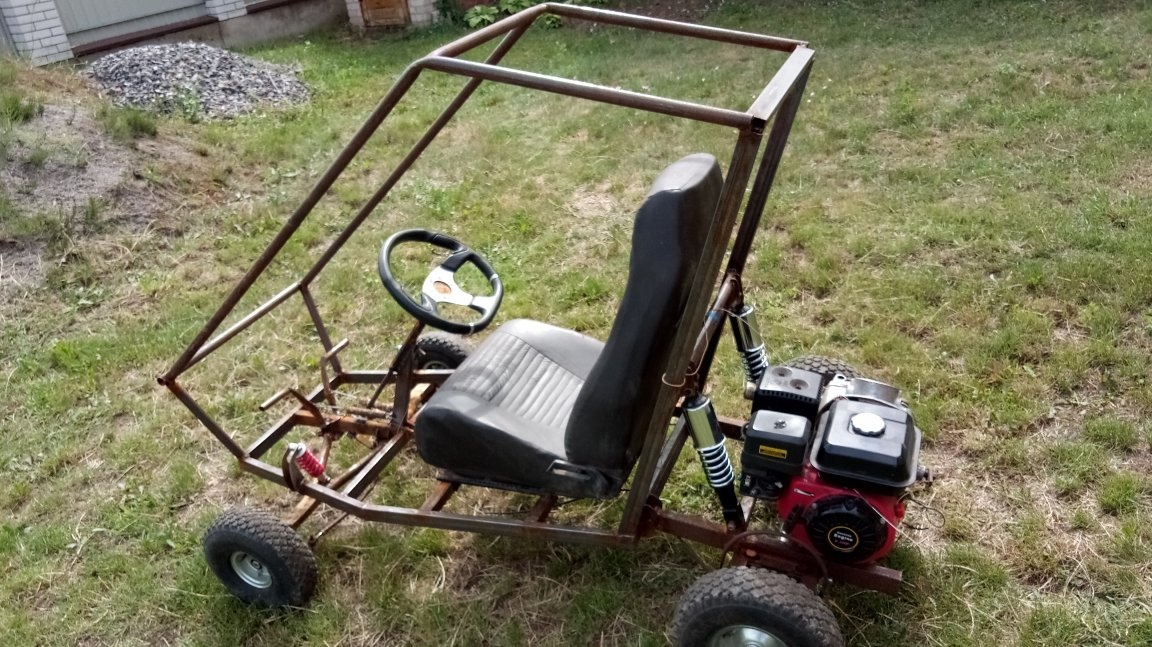
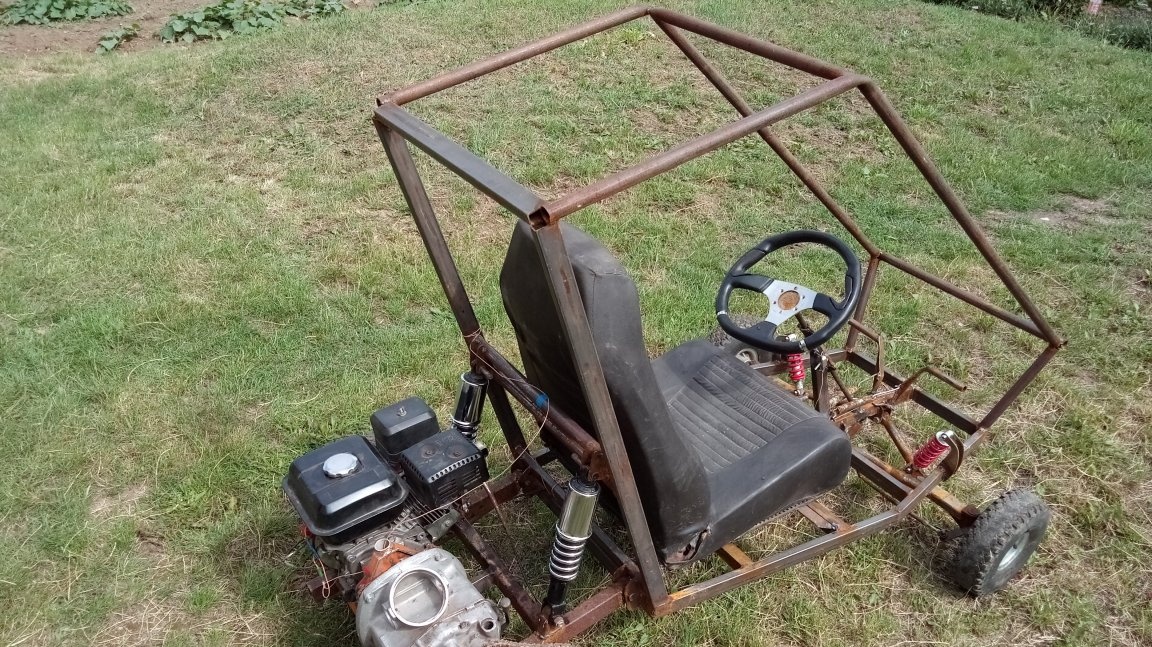
Step two: make the frame
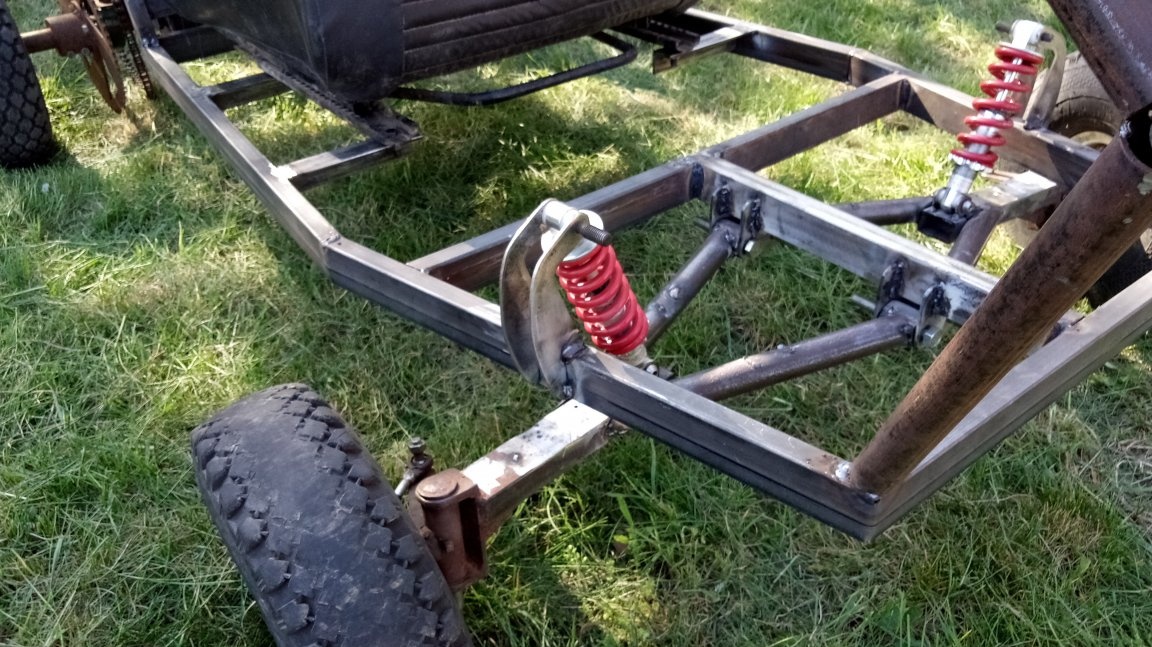
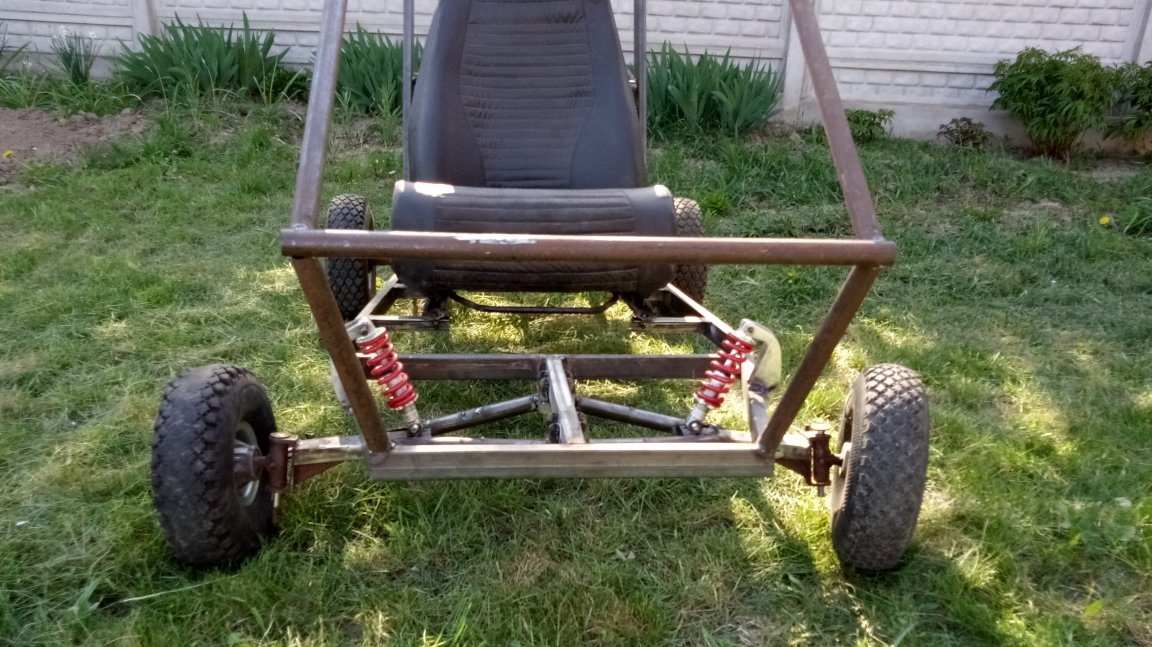
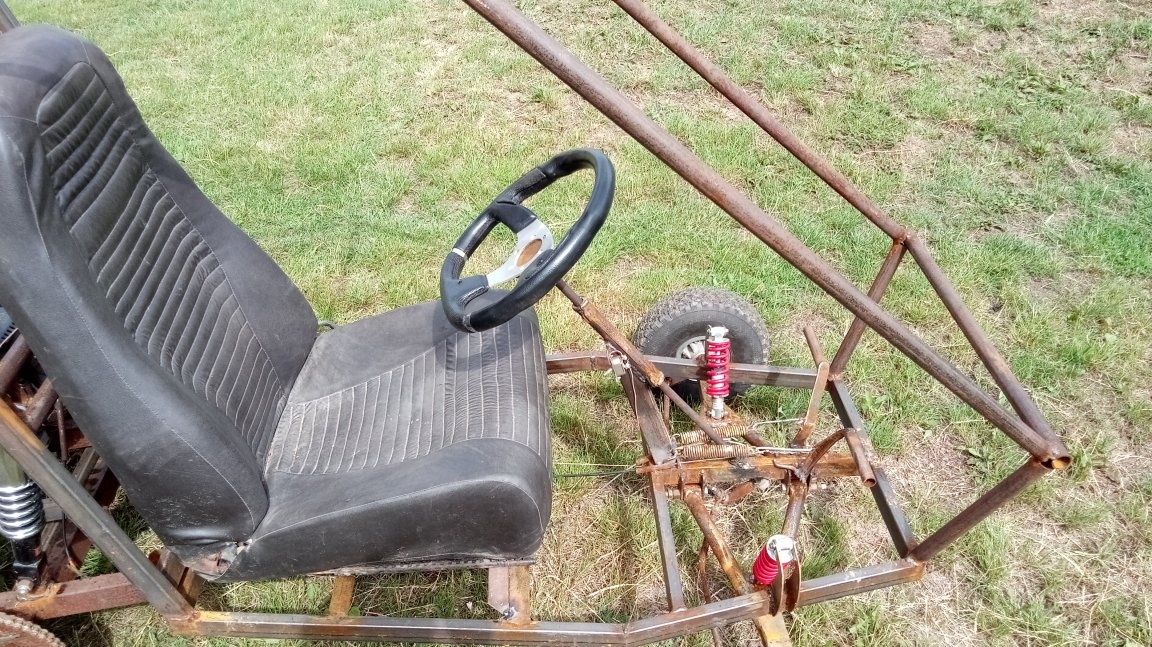
All dimensions and angles in the frame are relative and you do not need to repeat them exactly after me. I make a frame according to such a scheme — I take the chair that I will use, put it on a flat surface (in my case, a table), conveniently put the back out, sit down in it and put a mark on the table where my legs end. I add 10-15 centimeters and get the line of the front edge of the frame. The rear of the frame ends immediately behind the seat, and the racks behind the back will run parallel to it. The bottom of the frame and the rear pillars I welded from a profile pipe 40x20x2 mm. The upper part of the frame and the front are made of a circular water pipe of 26.8x2.5 mm.
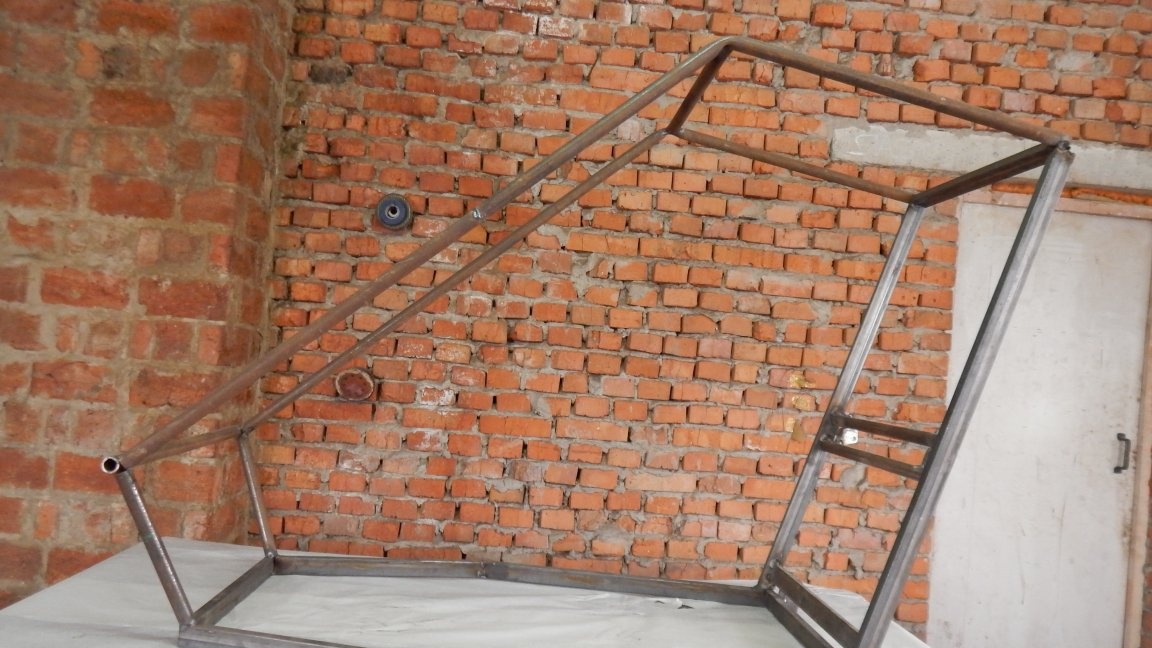
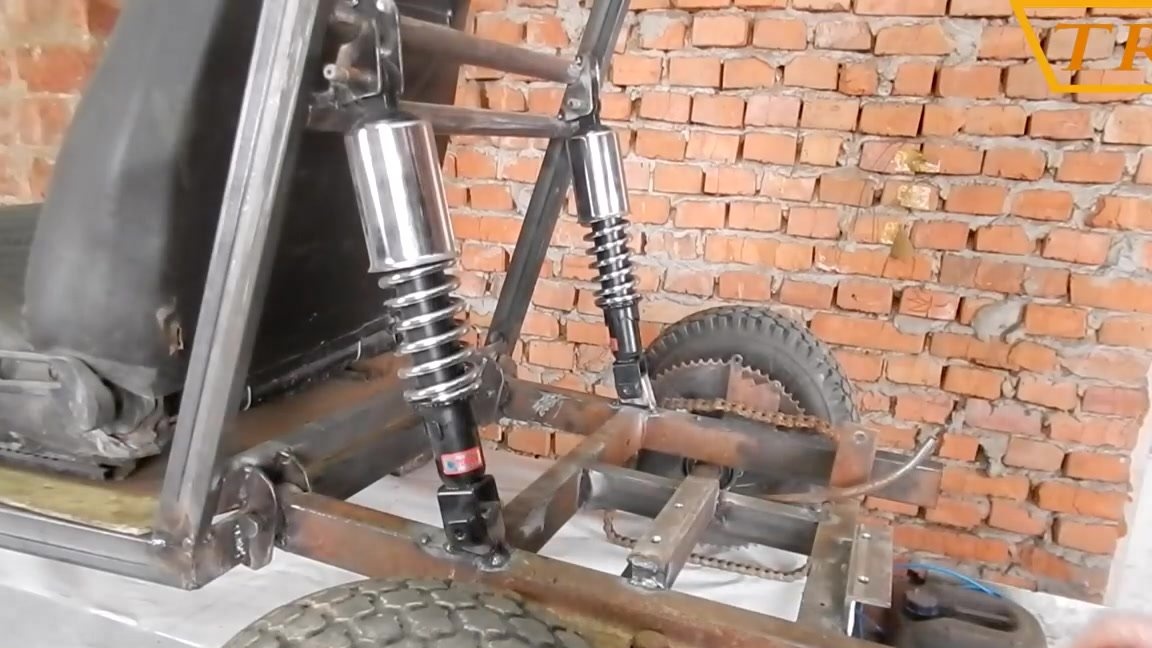
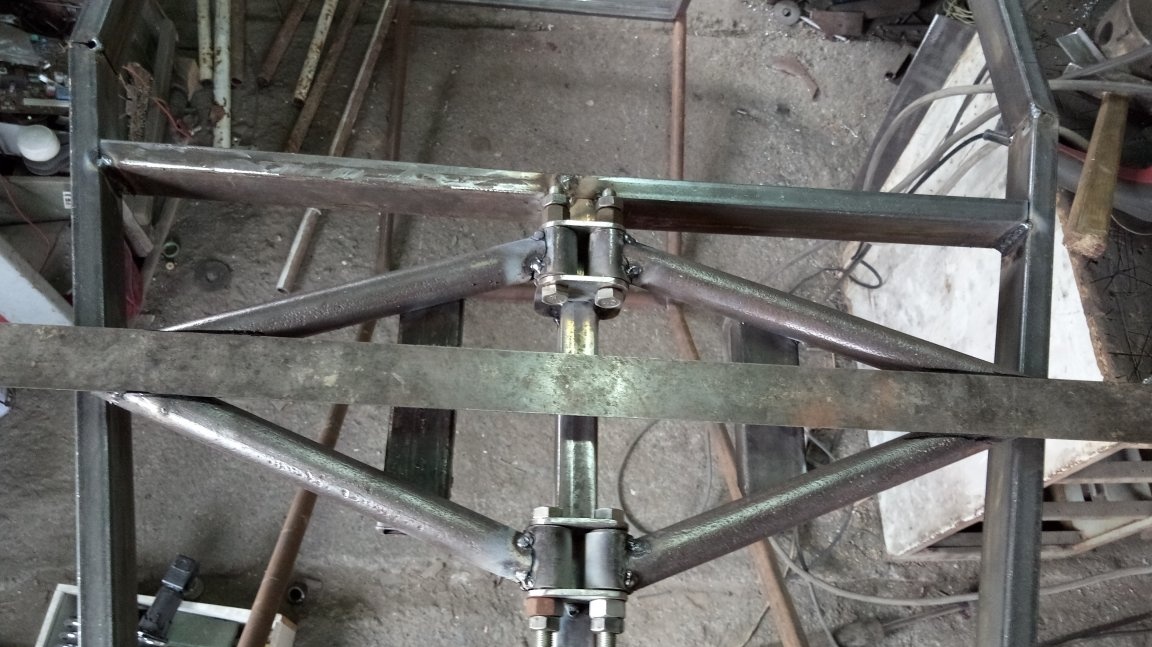
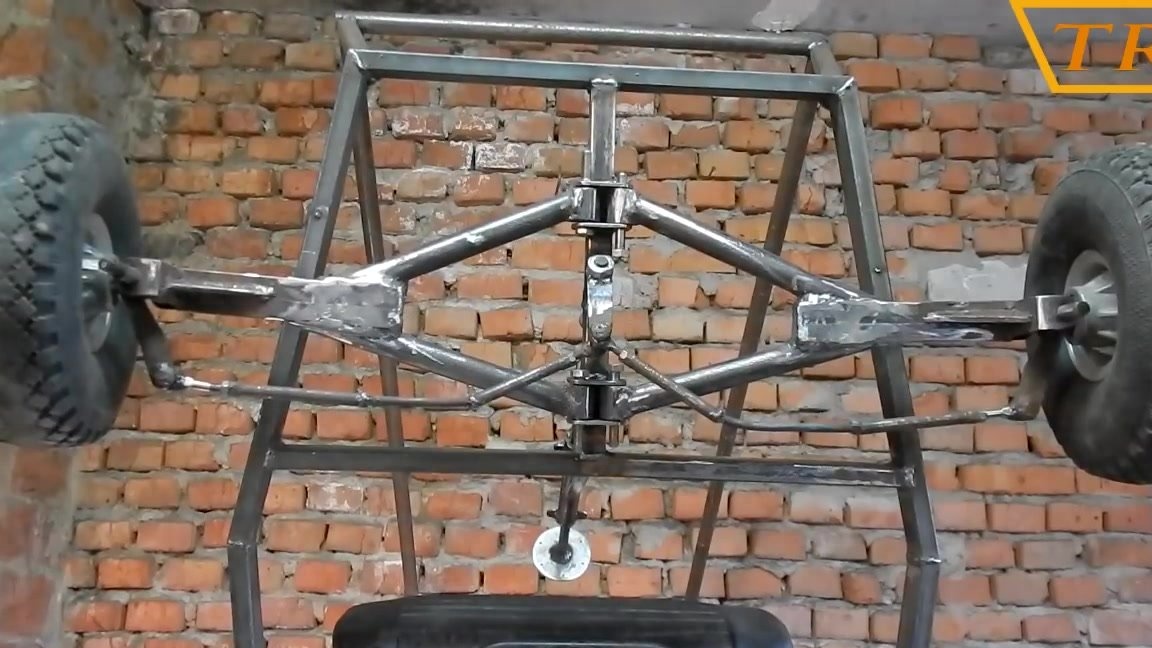
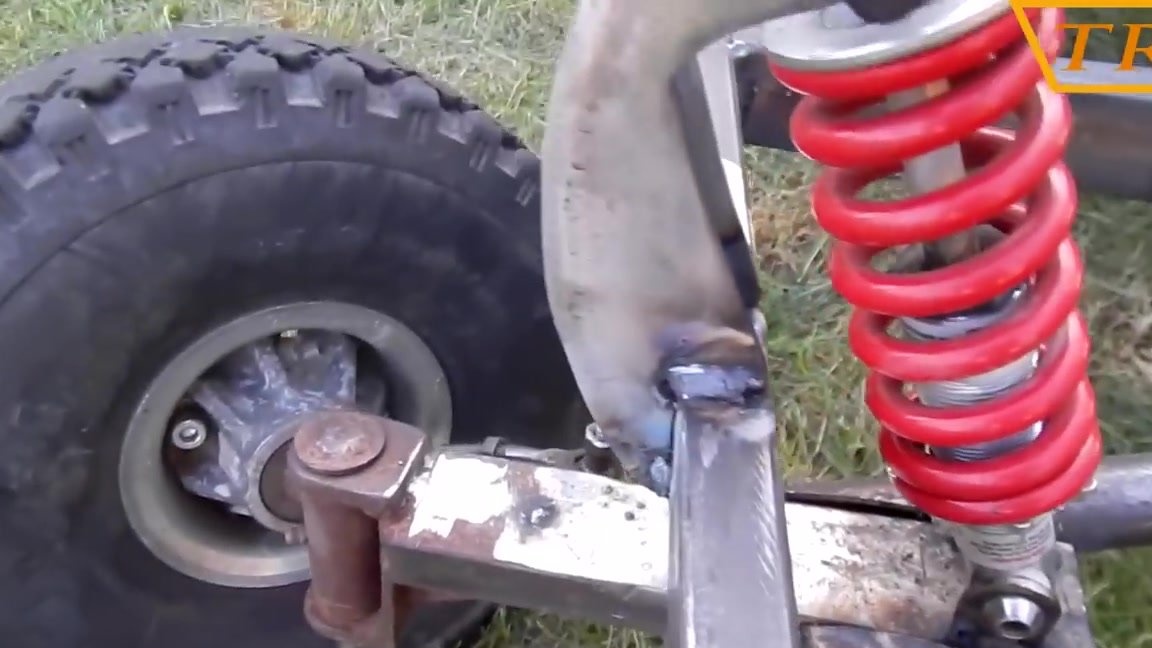
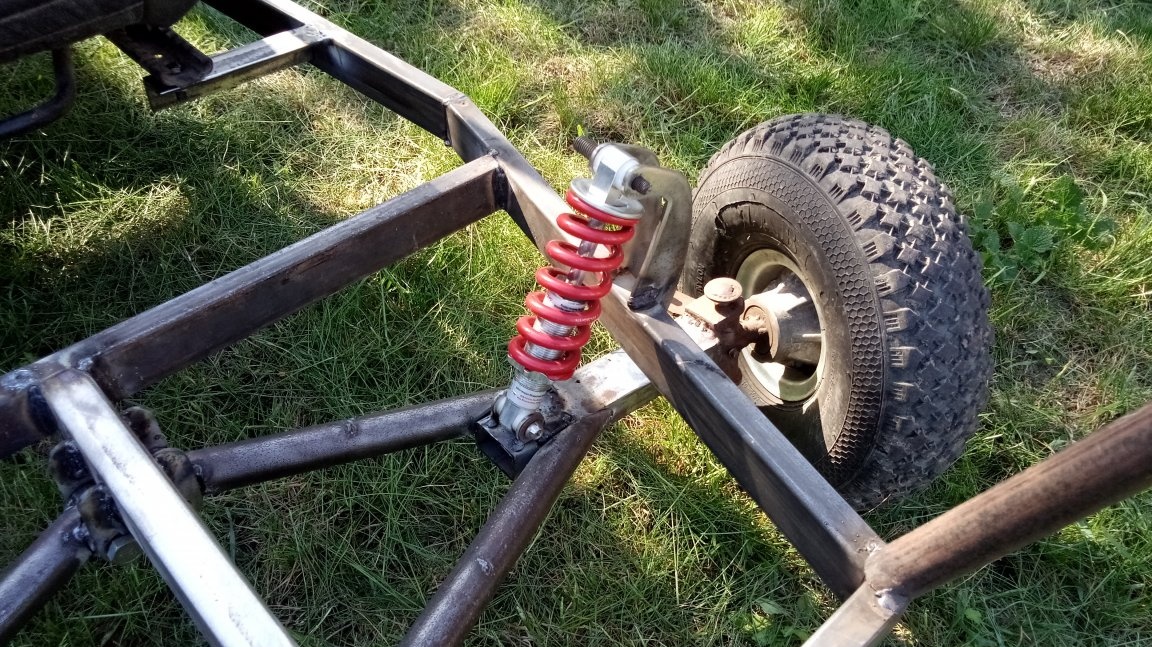
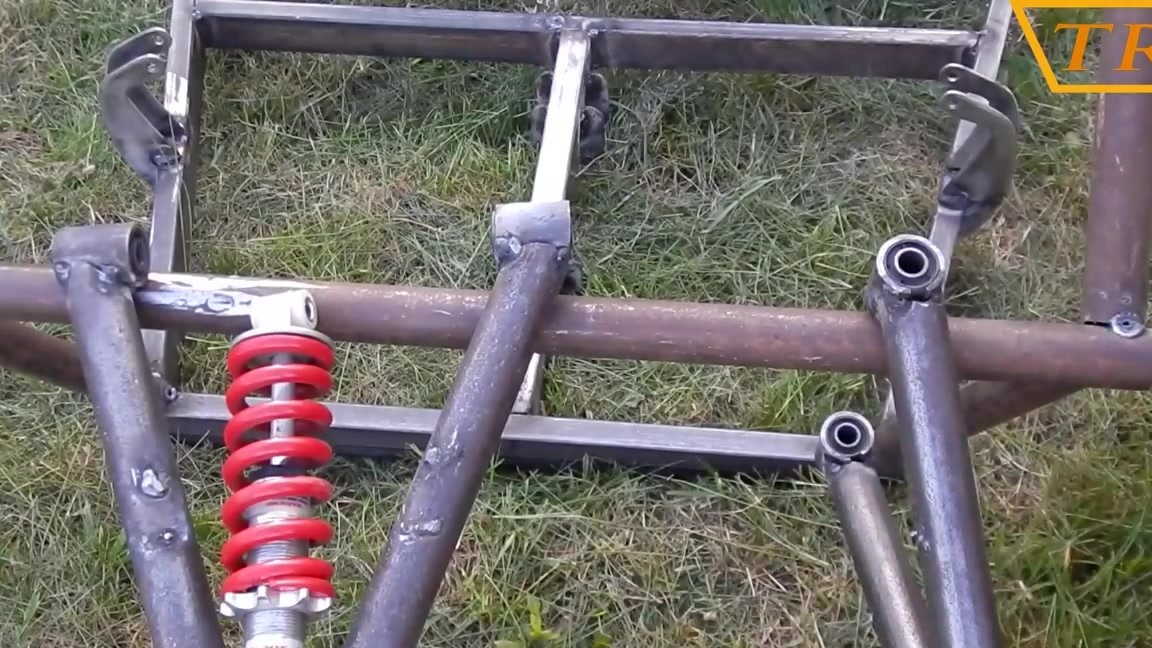
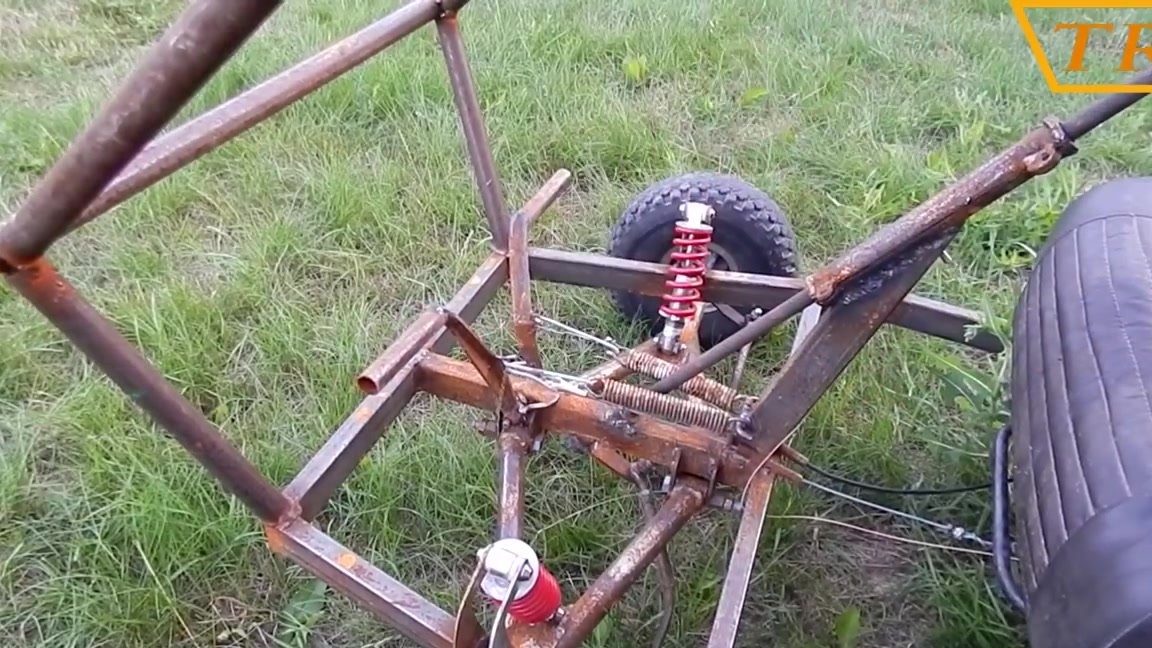
Two pipes are welded to the rear across the frame to which the fastening of the rear shock absorbers is welded.

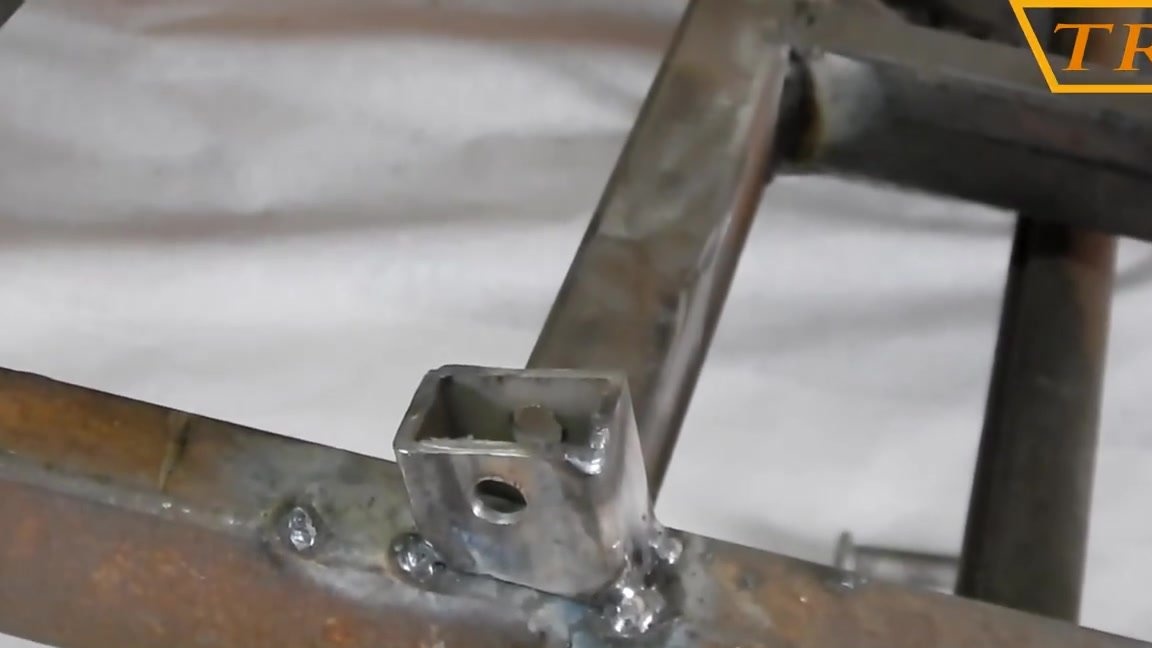
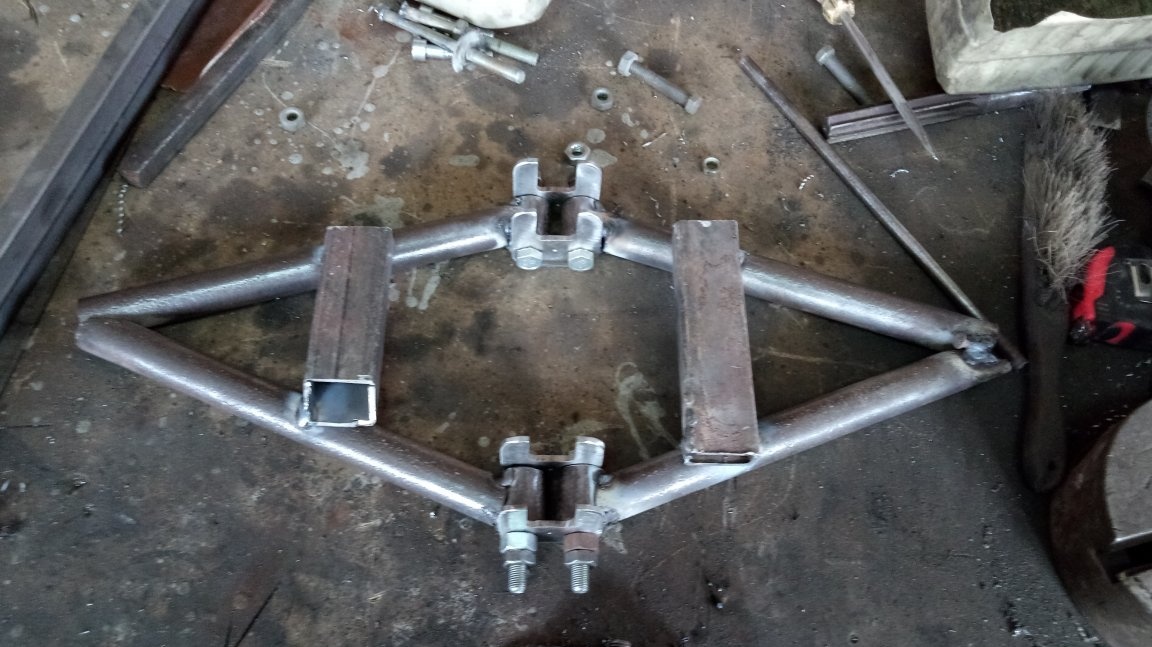
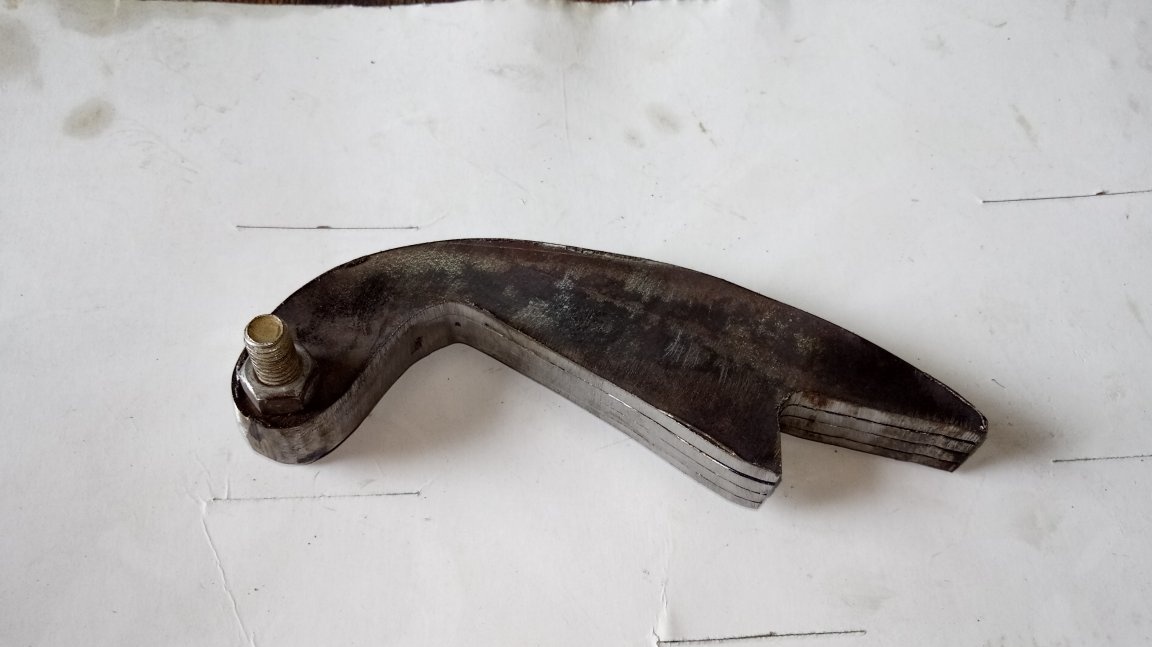
A rear suspension bracket is welded to the rear at the bottom of the frame.
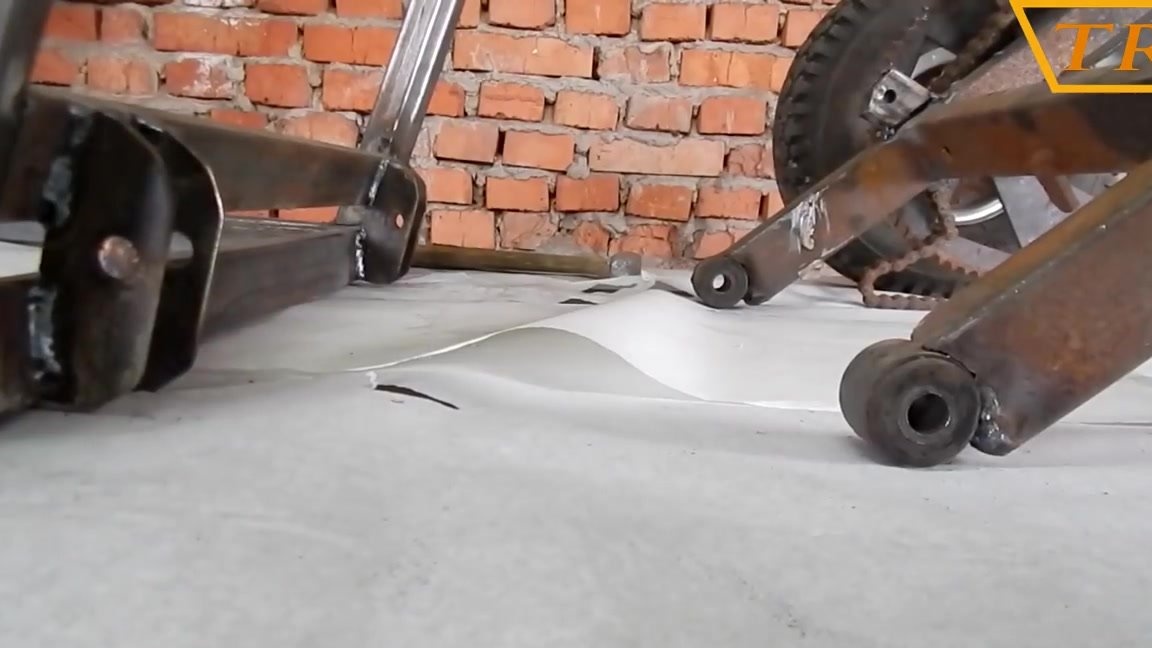
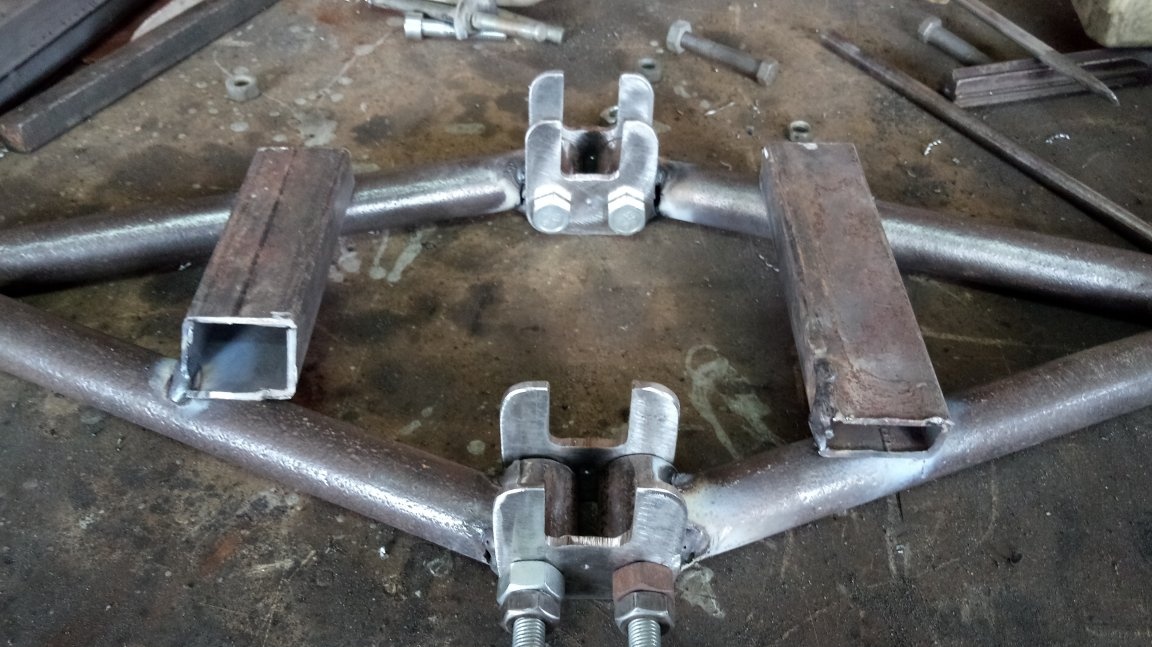
To dock the pendulum with the frame, I used cut-off shock absorber mounts, which were then welded to the ends of the pendulum.
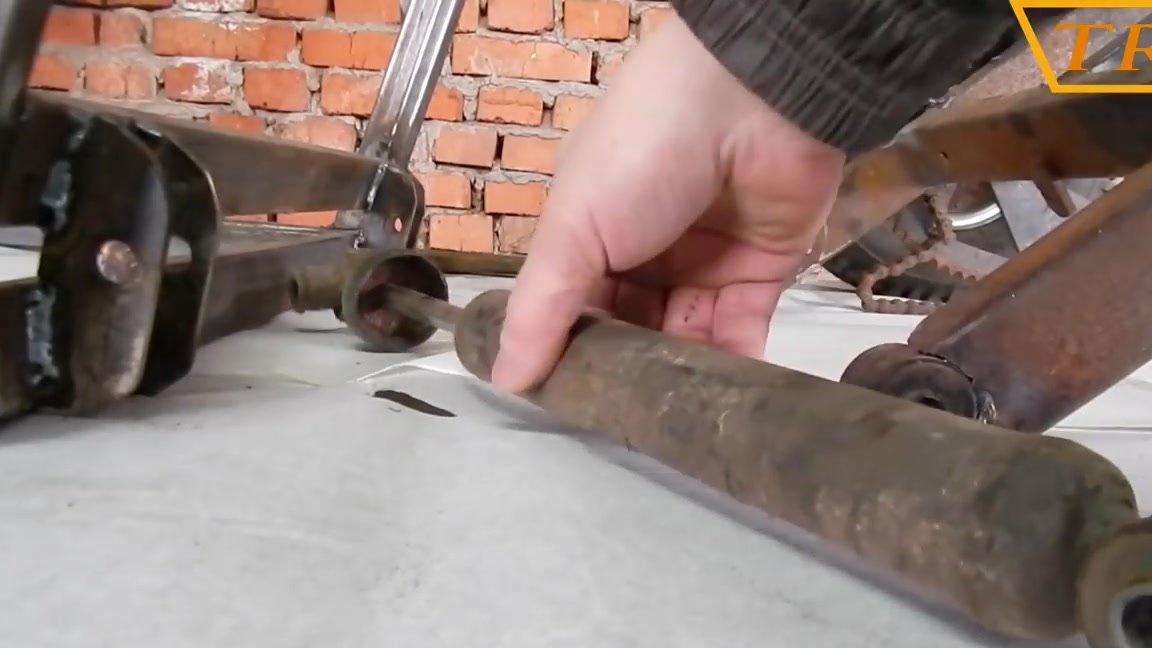
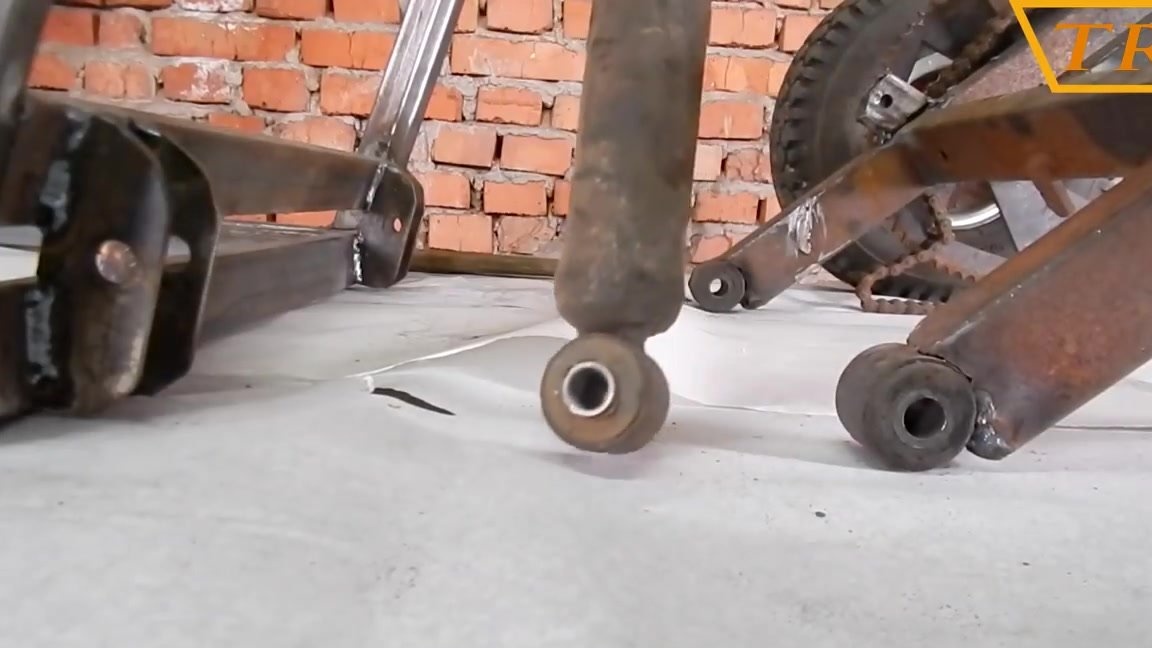
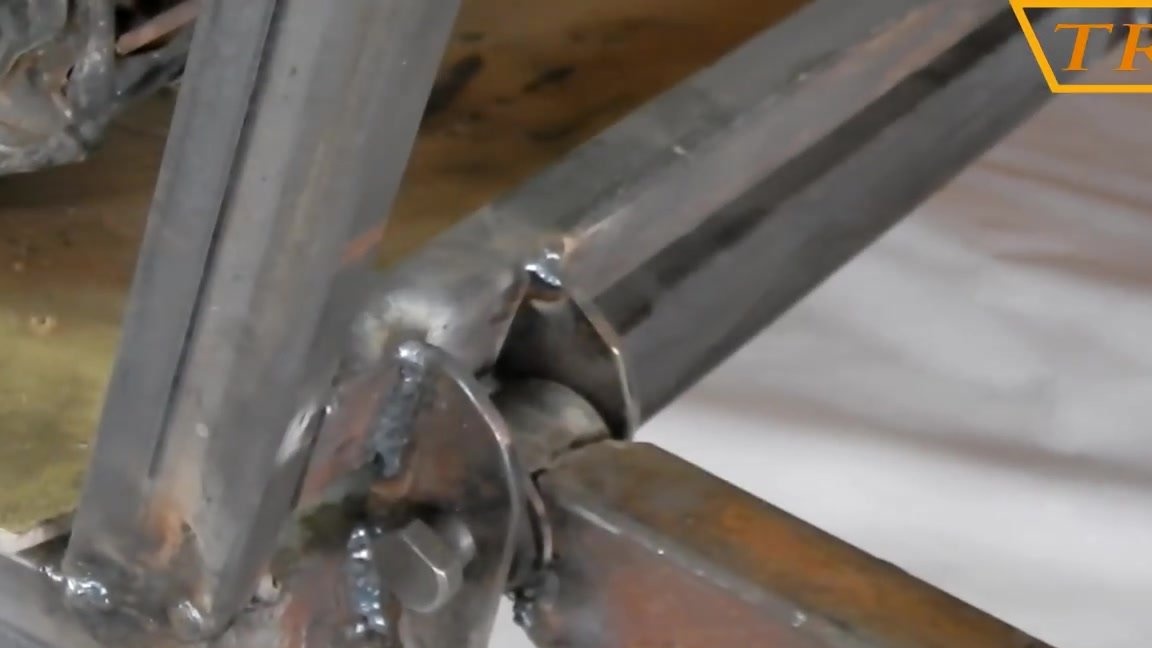
On the pendulum itself, I also welded the mount under the shock absorbers.
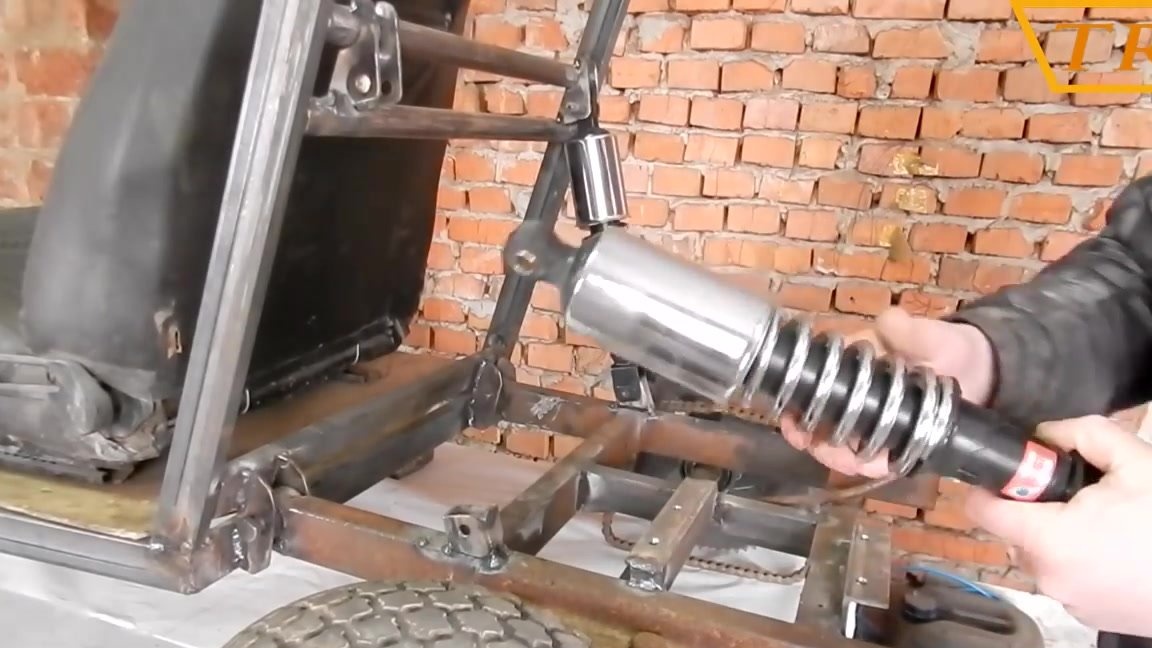
Now I put the shock absorbers in their place and connect everything with bolts. The shock absorbers are Chinese, they look beautiful, but for the Dnieper they are too soft, and just right for me.
Video instruction
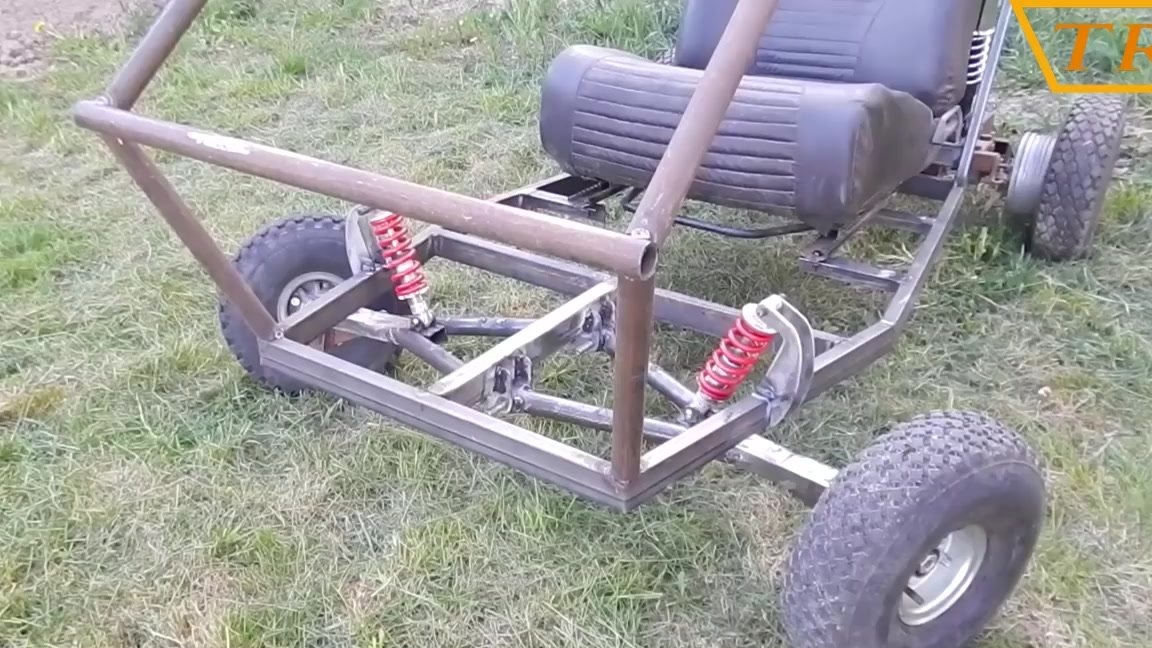
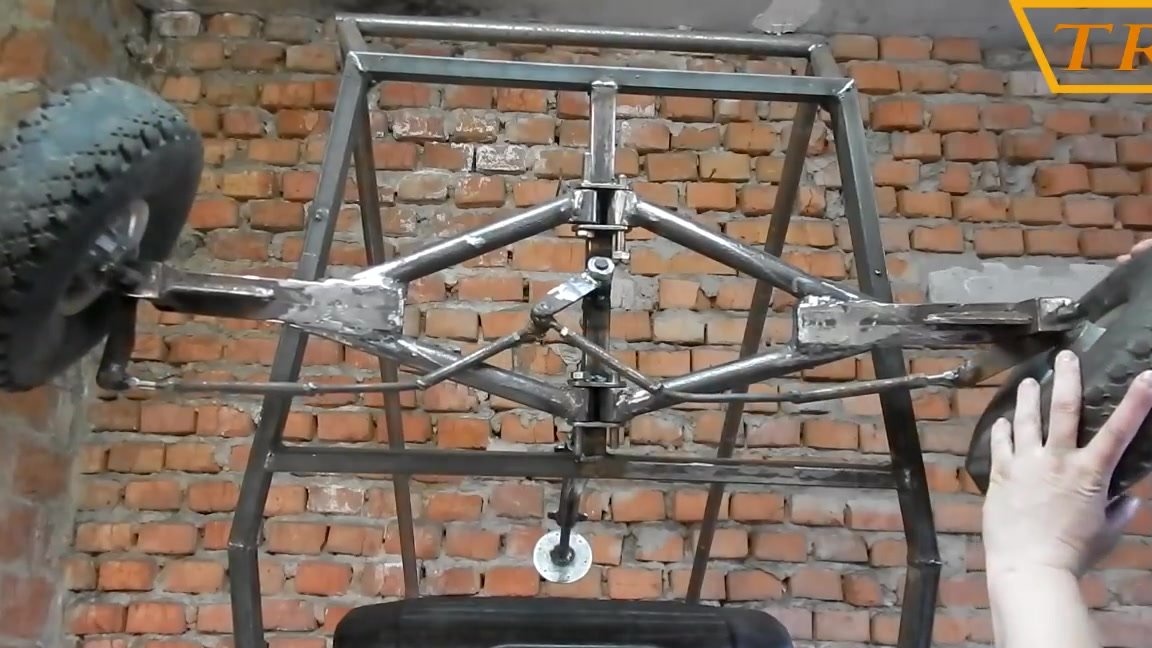
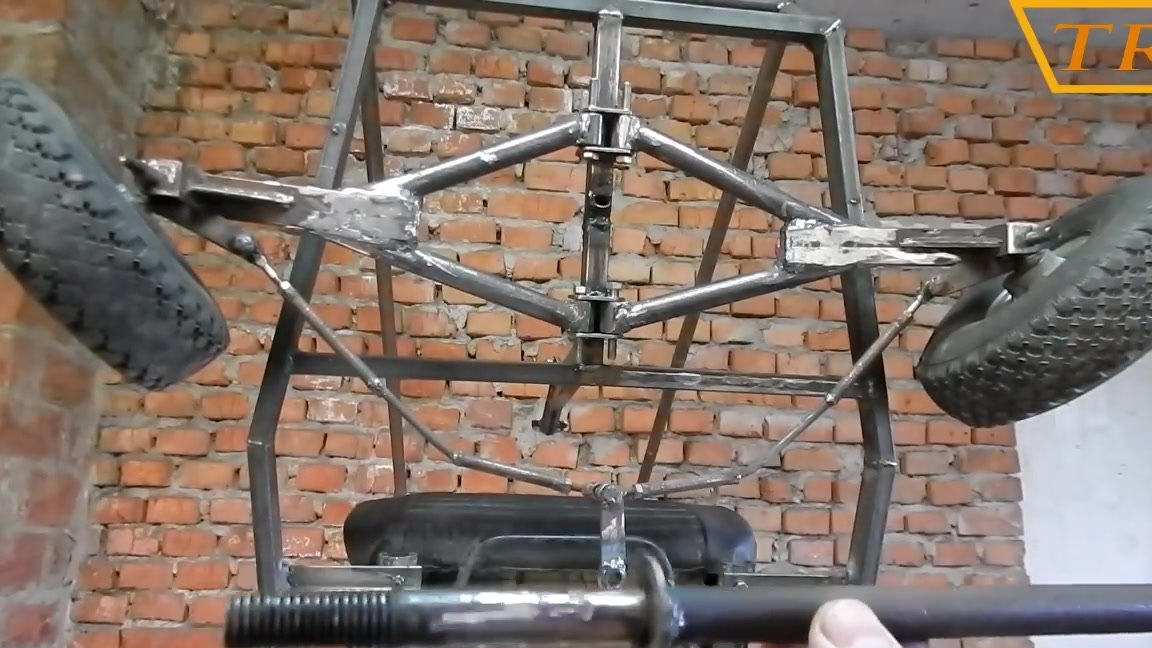
Step three: do the front suspension
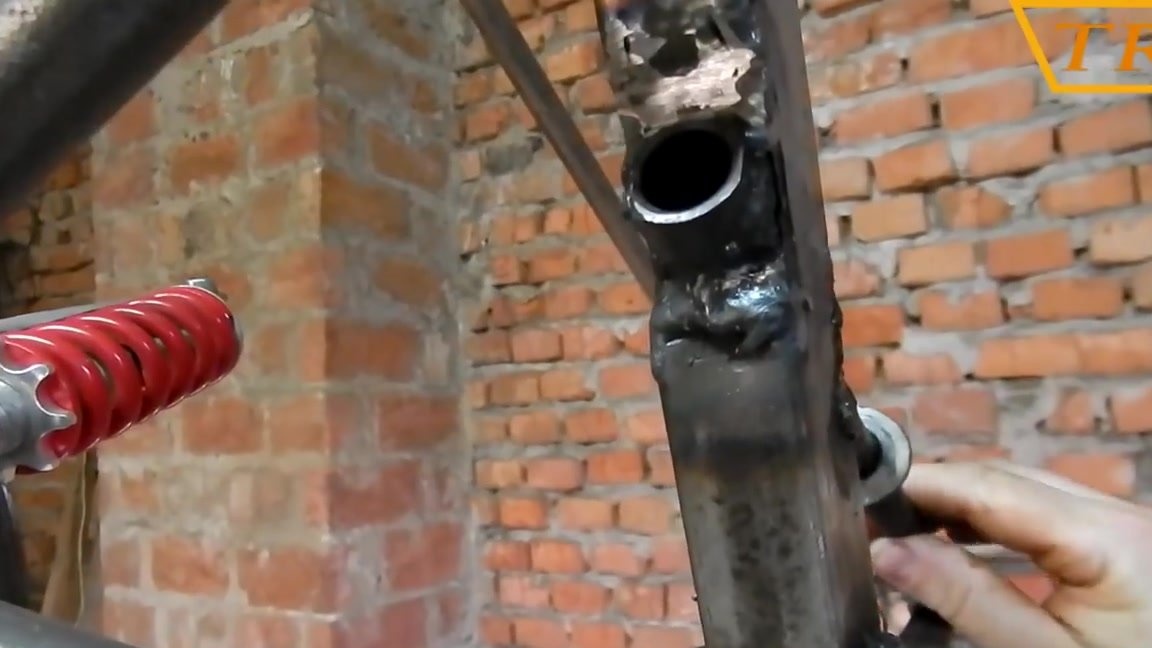
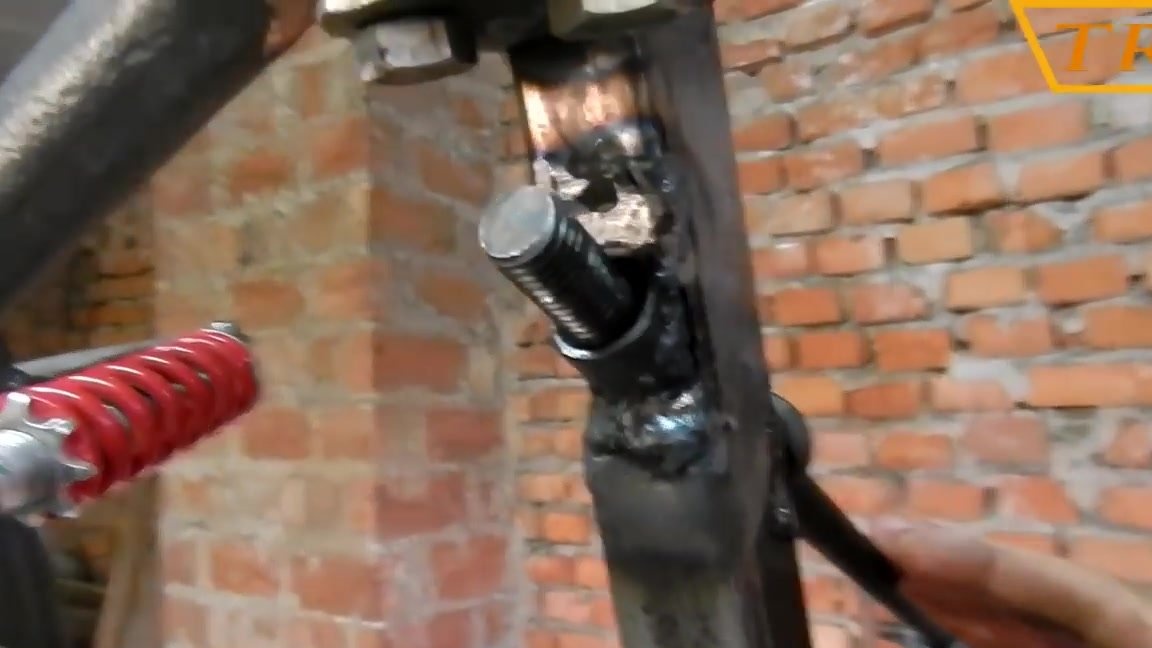
The design of the front suspension did not greatly complicate and made it a single lever. Shock absorbers taken from a mountain bike. They are very stiff, but if you choose the right location for installation, the suspension will work softly. The suspension is welded in the form of a slingshot from a round pipe to which a part of the profile pipe is cut off from the Go-Kart steering beam with a wheel mount. To mount the suspension in front of the frame, spacers from the profile pipe are welded.
Also, mounts for shock absorbers cut from 3 mm sheet metal are welded to the frame.


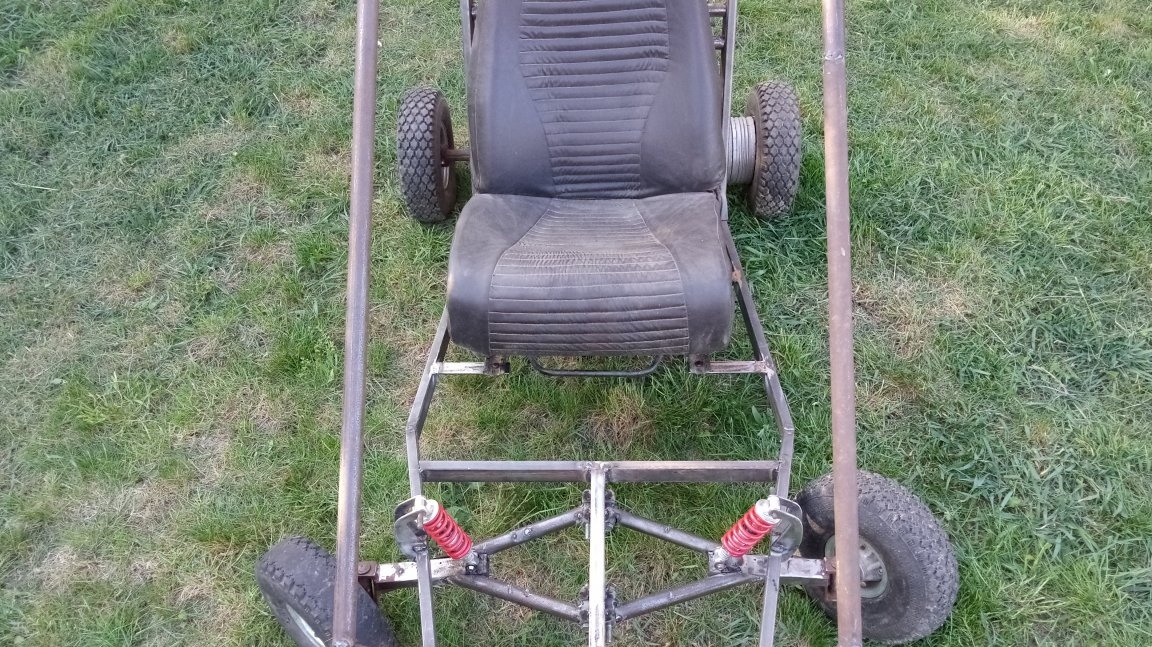
Suspension pendulums are attached to the frame through the silent blocks, which makes the suspension very soft. I took the silent blocks from the pendulum of the suspension of a moped Delta 35x23x10 mm. They are inserted into pieces of a pipe that was cut and adjusted to the size of the silent block, then I welded those pieces of pipe to the suspension.

Video instruction
Step Four: Steering
I also used steering rods from Go-Kart, though I had to cut them to lengthen and bend as required by the suspension design.
A tube is welded into the frame through which the steering shaft passes.
At the end of the steering shaft, a bolt is welded onto which the steering bipod is wound, and is fixed with a nut.
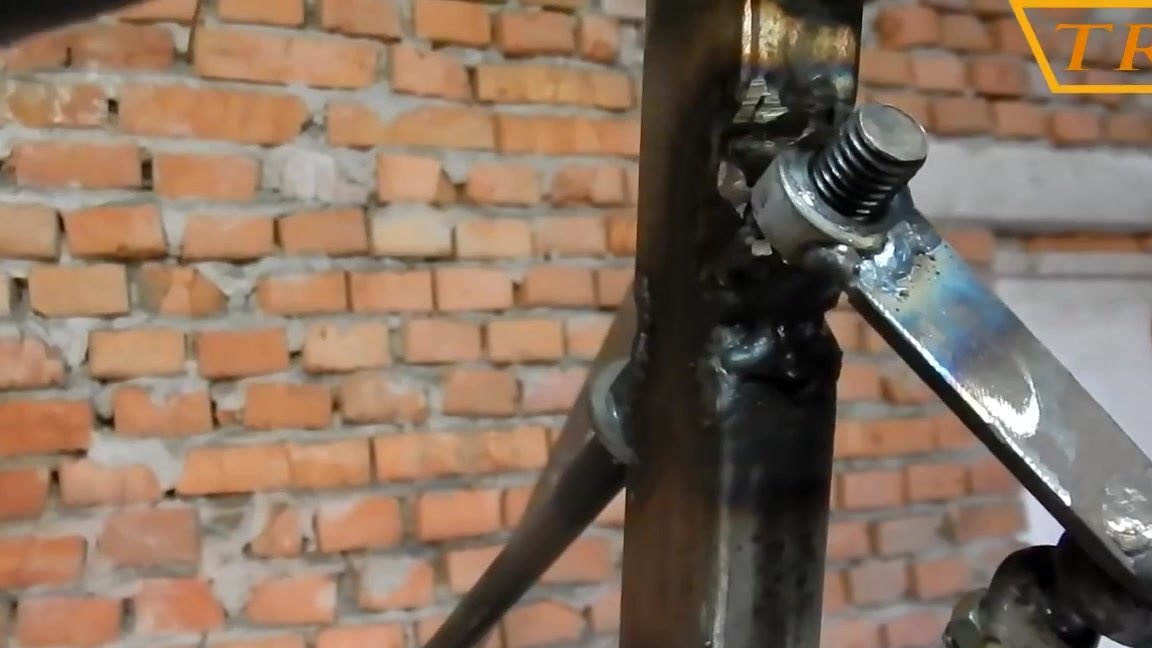

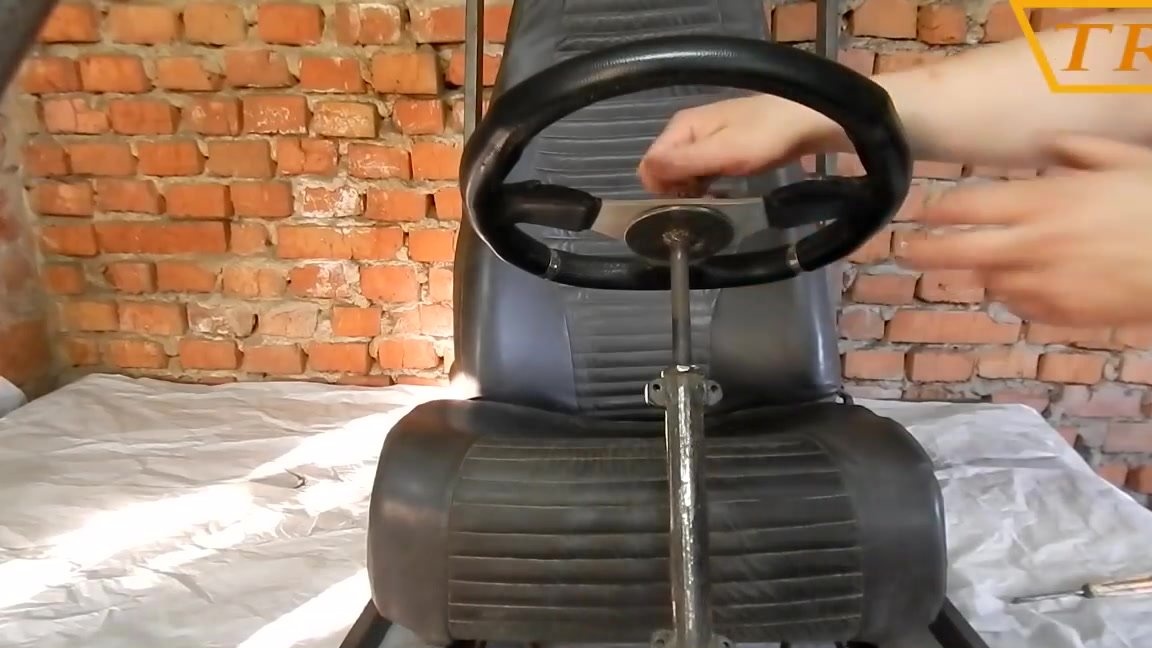
The steering shaft is mounted on a profile pipe welded to the frame. The shaft passes through a collapsible pipe inside which I put a piece of PVC water pipe. Thanks to this, the steering shaft rotates easily and is firmly fixed to the frame.
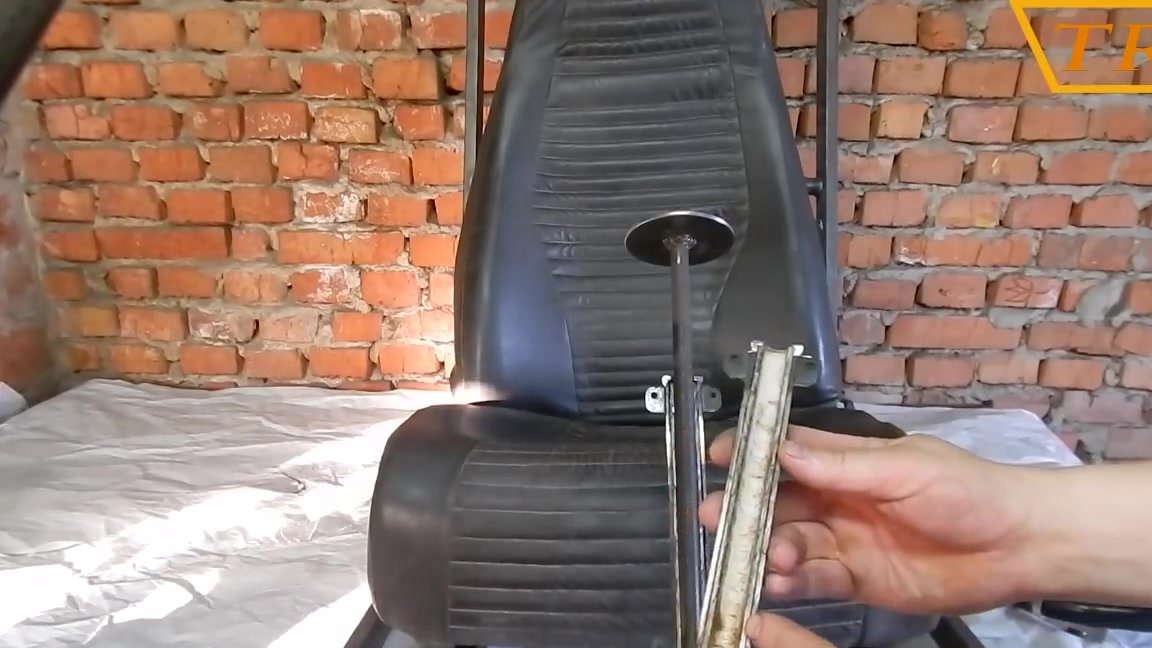
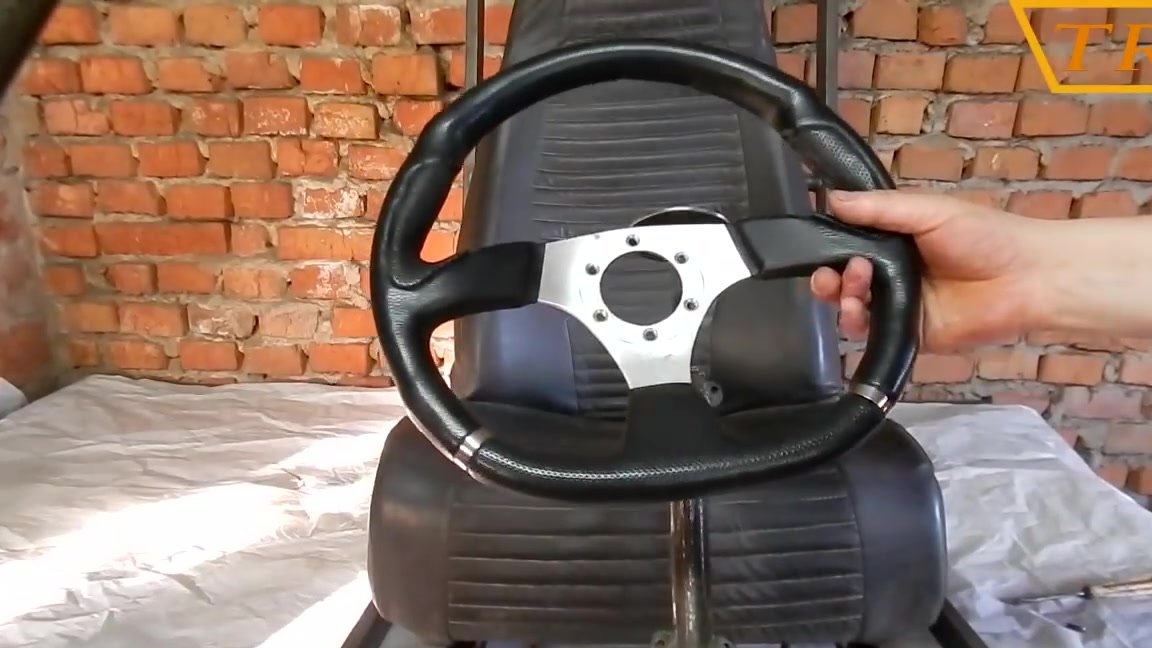
Used steering wheel from the car, such put on the VAZ. The quality is so-so, but this option suits me - light and small.
Video instruction
Step Five: Brake, Throttle, Chair and Gear Shift
The brake and gas pedals are made of a piece of strip and a round pipe, and are attached to the frame by dressing on bolts welded to the frame. Attached to them are a throttle cable and brakes.
I took the front car seat from a foreign car. It is mounted on four bolts to the corners welded to the frame. I did the gearshift using the cables. This was the only option since the suspension is always in motion.

Conclusion
While the buggy has an incomplete look, and much more needs to be done. Of course, I still have to disassemble everything, clean all the parts from rust and paint. Some elements will also be added to the frame and the floor will be made. All this I think is to finish in the spring.


I advise everyone to do something similar. From riding on such a device you will get a lot of pleasure and positive emotions that are not comparable to driving a car. Believe me, such an attraction will be the best entertainment for your friends on camping trips. Riding a buggy will not leave anyone indifferent!