

If you have an old hoverboard, you can make an excellent electric bike out of it. Two brushless motors are installed in the gyroscope, they rarely break and have a rather long service life. On one such engine, the author made himself an electric bike, everything turned out quite interesting. Although the design of the bike has changed a bit, it still remains to be a bike, that is, you can ride it in the classical way if the batteries run out.
An interesting fact is that when the engine is running, the pedals do not rotate, you don’t need to wave your legs, the driving sprocket of the bicycle now also works on a ratchet mechanism. Manufacturing process homemade not complicated, of the parts here, parts from of bicycles. If you are interested in the project, I propose to study it in more detail.
Materials and tools that the author needed:
Material List:
- ;
- bike;
- 2 sprockets from the rear wheel (with ratchet);
- chain;
- battery;
- ;
- steel corner;
- steel clamps;
- bolts with nuts;
- bushings from the rear wheels of the bike;
- wires;
- engine control knob;
- a leading asterisk from the bicycle.
Tool List:
- grinder;
- welding machine;
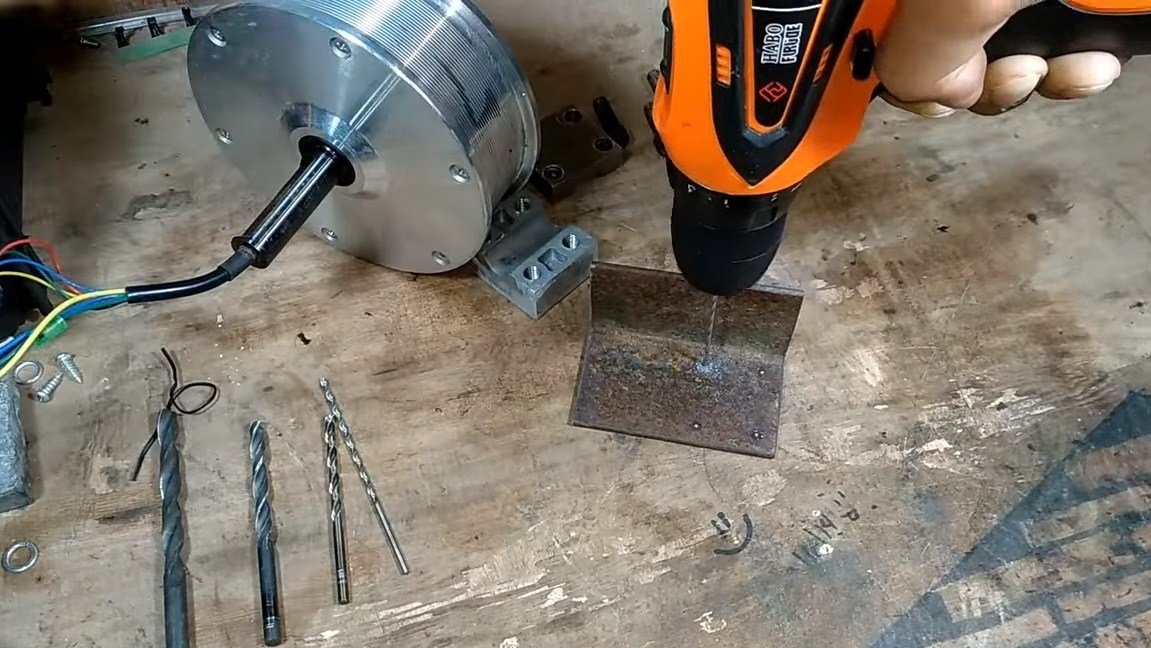
- drill;
- screwdriver and wrenches;
- electrical tape.
Bicycle manufacturing process:
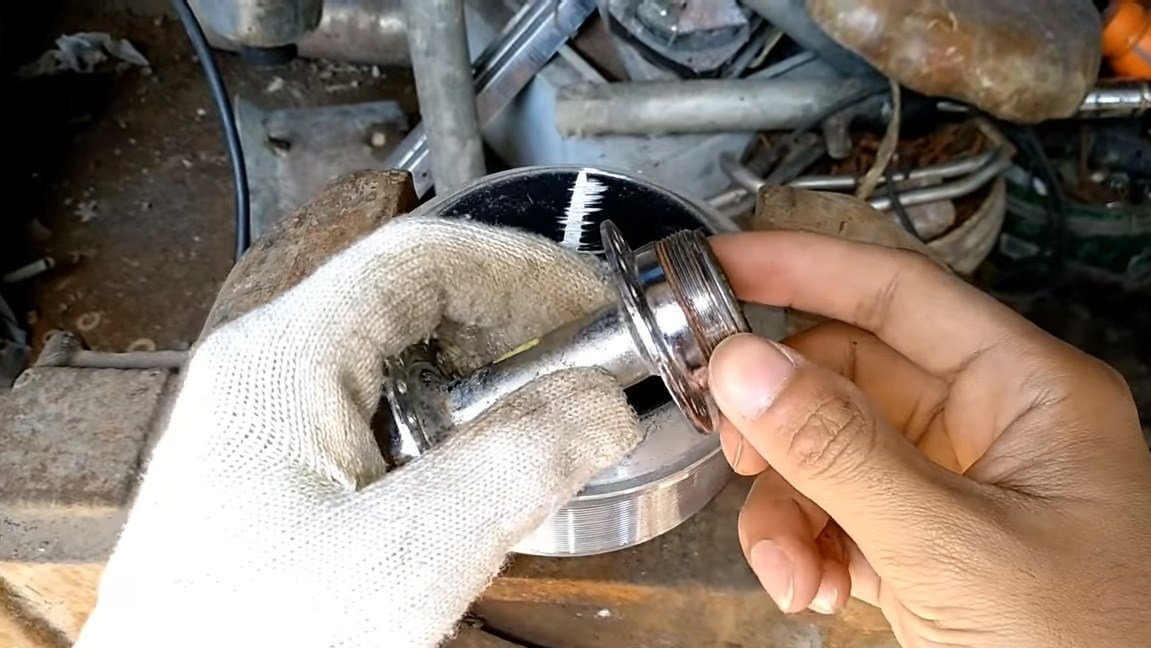
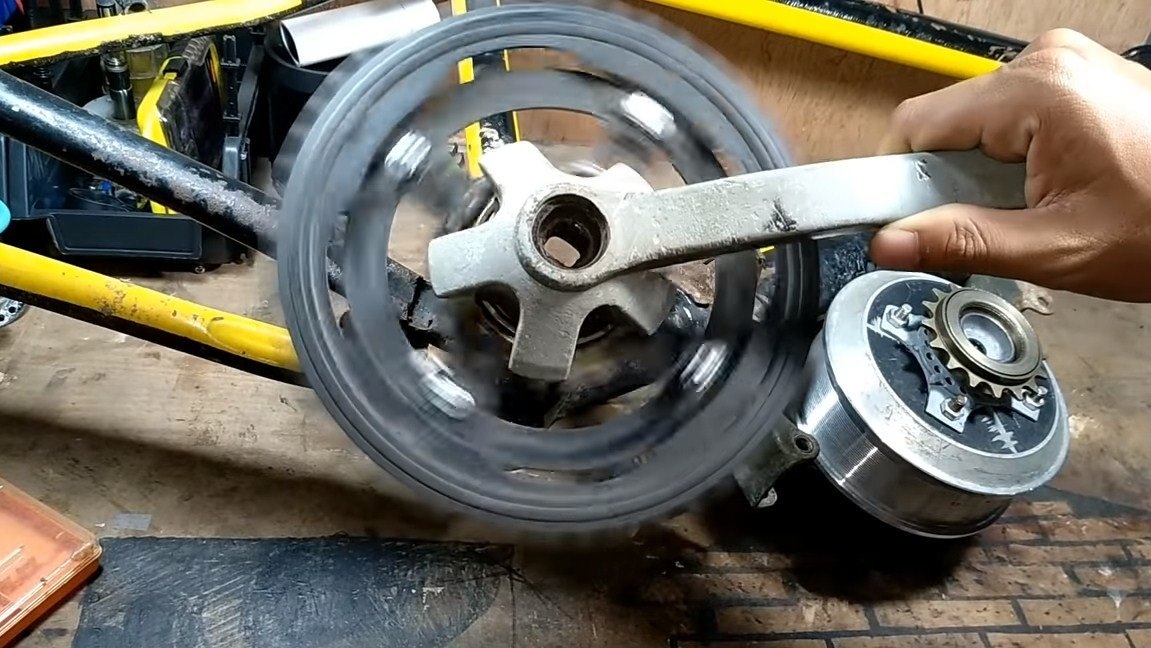
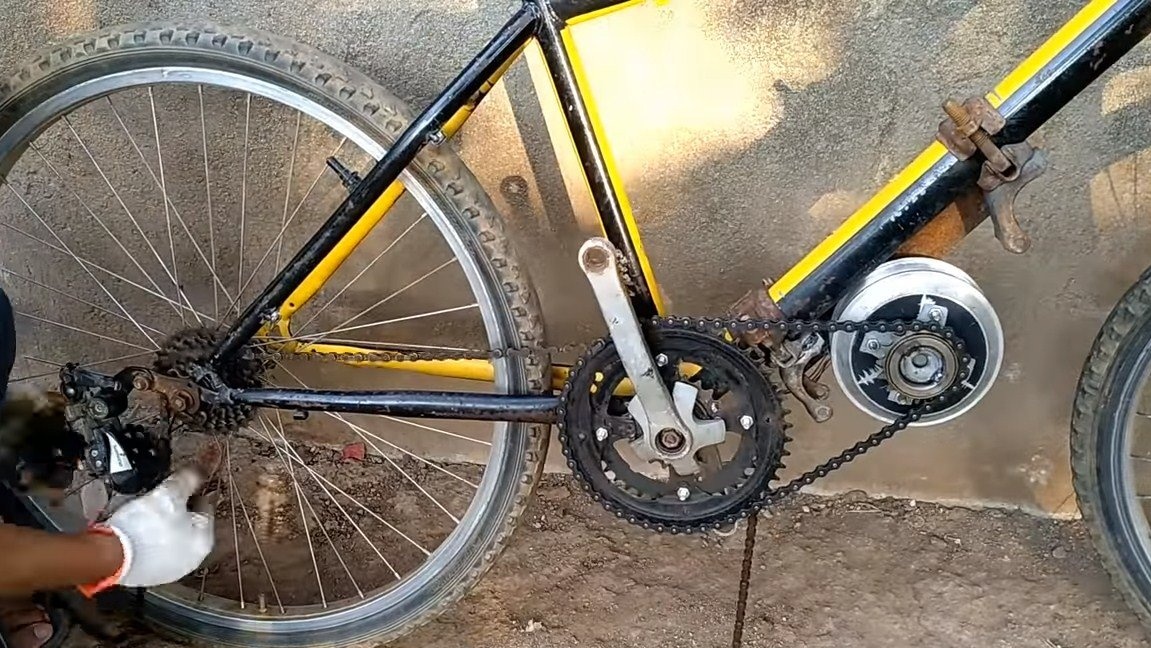
Step one. We finalize the leading sprocket of a bicycle
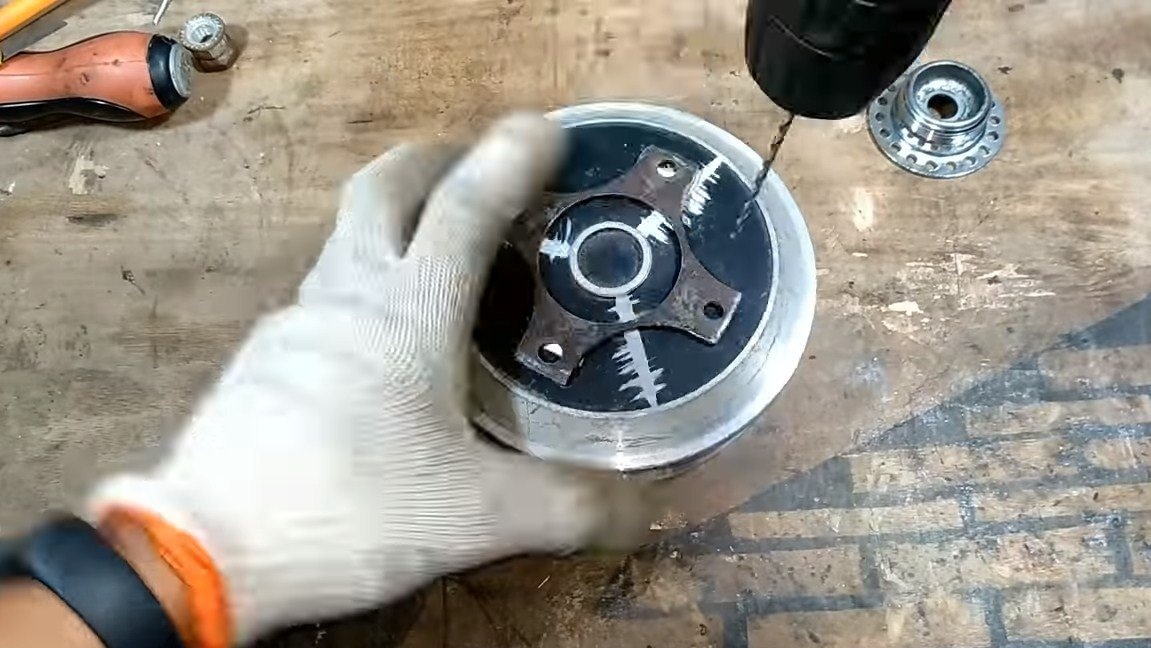
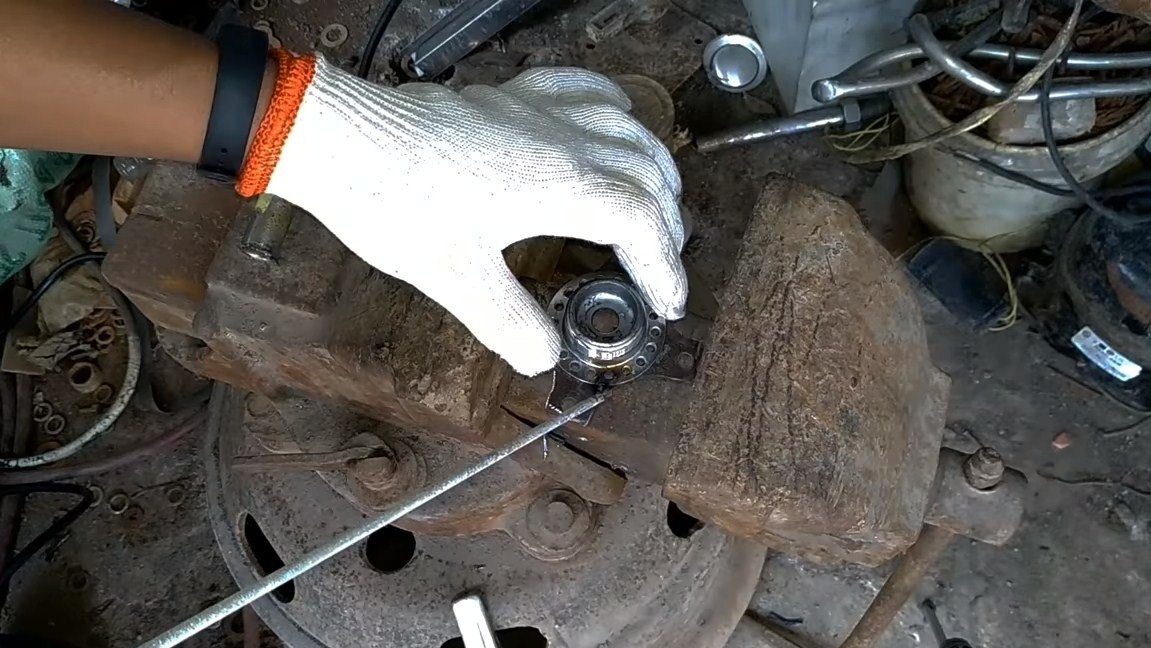
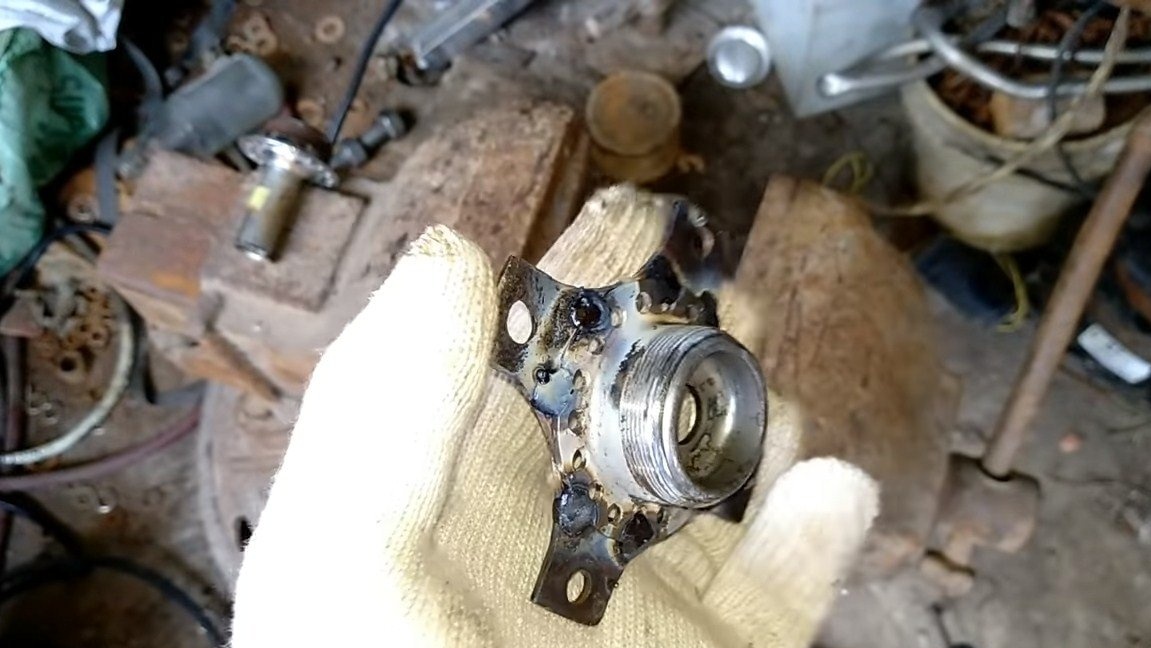
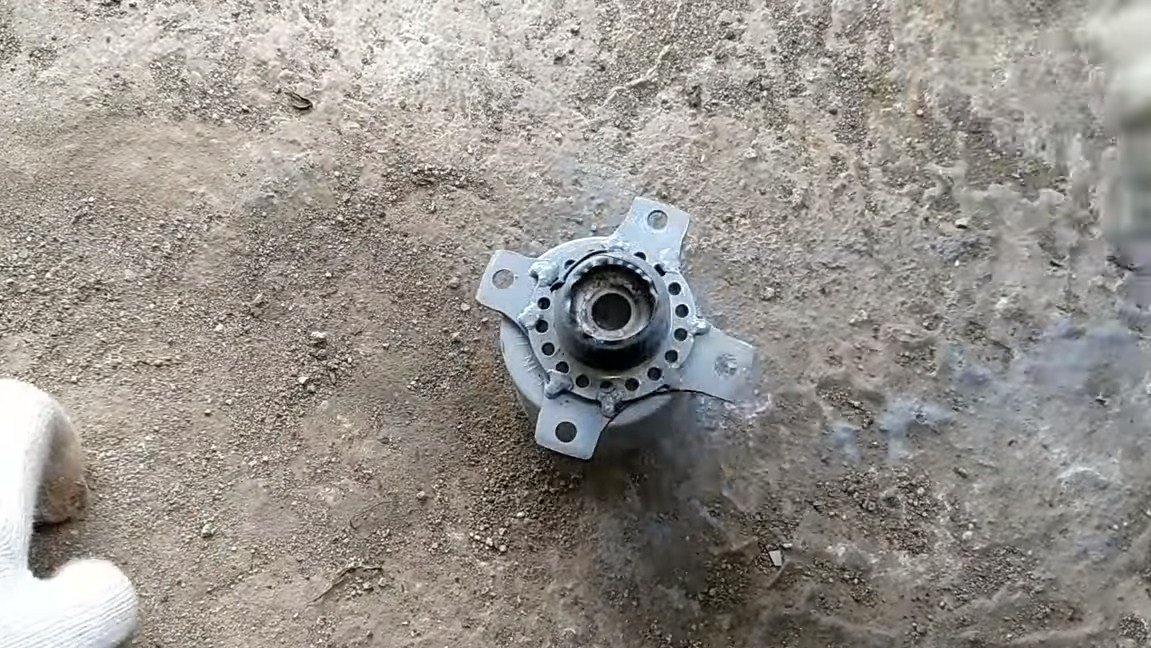
To begin with, we modify the leading sprocket of the bicycle, we need to make sure that the ratchet mechanism appears here. Thanks to this refinement, the pedals will not spin when the engine is running. At the same time, we can always ride on the pedals if something breaks or the battery dies.

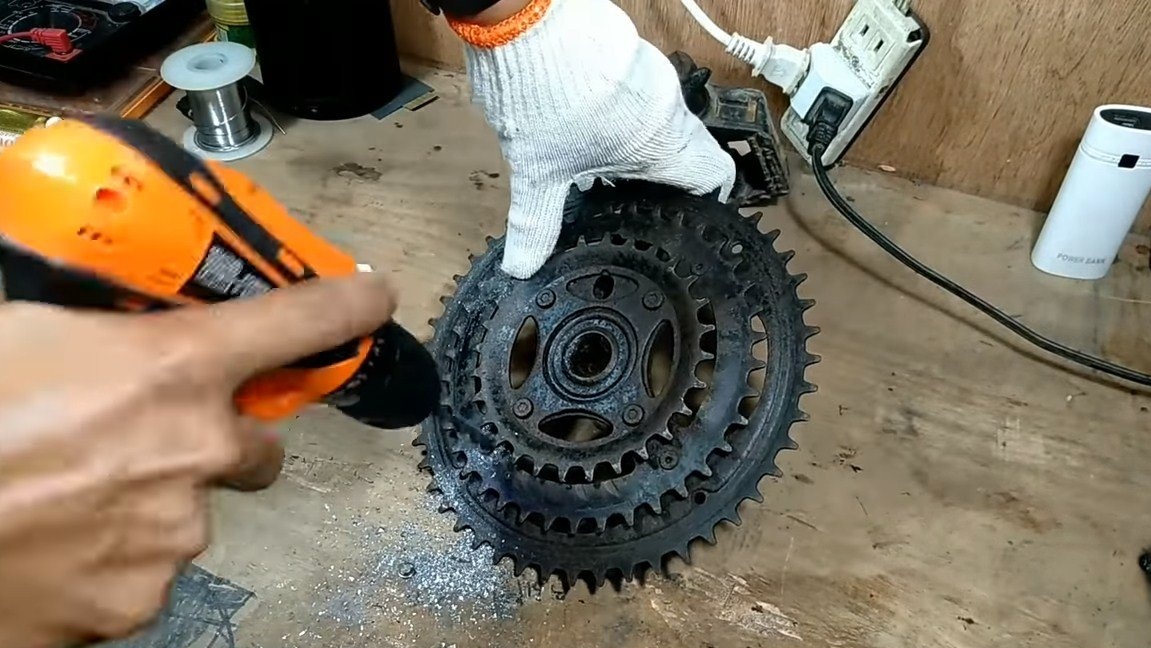
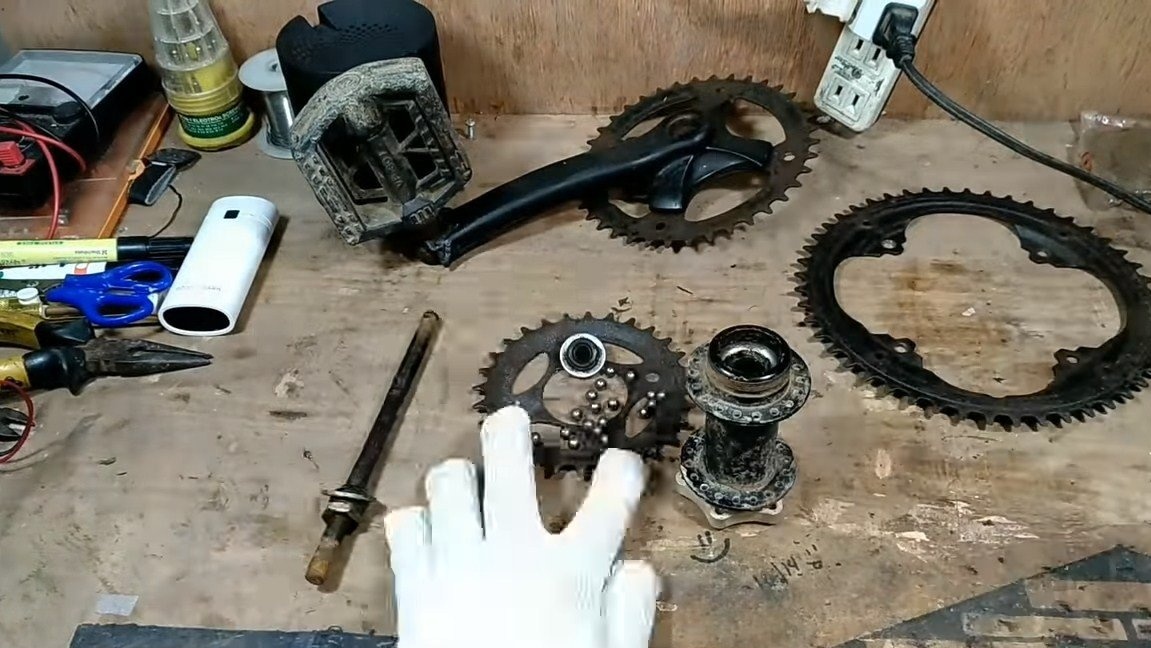
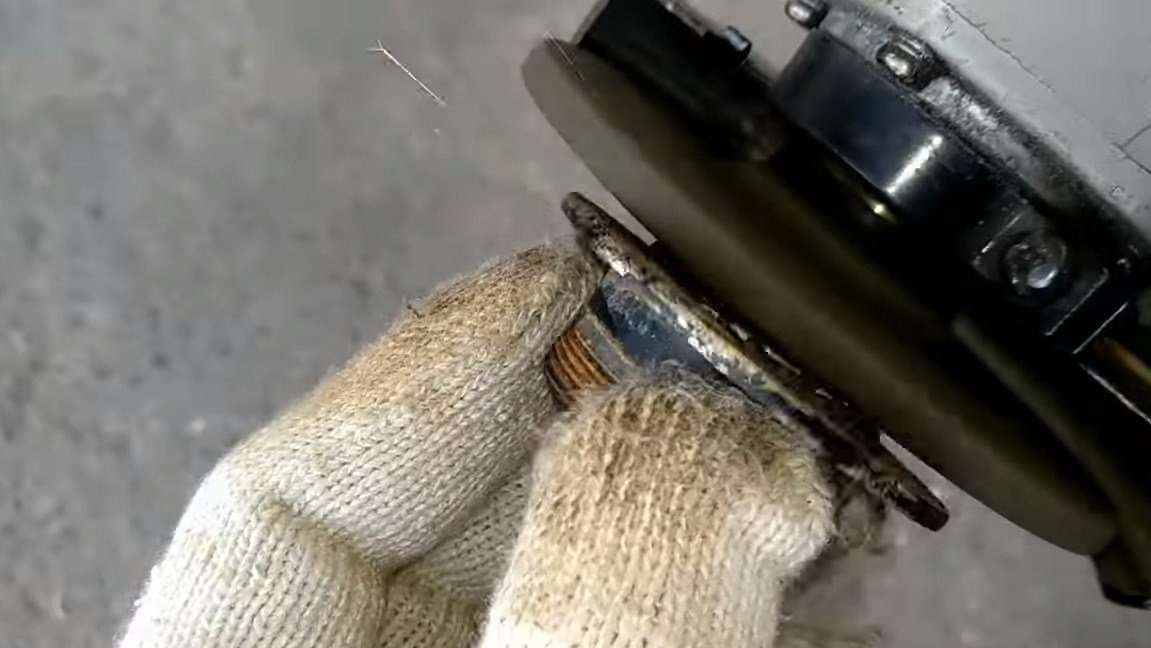
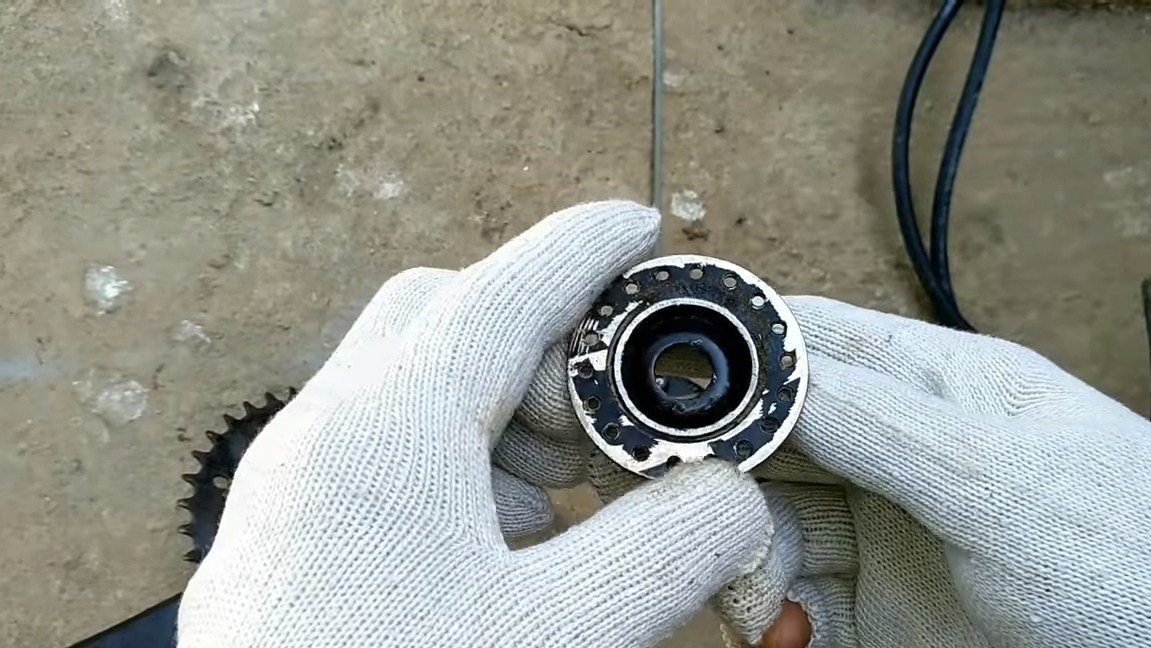
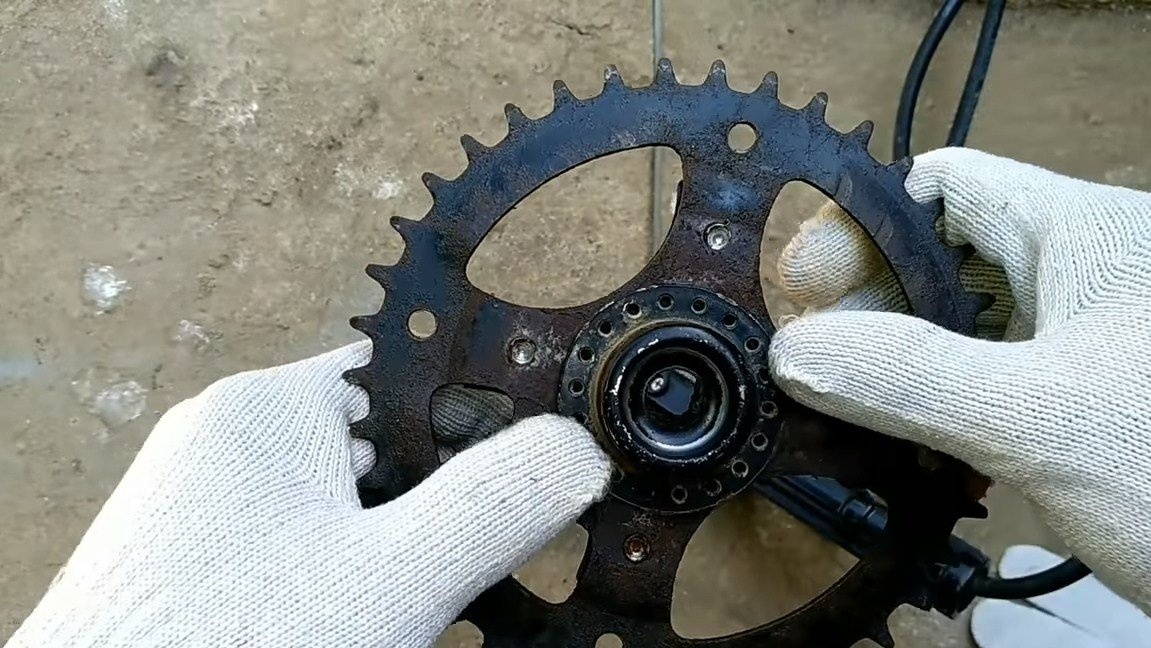
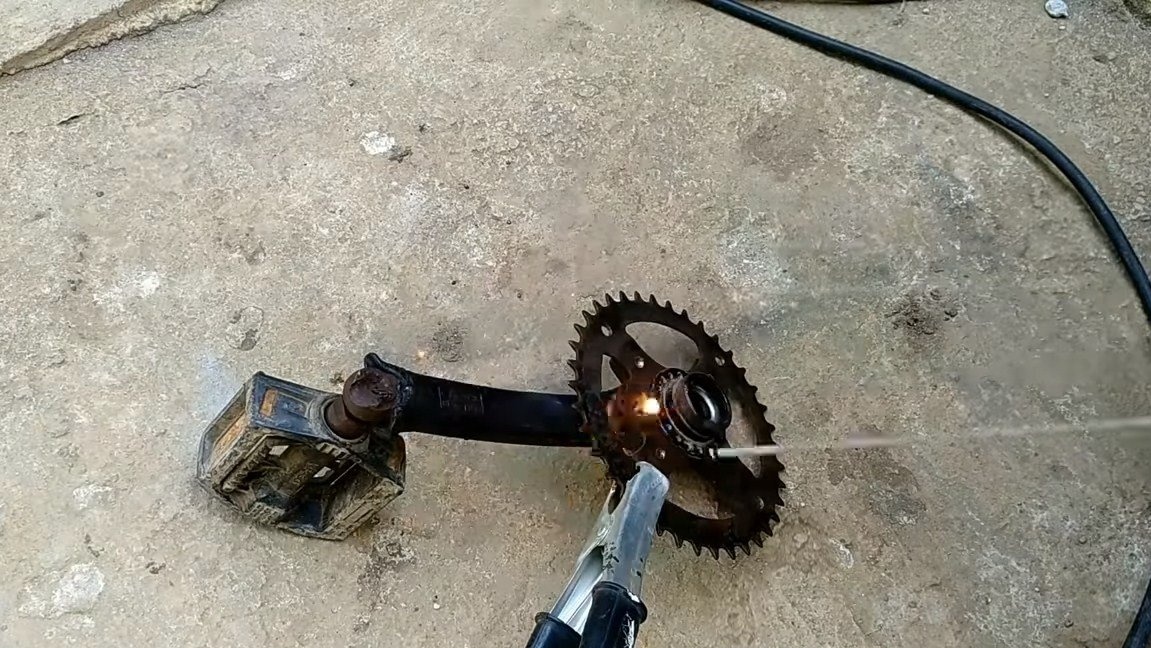
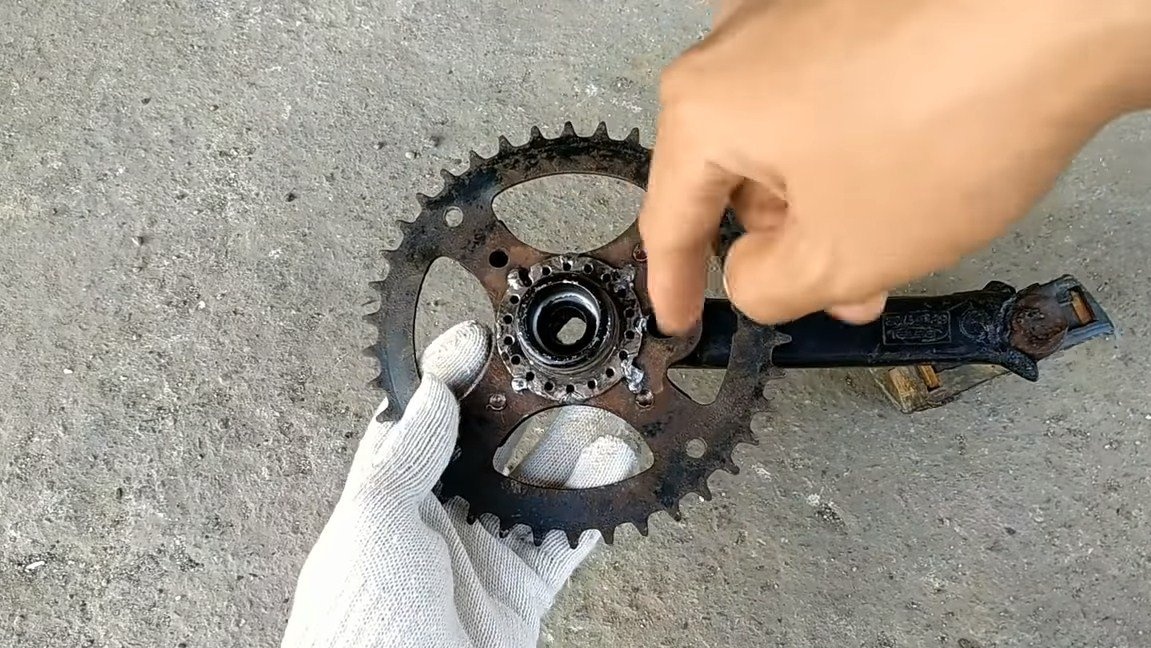
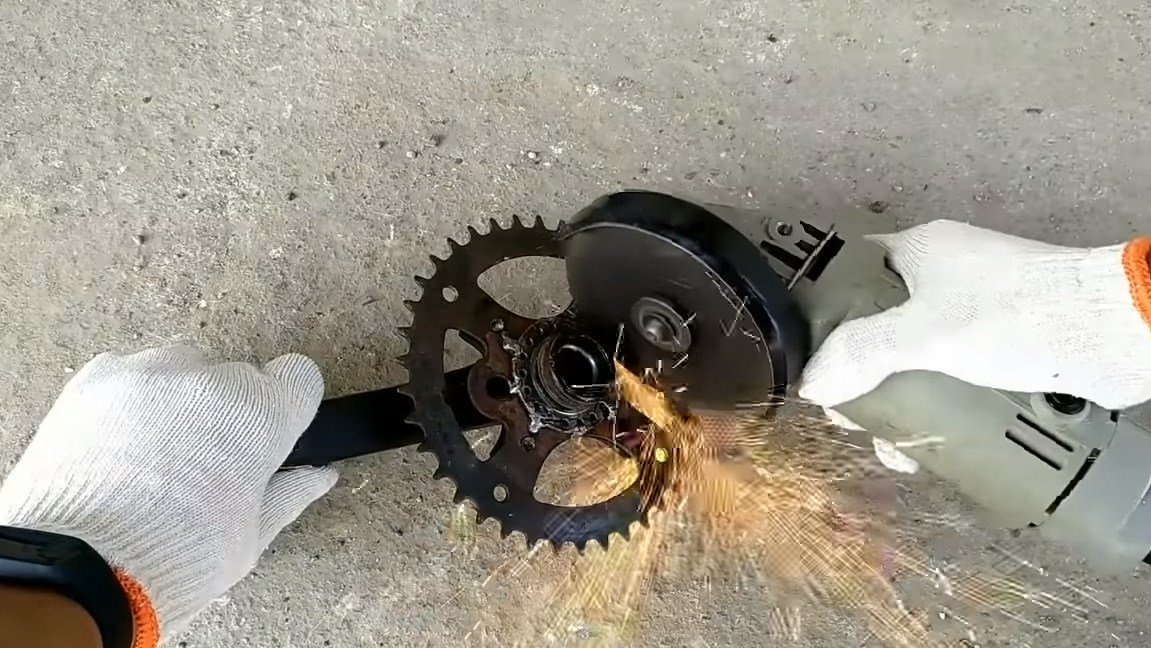
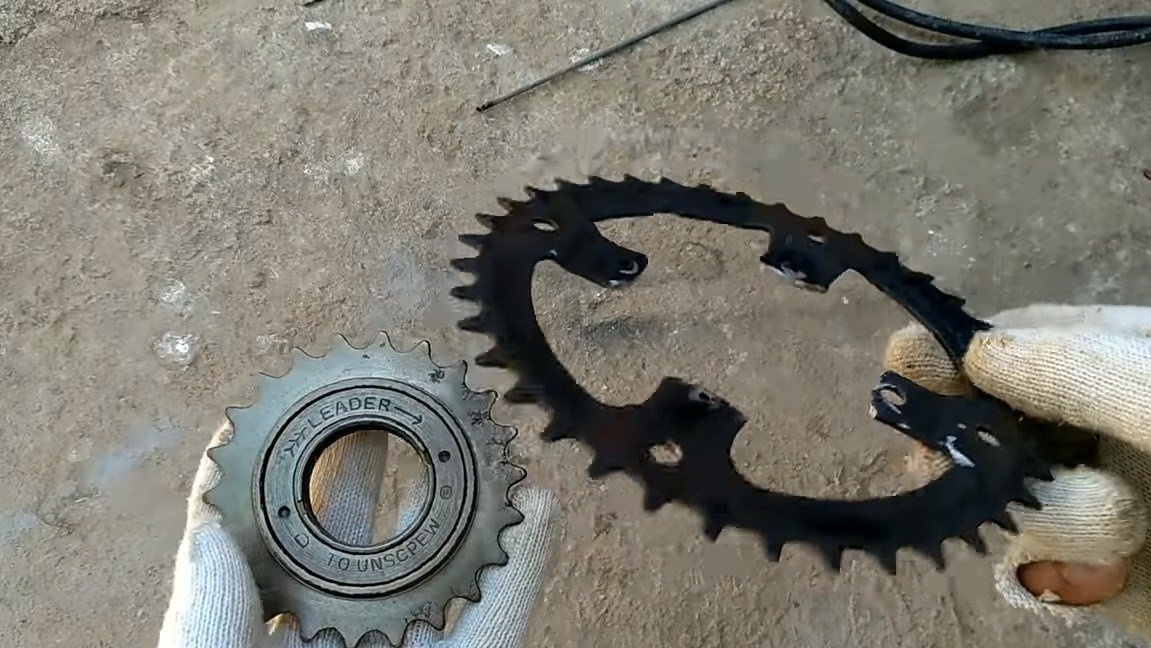
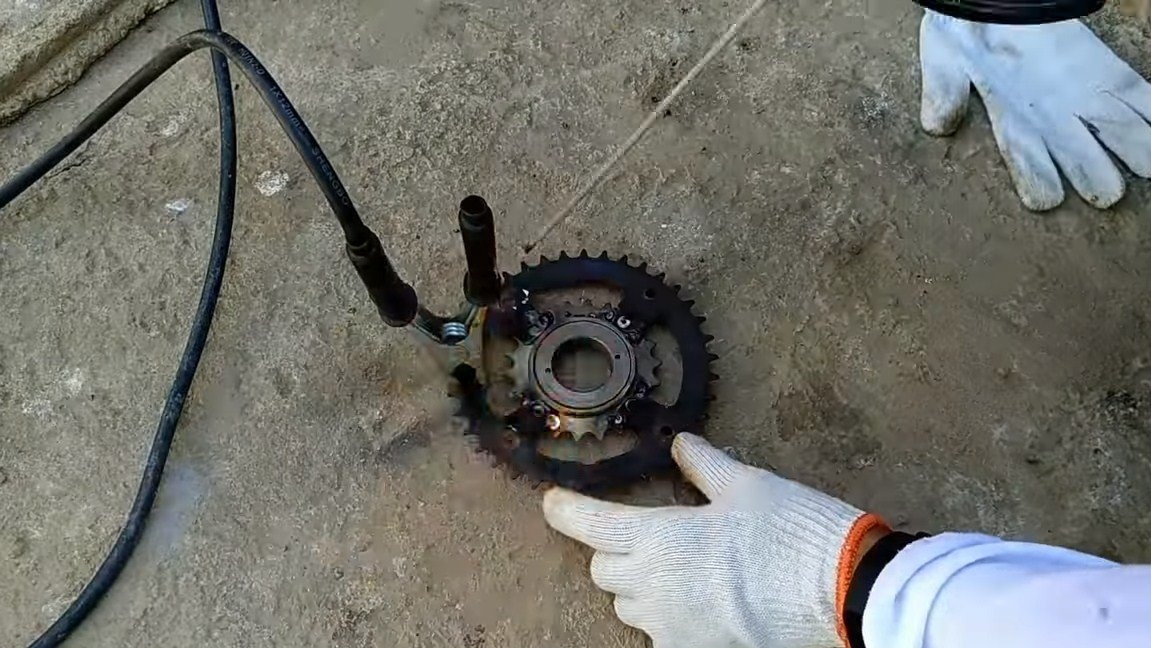
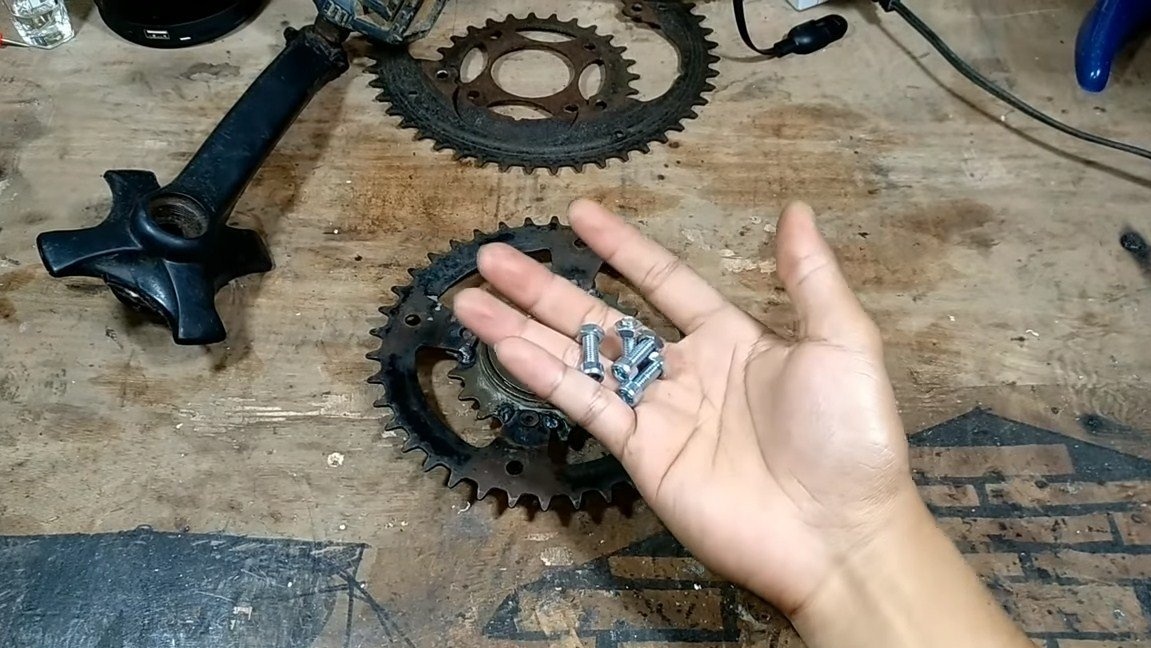
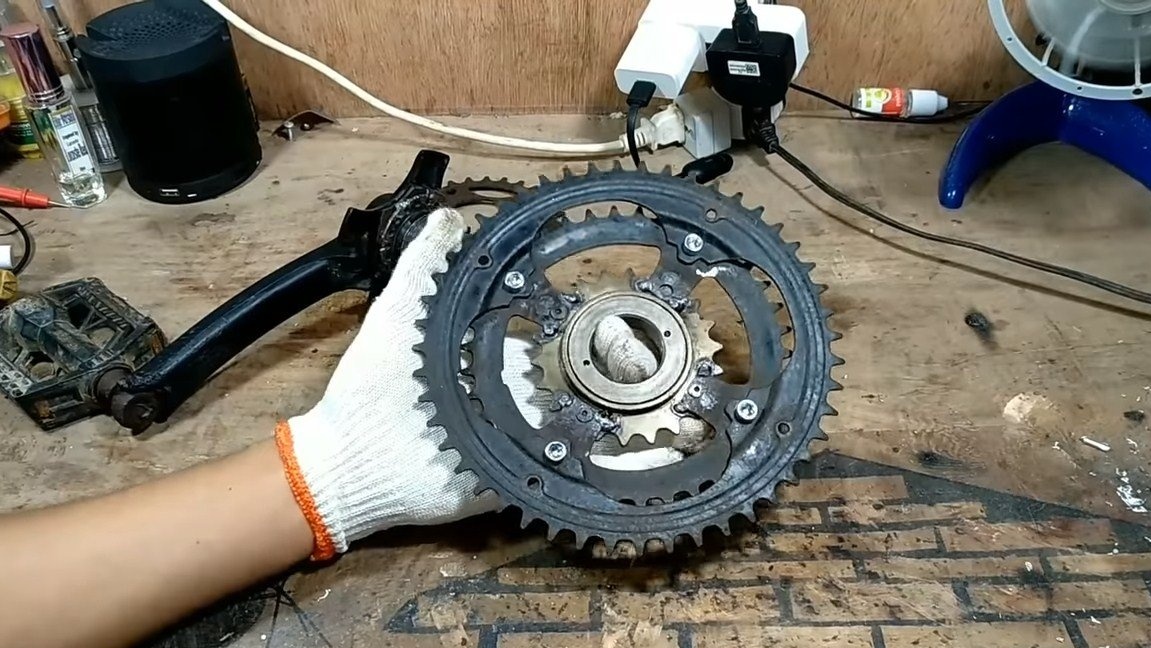
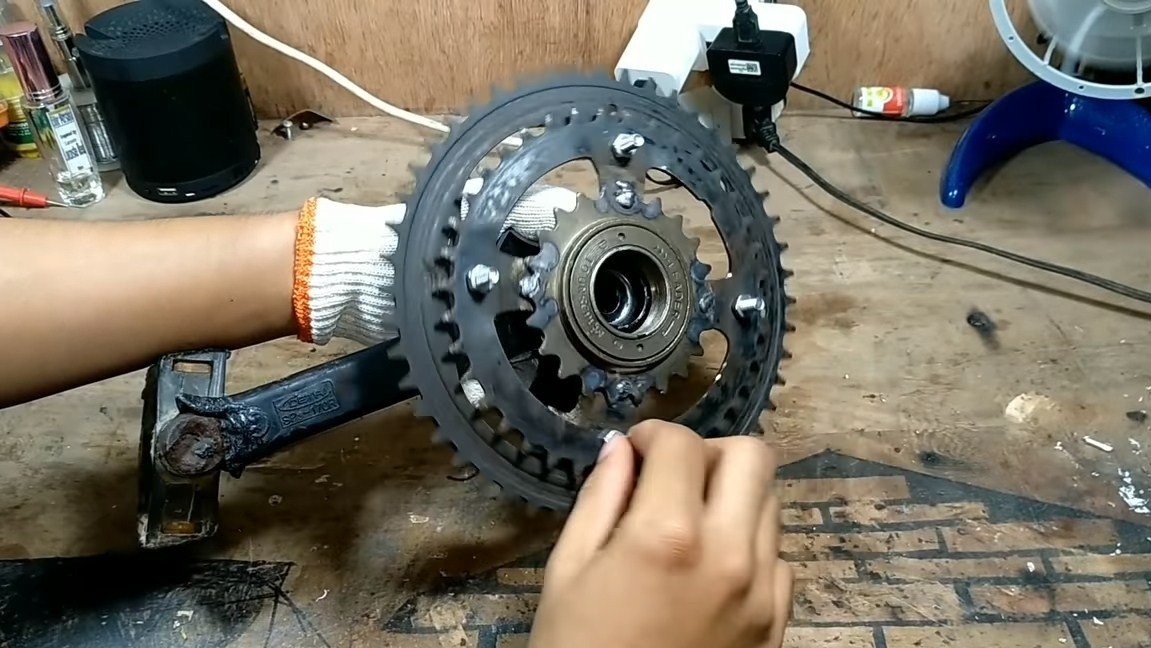
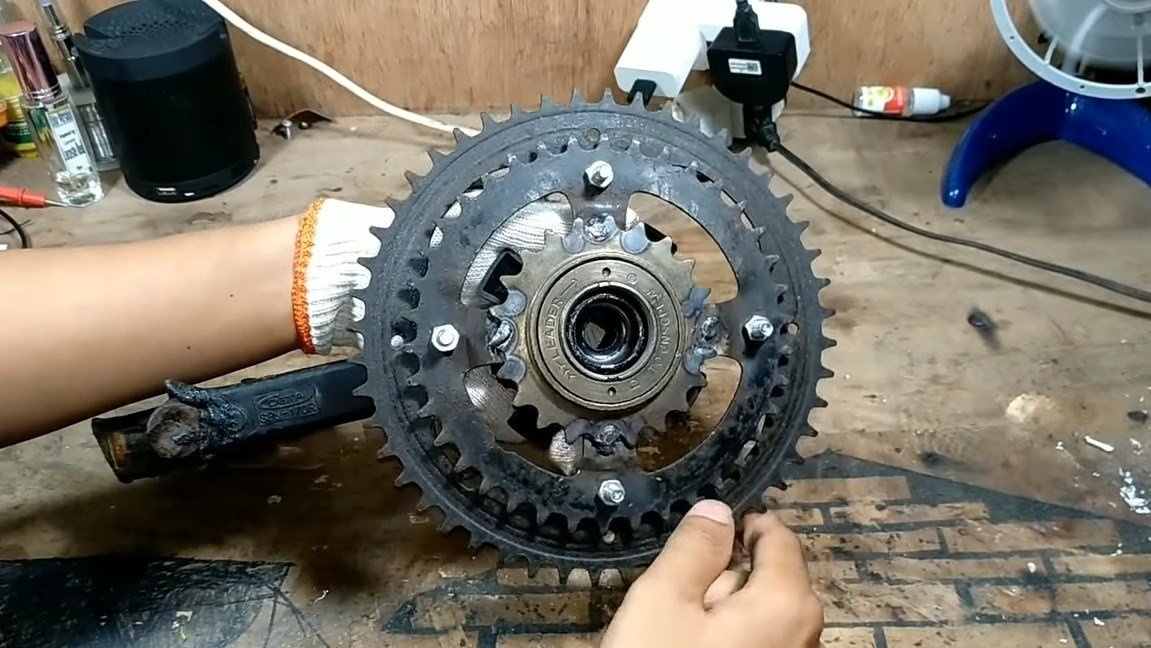

For such a refinement, we need a hub from the rear wheel, as well as an asterisk with ratchet. We disassemble the cartridge, drilling rivets. As a result, we will have a connecting rod with a small drive sprocket, weld a sleeve from the rear wheel of the bicycle here, and then cut the drive sprocket. Further, on the welded sleeve, you can install a driven sprocket from the wheel with ratchet. We weld the middle driving sprocket of the bicycle to this sprocket, and then we fasten the largest one to the middle one with bolts and nuts. As a result, we get two stars on the ratchet mechanism.
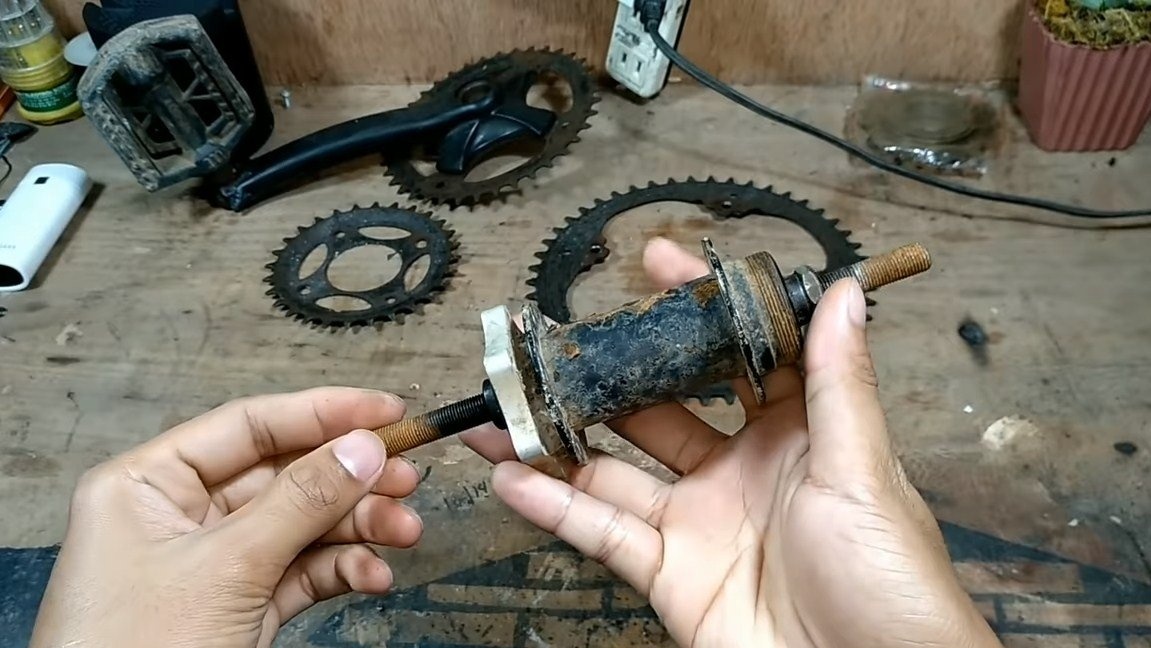
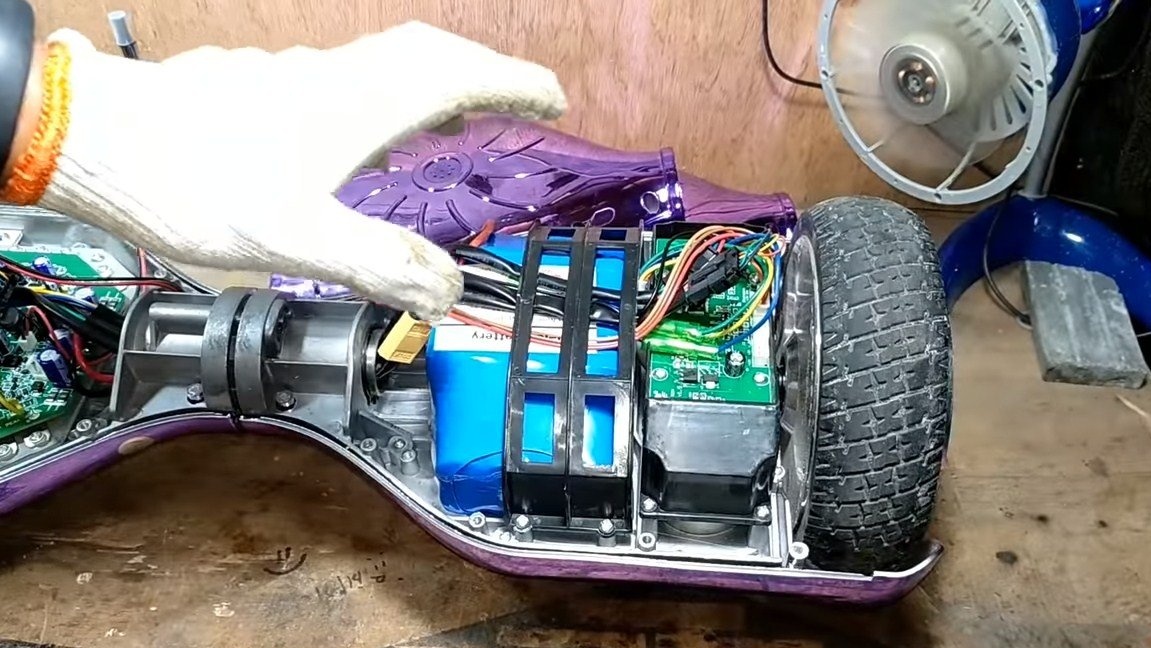
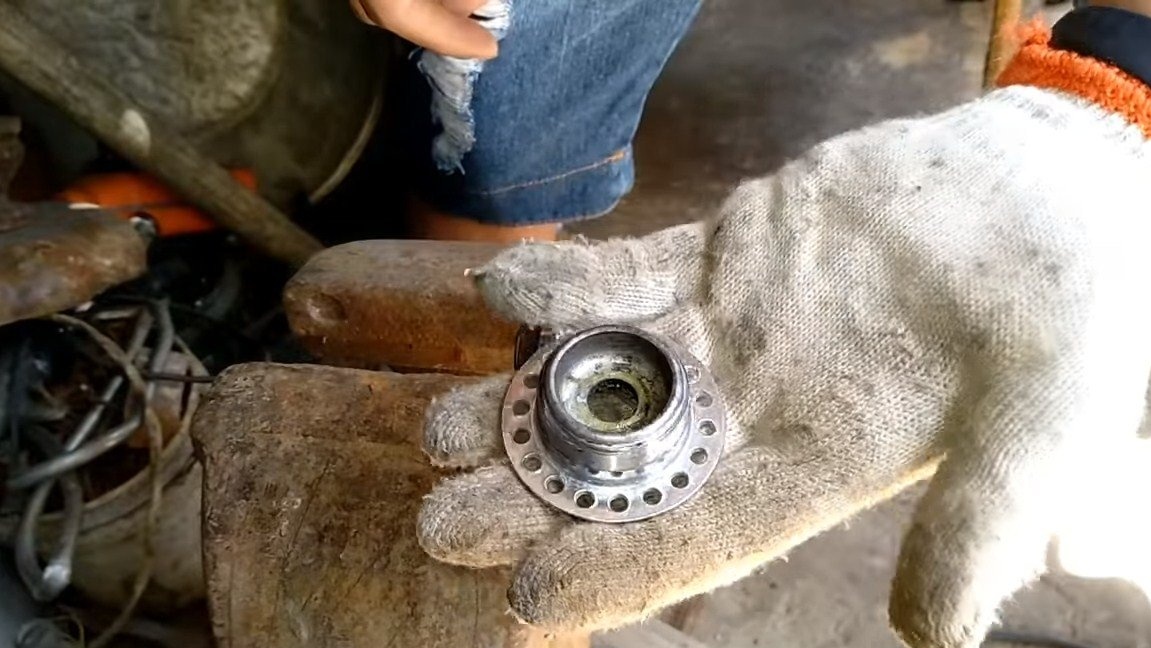
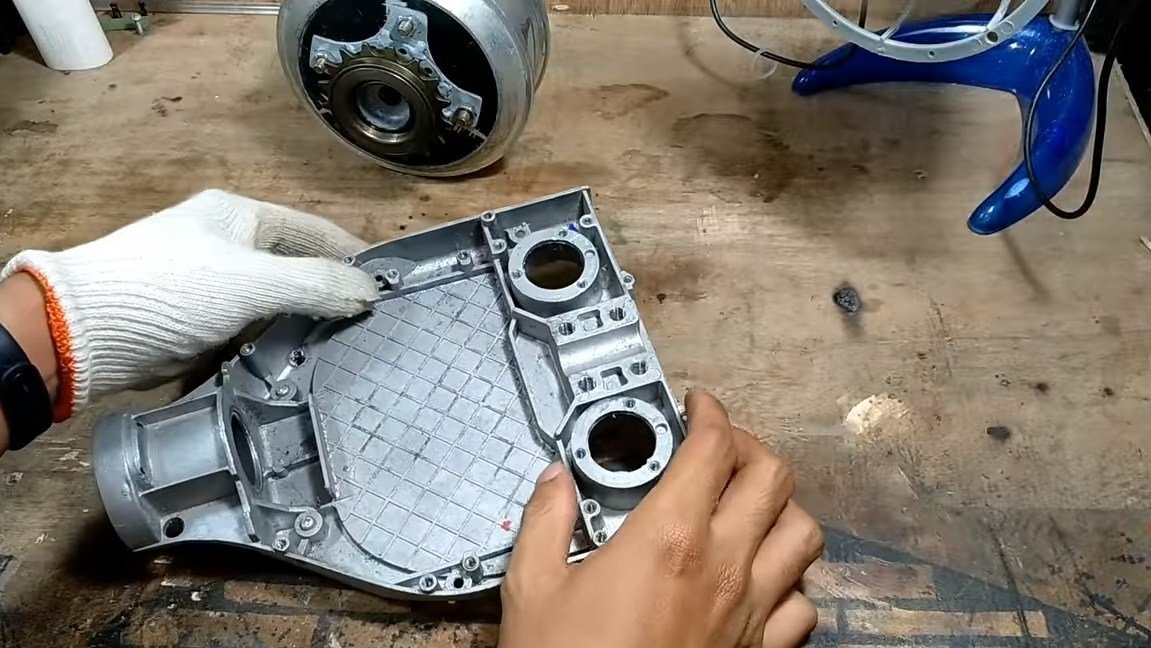
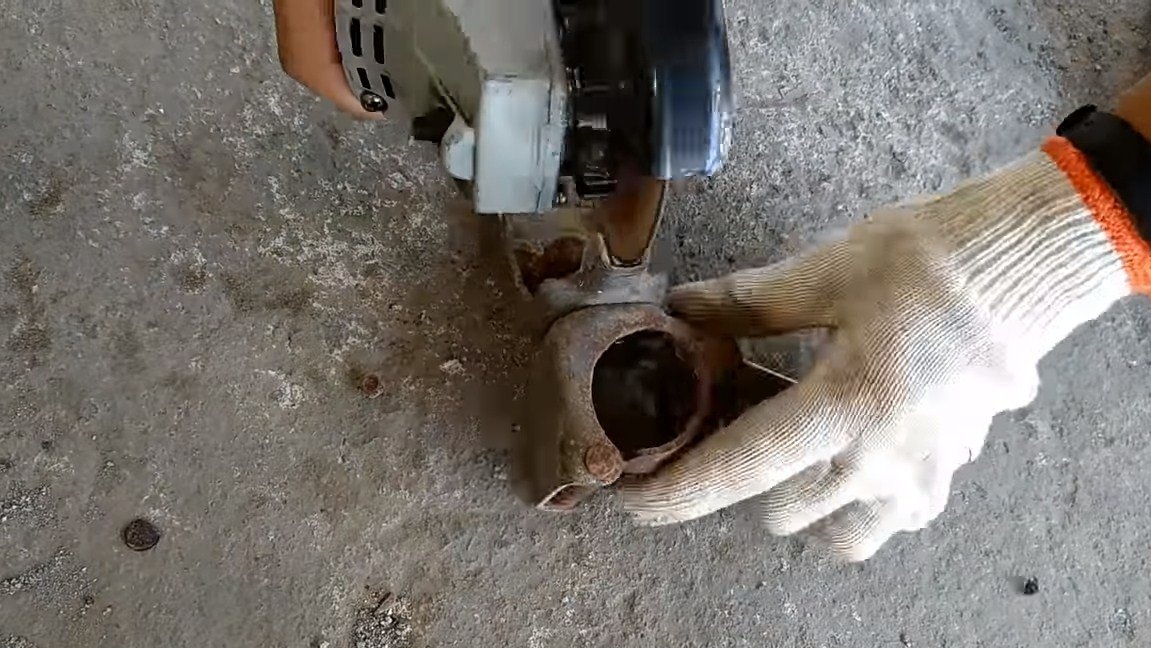
Step Two We prepare the engine
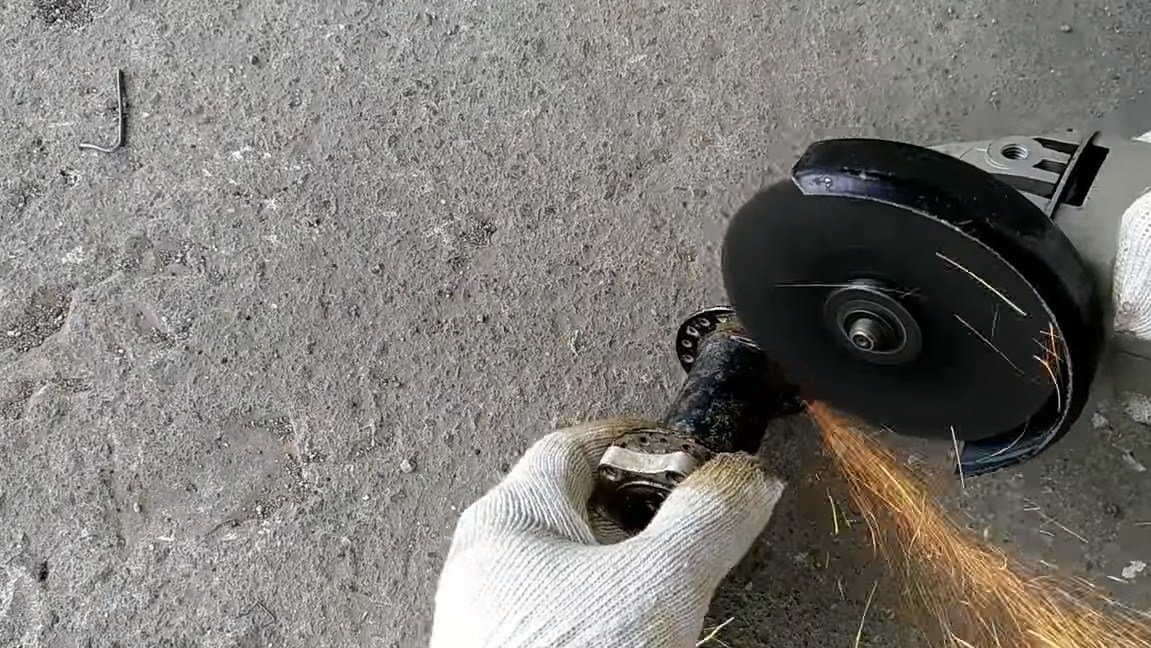
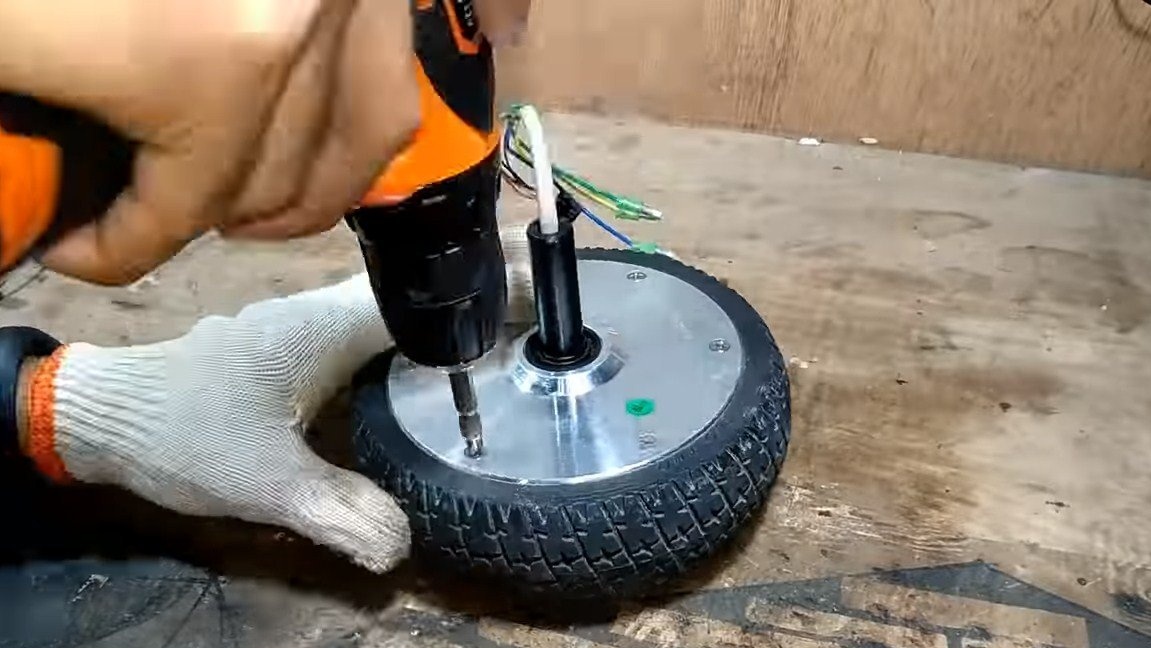
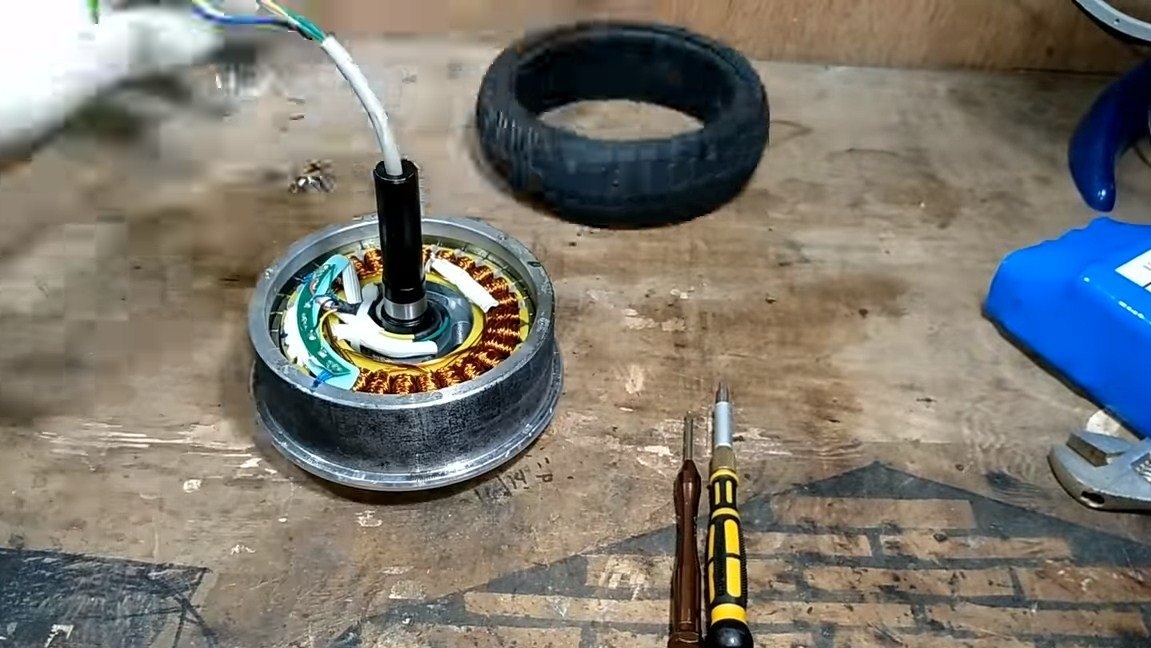
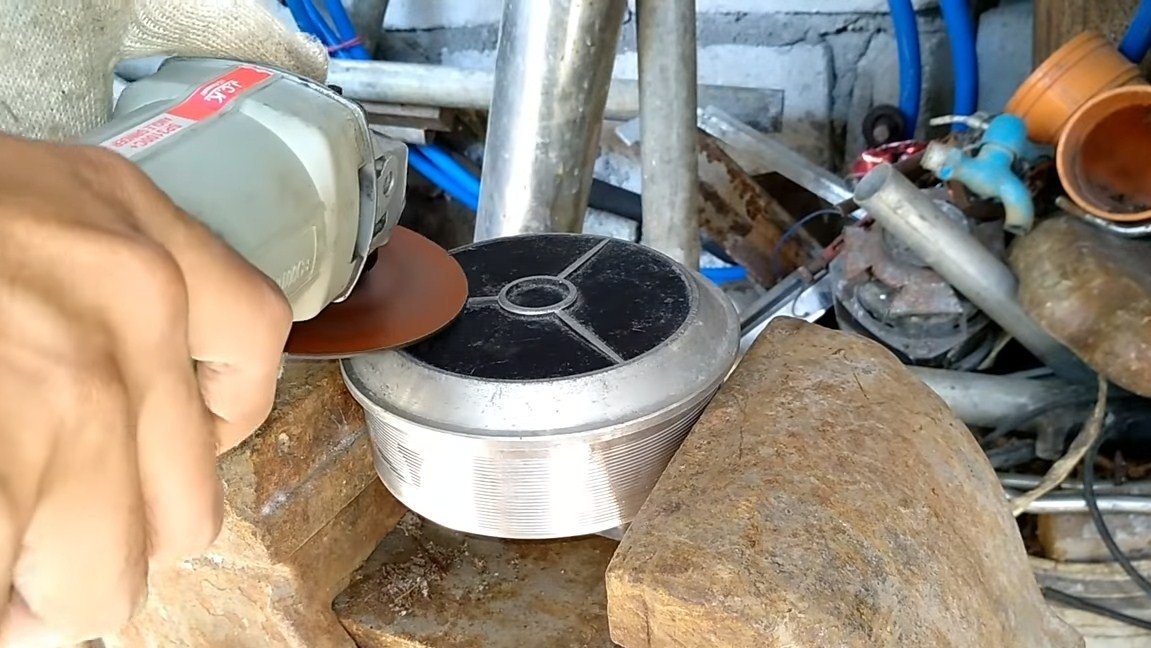
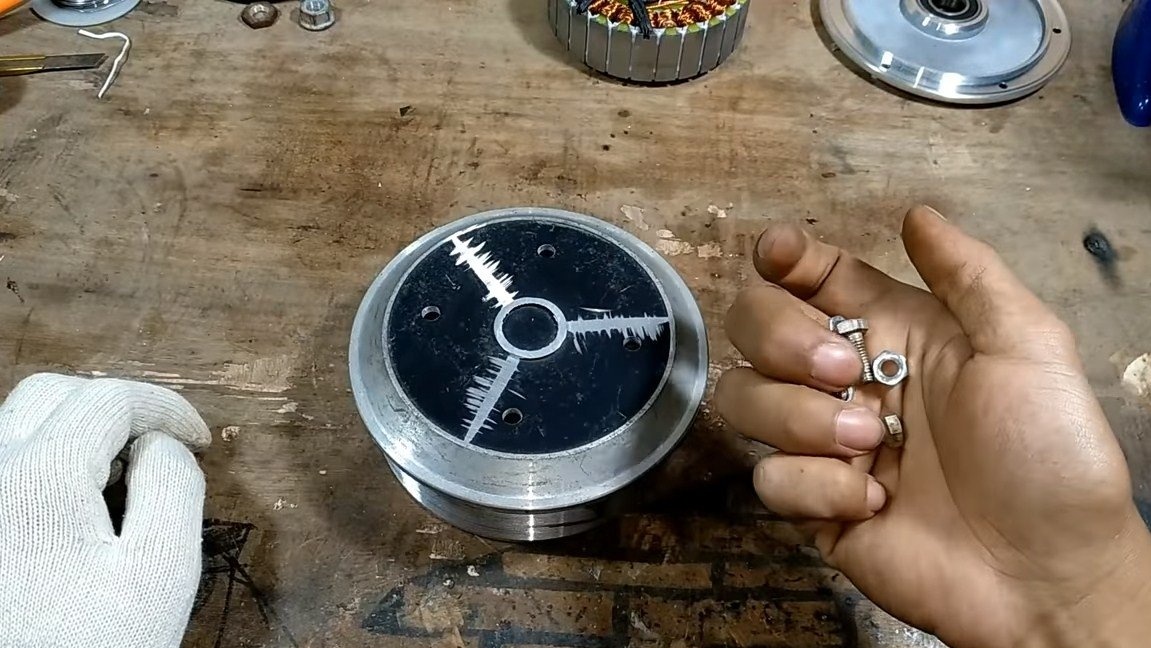
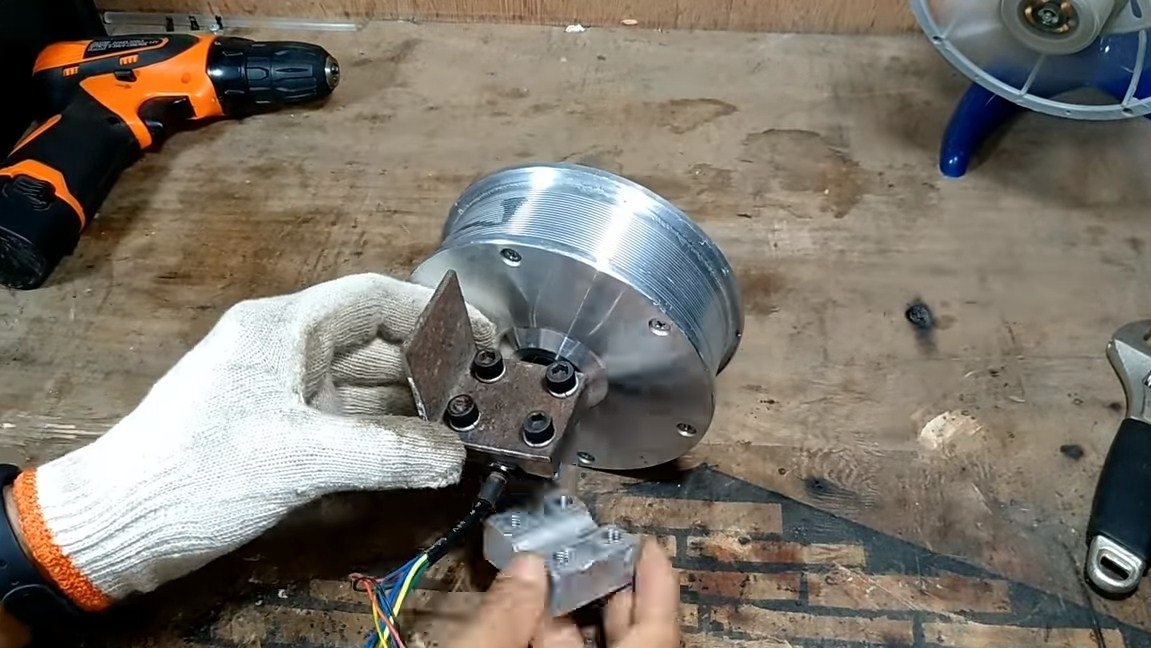
We will prepare the engine, for this we need to disassemble the gyro scooter, get the engine, and we will also need to disassemble the engine itself.The tire can be removed, we do not need it. We grind off the side wheel housing, here we will mount the drive sprocket, it will also work on a ratchet mechanism. To begin with, we need another sleeve from the rear wheel of the bicycle, we weld it to the leading sprocket of the bicycle and cut off the excess. As a result, we now have a sleeve mounted on an arm that we can screw to the motor wheel. We drill holes and tighten everything well with bolts and nuts, do not forget about the grover. The wheel can be assembled; after assembly, make sure that the bolt heads do not interfere with the rotation of the wheel.


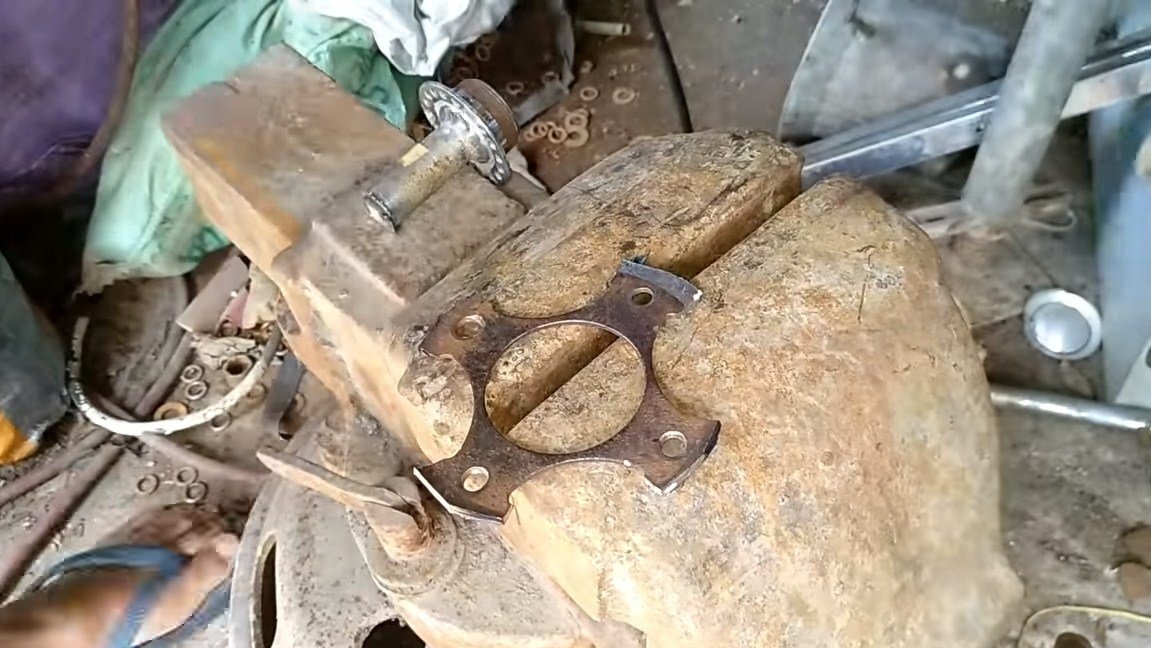

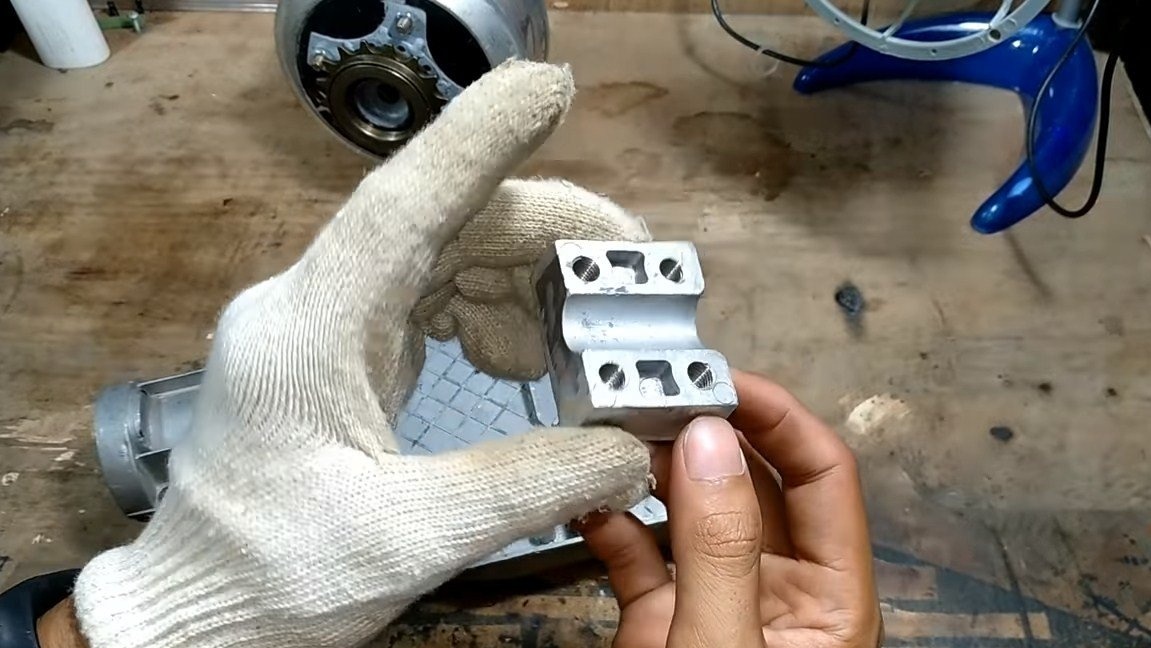
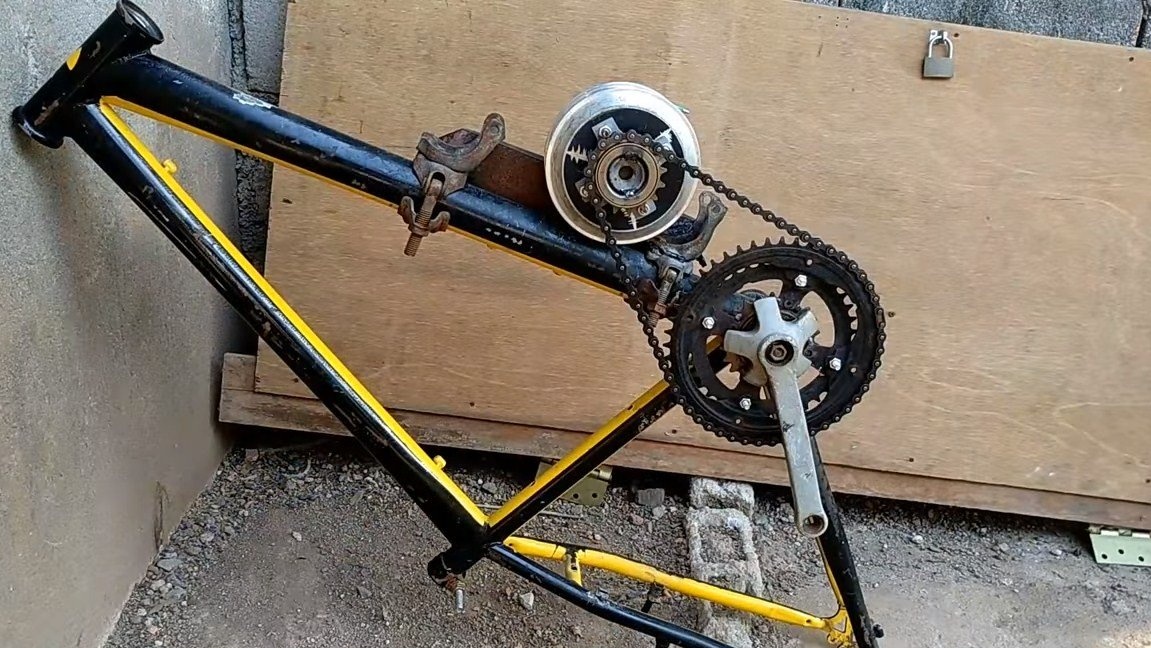
Step Three Engine bracket
The engine needs to be fixed on the bicycle frame, and we can fix it only on the axle. First, we cut out the bracket from the gyro scooter that holds the wheel axis. Now we need a piece of steel corner, we drill 4 holes in it and with the help of the bracket and bolts we fasten the wheel well to the corner by the axis.
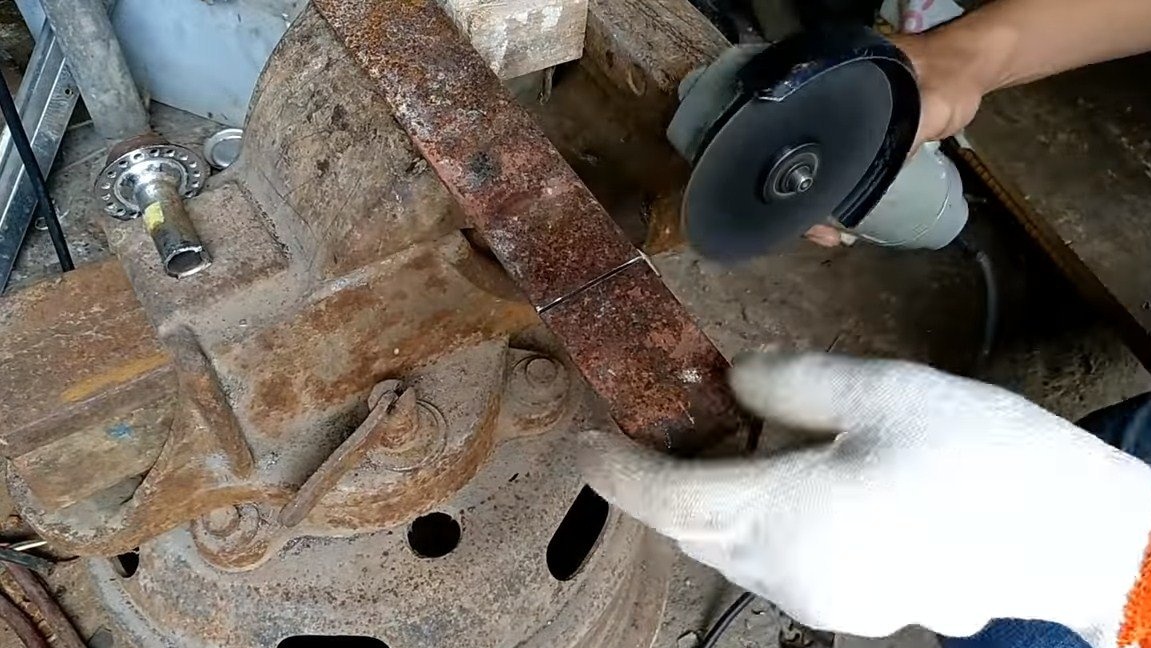
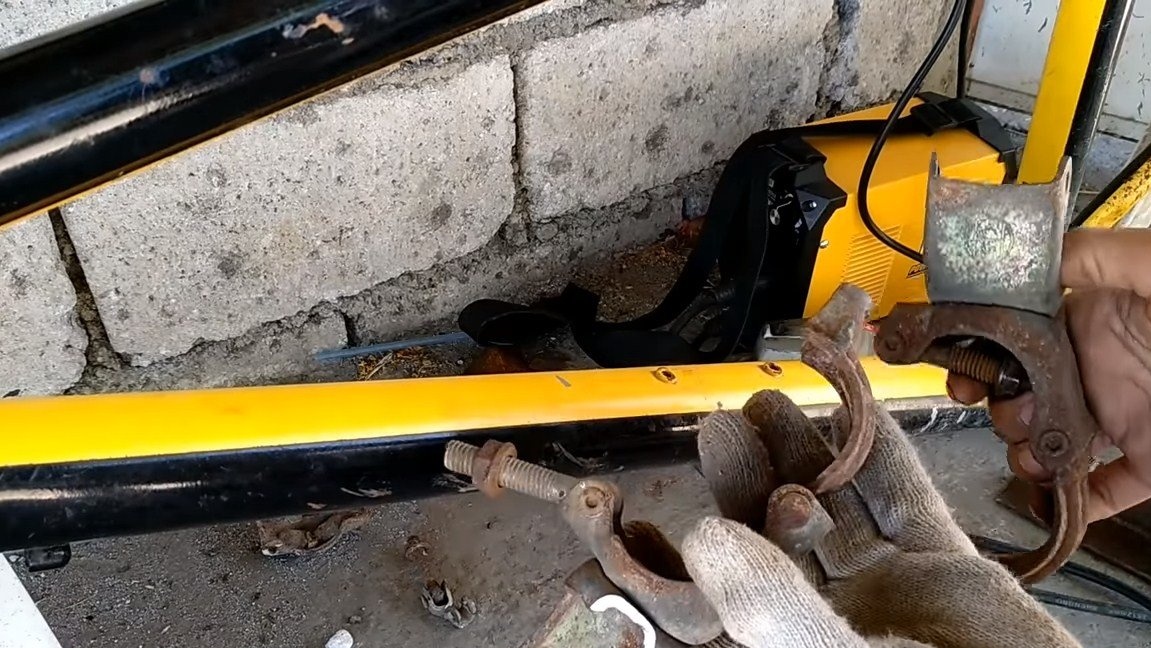


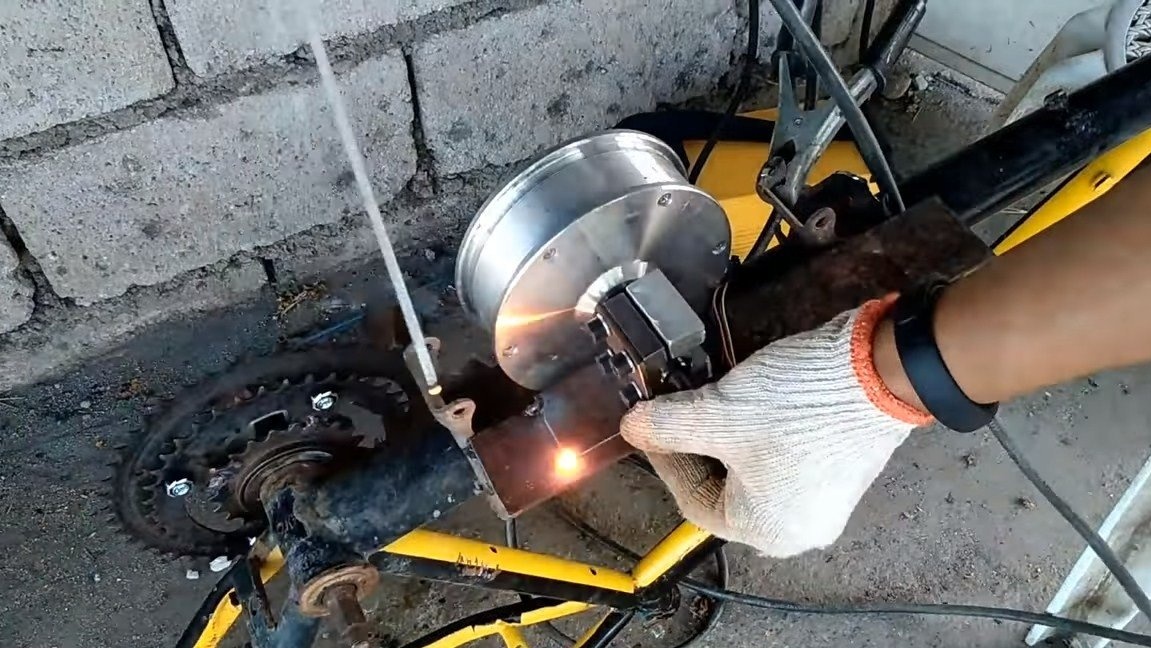
Well, then the author found two steel clamps and secured them to the bicycle frame. A corner was welded to these clamps, but our small corner can also be welded to the corner, with a motor wheel mounted on it. That's all, now the engine is quite securely mounted on the frame.
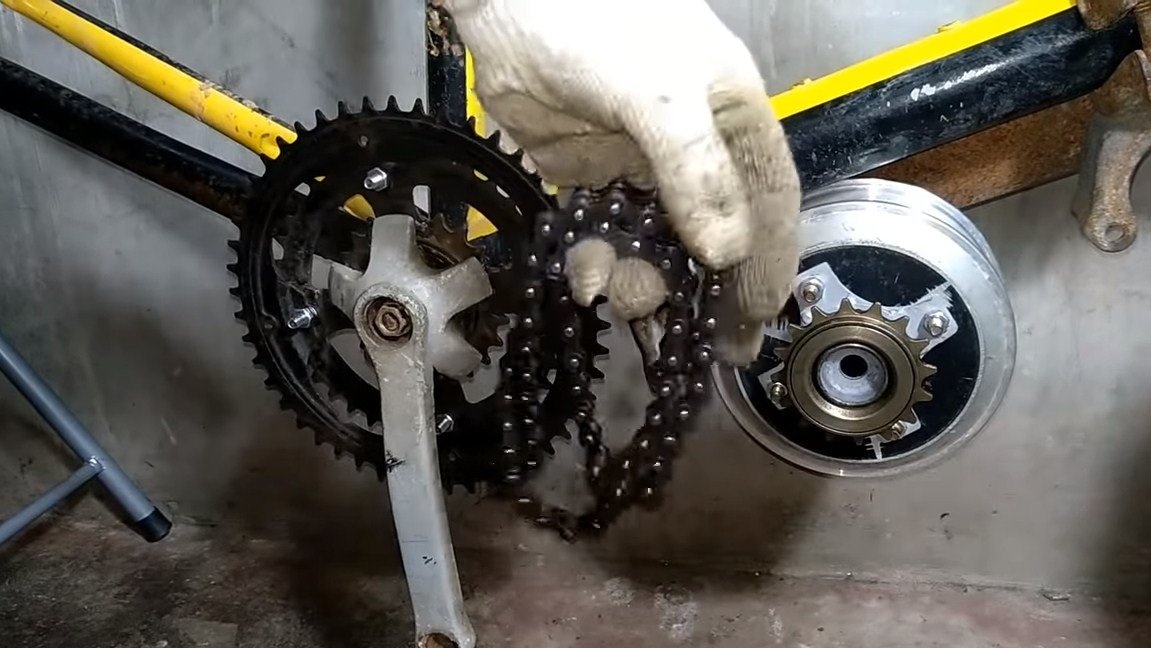
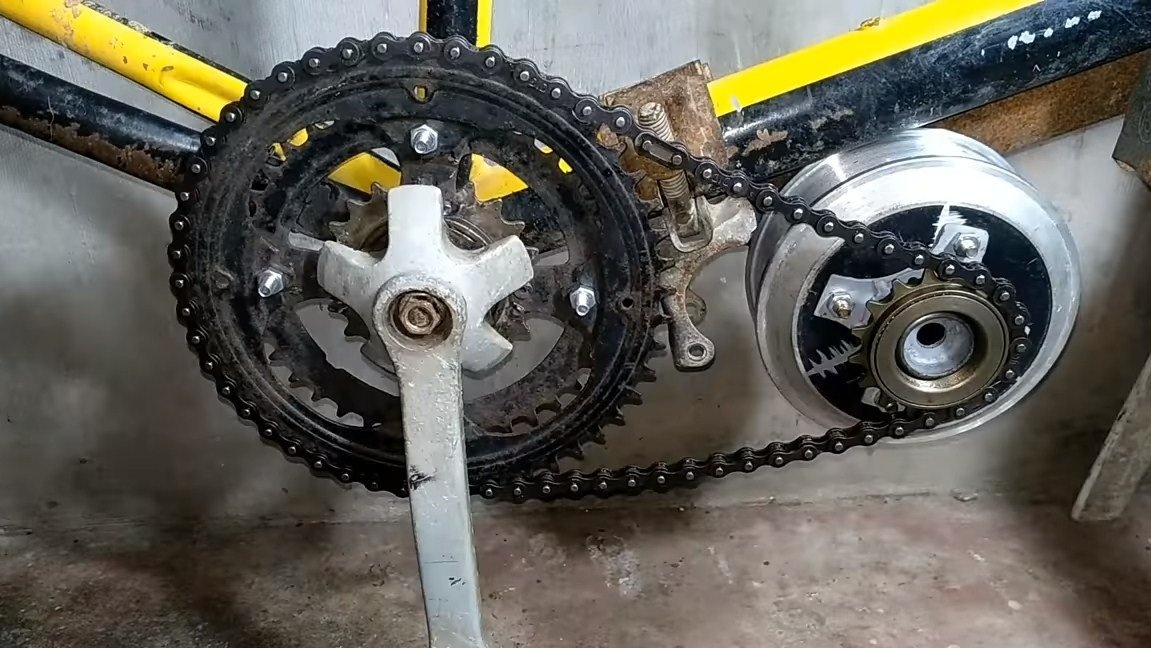
Step Four Chain installation
We install a bicycle chain, cut off the excess to get the desired tension. At the end, we try to turn on the engine, and also pedal. If the chain does not fall, everything is fine.
Step Five Final assembly and testing
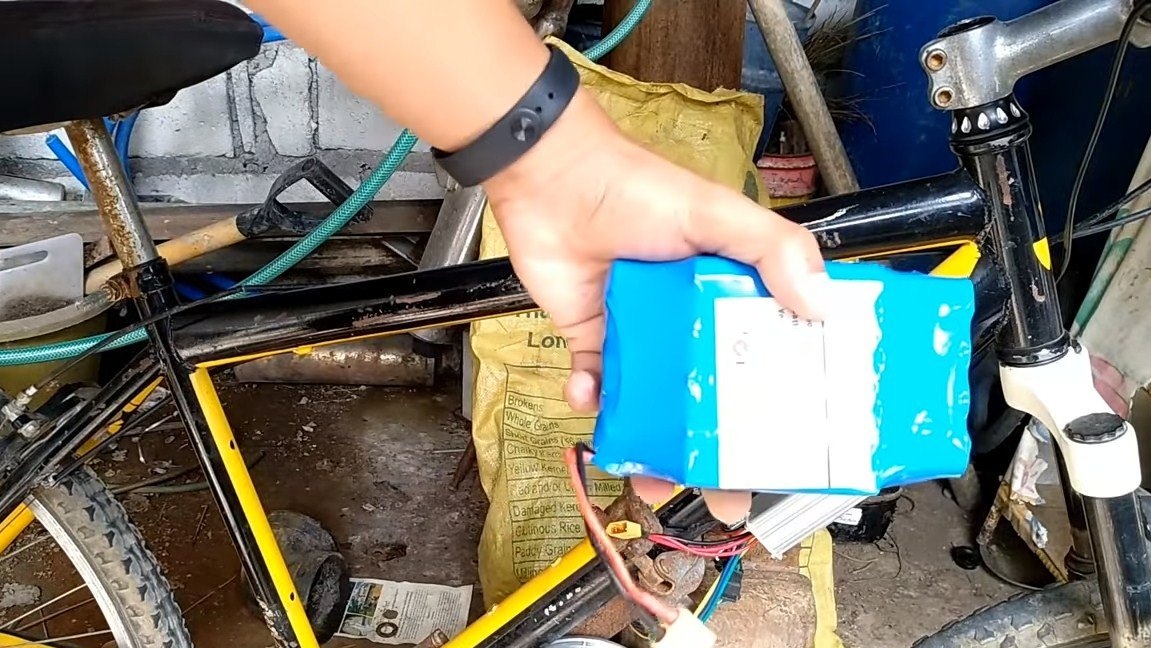
We install a “pedal” chain on the bicycle, and also fix the batteries with electrical tape on the frame. The battery can be assembled from old cells from a laptop 18650 or the like. We also attach and connect the controller for the brushless motor, without it the motor will not work. In the end it will remain to install on the steering wheel electronic knob to control engine speed.


Homemade ready, you can experience! The author easily gets underway, and then slightly accelerates. The engine easily copes with the task. On this project can be considered completed, I hope you liked the homemade work, and you found useful information for yourself. Good luck and creative inspiration, if you decide to repeat it, do not forget to share your ideas and homemade things with us!