

This industrial sconce is made using 38 mm iron corner and oak residues. Together with the author, we will go through all the stages of manufacturing and assembling this homemade, which will look great on a summer cottage by the front door.
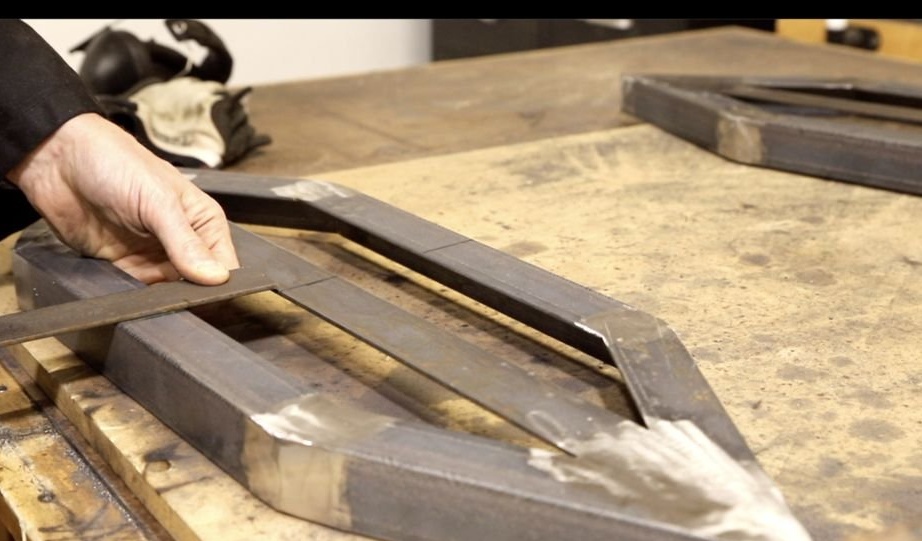
Step One: Making Frames
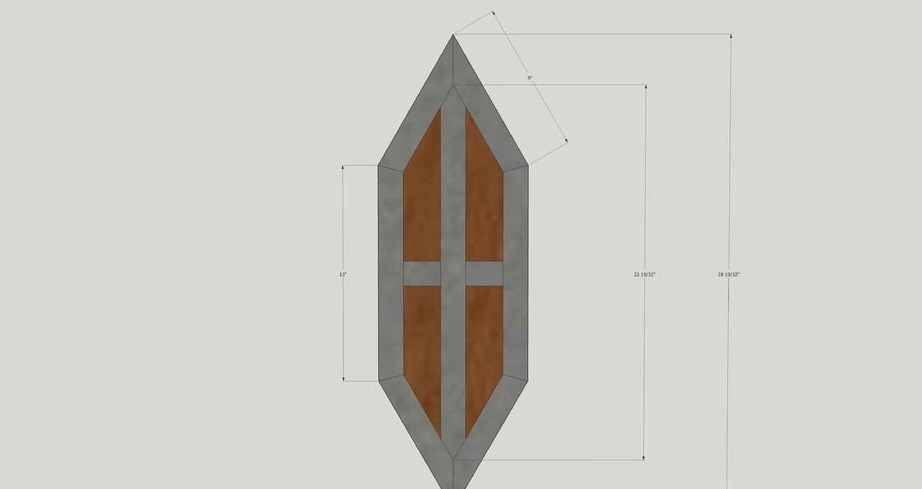
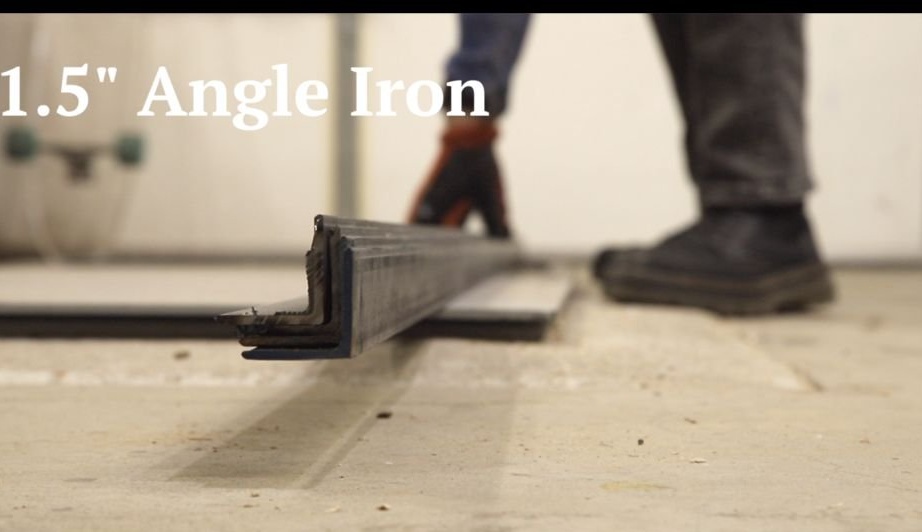
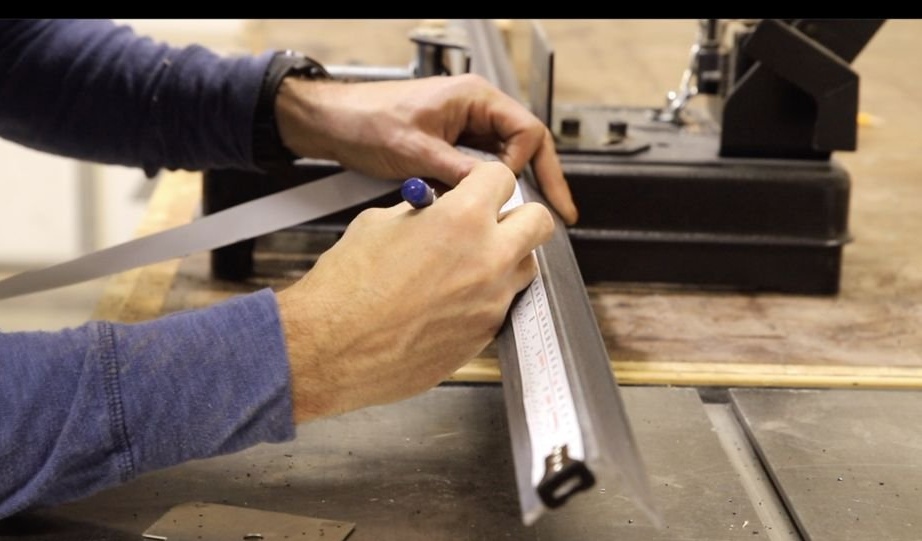
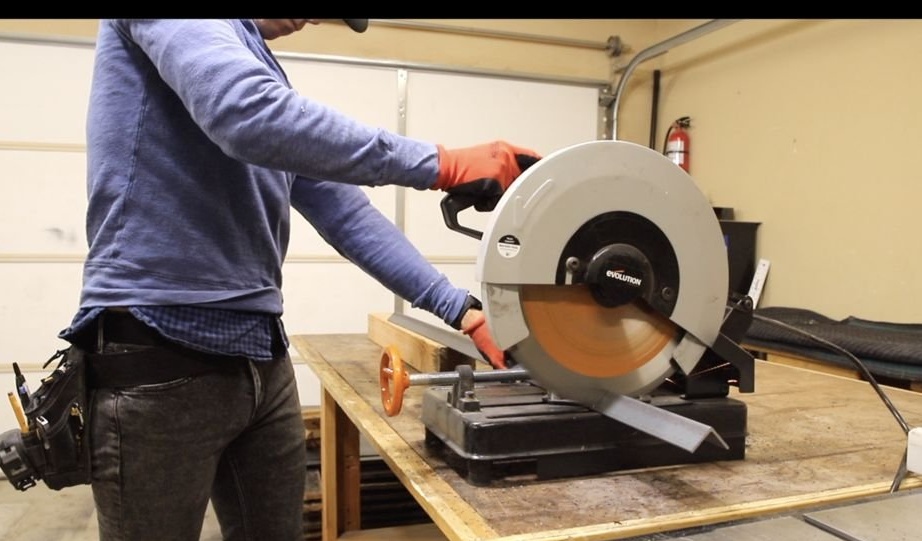
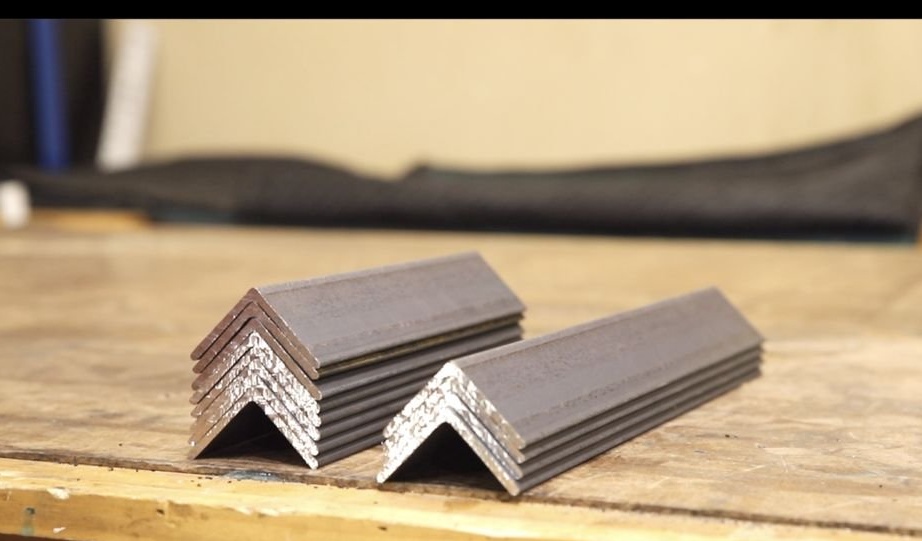
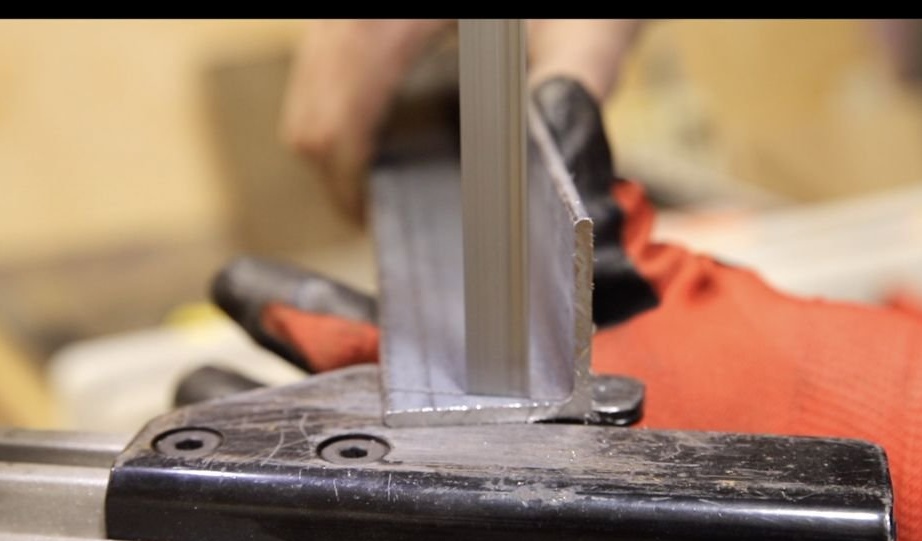
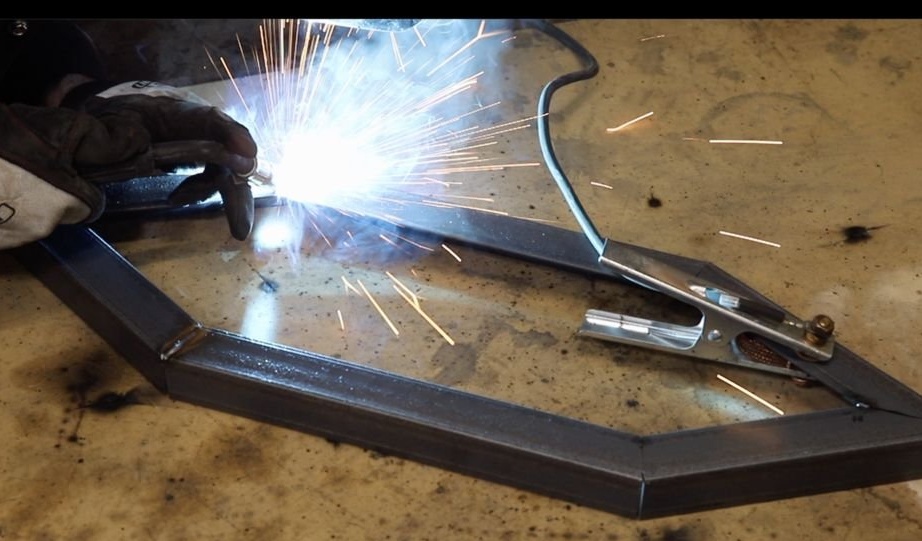
First you need to cut the corners to fit the future frame. The long parts are 33 cm and the short parts are 22 cm.
For proper positioning of the angle, refer to the diagram. Those parts that are 22 cm long get angles of 15 degrees at each end, and parts that are 33 cm long get an angle of 15 and 60 degrees.
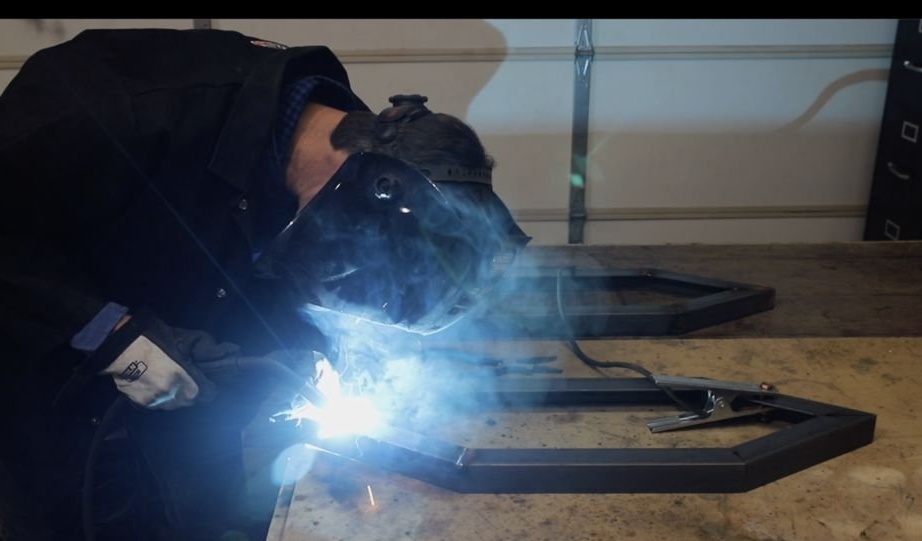
In this project, two identical sconces will be made at once, so there will be twice as many parts. Pay attention to this when you view the photo.
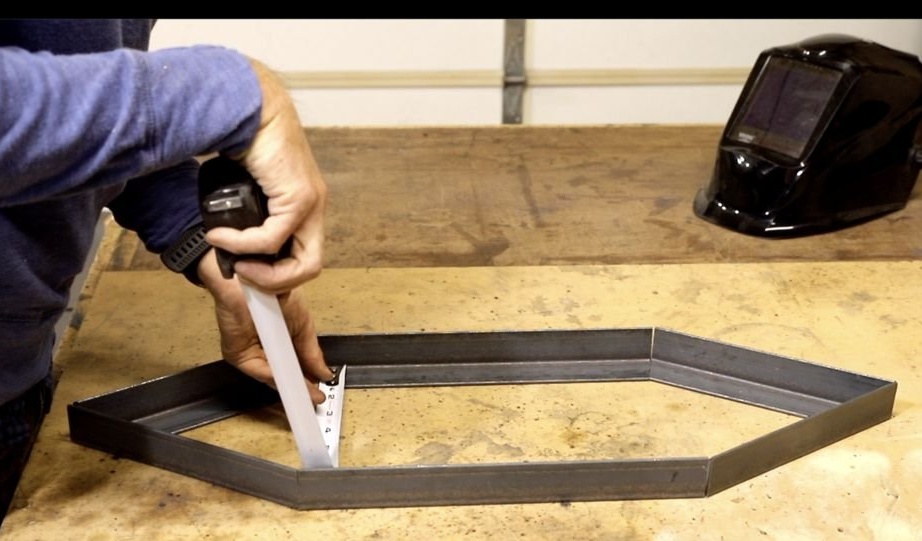
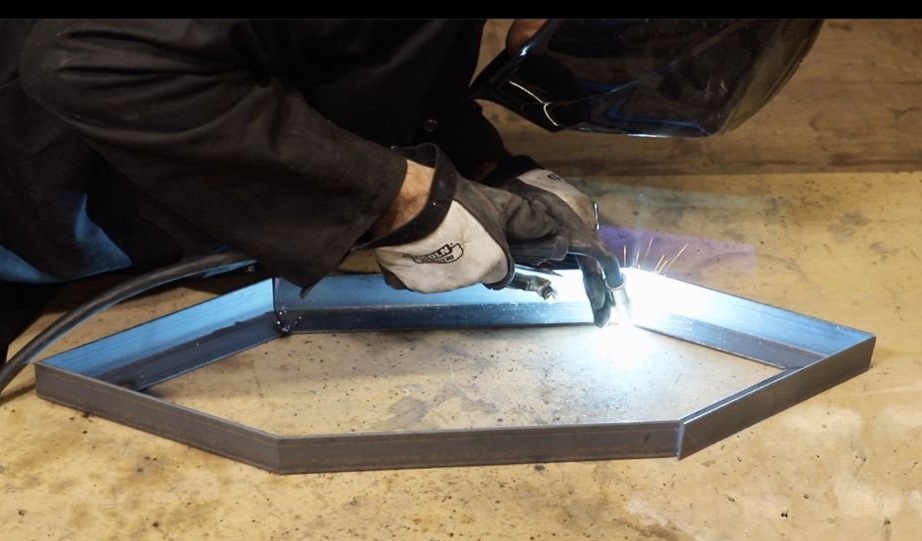
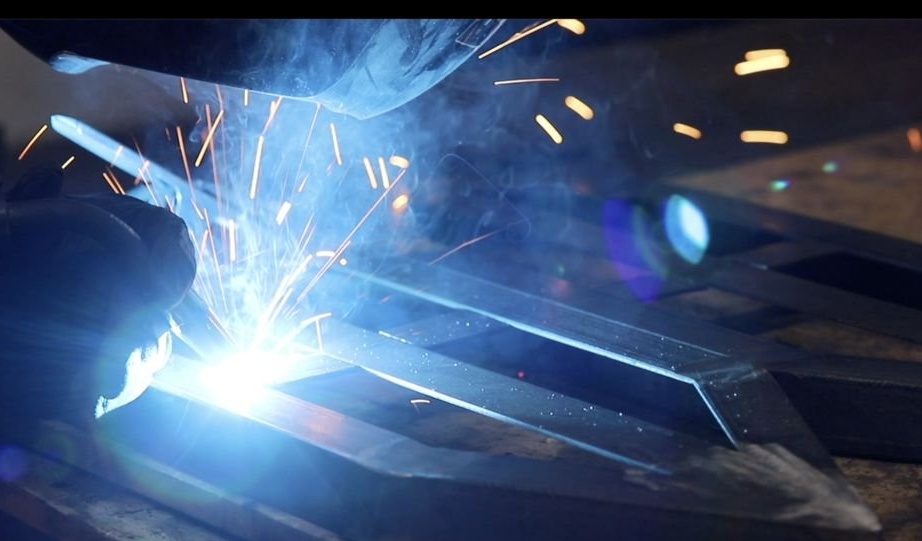
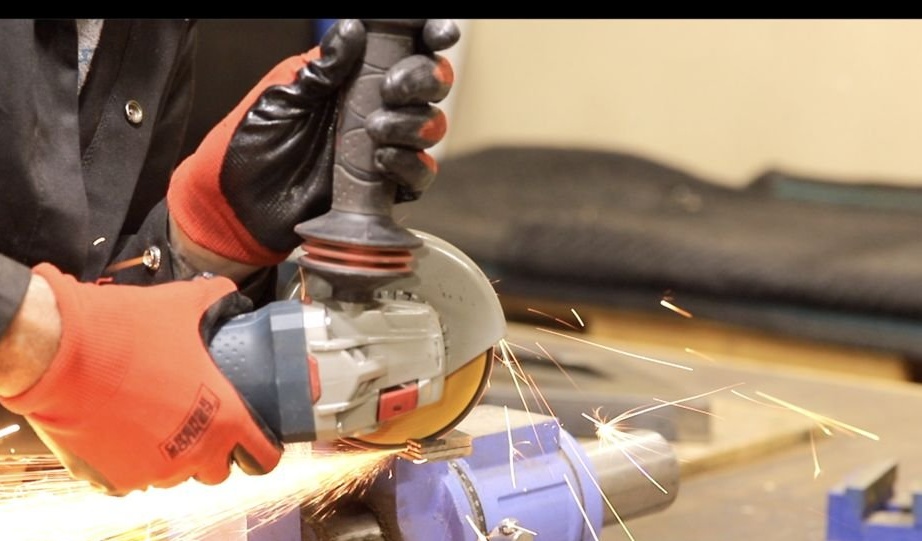
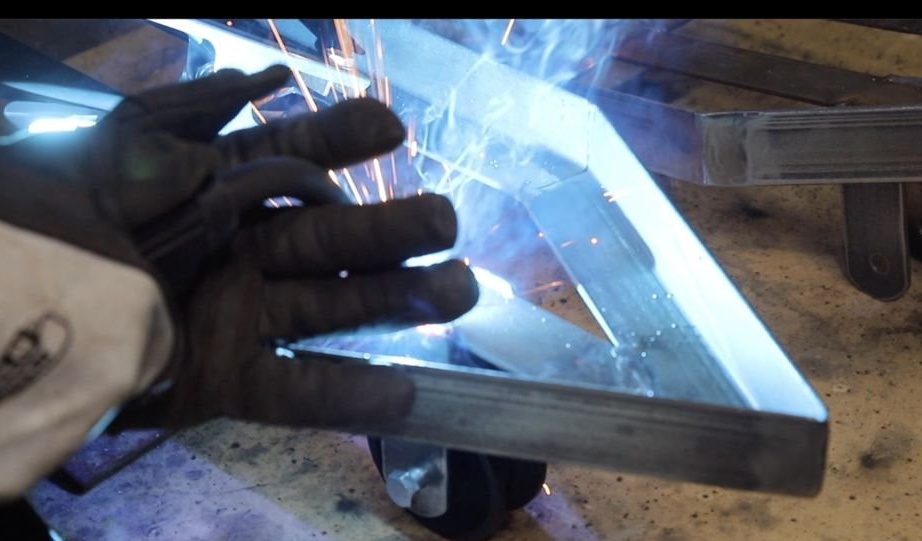
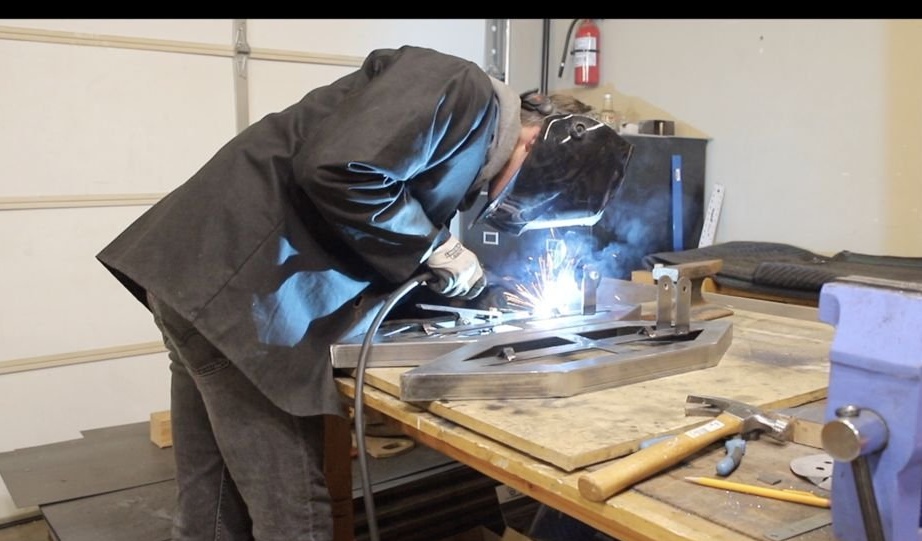
First, lay out the frame on the workbench. Then, without moving the iron, grab the corners between each other, and then boil all the seams. After welding, using a grinding disc from the grinder, flush the welds flush.
Step Two: Wood Panels

Oak trimmings were used for this project. Pine can be used if oak is not available. You can also use any wood that is available. The main thing is that it does not rot very quickly, since the lamp is supposed to be operated in outdoor conditions.
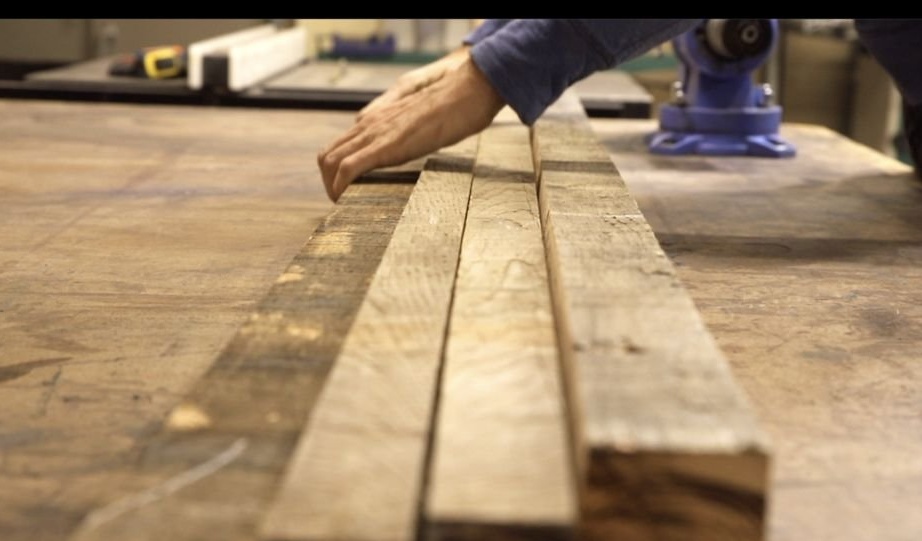
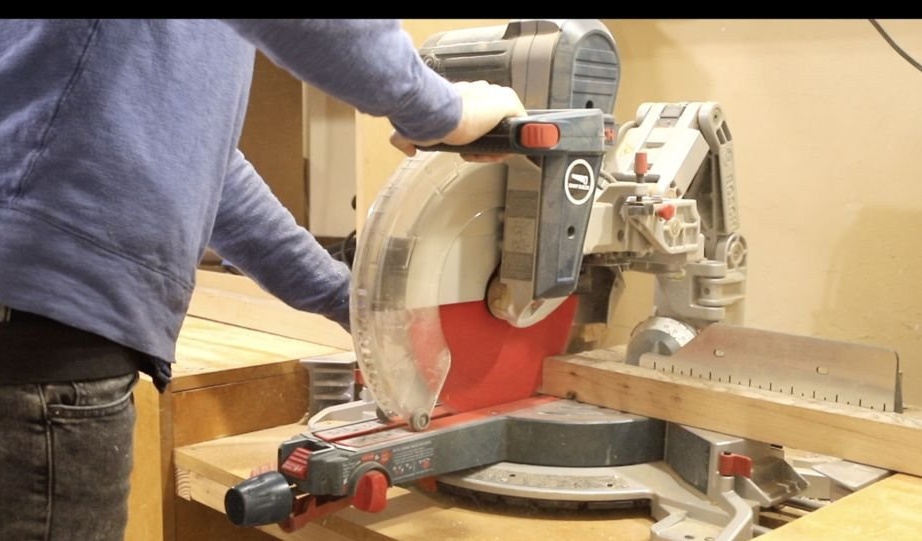
First, boards should be trimmed and cut to a length of 76cm. These boards were about 5 cm wide, but the main thing is that the final panel width should be at least 22 cm.
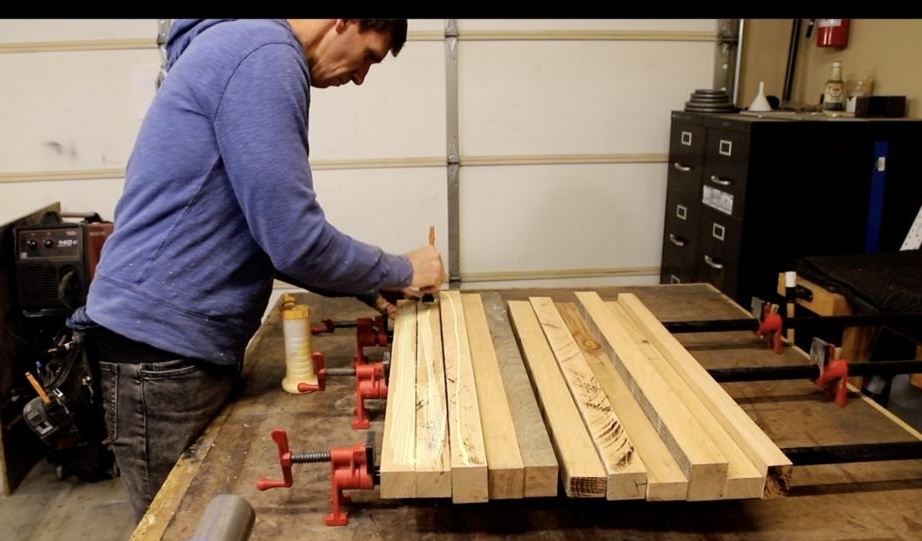
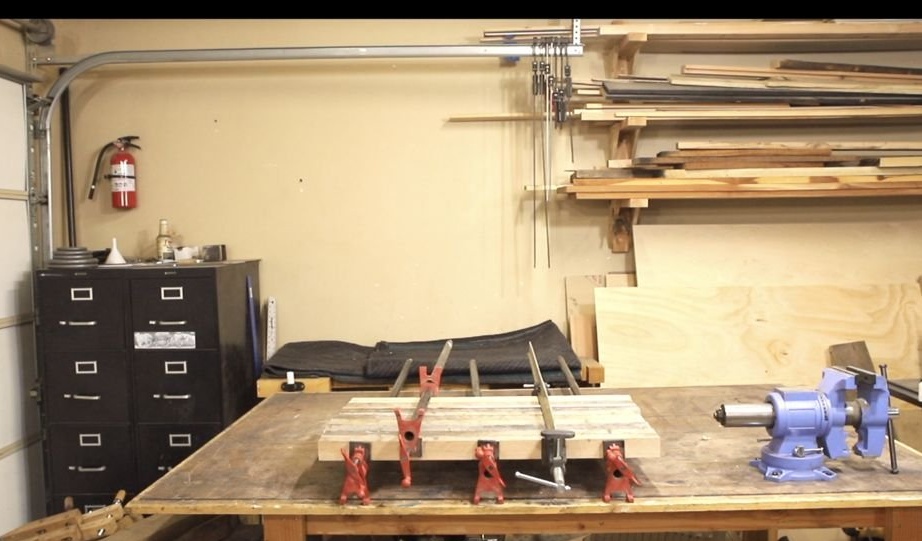
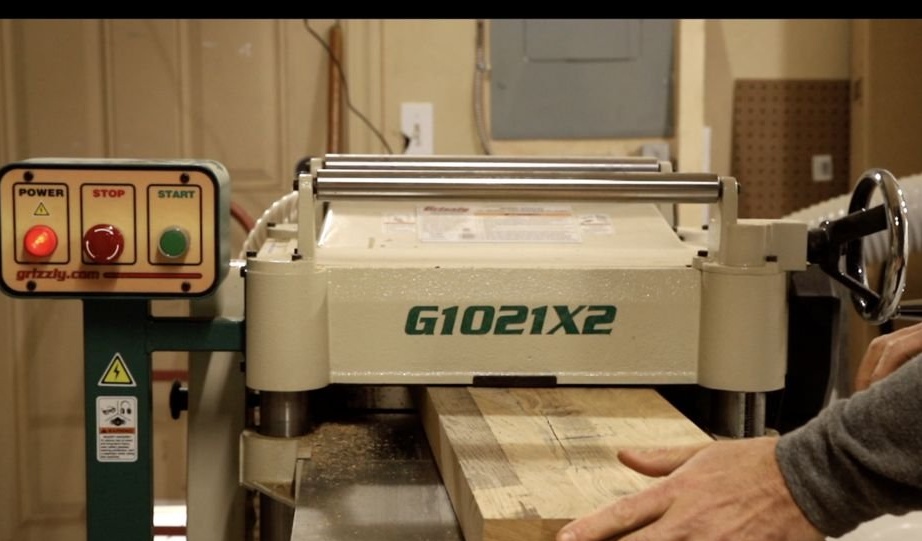
Then the boards are glued together using wood glue. Next, a wooden board is planed on a planer to align the panels.
Panels should be trimmed to about 3 cm thick. This will fit perfectly into the iron frames from the corner.
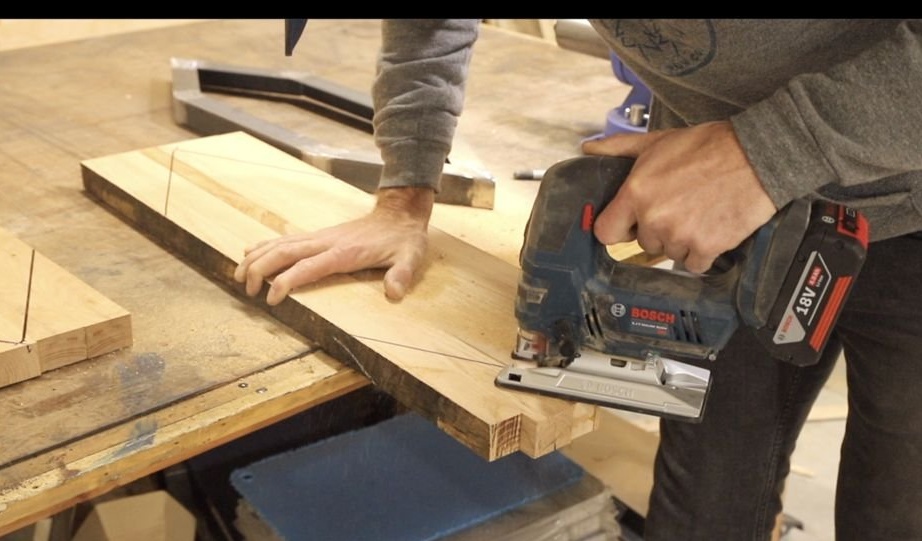
Using metal frames, a sketch should be made on the wooden panels. To do this, simply circle the frames with a pencil.
Then, the resulting pattern should be cut with a jigsaw or parquet.
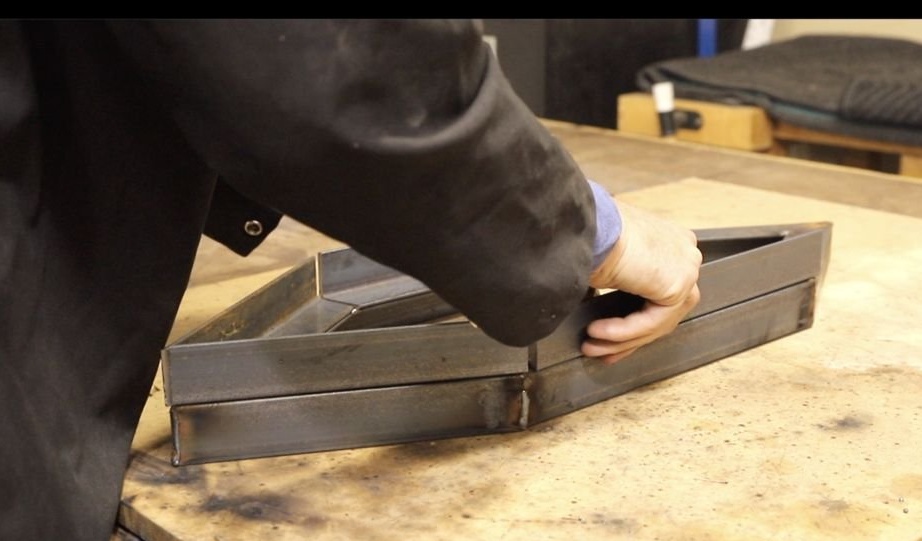
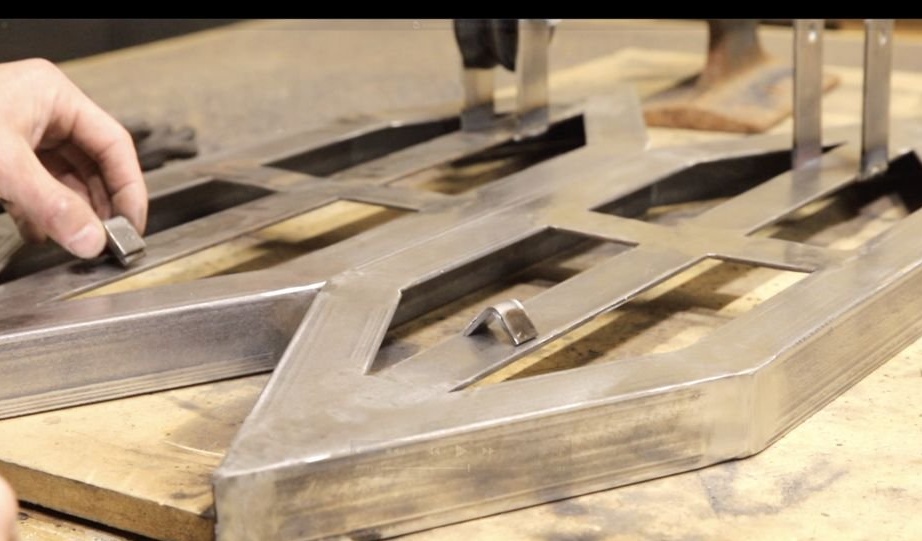
Step Three: Finish Frame Making
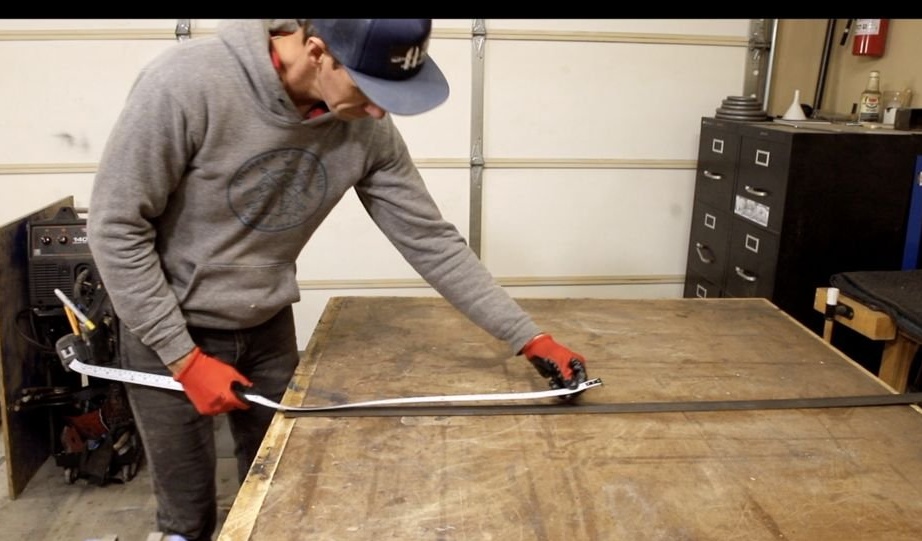
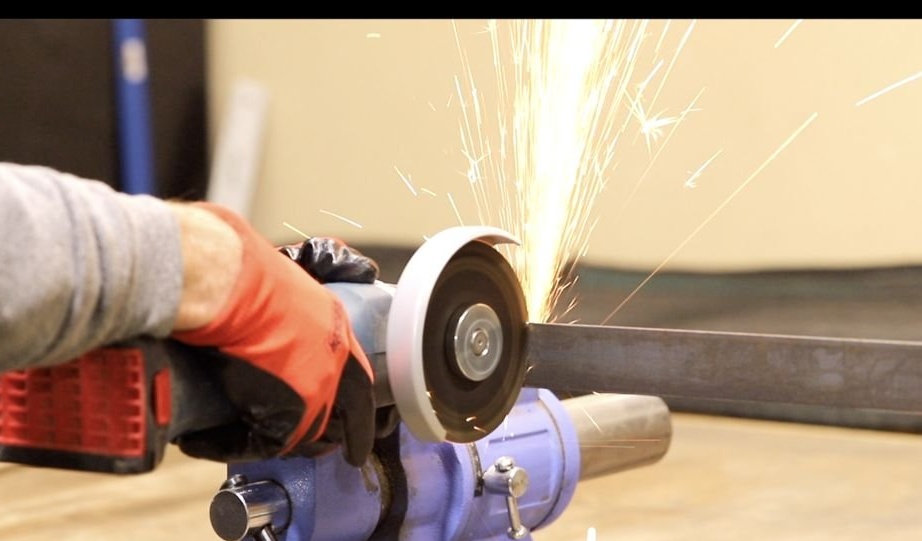
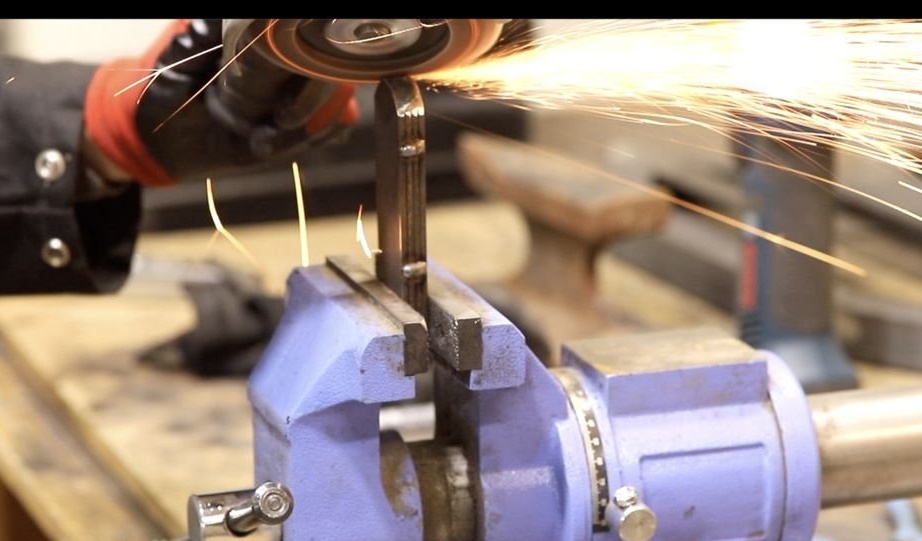
Cut two pieces of flat steel, 38 mm wide and 70 cm long. For this, it is best to use an angle grinder and a cutting disc.
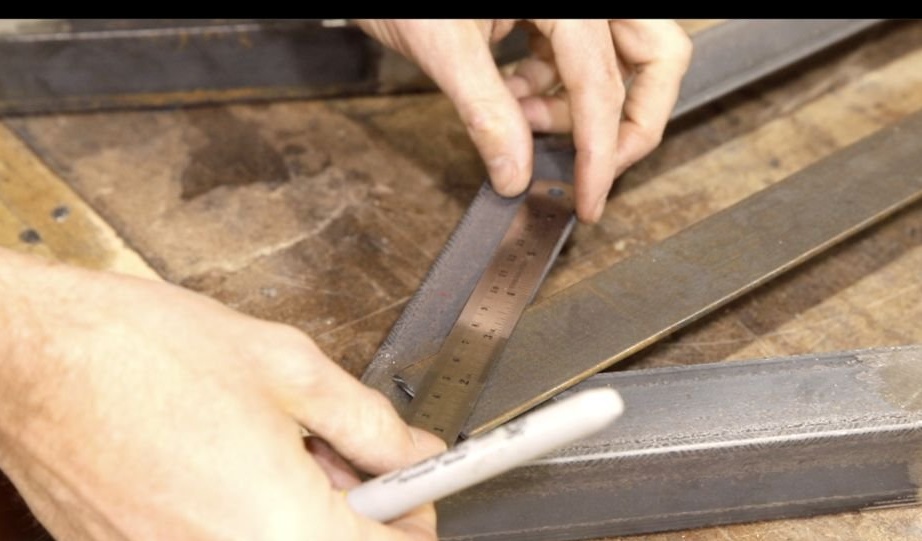
Using the straight edge of the metal strip, it is necessary to mark the corners of the frame on the central bar, and then cut off the excess metal at the corners with a cutting disc.
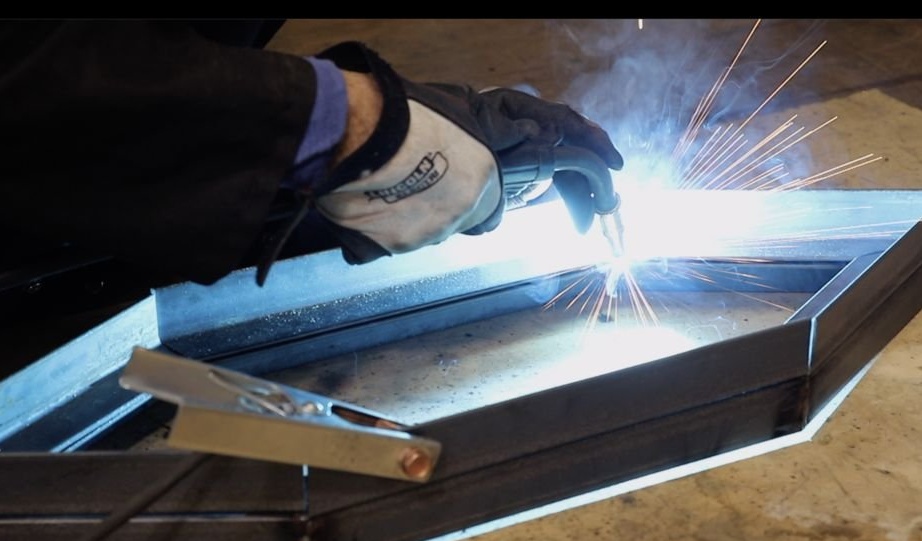
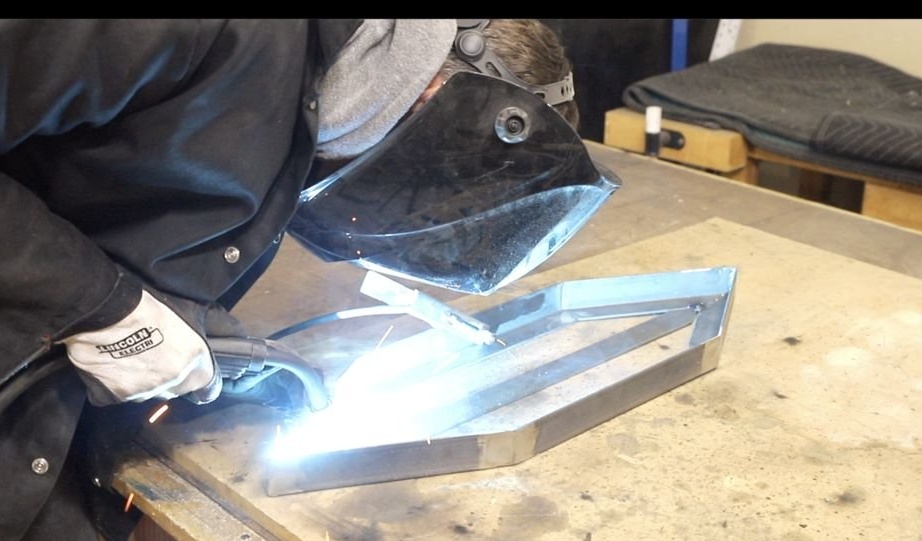
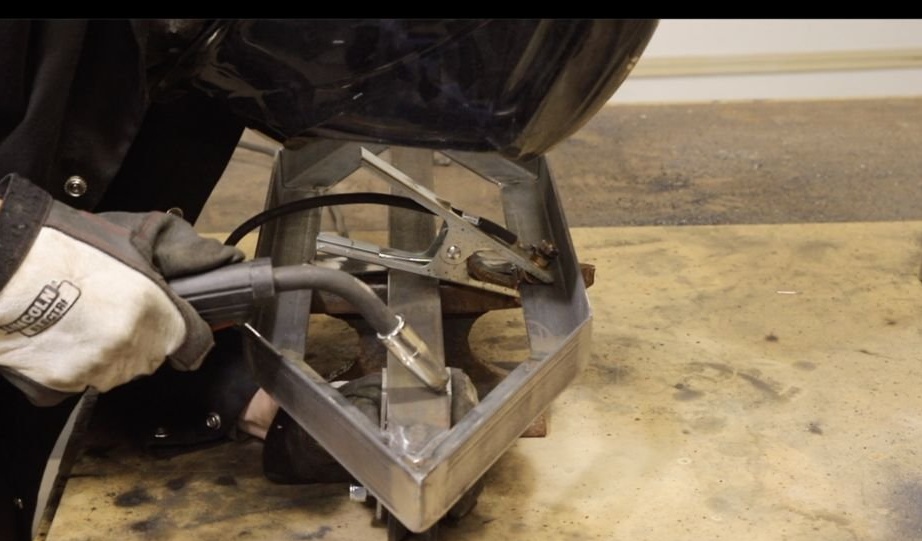
We weld the central bar on the back side, and then weld all the seams from the front of the frame.
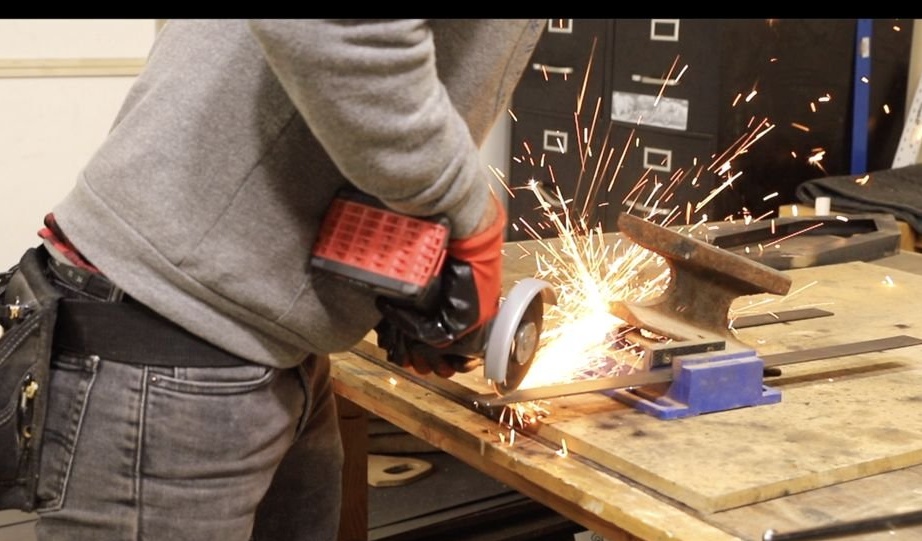
At the end of the welding work, all welds should be sanded with a wiper blade.
Step Four: Lamp Suspension and Pulley
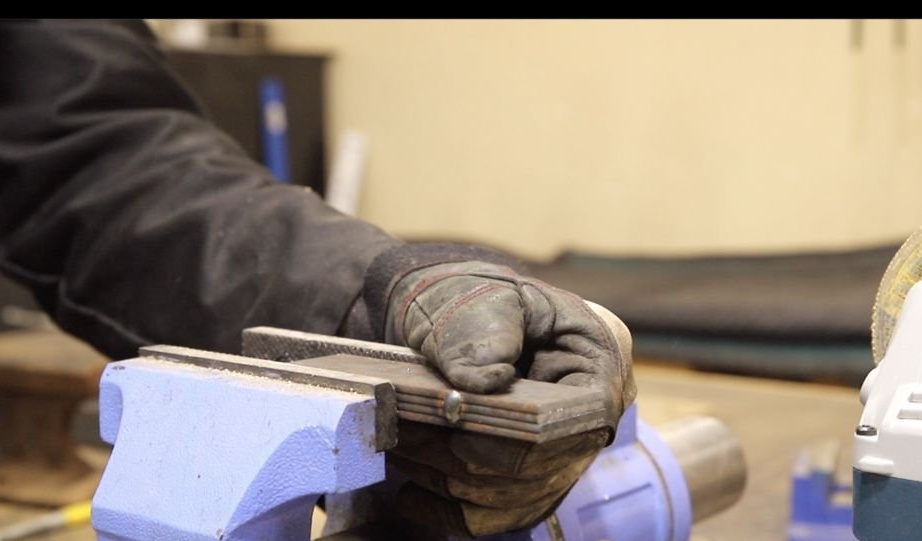
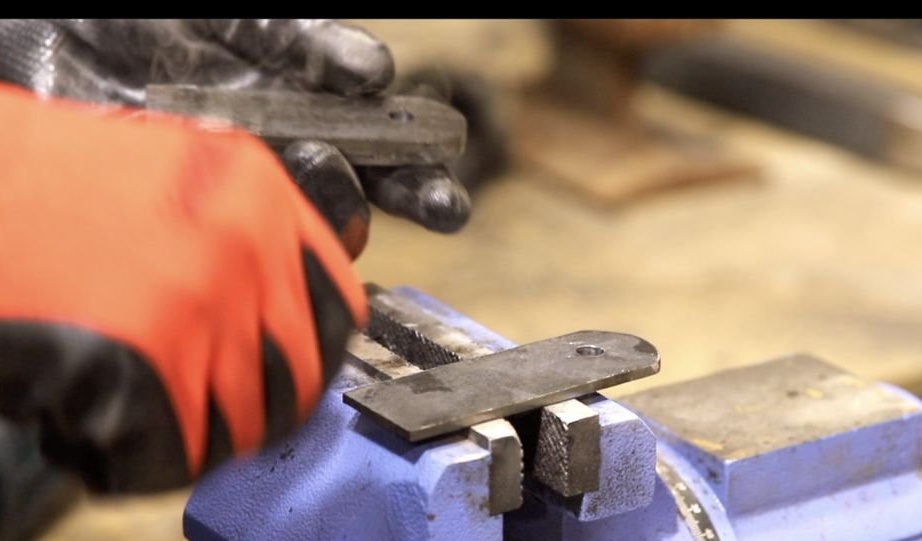
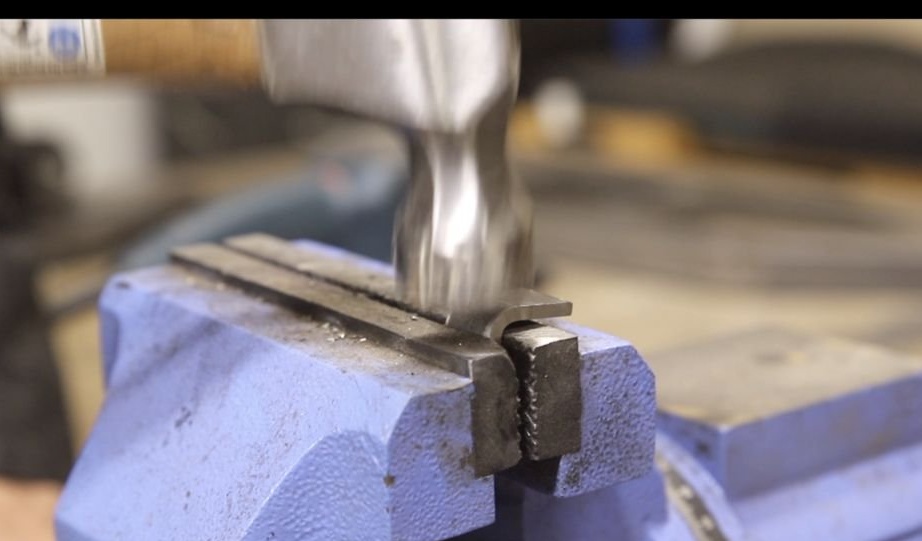
We cut 4 parts of flat steel, 38 mm wide and 11 cm long.
It is necessary to put these parts one on one and make several welded tacks to hold them together. This is necessary in order to process all four parts at once. At the same time, they will look identical, which is not unimportant.
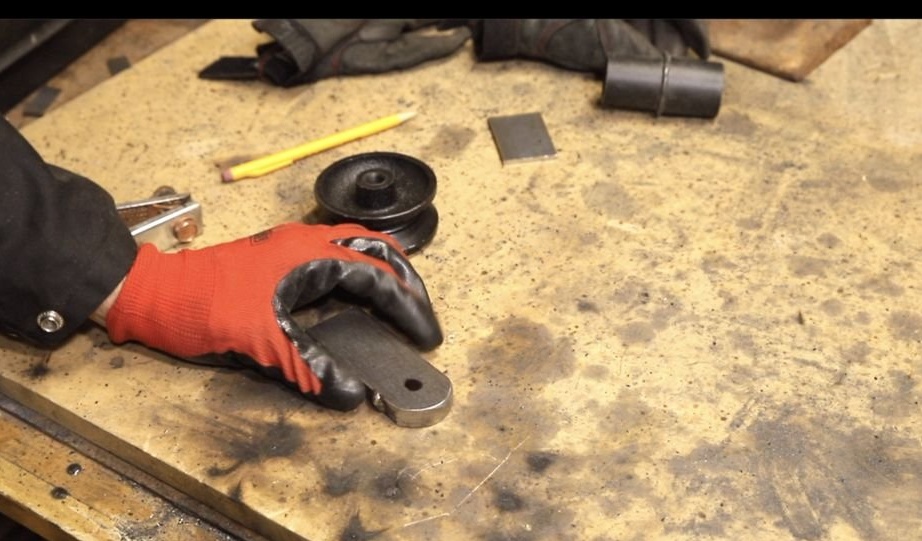
Further, on the one hand, the profile should be made semicircular. The author used a small connector for a watering hose to draw this semicircle, and then cut off the excess metal with a cutting disc.
Then the resulting radius should be sanded with a smooth stripping disc.
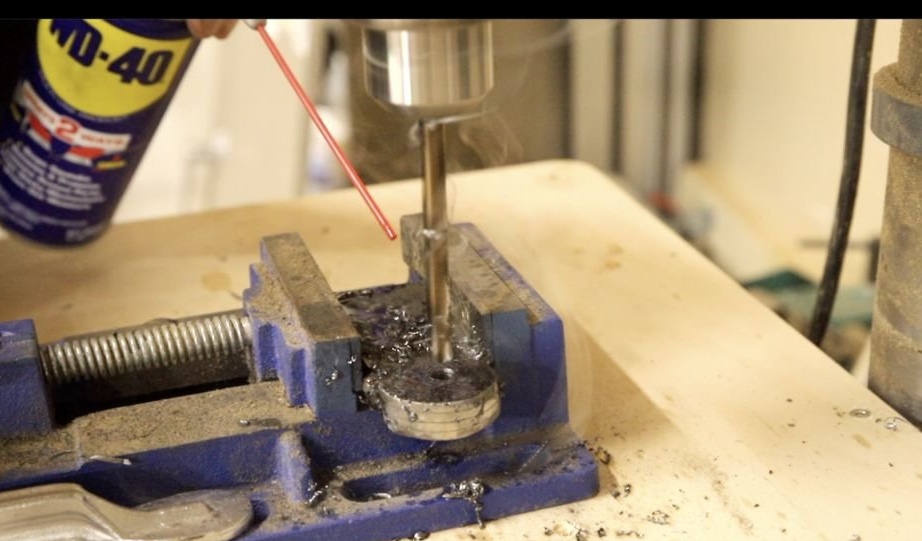
After that, it is required to drill a hole with a diameter of 8 mm for the pulley bolt through all four supports.
12 mm should be cut from the rear end of the suspension support. These plates will become fixture for the cord of the lamp.
Then weld holders should be grinded so that the plates can be disconnected. It turned out four identical details. For each sconce, two supports.
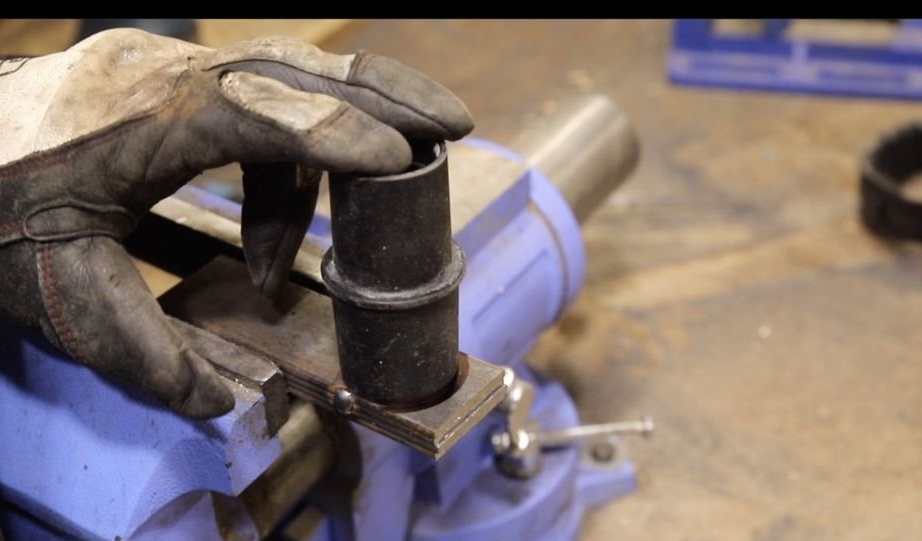
We insert a bolt into the suspension hole and fix the pulley.
Then we turn the frame upside down and use some kind of substrate to support the frame at a height of about 10 cm from the table. Suspension support for the pulley should be welded flush with the central bar at a distance of 5 cm down from the top.
Then we bend 12mm segments, placing them in a vise. A bend of 90 degrees is required. This is easy to achieve with a hammer or sledgehammer. We need to make four such corners. With their help, the lamp cable will be held.
These corners must be welded at a distance of 7 cm from the bottom of the central bar and 7 cm below the pulley suspension support.
Step Five: Finish: Painting and Wax
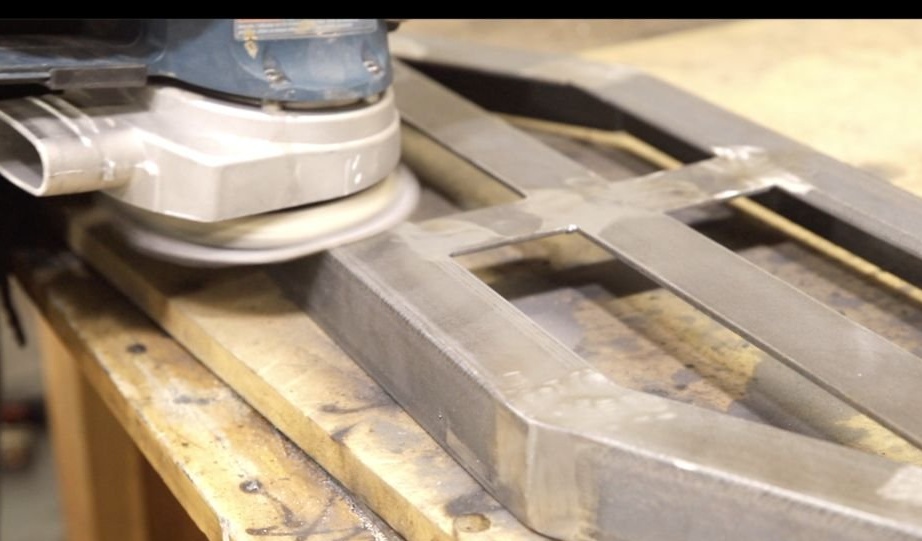
For the final completion of work, it is necessary to grind all metal surfaces from corrosion to the sheen of steel.
Then the metal surface should be primed, and then painted in some dark color.
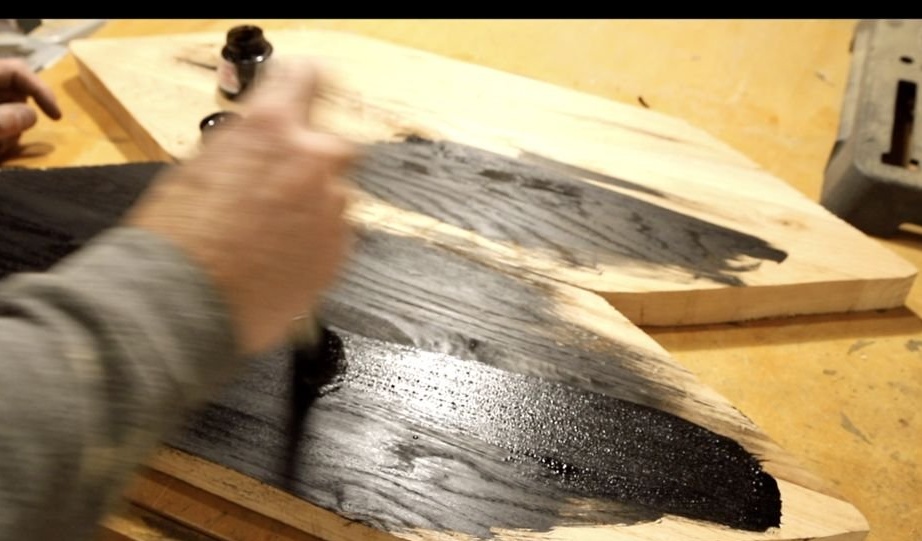
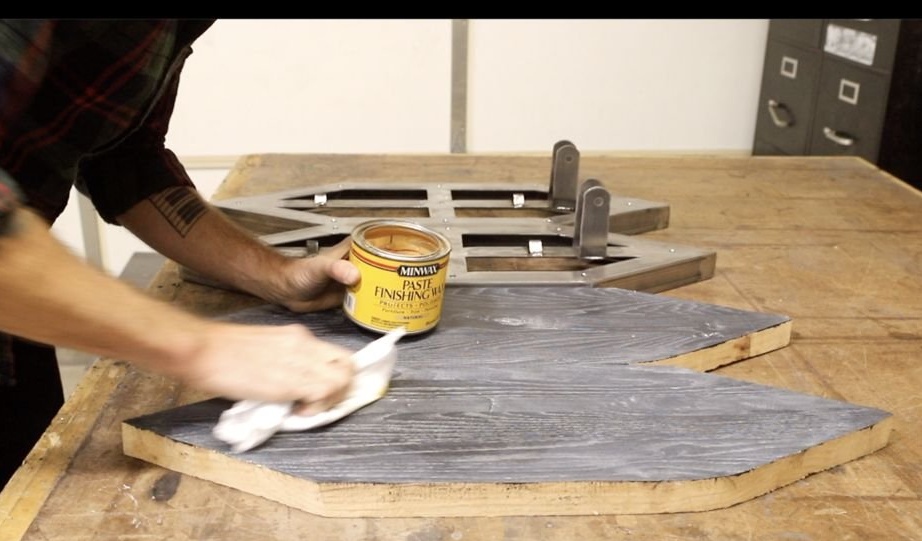
Dark wood paint should be applied to wood panels.
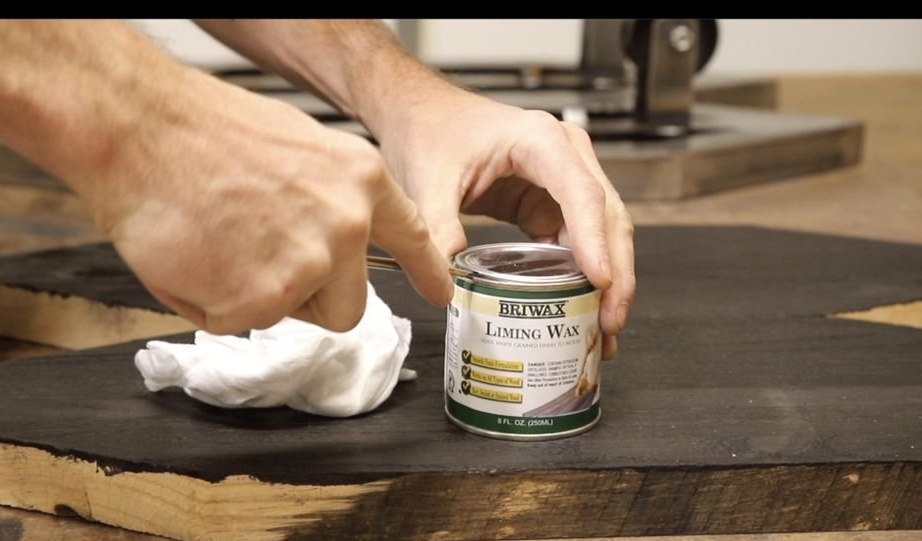
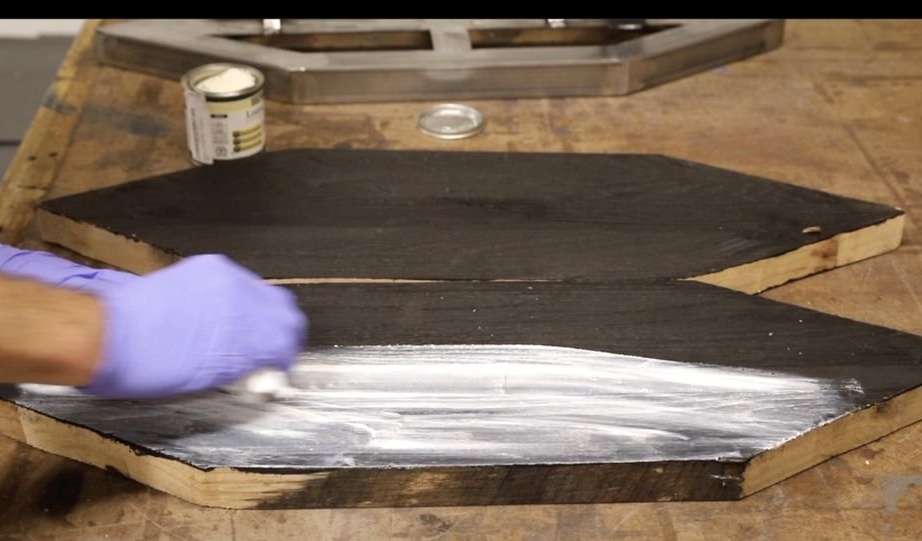
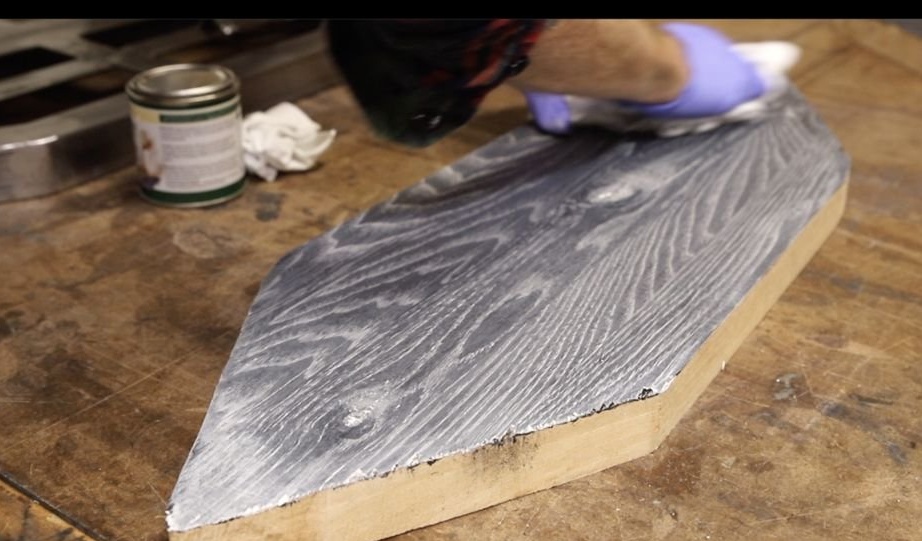
After drying the paint on the panels, apply a layer of wax and rub well into the wood structure.
Sticky wax needs to dry and then wipe off excess.
Step Six: Assembly of the lamp
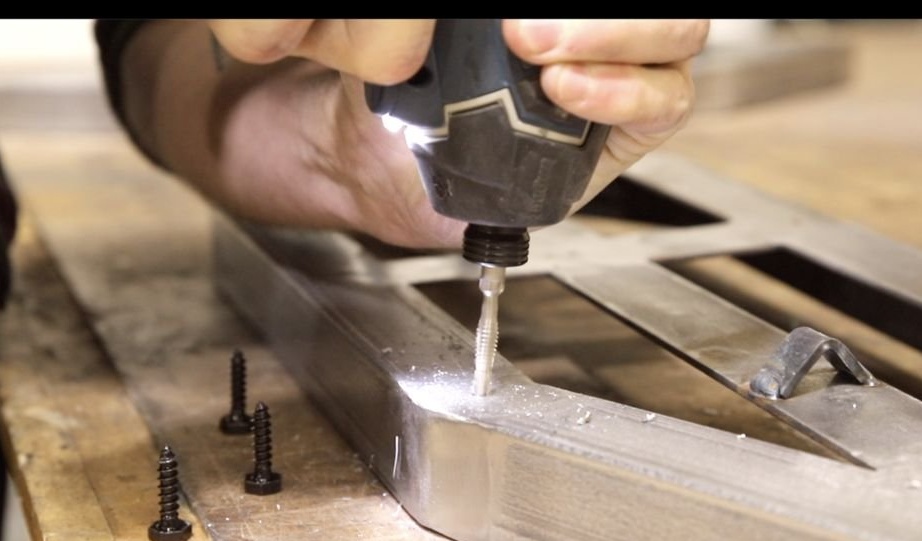
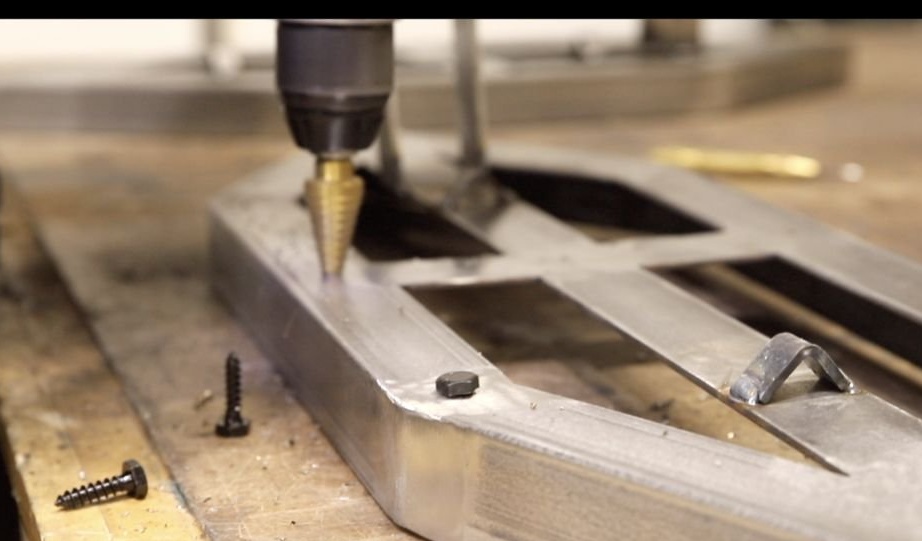
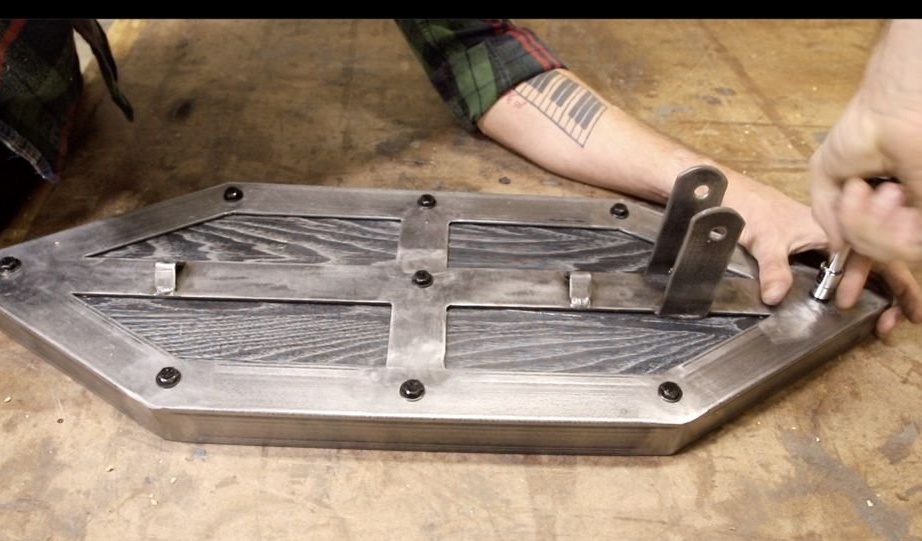
Attach the panel to the frame, as shown in the figure, using 9 bolts after pre-drilling the holes. See photos for proper placement.
Seventh step: Wiring for the lamp
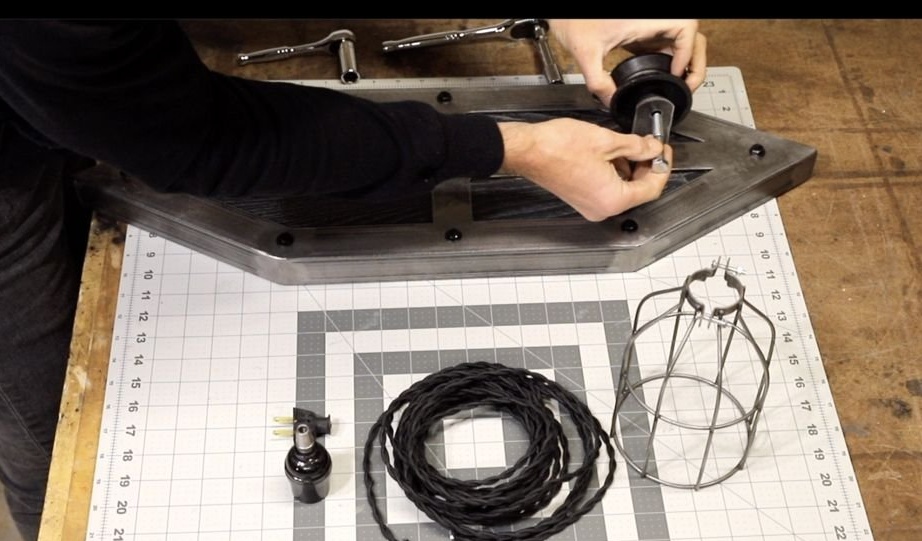
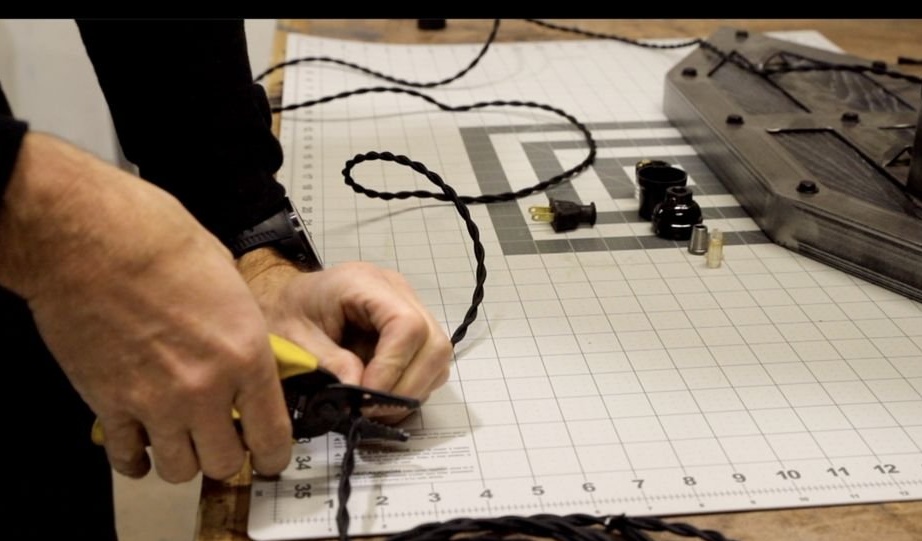

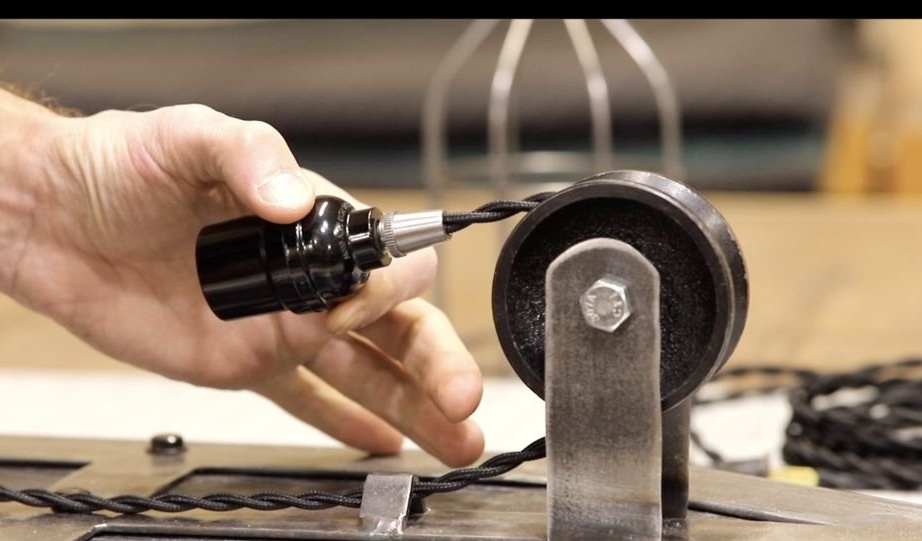
Connect the cable for the lamp to the socket.
Pass the cable through the pulley and pull it down through the welded brackets.
Lock and secure the cord in place.
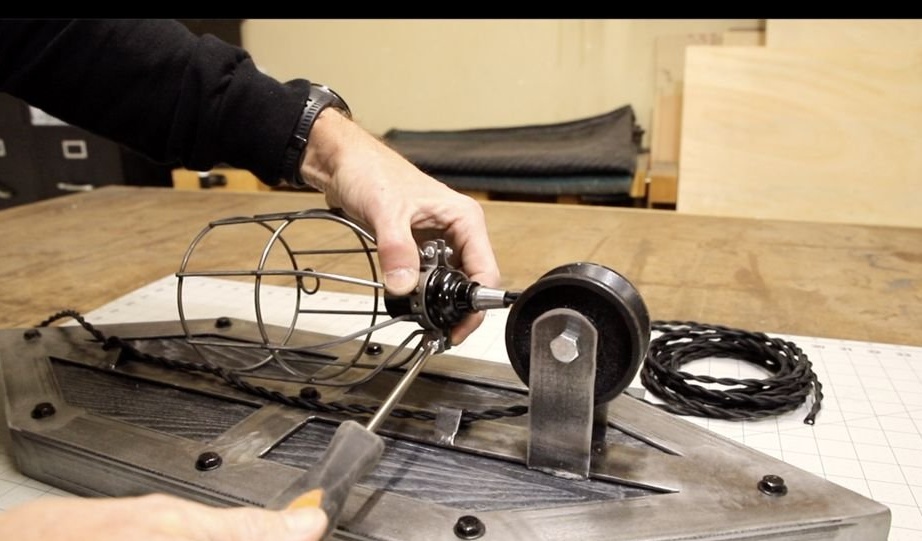
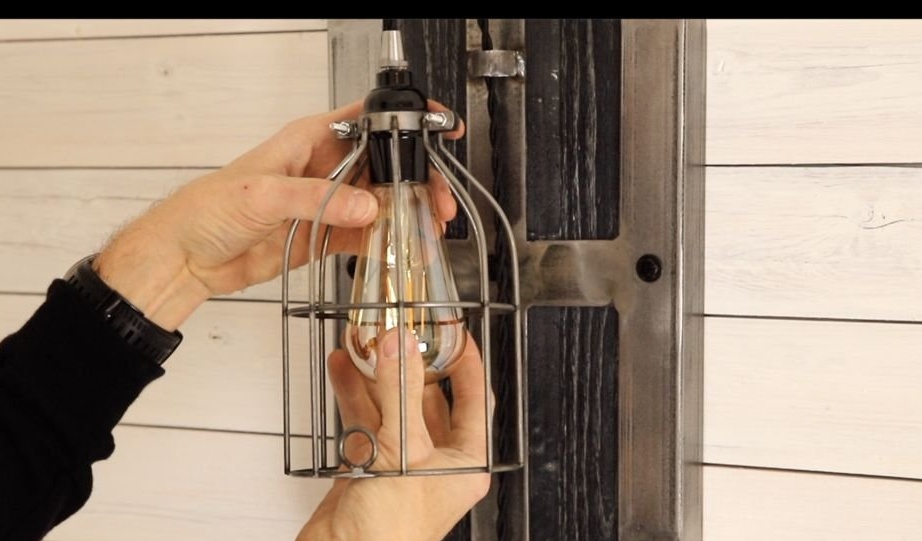
Attach the protective cage to the cartridge.
It remains to hang a sconce and add a light bulb to Edison.
Step Eight: Final Work
This homemade product is ready for use. If something was not clear or if you have questions, watch the video for more information.