
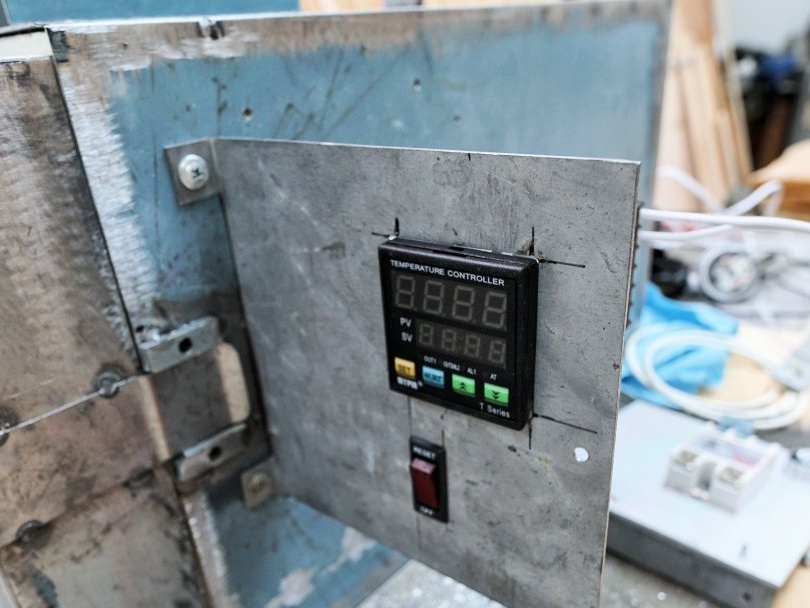
Hi lovers to craft this homemade will be needed for those who work with metal. To process the metal was easy, you need to let it go, but this requires heating and gradual cooling. This furnace copes with this task. In addition to steel, copper can also be annealed in it, the metal will then become soft and ductile. Using such a furnace, it is easy to produce and harden steel. In the oven, a temperature of around 1030 ° C is reached, which is quite enough for the purposes described above. There is a convenient controller for setting the required temperature in the furnace. The homemade product is powered by a voltage of 120V, and the power of the heating element is 1500 watts. If the project interests you, I propose to familiarize yourself with it in more detail!
Materials and tools used by the author:
Material List:
- refractory brick (the author withstands the temperature of 1260 ° C);
- sheet metal;
- door hinges;
- ;
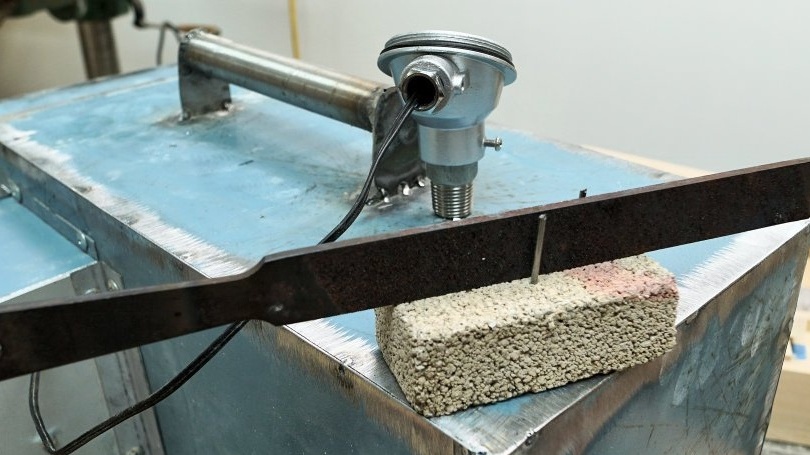
- thermocouple;
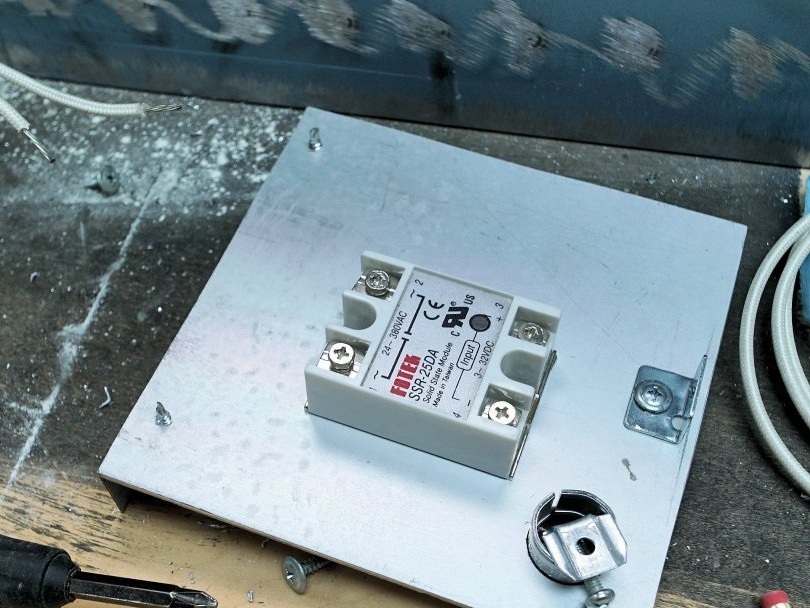
- relay for turning on / off the spiral (SSR-25DA);
- a spiral;
- automatic 15A;
- switch;
- wires;
- self-tapping screws, nuts, threaded rods, etc.
Tool List:
- grinder;
- welding machine;
- drill;
- pliers, screwdrivers and more.
Homemade manufacturing process:
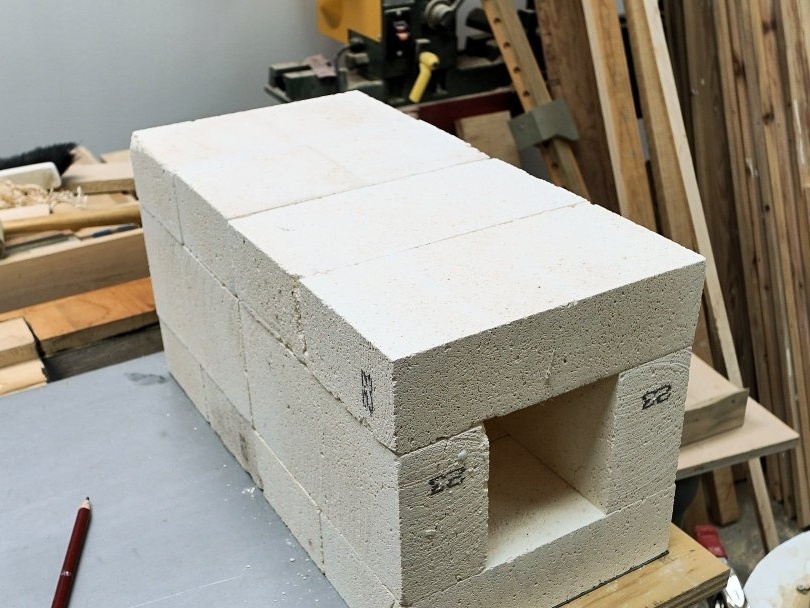
Step one. Bricks
For the manufacture of the furnace, the author used a total of 12 refractory bricks. The furnace volume was more than normal for annealing small parts. A workpiece about 38 cm long can be placed in such a furnace. The author needs such a furnace for making knives.
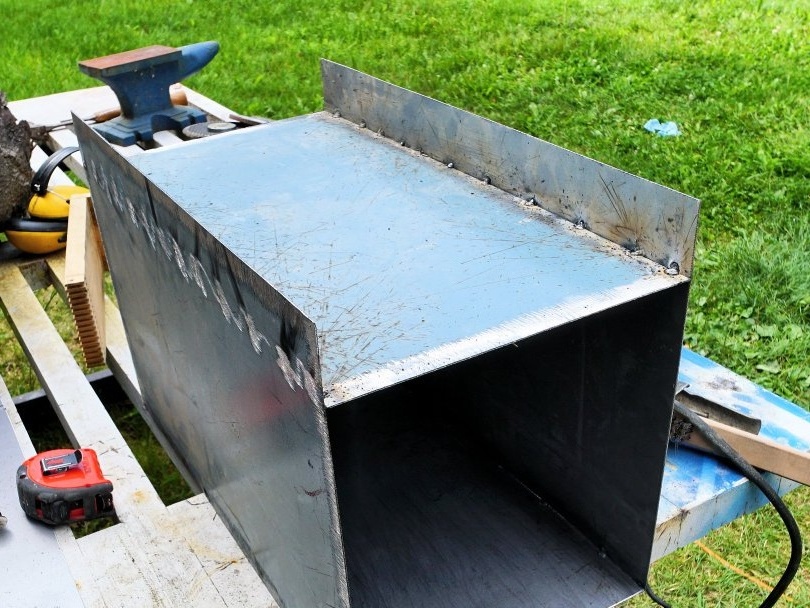
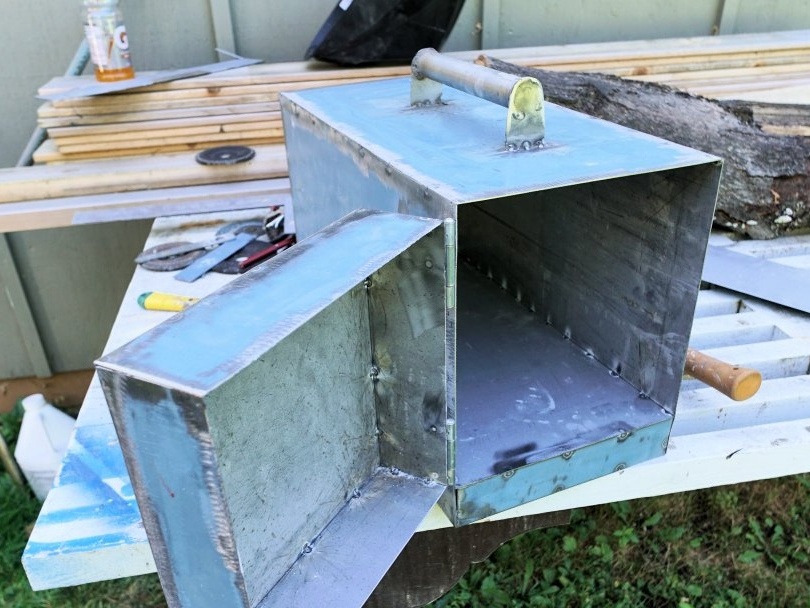
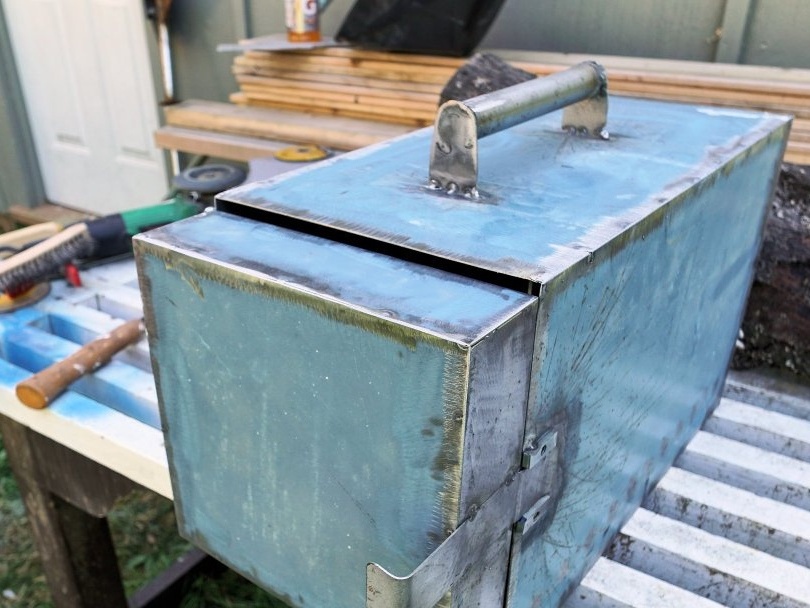
Step Two Housing
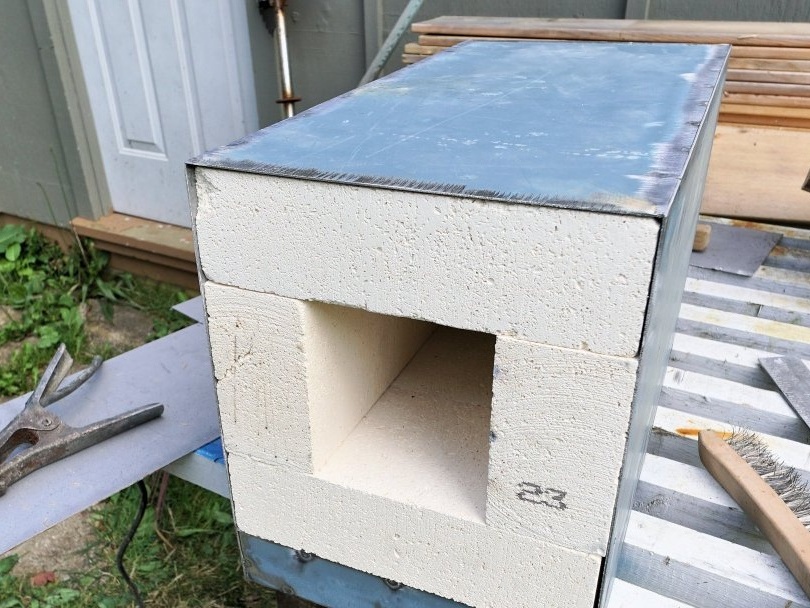
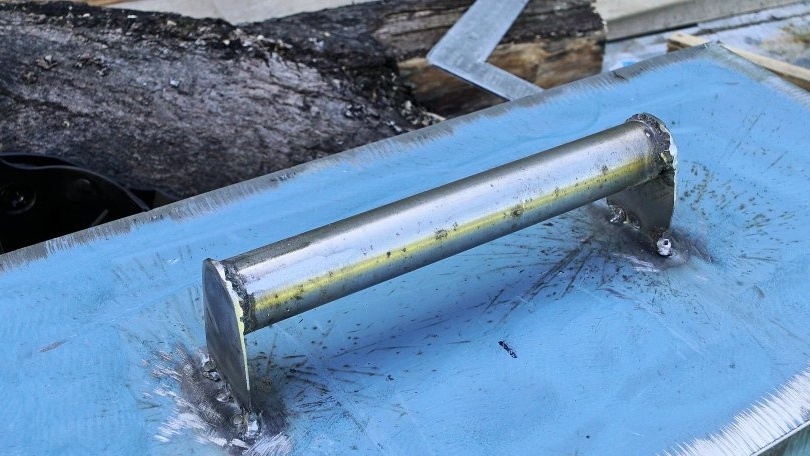
Knowing the dimensions of the furnace, we can make a casing for it. Here we need sheet metal and it’s better to pick up the material thicker. Well, then everything is simple, we cut the material, weld and lay the bricks inside. And you can immediately weld the body around the stacked bricks. In the upper part, the author welded a handle so that the oven could be transported.
Of course, in order for the furnace to work more economically, it is desirable to isolate the bricks from the body with a heater. However, more than 1300 degrees, the brick still can not stand, so there is no special sense in strong thermal insulation.
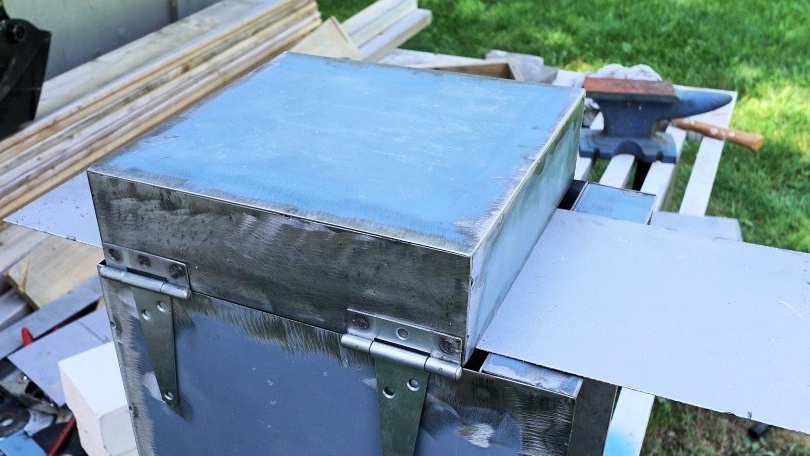
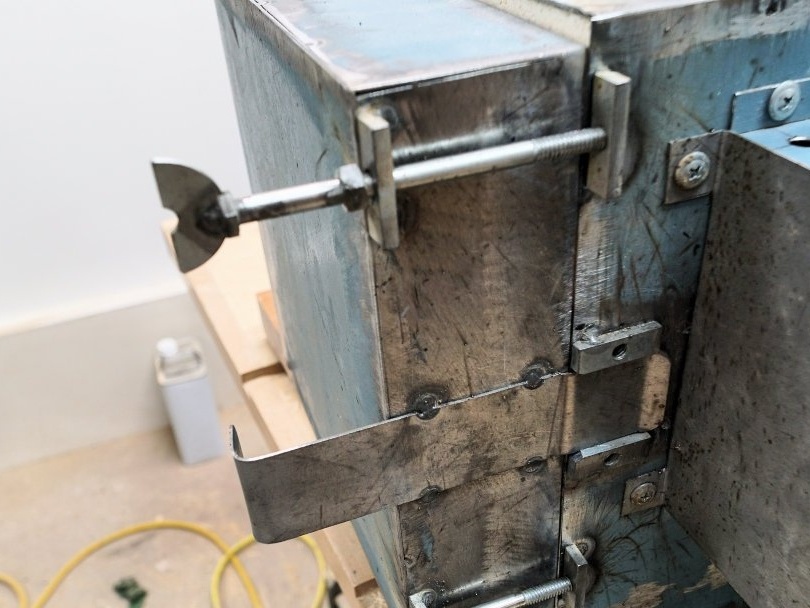
Step Three Door
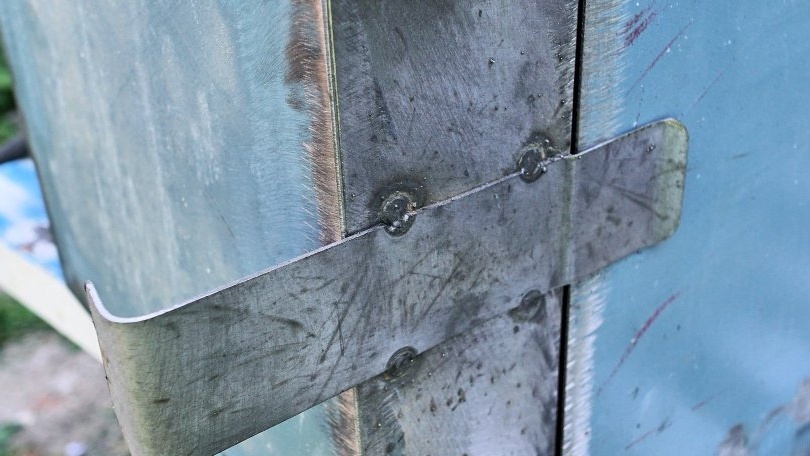
Similarly, we assemble the door, weld it from sheet iron. We hang the door on the hinges, and also make a locking mechanism. The author simply welded a plate to the door that fits snugly against the furnace body; this is a kind of latch. On the sides of the latch there are special stops that are welded to the furnace body. These stops prevent the door from sagging.
Step FourInstallation of a heating element
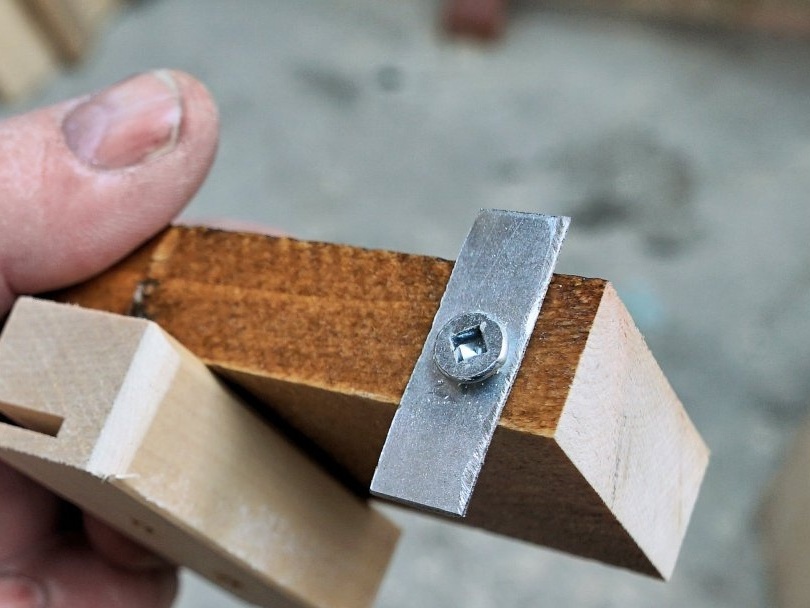
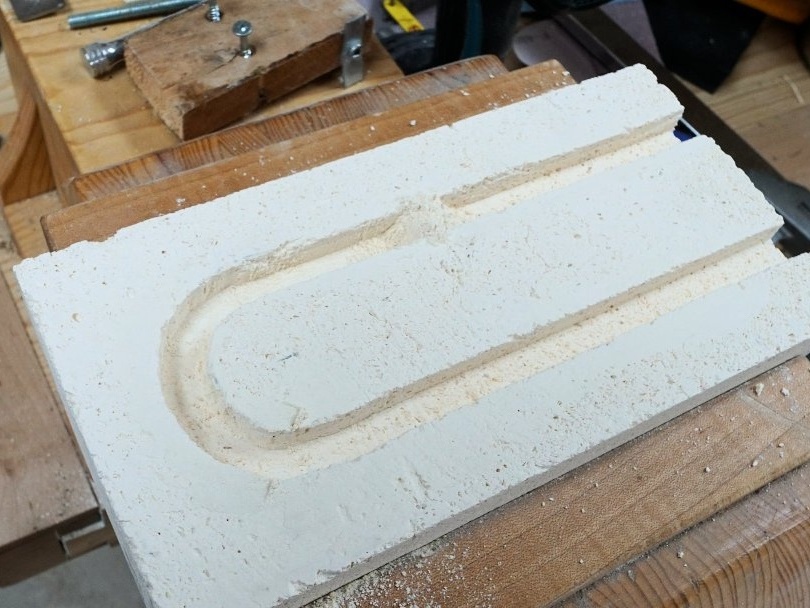
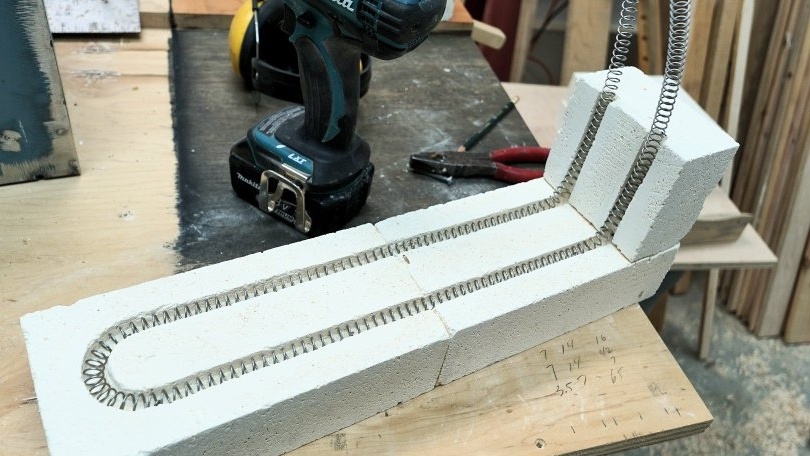
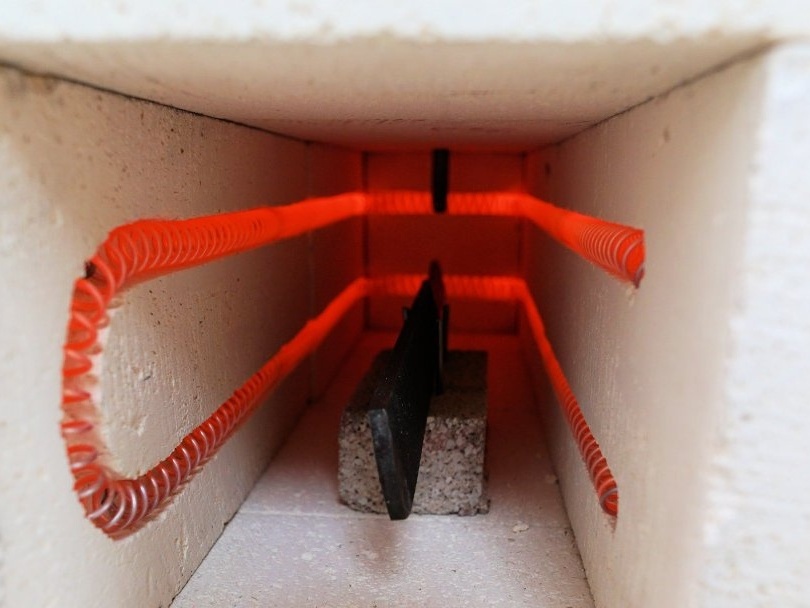
As a heating element, we use a spiral, the length of the wire, the type and thickness of the author did not indicate, but you can calculate it yourself. Under the spiral, we make grooves in the brick, the brick used by the author is quite soft, so that the grooves are made easily. To simplify the task, the author made a special tool from wood and a metal plate. To fix the spiral in the grooves, you need to make staples from the same heating element.
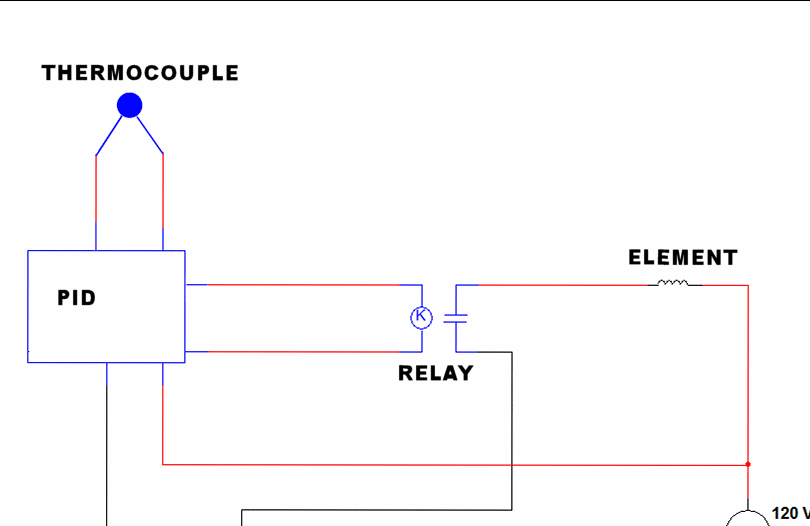
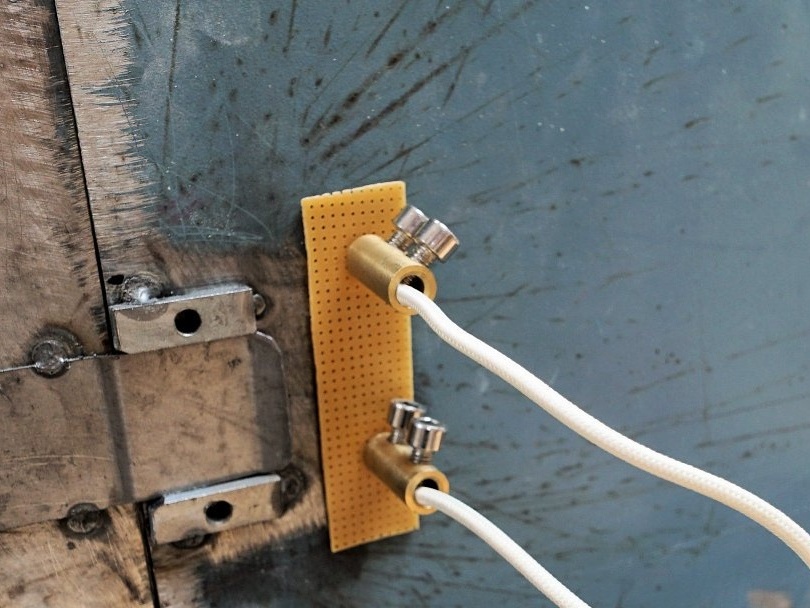
It is important to reliably bring the wire out of the furnace, they should not come into contact with the furnace body, otherwise the furnace will be shocked, and a short circuit may occur. We use ceramic inserts or textolite. We connect the power to the spiral and see if it works. In order for the spiral to serve for a long time, it must glow in dark red. Places where the spiral glows yellow will quickly burn out.


Step Five Assembly
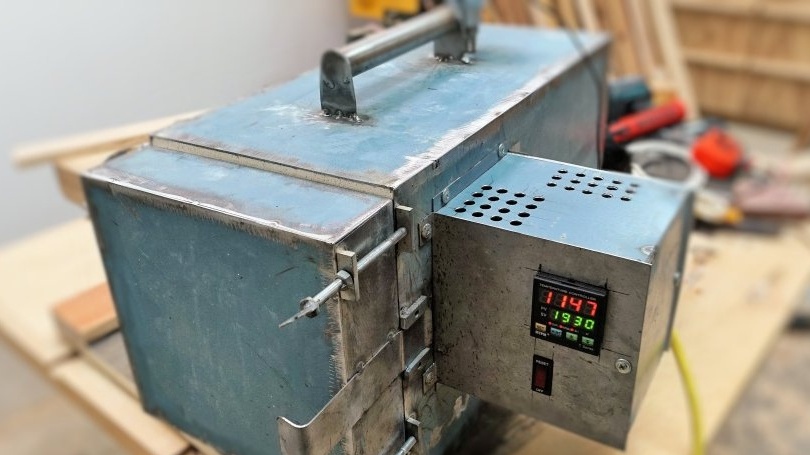
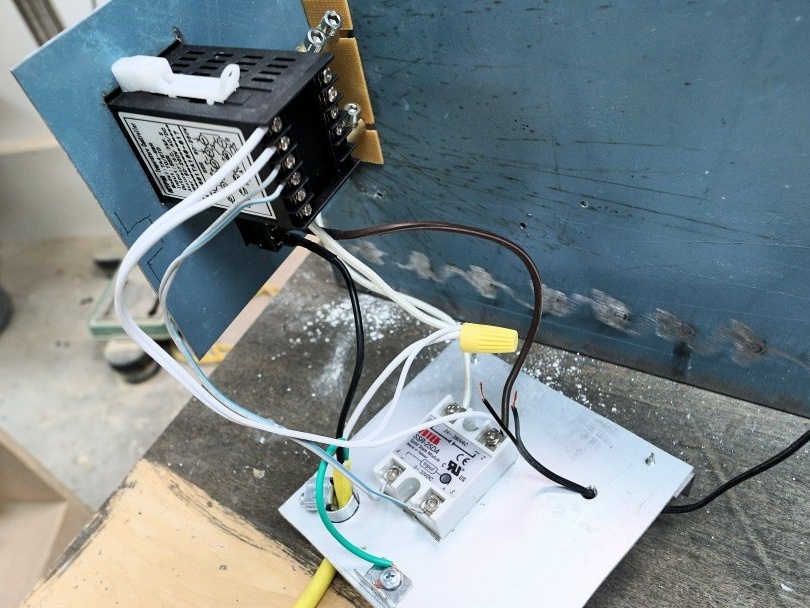
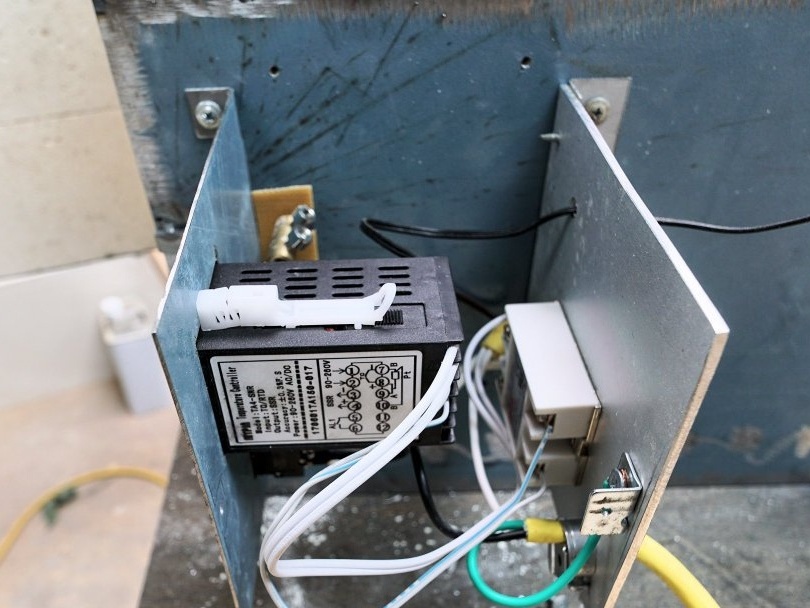
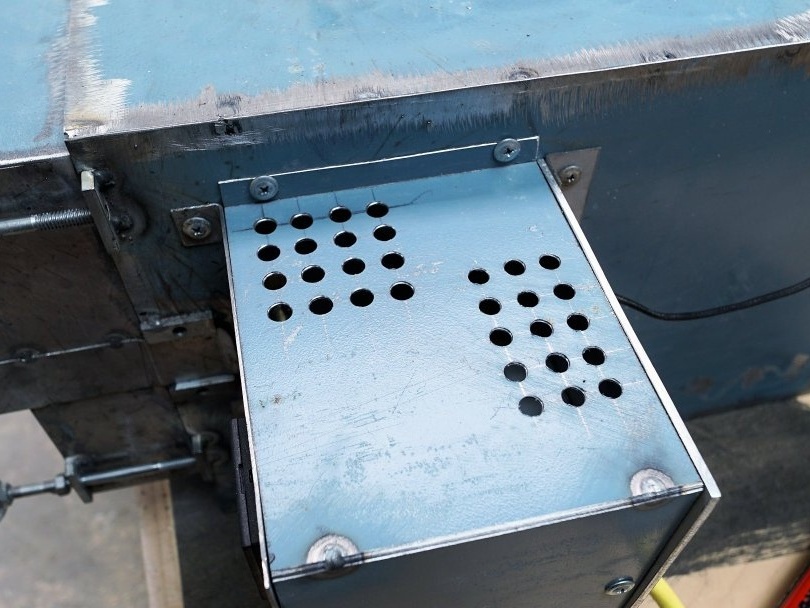
We are assembling the furnace, the installation of electronics refers to this step. We fasten an additional plate to the furnace body, on which we will place all the components. Here is located, as well as a relay to control high current, as well as a switch. For safety reasons, it is very important to use a three-wire cable and connect the ground to the furnace. We assemble a metal case above the electronic components, it must have ventilation openings, since the furnace will heat the contents.

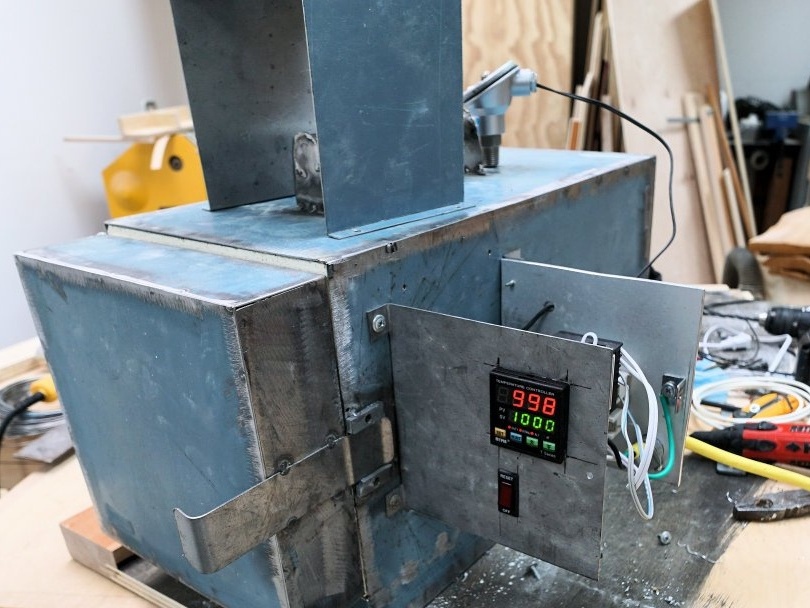
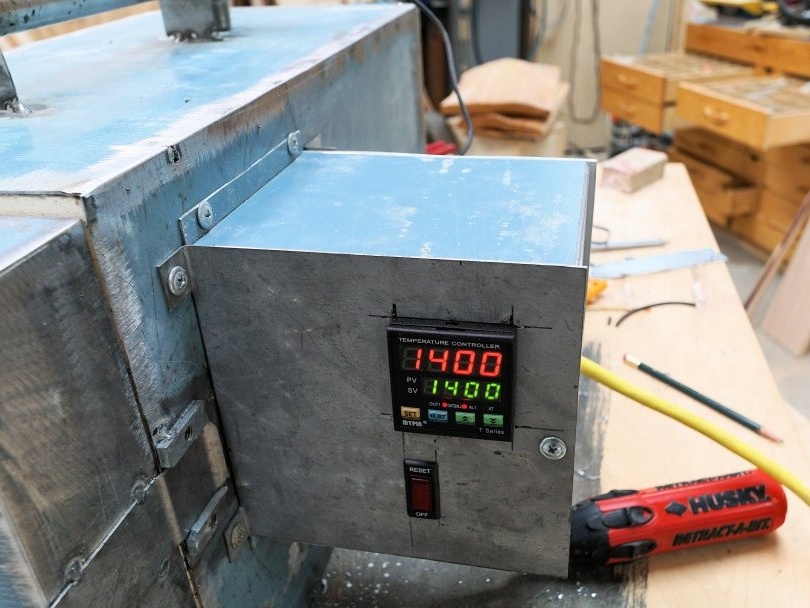
After that, the oven is ready, for starters, the author tried to release the file for making a knife. The file was heated to 760 ° C, and then the author turned off the oven and let it cool in the closed state along with the file. After that, the metal should become malleable.
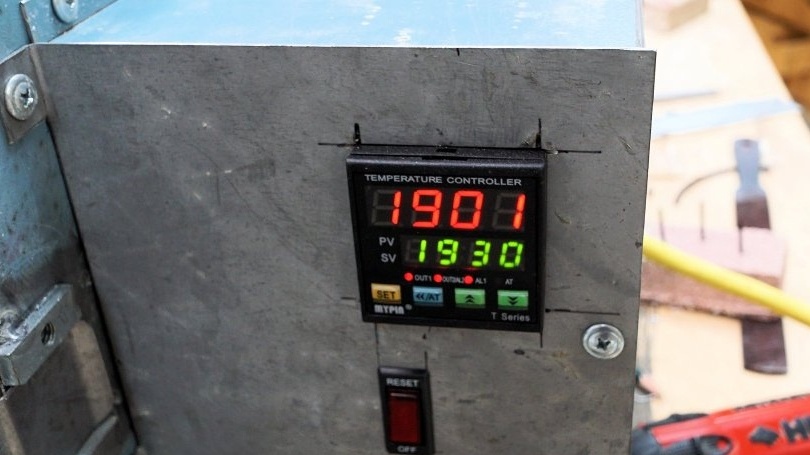
Then the author decided to bring the furnace to a maximum temperature, which is 1038 ° C. The stove took some time, but it still warmed up to the indicated temperature. The author did not want to paint the oven, because he likes her current look.
Homemade works perfectly, I hope you liked the project and you found useful information for yourself. Good luck and creative inspiration, if you decide to repeat this. Do not forget to share your ideas and homemade things with us!