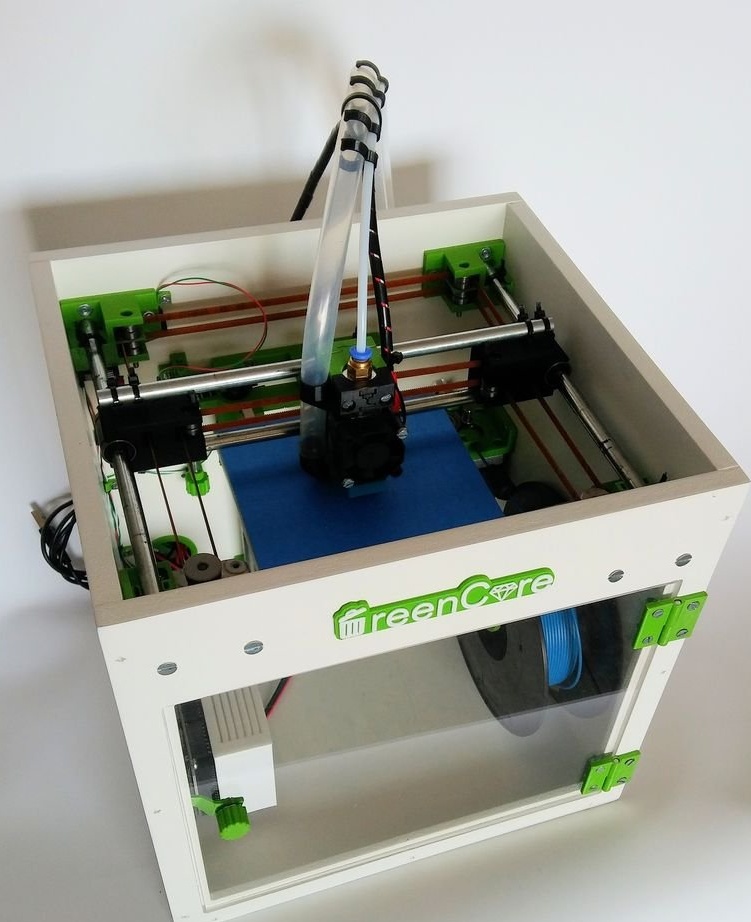
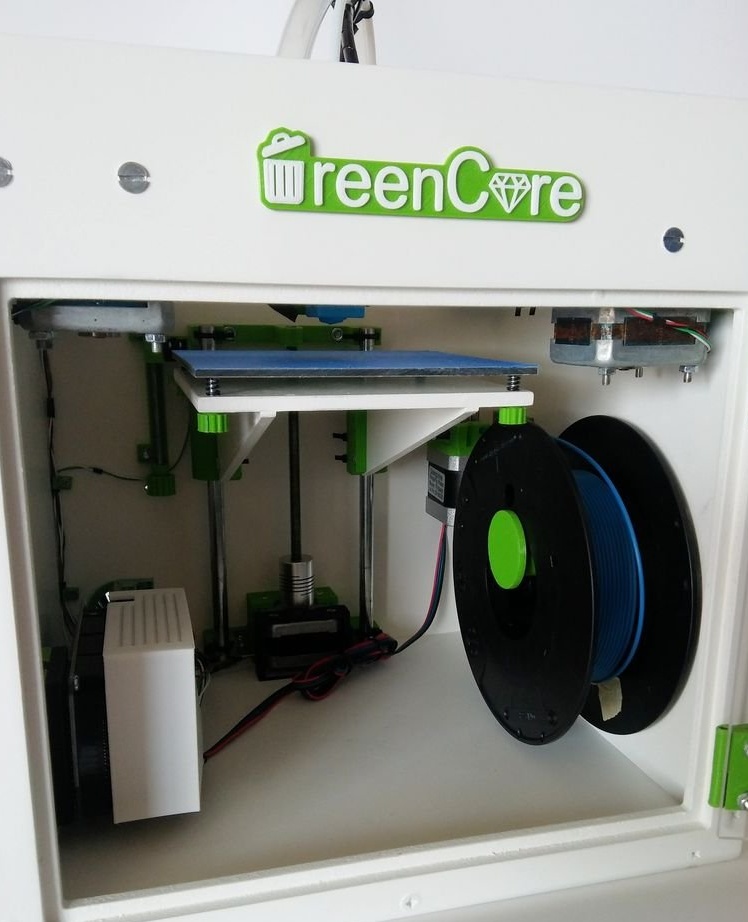
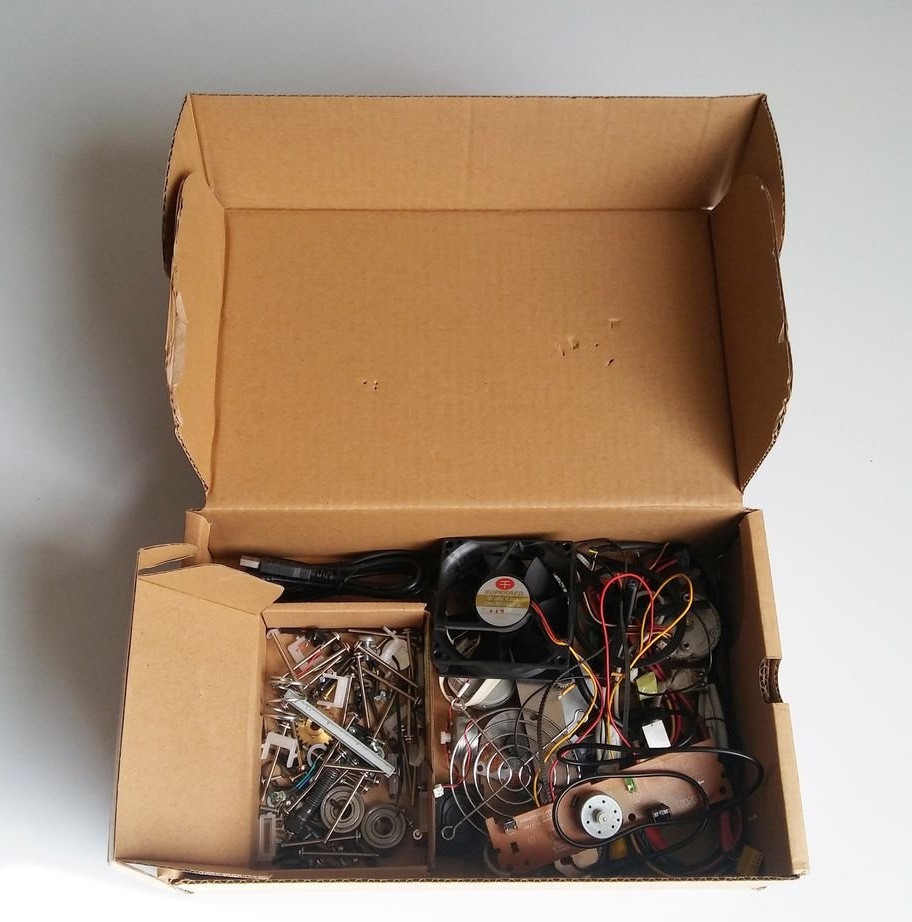
In this article, the Wizard will present us with his version of the 3D printer. 70% of this machine is made from parts extracted from old used equipment. The master made and assembled the machine together with his son, trying to convey to him the skills in mechanics, programming, mechanical engineering, electronics. The machine can also be used, slightly redone, like a laser cutter or engraver.

The device has the following features:
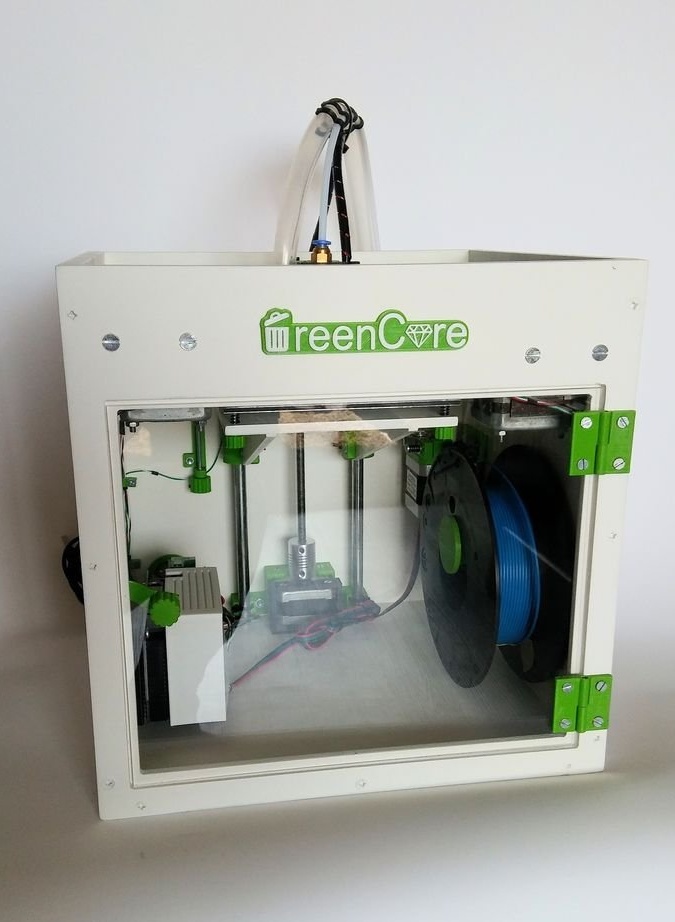
Compact design.
Easy to move and use.
Printing area 10 cm x 10 cm x 10 cm.
Threads are stored in the machine (250 g spool).
Compatible with conventional nema17 stepper motors and GT2 belt.
Modular head.
Despite the secondary details, the master wanted to make a good machine capable of performing high-quality 3D printing. So he had to buy some parts, such as bearings.
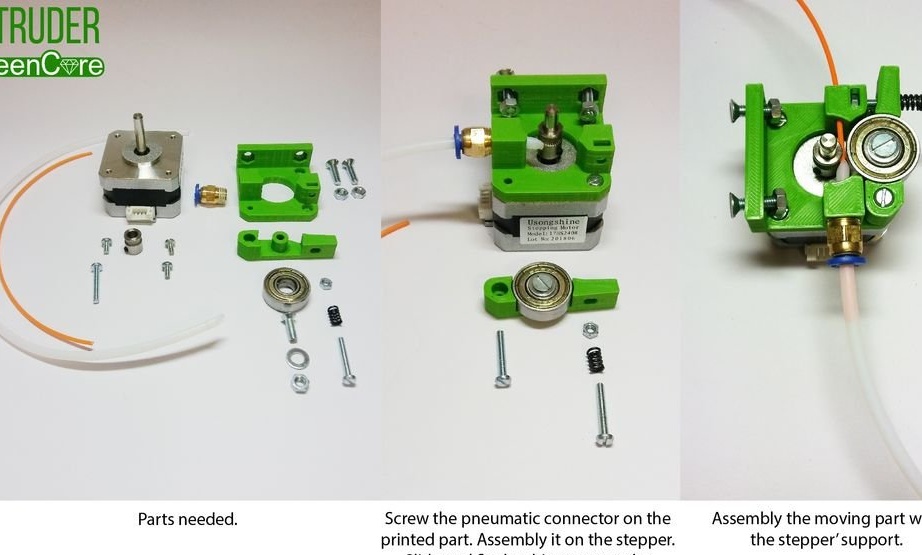
The master designed all the parts except the Bowden extruder () and the linear bearing clamp ().
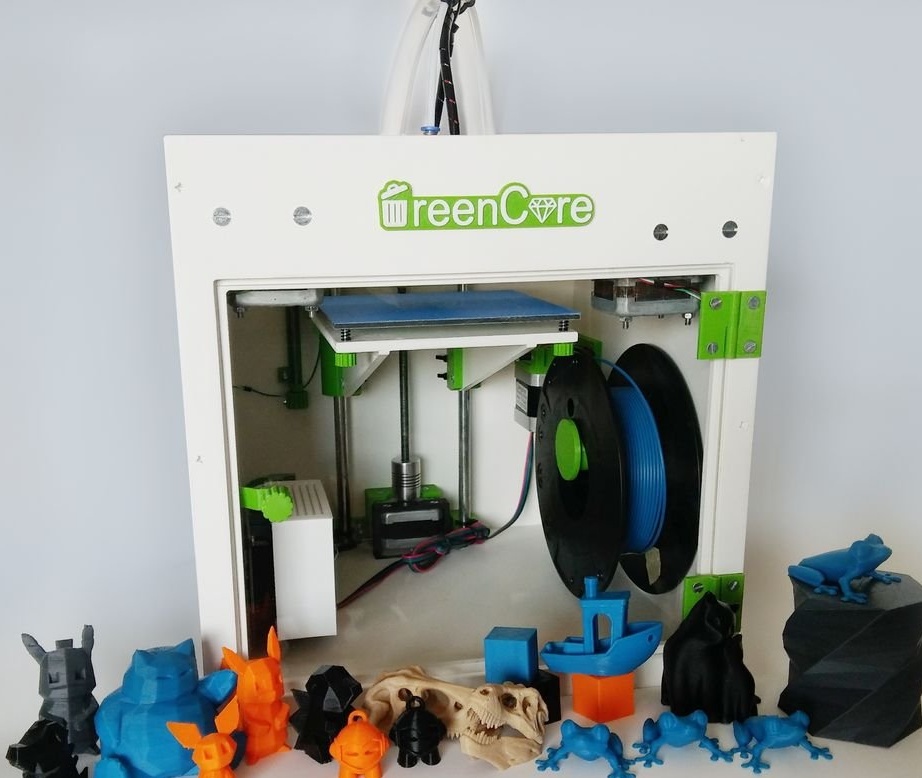
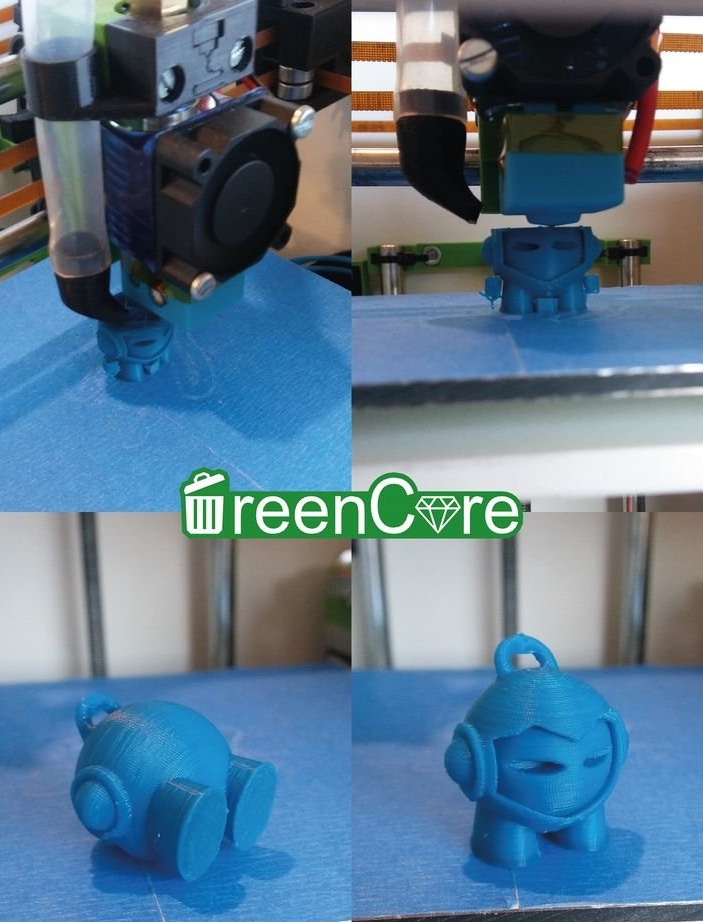
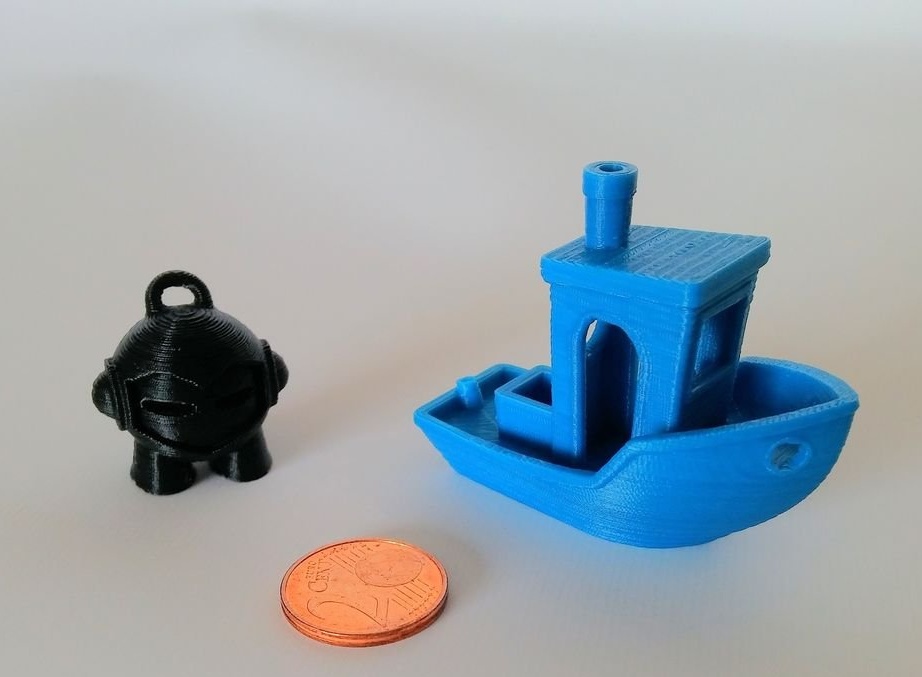
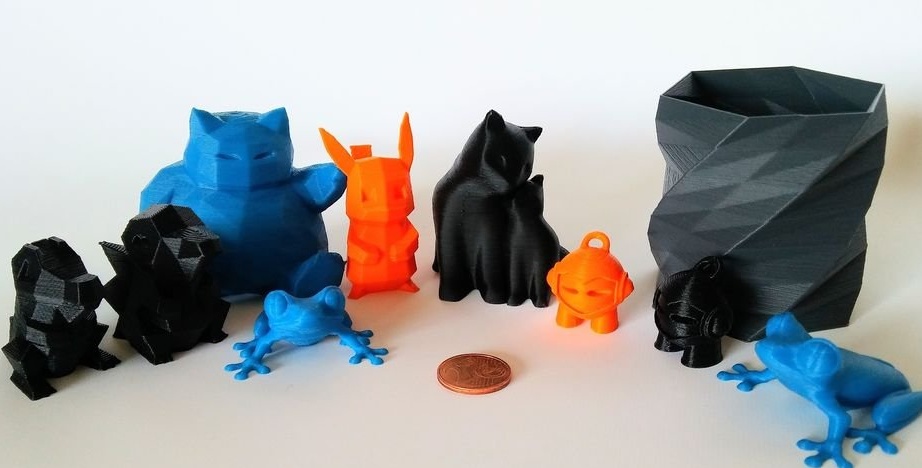
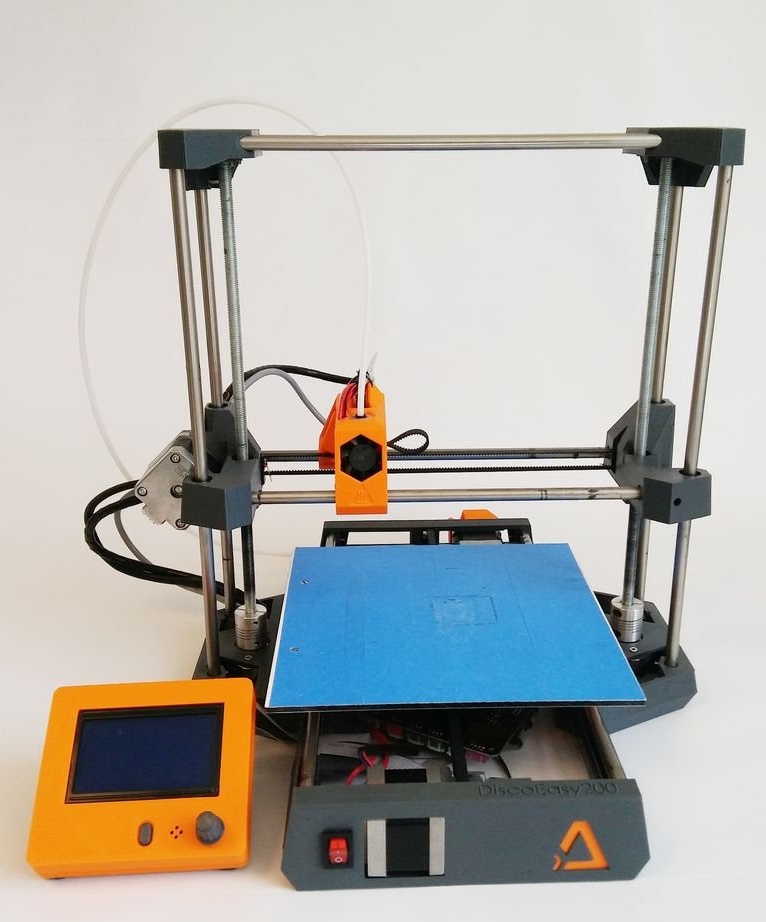
As you can see in the picture, the first user is the master’s son. In the first photo you can see everything that the machine prints, including unsuccessful models. The machine can print with a resolution of 0.15 mm, and the print duration is 3 hours.
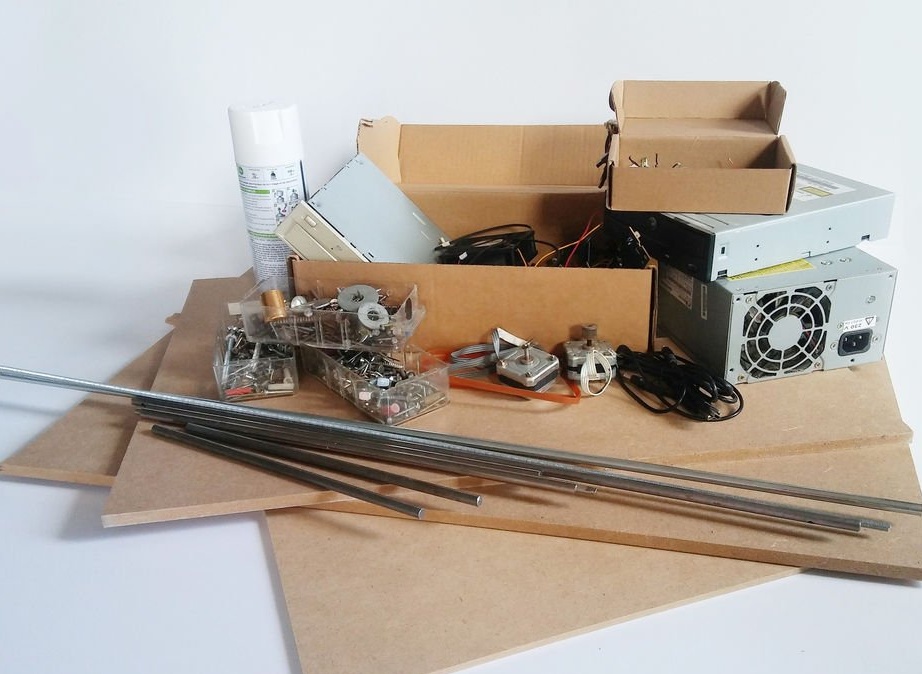
Now we turn to the list of materials, in which the master indicates where this or that part was extracted from.
Tools and materials:
-2 nema 17 stepper motors with belts and bolts for the XY axis from the Espon C20 printer;
-1 nema 17 stepper motor with bolts for the z axis from an Epson C20 printer;
-1 stepper motor nema 17;
- Coupling 4x6;
- 608zz bearing;
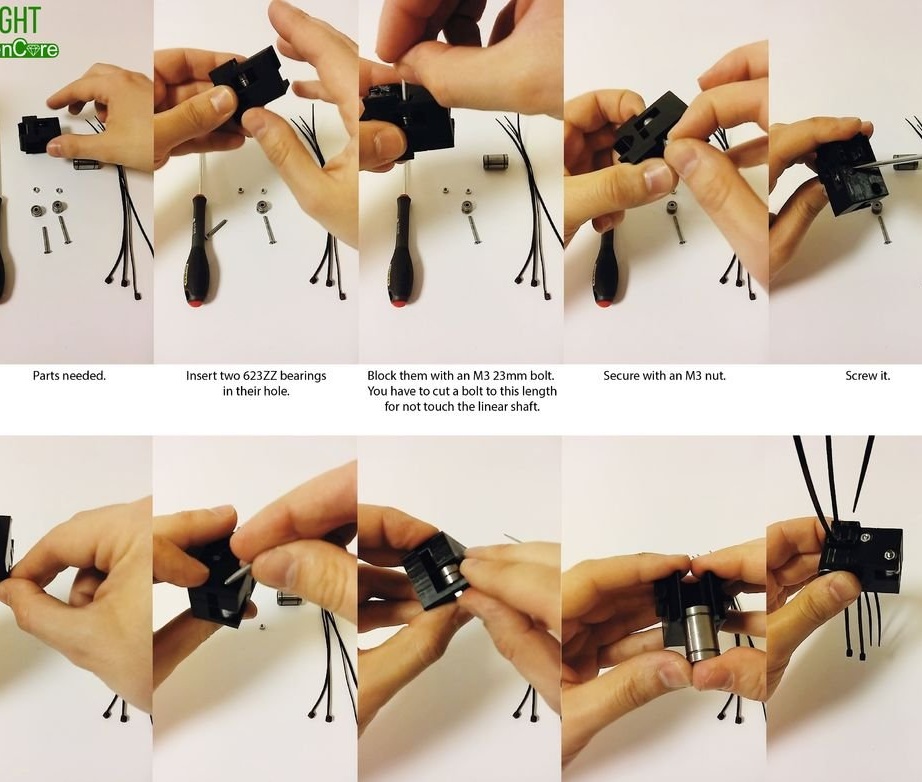
-623zz bearings - 16pcs (the wizard recently found them in server cooling fans);
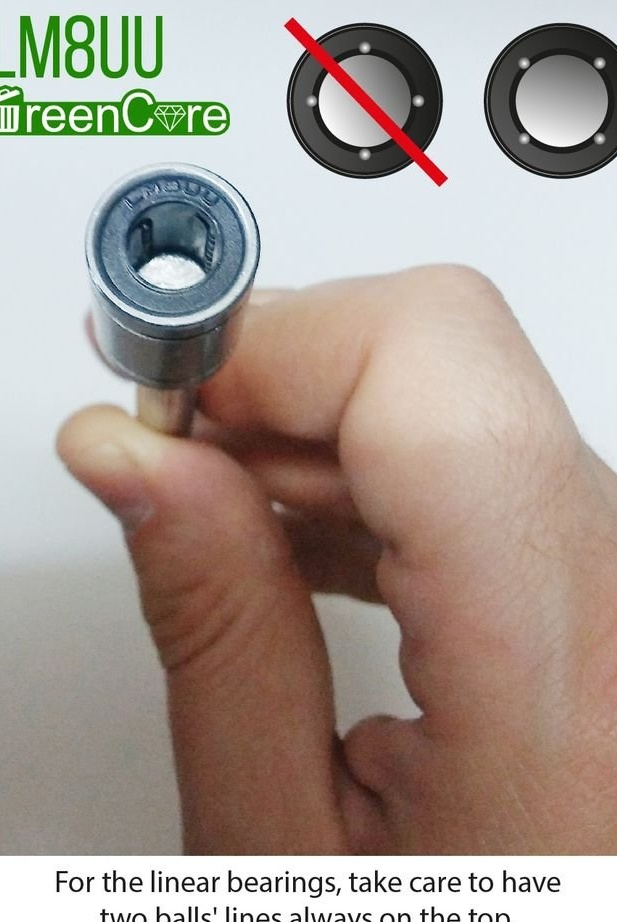
- LM8uu linear bearings 8 pcs;
-Pneumatic quick connector PC4;
---- Toothed nozzle on the extruder shaft;
-Thermoblock;
- Arduino mega kit for 3D printer;
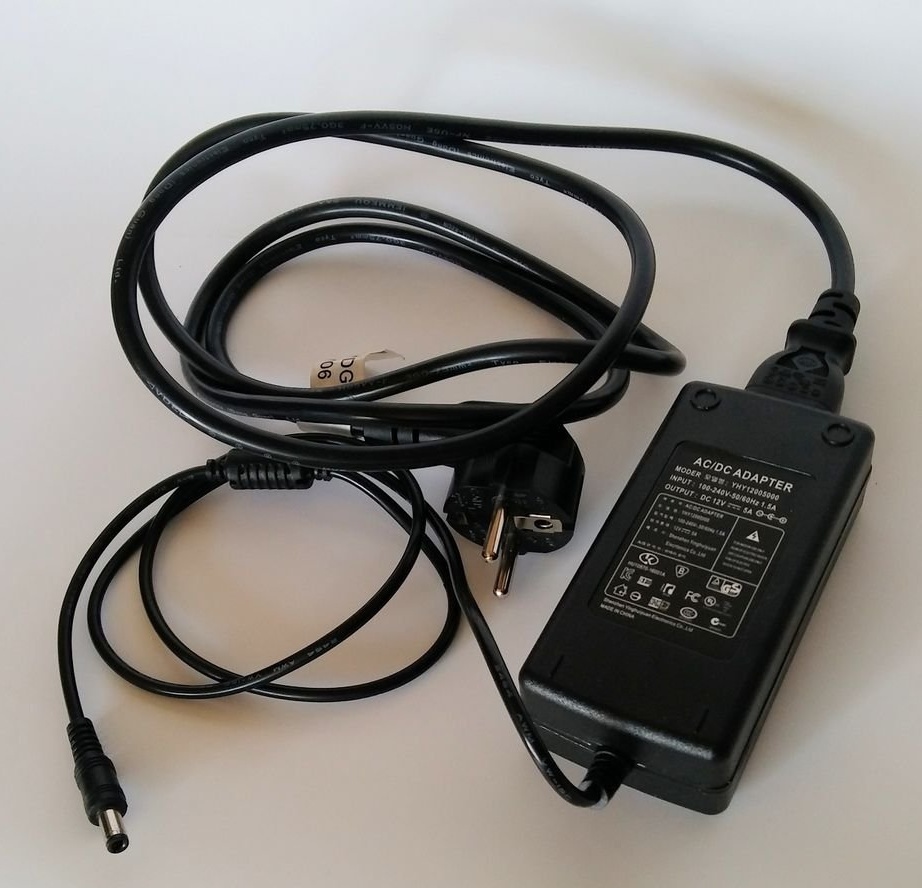
-12V 5A power supply (the master uses a computer PSU);
- 12V plug;
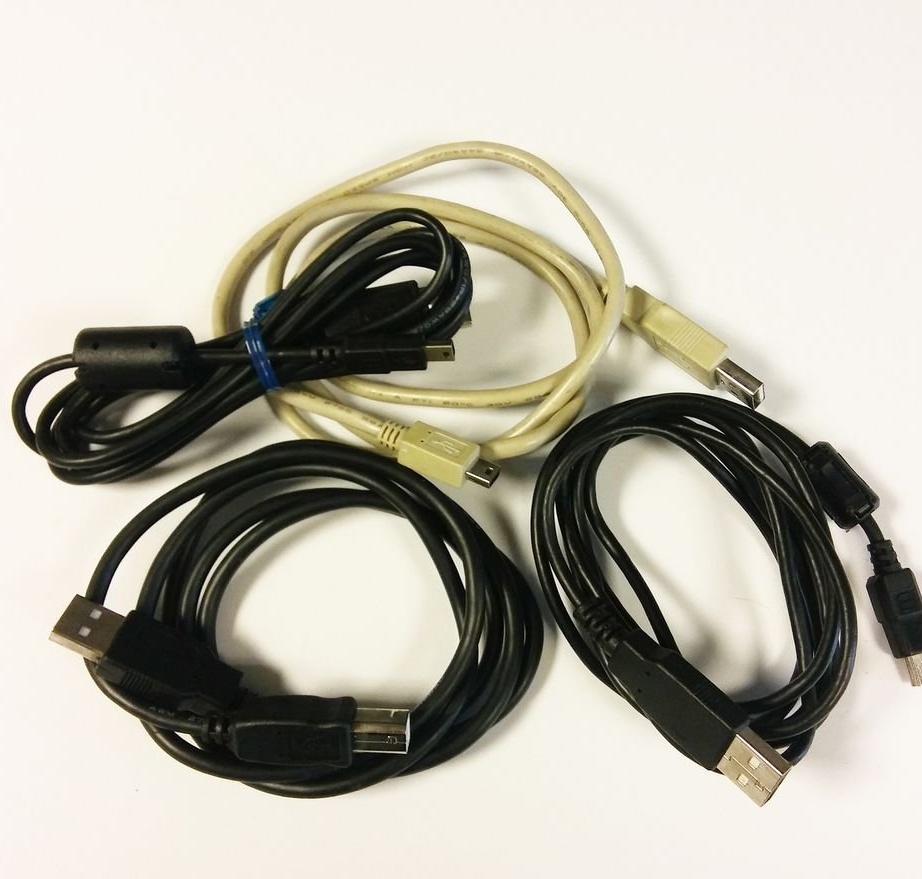
USB cables
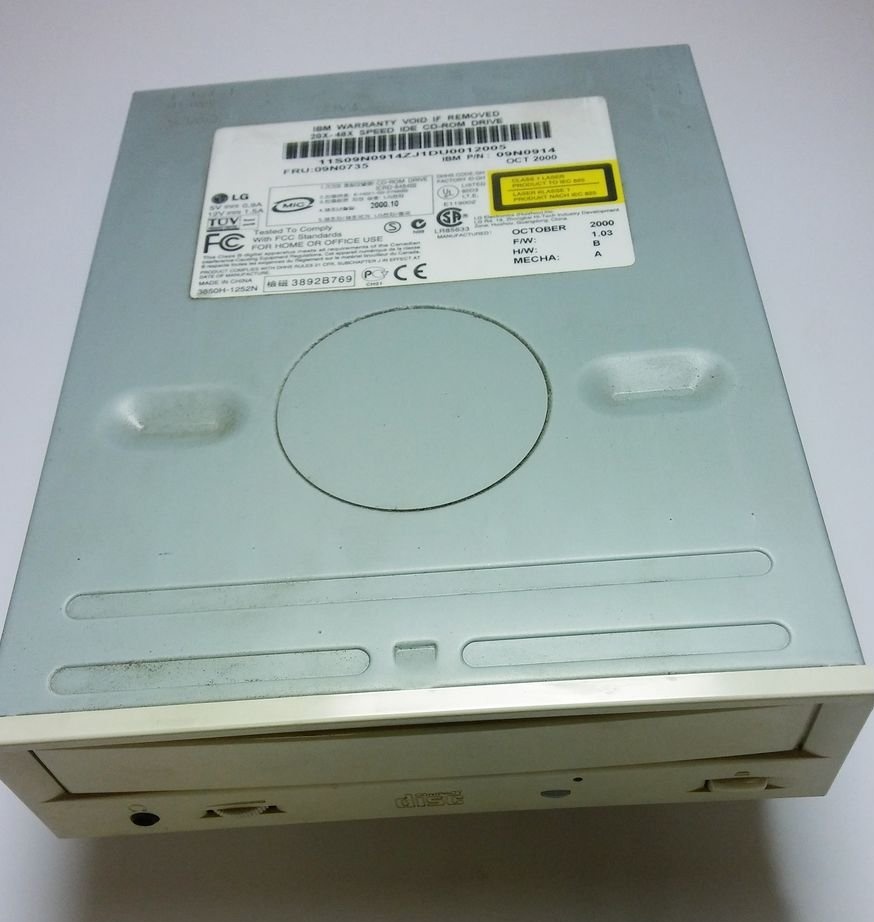
-2pcs DVD drive;
- Limit switch;
-8 mm linear shafts;
-6 mm threaded rod;
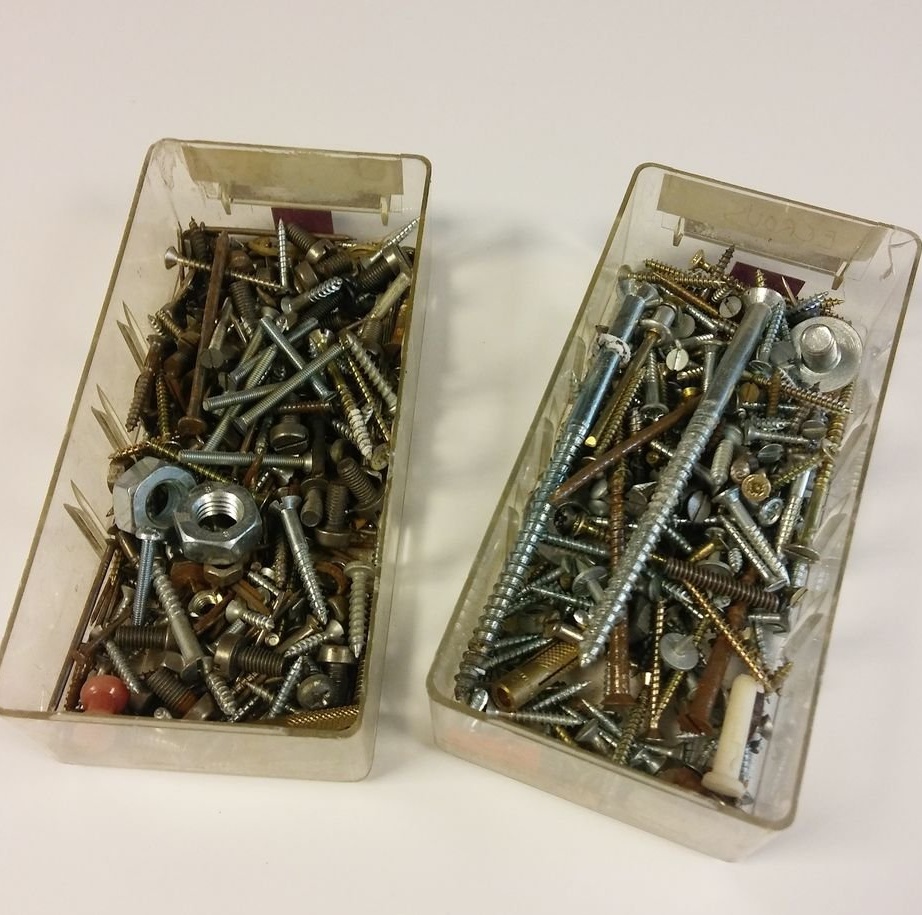
- Screws, bolts and nuts (M2, M3, M4 and M6);
-Springs (found in the printer, cars);
MDF or plywood;
- Orgsteklo;
-12 mm flexible pipe (PVC can be used);
- Electric jigsaw;
-Screwdriver;
-A circular saw;
-Knife;
- Metalwork keys;
-Drill;
-Paint;
-3D printer;
-Heat-shrink tubing;
-Soldering accessories;
-Aluminum plate;
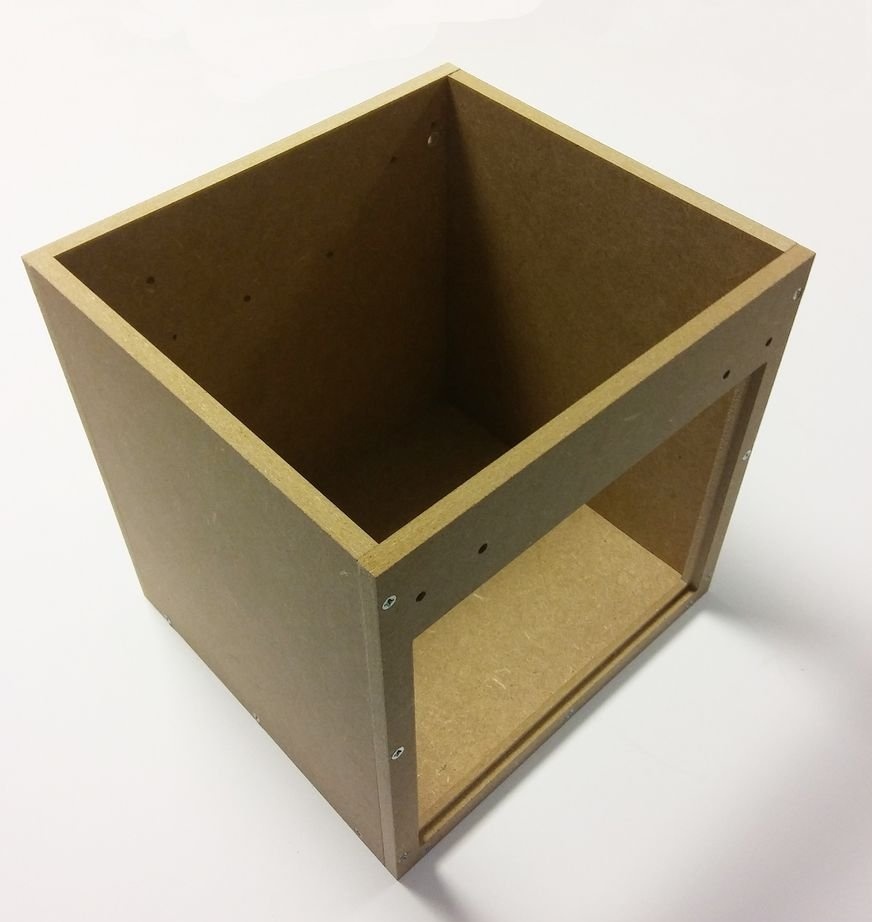
Step One: The Case
The body was made by the master from MDF waste. The thickness of the MDF is 10 mm. The door is made of 3 mm acrylic. MDF cut partially on a circular machine, partially with a jigsaw. After assembly, the body is painted with white paint.
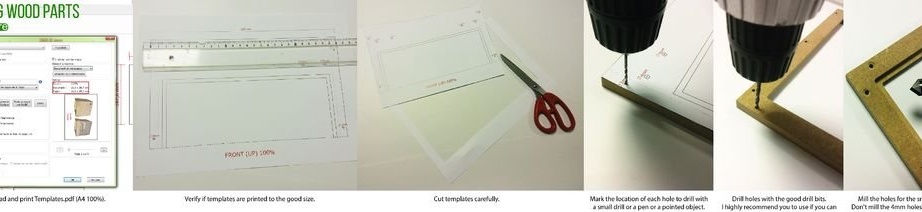
Below you can download a PDF file with a drawing of the case.
Greencore templates.pdf
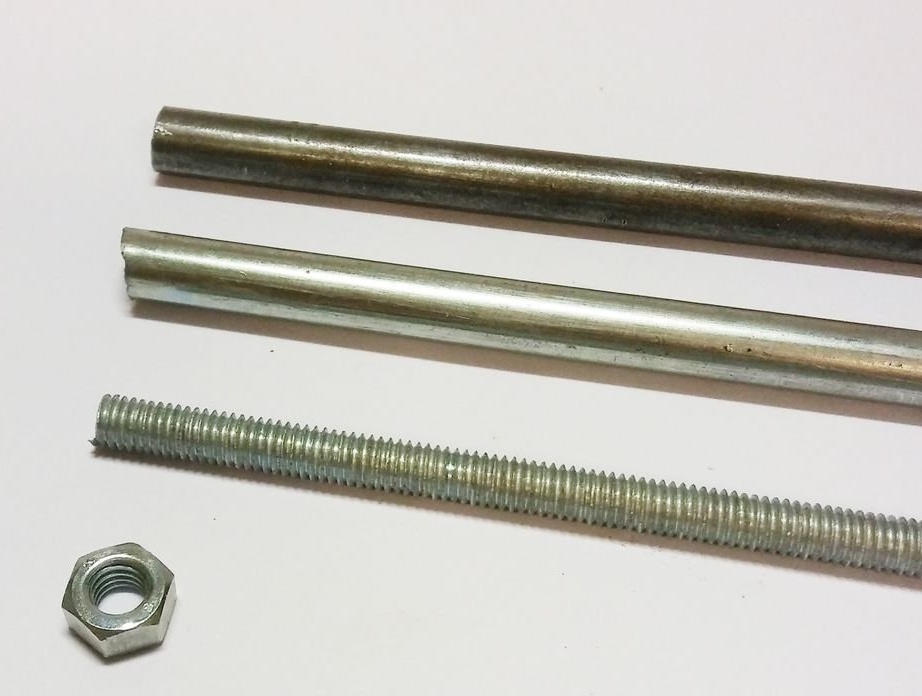
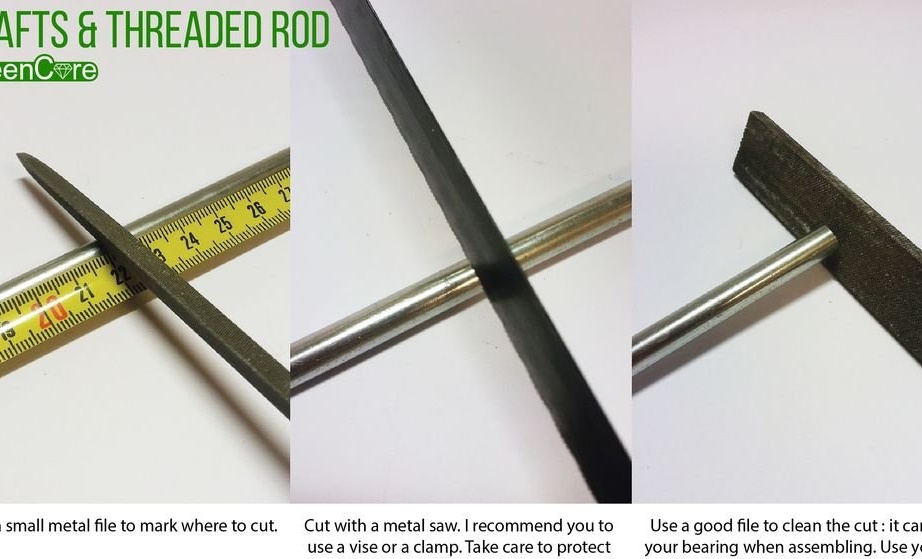
Step two: rods
Need a few smooth and a few threaded rods. Shafts 6 and 8 mm the master took out from the old fax machine. The 3 mm shaft was removed from the DVD drive.
Linear shaft with a diameter of 8 mm:
225 mm (X axis) - 2 pcs.
180 mm (Z axis) - 2 pcs.
200 mm (Y axis) - 2 pcs.
Threaded rod with a diameter of 6 mm:
135 mm (Z axis) - 1 pc.
Linear rod with a diameter of 3 mm:
30 mm (for loops) 2 pcs.

Step Three: 3D Printing
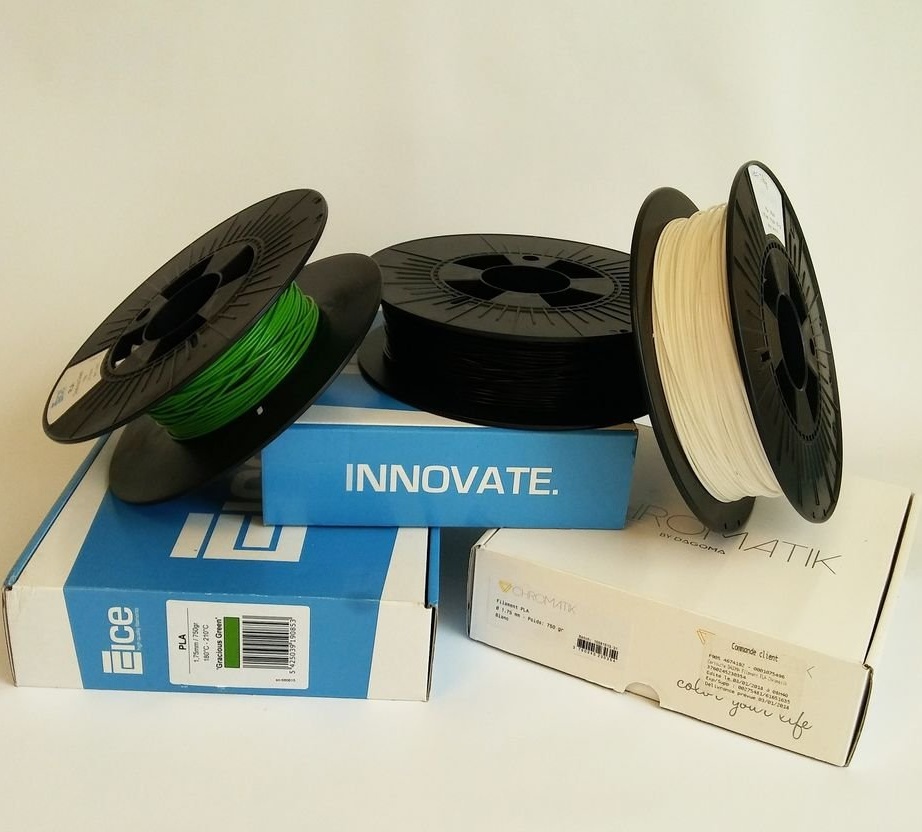
To make several parts, you need access to a 3D printer. The master used his Discoeasy200 3D printer with green and black ICA Gracious PLA filaments and Dagoma White Chromatik PLA filaments to print parts. The project needs 220 g of thread.
Print Settings:
Support: no
Resolution: 0.2 mm
Filling: 20%
Incandescent: PLA
All files can be printed directly with a better orientation. The author recommends starting with the Test.stl. File to check print quality.
Test.stl
E3DV6 Holder.stl
E3DV6 Parts.stl
Extruder arm.stl
Extruder.stl
MB box.stl
MB rail.stl
MB Support.stl
Spool holder.stl
Wire hole.stl
X Carriage.stl
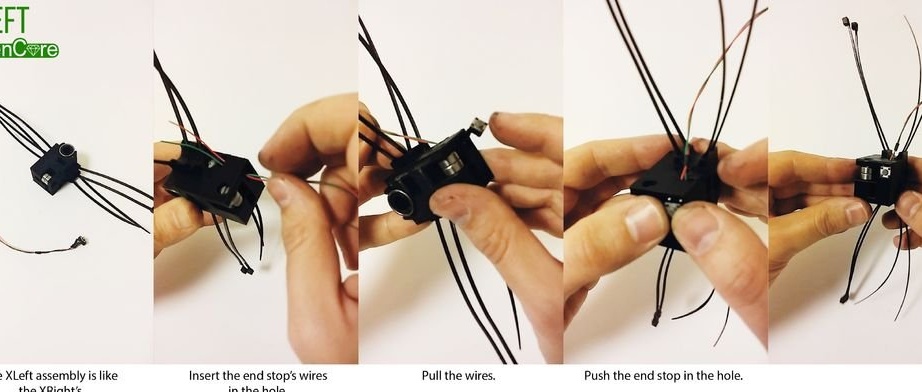
X Left.stl
X Right.stl
Y Back Left.stl
Y Back Right.stl
Y Front Left.stl
Y Front Right.stl
Z bottom.stl
Z carriage.stl
Z plate.stl
Z Top.stl
Z Endstop.stl
ZMotorSupport.stl
Door Parts.stl
Bed knobs.stl
Wire clamps.st
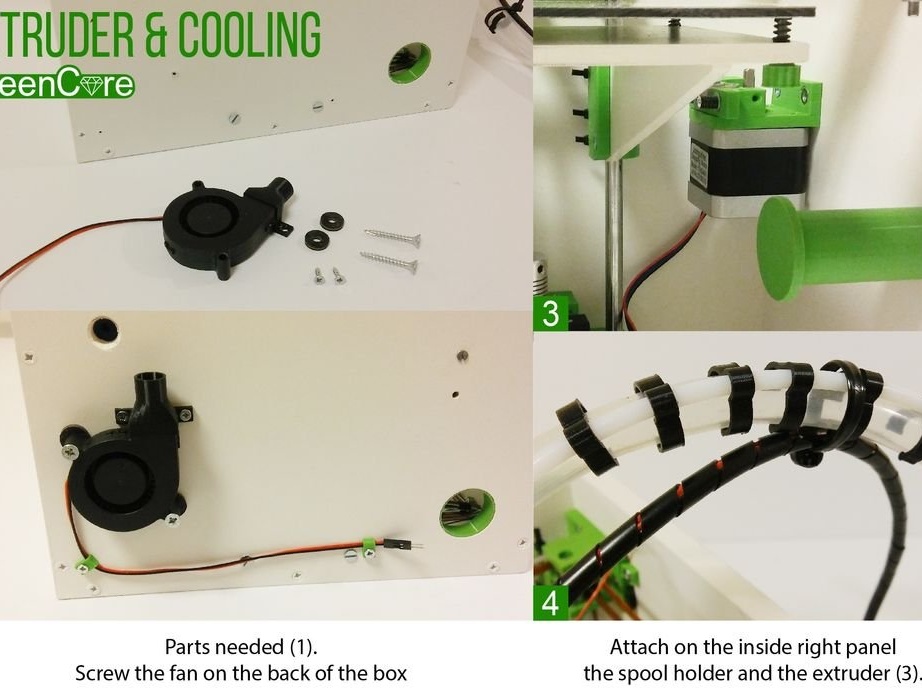
Cooling Parts.stl
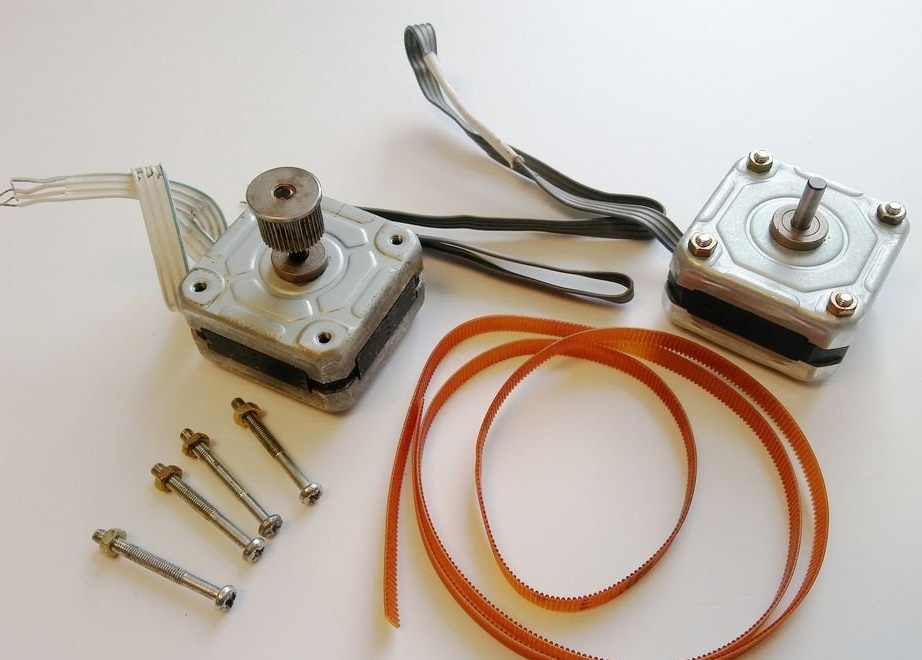
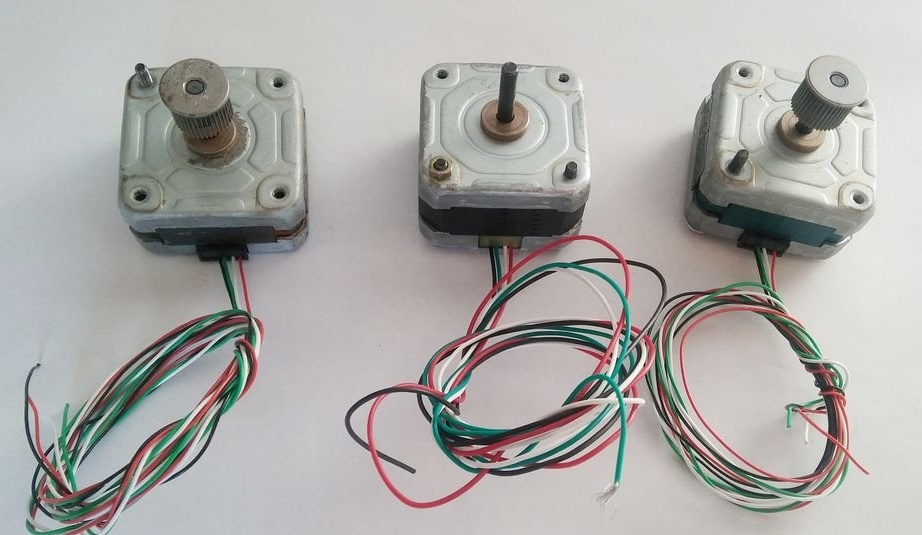
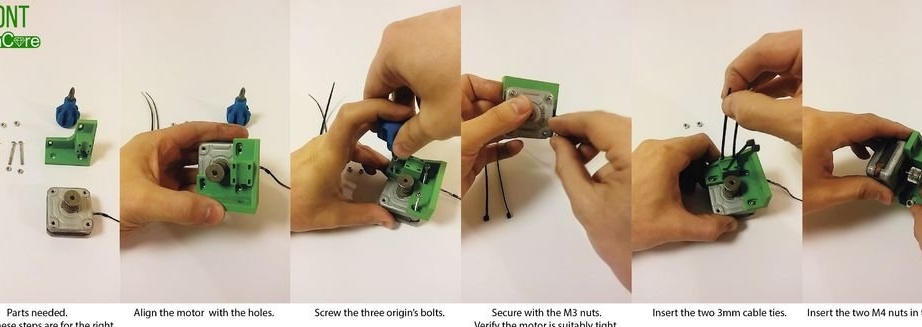
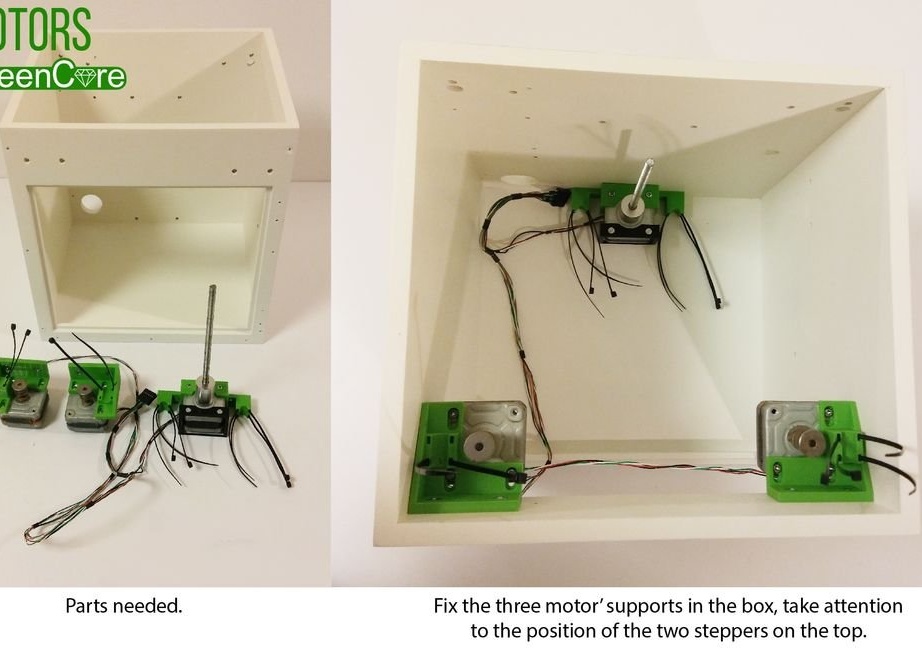
Step Four: Stepper Motors
For his project, the master used 3 stepper motors that worked on old Epson C20 printers. Typically, printers are thrown into the bin because the printheads are clogged, but all the other parts of the machine work well. You can remove the stepper motor, M3 nuts and bolts, belt, linear shaft, springs, buttons from old equipment. Older Epson printers have nema 17 stepper motors; if you need more powerful motors, check out the Ricoh technique.
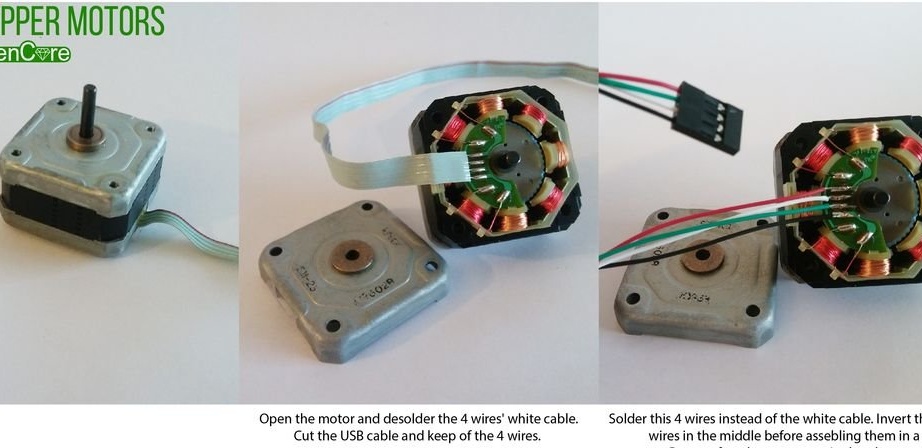
To prepare the engines, you will need Dupont connectors, old USB cables and soldering accessories. For this project, two engines with a drive pulley and one without are needed.
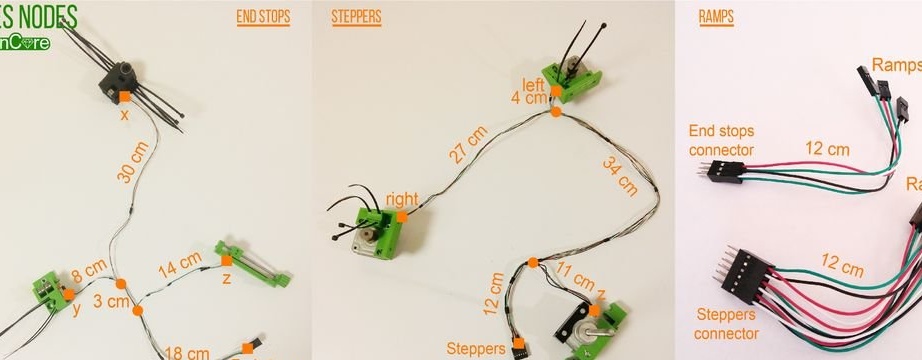
Wire length:
Front right engine (with pulley): 73 cm
Front left stepper motor (with pulley): 50 cm
Motor without pulley: 23 cm
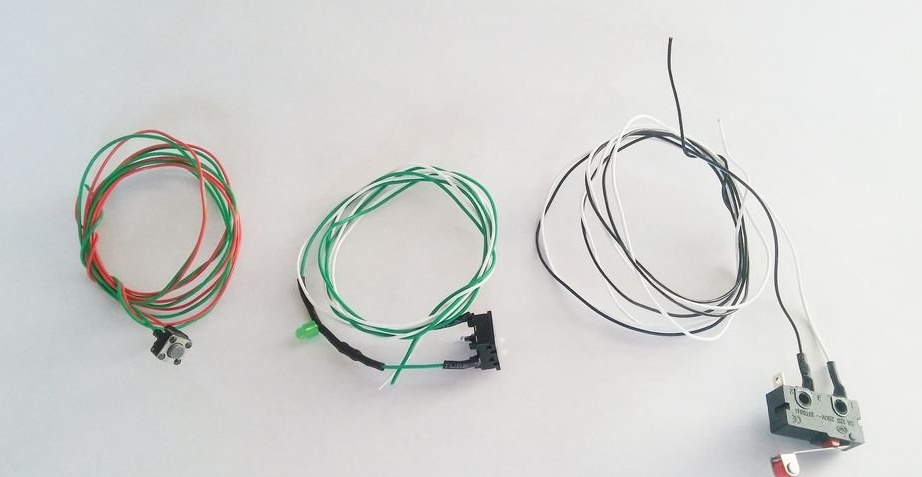
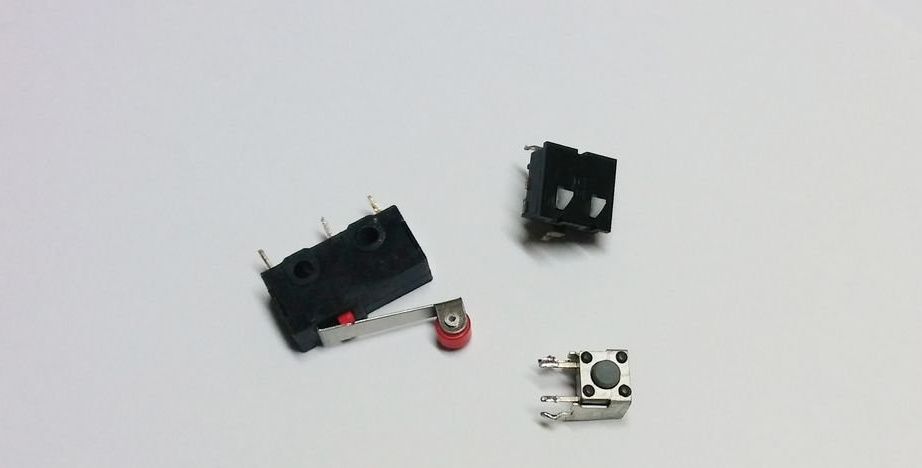
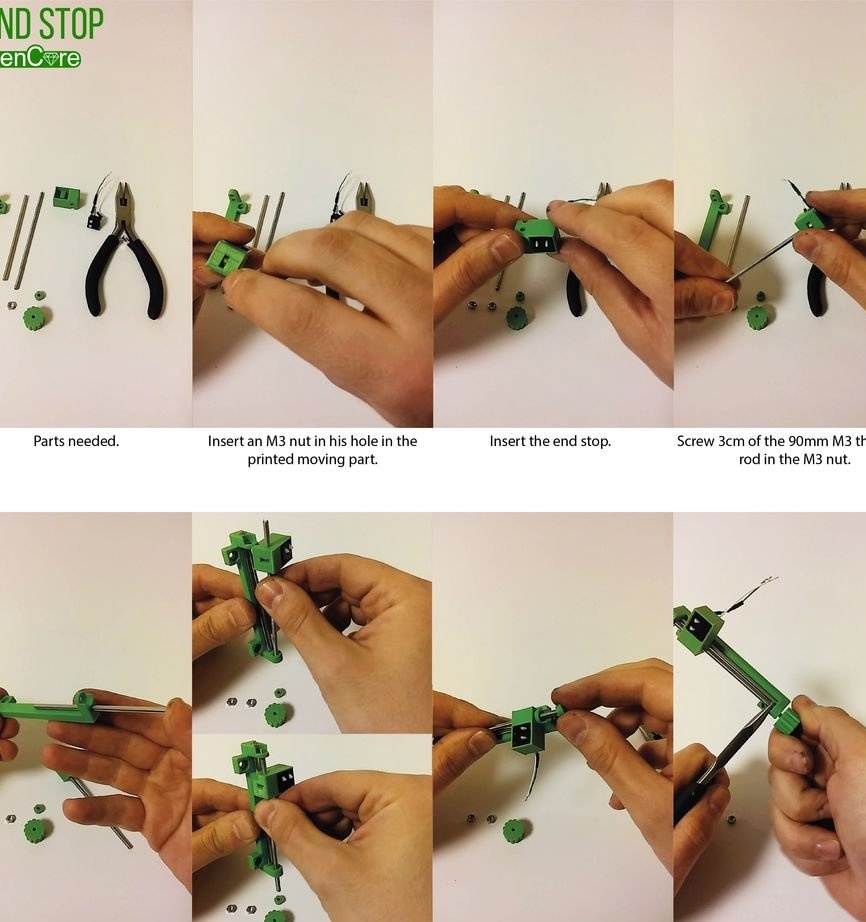
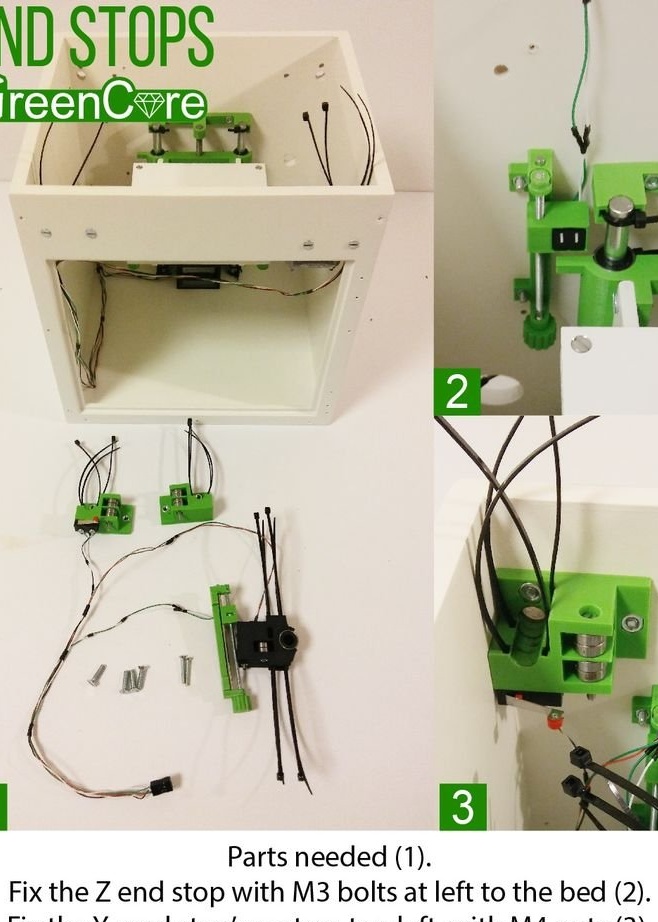
Step Five: Limit Switches
For limit switches, the master uses three different switches. He extracted two of them from old DVD drives. Solder wires to the switches:
Limit switch (Y): 29 cm
Button (X): 51 cm
Three-position switch (Z): 32 cm
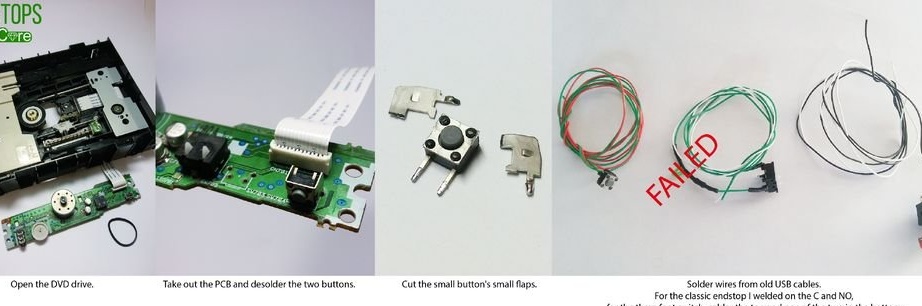
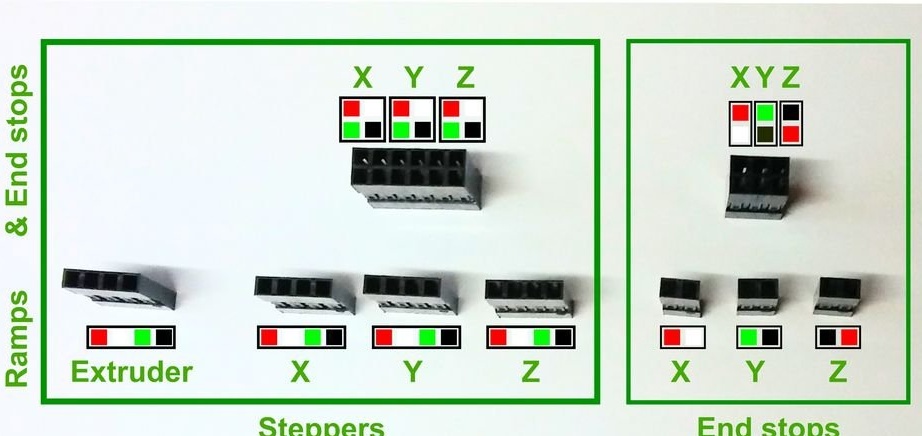
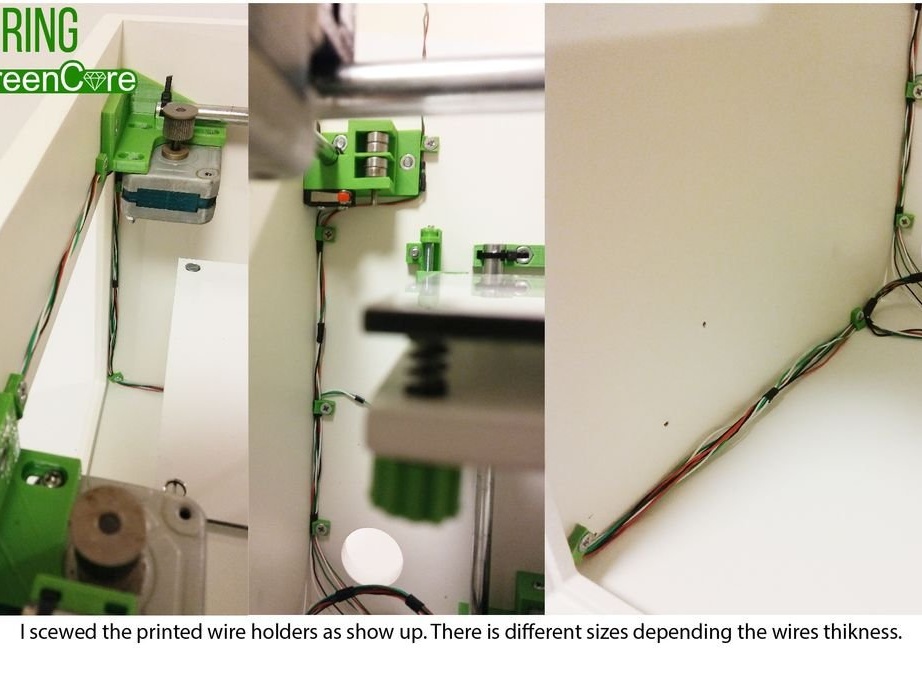
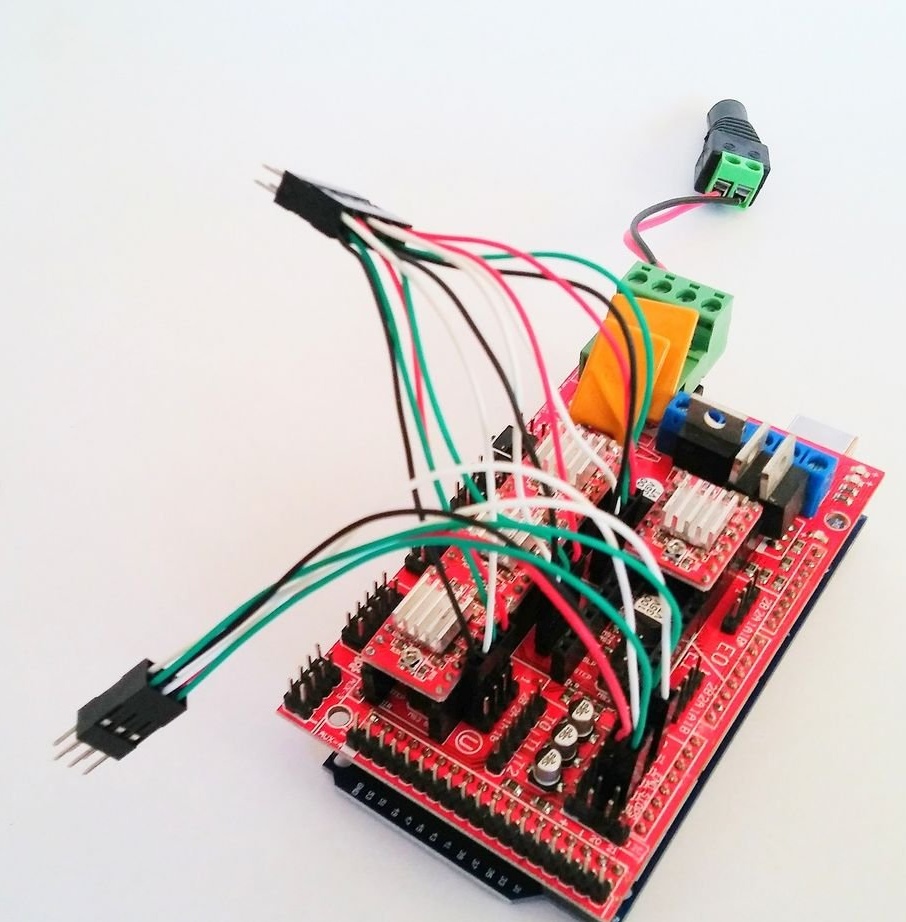
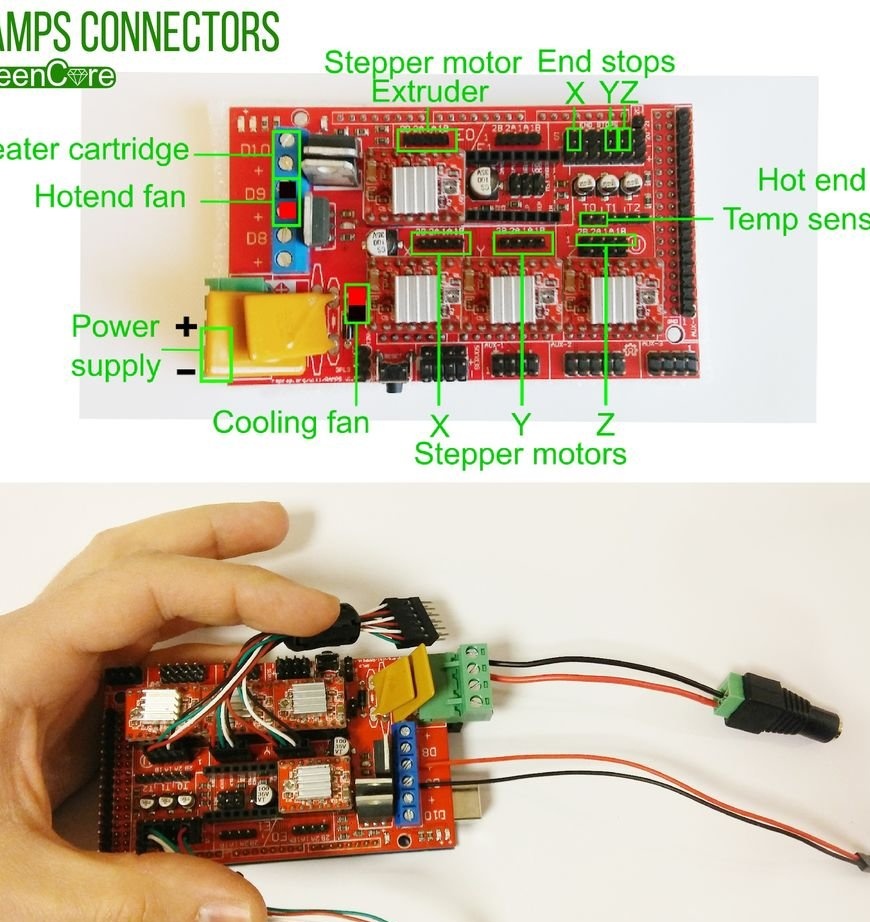
Step Six: Wiring
As the author has already said, all the wires on the device are from old USB cables.
All stepper motors and switches are connected to the Ramps via connectors, and not directly. This is in case of replacement. Arduino Mega and Ramps on Arduino Uno with CNC screen.
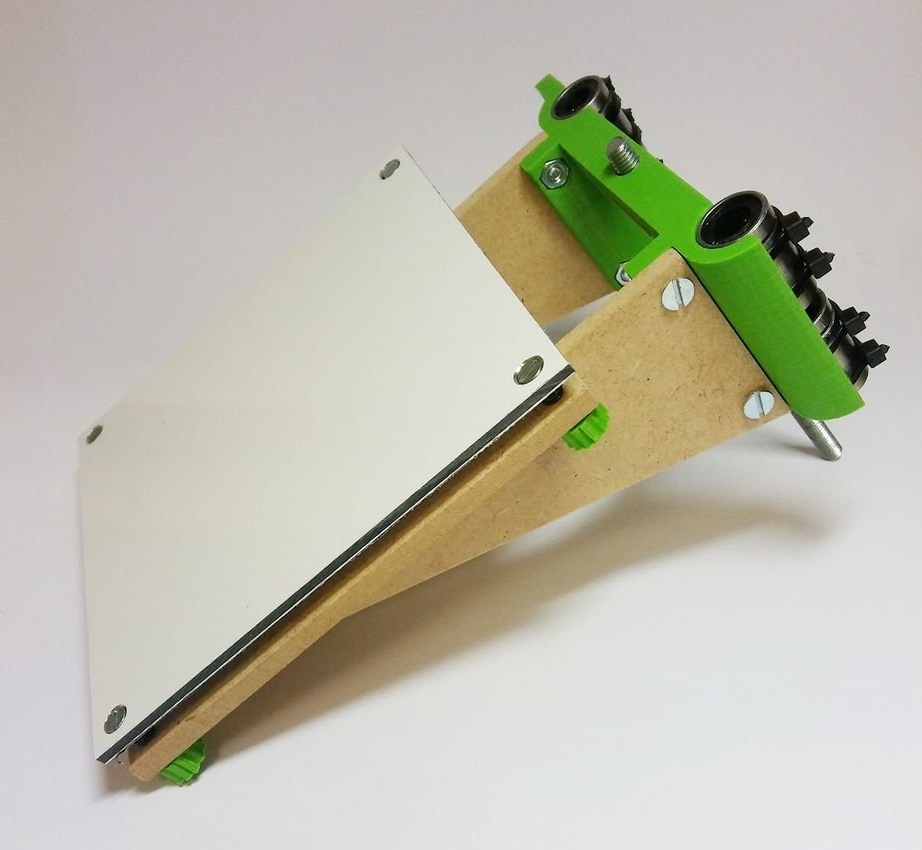
Seventh step: desktop
The desktop is made of an aluminum plate fixed to the base of MDF. MDF is attached to previously printed parts.
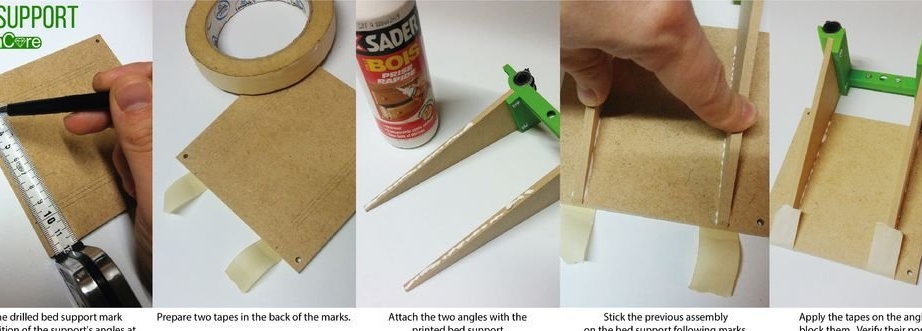
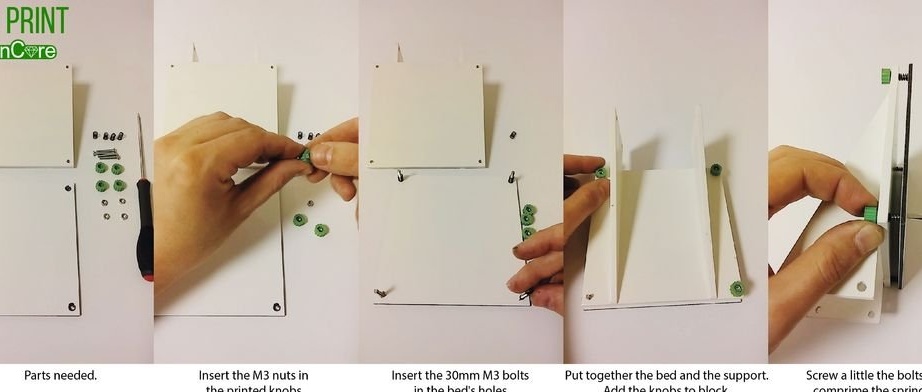
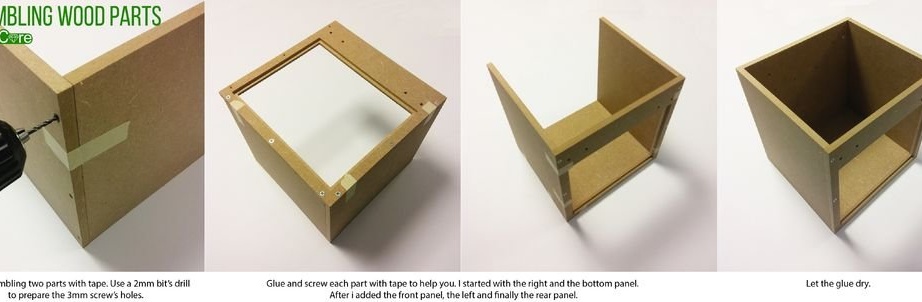
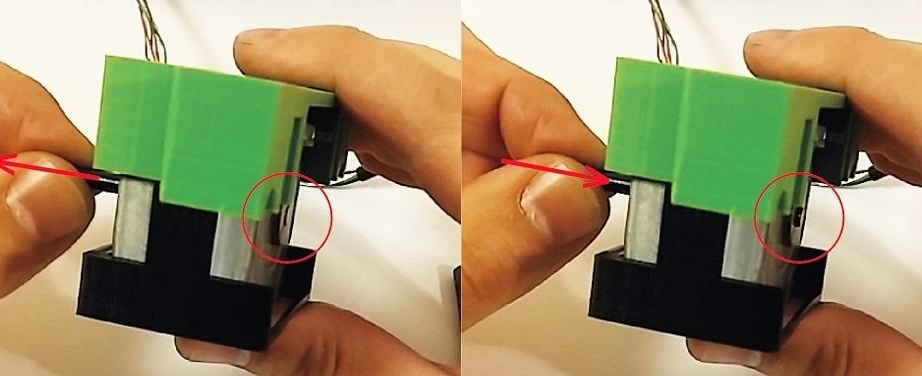
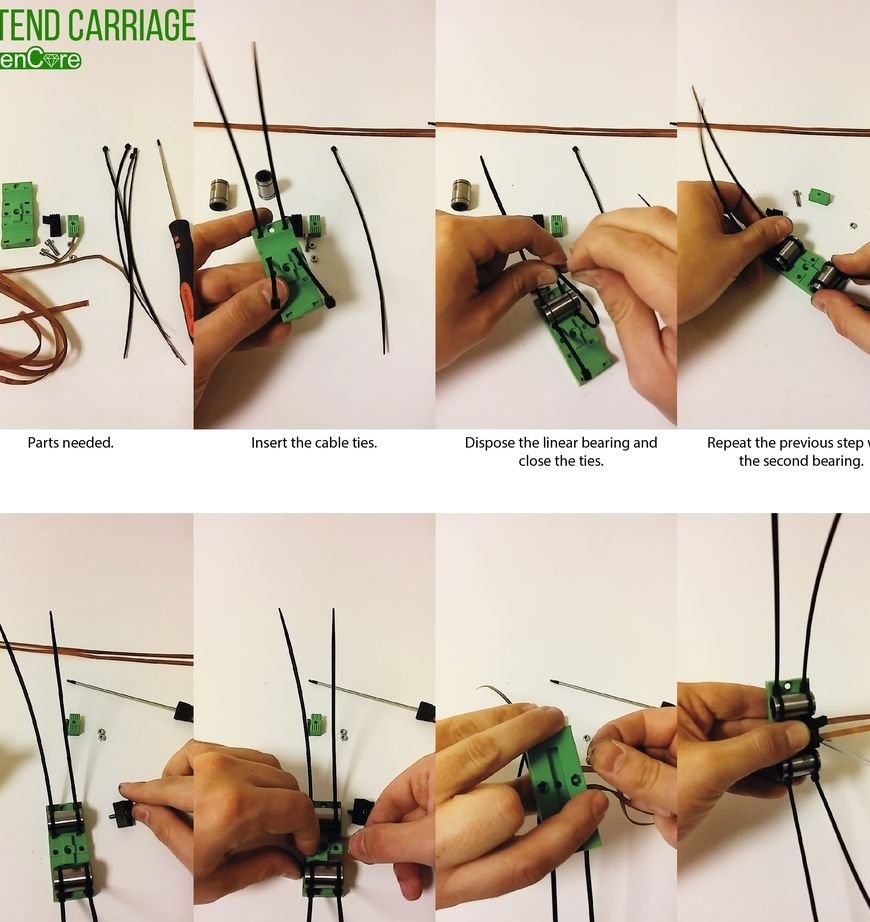
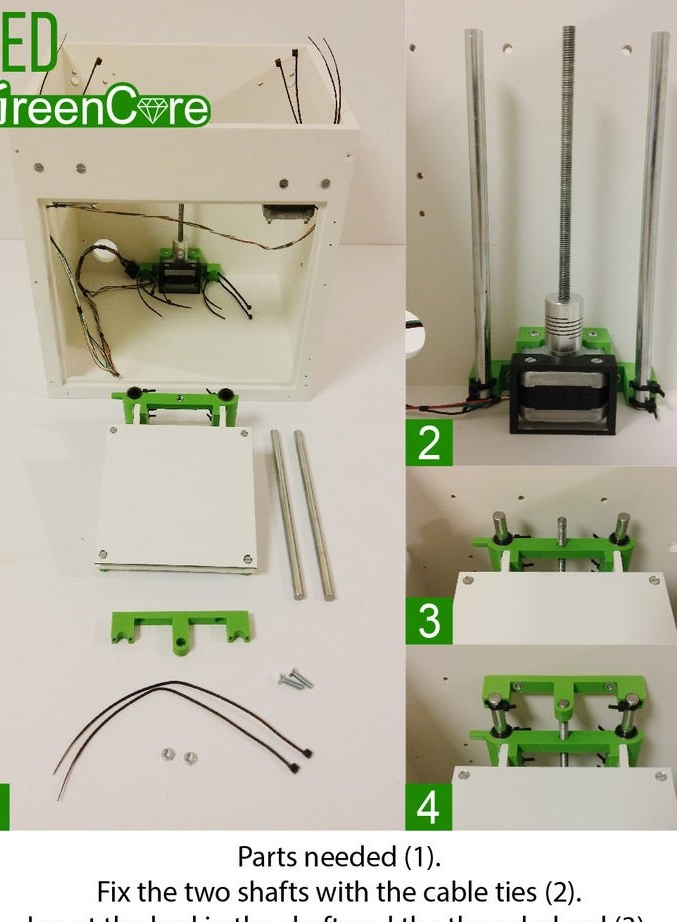
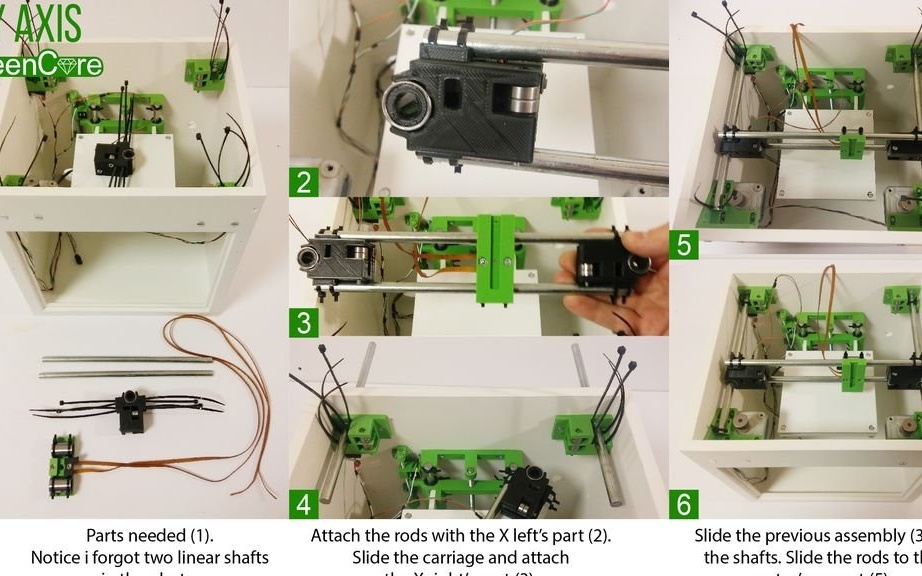
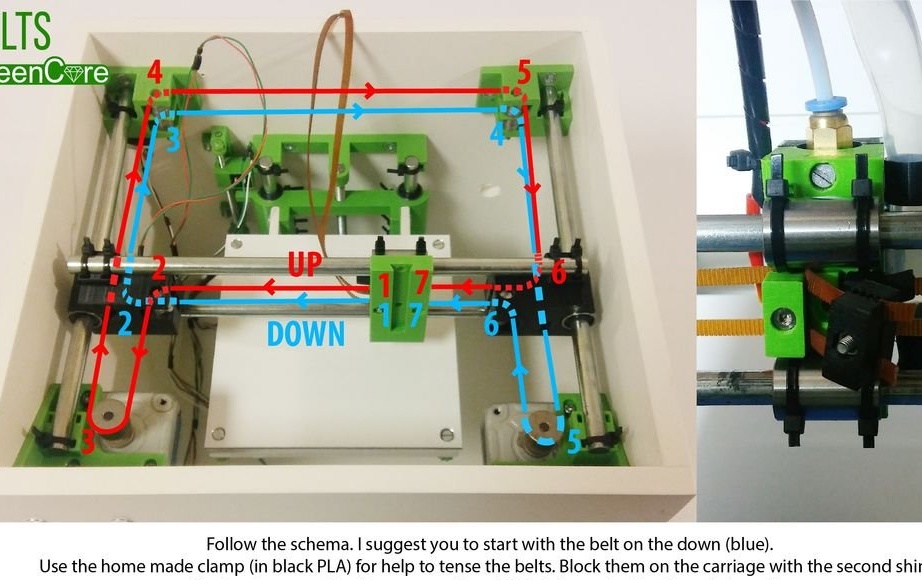
Step Eight: Build
It makes no sense to describe the assembly process, the master took a picture of each step.
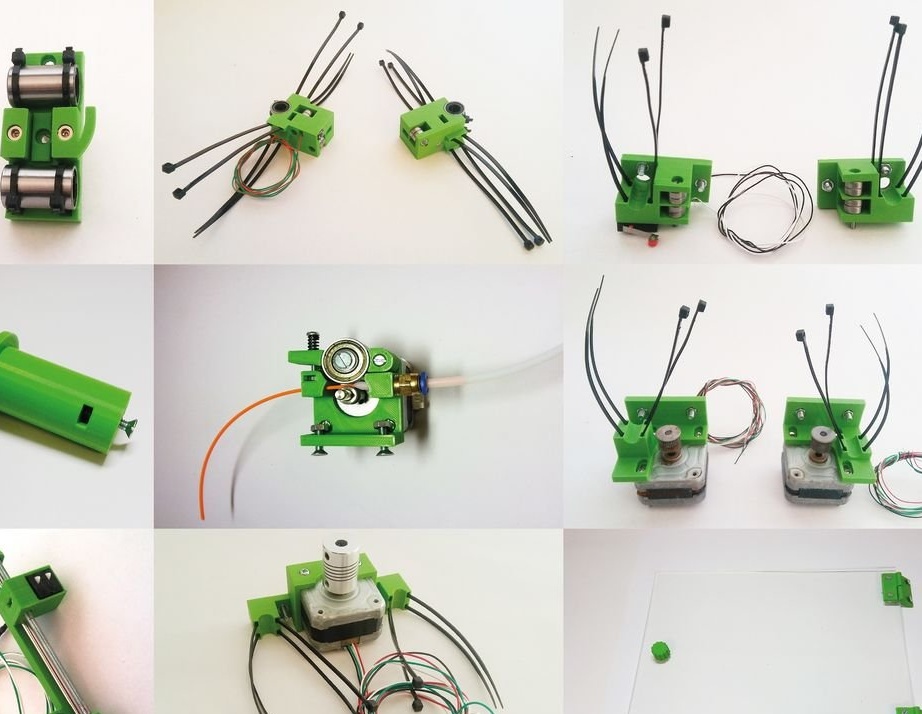
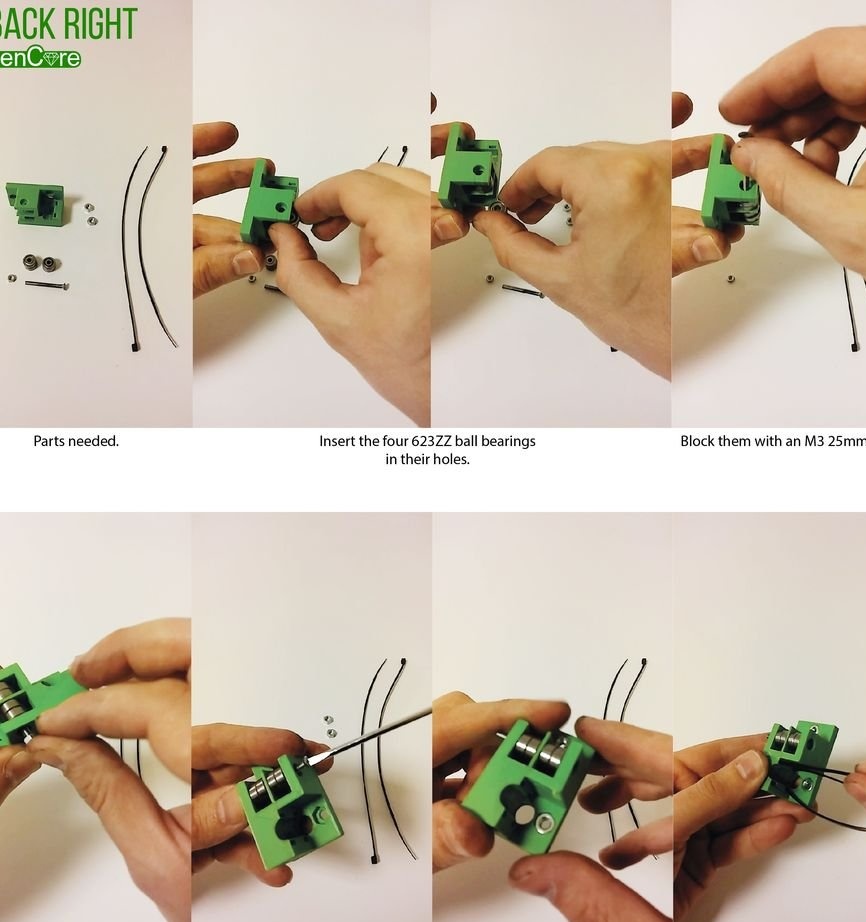
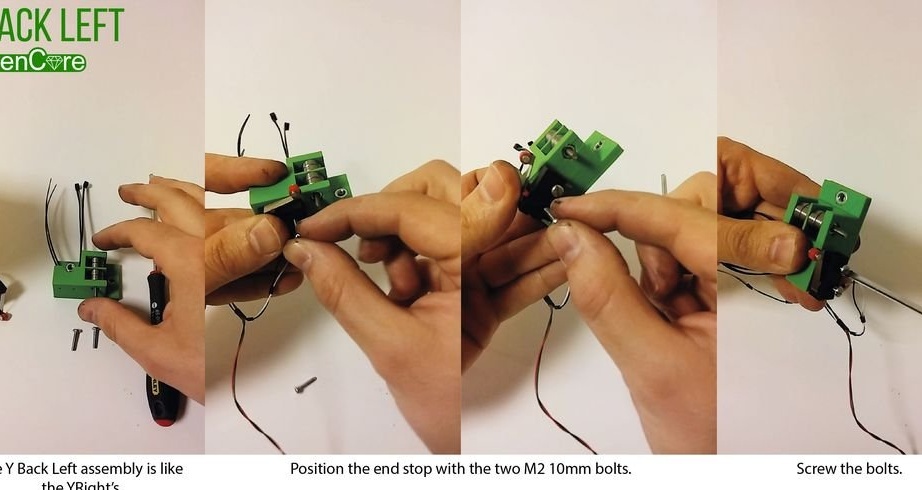
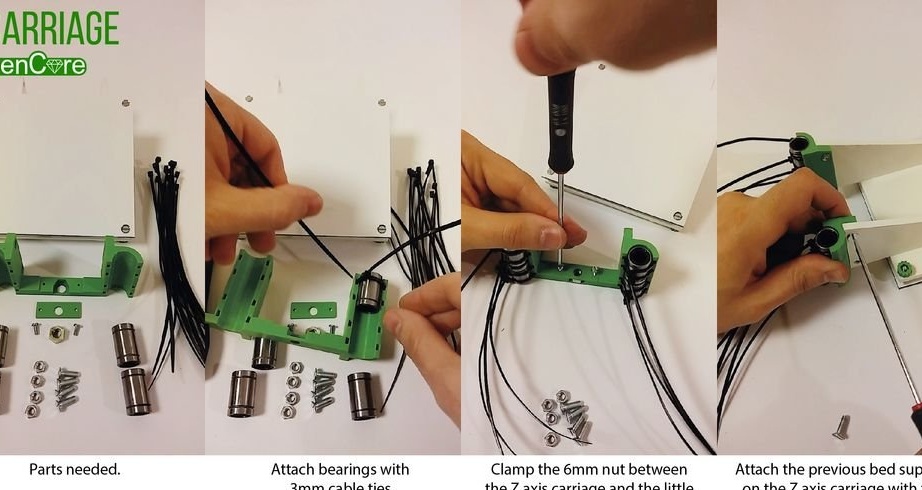


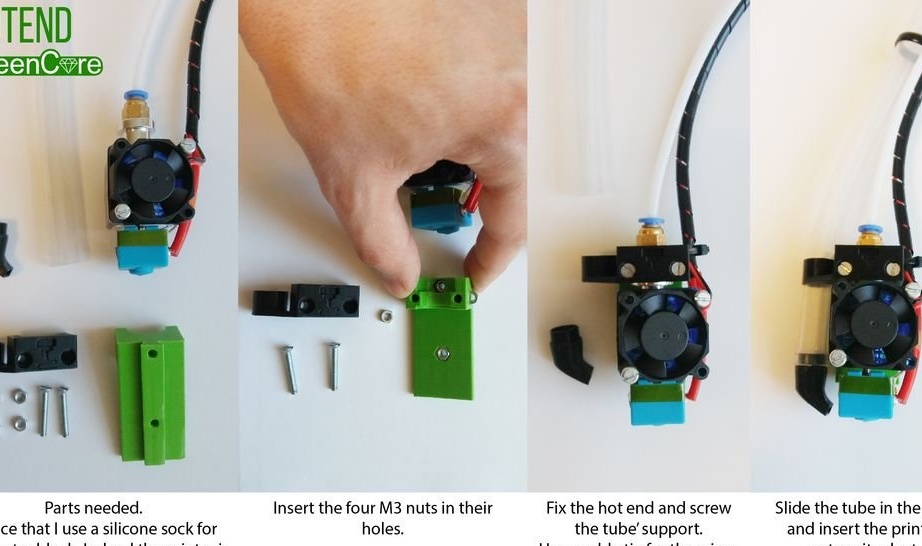

It is time to collect all the details before giving life to the printer.
Here you need to be careful with the belt tension: the quality of your printed parts depends on this step.

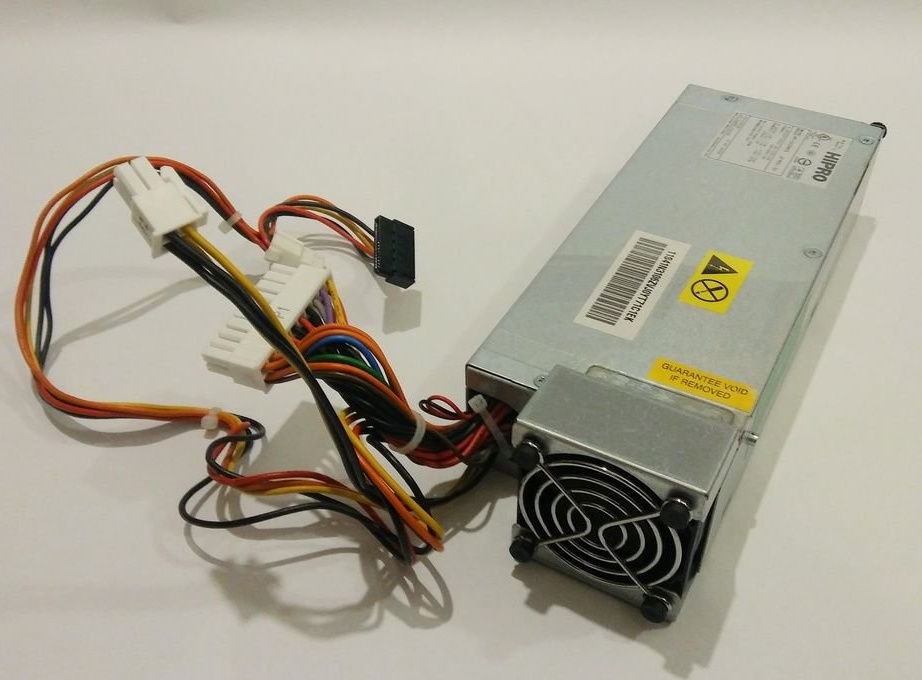
Step Nine: Power Supply
For power supply, any PSU with parameters 12V 5A is suitable.
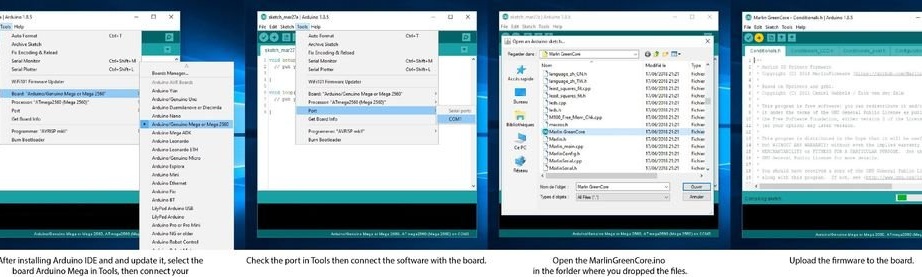
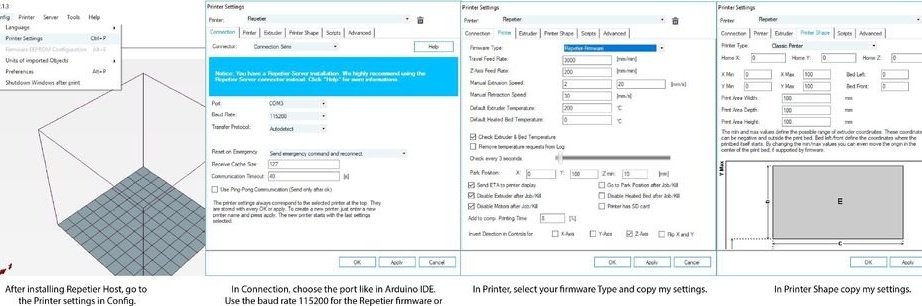
Step Ten: Firmware
For software, the wizard uses for the following reason:
Free software.
Easy to use.
You can use Cura and Slic3r to work.
It can be easily customized for CNC or laser.
It is compatible with Marlin firmware.
You need to install to install the firmware (Repetier or Marlin) in Ramps.
The wizard uploads both firmware for, and for, they both work.
MarlinGreenCore.zip
RepetierGreenCore.zip
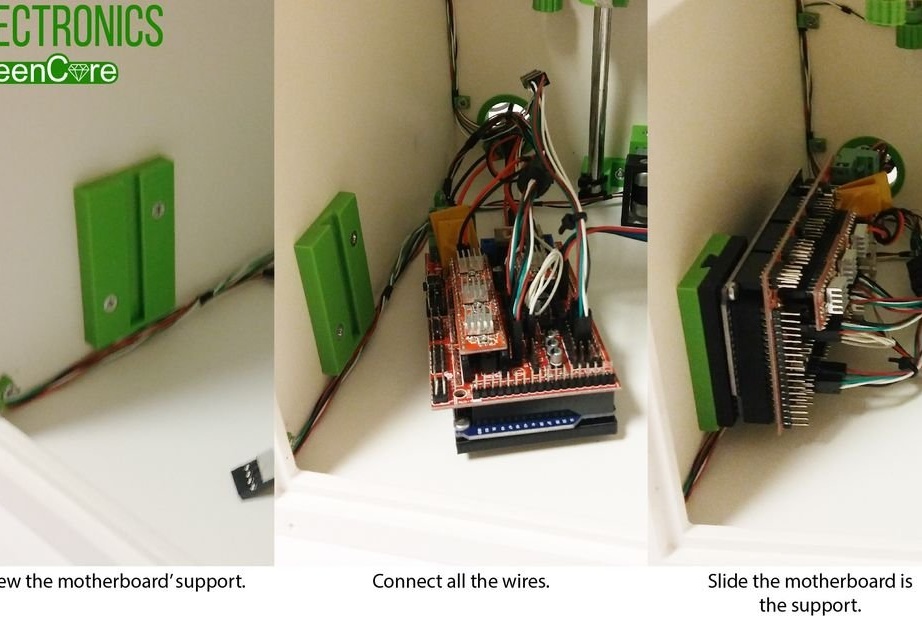
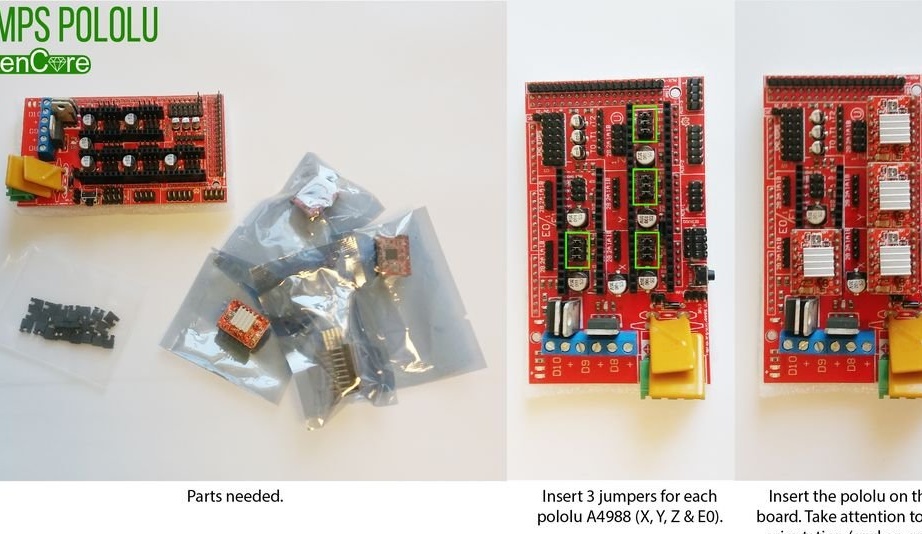
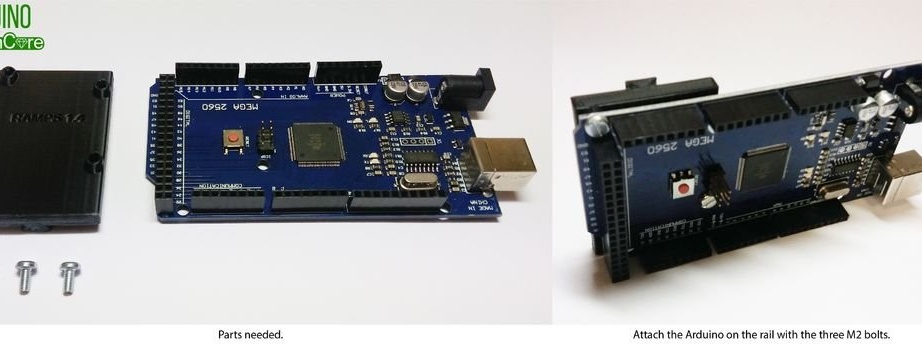
Step Eleven: Arduino Mega and Ramps 1.4
The master chose these two elements because they are cheap and well known. To control the stepper motors, the master uses the A4988 driver.
After connecting, it checks the operation of the engines. Turns on the printer and proceeds to manual settings.
Checks engine operation right and left. If the engines do not spin correctly, you need to swap the wires. Everything should be customized as per the drawings.
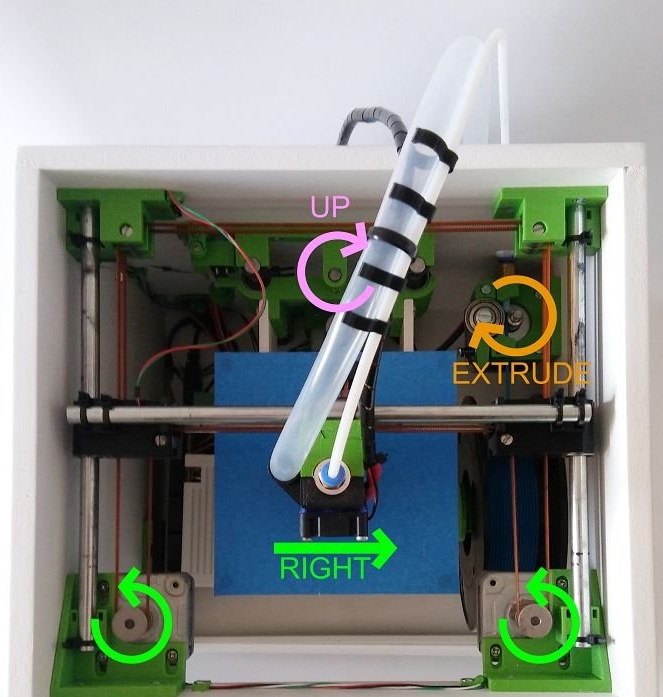
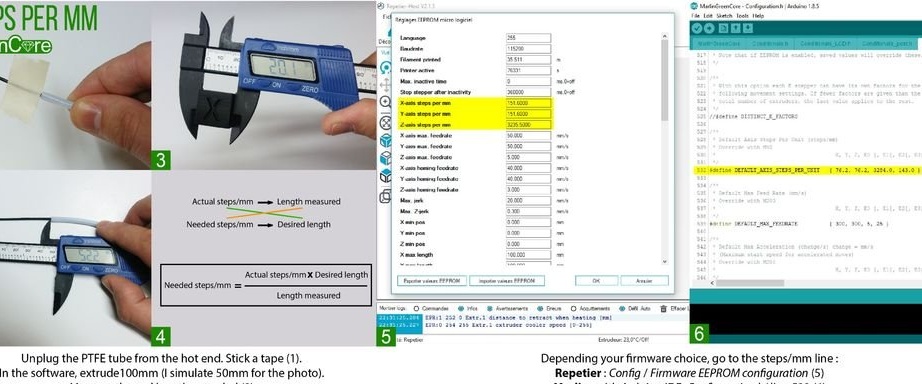
The last step is the wizard calibrates the device.