
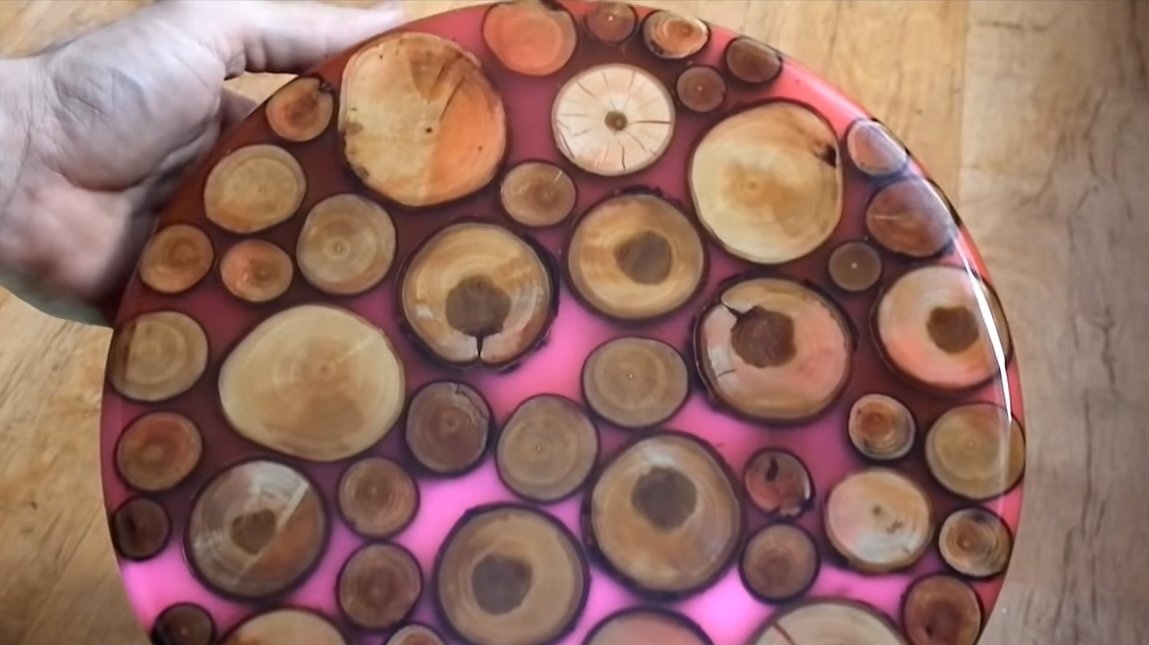
I welcome fans to craft, today we will consider how to make a wonderful stool. Homemade made of epoxy resin and wood, the design is strong, beautiful and easy to assemble. Using epoxy resin, you can quickly create real masterpieces from banal materials, and this homemade product is an example. Using this technique, you can also make a table, as a result, you get an excellent set. You yourself can choose the materials, shape and size at your discretion. If you are interested in the project, I propose to study it in more detail!
Materials and tools used by the author:
Material List:
- trunks of branches or small trees (cherry, plum, etc.);
- ;
- dye of the desired color.
Tool List:
- adhesive tape;
- a plastic bucket;
- glue gun;
- containers for mixing the resin;
- electronic Libra;
- marker;
- stationery knife;
- ;
- milling cutter.
Homemade manufacturing process:
Step one. Mold for filling
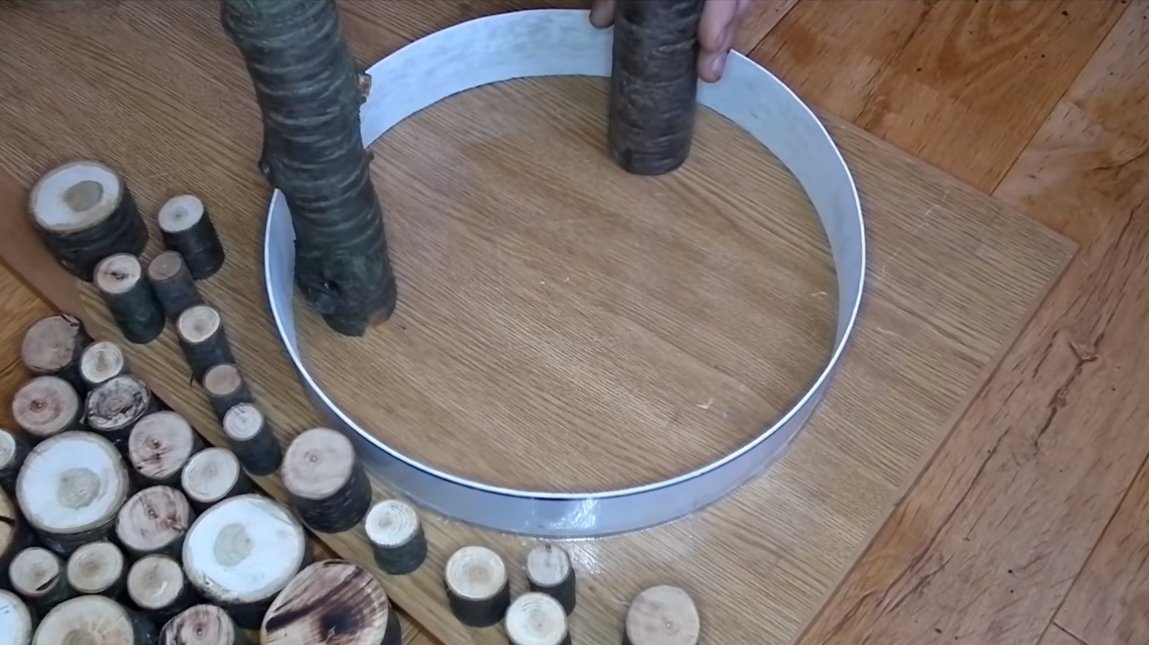
First, we’ll make the mold into which we will fill the resin. For such purposes, the author decided to use a plastic bucket of large diameter. We cut the bottom from the bucket, and then we will need to cut off the ring, which will be the formwork. You need to cut evenly, the adjacent surface of the formwork should have minimal gaps. You can cut with a clerical knife, fixing it on the base and rotating the bucket.


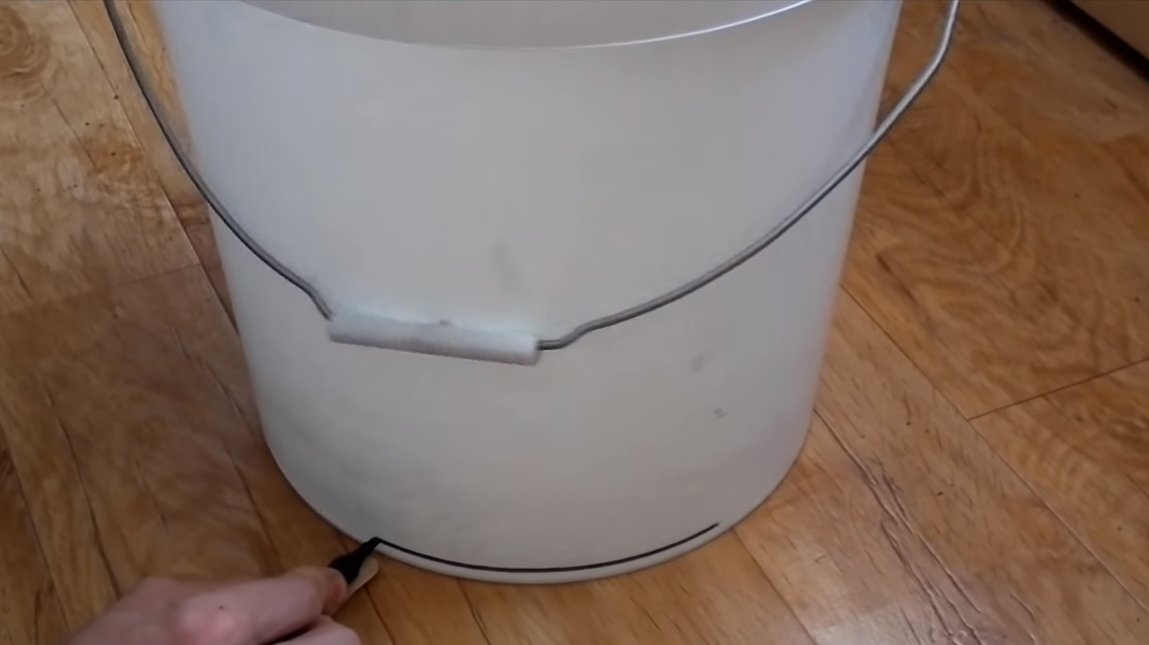


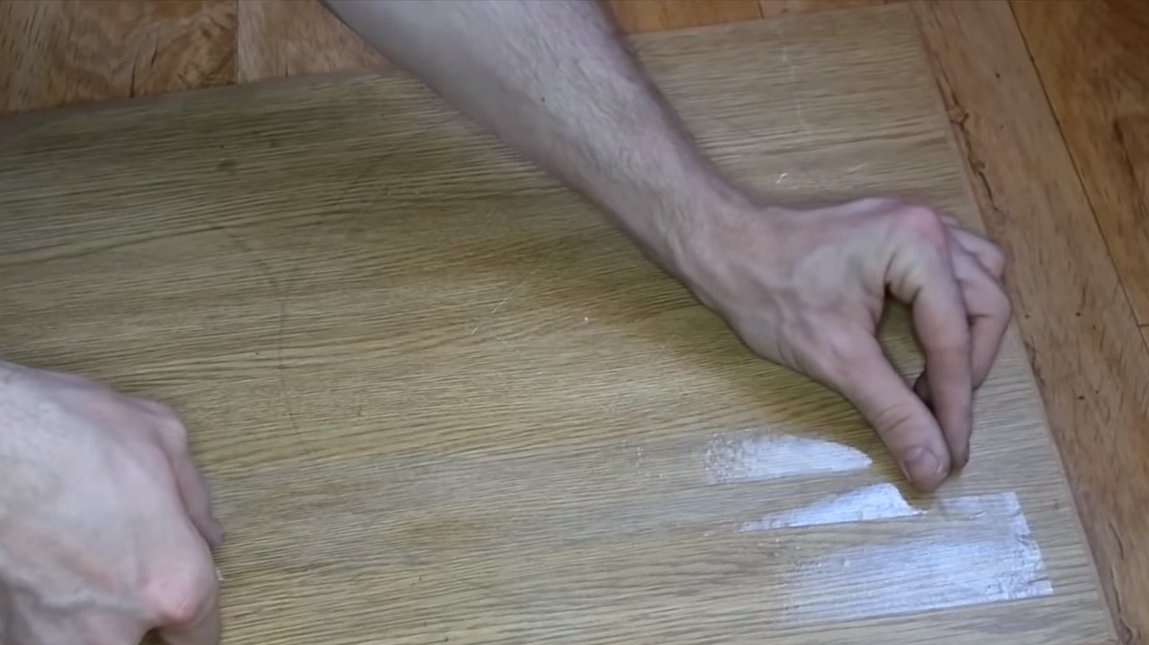
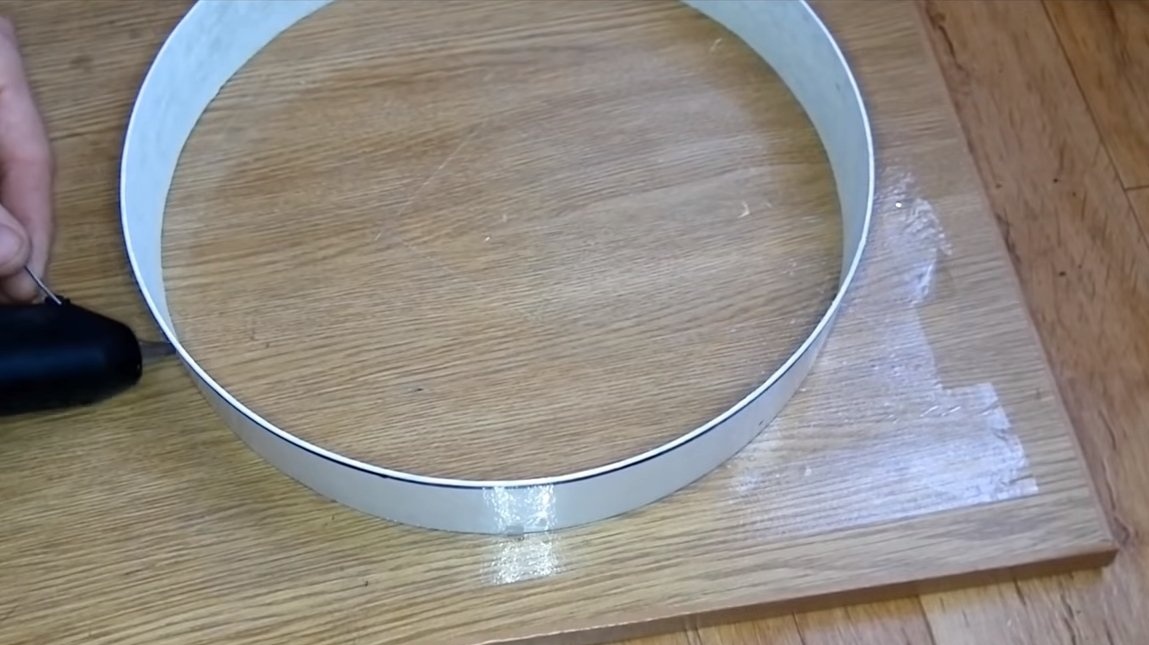

Next, you need to make a bottom for the form, it can be a table or other flat surface. We glue the material with tape so that the resin does not stick to the table. Next, you can install the formwork, it must be glued on the outside with hot glue. Using a glue gun, carefully seal the formwork. It is important to know that the epoxy resin, which is intended for pouring, is very fluid, it is able to seep through the smallest cracks.
Step Two Pouring
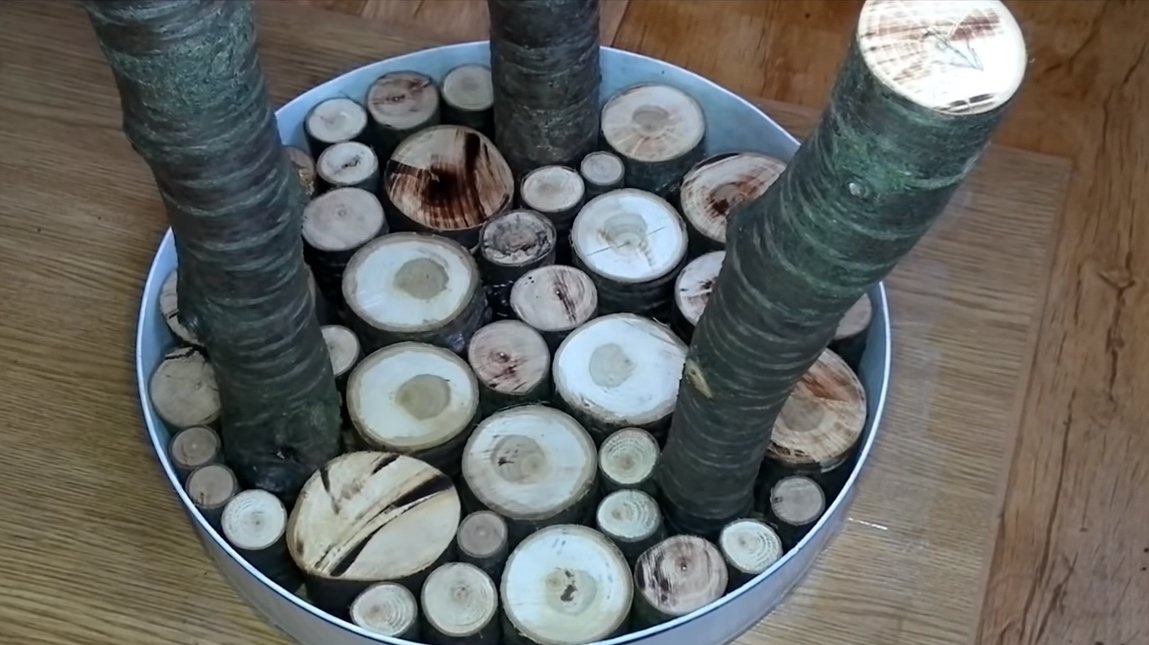
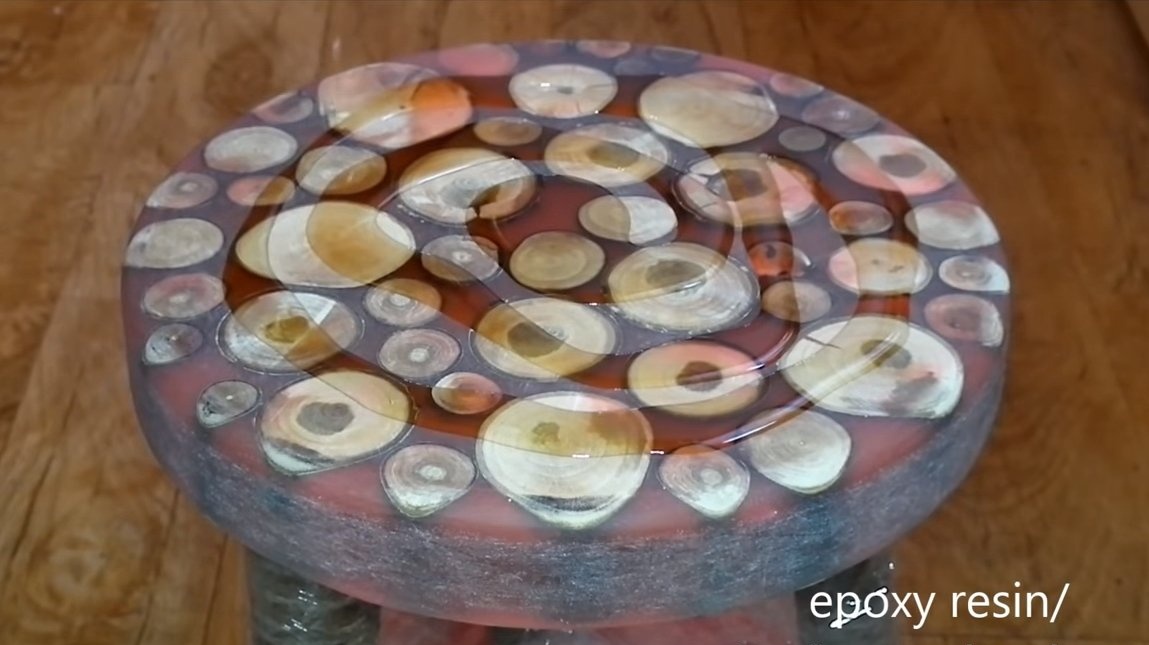
We put in the mold filling material, we will need blanks of the same length and different diameters. These may be parts of branches or trunks of young trees. It is important that the material is dry, otherwise the resin may become cloudy, and even the toilet seat is likely to crack when the wood dries.
As for the legs, we also set them in shape, the legs should be the same length, otherwise the stool will stagger. We put them at the right angles if the material is curved. Plum or cherry is good as wood, such a tree has a beautiful pattern and it is very durable.
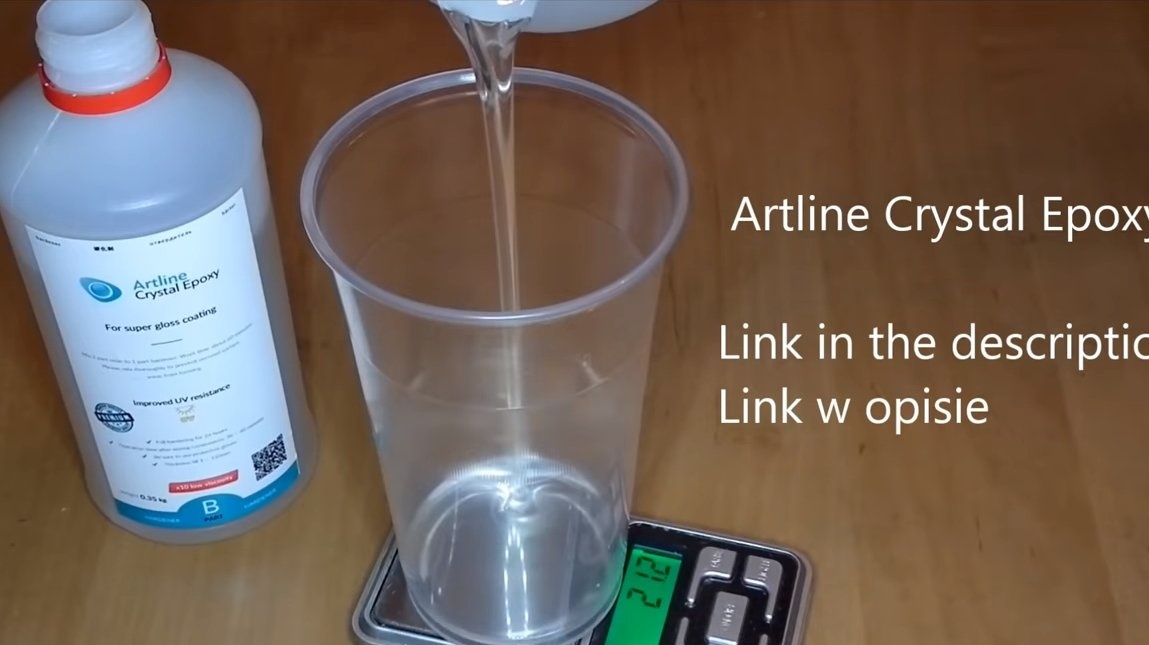
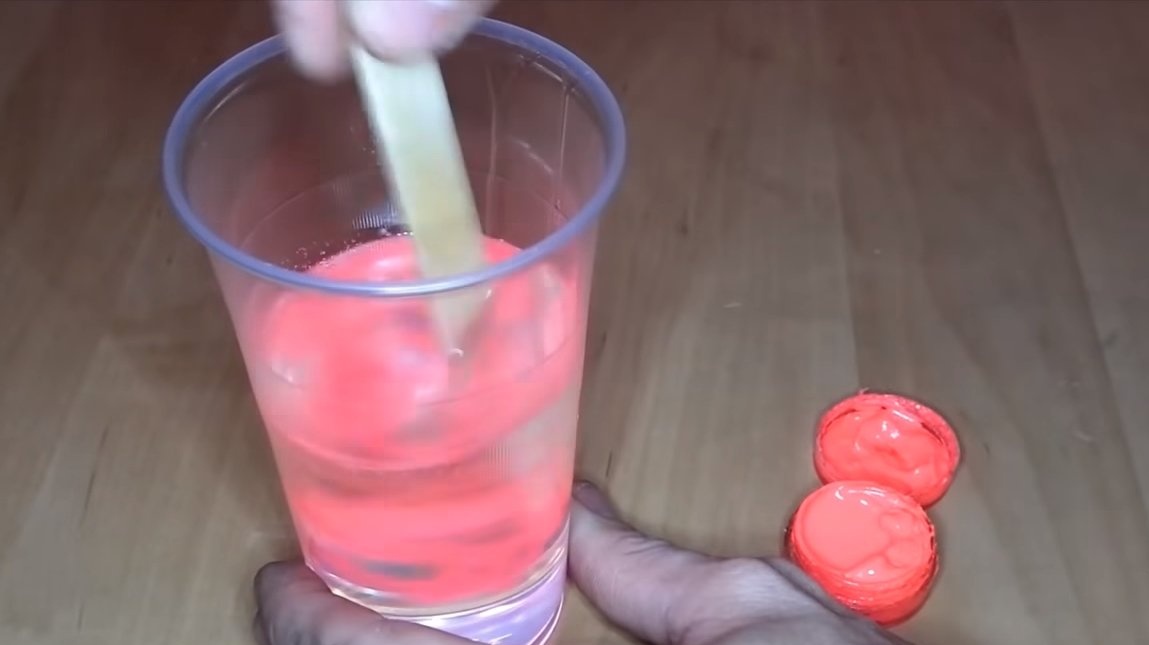
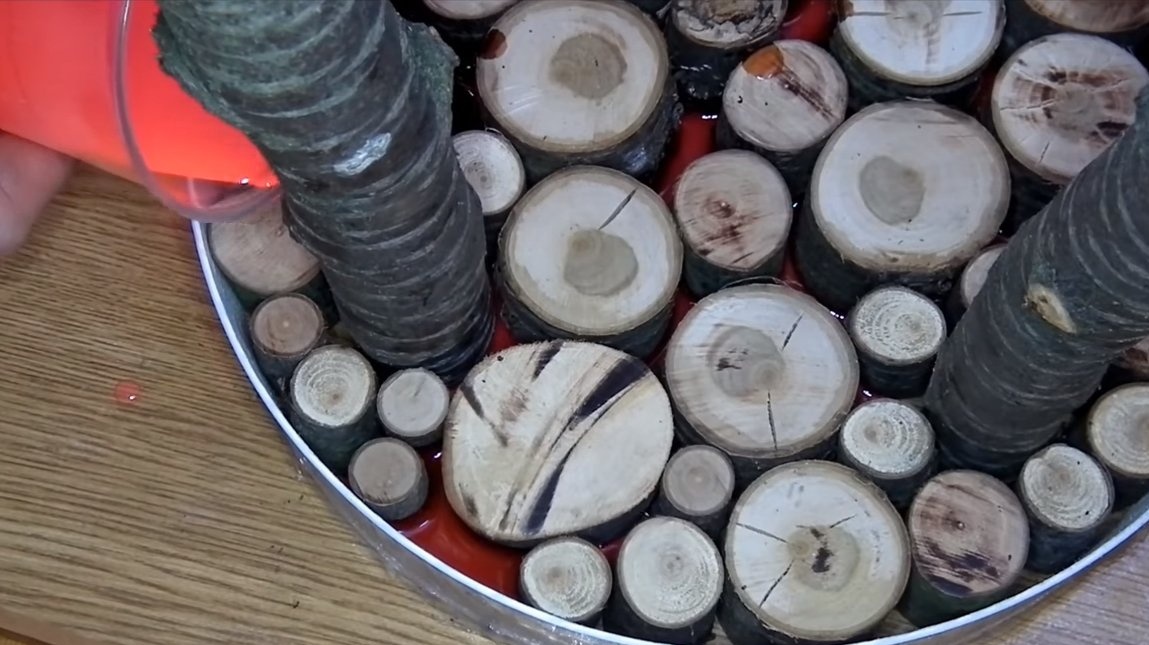
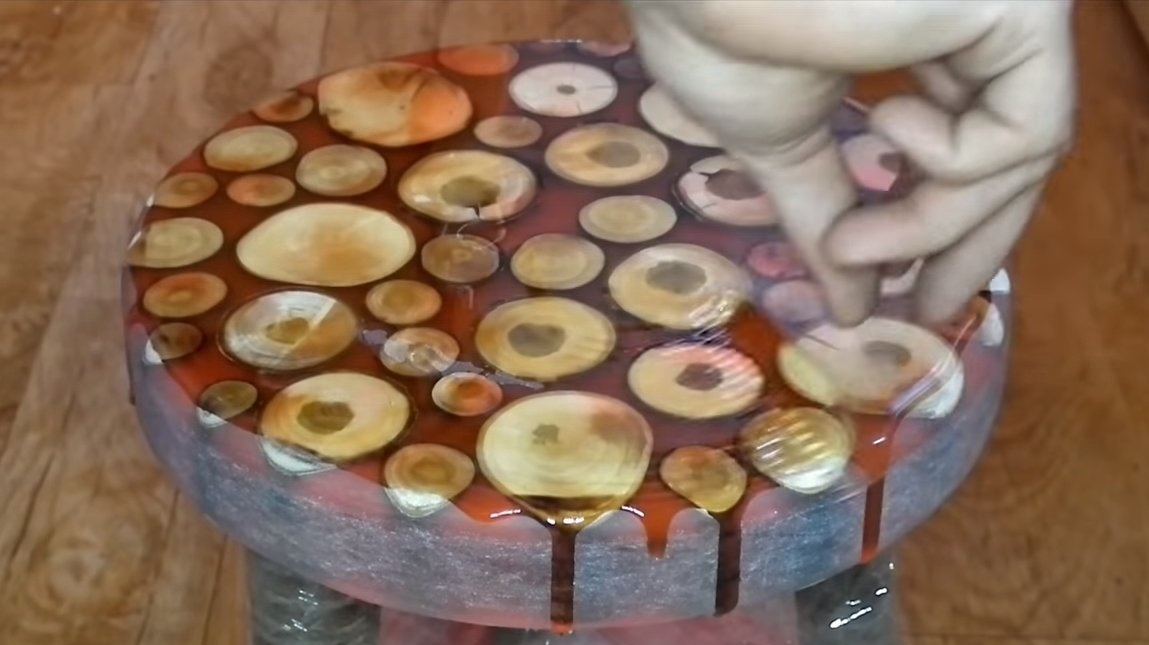
We mix the pouring resin by weight with a hardener, we also add dye to your taste. As a dye, paints for a string or laser printer are excellent, you can also use paste from writing pens. Before pouring, it is important to know what volume you will fill, and whether the selected resin can be poured in large volumes. If you pour a large volume of resin, not intended for this, it is likely to boil, and all work will be spoiled.
Evenly pour the resin into the formwork and wait for its solidification.
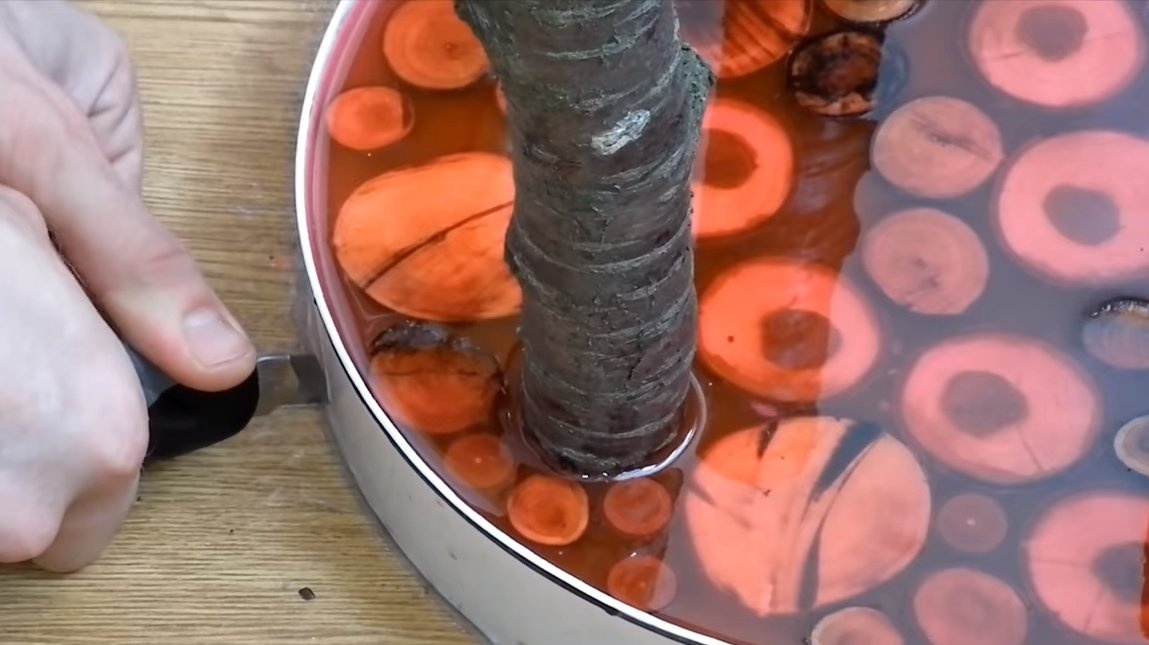
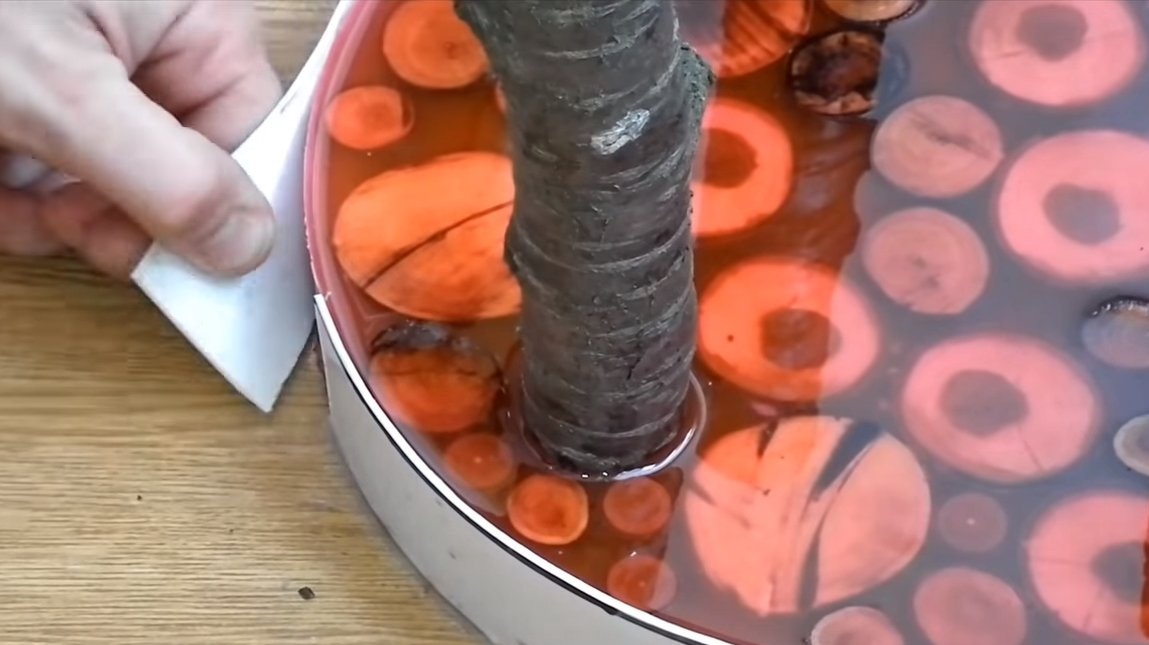
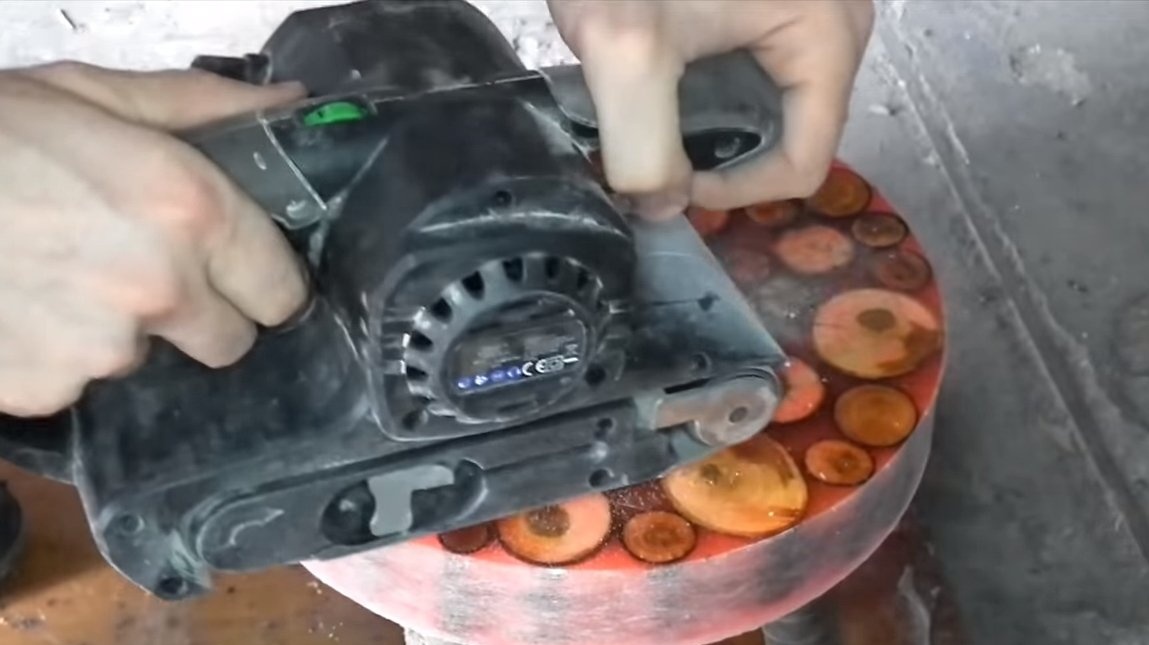
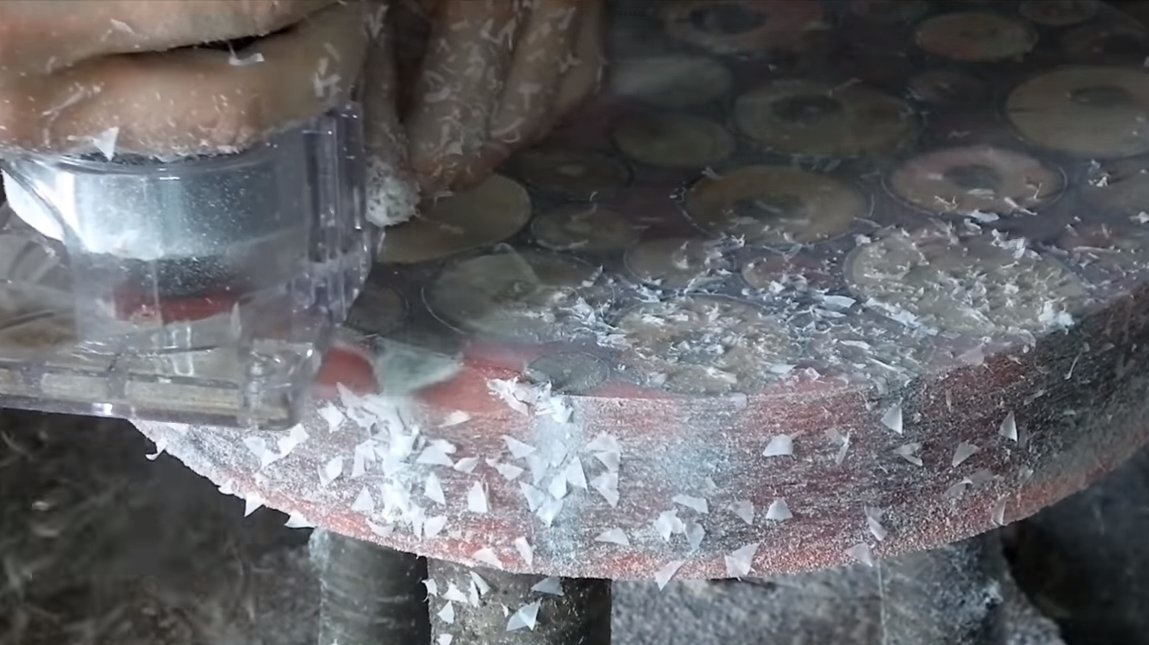
Step Three Grinding
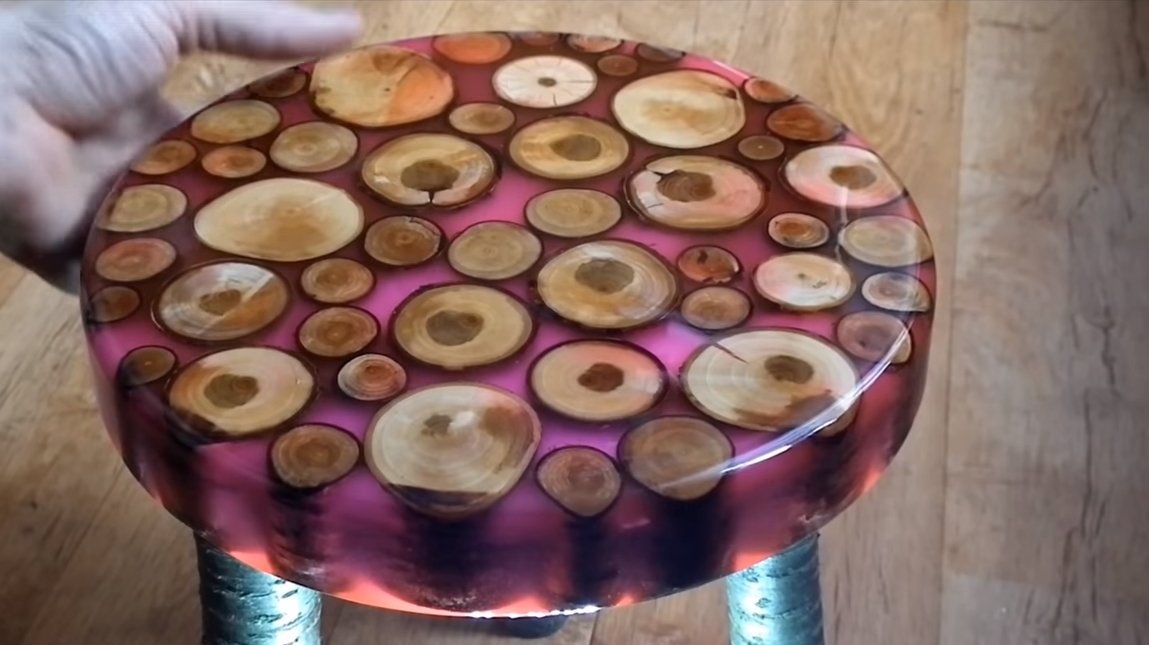
When the resin hardens, we cut the formwork and remove it, the adhesive tape should peel off without problems. Next, we arm ourselves with a belt sander and level the plane of the toilet seat. If the resin dries poorly, the tape will clog and grind the resin will not work.
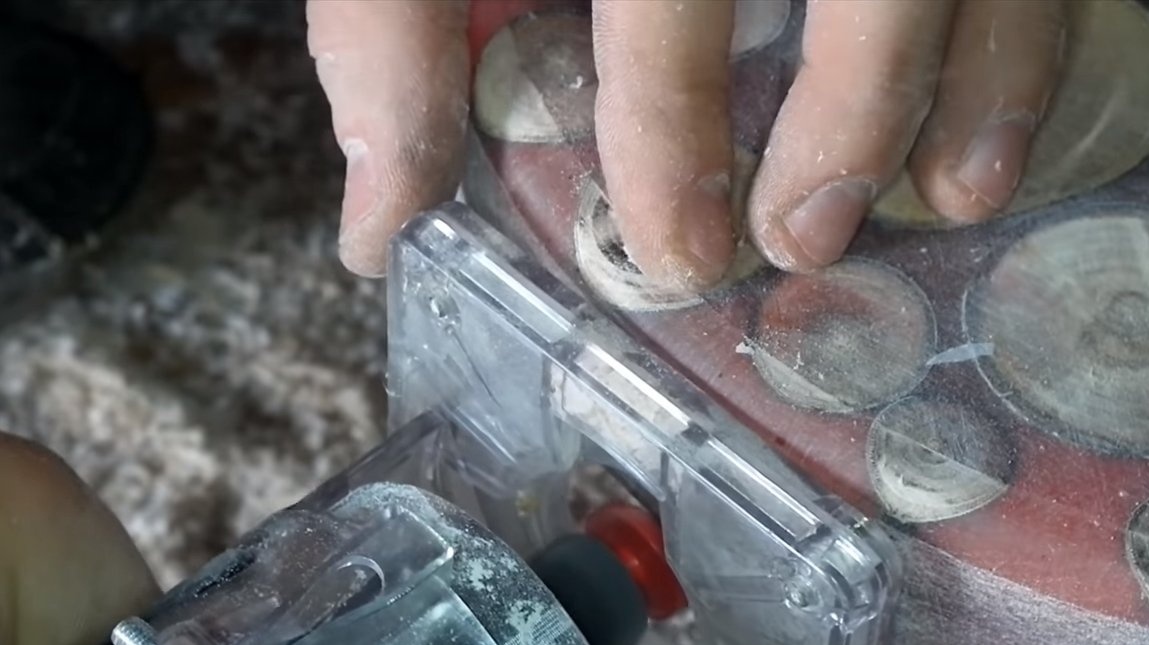
In addition, we will need to round the edges of the toilet seat so that it does not cut. For such purposes, we need a router.
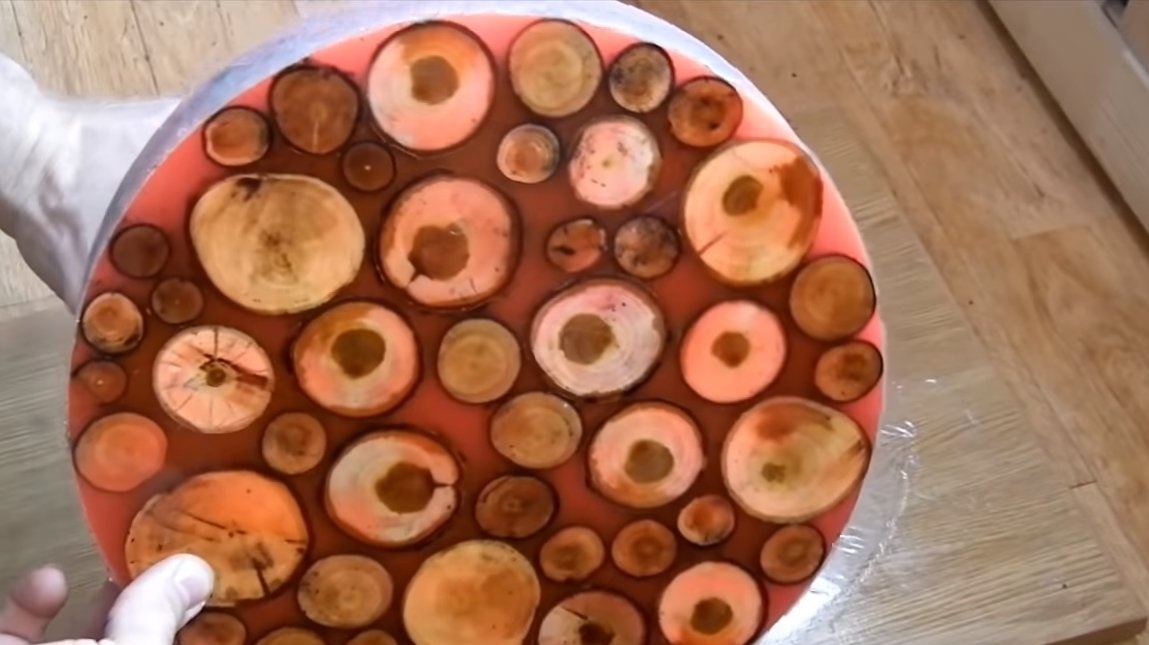

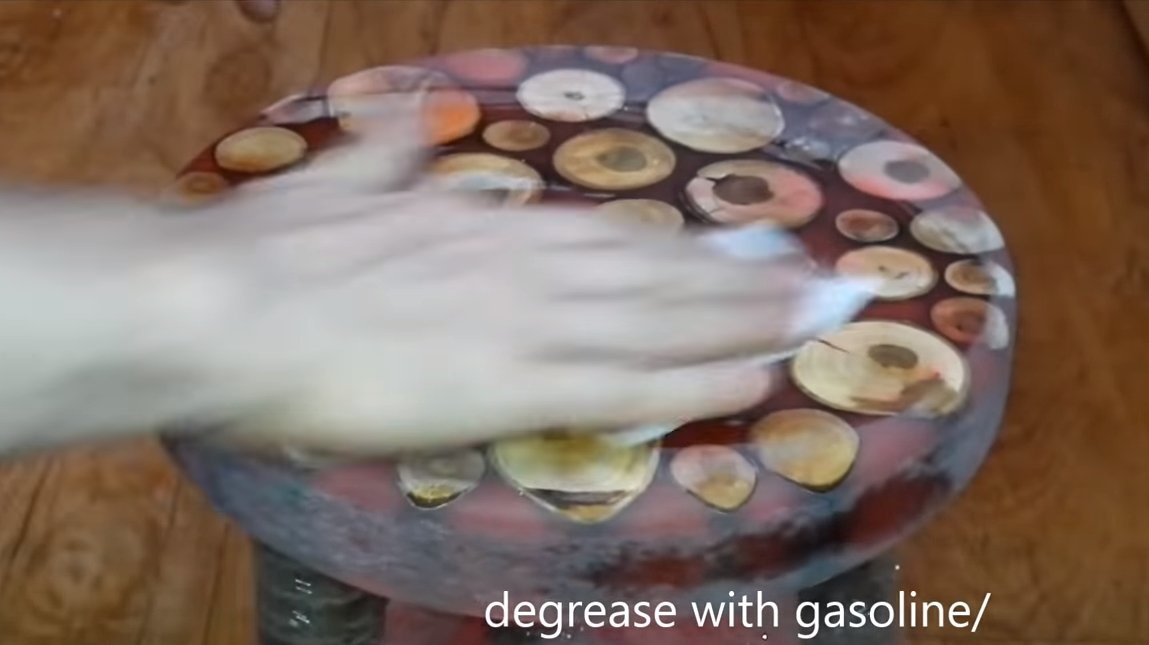
Step Four Final touches
At the end we grind the stool with fine emery paper and degrease it. We need to return the resin to its former transparency. For such purposes, we use a transparent epoxy resin and cover it with a toilet seat as varnish, a thin layer. With this coating, the resin will again become transparent.
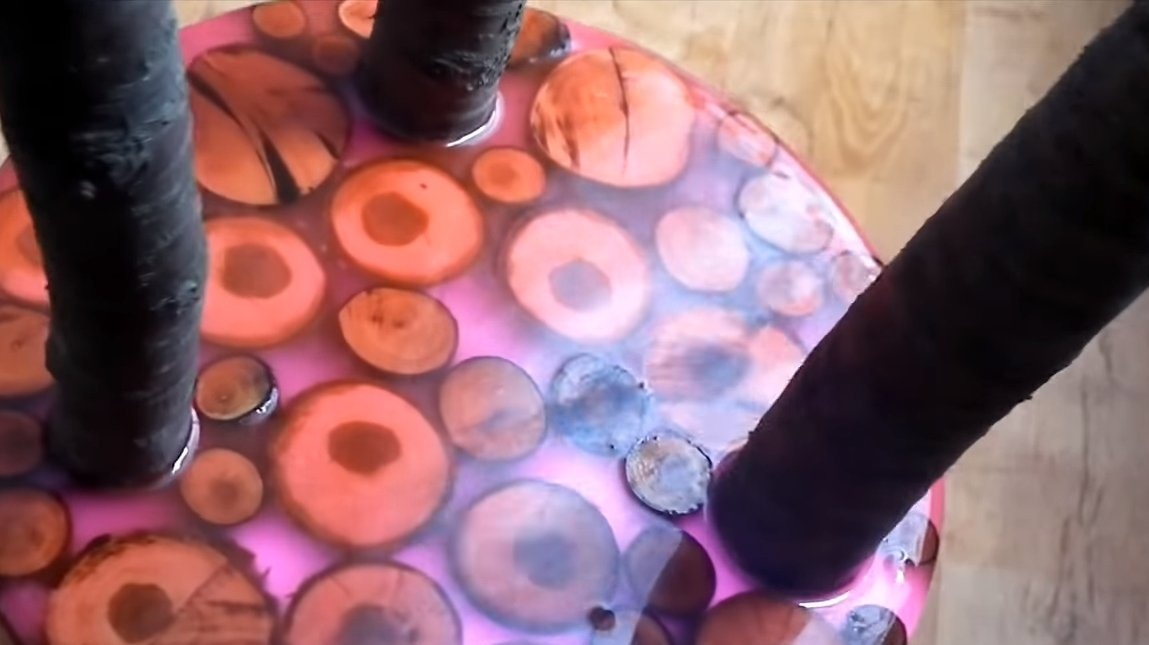
That's all, the stool is ready, for additional protection of the resin from ultraviolet radiation, it is recommended to apply a special protective varnish. The homemade product looks great, especially if there is a light source from below. Also, the design turned out to be quite strong, but it is quite possible that you will have to cut a little leg so that the stool does not stagger. The project was successfully completed on this, I hope you liked the homemade work, and you found useful thoughts for yourself. Good luck and creative inspiration, if you decide to repeat this. Do not forget to share your ideas and homemade things with us!