
At the flea market, you can find almost everything, from antiquities to quite good power tools. And during the next trip to the local flea market, the author of the YouTube channel “AKA KASYAN” purchased such a screwdriver for only 1000 rubles.
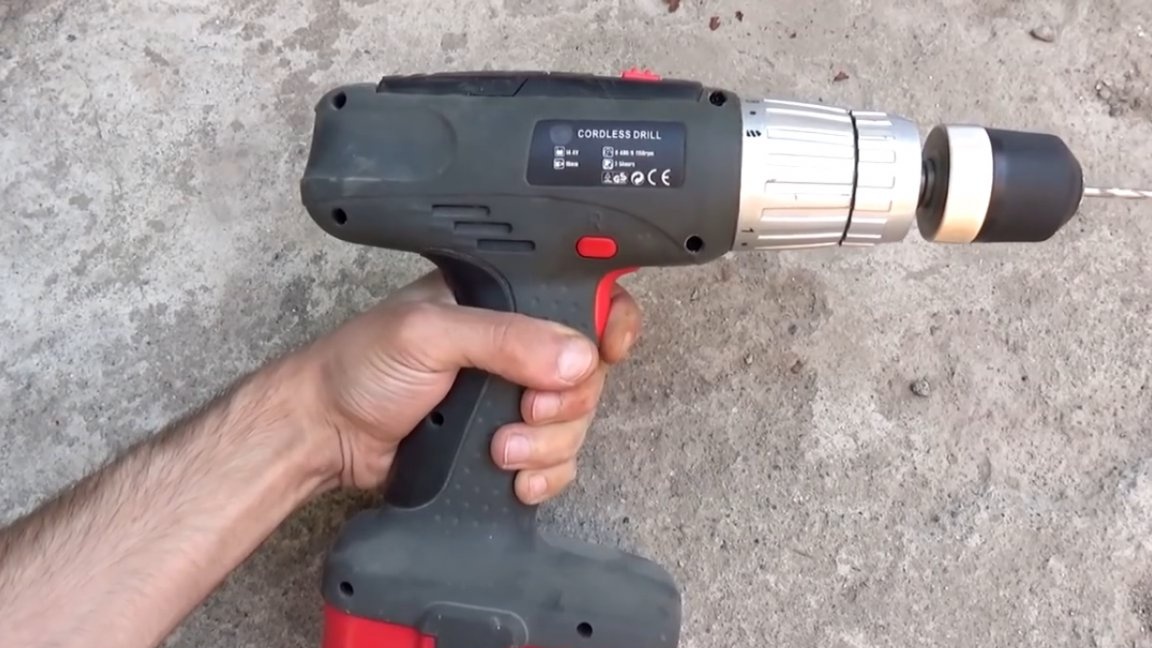
The choice fell on this particular screwdriver because, firstly, it is almost new, secondly, a complete set with two batteries and a charger, and thirdly, who will refuse this offer for such a ridiculous price.
There was also a fourth reason. The fact is that this is not just a two-speed screwdriver, in addition to this, there is still a drilling mode with an impact. In cheap screwdrivers, this is quite rare, and good ones with this option cost a lot. Naturally modest impact mechanism cannot be compared with the pneumatic mechanism of a perforator, but the impact mechanism here is a nice bonus.
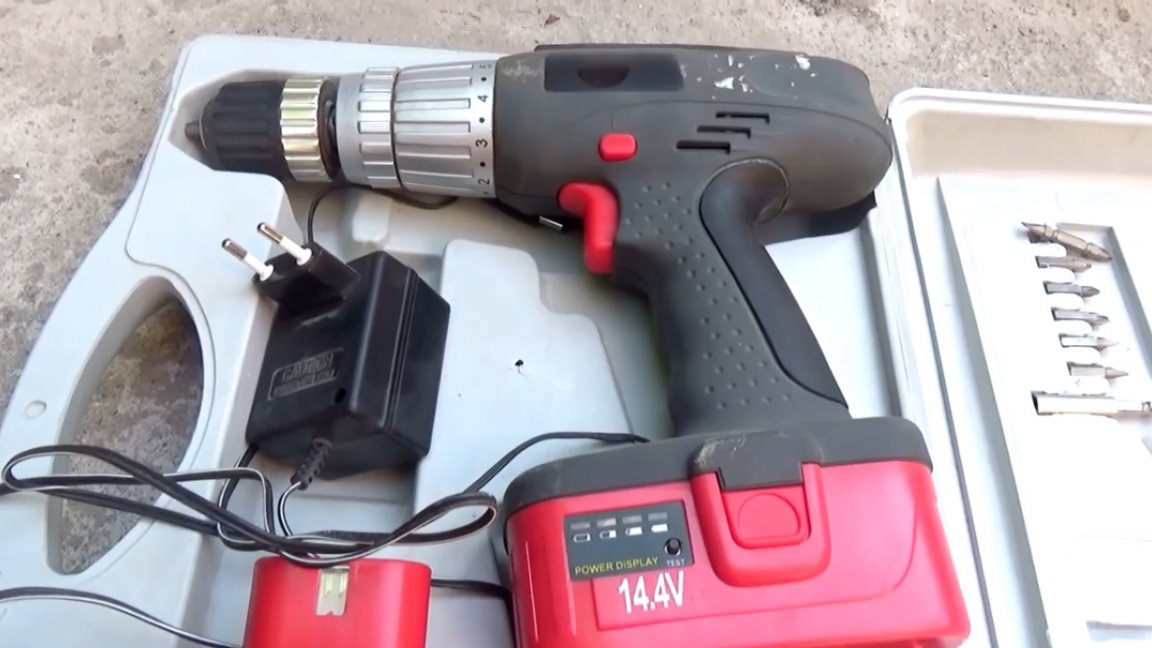
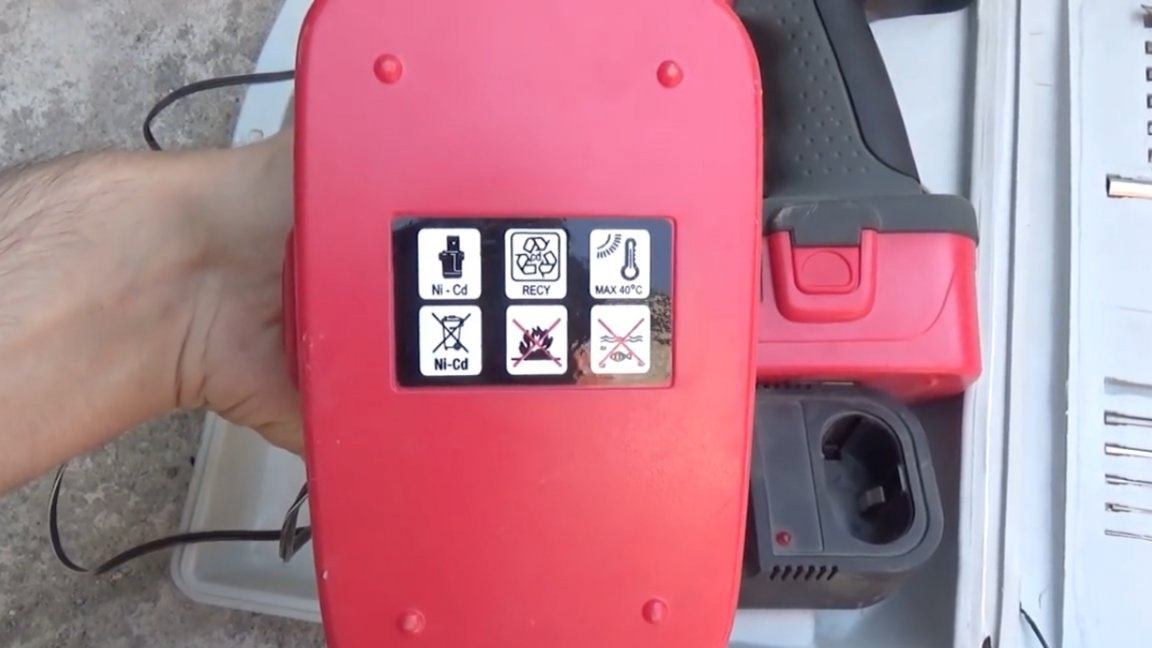
Included with this screwdriver were 2 ancient 14.4V nickel-cadmium batteries.
The tool is based on the 550th motor. The shurik is rather bulky and heavy, but such tools also have a place to be. Such a screwdriver can be used where you need long battery life and high torque.

In general, this article will focus on reworking this power tool. The essence of the alteration is the replacement of old nickel-cadmium batteries with lithium-ion ones. Moreover, the capacity of the new battery should be at least a couple of times more than the old one, which will significantly increase the battery life of the screwdriver. We will also assemble a new charger for lithium batteries. Charging should be powerful enough so that you can easily charge a high-capacity battery for a maximum of a couple of hours plus or minus.
Necessary components:
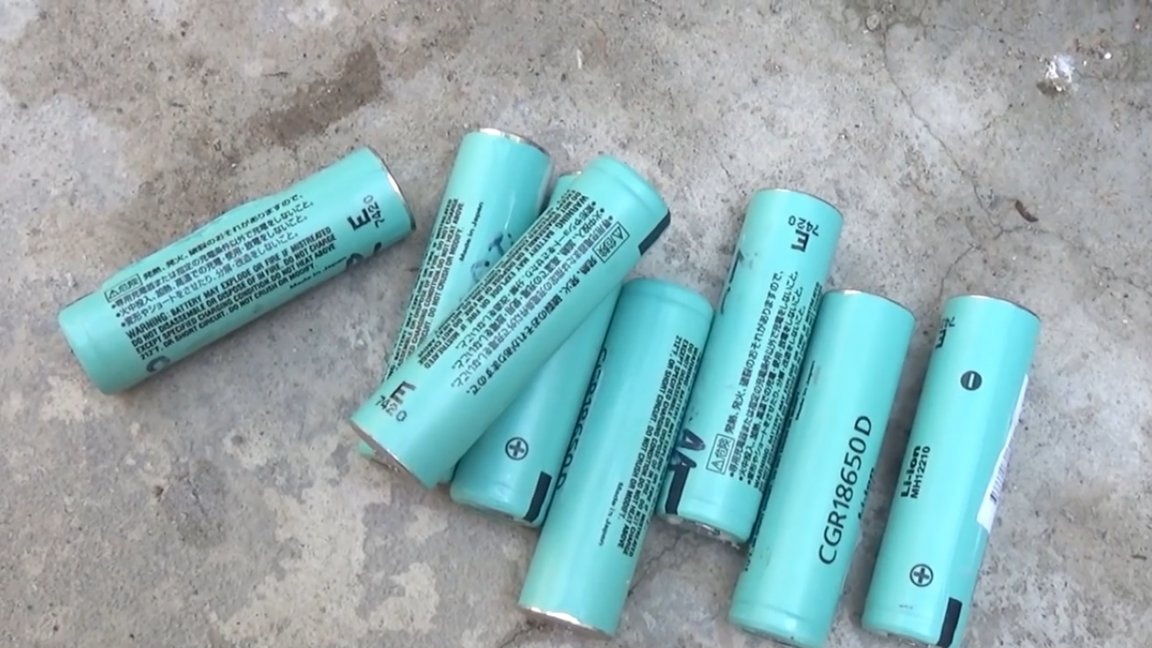
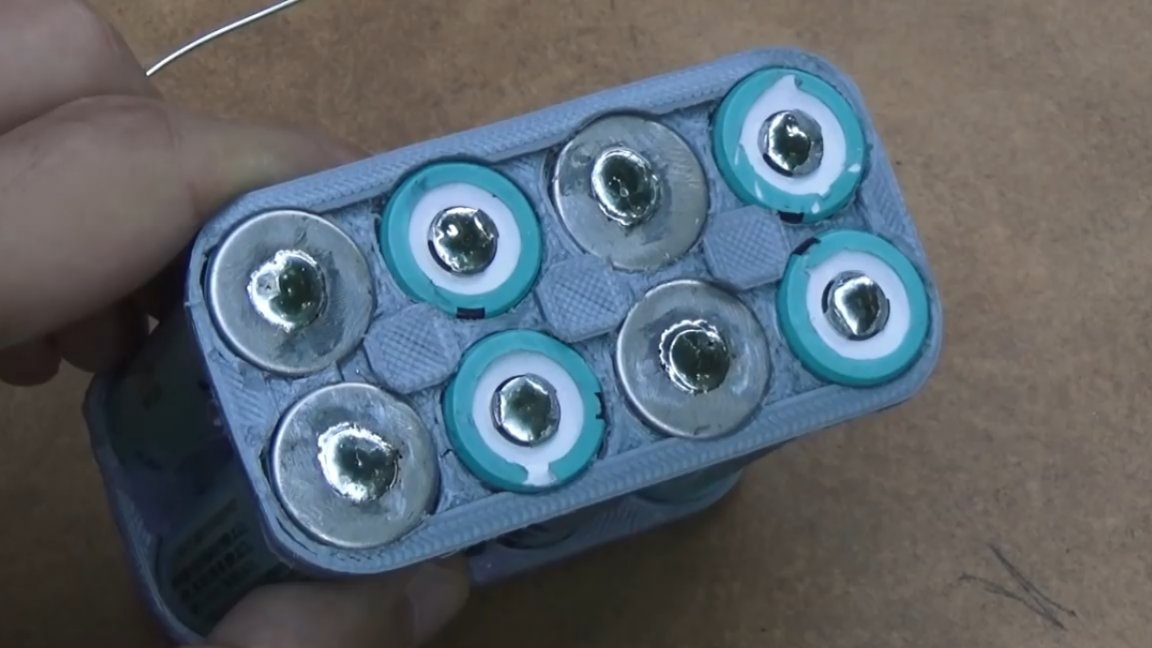
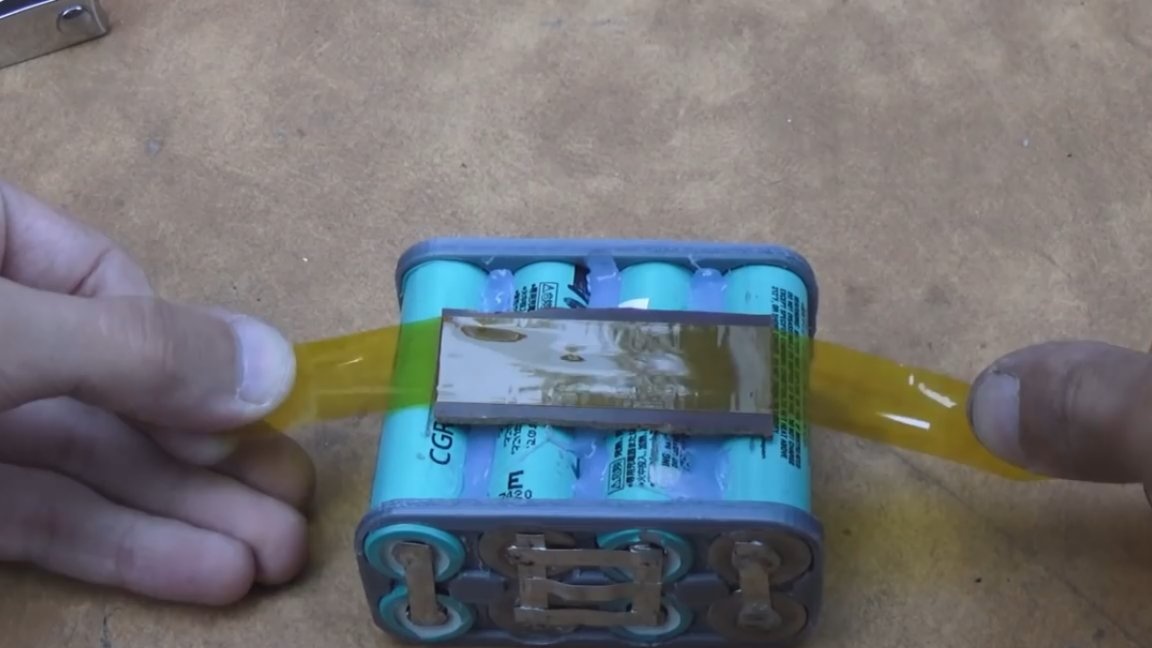
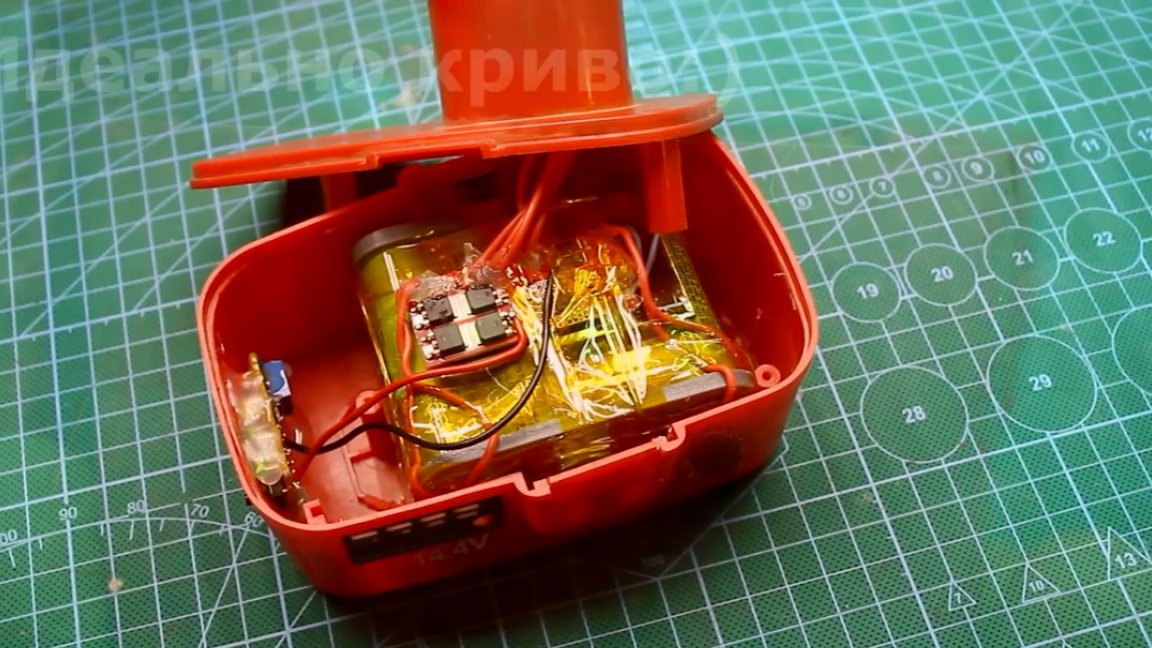
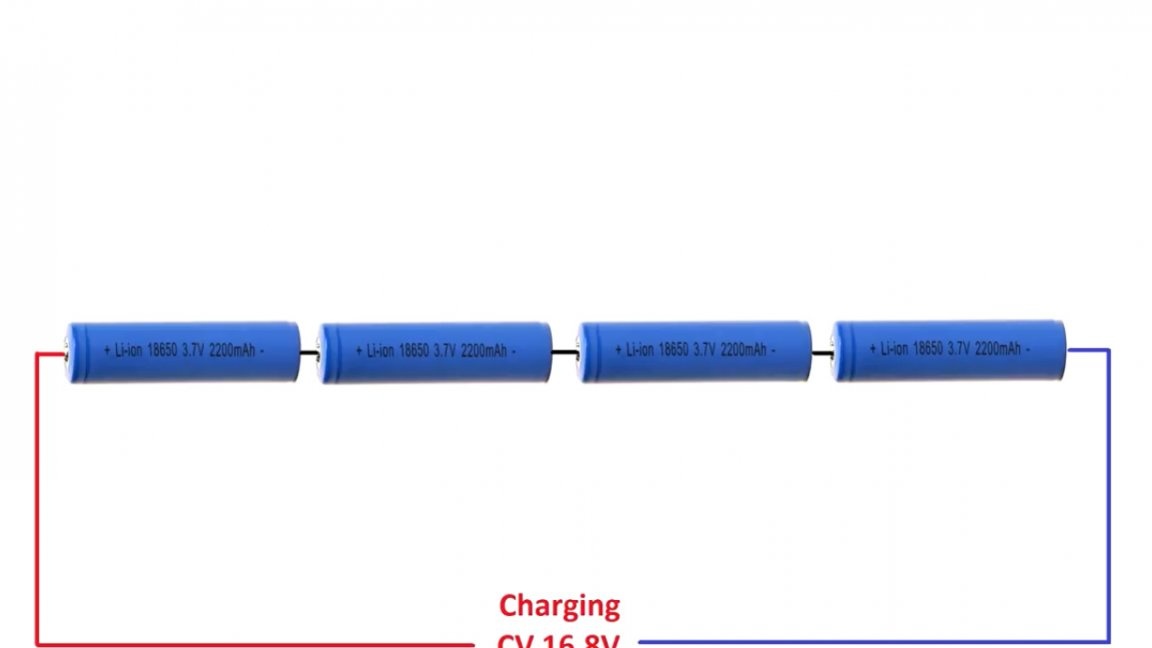
The battery consists of lithium-ion batteries of standard 18650 in the amount of 6 pieces. Each two banks are connected in parallel to increase the capacitance and return current, and 4 assemblies of 2 cans in series, to increase the total voltage. In other words, this is a 4s2p battery.
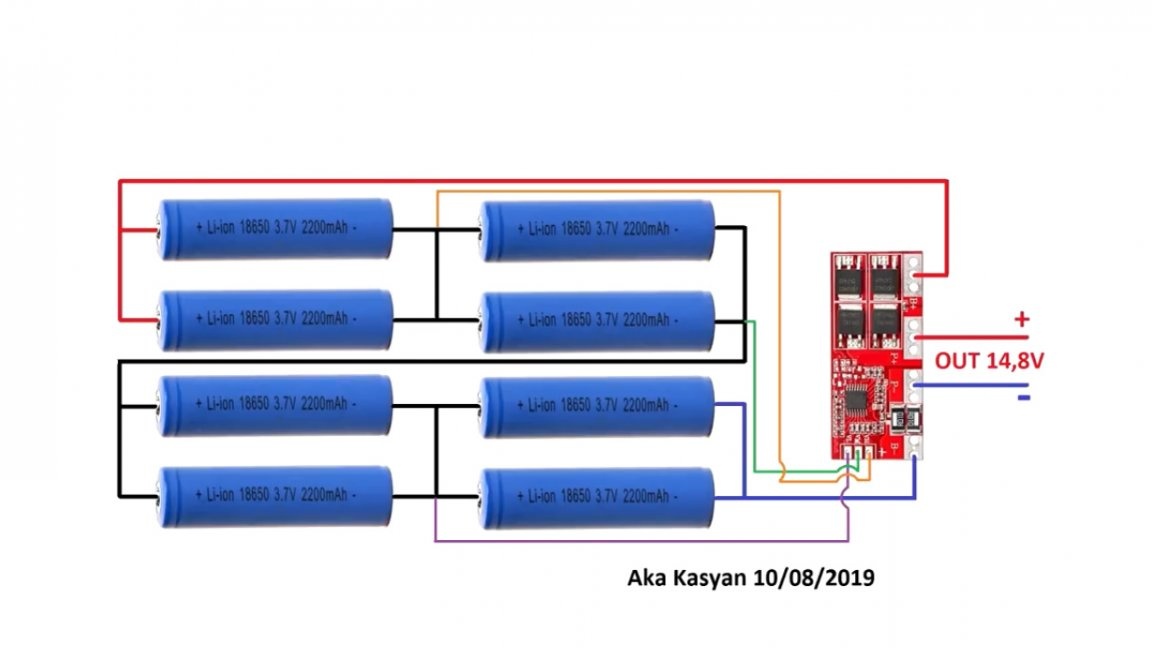
The parameters of the battery are as follows: voltage 14.8V, capacity 4000mAh, it is advisable, of course, to use high-current ones with a return current of 15 to 30A.
If you plan to use used batteries, it is important to choose banks with the same internal resistance.Moreover, the less this resistance, the better.
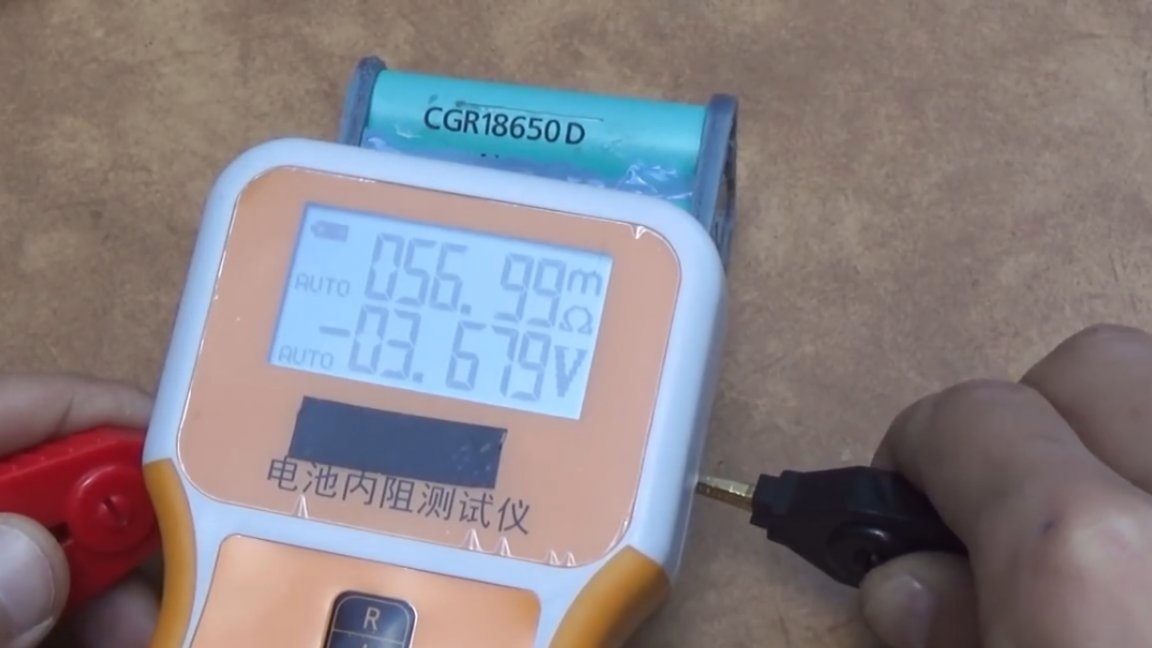
The author for this alteration used such batteries from Panasonic, the capacity of each can is on average about 2000mAh, with a discharge current of 1A.
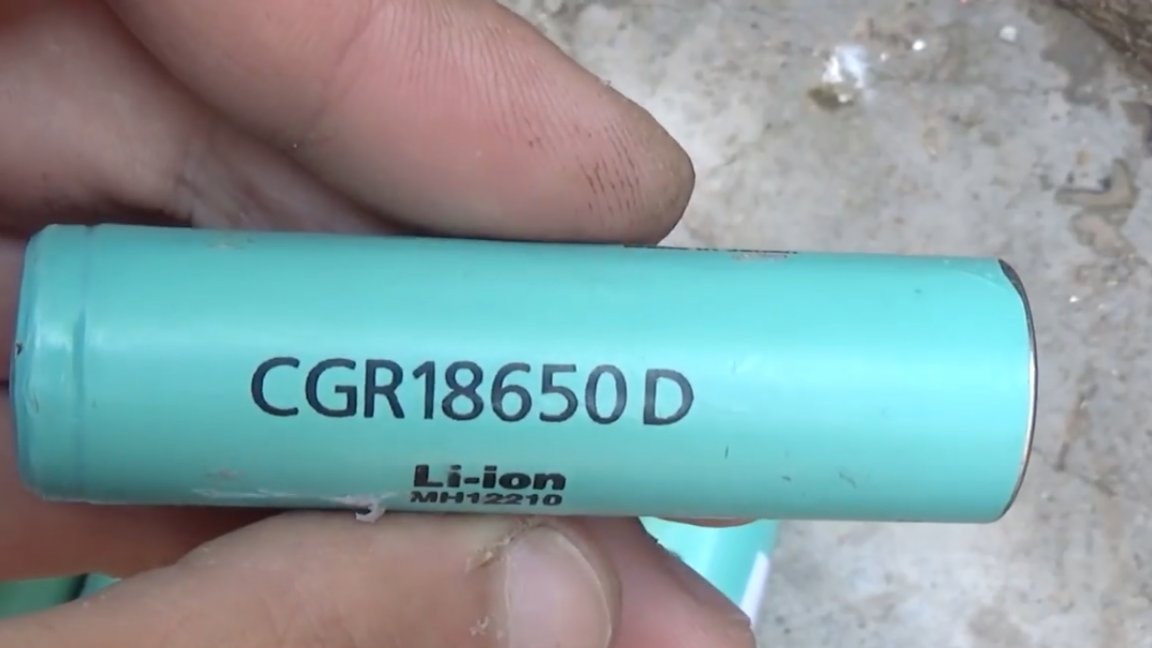
The technical documentation of these batteries says that the jar can be discharged with a maximum current of up to 4.5A, and for a short time with a current of up to 8A. Peak discharge current 14A, but not more than 4 seconds.
In our battery, there are 2 banks in parallel, that is, the maximum discharge current can be up to 9A, short-term up to 16A, peak up to 28A, respectively.
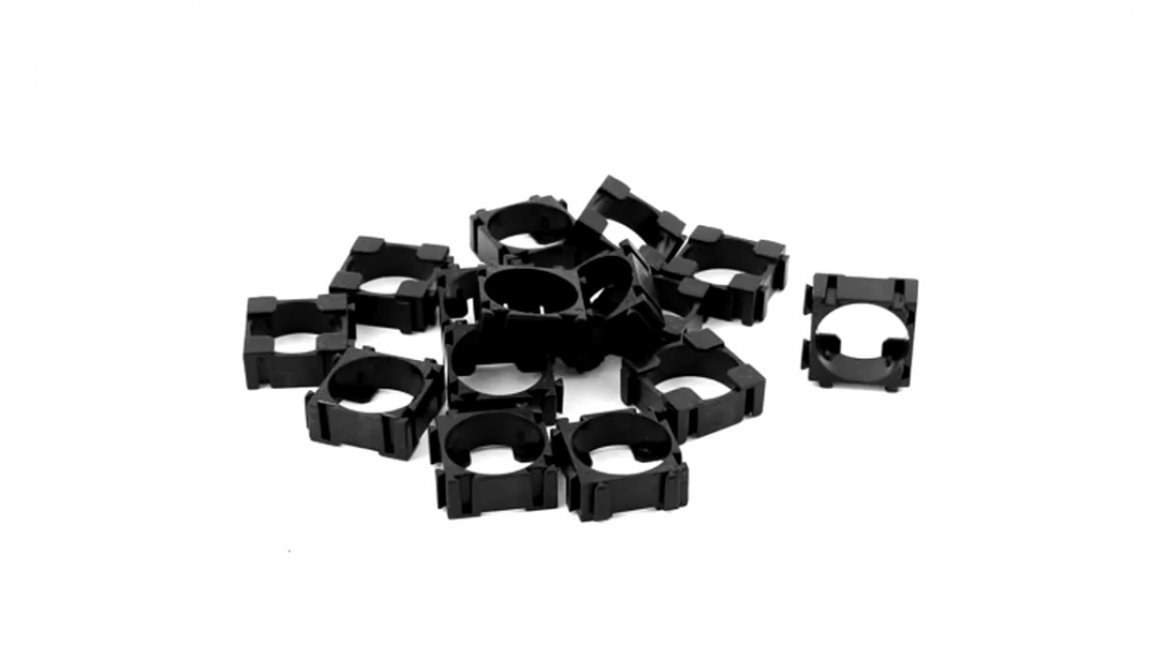
To install the batteries, holders were printed on the 3d printer.

Of course, you can buy exactly the same literally for a penny, and besides, their quality will be much better.
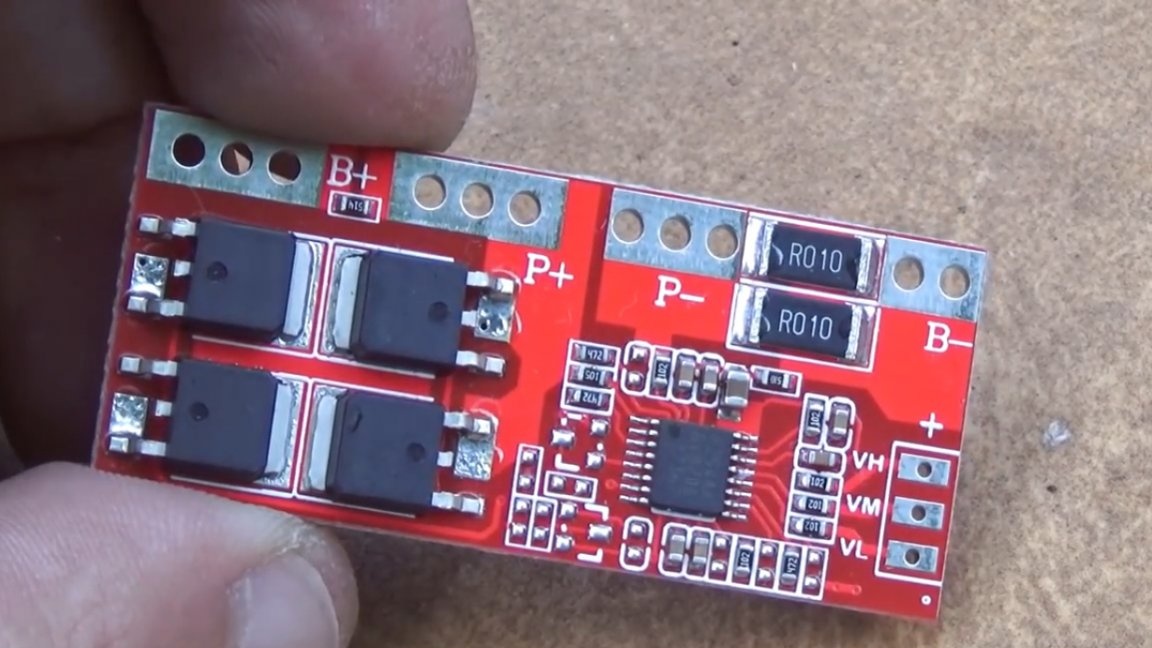
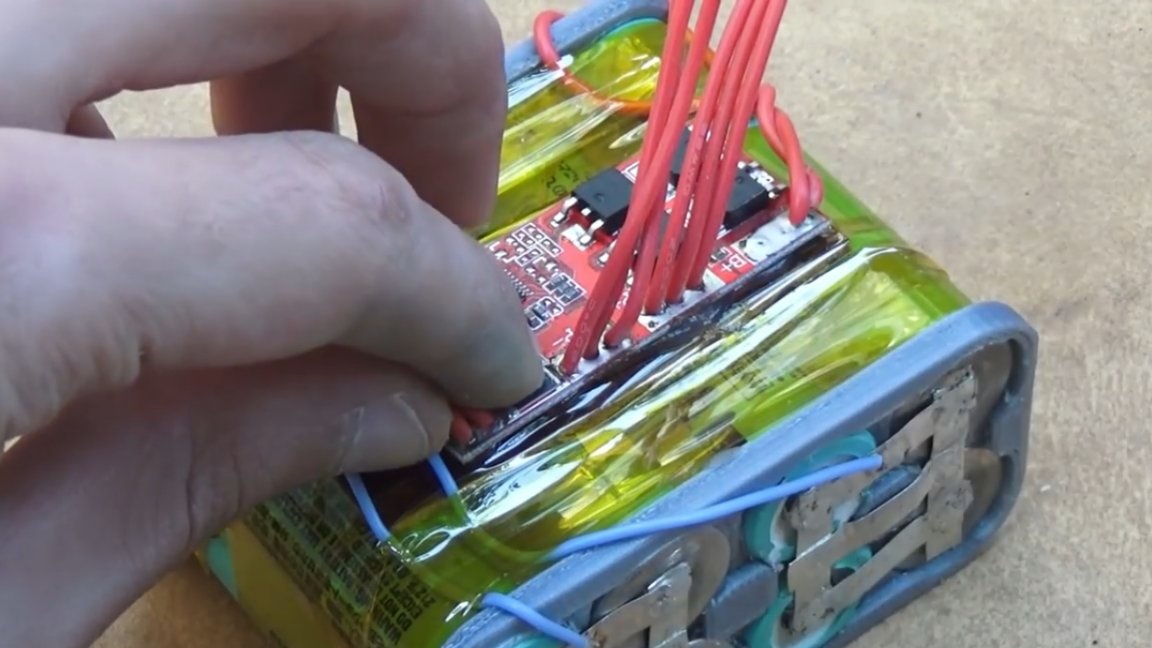
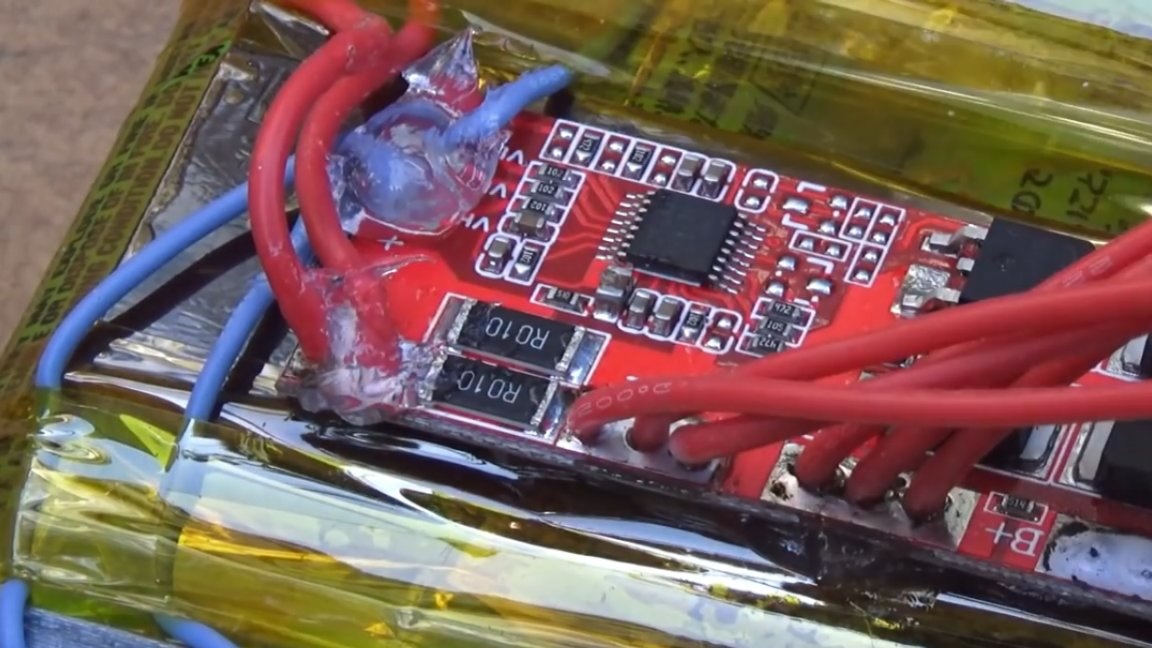
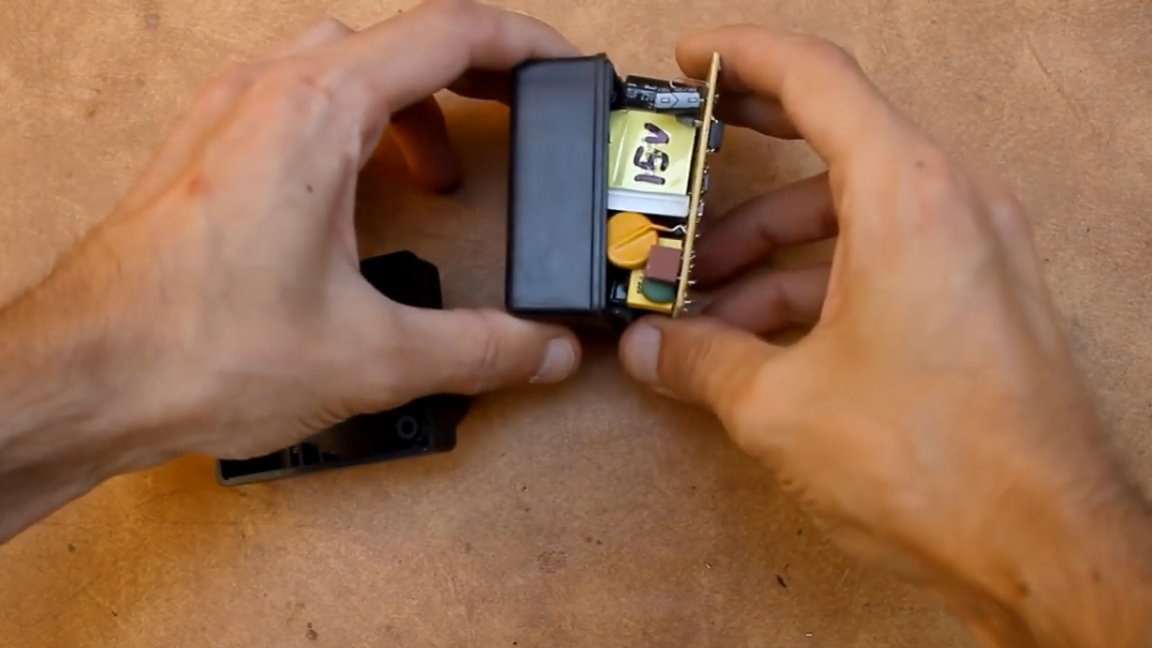
Payment of protection. Without this thing, lithium batteries cannot be put into operation. Such a scarf protects the battery from deep discharge, overcharging and short circuits. In this case, an inexpensive protection board was used for 4 cells of a lithium-ion battery. Board protection current is 15A.
It is desirable to connect the batteries using nickel tape and a resistance welding machine, but you can use, for example, several layers of tinned copper tape, such are used to connect solar modules. When soldering, the main thing is not to overheat the batteries.

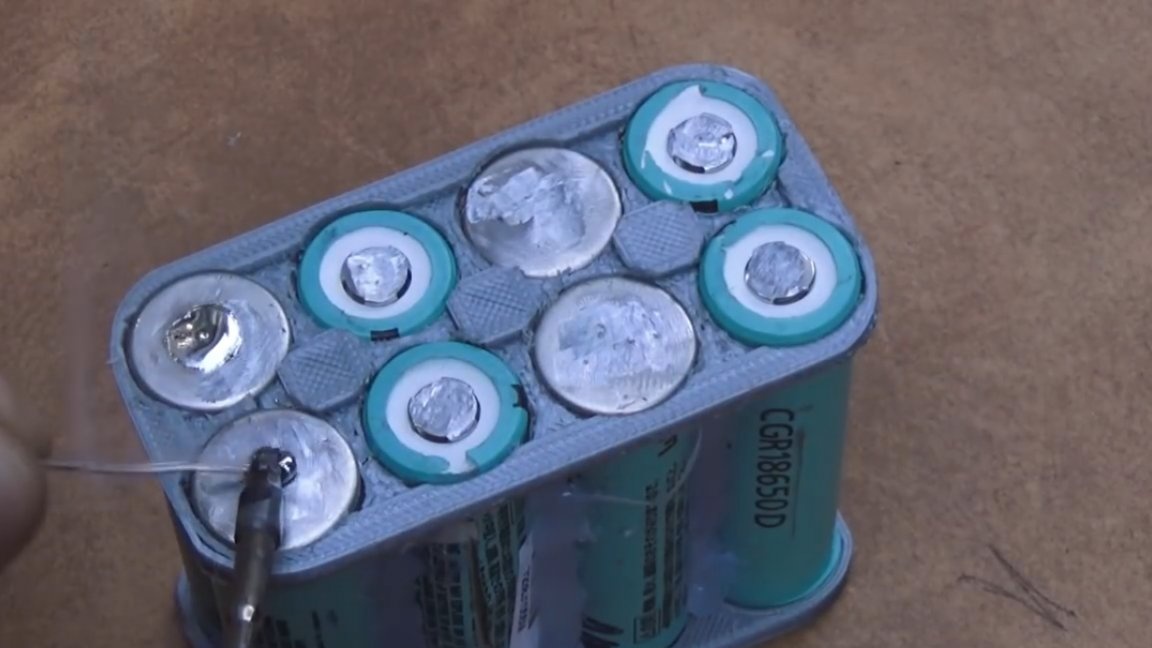
Soldering must be fast enough. The process of soldering one patch should not exceed 2-3 seconds.
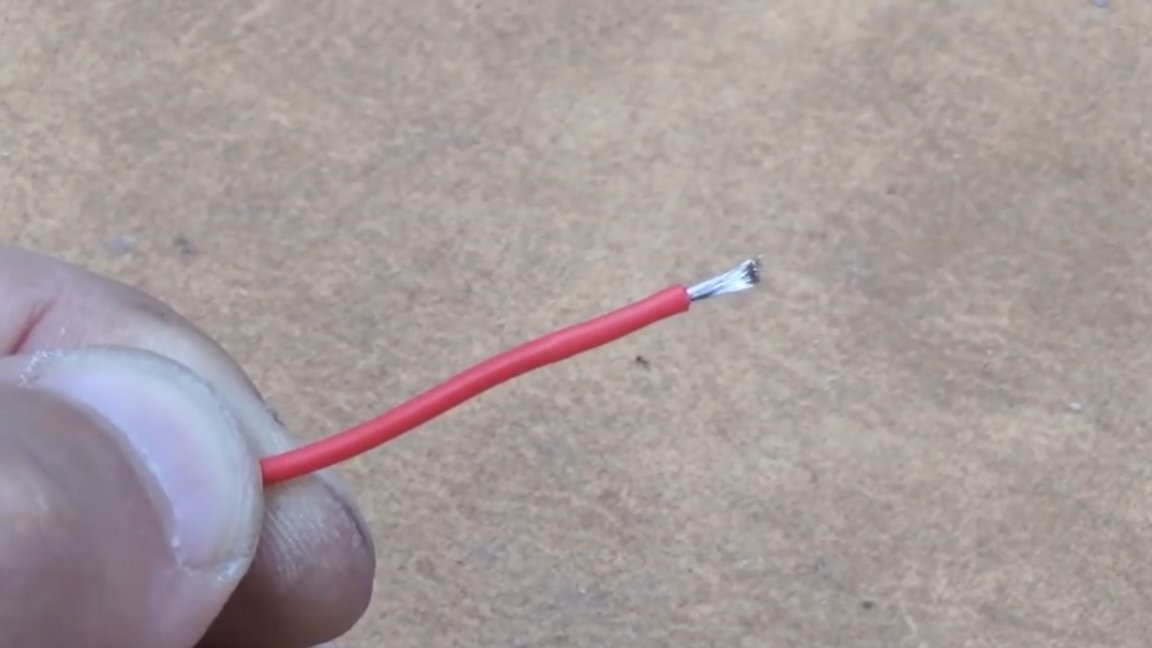
To connect the protection board, it is necessary to use wires in heat-resistant silicone insulation.
We fasten the protection board to the battery through the insulator and fix it with sealant.
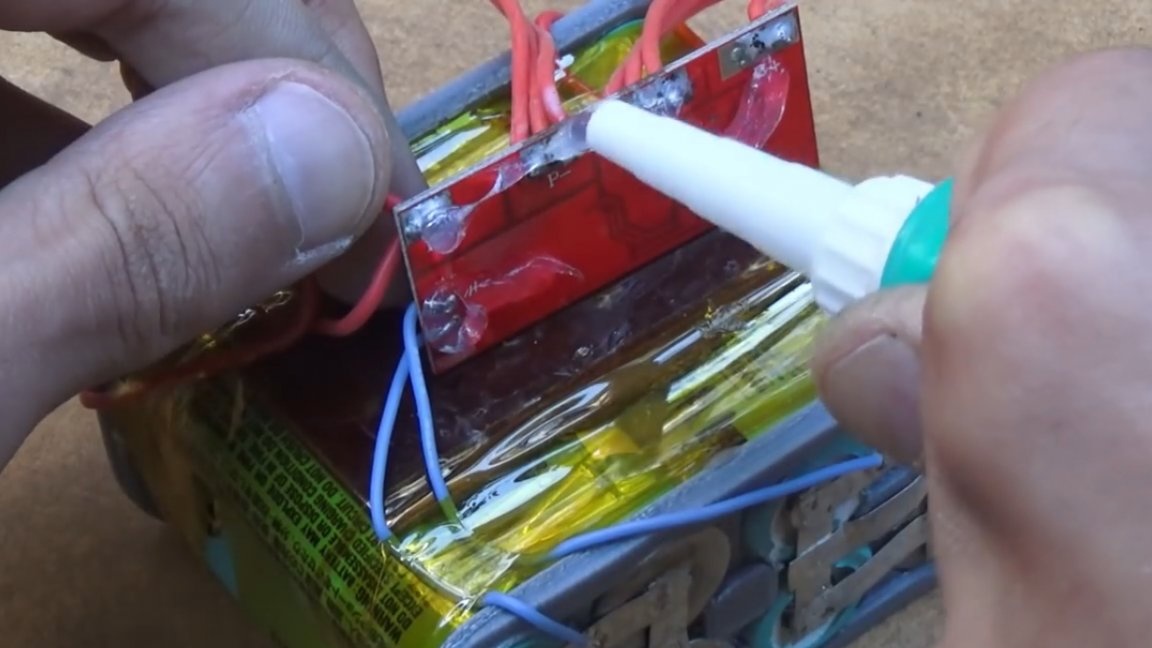
The same sealant can also be used to fix the rations of the wires.
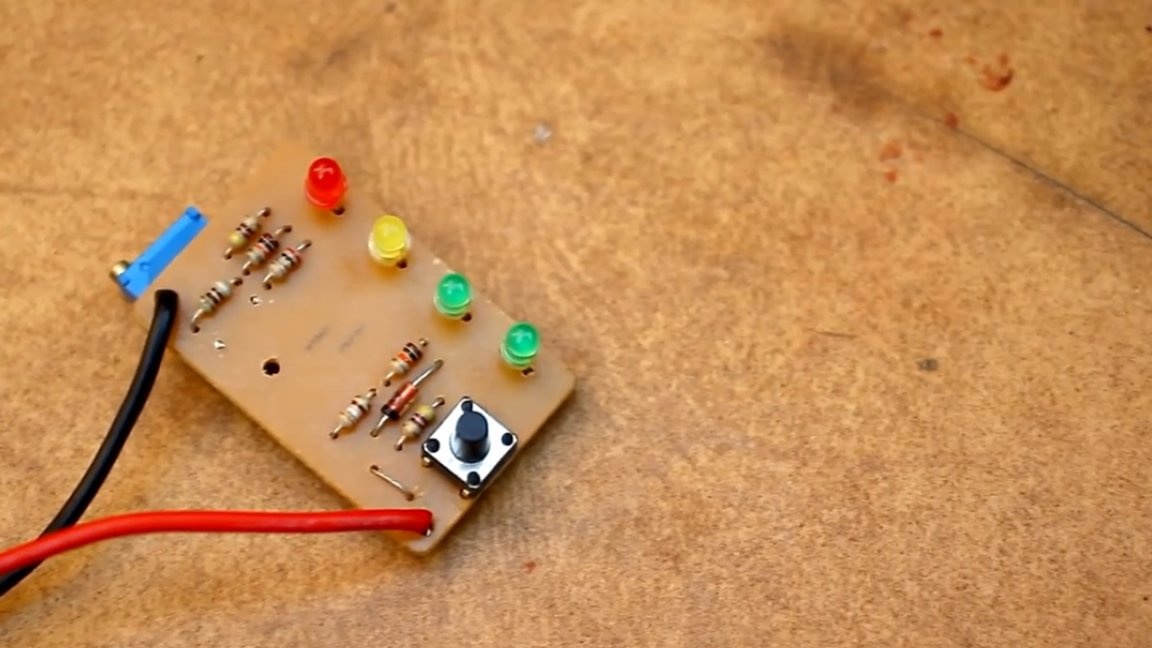
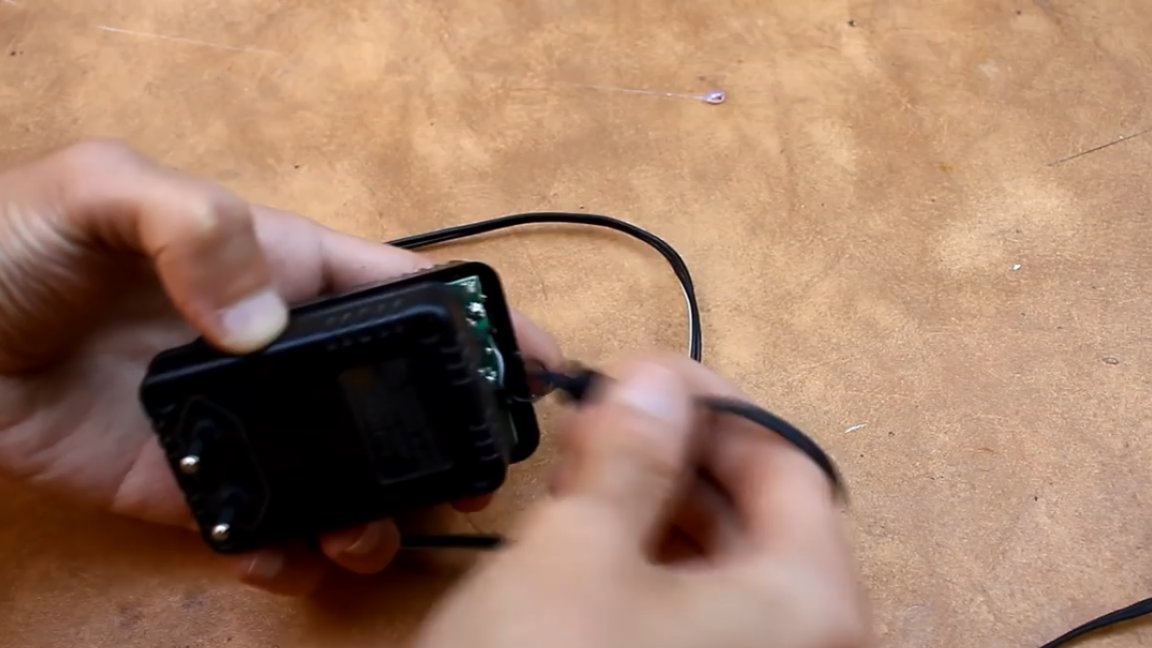
After that, install the battery in the case. The display board will be left from the screwdriver’s native battery.
This display board is based on the operational amplifier lm324.
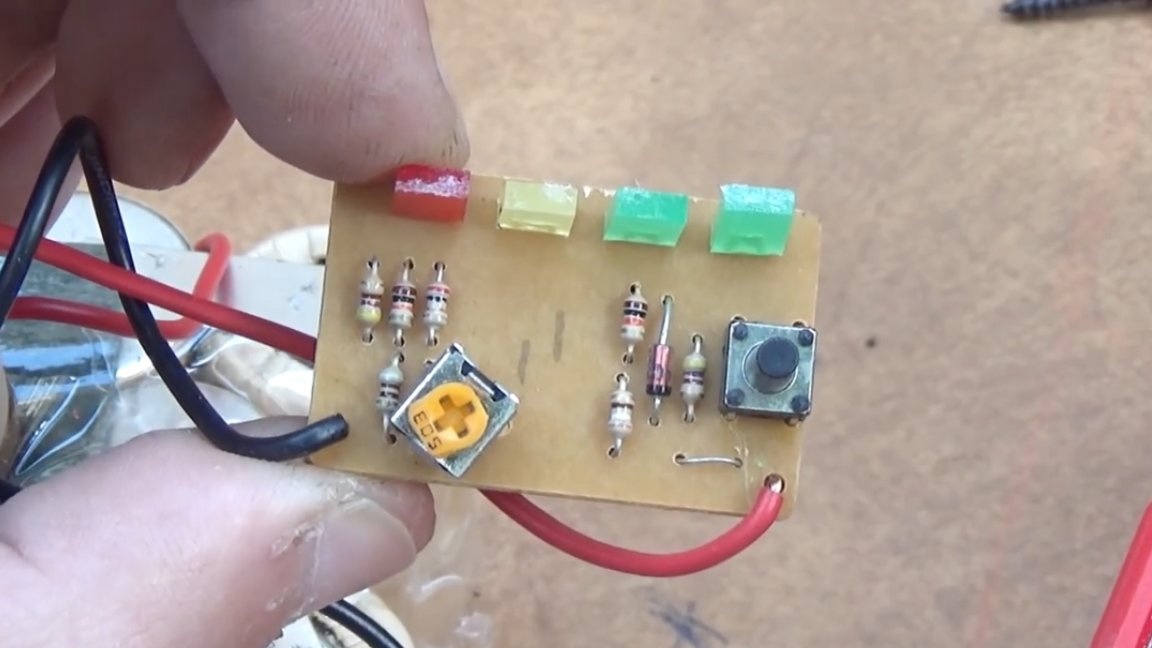
There is also a variable resistor for calibration on the board and all that was left to do was connect the board to the laboratory power supply and calibrate the indicator specifically for this battery.

The lab in this case, as you understand, in the role of simulating a battery. For these purposes, almost any power supply with voltage control is suitable.
After calibration, the variable resistor can be replaced by a tuning resistor with high resistance, and the LEDs can be changed to round 3 mm.
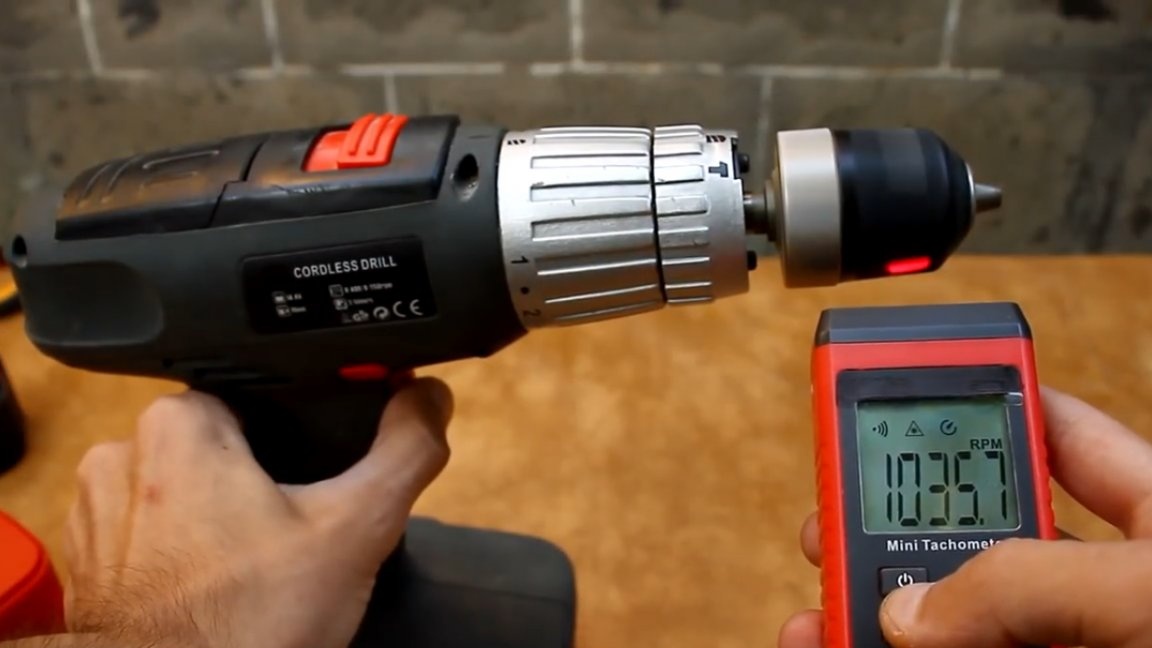
The battery is fully operational. Now let's check the idle speed. With an old battery at second speed, we get about 1000 rpm.
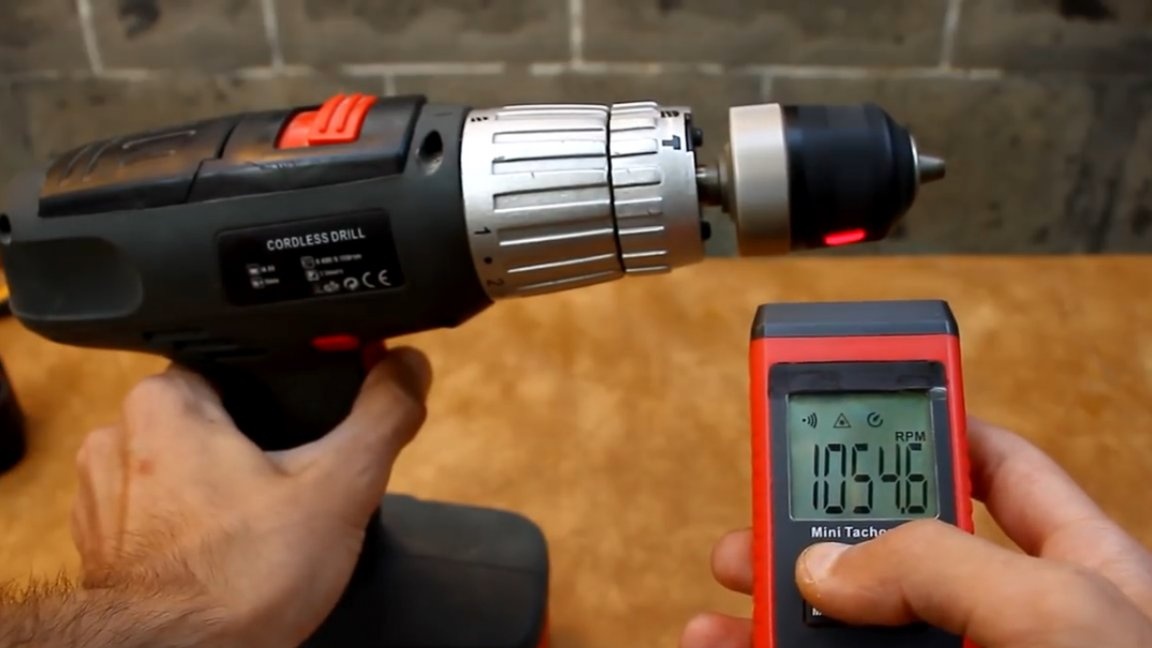
Under the same conditions, the rpm is practically the same with the new lithium-ion battery.
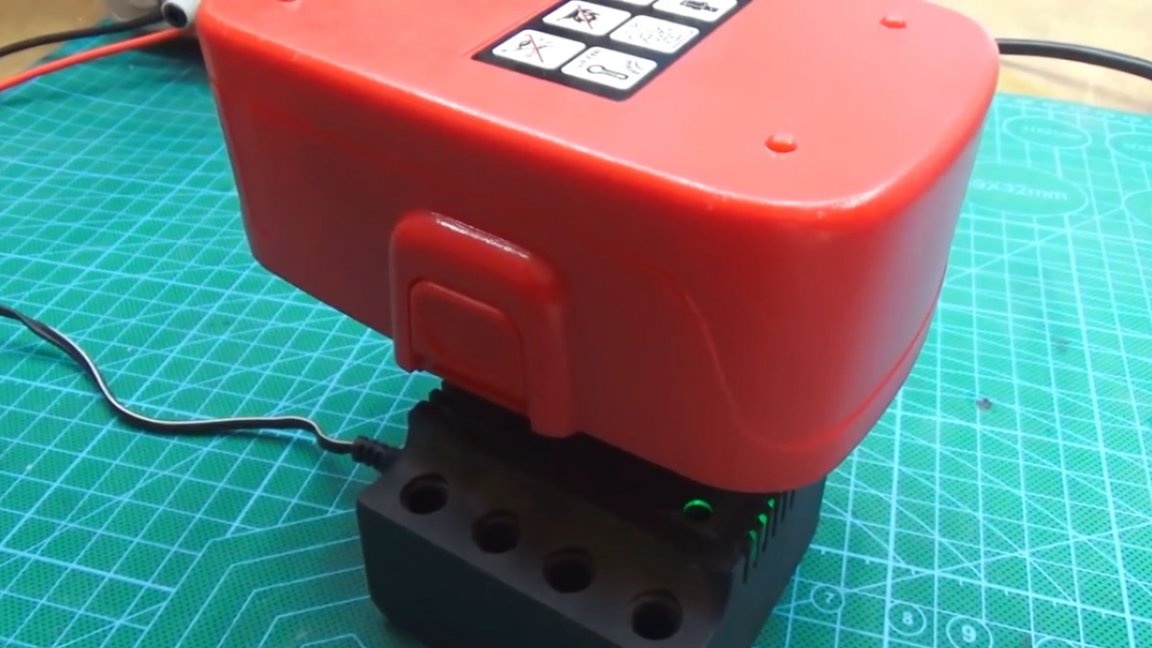
Native charger for a new battery is not suitable.
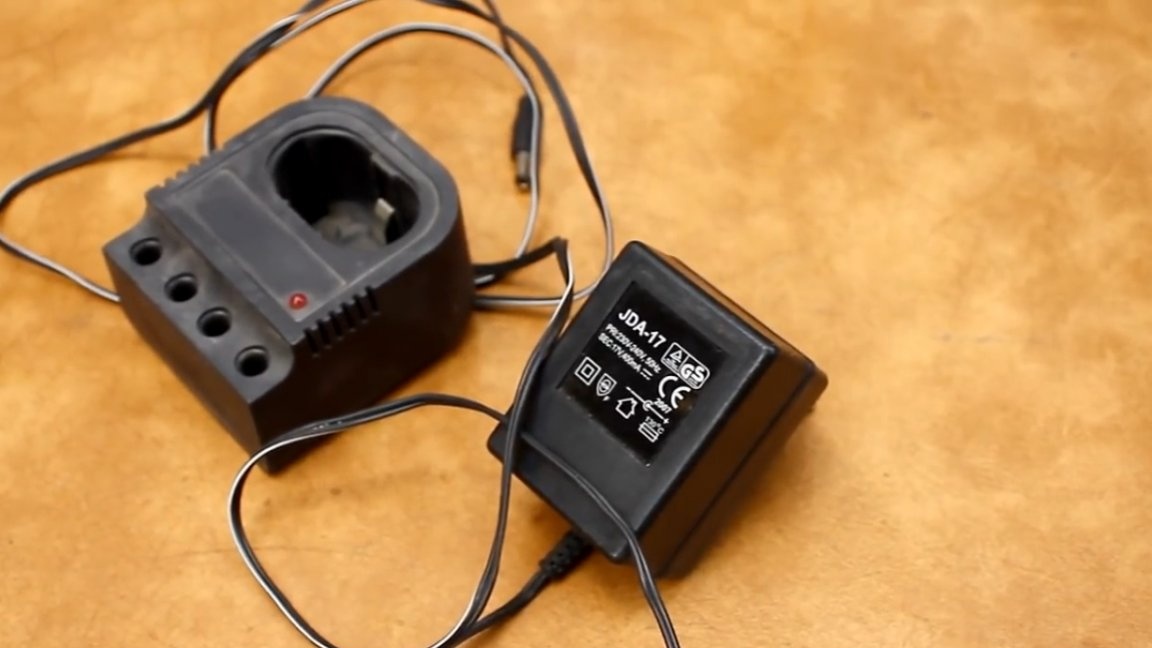
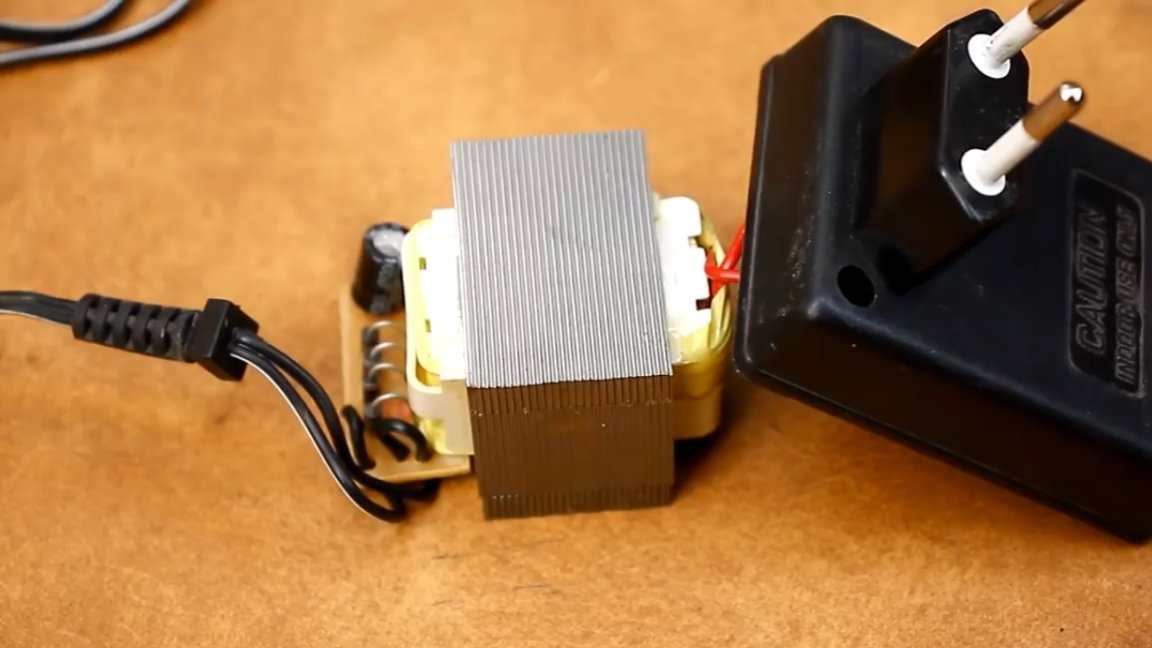
In case of alteration, everything needs to be replaced here. A lithium-ion battery needs a charger that delivers stable current and stable voltage.
To charge 4 externally connected lithium cans, a 16.8V charger is required. It is this voltage that our charger must give out to fully charge the battery.
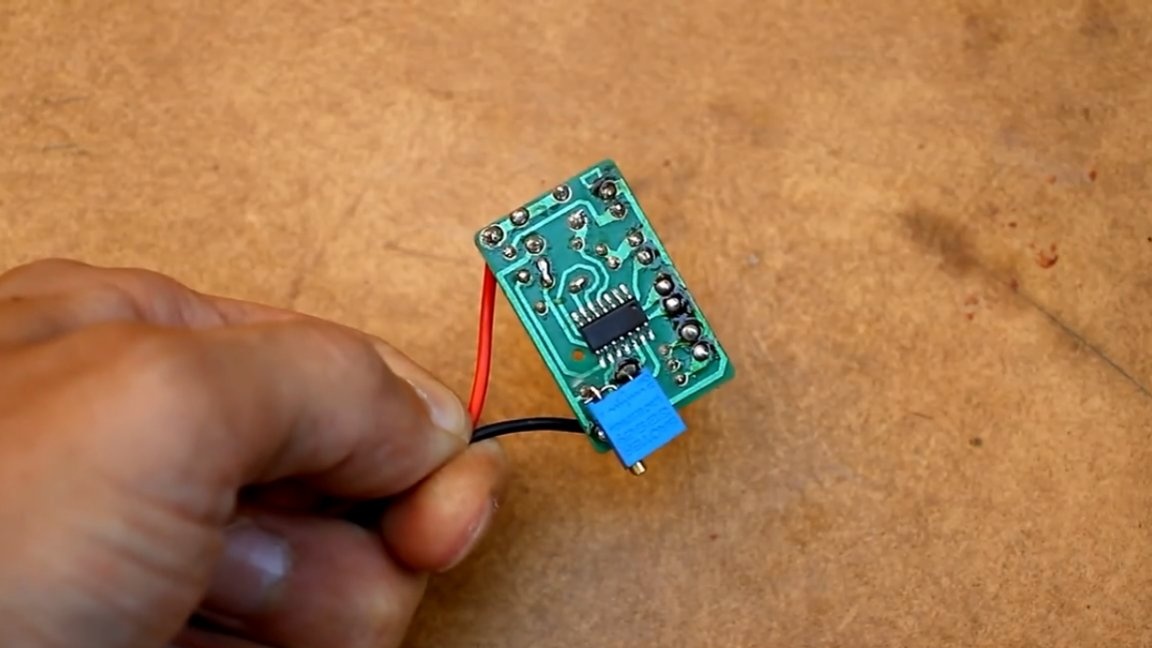
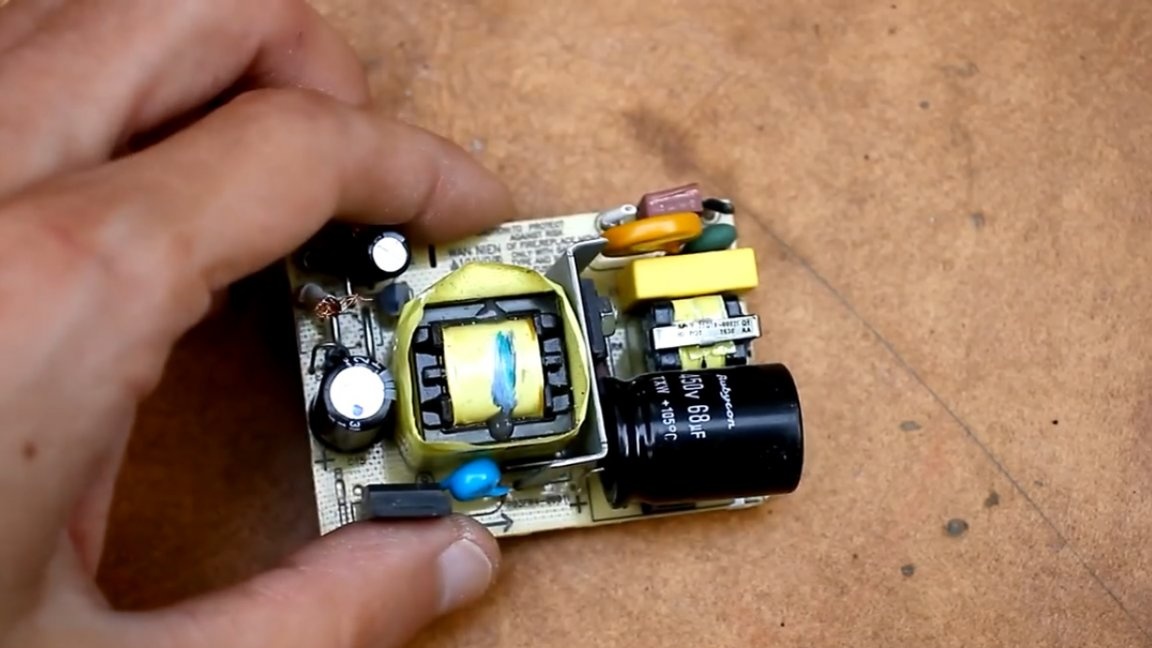
The charge current depends on the type of battery. The author took a ready-made 15V power supply and a popular 5-ampere current and voltage stabilizer board based on the xl4015 chip.
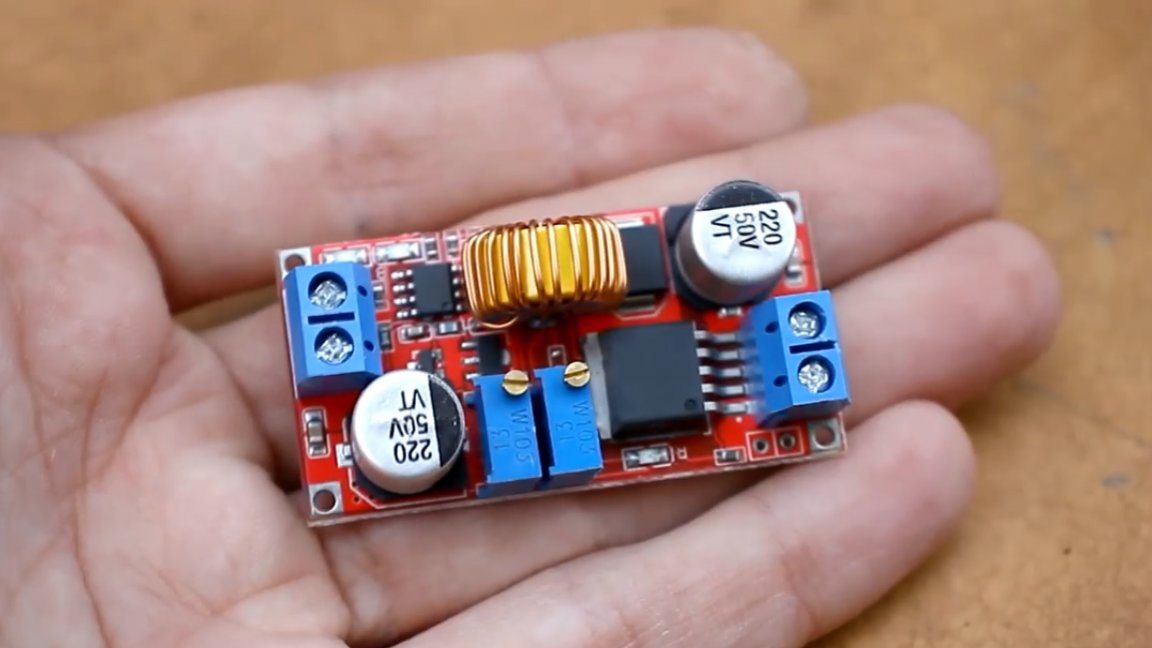
There are 2 trimmer resistors on the stabilizer board for adjusting current and voltage.
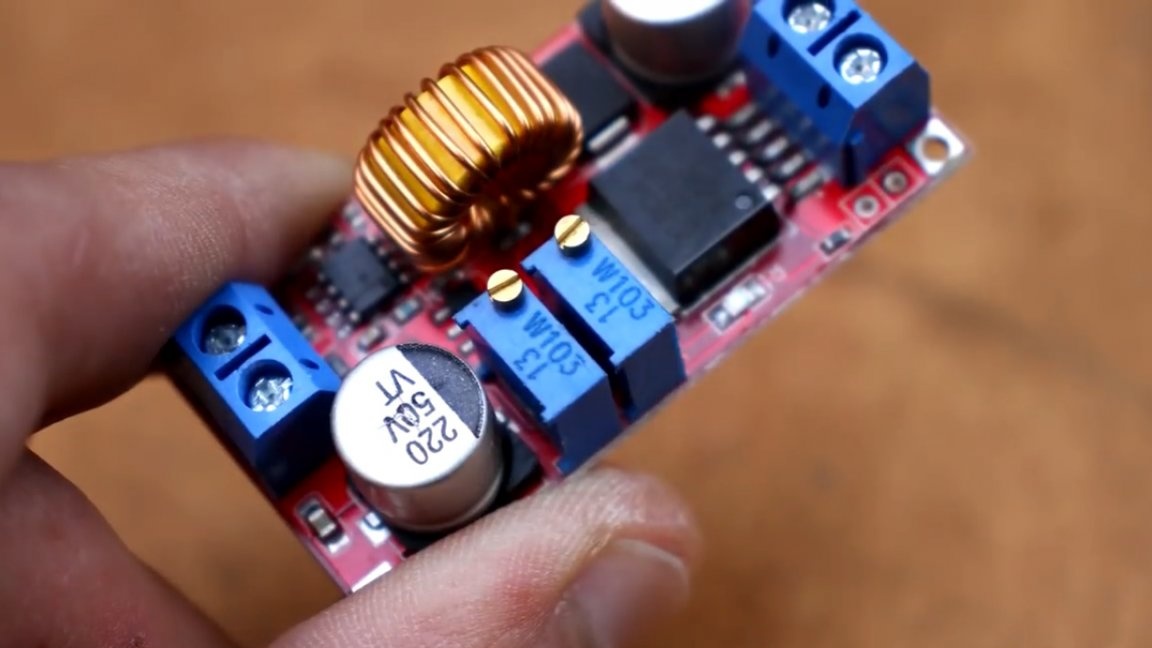
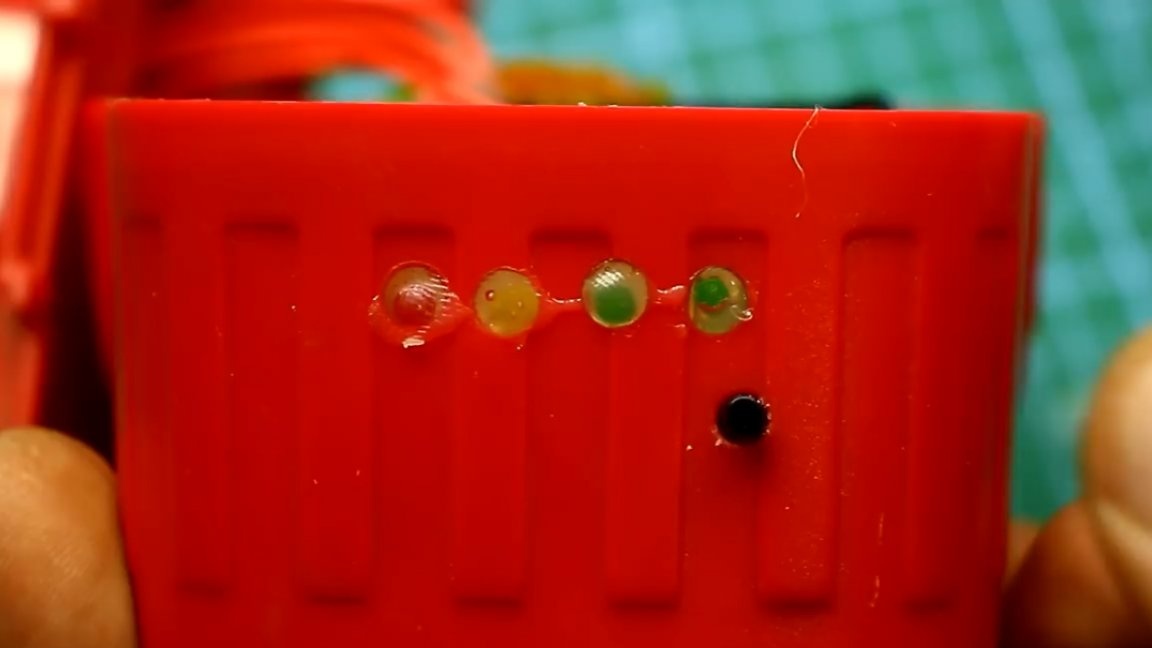
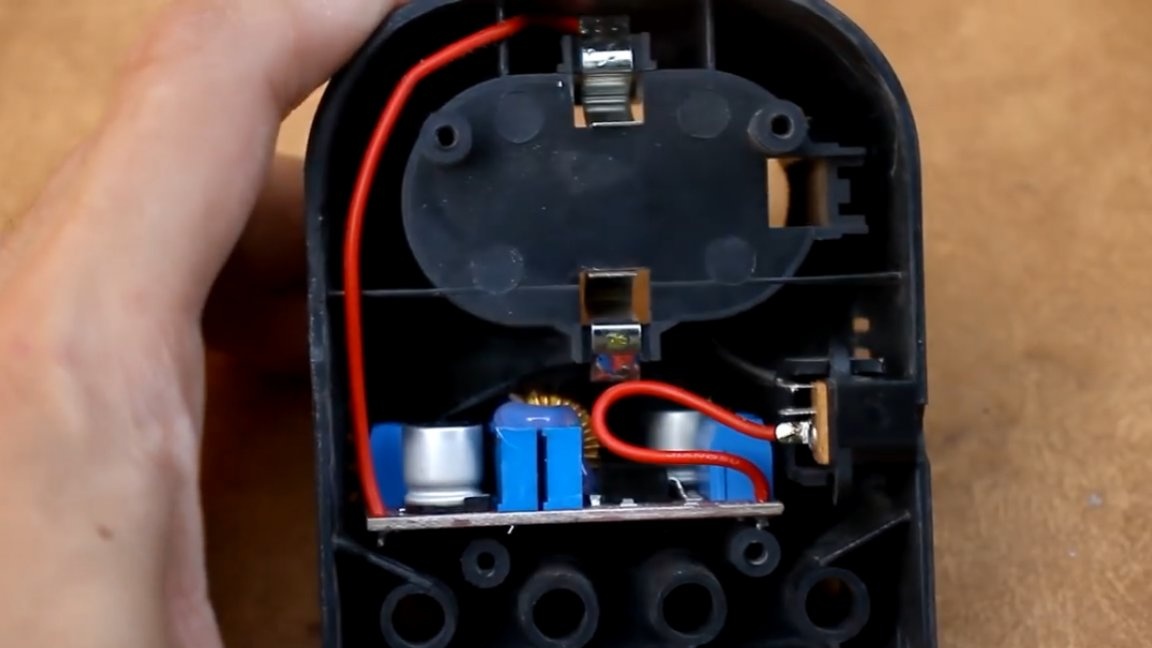
Place the board in the dock. It is not necessary to bring out the LEDs, as there are slots on the docking station and it is clearly visible what LED is lit at the moment.
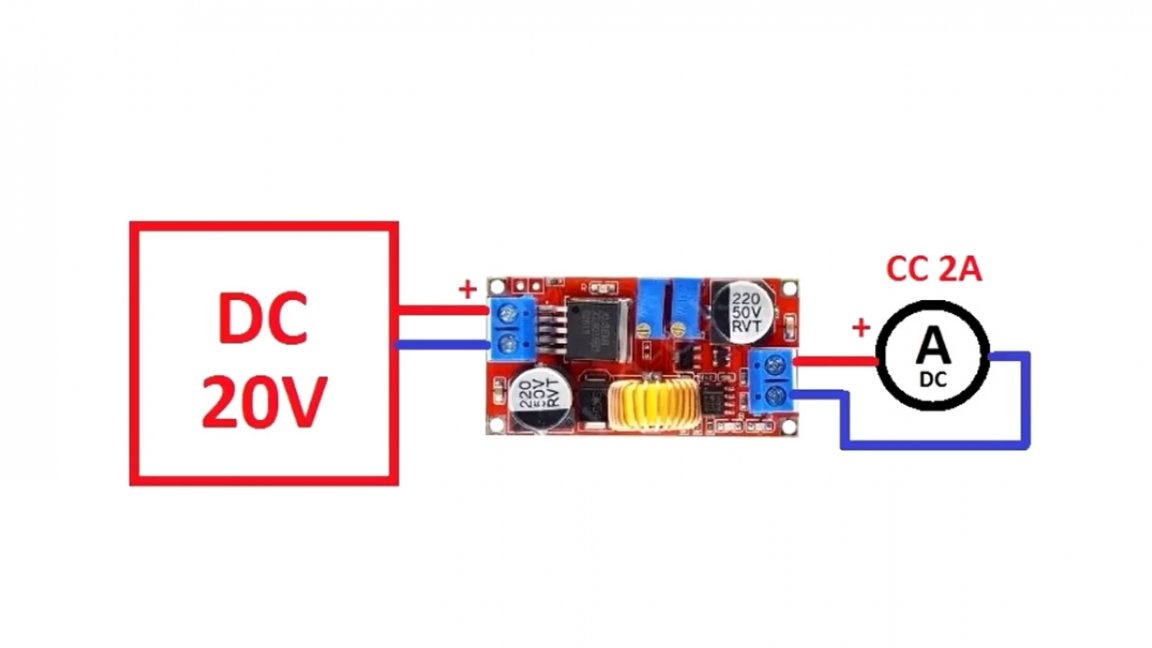
Now we connect the board to the laboratory power supply, apply a voltage of about 20V to the input and rotate the tuning resistor responsible for the voltage, set the voltage we need at 16.8V at the output of the stabilizer.

Then we close the stabilizer output through an ammeter and, rotating the interline, which is responsible for stabilizing the current, set the output current to about 2A.
The switching power supply did not fit in the case in which the transformer was located, so I had to find another case. After that, we connect the power supply with the stabilizer board and you're done.
As a result, we got a charger that will charge the battery with a stable current of no more than 2A. The voltage in this case is 16.8V.
On the stabilizer board there are indicators that show the status of the charge. Such a charger can charge a completely dead battery somewhere in 2-2.5 hours.
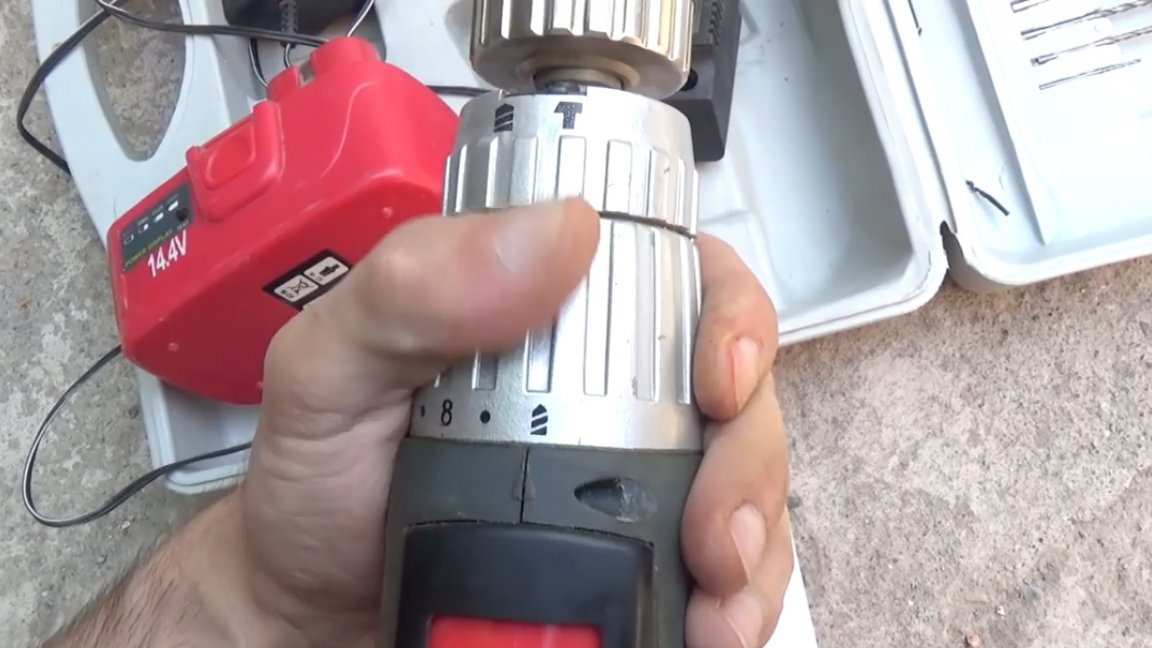
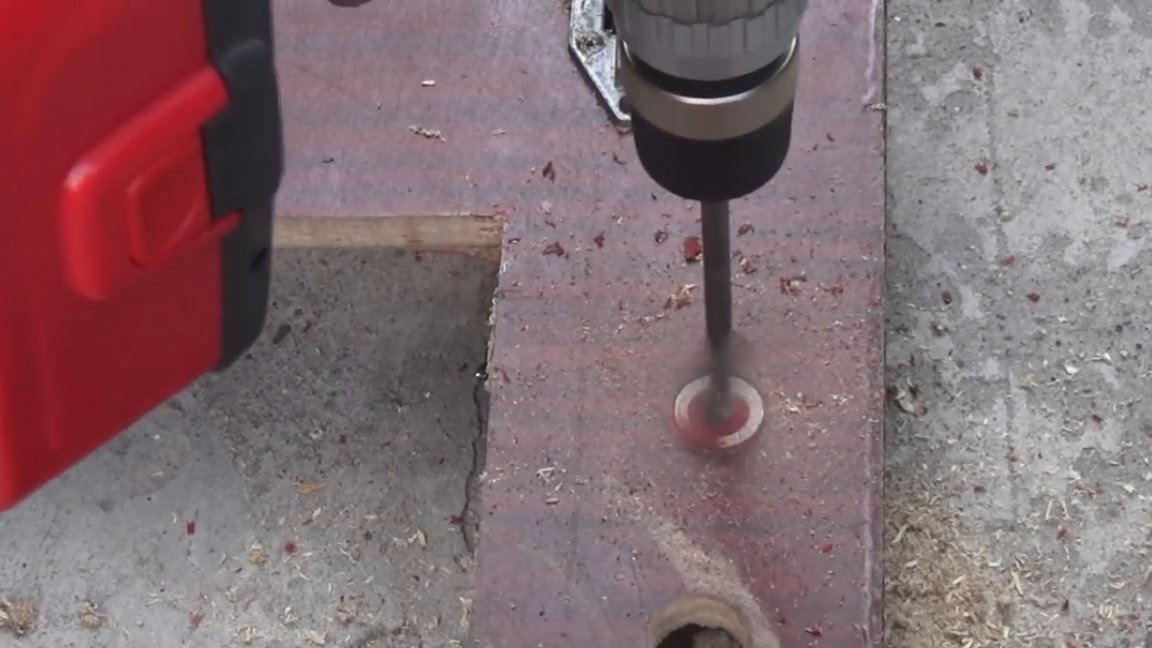
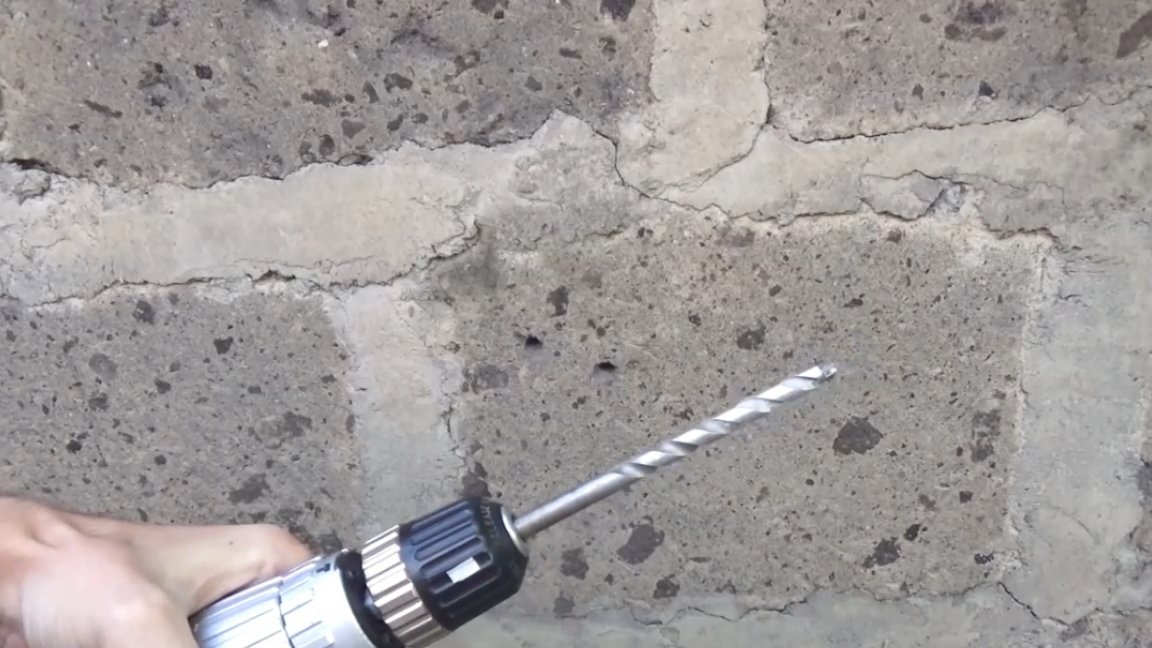
We’ll work with a 25mm wood drill.
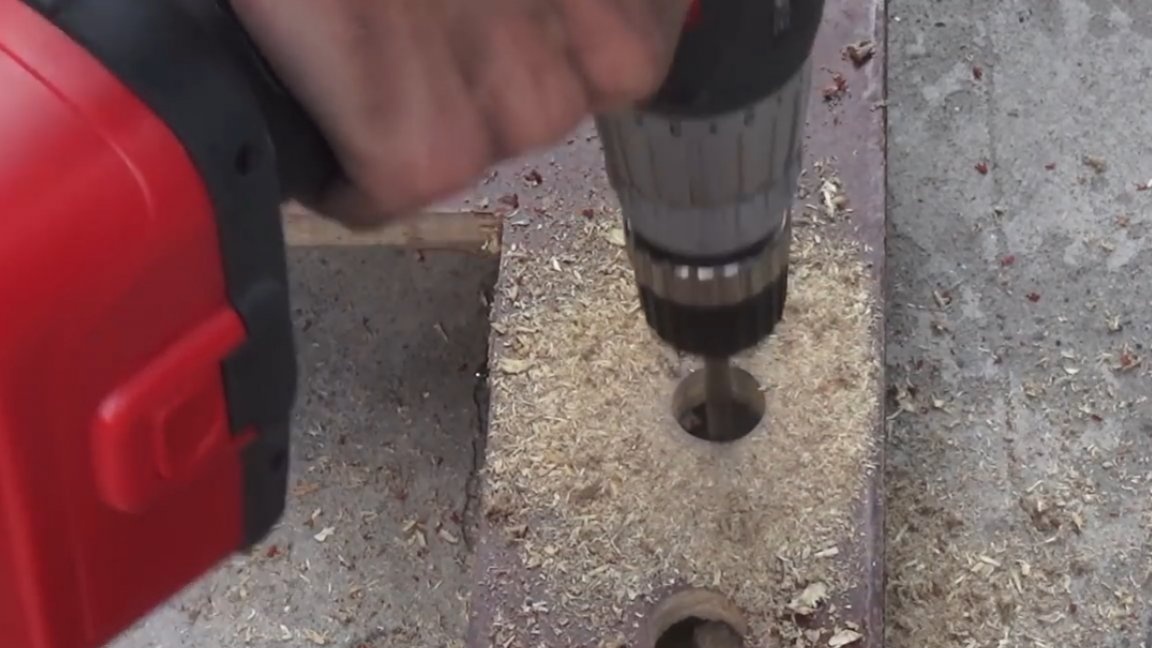

Now drilling with a punch:

The author was pleased with this alteration. The only “BUT”, in this case, the balancing system was not used to equalize the charge on the banks. This is certainly wrong, but if such a need arises, then introducing a balancer will not be difficult. That’s probably all. Thank you for attention. See you soon!
Author's video: