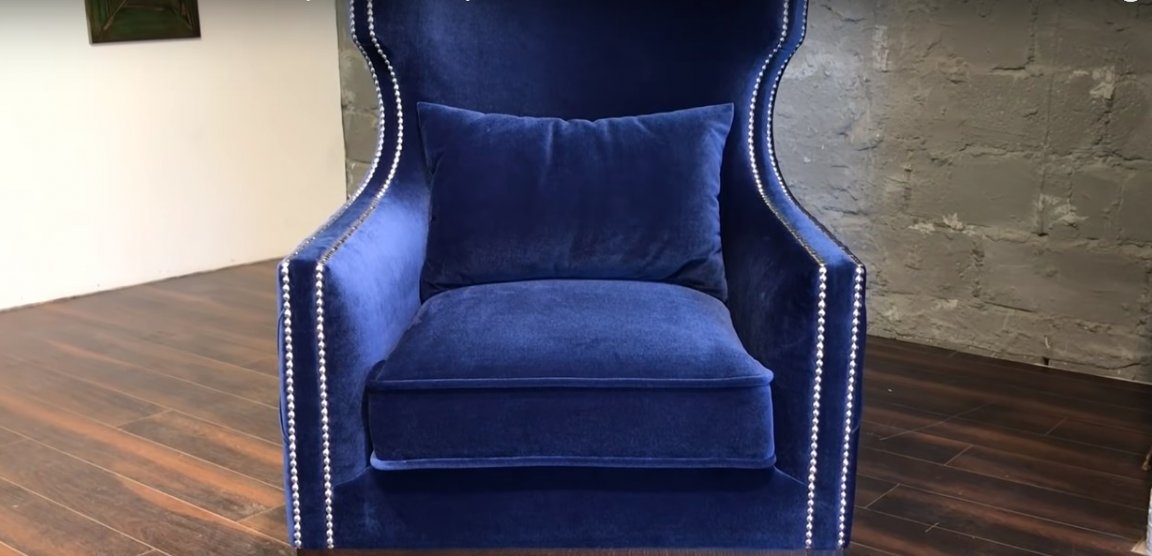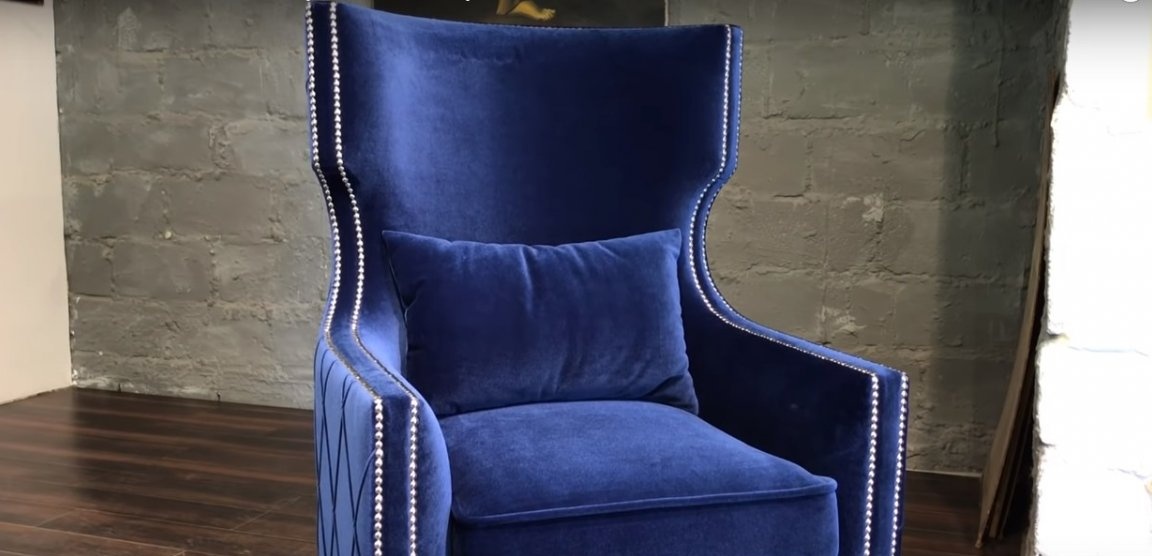
Fireplace chair - traditional look of furniture for old Europe. The homes of Europeans of past centuries were heated mainly by fireplaces. A wealthy estate could afford furniture, including upholstered furniture. And the mantelpiece played a paramount symbolic meaning here.
Often chairs in this category were trimmed with velvet or genuine leather. Later they started using synthetic fabrics, as well as leatherette. The author made a fireplace chair in the image and likeness of an old prototype, originally from old Europe. Therefore, it will be trimmed with nothing else, namely velvet.
In order to make a fireplace chair from velvet you will need:
Materials:
- plywood with a thickness of 20-22 mm for the manufacture of a supporting frame structure;
- wooden blocks to strengthen the frame;
- thin plywood with a thickness of not more than 5 mm for casing;
- furniture foam 50 mm thick;
- thin foam rubber with a thickness of 10-15 mm;
- synthetic winterizer;
- holofiber for stuffing pillows;
- velvet for covering the chair and making a soft pillow;
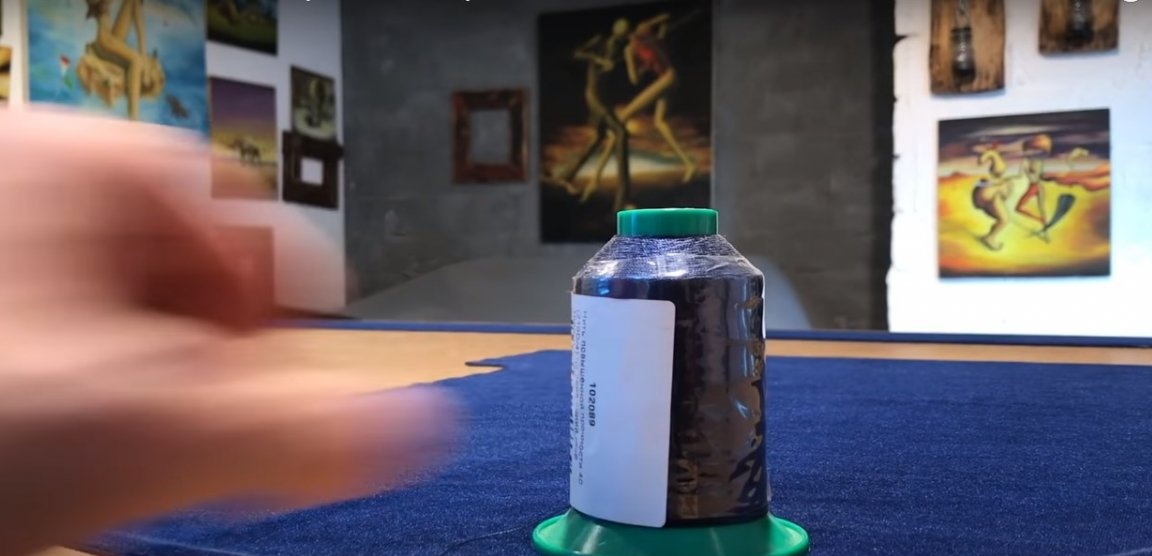
- strong sewing threads - reinforced or thick threads from polyester;
- furniture nylon cord with a diameter of 3-4 mm;
- secret lightning for a pillow cover;
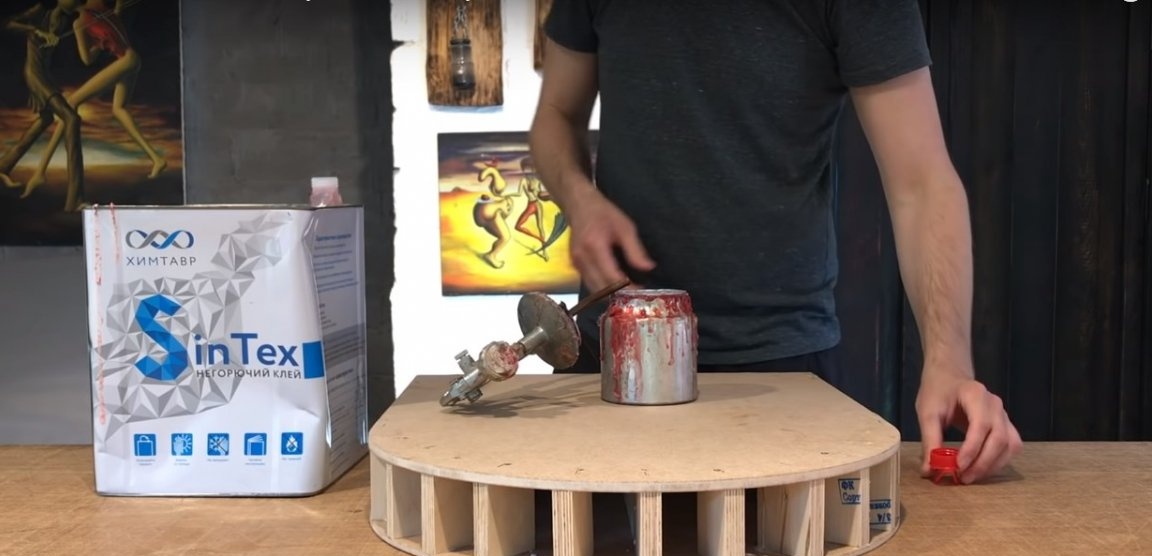
- non-combustible glue for gluing foam rubber and sintepon;
- glue for woodwork;
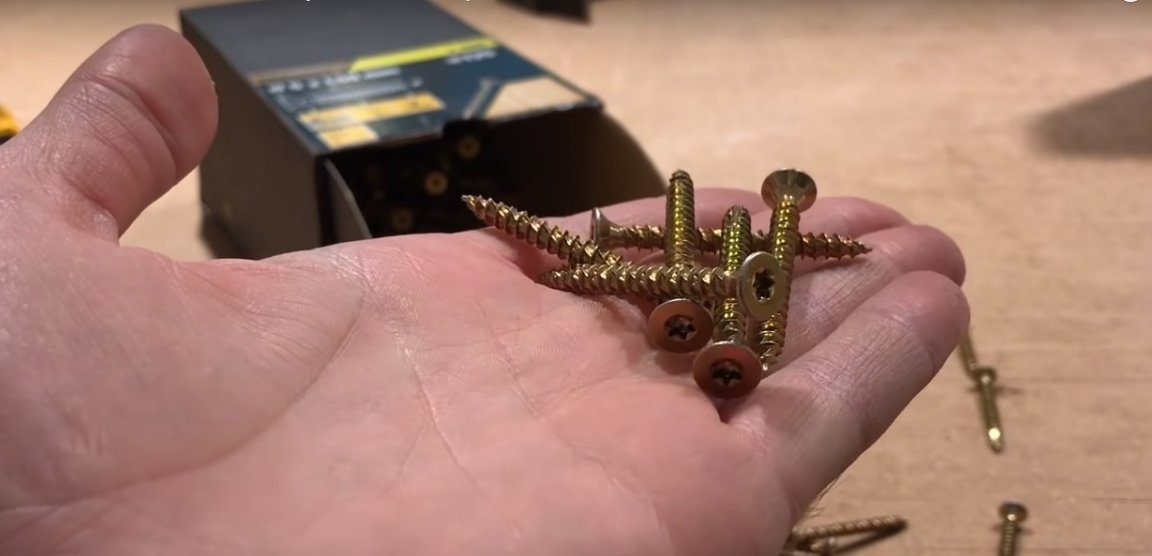
- furniture nuts, self-tapping screws and furniture screws;
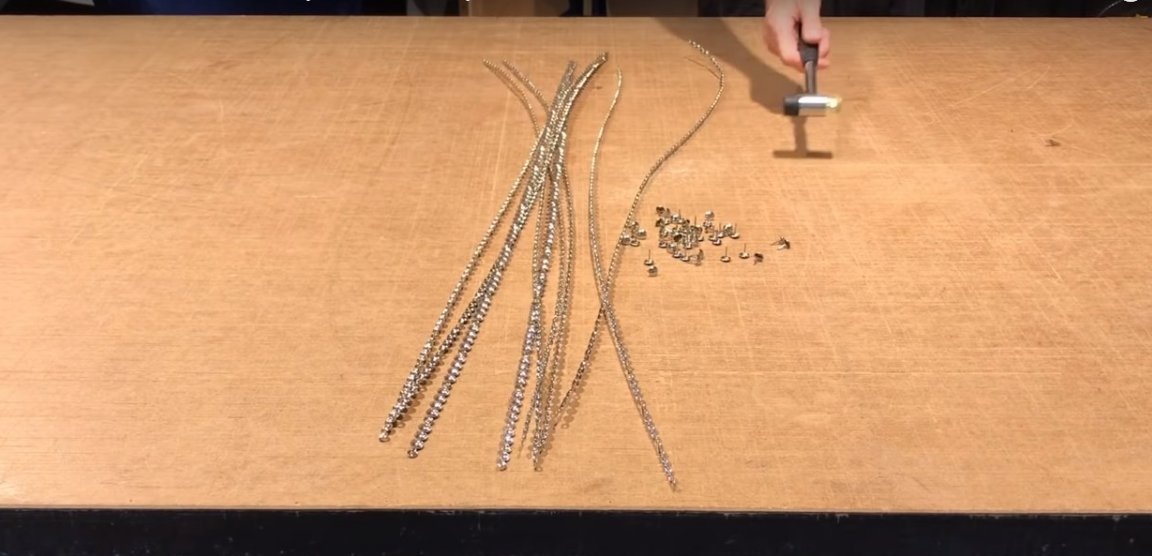
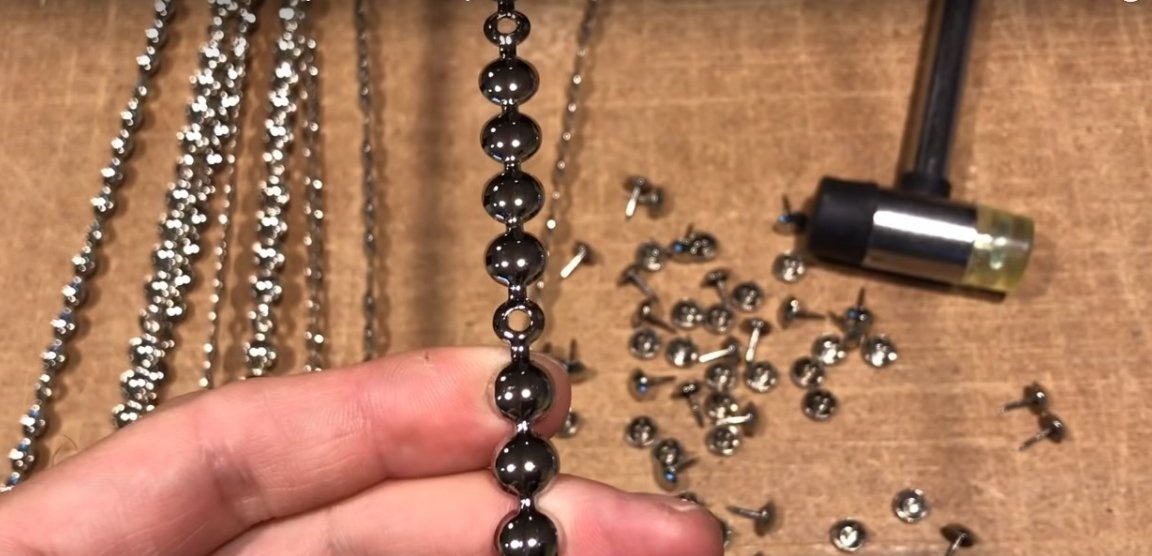
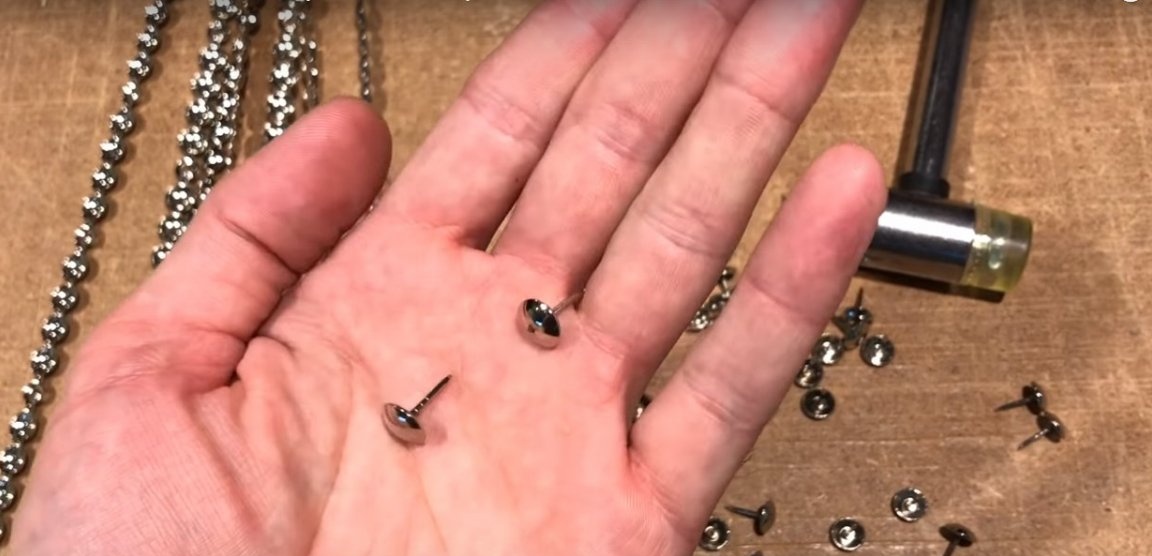
- furniture metal molding and buttons;
- dense fabric for processing the bottom of the chair;
- finished wooden legs.
Instruments:
- jigsaw;
- drill;
- screwdriver;
- grinder;
- pneumatic furniture stapler;
- spray gun for glue;
- clamps;
- stationery knife, scissors;
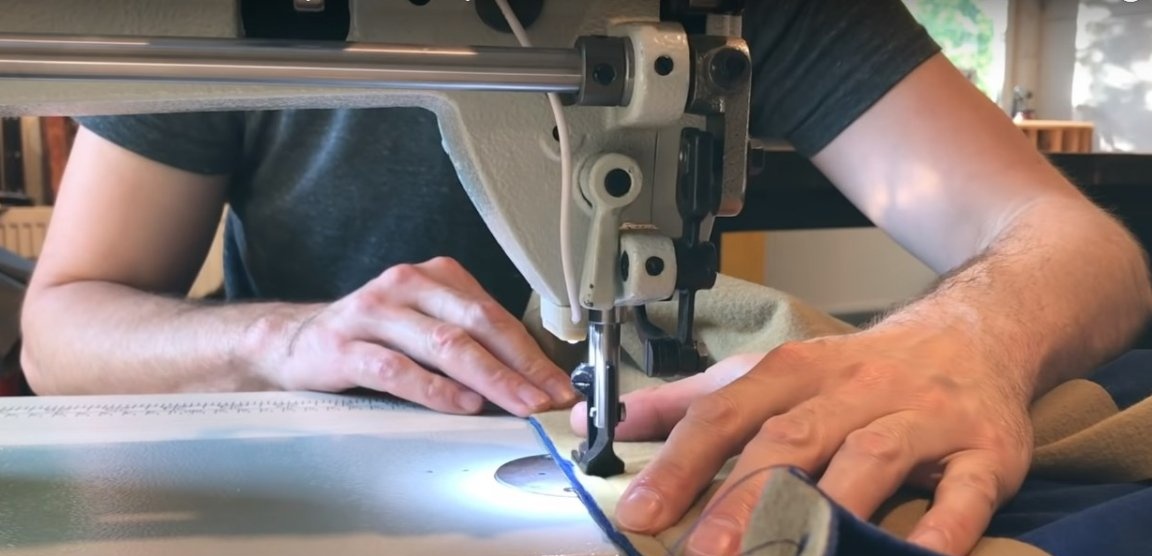
- a sewing machine with a top conveyor, a foot for tucking or stitching the cord;
- rubber mallet for fixing the molding;
- Homemade stapler made of rail and self-tapping screw;
- square, ruler, construction tape;
- marker.
Manufacturing process
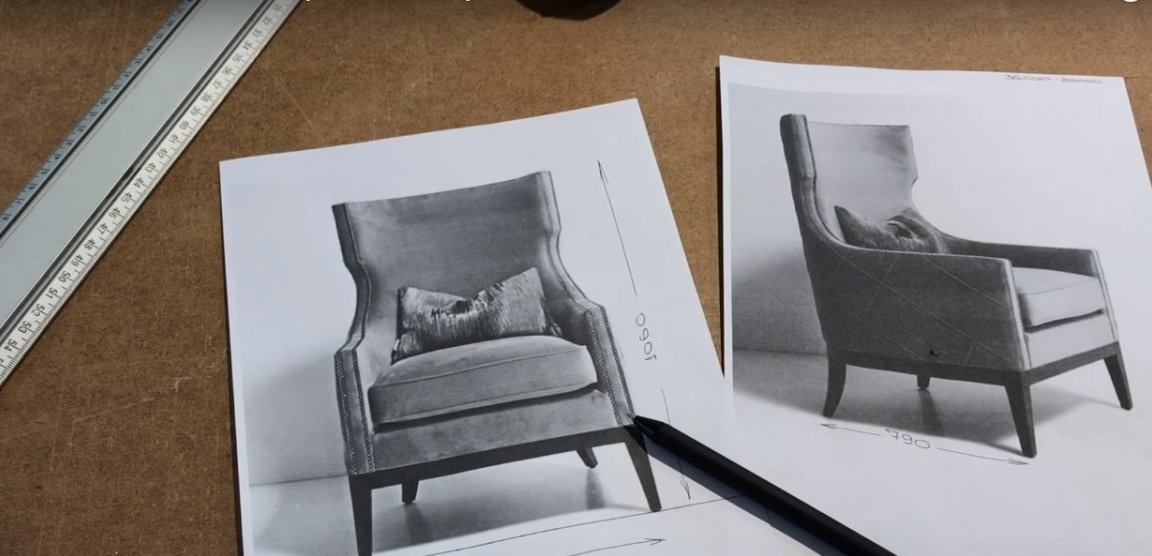
Step one: preparing patterns
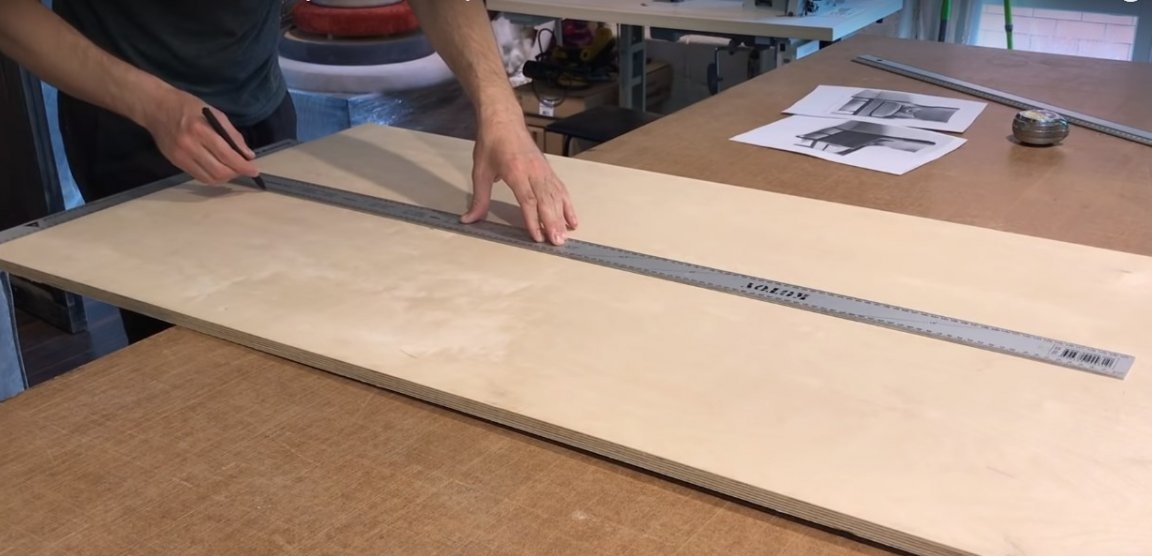
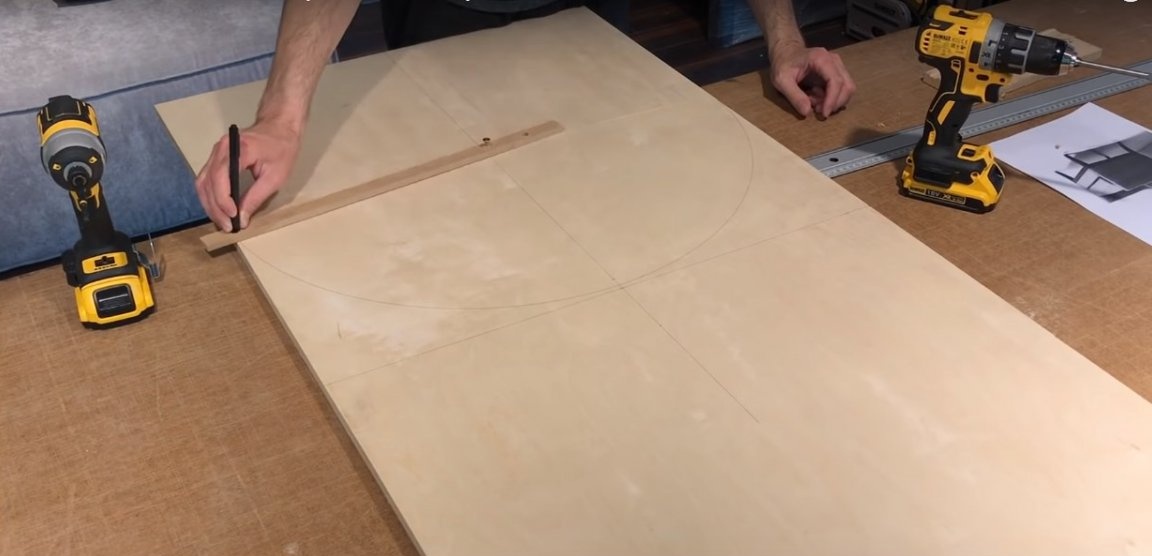
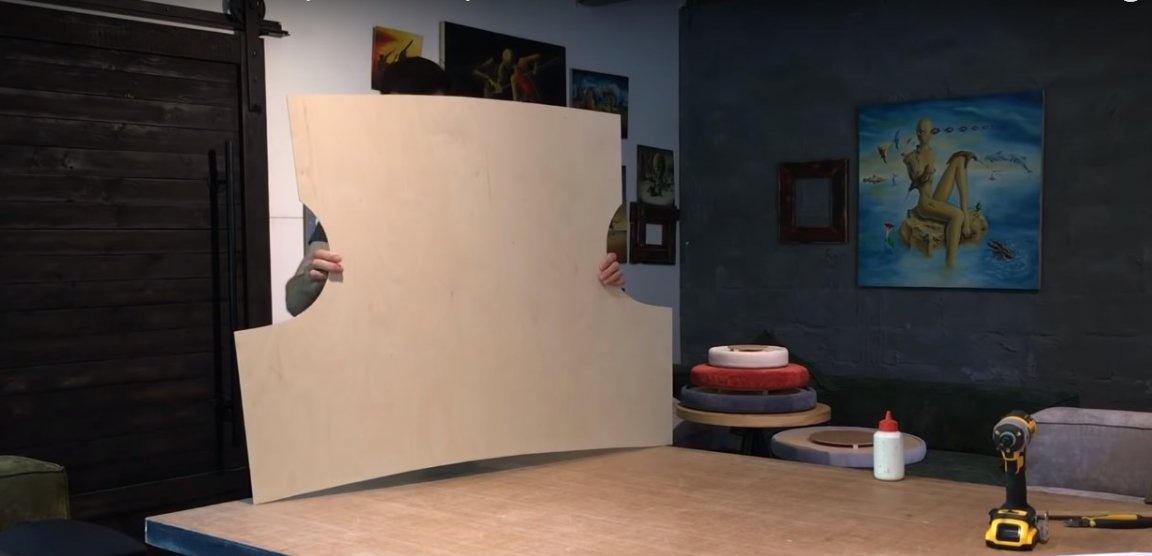
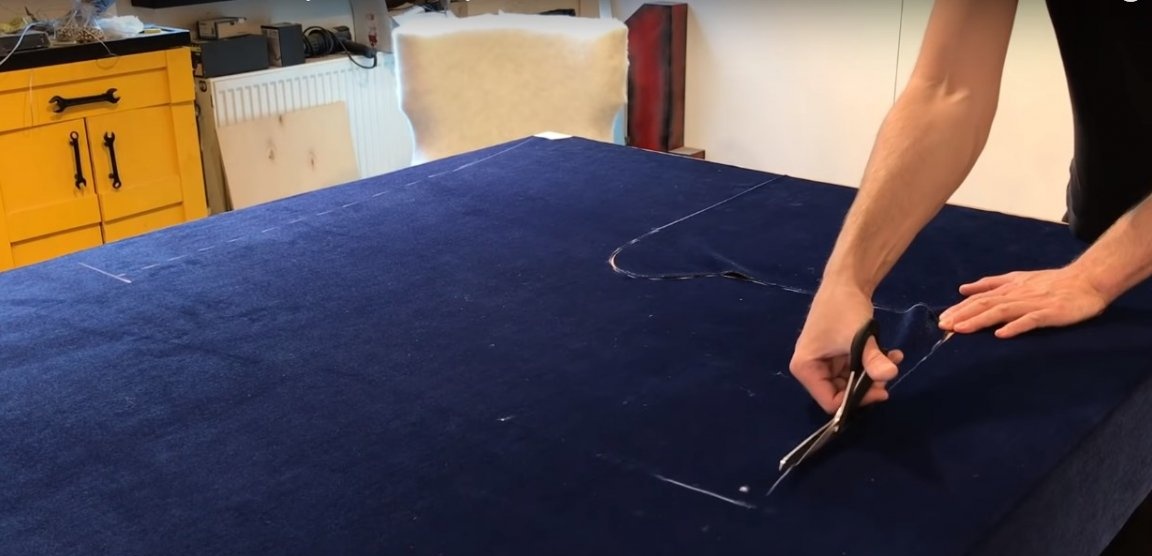
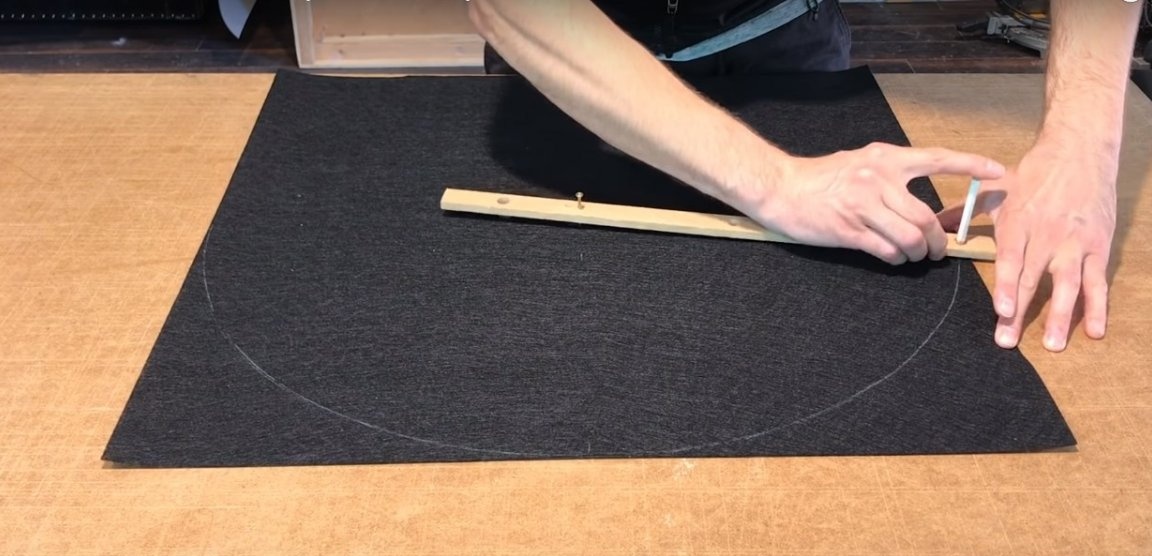
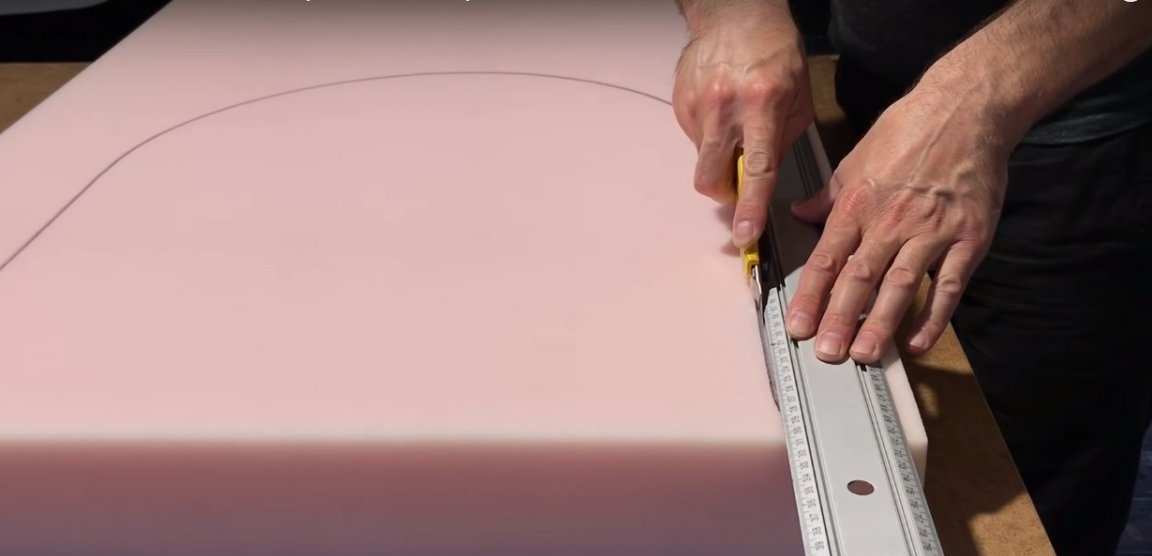
For a sample, the author took a photo of a fireplace chair from the Internet. Typically, patterns are created for irregularly shaped parts. In this case, such a detail is a curly back. To build a pattern, use a square, a ruler and a compass. It will not be superfluous to acquire a special tailor's pattern.
In order for the pattern to be symmetrical, conditionally divide it along the vertical axis into two parts and build the first half of the pattern on a bent sheet of paper.Cut the resulting pattern, expand it - and you get an absolutely symmetrical pattern.
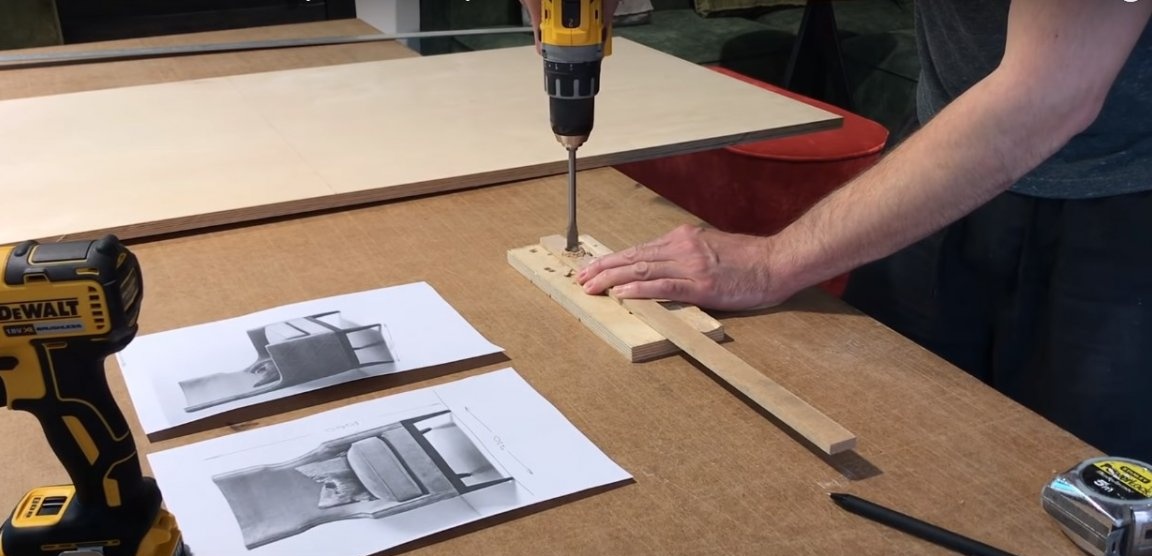
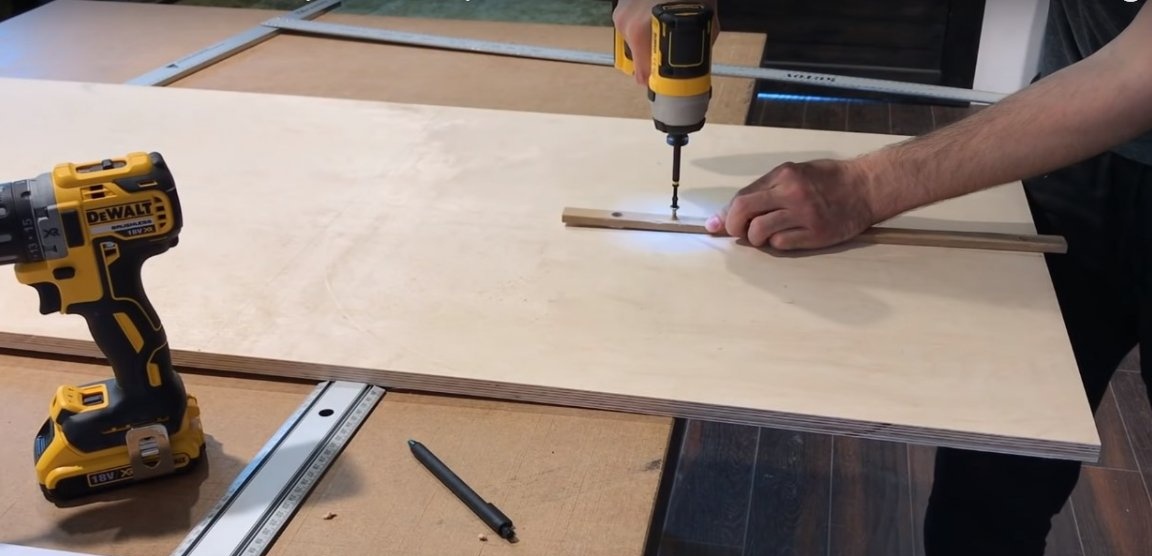
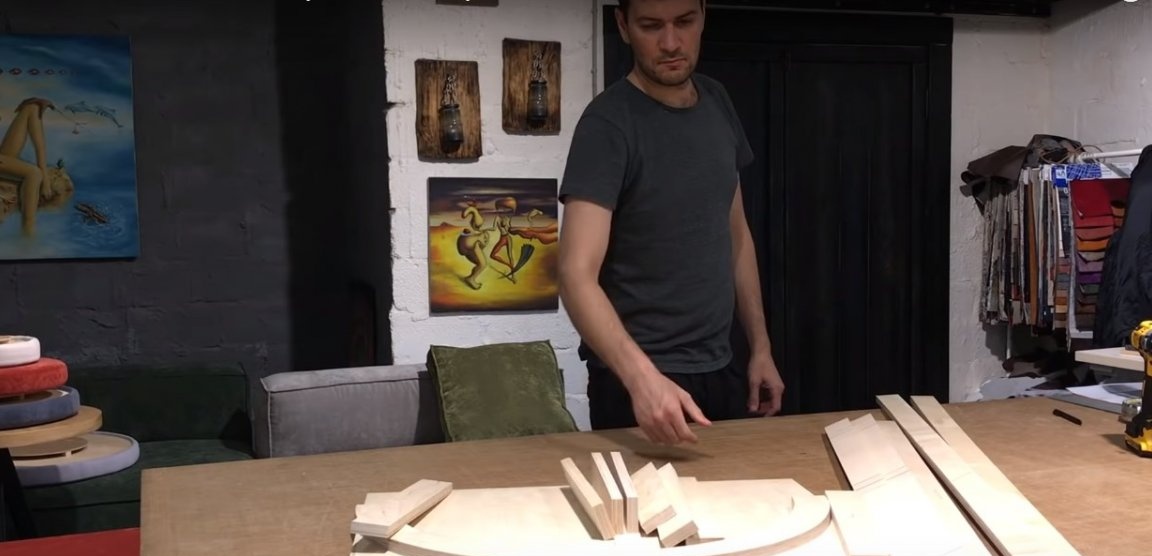
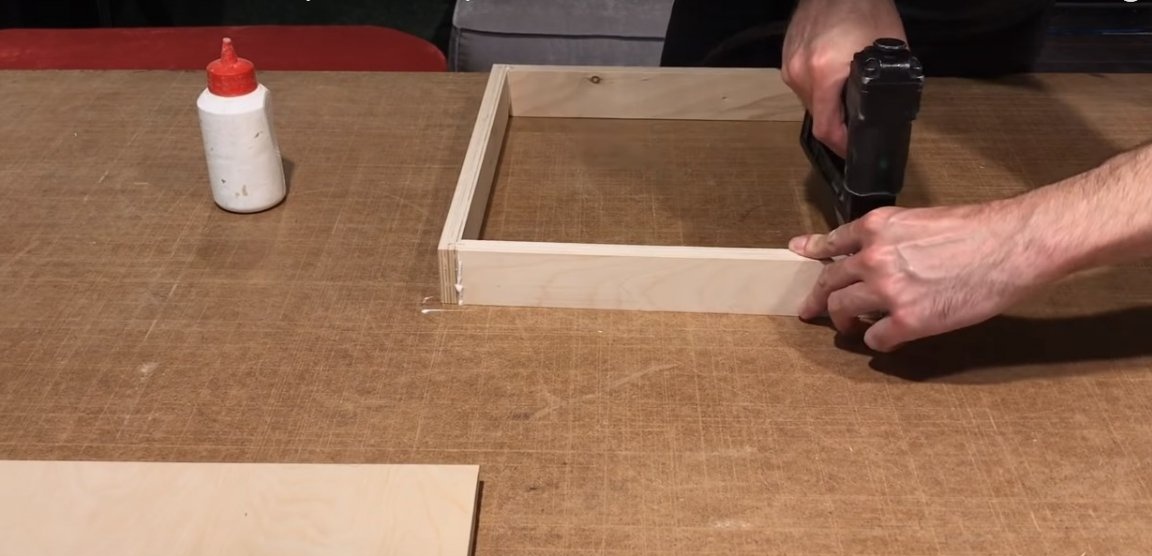
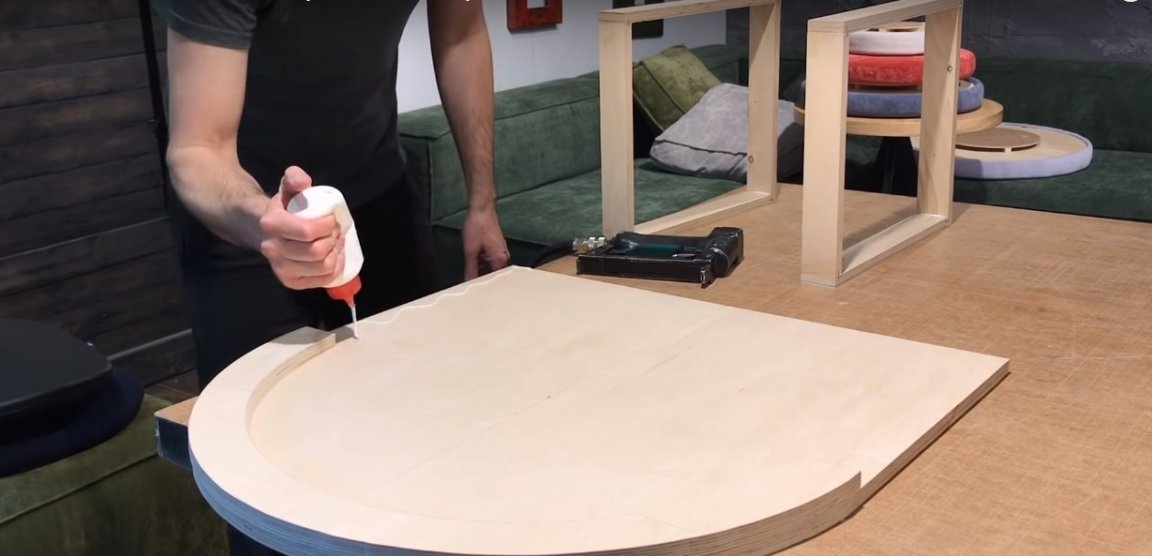
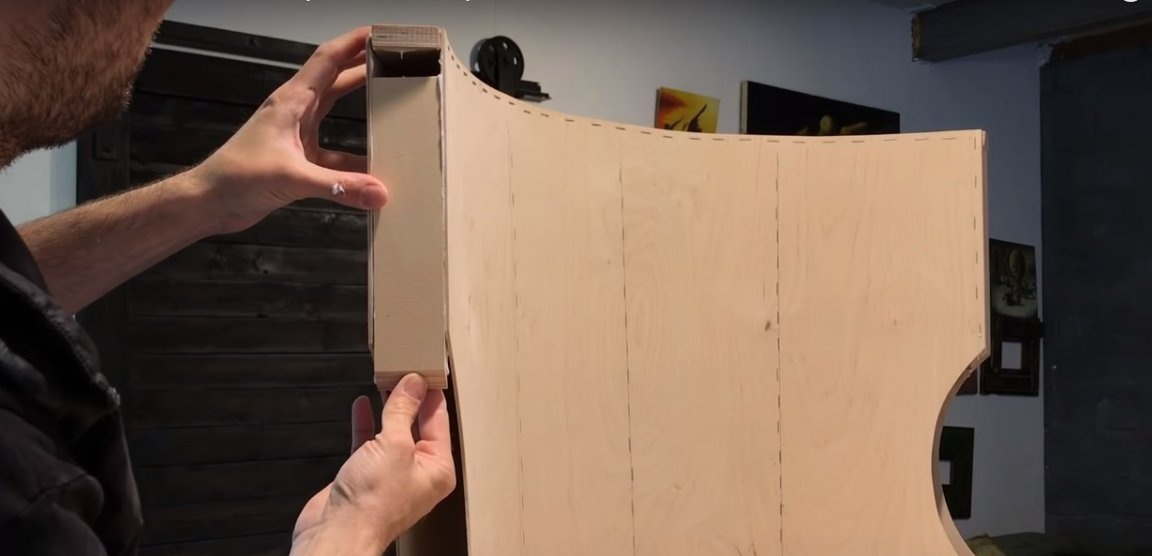
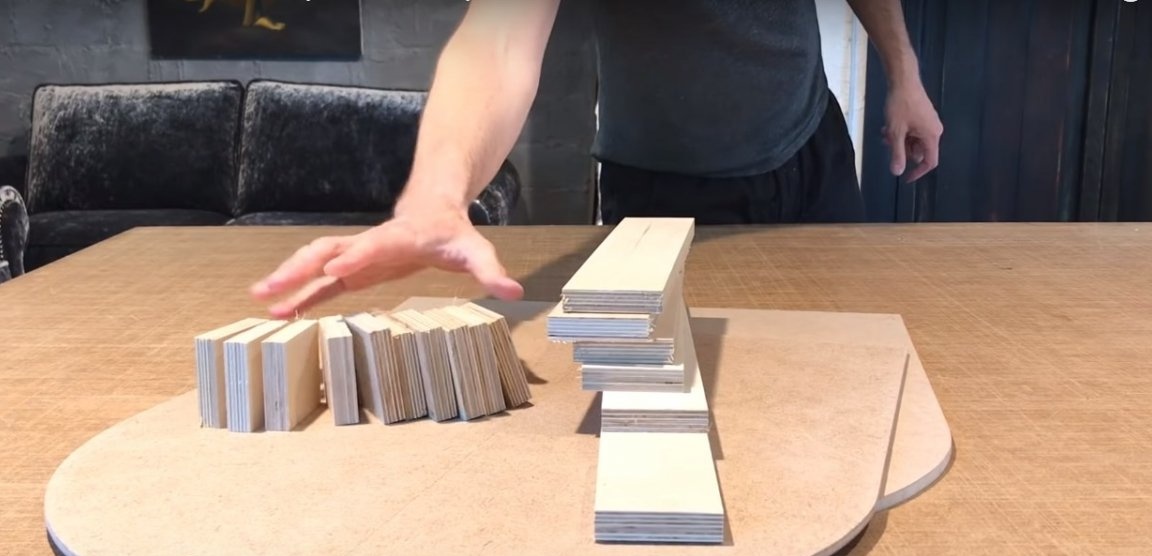
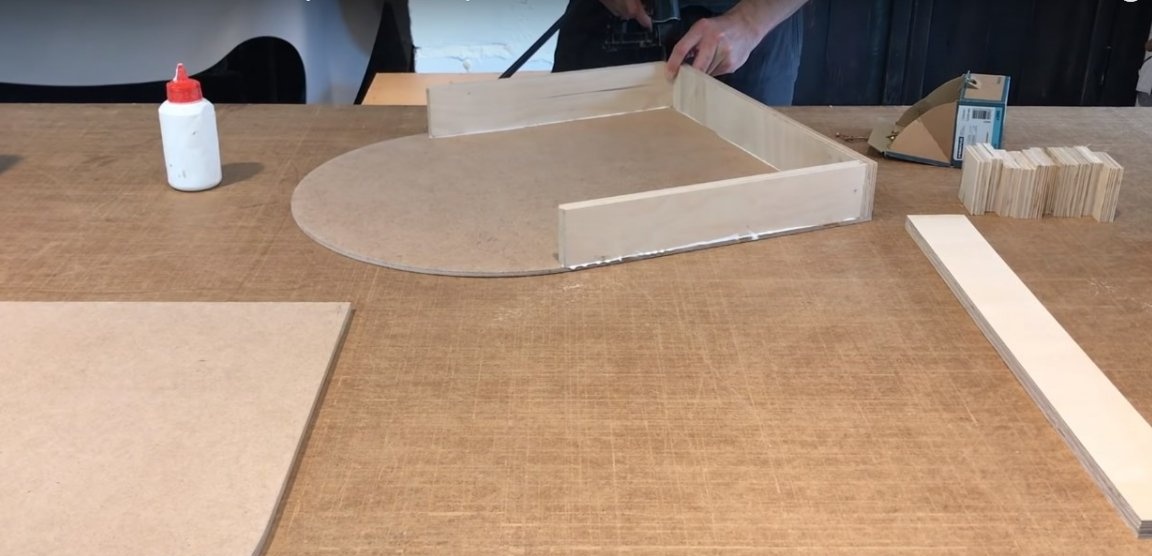
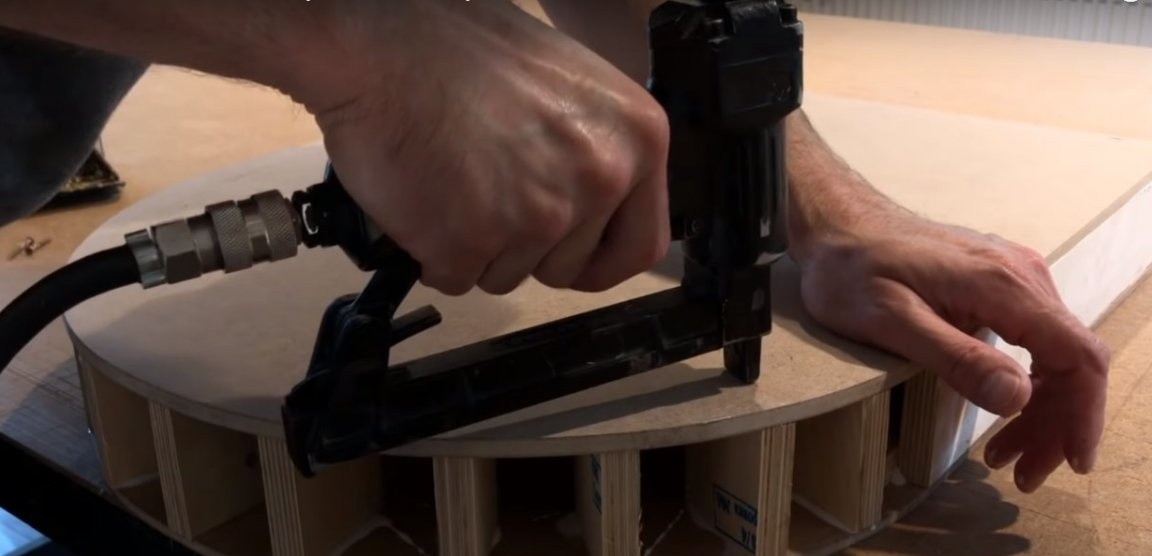
Second step: manufacturing of parts and framework
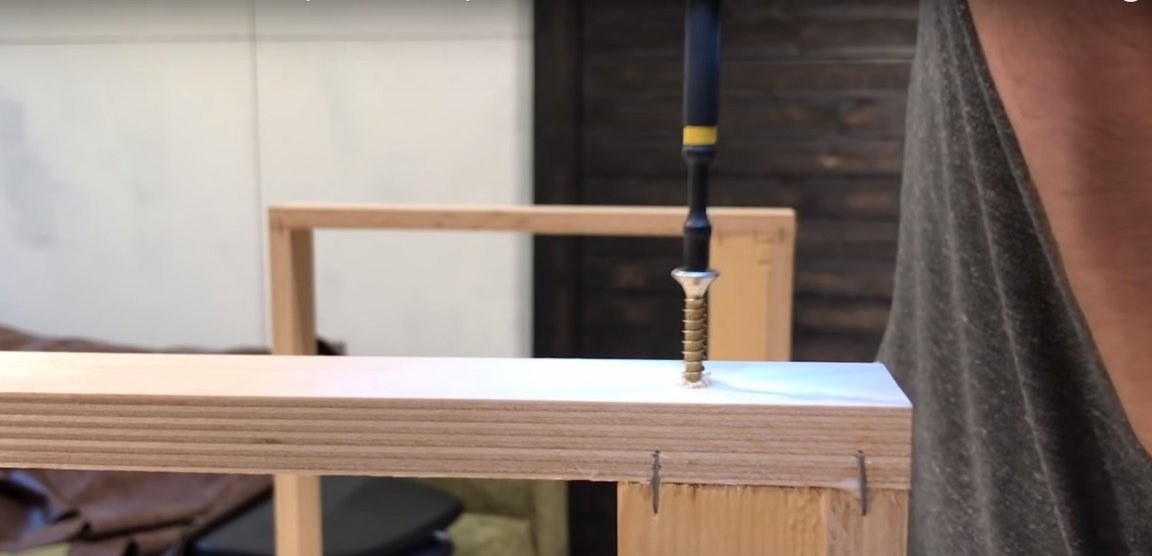
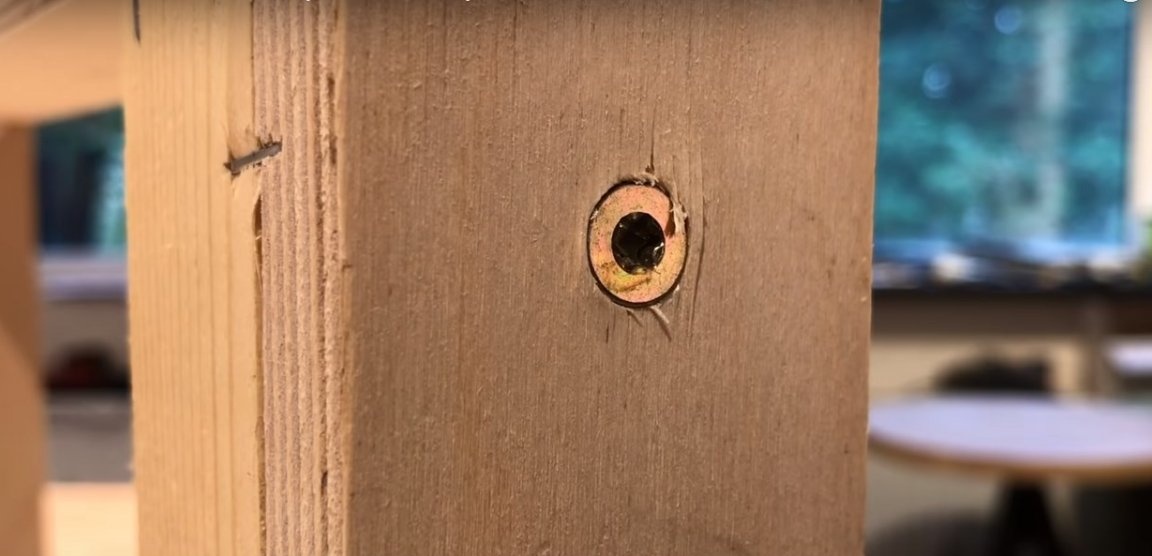
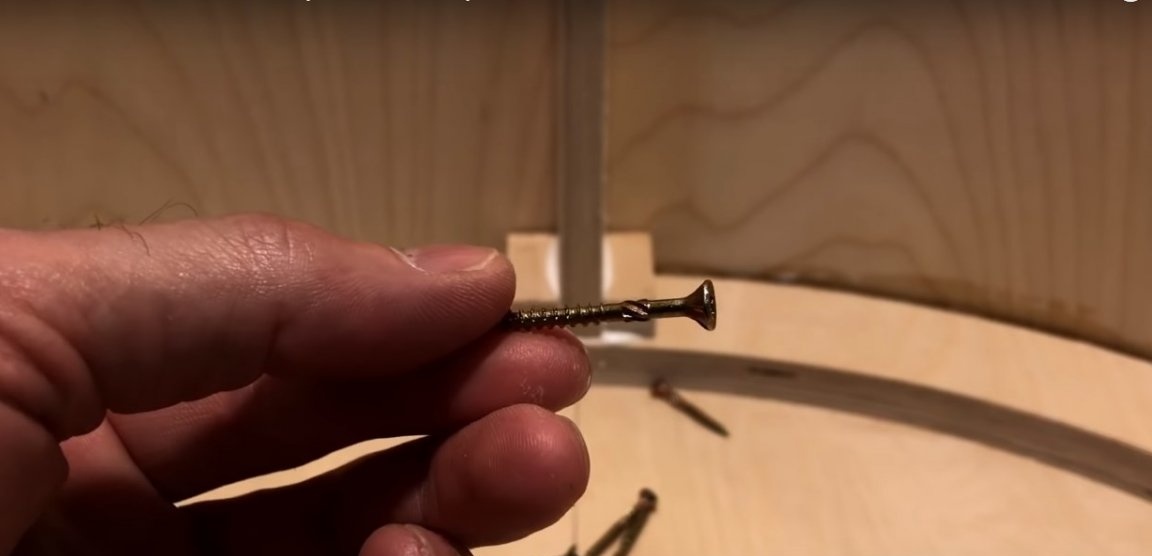
Prepare the basic details of the frame. Sand the edge thoroughly and proceed with assembling the base. To do this, collect the two side parts of the frame and pre-fix them on the seat with brackets. Also secure the semicircular part of the seat. For glue strength use glue. Twist the resulting frame with screws.
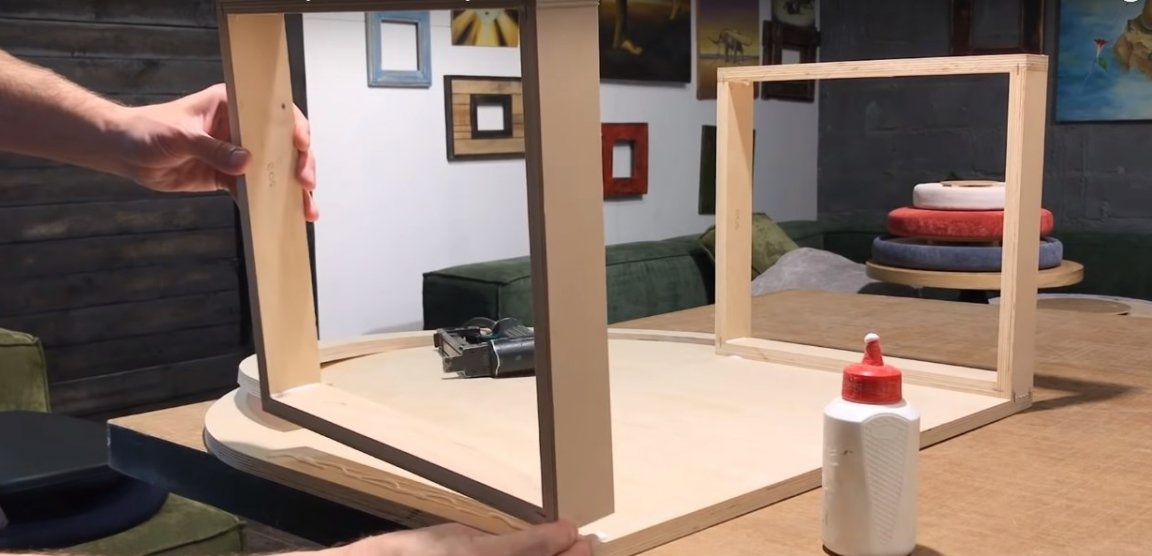
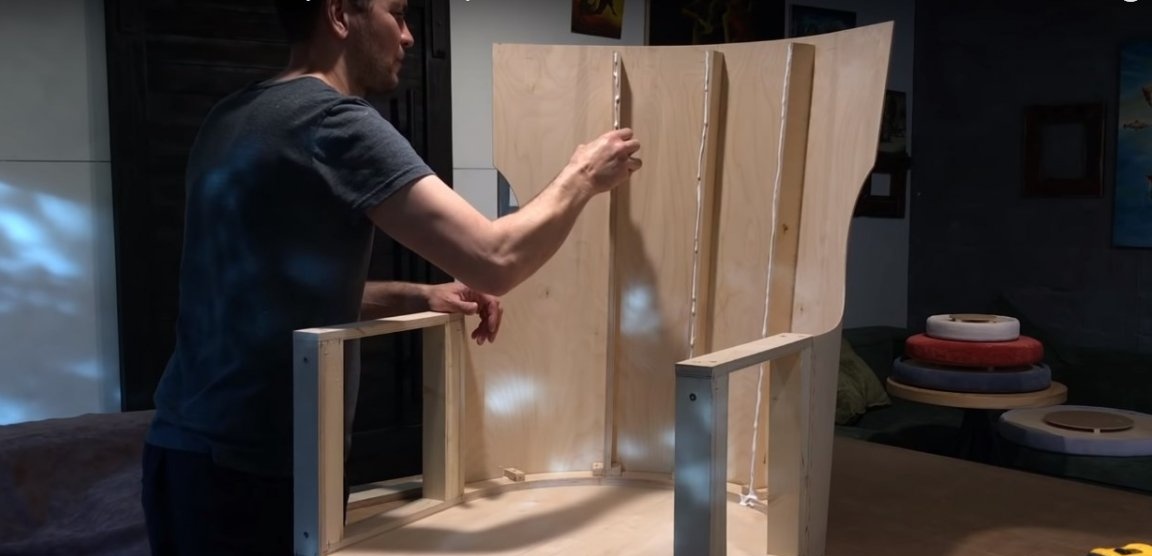
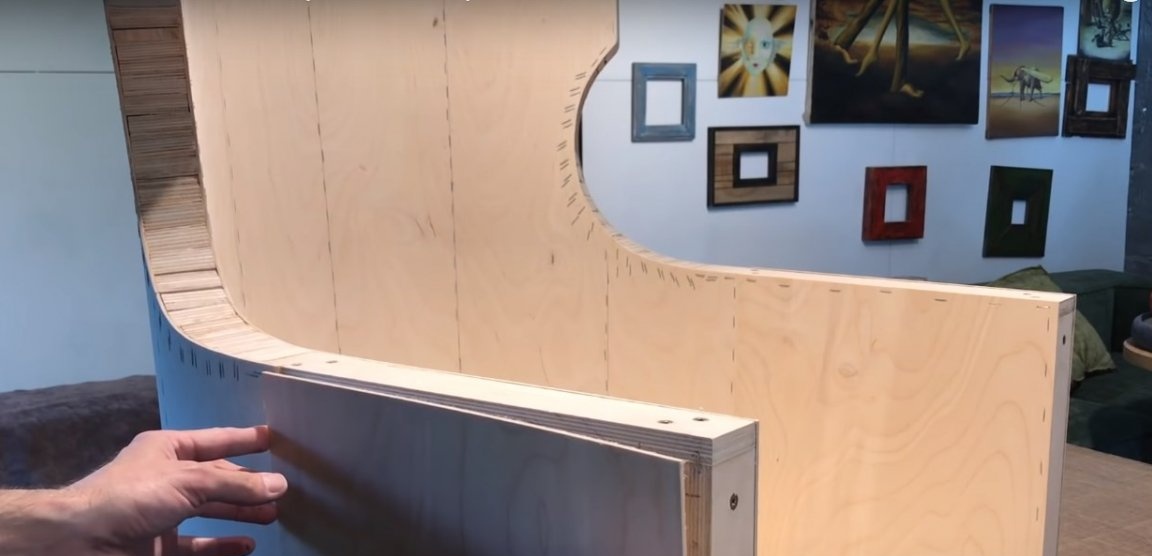
Step Three: Assembling the Back
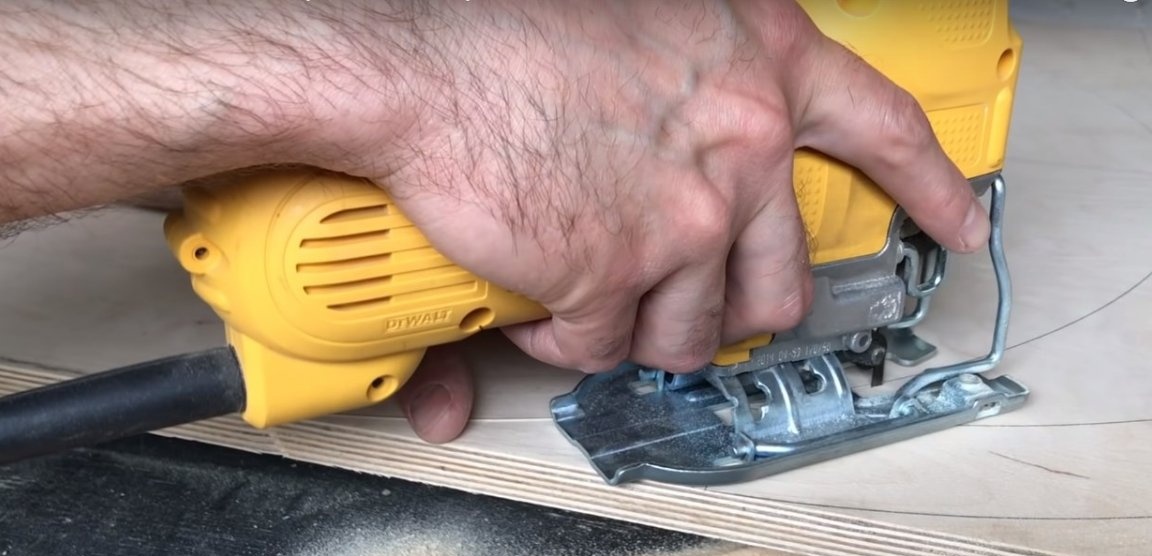
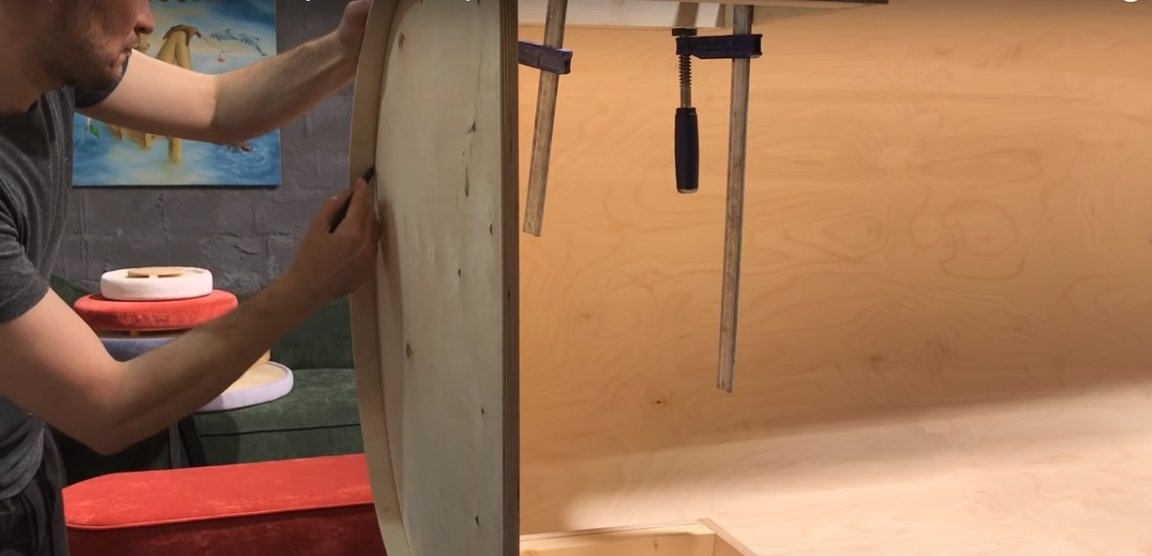
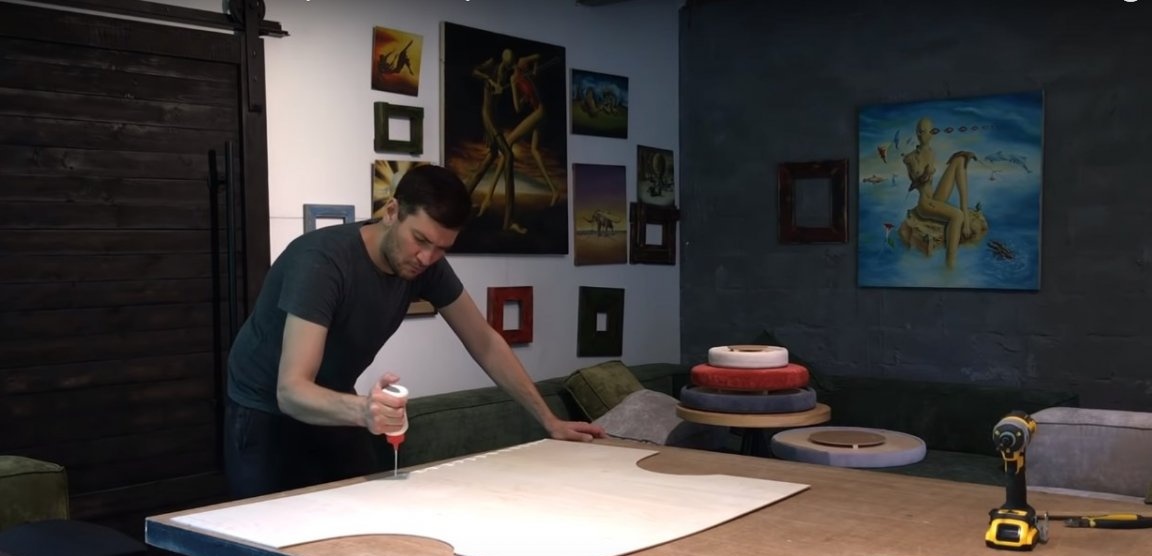
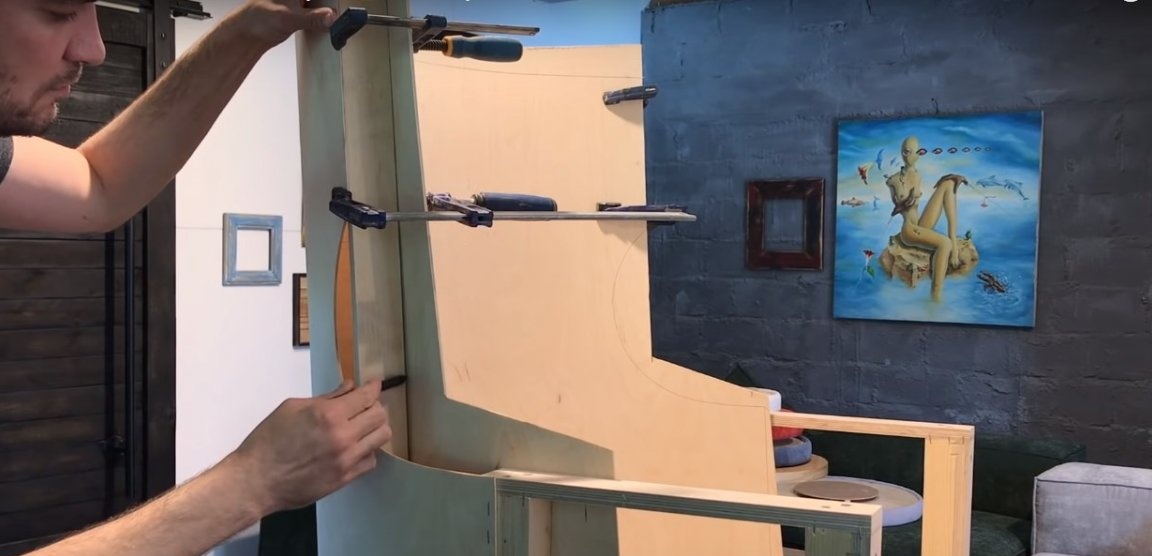
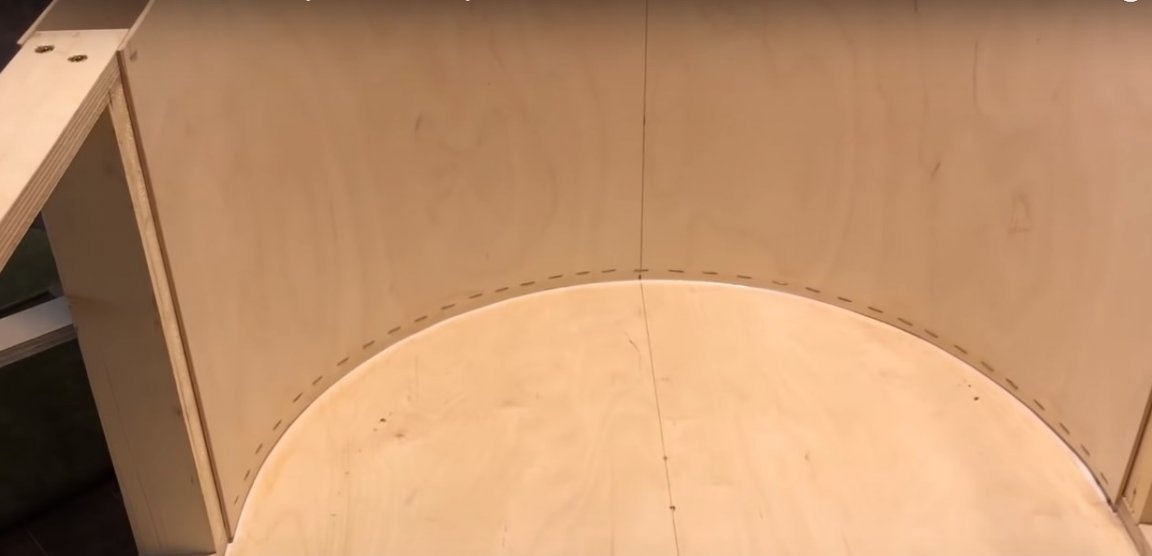
If you do not use patterns, attach a sheet of thin plywood to the back of the frame and temporarily secure with clamps. Make the necessary notes, dismantle the plywood and mark out the curly part of the back. Please note that the bottom of the casing has a concave profile, so that the back is flat.
Cut the backrest trim and fasten to the frame using glue and metal staples.
Install the vertical jumpers of the backrest, attach a sheet of thin plywood to the inside of the backrest, and mark out the inner lining. Cut the workpiece and fix it according to the example of the first.
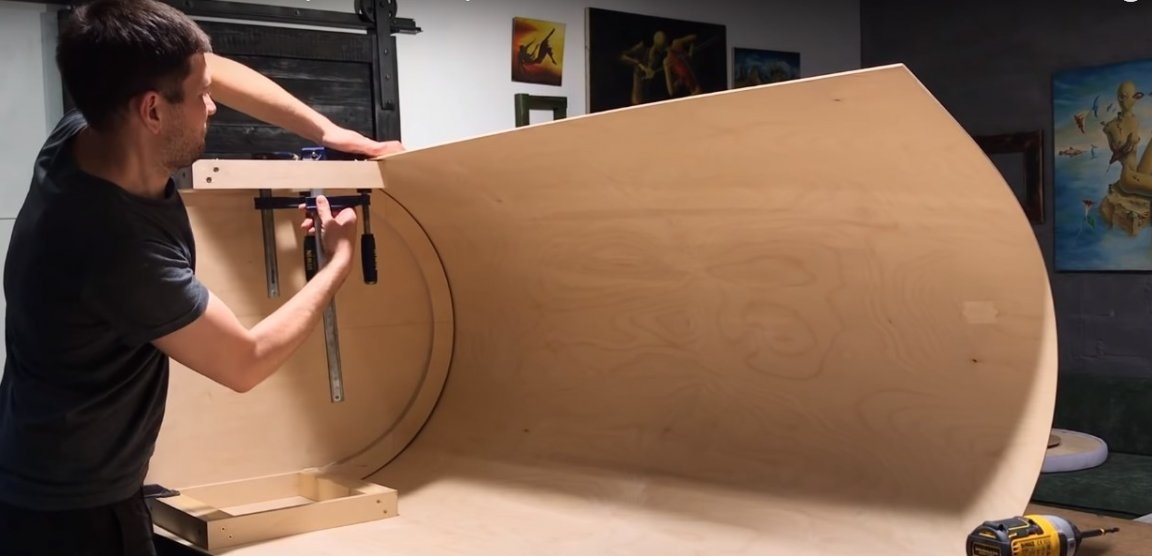
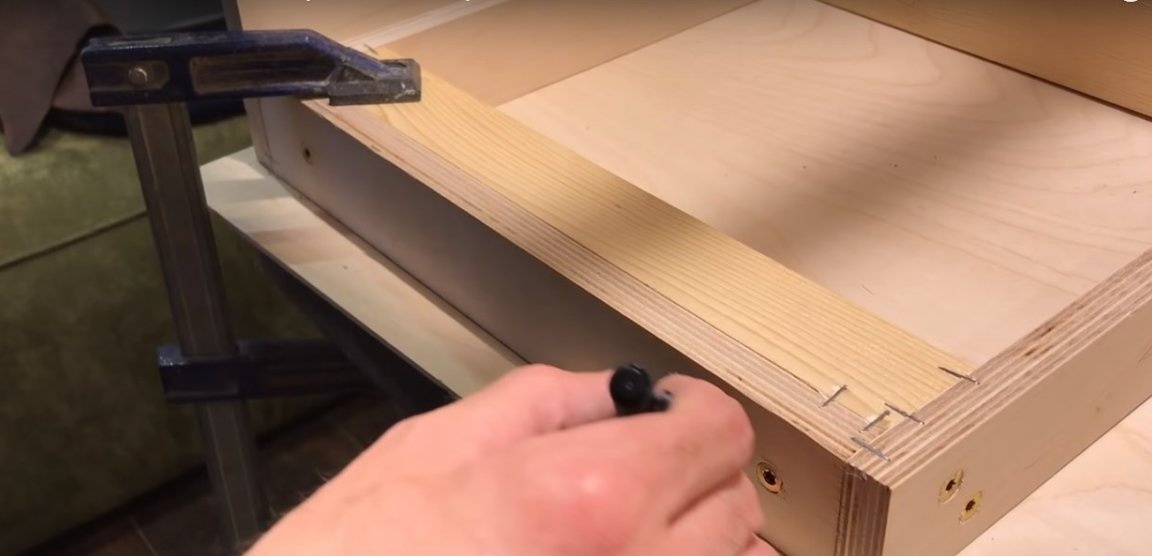
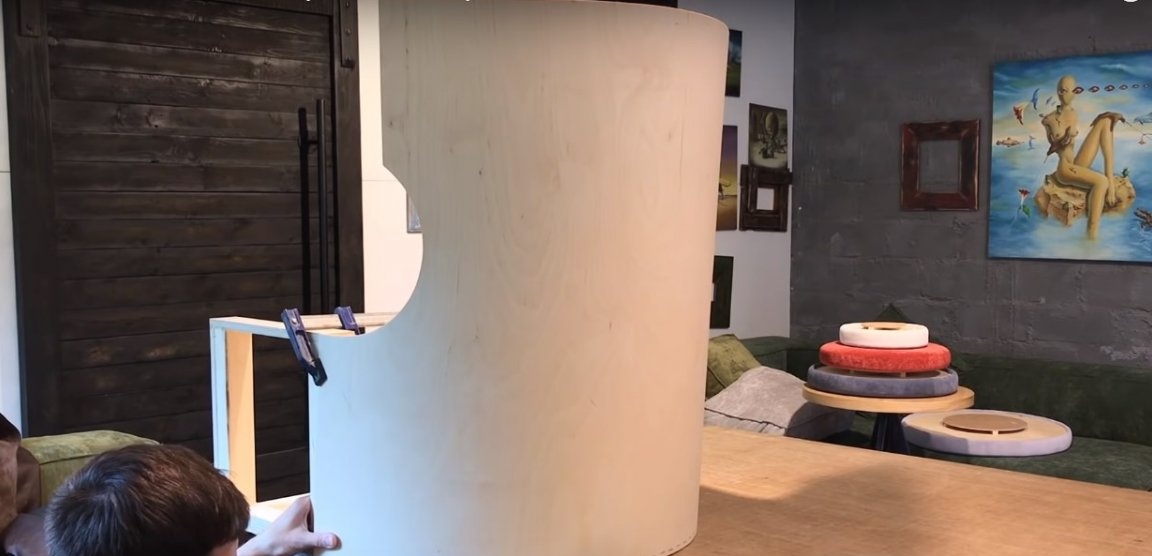
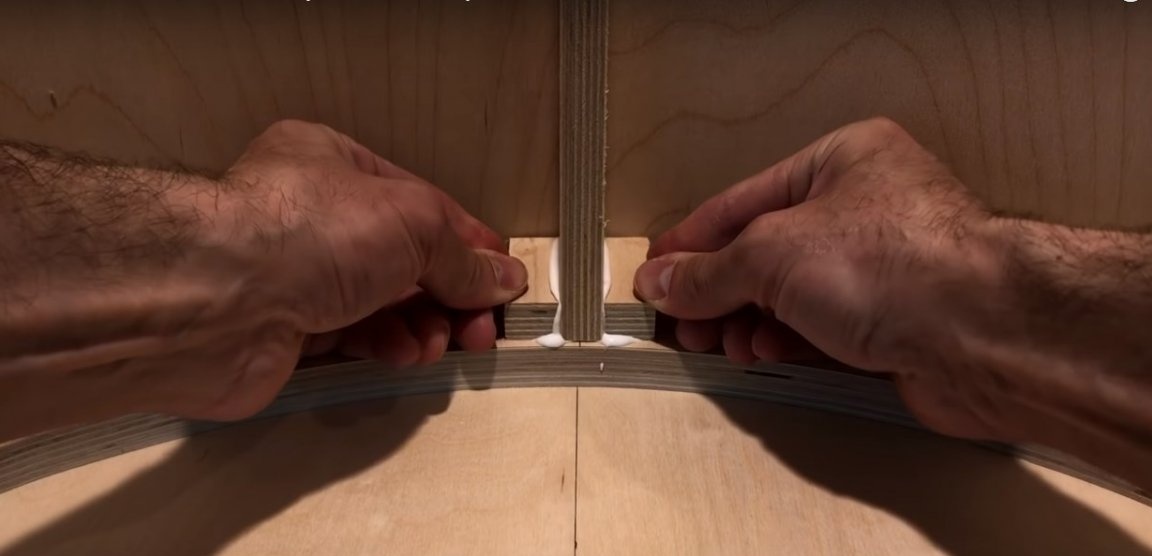
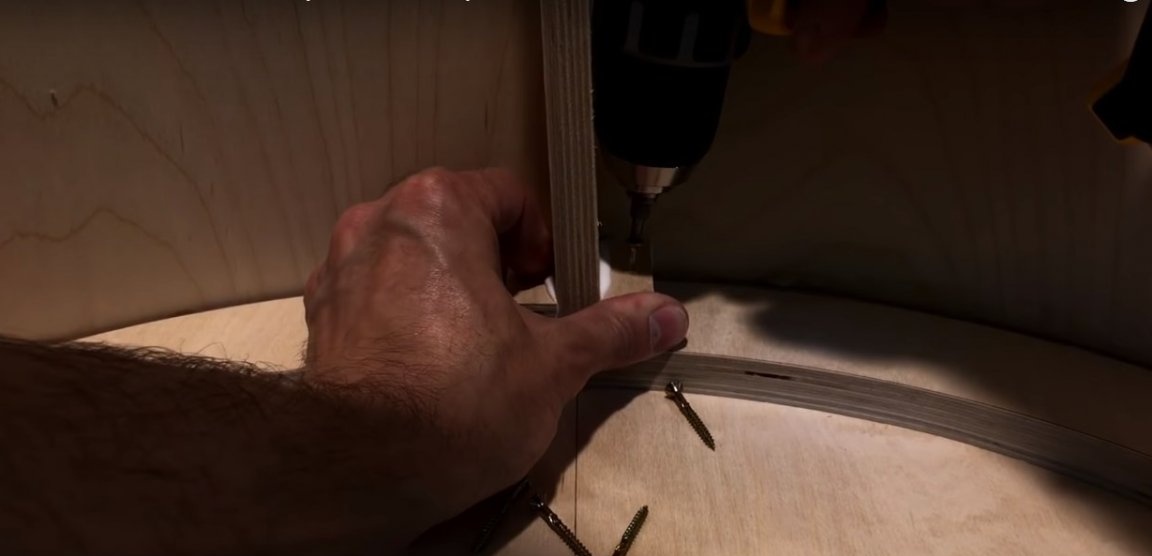
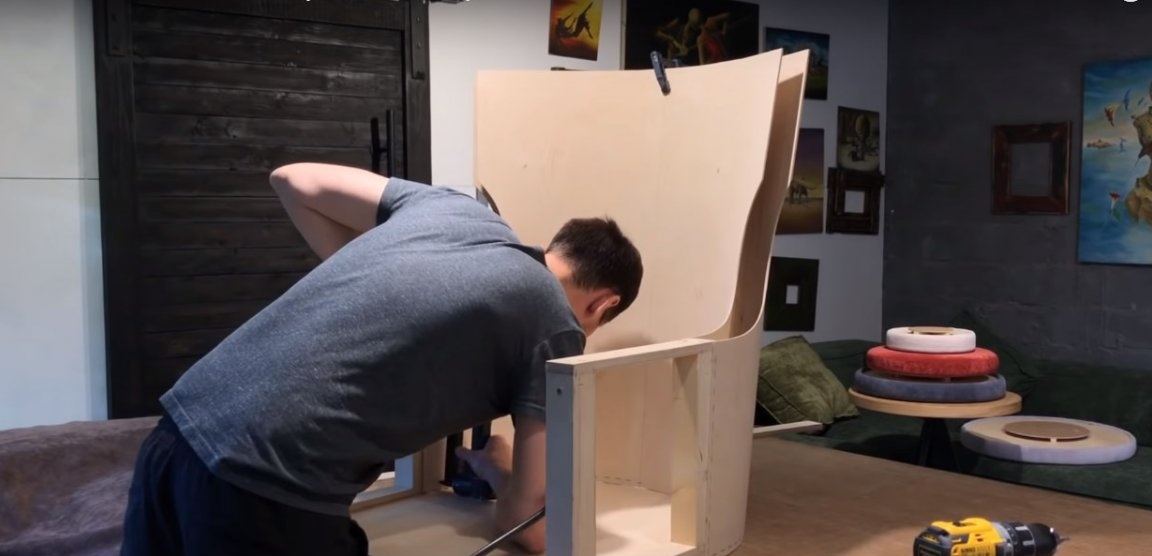
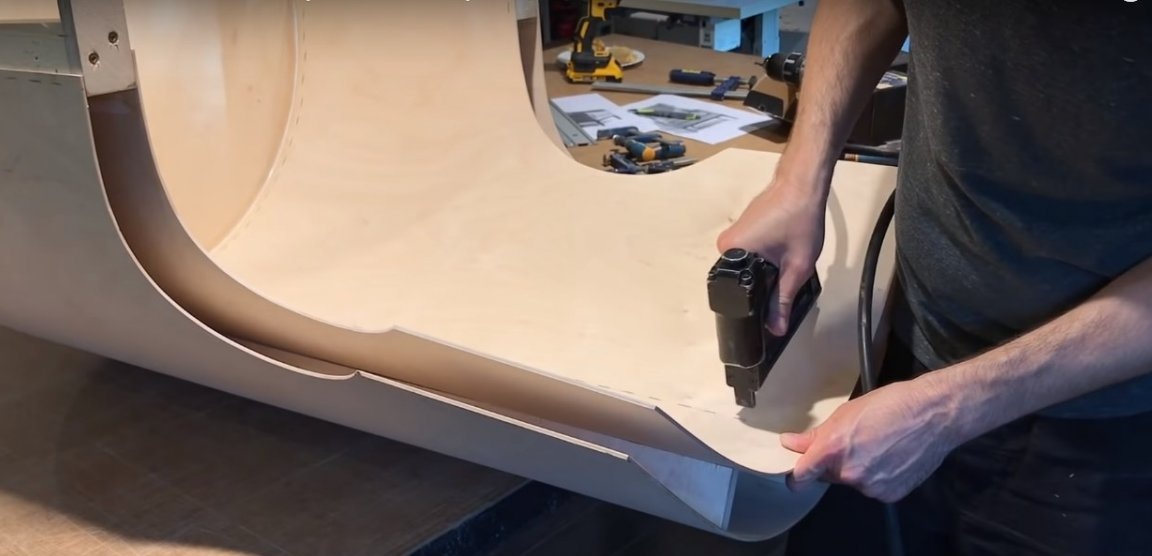
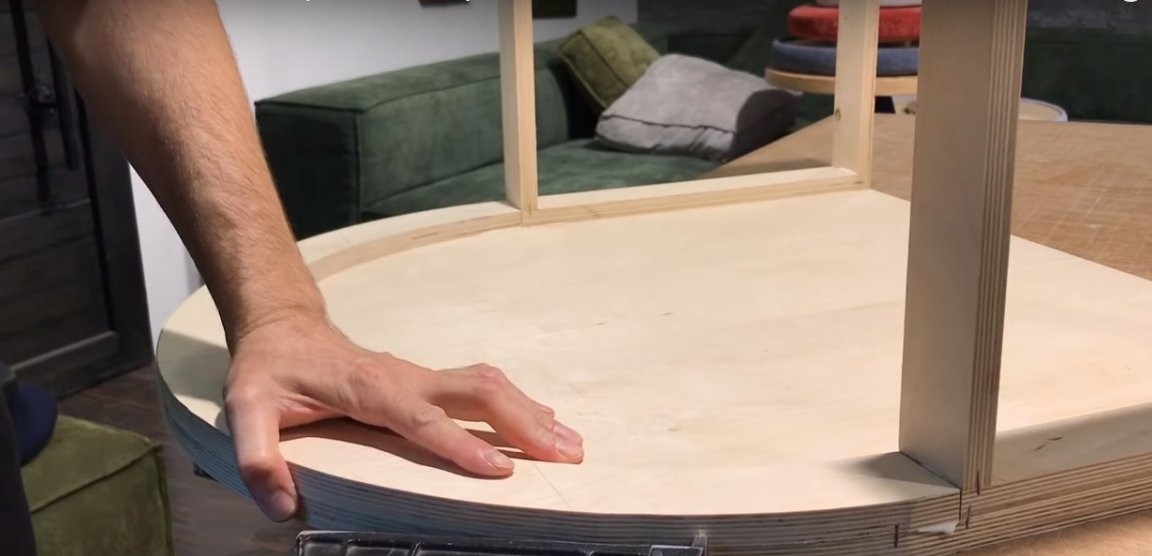
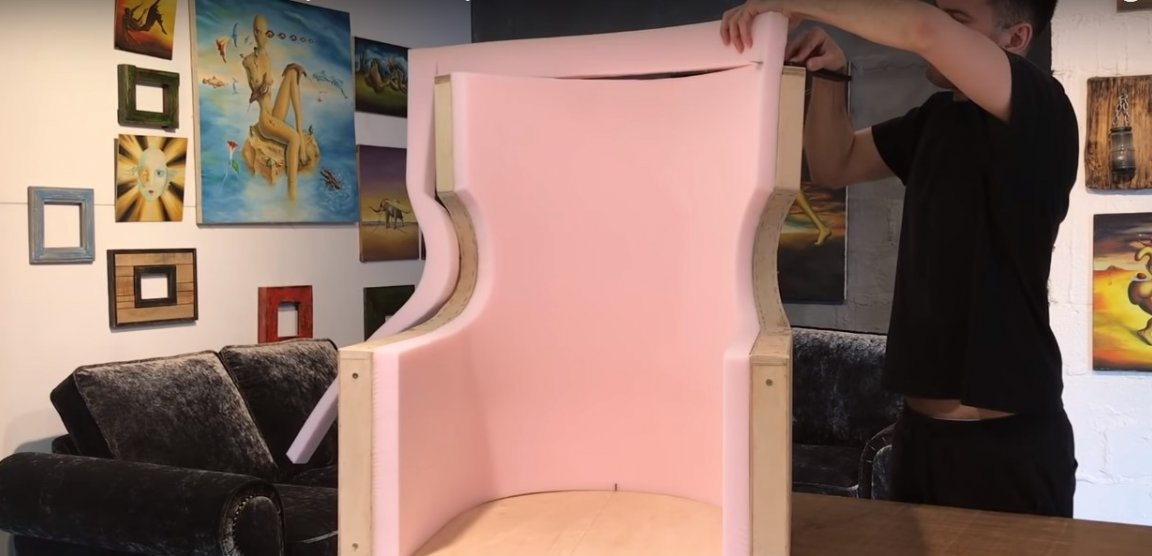
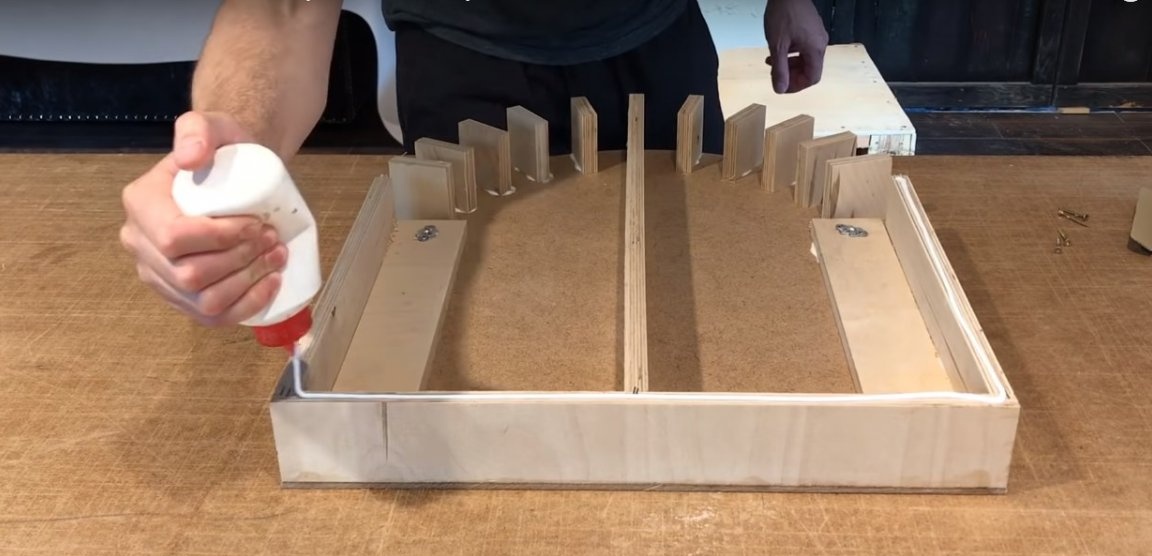
Fill the space between the outer and inner back trim with plywood trimmings, cover it with a plywood strip and secure with brackets. Sew plywood on the sides of the chair as well.
Step Four: Preparing the Base for Sheathing
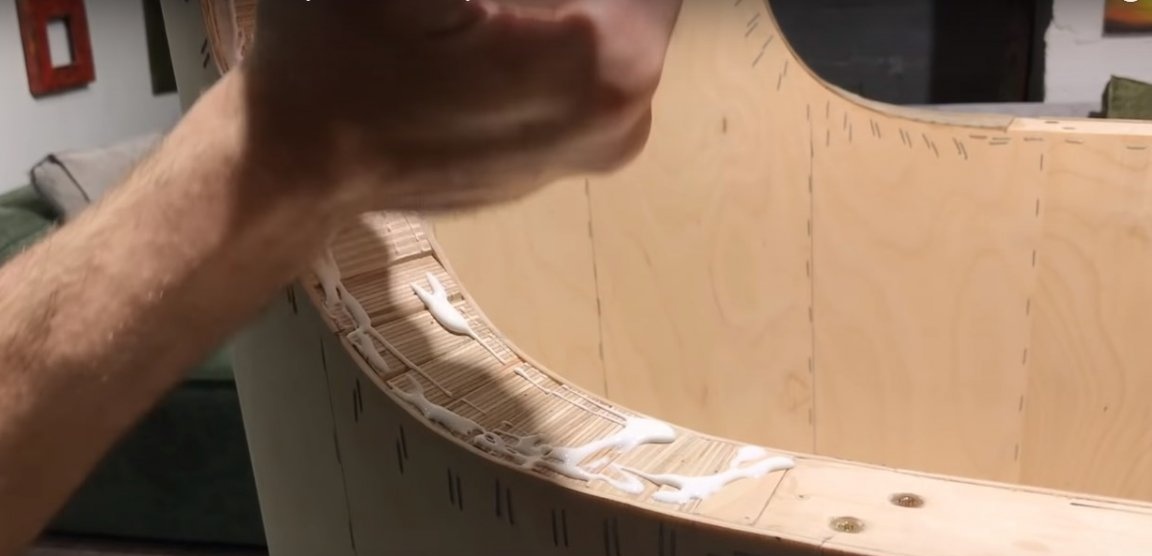
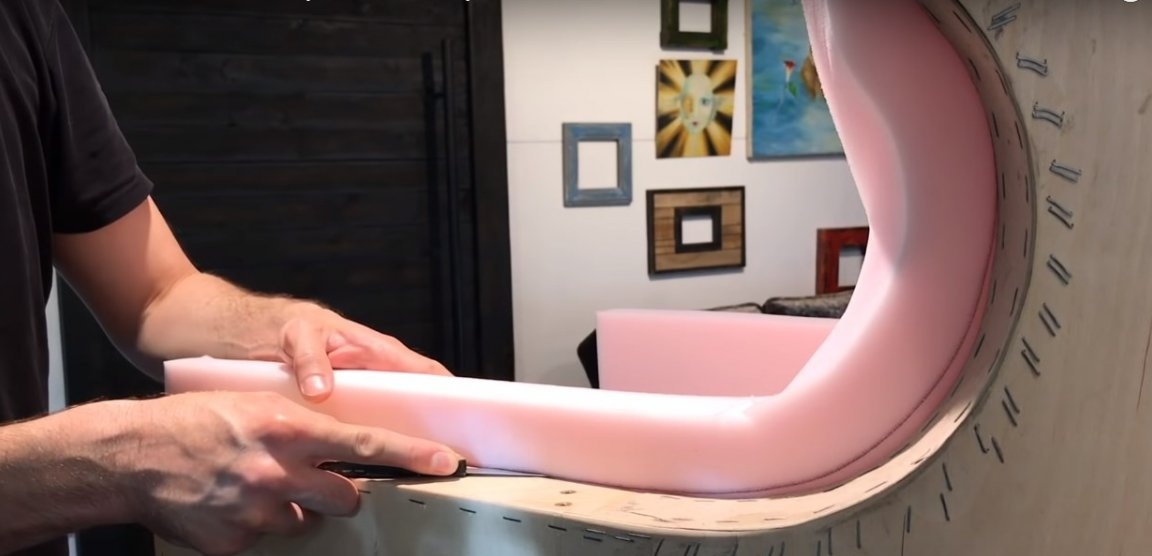
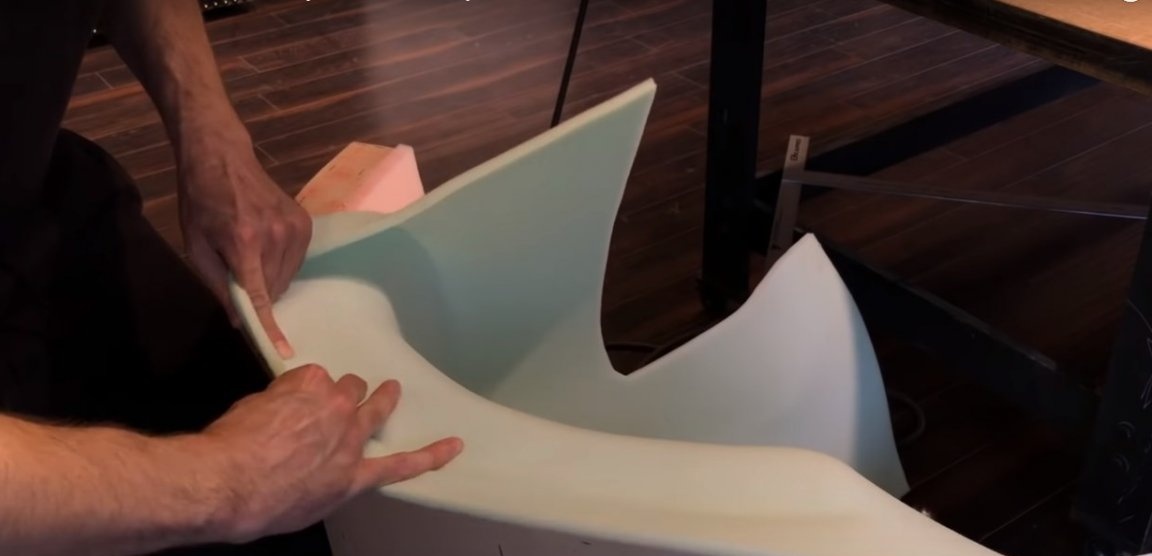
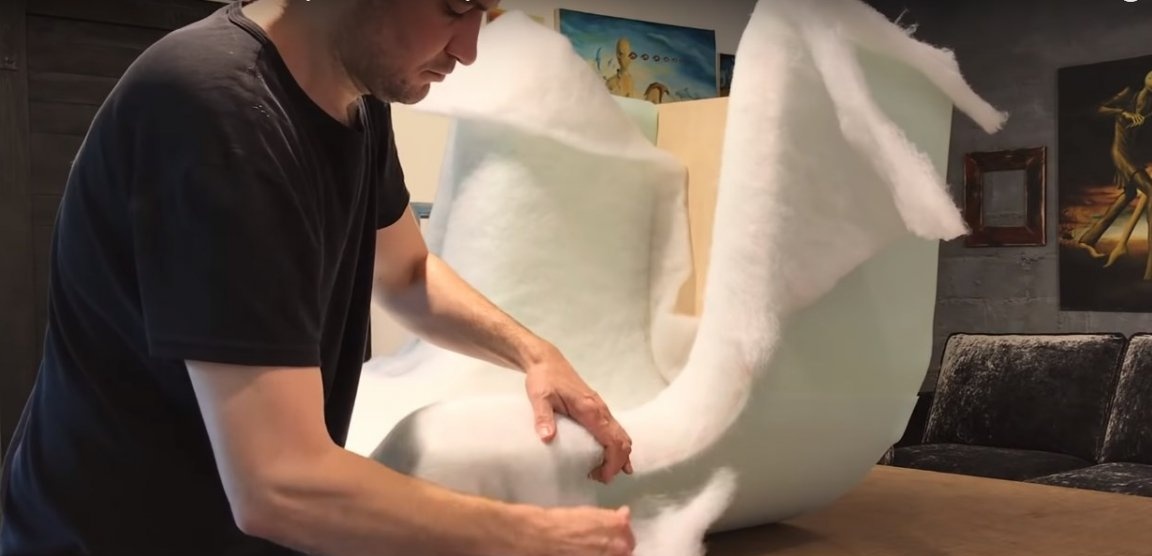
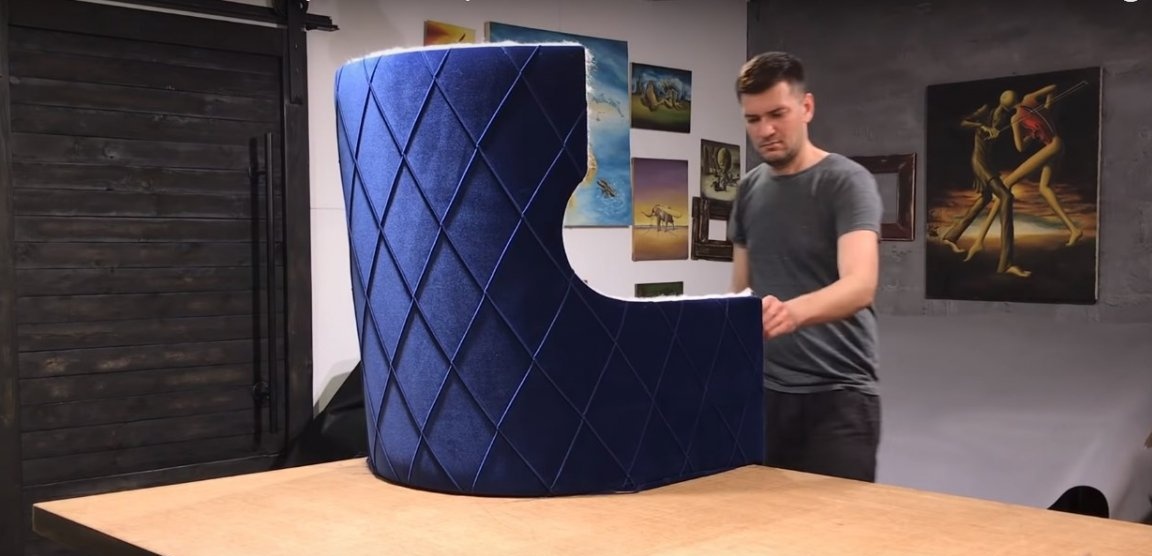
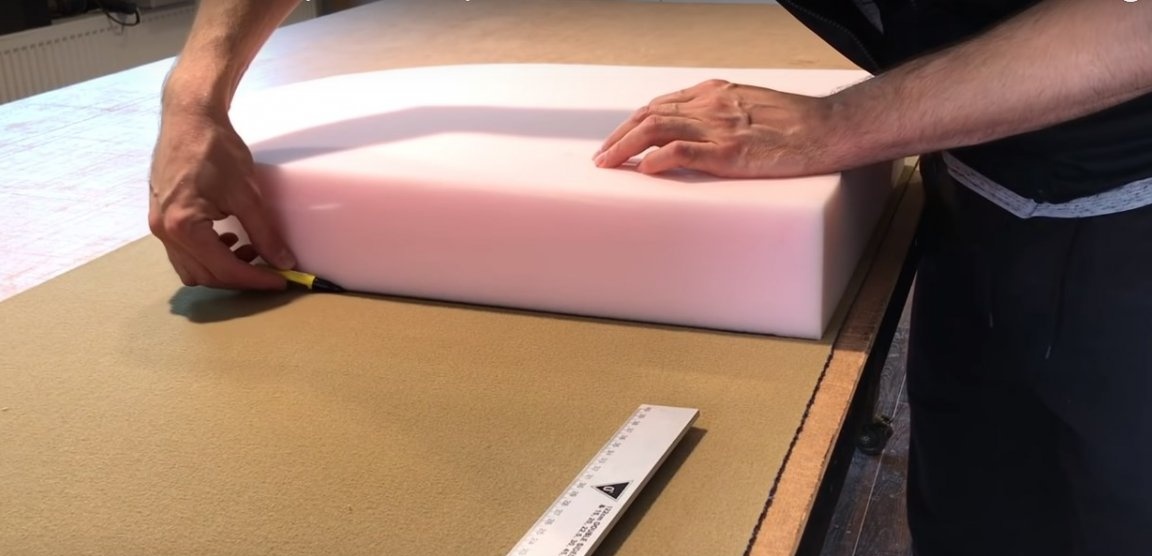
Sand the frame of the chair thoroughly. From the furniture foam, cut out the curly part of the back with small allowances. Work the back plane with glue and lay the foam blank. Spread the foam, cut the excess.
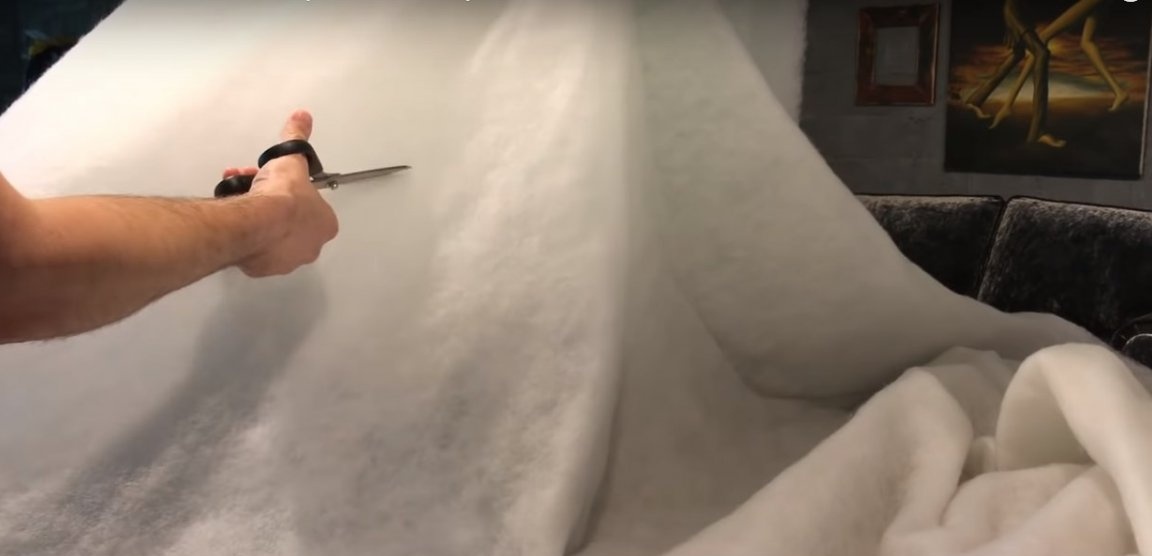
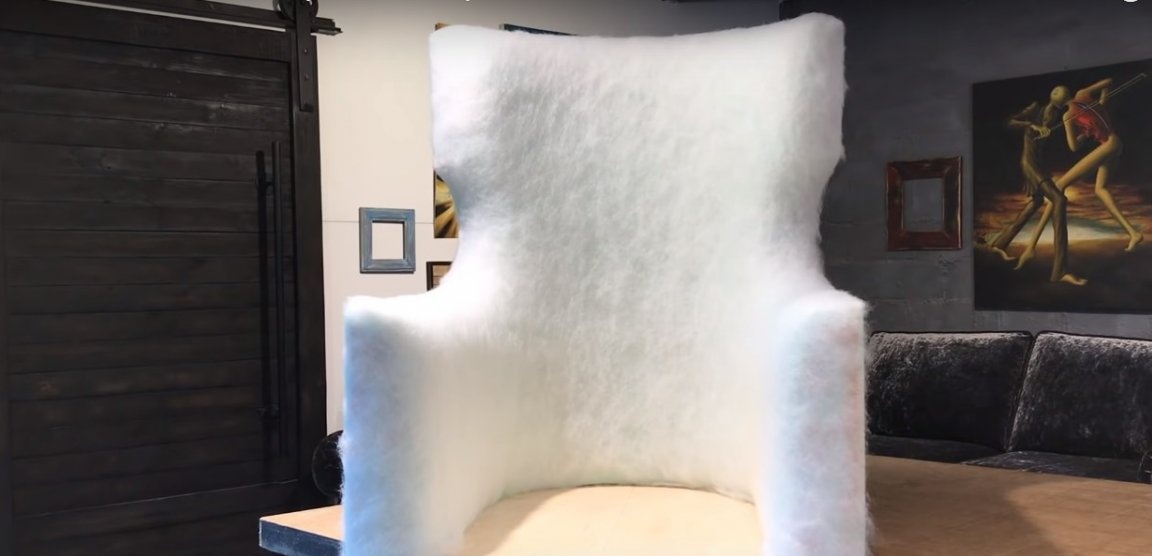
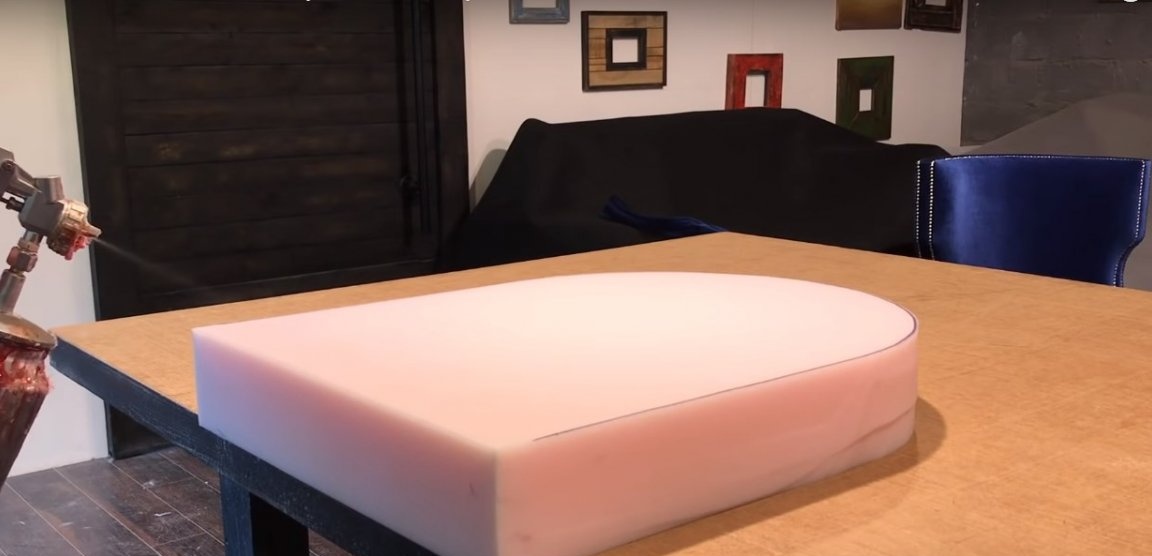
Apply glue from the spray gun to the inside and outside of the back and side elements of the chair. Glue these zones with thin foam rubber with a thickness of 10-15 mm. Apply glue again and glue a layer of padding polyester.

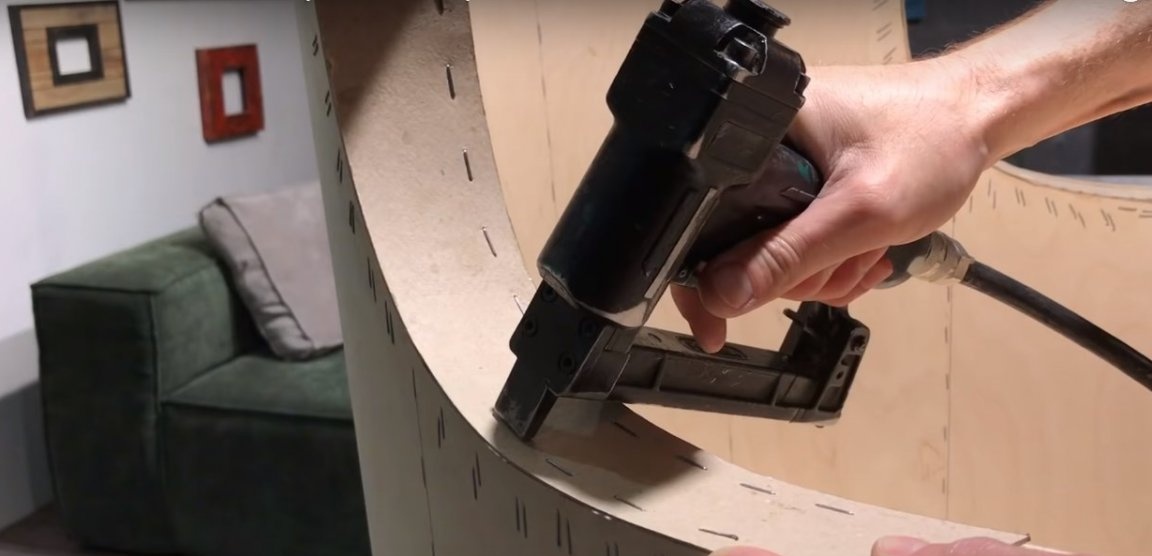
Step Five: Velvet Sheathing
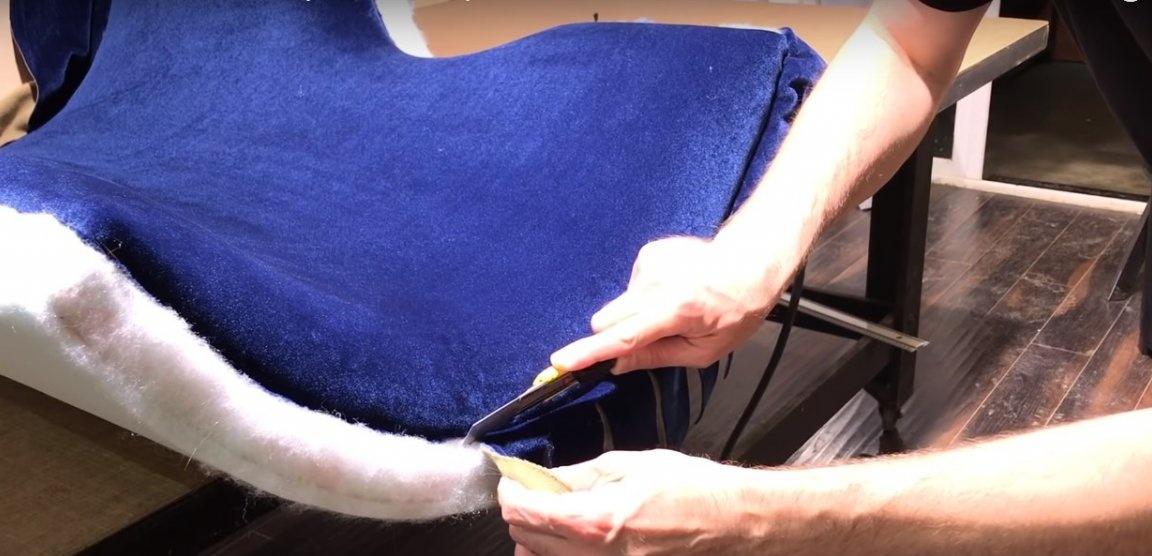
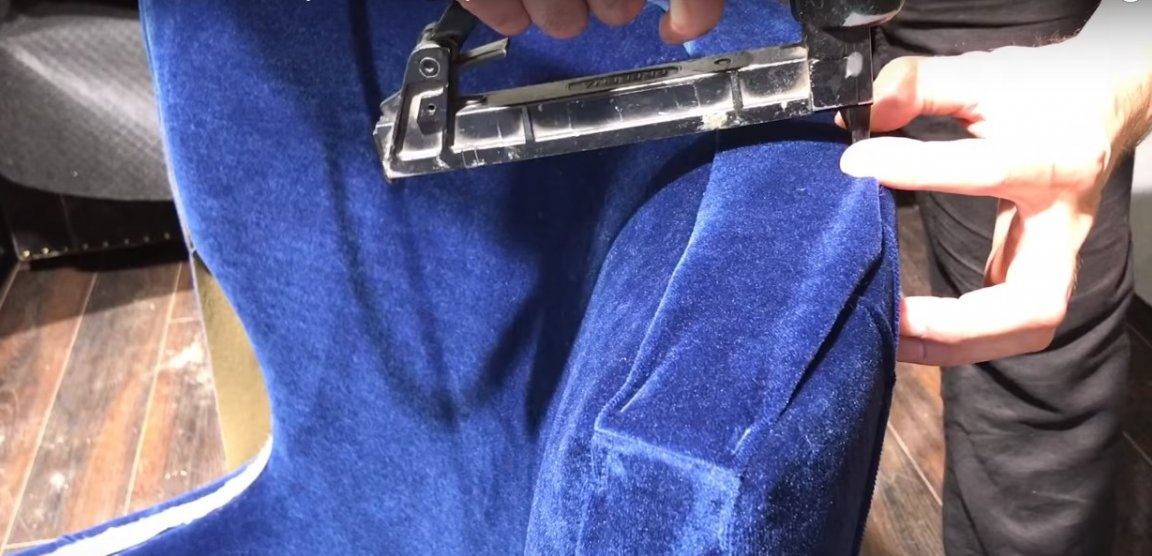
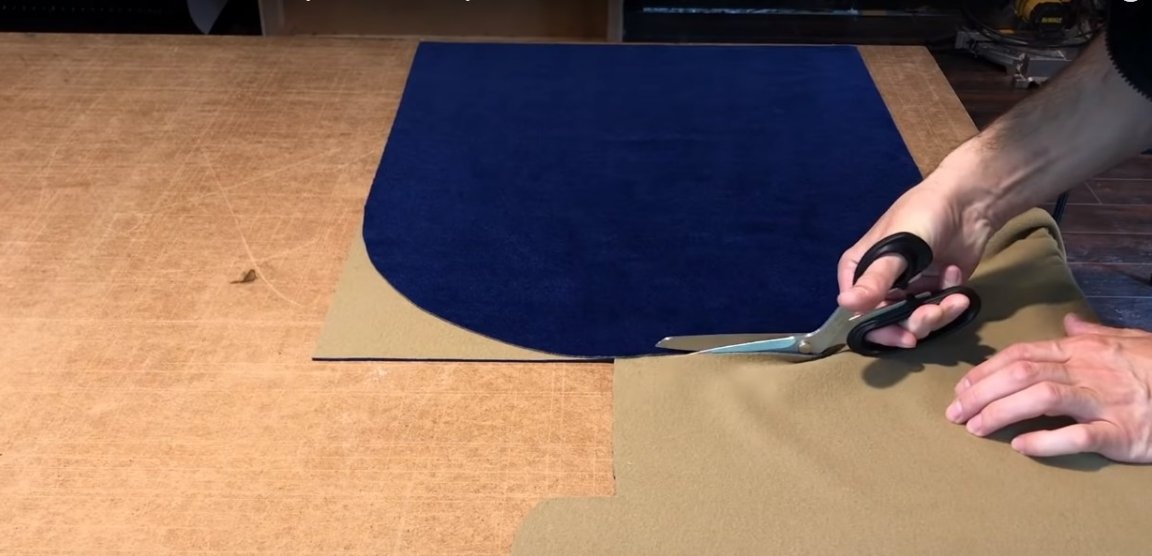
Prepare a pattern for the inner lining of the back of the chair. Mark the fabric and cut out the trim part. Fix the velvet on the inside of the back, spreading it evenly on the surface and gradually fixing it with brackets around the perimeter. Cut off excess material directly under the staples.

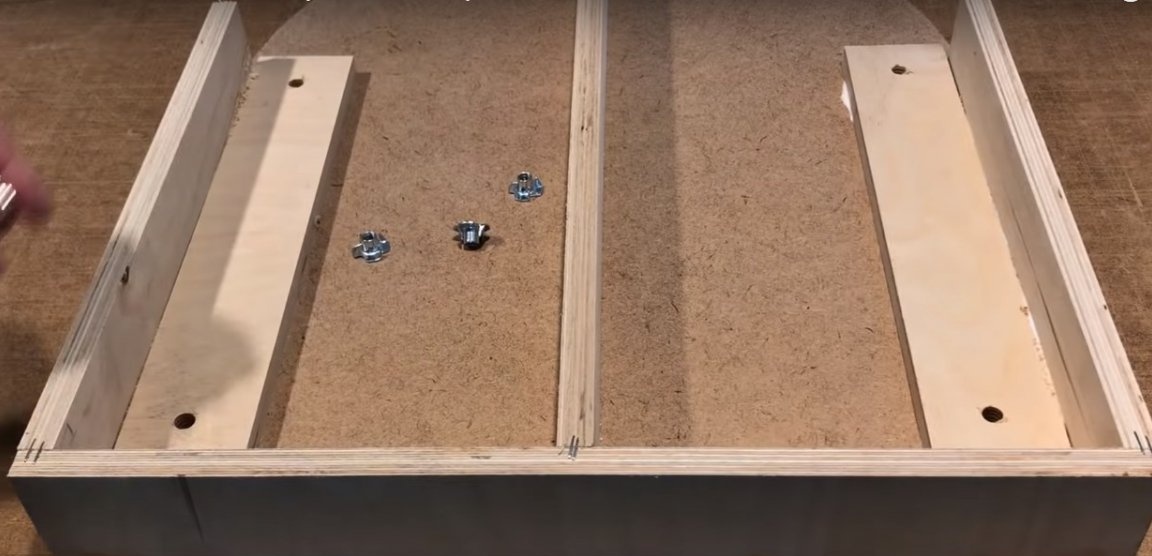
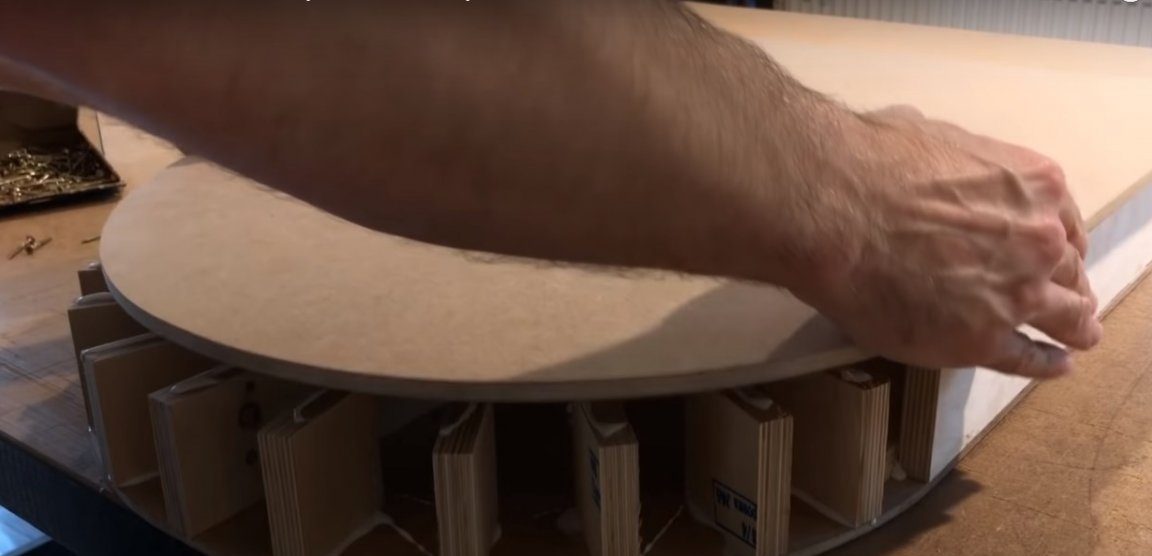
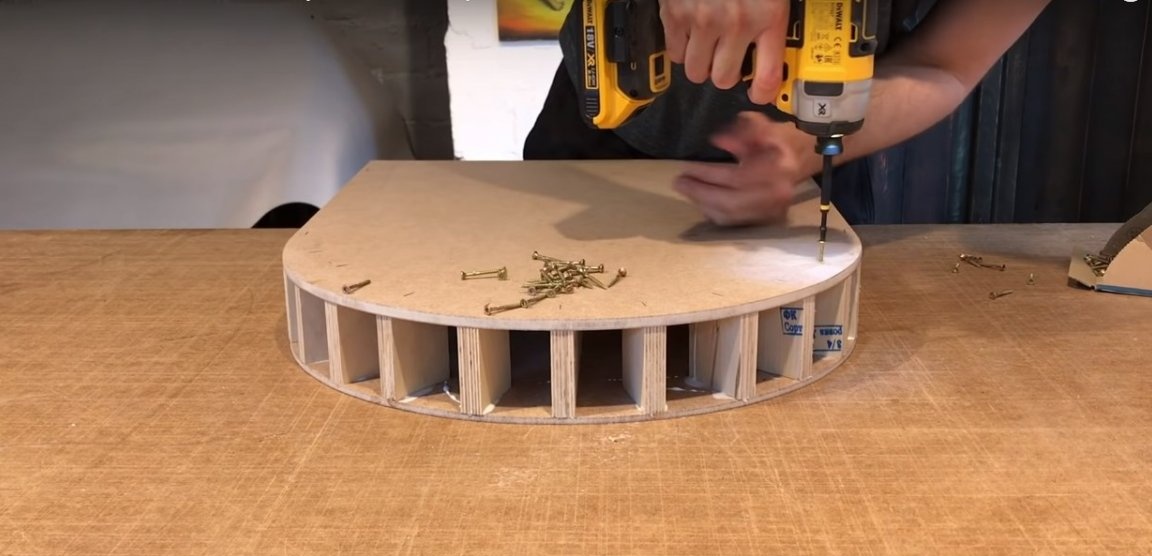
Step Six: Making Seats
Assemble the seat frame from plywood as shown in the photo. Install furniture nuts for fixing the legs, fixing them with self-tapping screws.
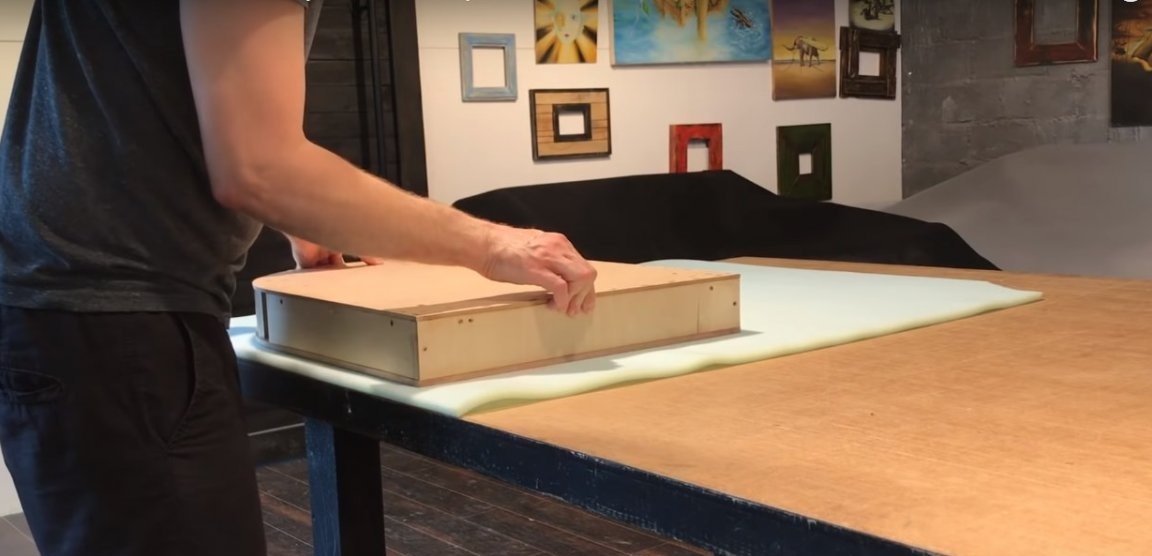
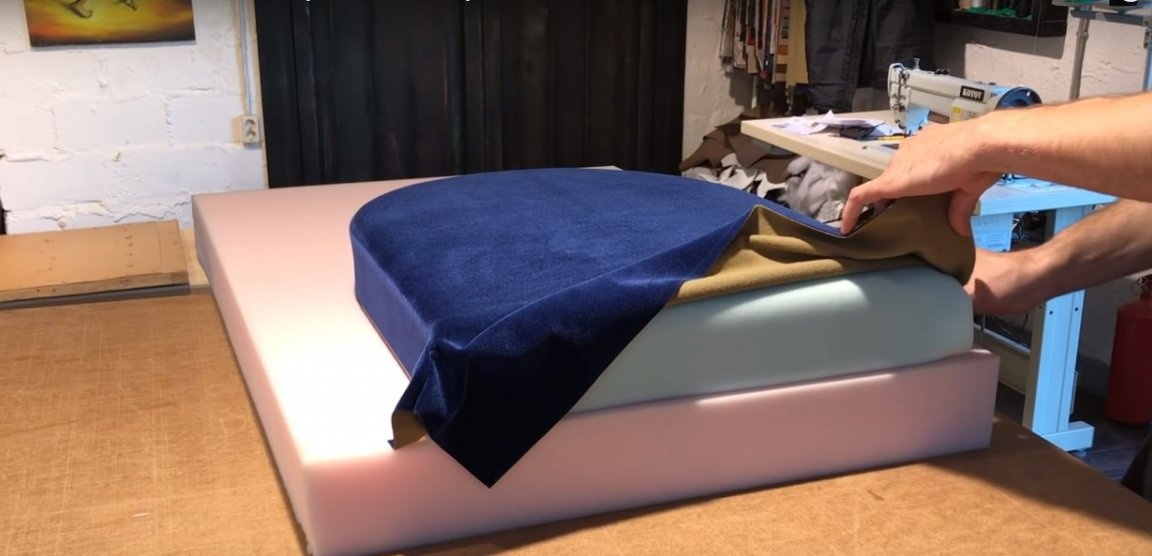
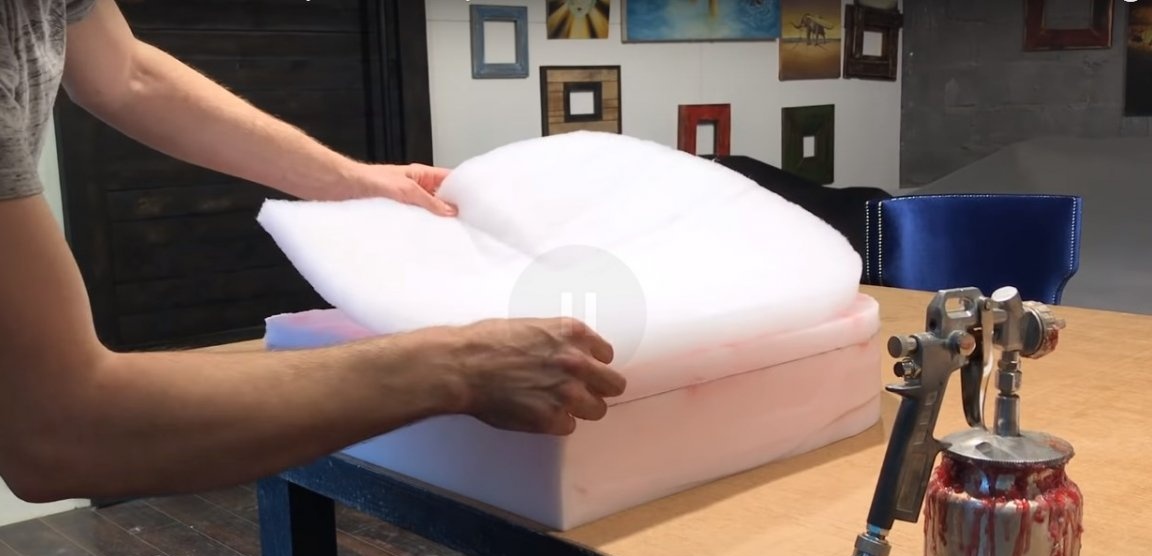
Tape the seat with thin foam on all sides.

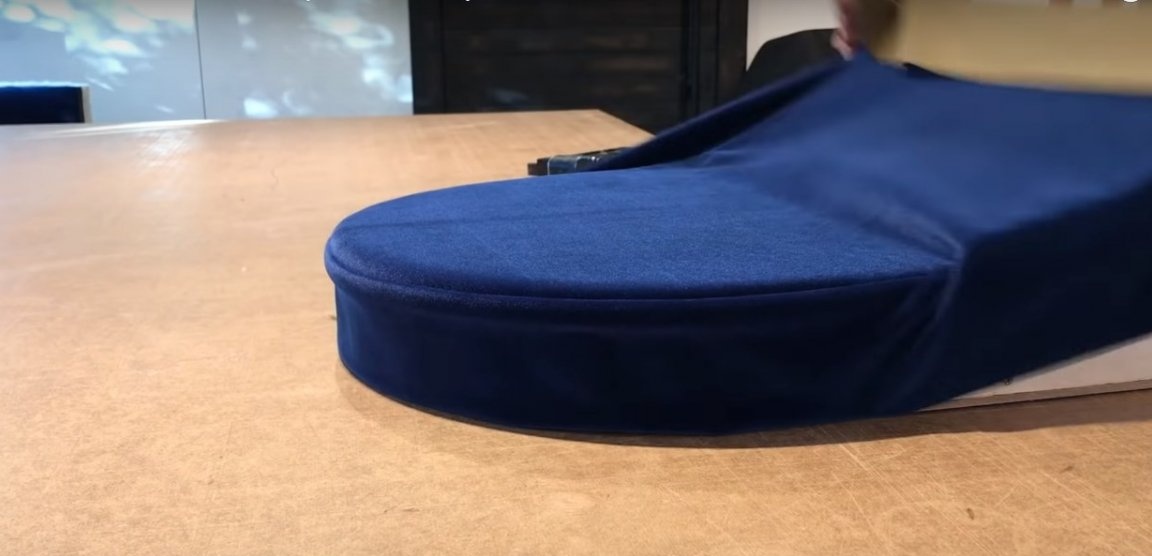
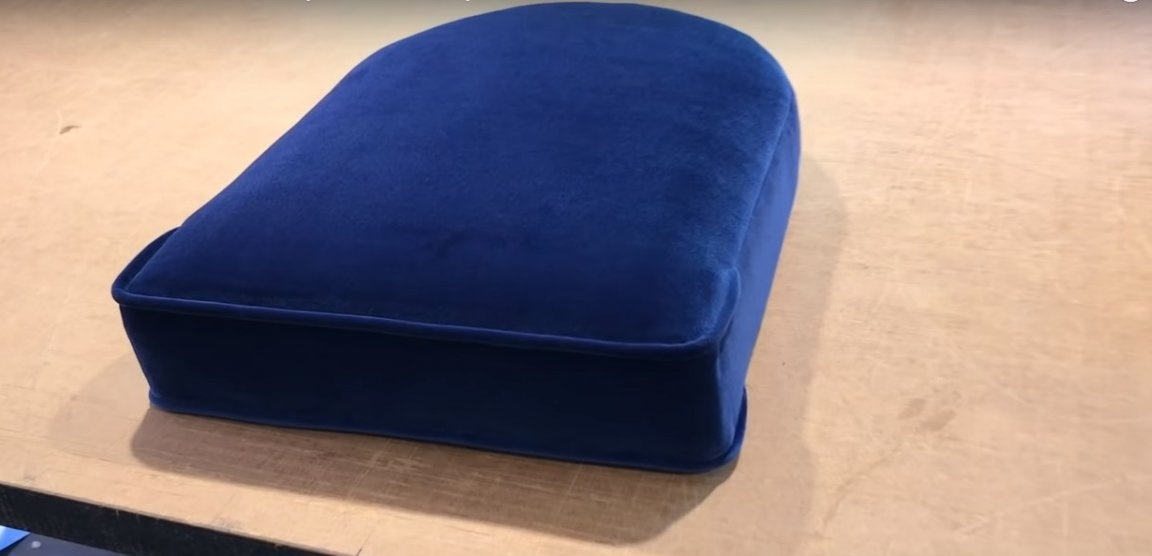
For sitting, sew a voluminous cover from velvet, insert the frame pasted with foam rubber, wrap the casing on the back side and fix with brackets, leaving the edges on the sides unprocessed. Put the seat in the chair, straighten the corners, tuck them and secure with staples with an overlap on the past.

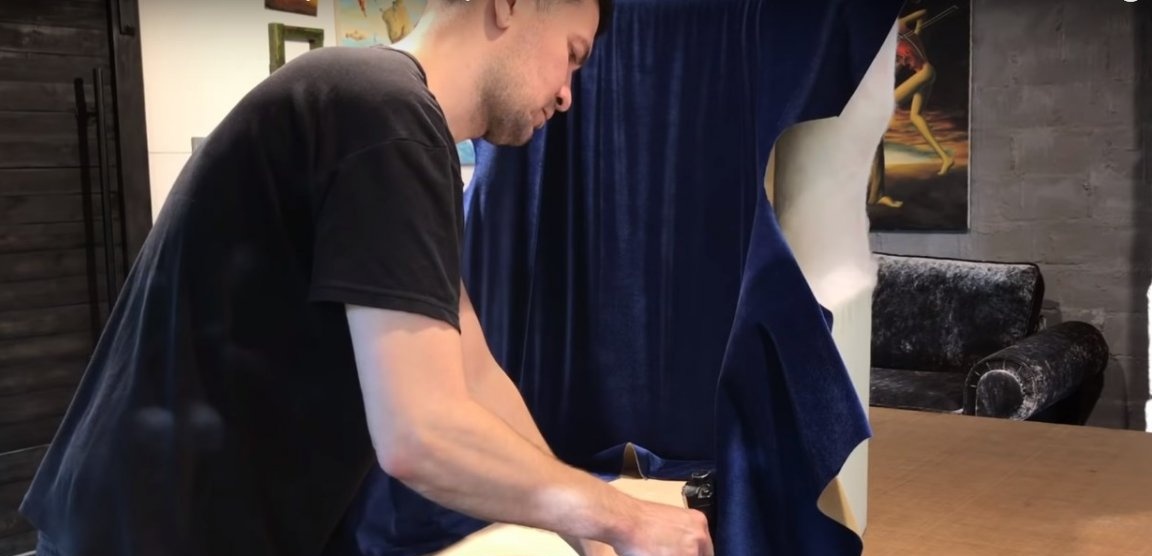
Seventh step: velvet trim on the outside of the back
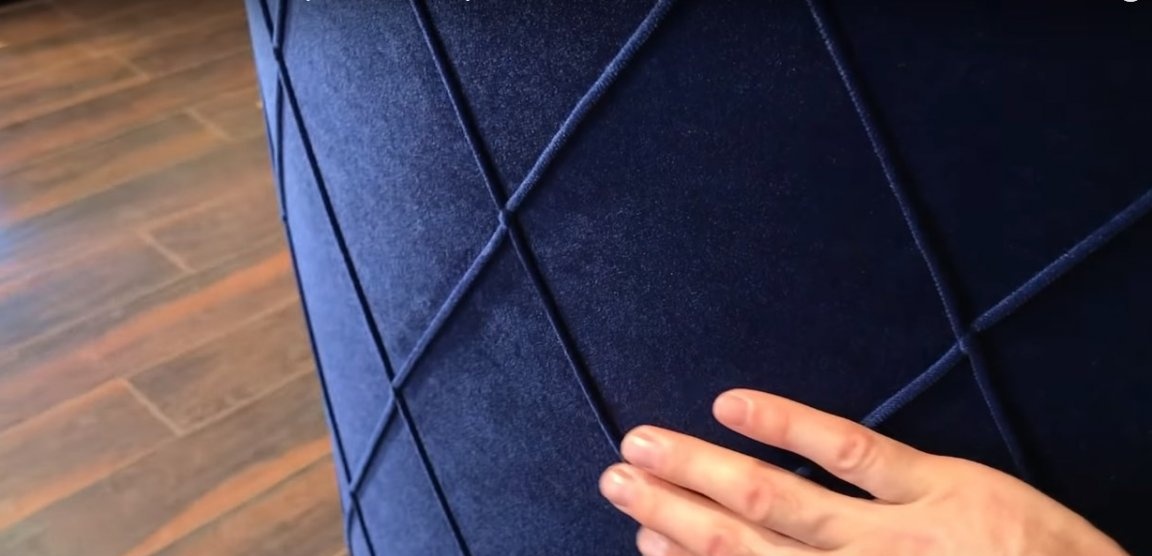
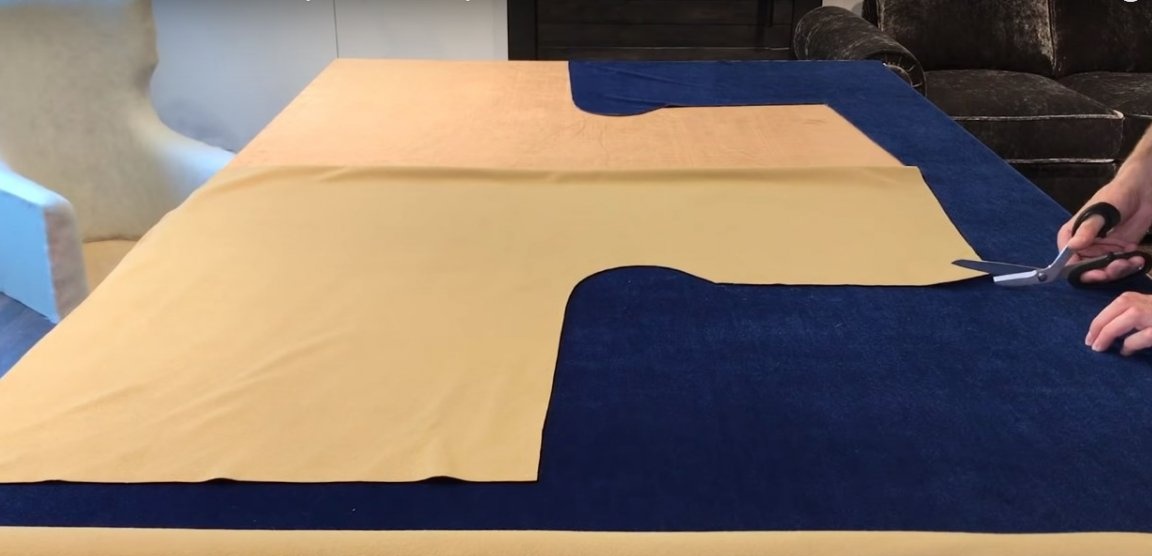
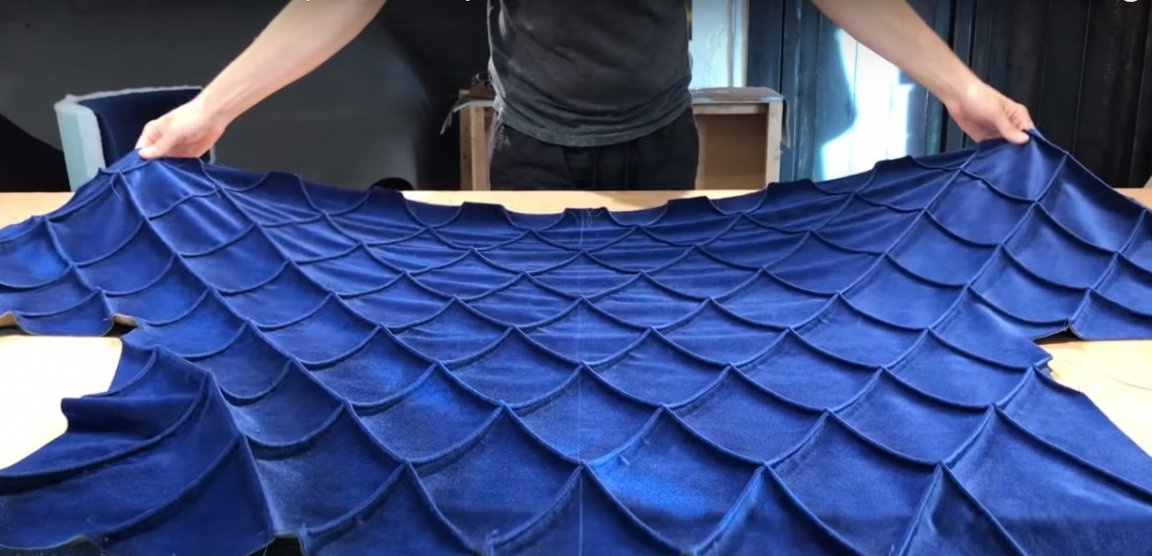
Prepare the exterior trim for the seatback. Cut it out with an allowance for tucks. The pinches are placed diagonally along and across the fabric.
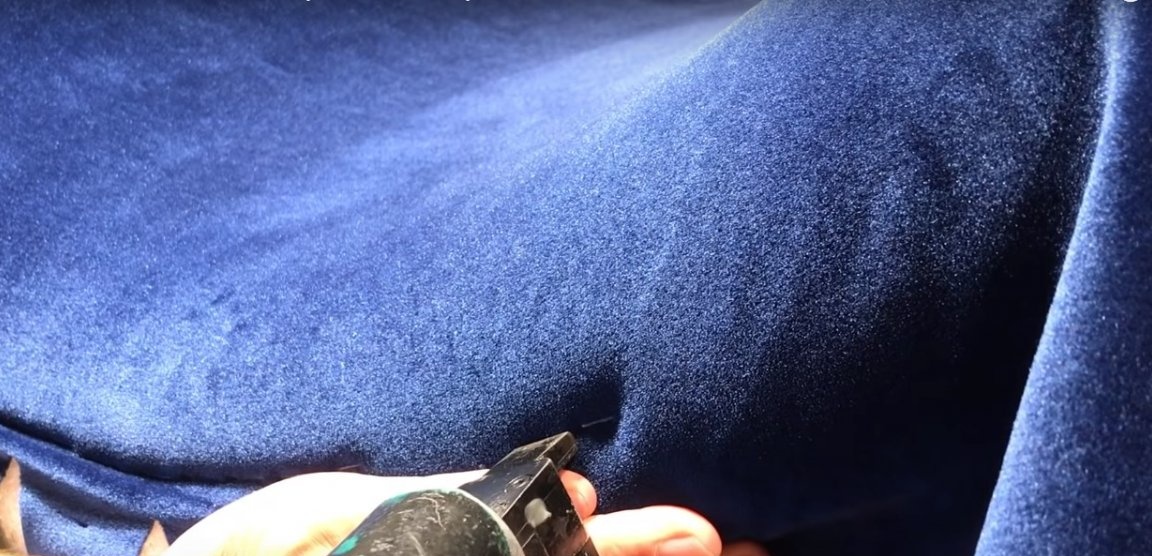
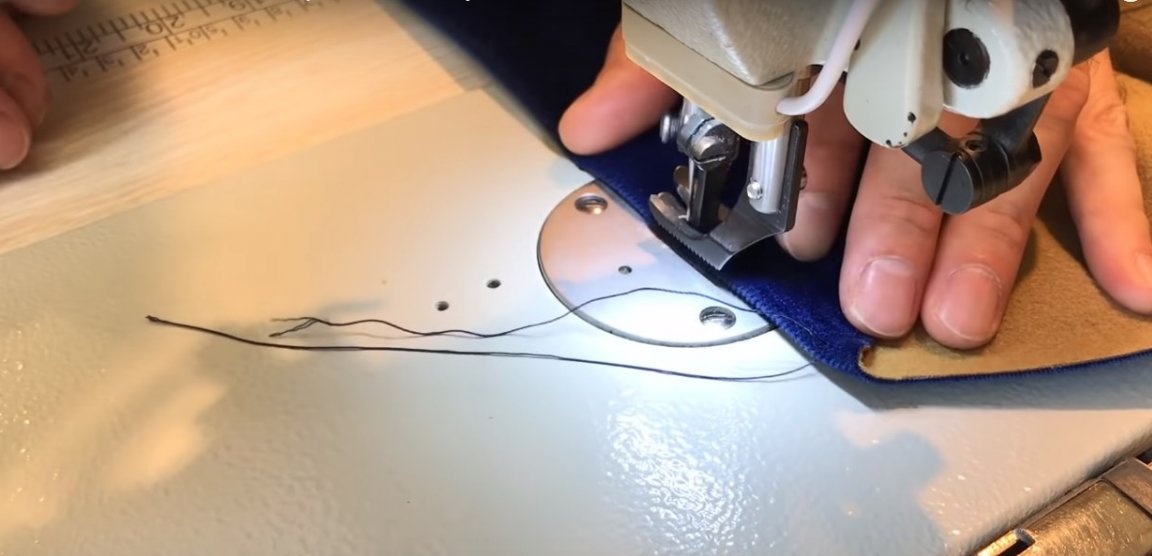
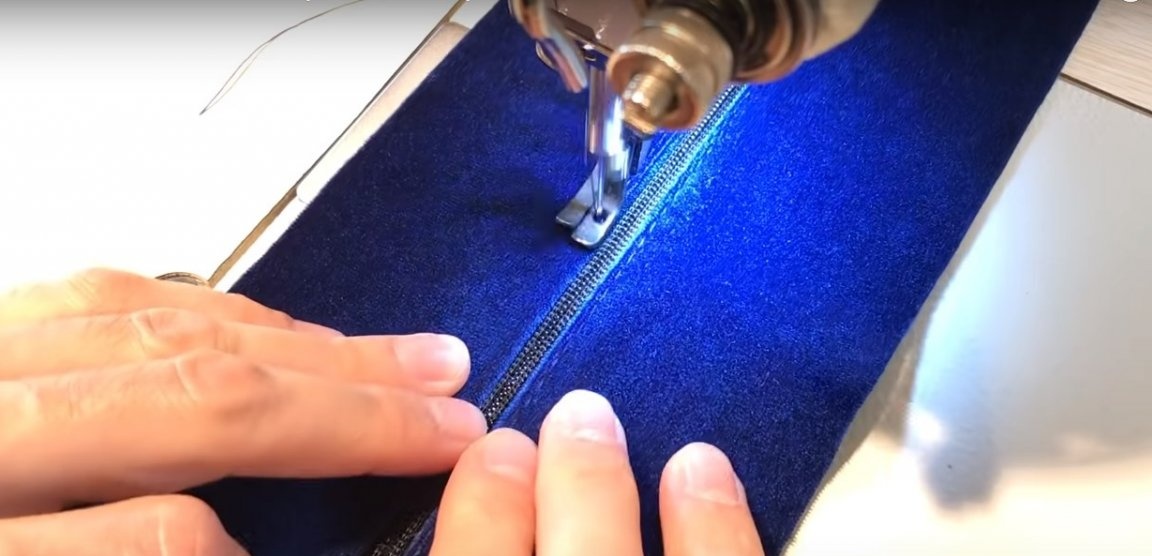
As a rule, sewing velvet products is carried out by industrial sewing machines with a top conveyor. Velvet has a sliding surface, so the bottom conveyor of a household appliance does not satisfactorily cope with this task. An exception is old-style straight-line machines, to which you can purchase removable legs with an upper conveyor.
To make tucks on a household machine, use the special detachable foot for tucks, and even better - to sew the cord. By the way, in order to make the pinches look more voluminous, you can sew a small diameter cord inside.
Fasten the prepared cover to the outside of the back of the chair with brackets.


Step Eight: Processing the Top of the Back and the Legs
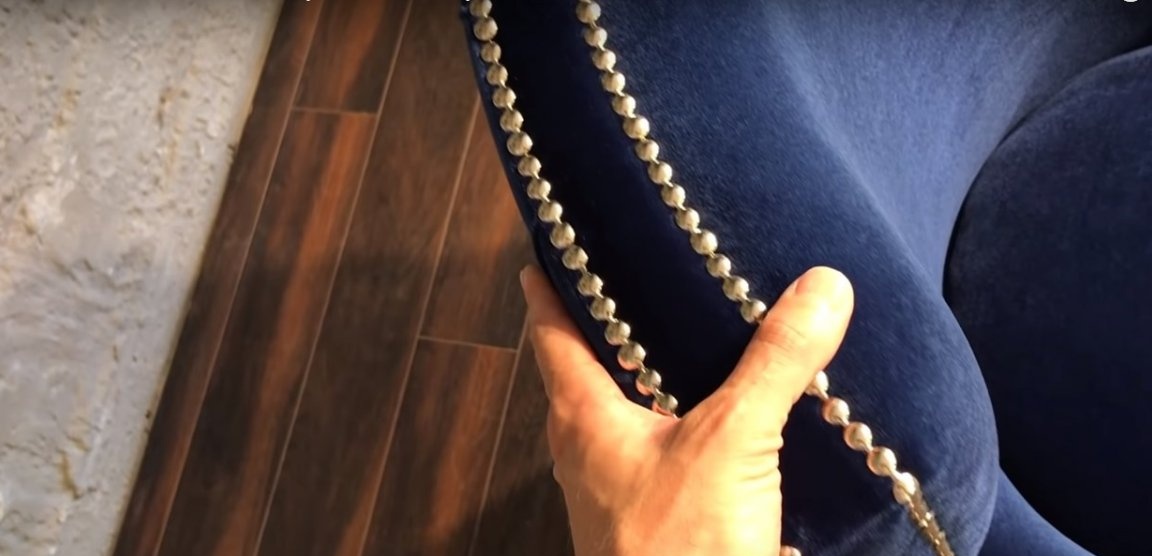
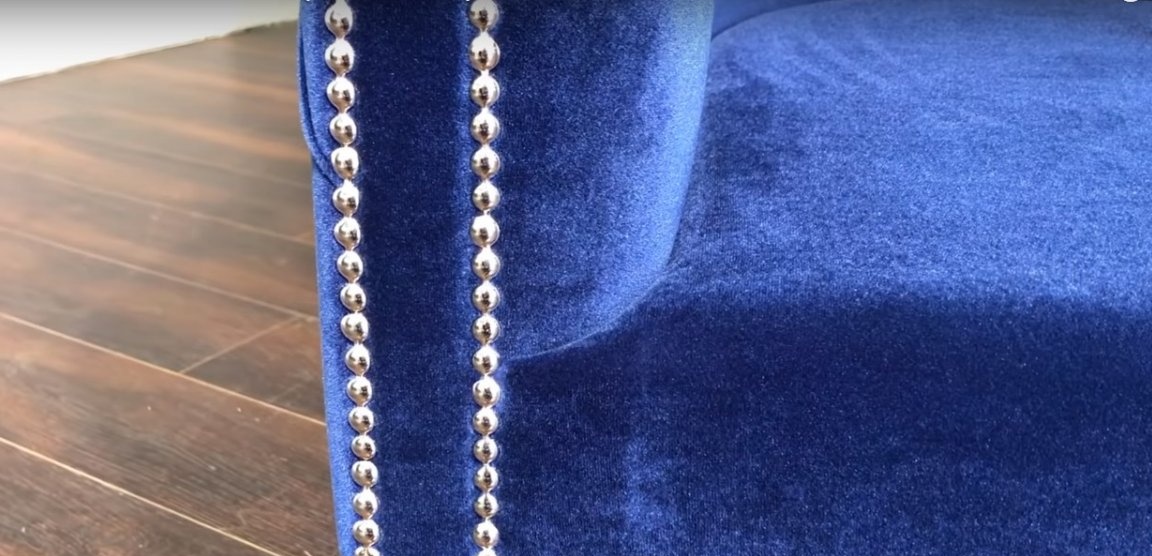
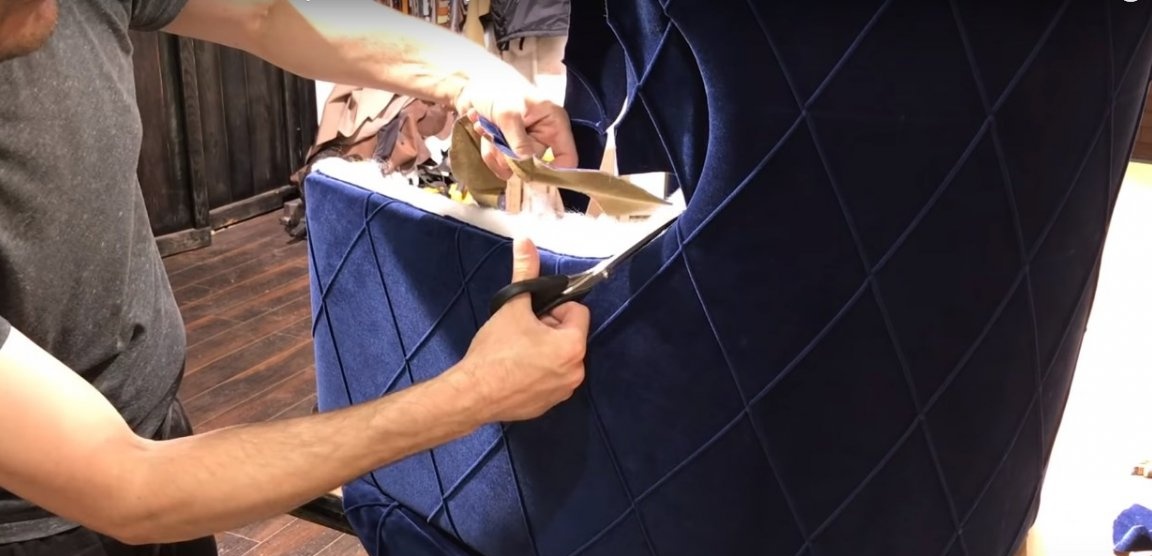
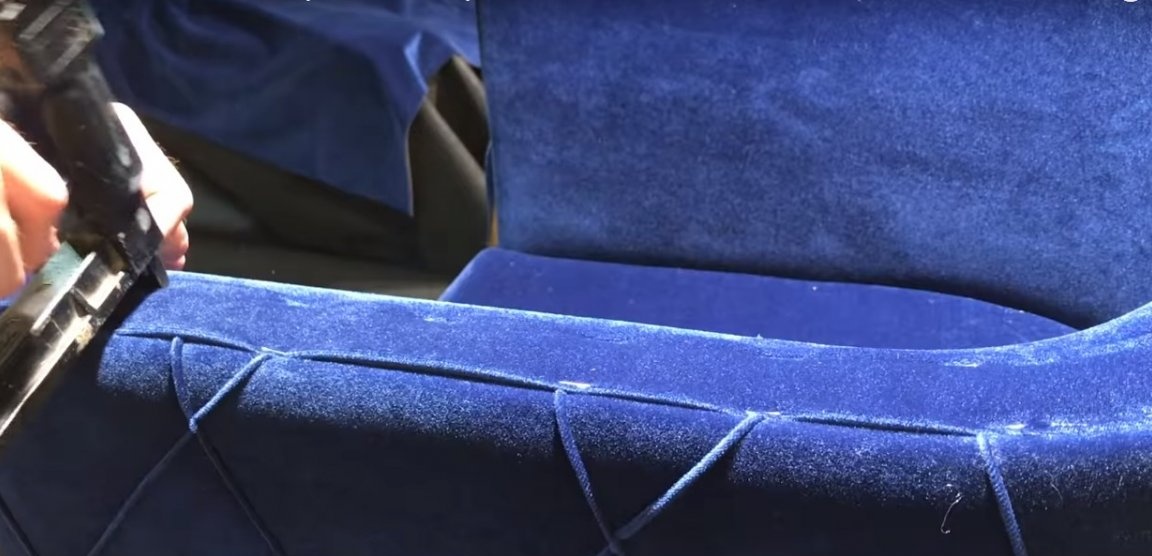
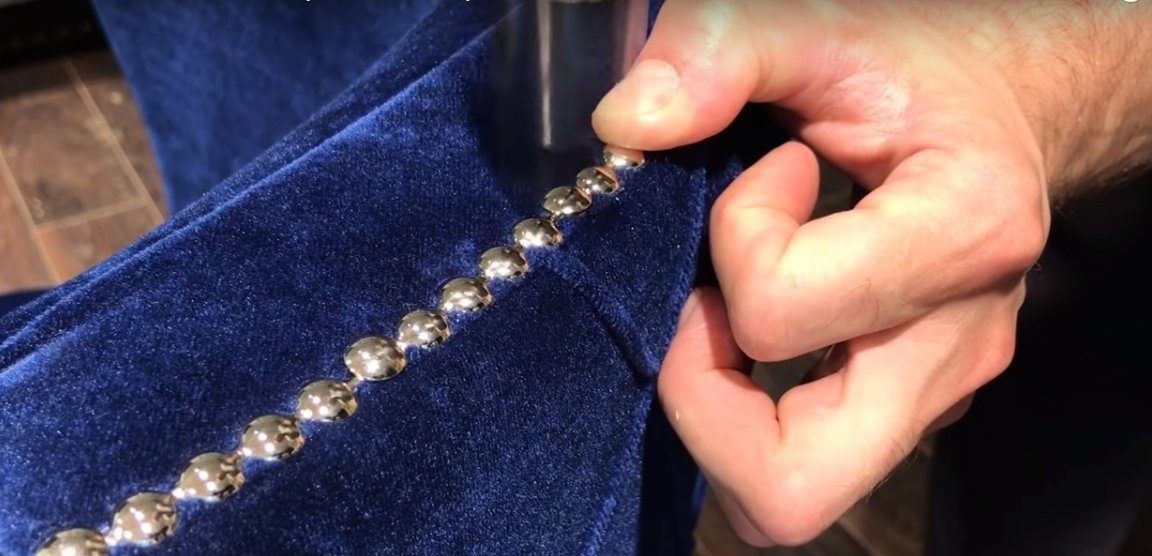
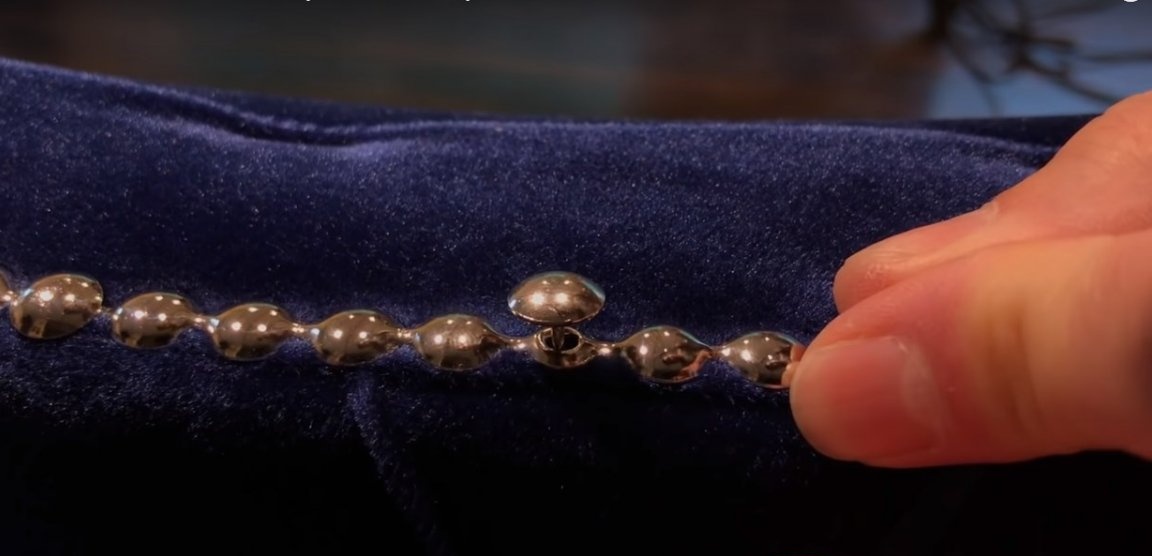
To process the upper part of the bylts and the back, prepare a velvet strip and fix it in a notch with brackets.
Mask the seam lines with brackets with a metal furniture molding.

Step nine: processing the bottom of the chair
For processing the bottom of the chair, use any dense, wear-resistant fabric, preferably stiff. Cut out the bottom part with a small allowance and fix it with staples with a notch to the width of the allowance that you left.
Step Ten: Making a Soft Cushion for Back and Seat
The back cushion has a simple square shape. It is sewn from two parts and filled with holofiber. For the pillow, the author made a removable velvet cover to match the tone of the chair trim.
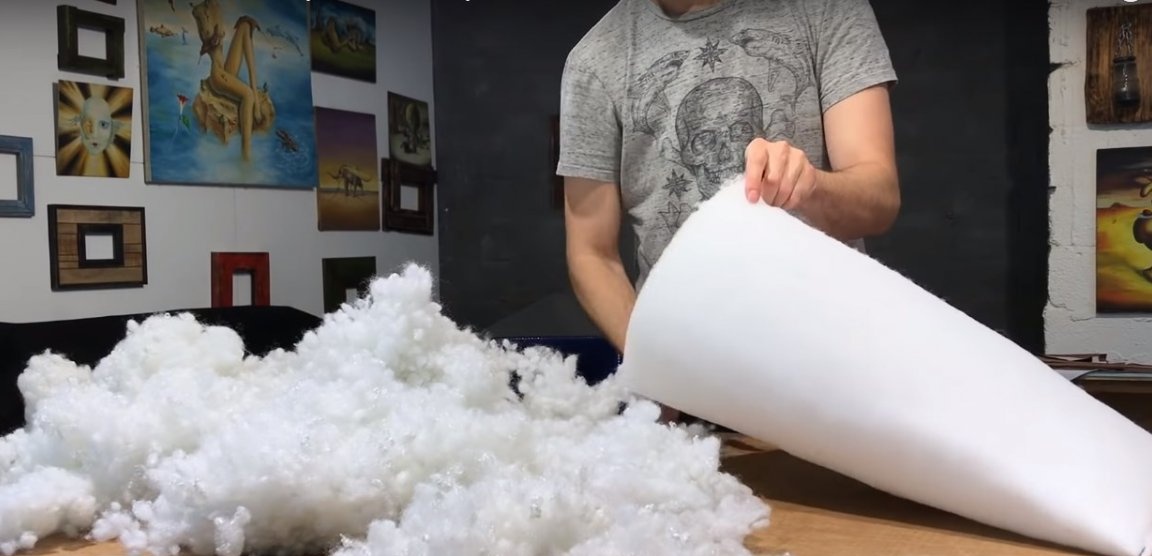
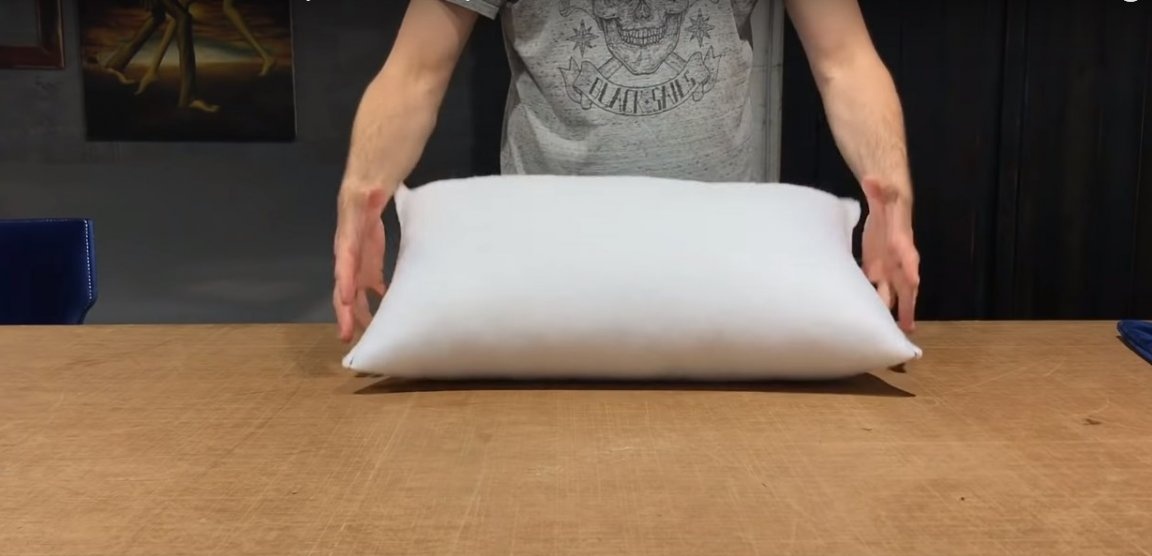
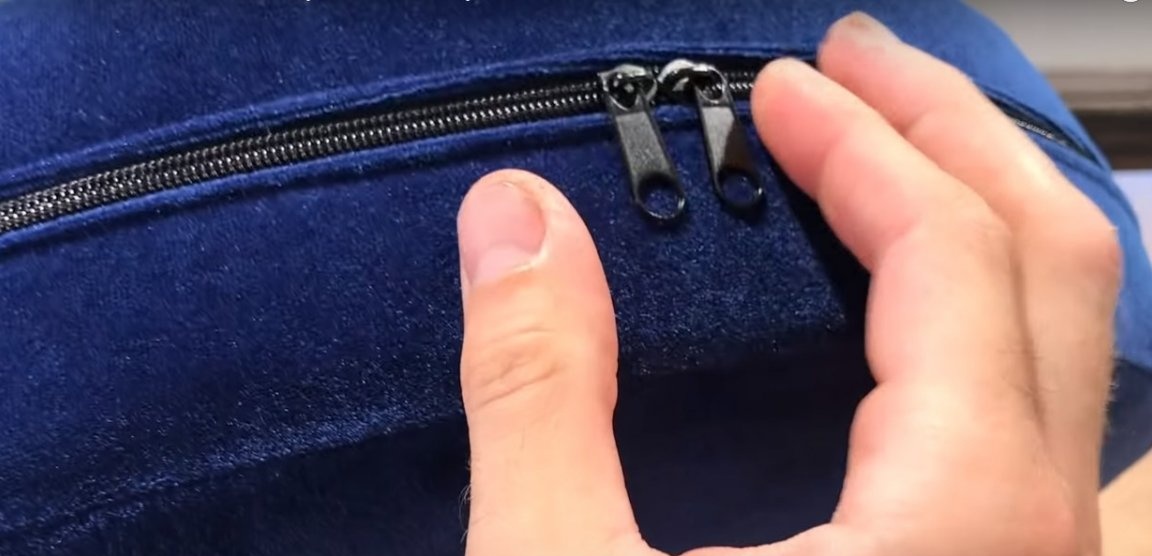
The seat cushion is voluminous; it was filled with a piece of foam pasted over with a synthetic winterizer. The cover for this pillow is also equipped with a hidden zipper and can be removed for cleaning.
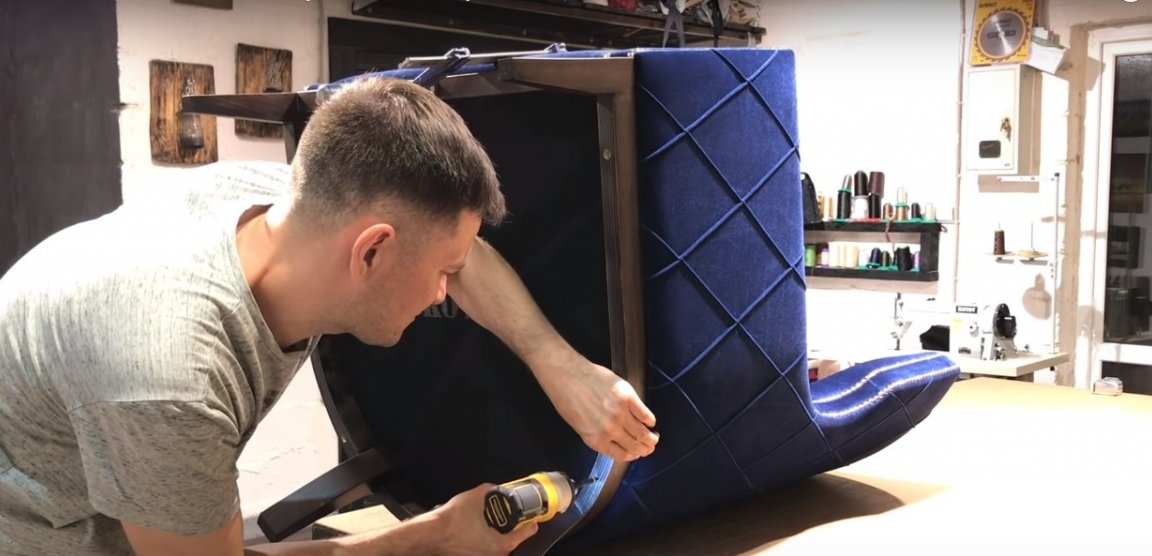
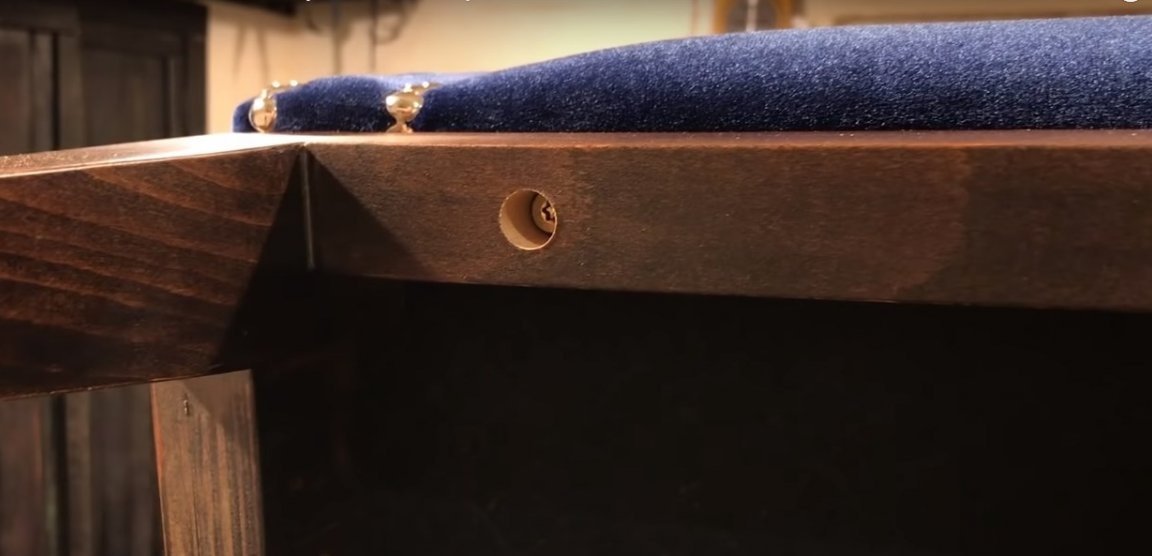
Step Eleven: Installing Wooden Legs
The author uses a wooden base with legs, which he made for this chair in advance. Wood must be sanded and treated with oil coatings. After that, the wooden base is again subjected to grinding with fine-grained sandpaper with a grain of at least 220. In this case, the solvent-based furniture quick-drying wax can serve as the finishing coating.