The stubs at the ends of the legs collapsed ...
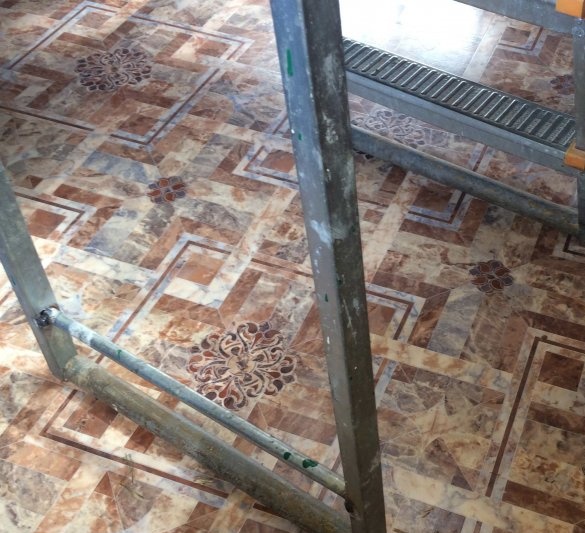
Legs crashed into linoleum and pressed into the ground when working on the street.
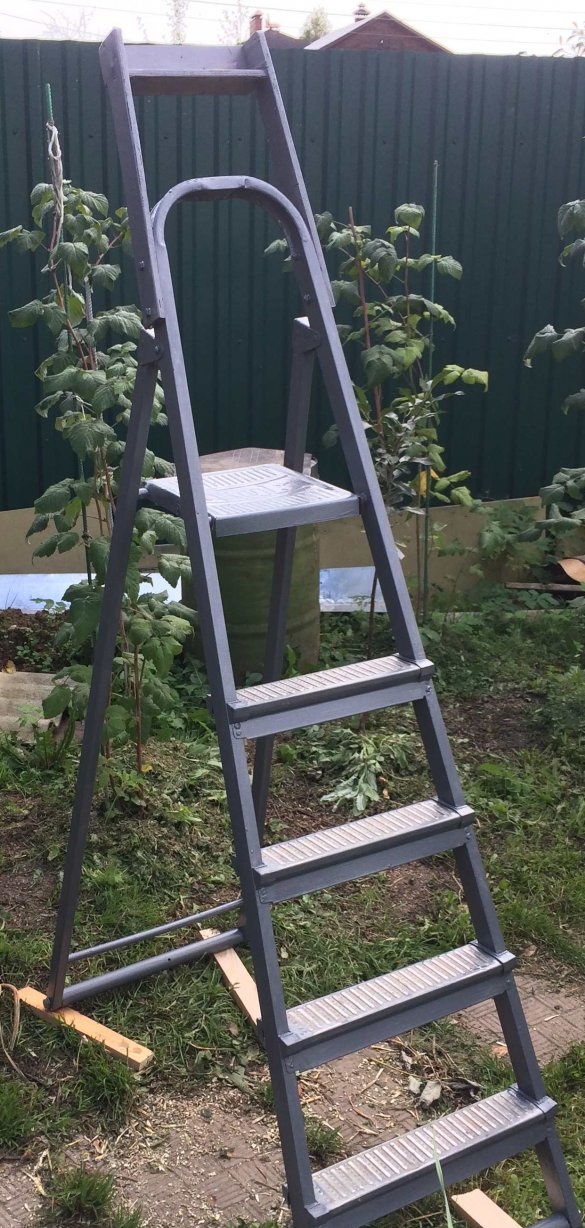
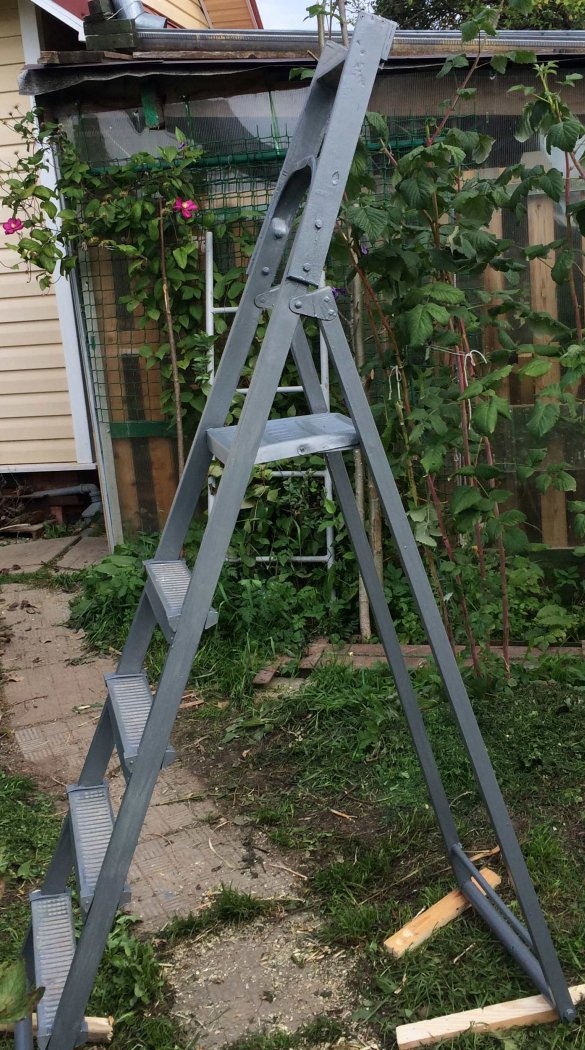
Stepladder after completion of work and painting.
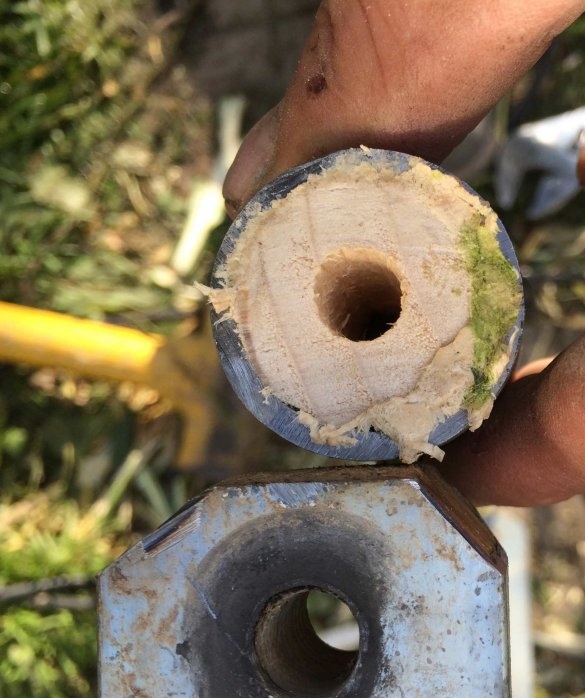
To begin with, I inserted wooden plugs (4 cm long) into the ends of the legs and drilled 10 mm holes in the legs with a drill. A 3/4 "diameter steel water pipe went as a new support. I inserted wooden plugs into the ends of the pipe in which I drilled holes of 9.7 mm in diameter.
Hole 10 mm in the foot of the ladder and 9.7 mm in the cork of the water pipe
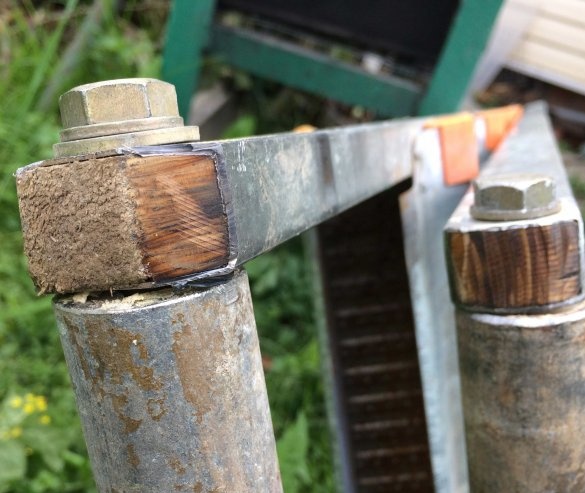
I cut the right angles of the ends of the stairs with a grinder along with wooden corks inside. He fastened the pipe and the legs of the ladder with M10 bolts
Fixture of the pipe to the legs of the stairs.
Pipes protrude 5 mm (approximately) beyond the boundaries of the legs.
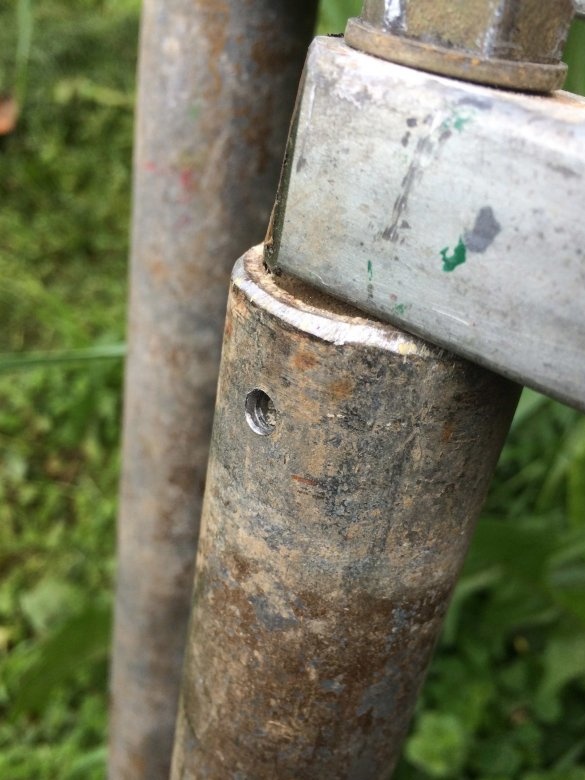
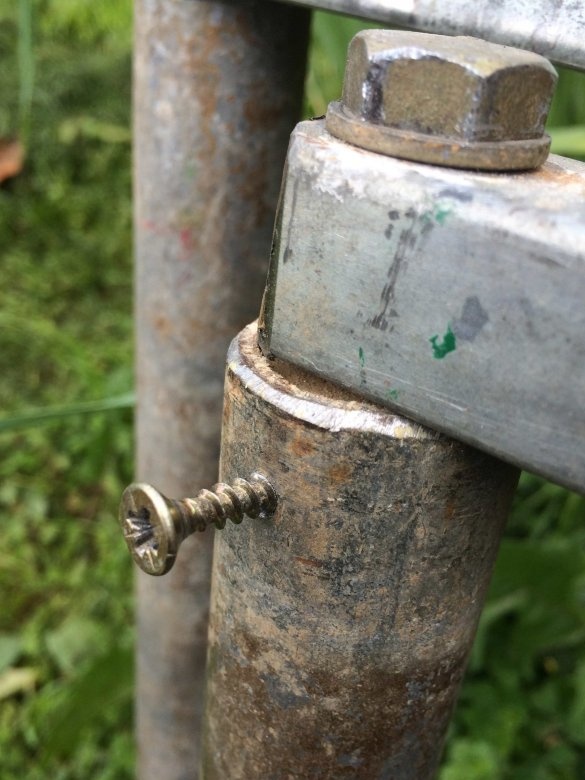
One plug in the pipe turned out to be too mobile and when screwing the M10 bolt pressed into the inside of the pipe.
I had to pull out this plug, drill a hole for a technological screw
screw in the screw and only then screw in the M10 bolt.
The bolt is screwed in, the self-tapping screw is removed.
Now the ladder does not rest on legs, but on a pipe.
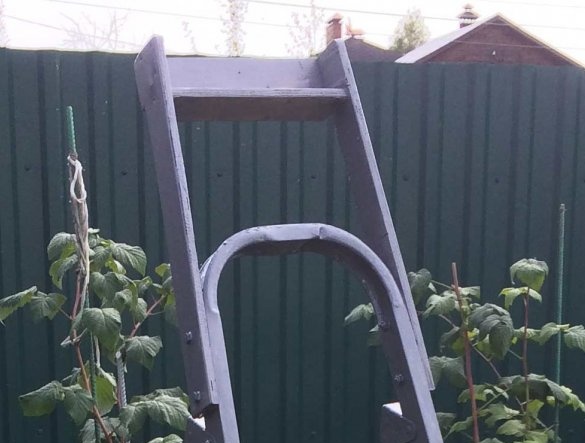
Initially, on the top of the stairs there was a plastic nozzle where it was possible to put small things when working on the stairs. Over time, it collapsed. I decided to restore, but in a different version. When I was at the top step I did not feel confident. There was no additional support.
Decided to do so
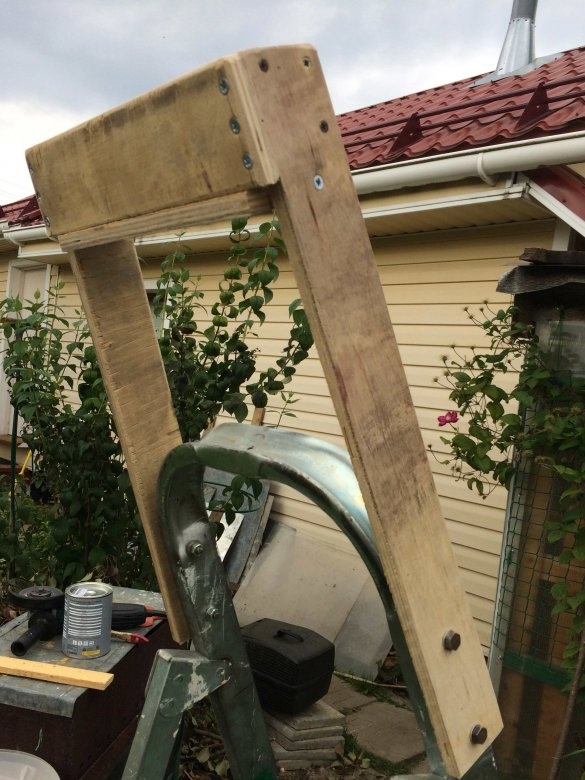
Additional support for work on the top step. Support length 45 cm.
Fastening of the additional support to the ladder is done with M 8 bolts
The support itself was made of plywood 10 mm thick
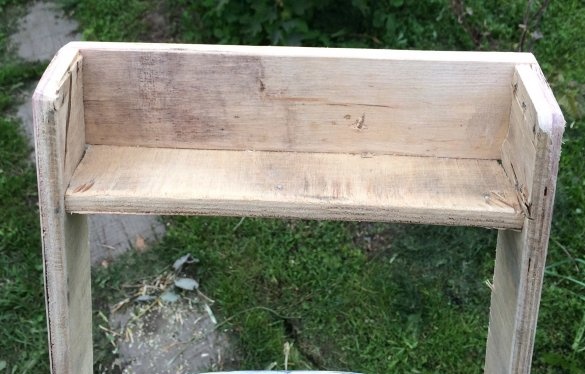
On the top of the support made a shelf. In the unfolded state of the stairs, the shelf has a slope at which the small things will not slide out.
Everything is fastened with screws, but only after drilling holes for screws to delaminate plywood.
Tilt shelves
The tilt of the shelf does not allow small things to slide out.
At the same time, the shelf made the whole support stiffer.
The grinder removed irregularities and rounded the edges of the plywood parts.
The grinder brought to the condition the ends of the legs of the stepladder.
The metal of the stepladder is very thin ... As rust began to appear on the metal, I decided to paint the entire staircase with 3 in 1 rust paint (except for the upper surface of the steps).
Stepladder after painting.
It became comfortable to be on the top step.
In time, the work took about 3 hours - design development, material search and manufacturing.
It was possible to use M 8 bolts and come up with something else instead of a steel pipe for support, but what was in front of our eyes went to work ...
I hope 10 years is enough ... and maybe more.

