
After a short break, the author of the YouTube channel "Lefty", again set to work. In this article we will consider a new project, a person ordered it for a gift. Today we will make a miniature fencing sword.
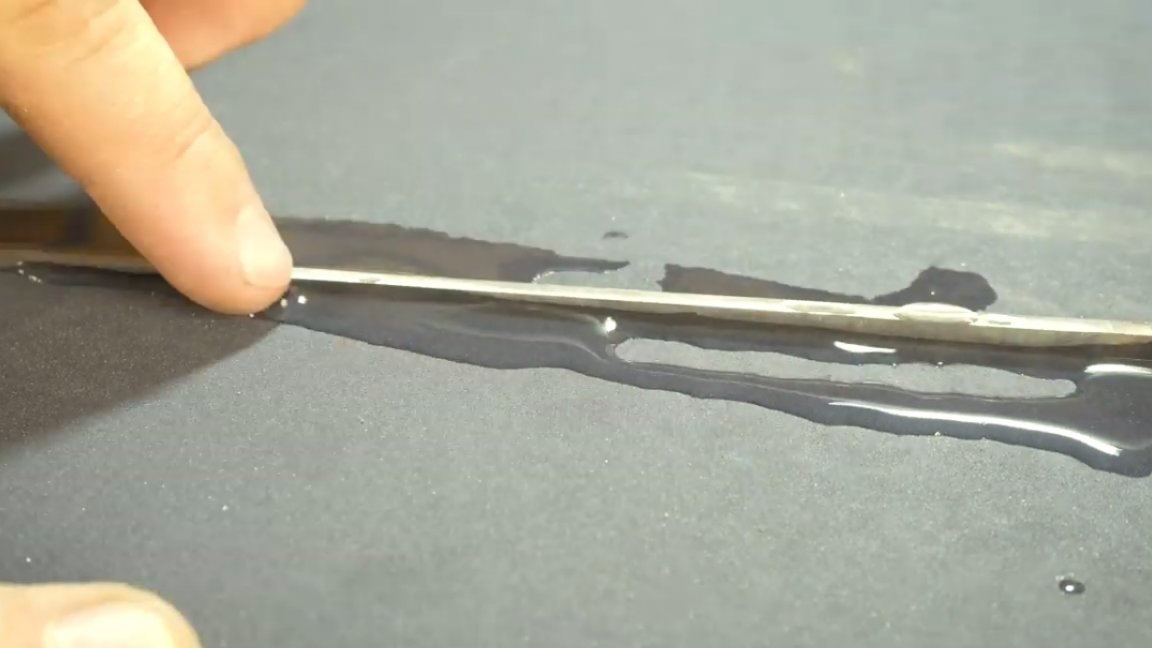
So let's get started. The first thing that comes to mind is to make a blade from a kitchen knife.

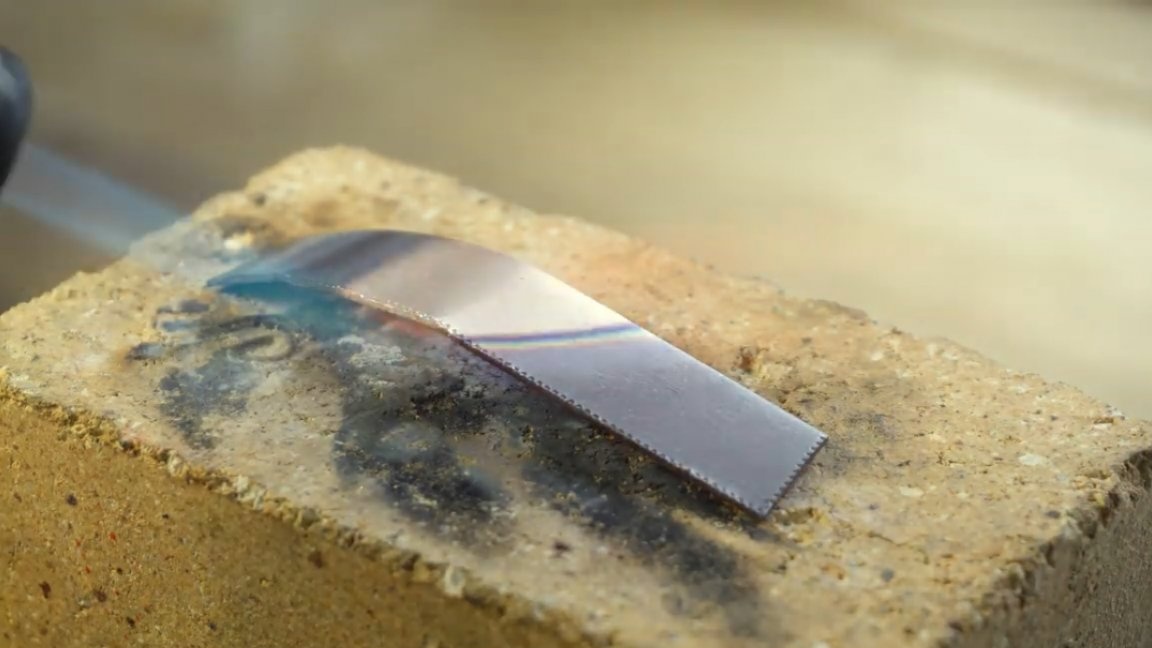
This kitchen knife is made of stainless steel, the cutting part is hardened, and the one that goes into the handle is not hardened, in the future this will be useful to us.
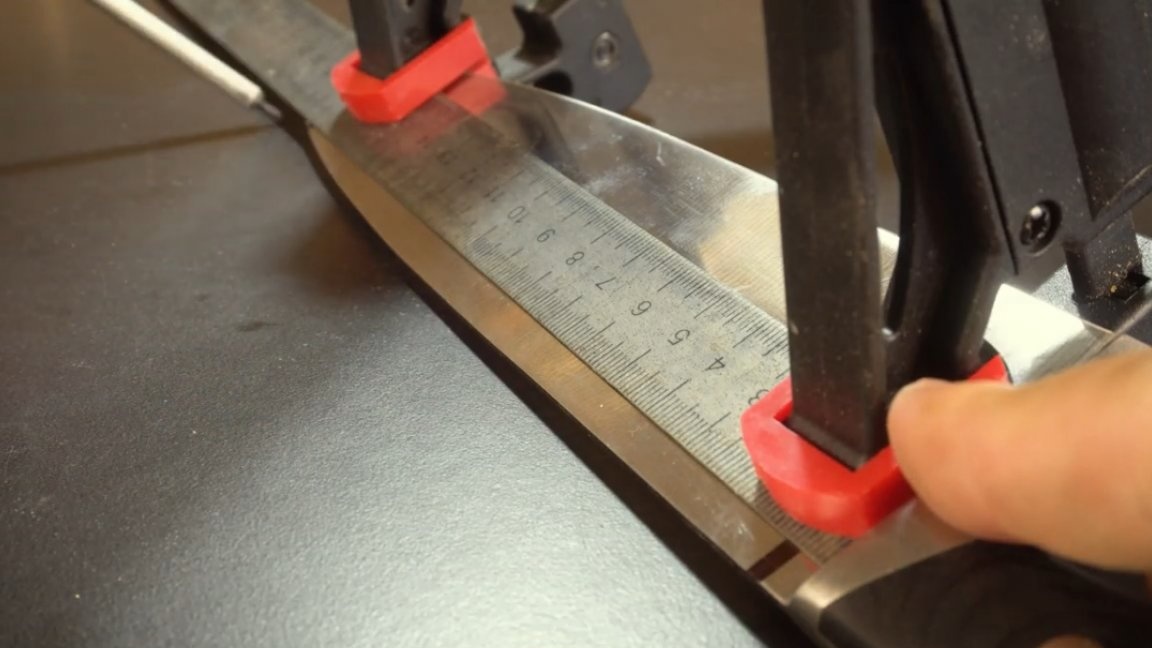
For this project, it is necessary to choose a knife more massive, which is exactly what the author did, since the blade of the miniature fencing sword will be tetrahedral, and here a certain thickness is needed. After marking, we cut off the part we need. In this case, the steel must often be cooled so as not to overheat the blade.
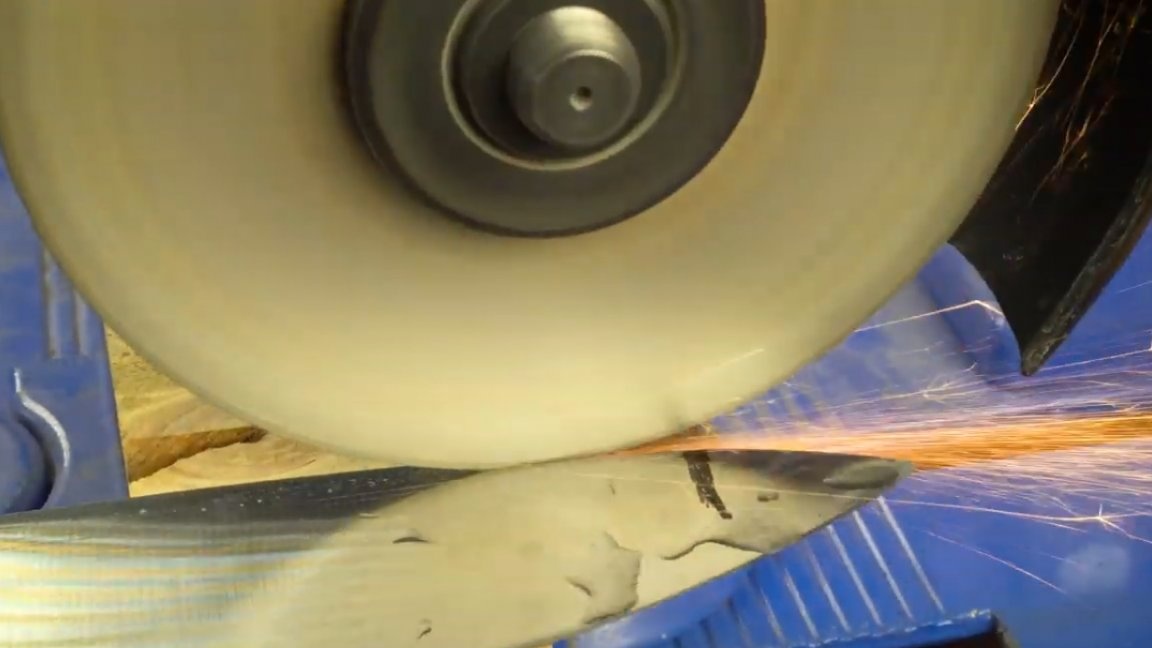
Due to frequent cooling, the process may be delayed, but we won’t have time to read War and Peace.
The knife itself is quite large, and we cut off quite a bit, so the rest can be used in any of the following projects.
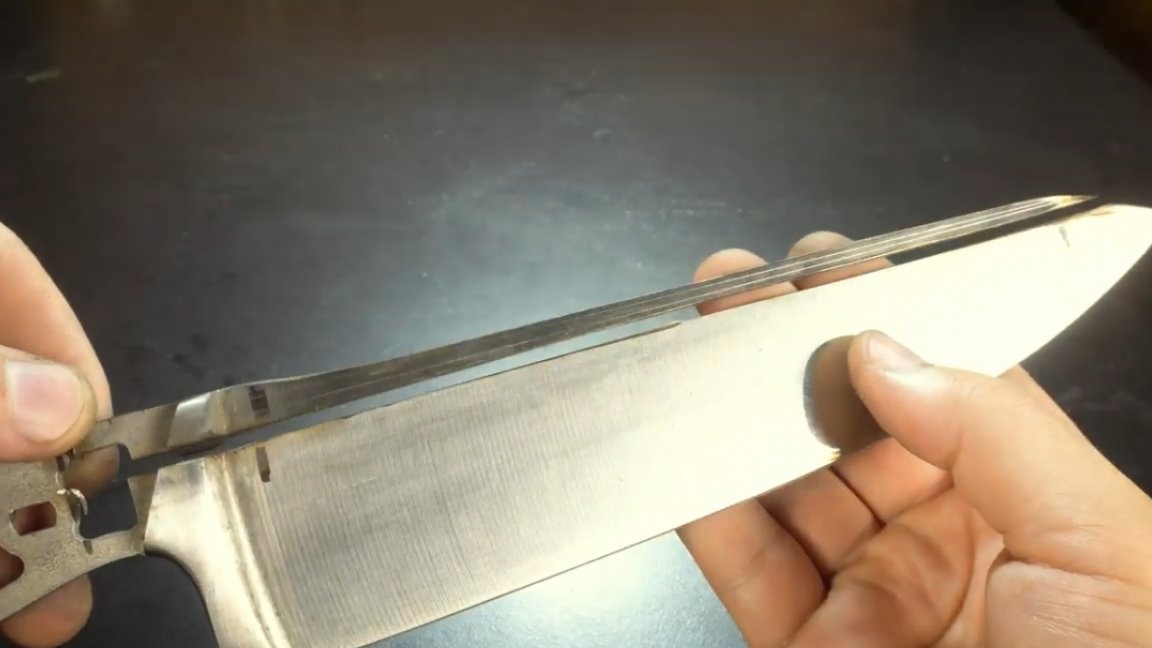
Next, you should process the resulting part. Since the entire grinding process took place almost manually, it took quite a lot of time, but it’s also a piece copy for that.
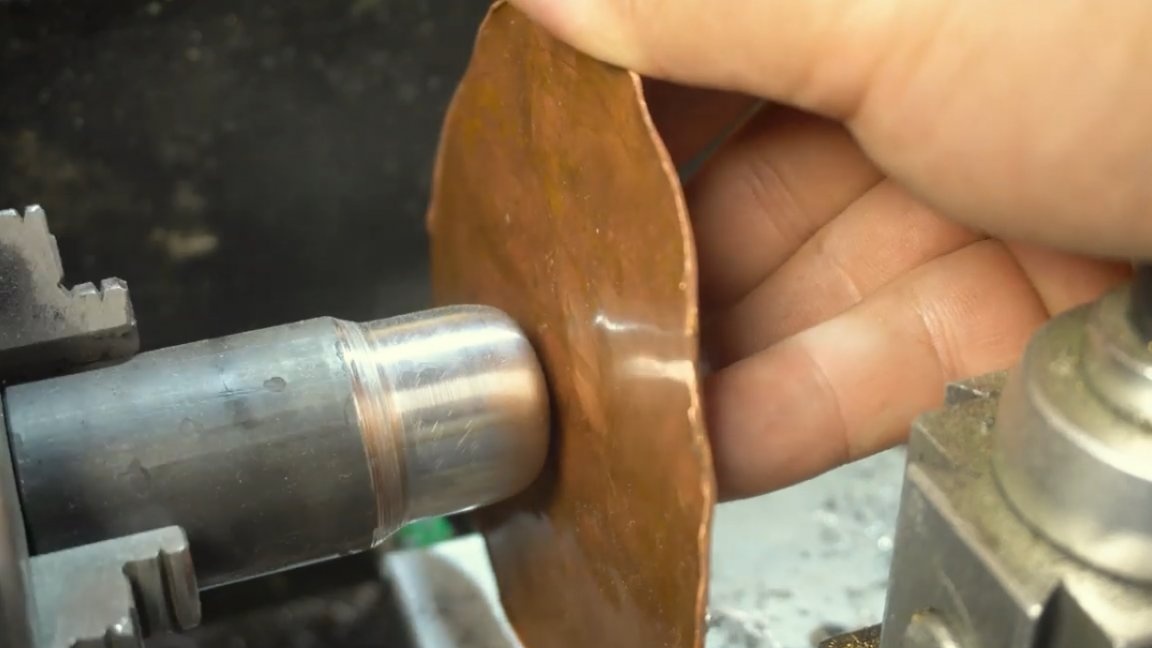
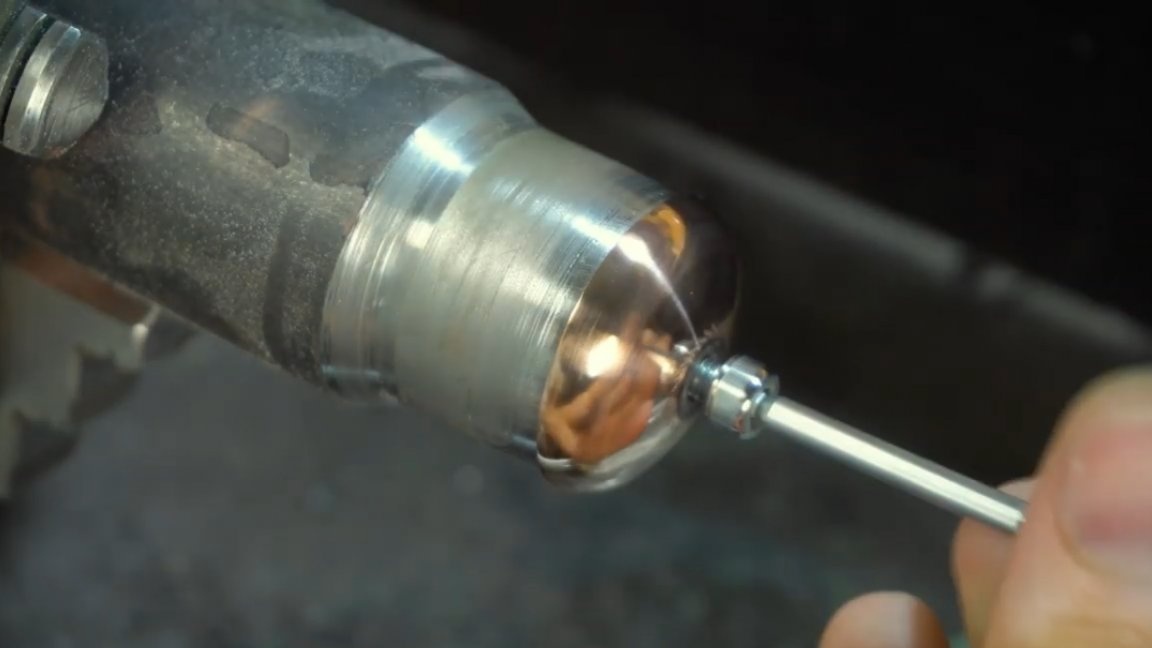
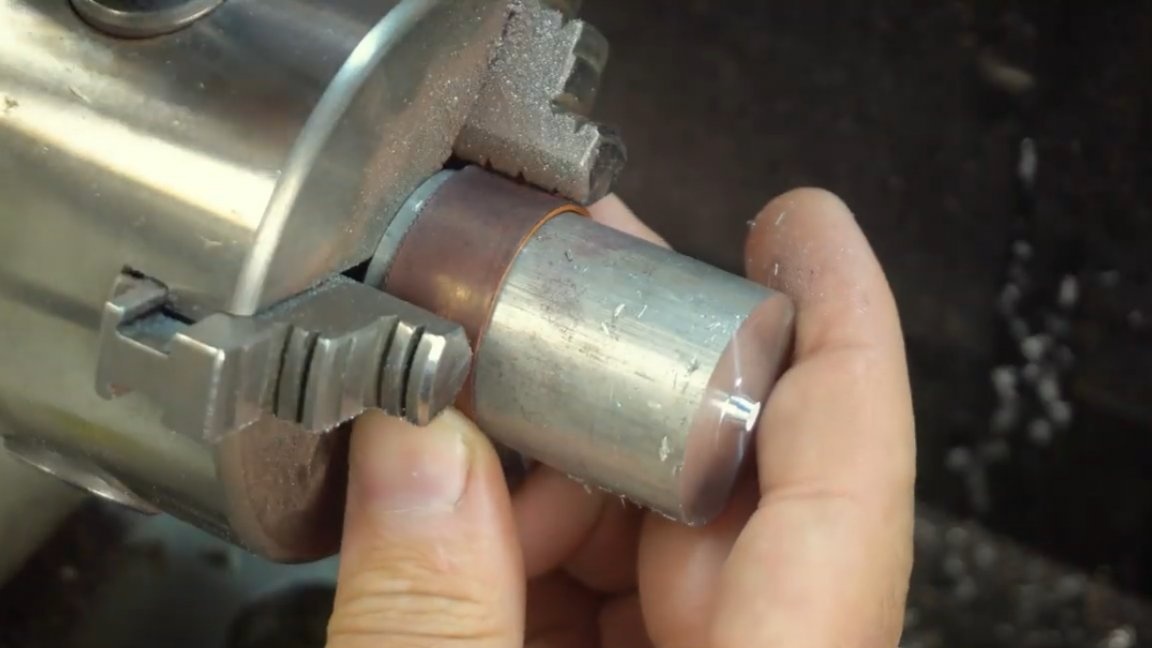
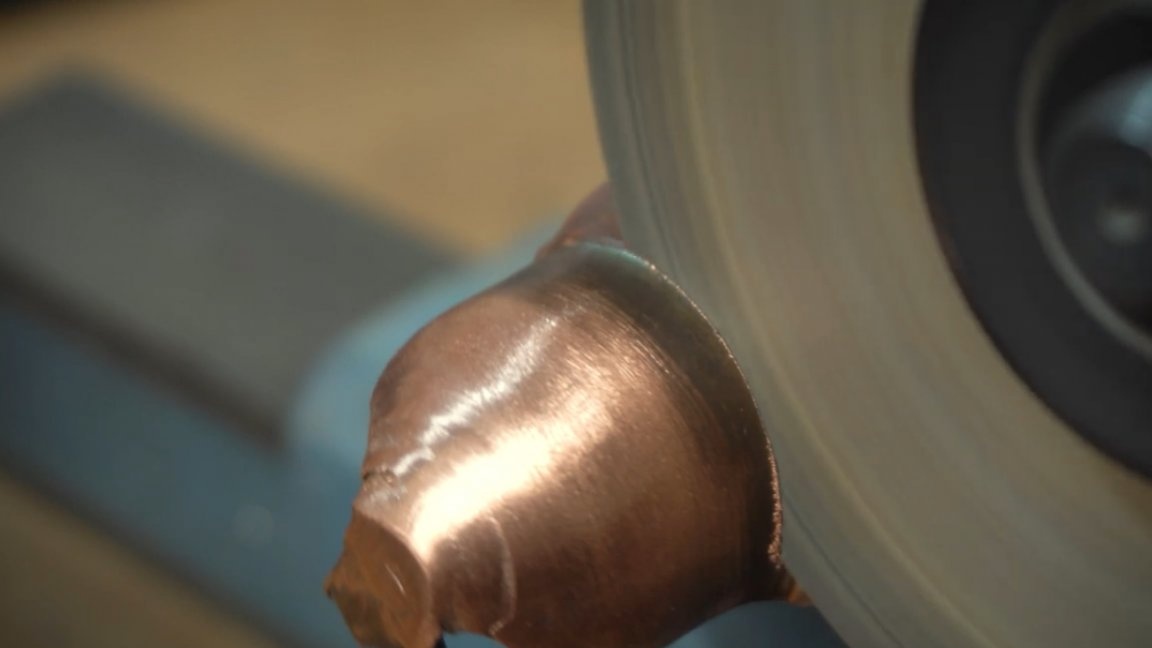
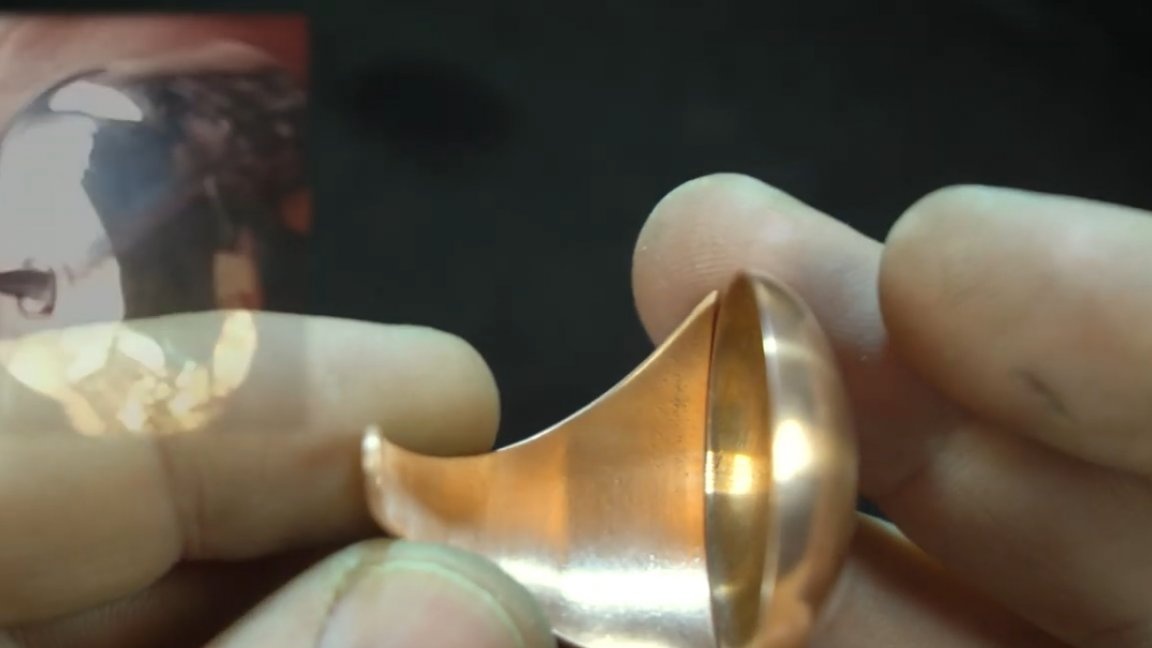
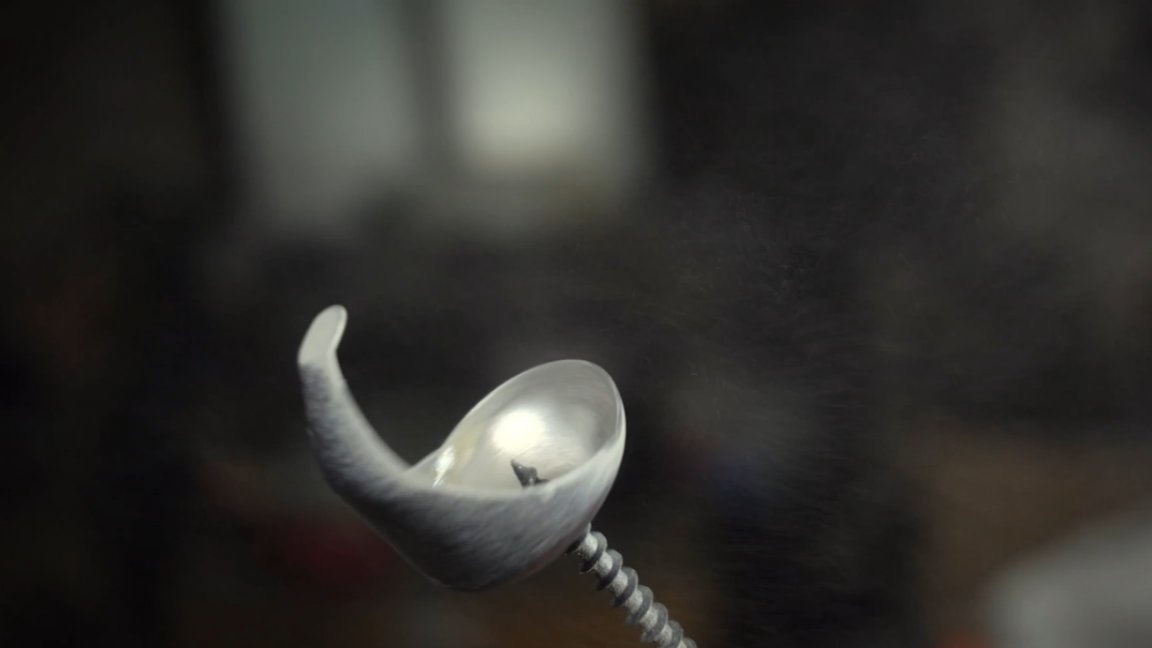
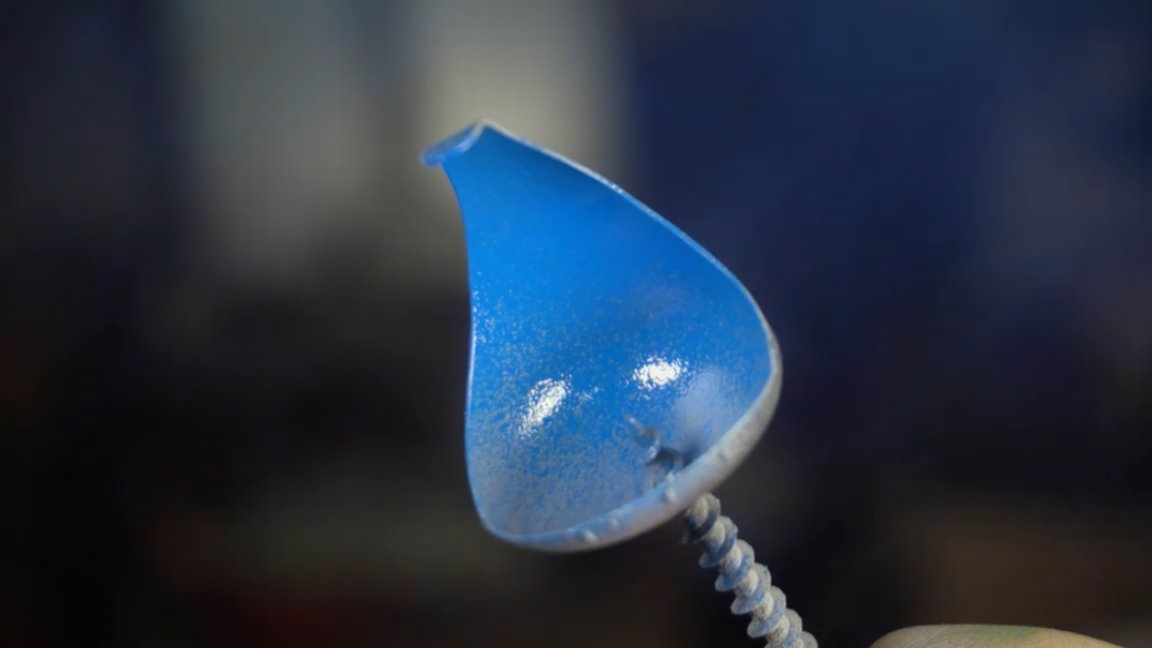
Then we proceed to the manufacture of the next part and this is our guard. We will do it by rotational drawing. The master had long wanted to try this method, and it is precisely in this project that he will try it. If anyone is interested, then on the World Wide Web you can easily find a huge number of videos on this topic. In this way, they pull out the dishes and do much more.
The first step is to prepare a rigid rotating base, to which a sheet of metal then rolls.

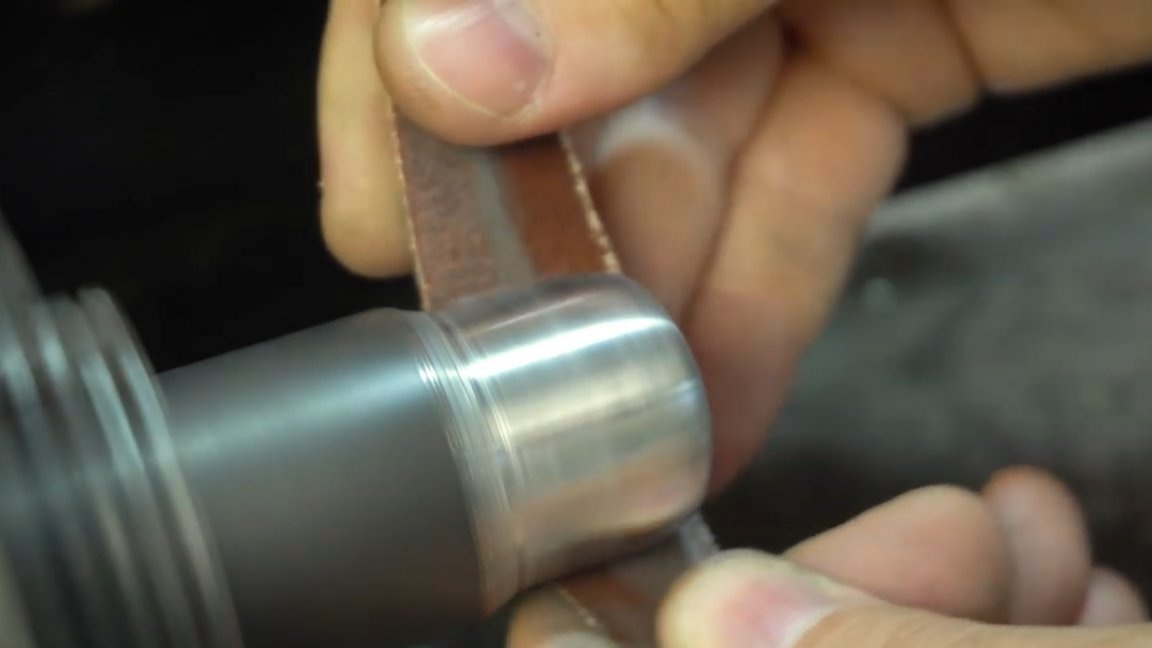


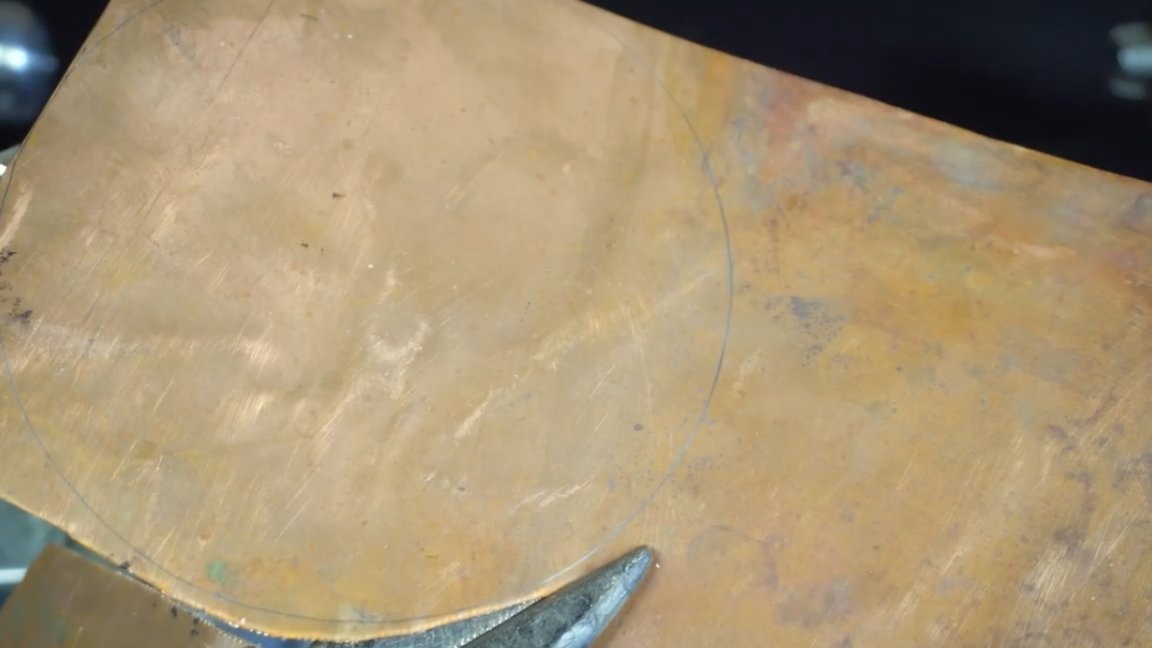
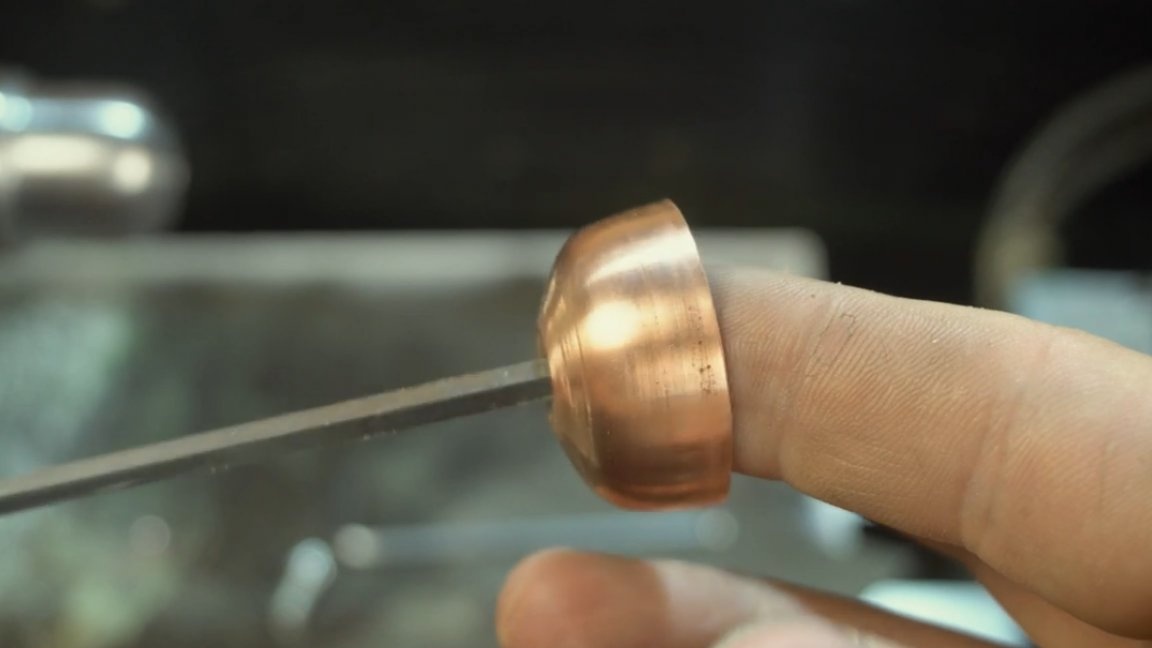
The first thing that turned up by the author’s arm was a sheet of copper 0.5 mm thick, and all the first experiments were carried out on it.

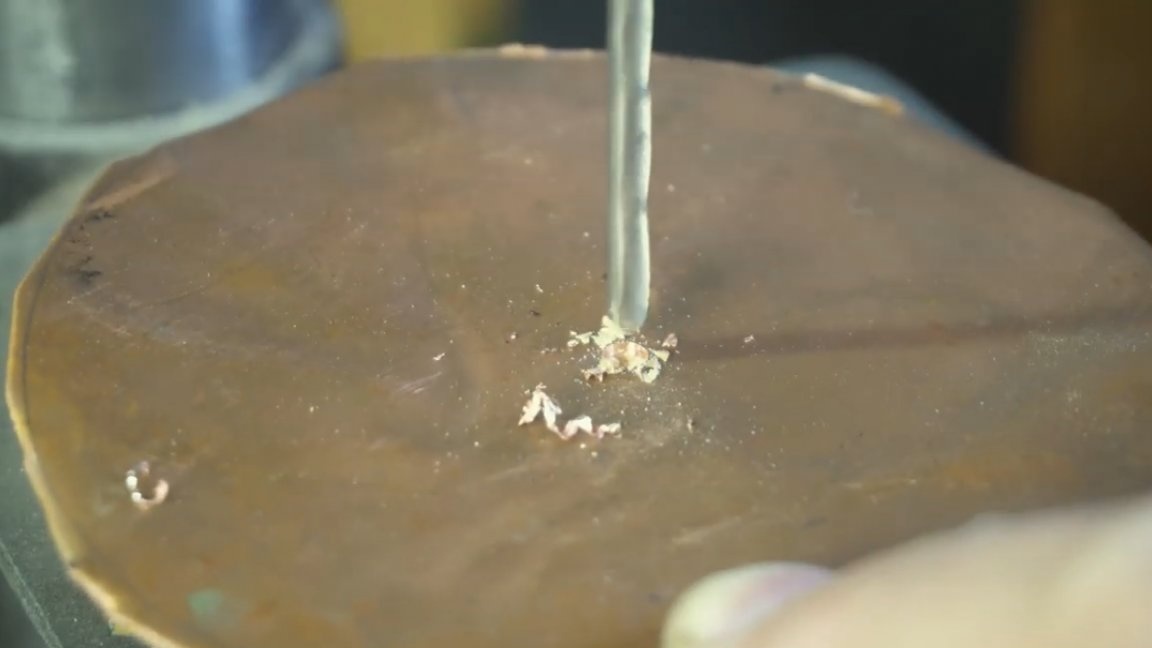
On this sheet of metal we draw a circle, cut it out and drill a hole strictly in the center.
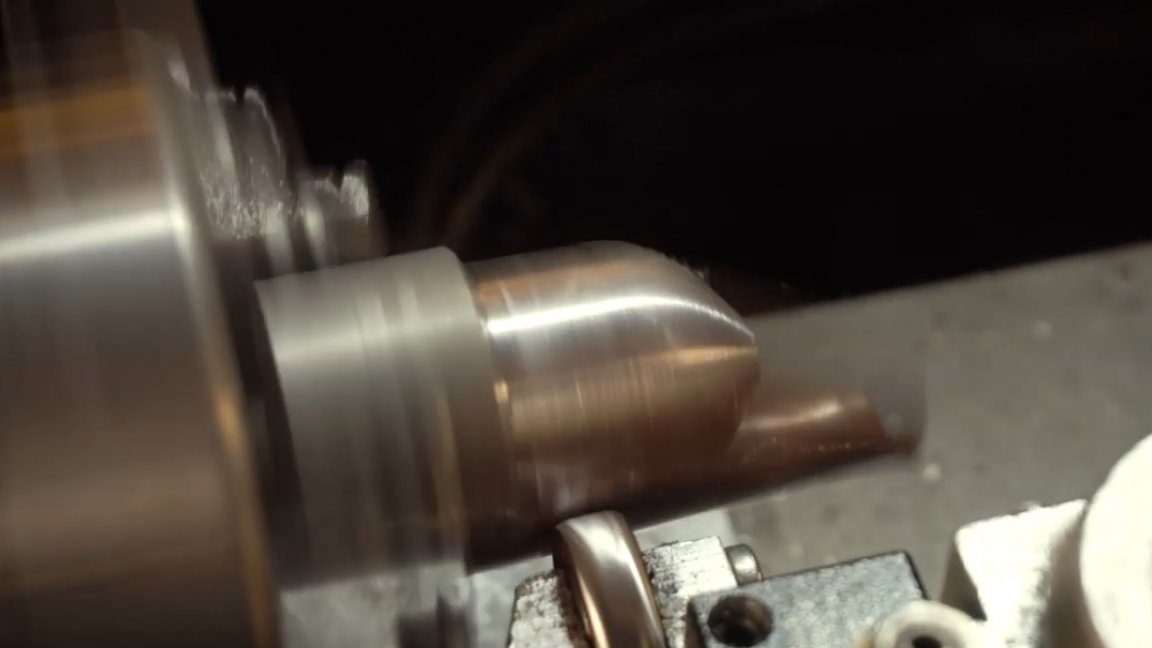
Typically, in the manufacture of such products, they are fixed by a rotating center. A rotating roller was made in haste, but it was not so easy to roll it, and there were reasons for it. Firstly, due to the fact that it is rigidly fixed in the tool holder, there is practically no feedback, that is, in fact, you do not feel the workpiece. In addition to everything, it should be of a larger diameter in order to work well both with its front part and the side without touching anything.
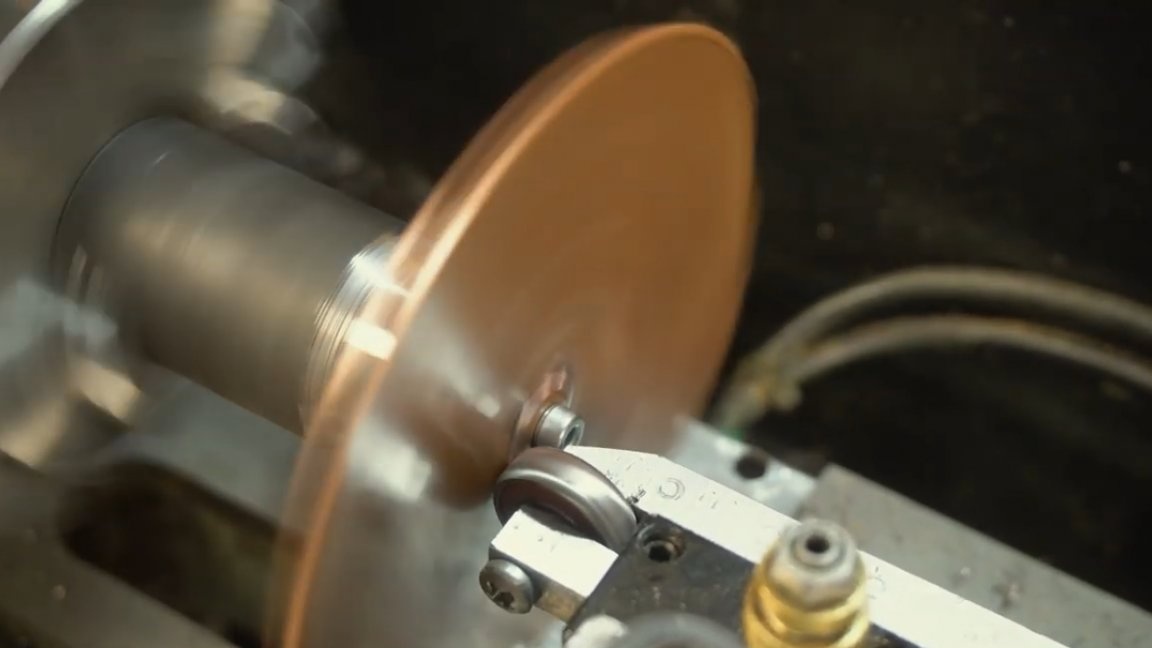
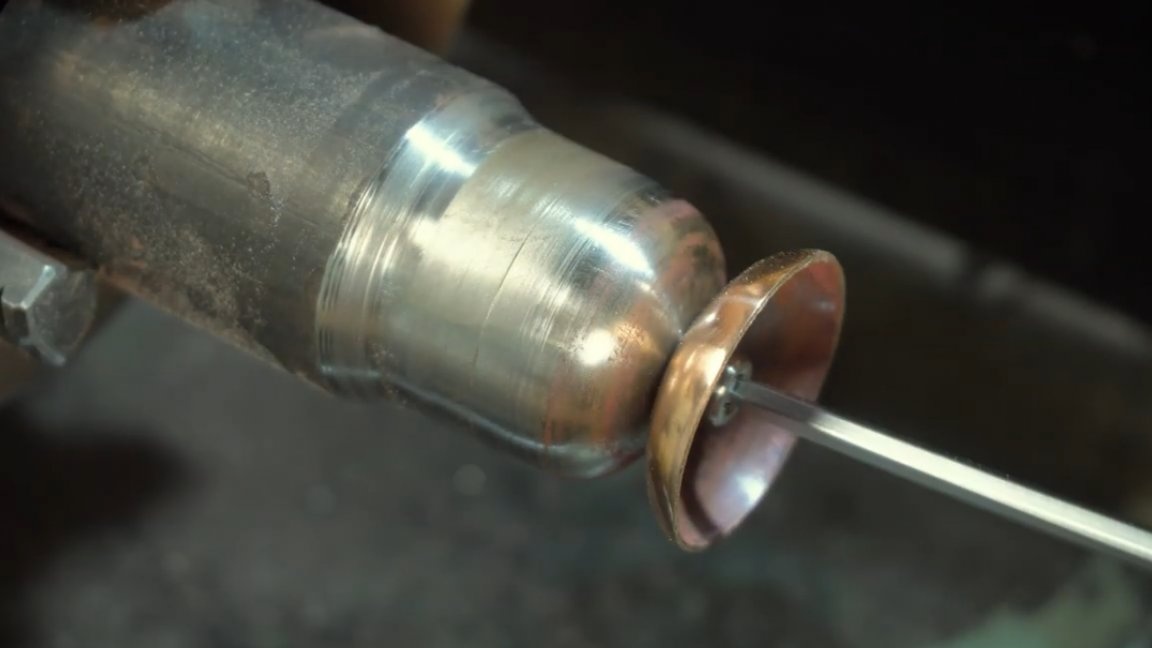
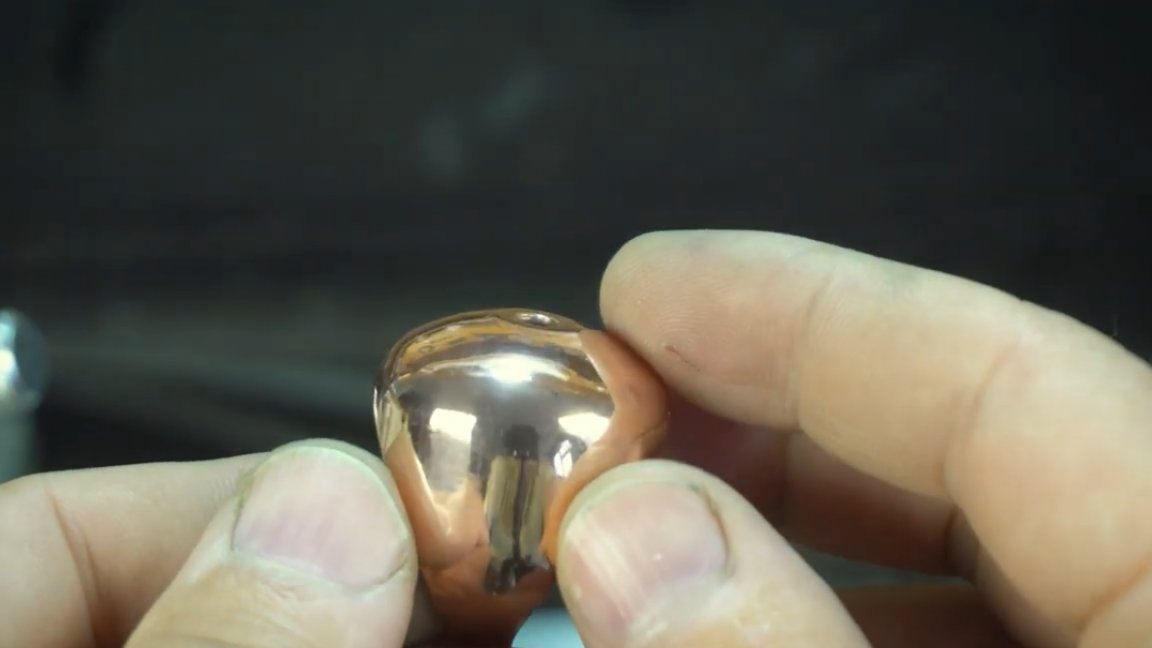
In addition, the thickness of this sheet is only 0.5 mm, and this is too small. The author rolled out only from the center, and, accordingly, the sheet simply broke in the middle. But despite this, nevertheless, something happened, and this cannot but rejoice.
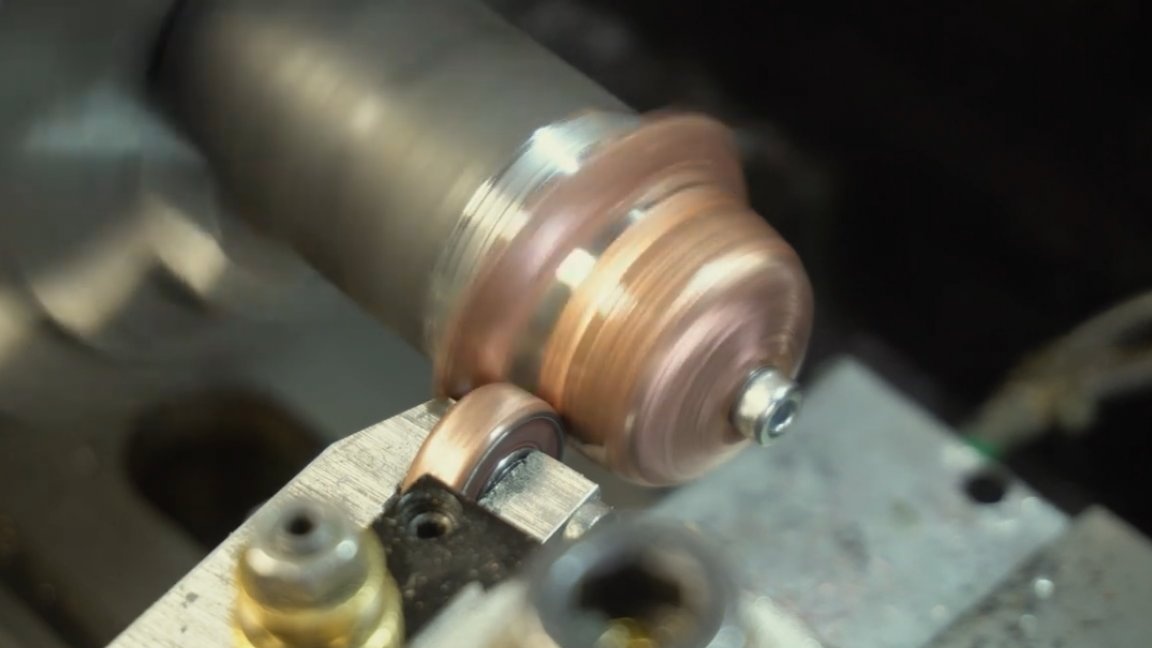
But the master decided to continue experimenting and a sheet thicker was ordered specifically for this project - 1mm. This has greatly expanded the field for creativity.

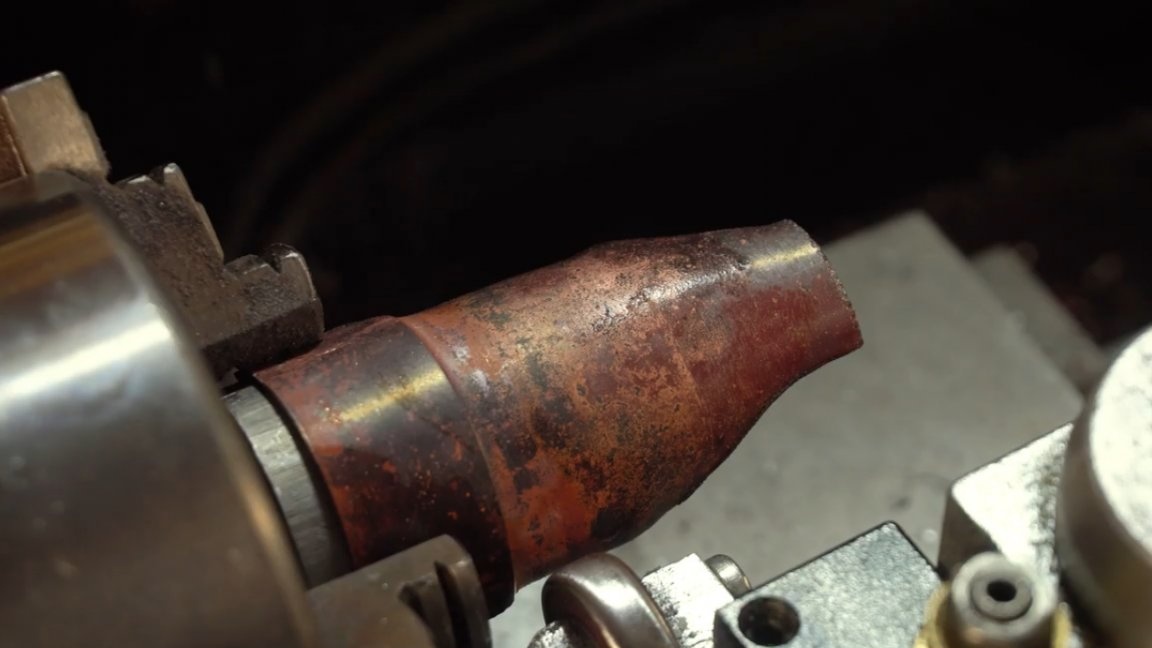
The plans were to make the part without soldering, that is, to pull it out as a whole. But after numerous trials of various methods, the result was the same.
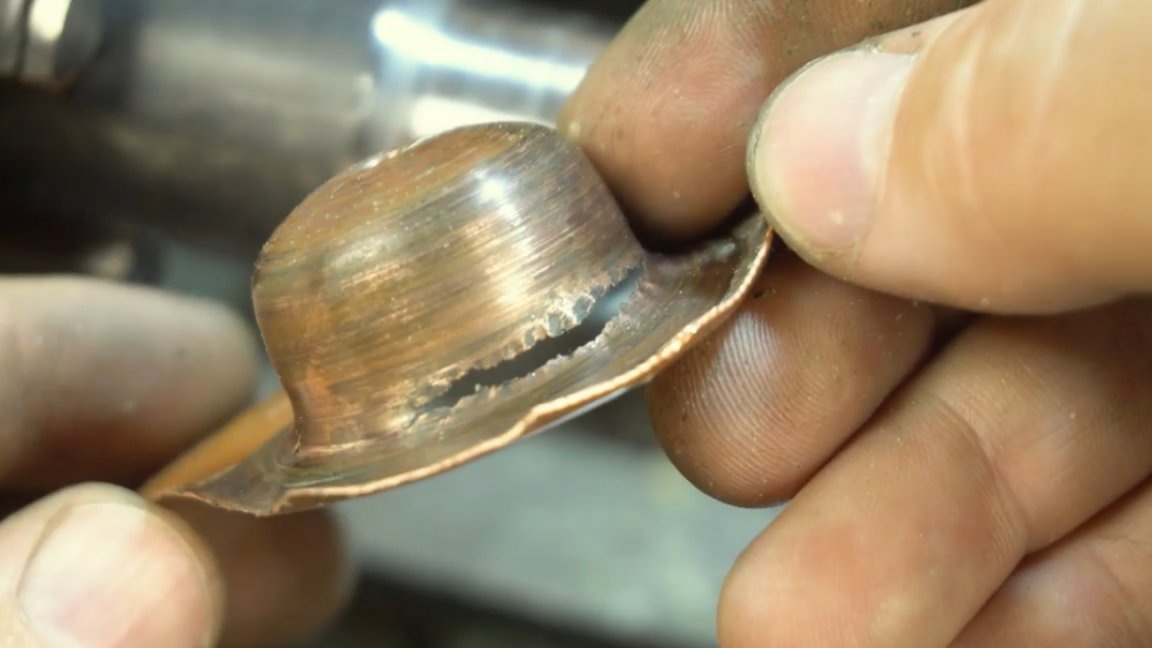
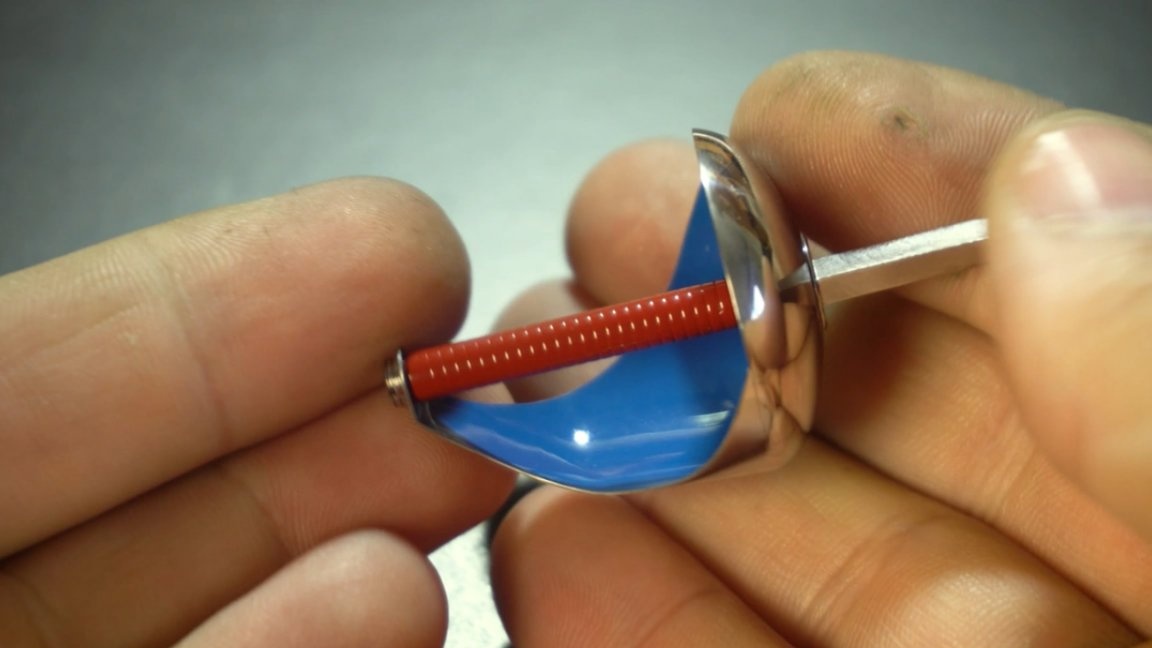
As a result, the author decided not to torture himself nor metal, and to make a guard from two parts. Due to the fact that the metal is now thicker, all defects from the hood, although they should not be, are now easily removed by grinding.
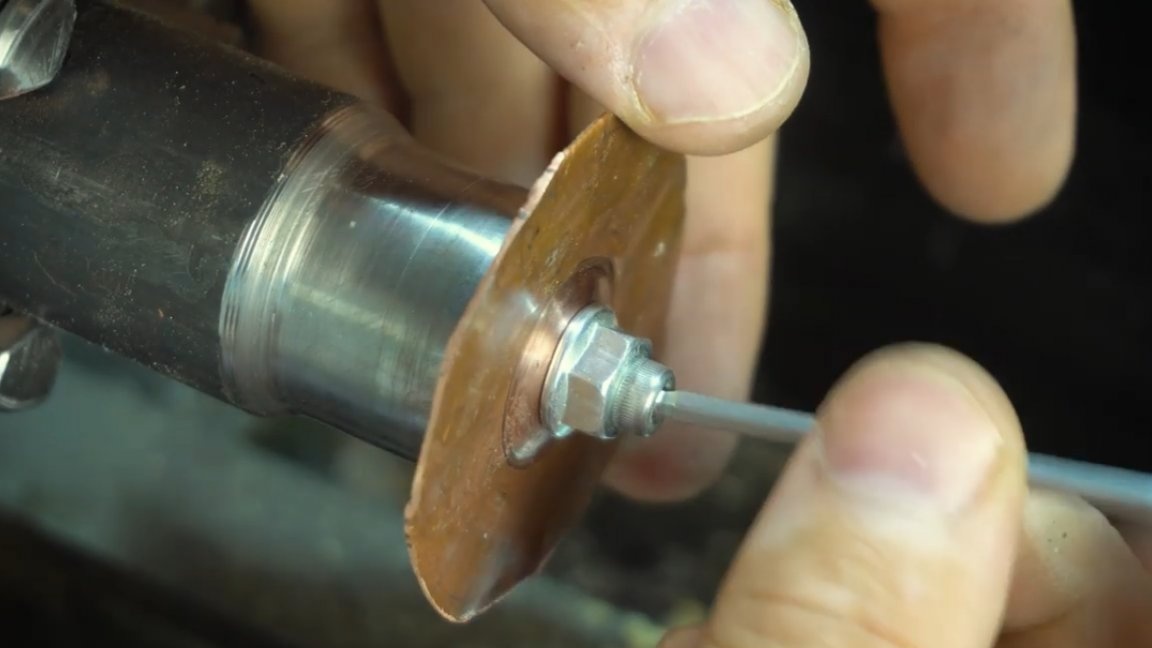
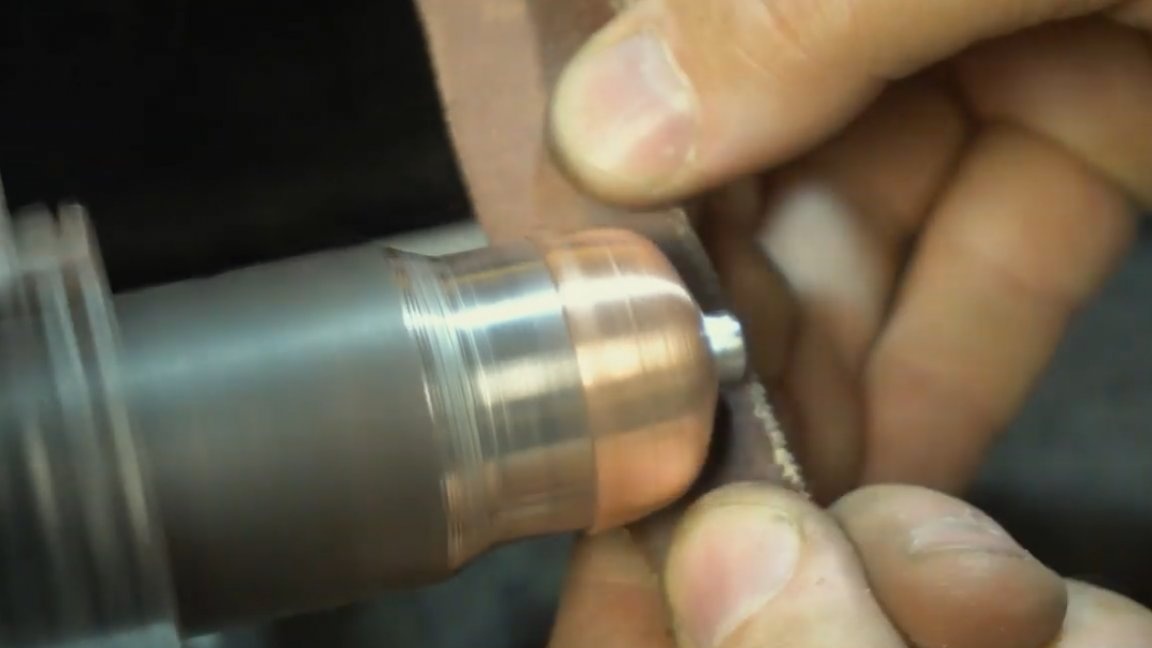
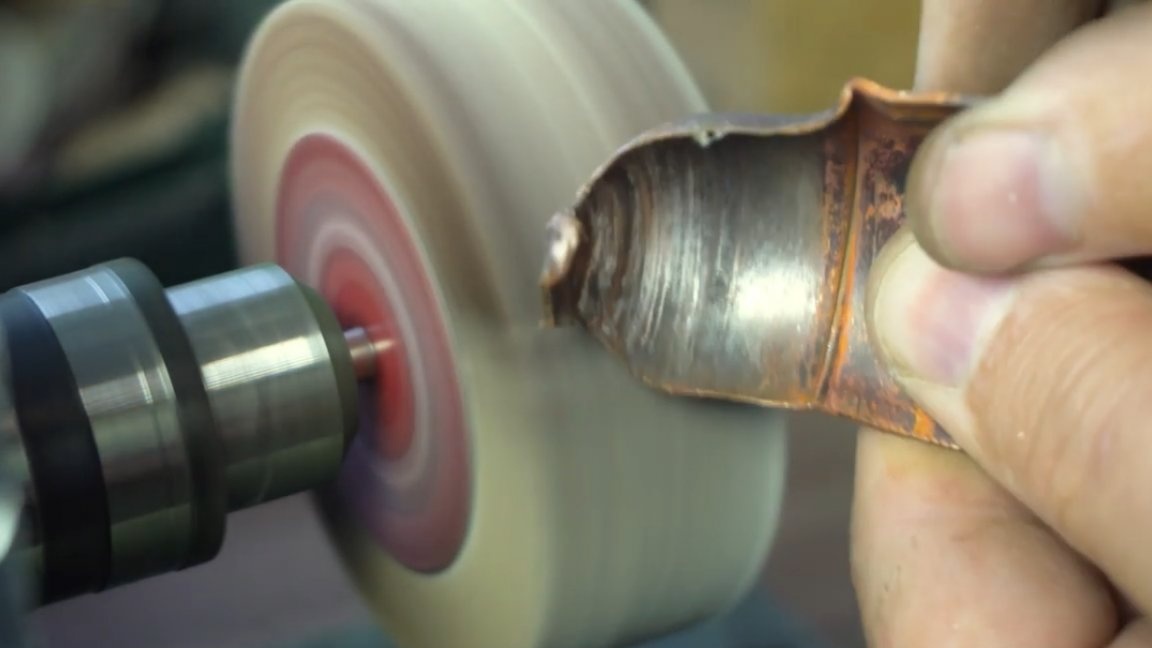
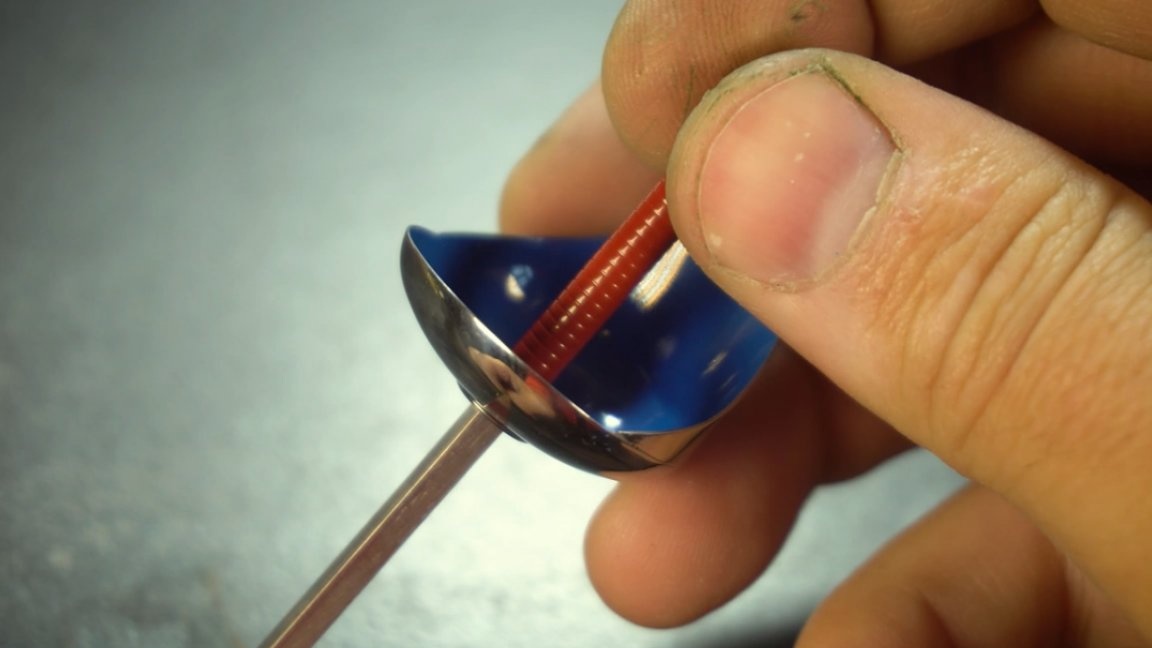
After you have finished with external processing, you need to deploy the product and process its inner side.
The reverse side of the guard has a different angle and it is necessary to make a new base for it.

Under 2 cams of three we put a strip of the same thickness as our workpiece, and grind the template. Thus, we will practically get rid of the beating when we fix our workpiece.
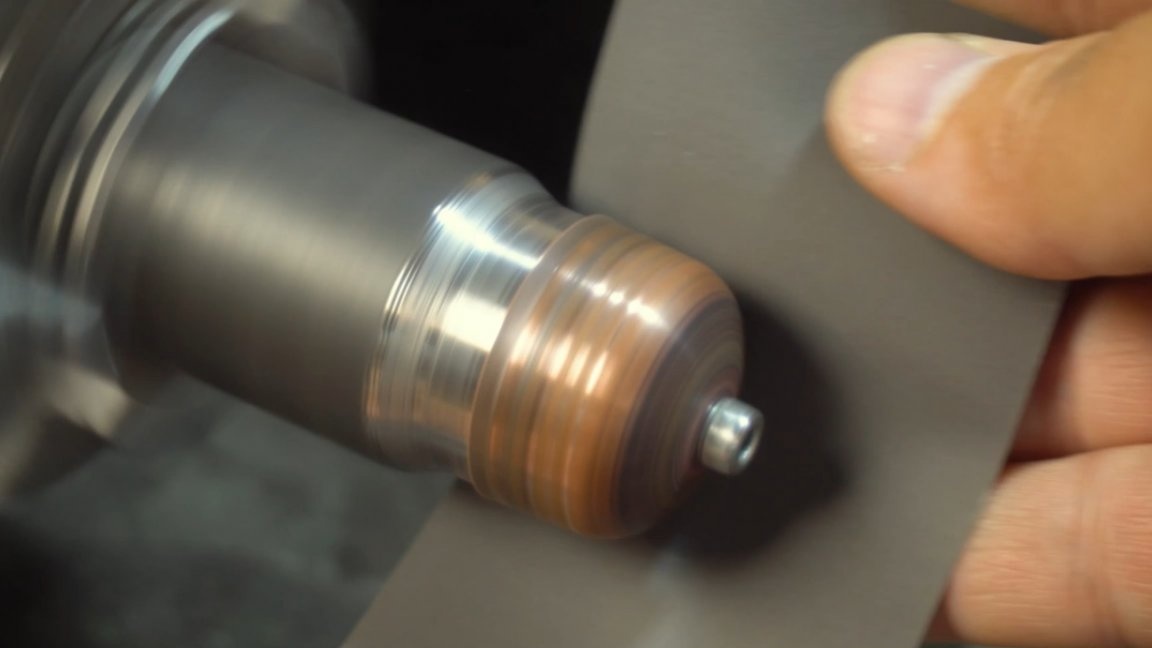
We roll it from the cartridge and periodically warm it up.
Warming up in this case is necessary in order to get rid of the voltage in the metal.
Due to the fact that we have a good supply of metal, we get a good result at the output.
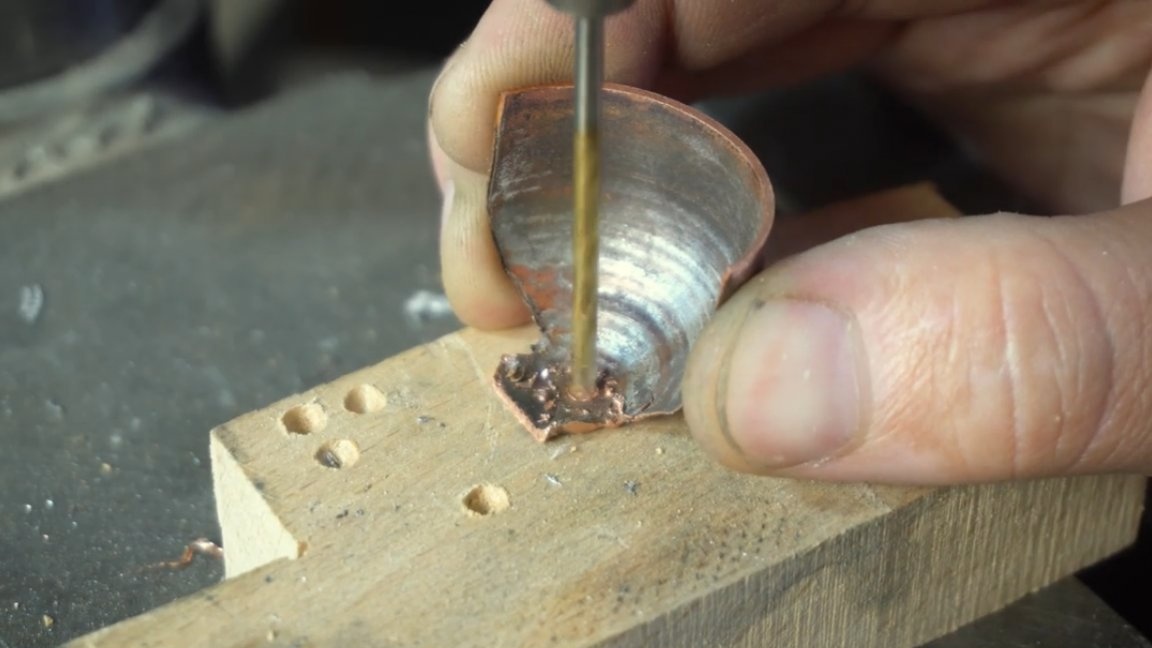
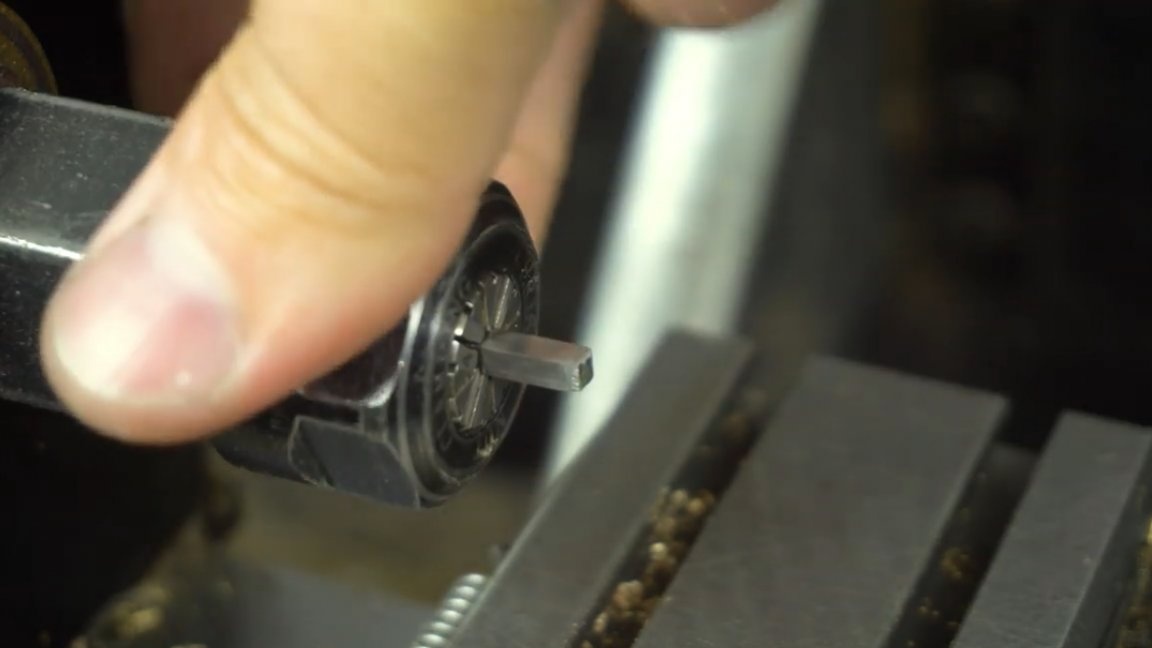
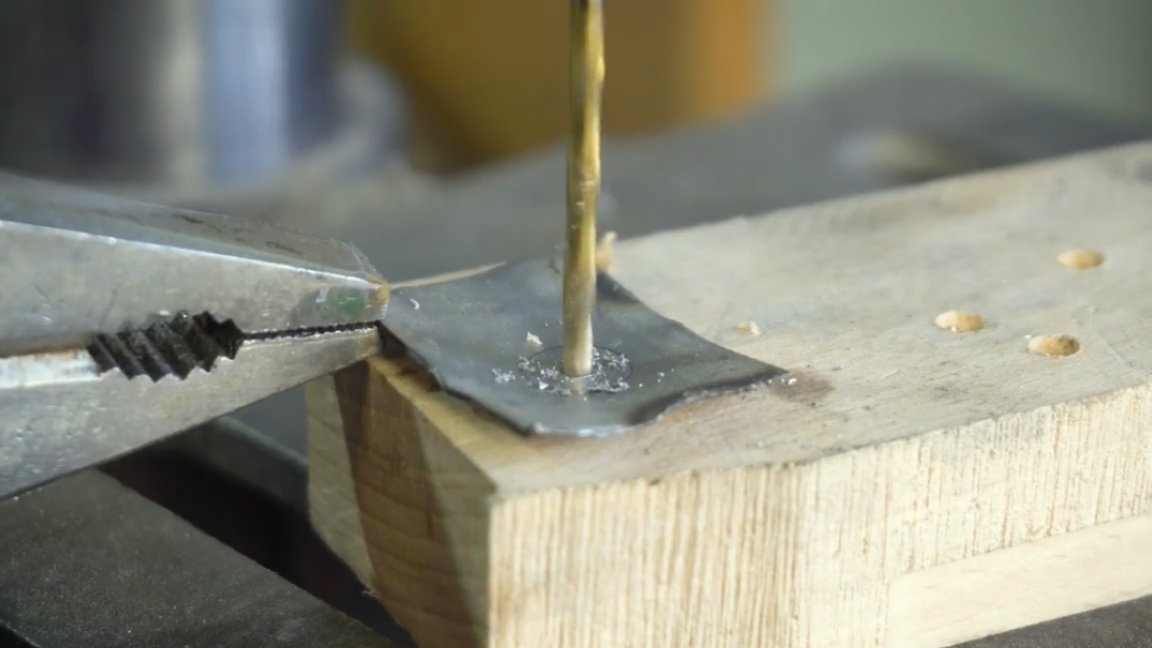
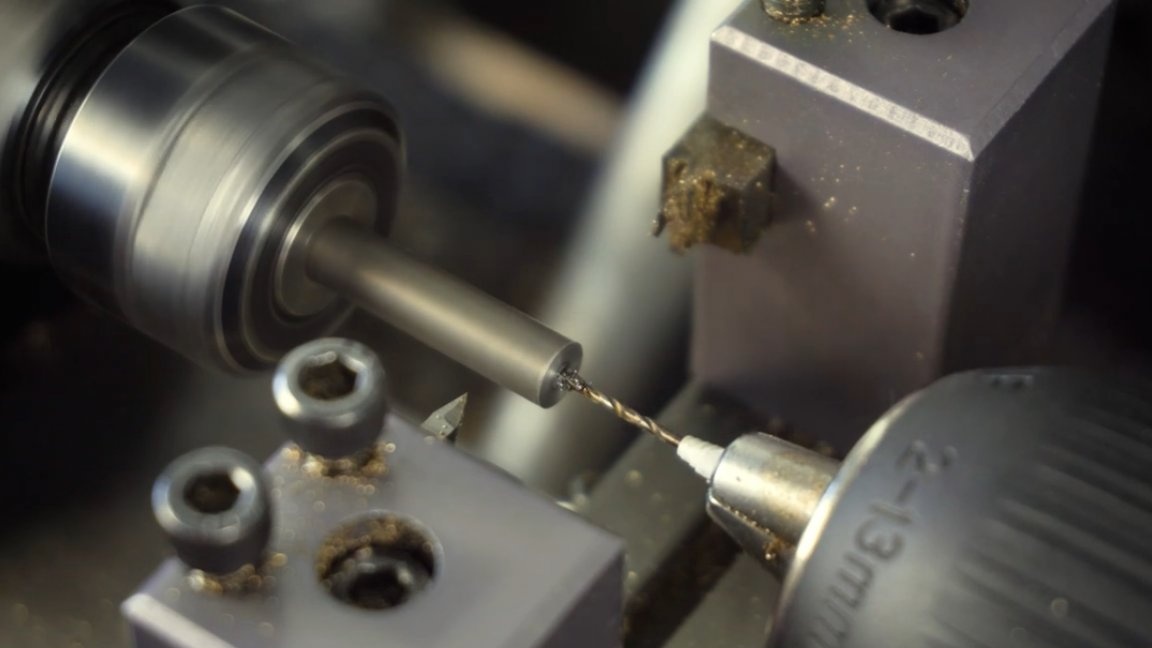
From the narrow side, strictly in the center, it is necessary to drill a hole, the back of the handle will be attached here.
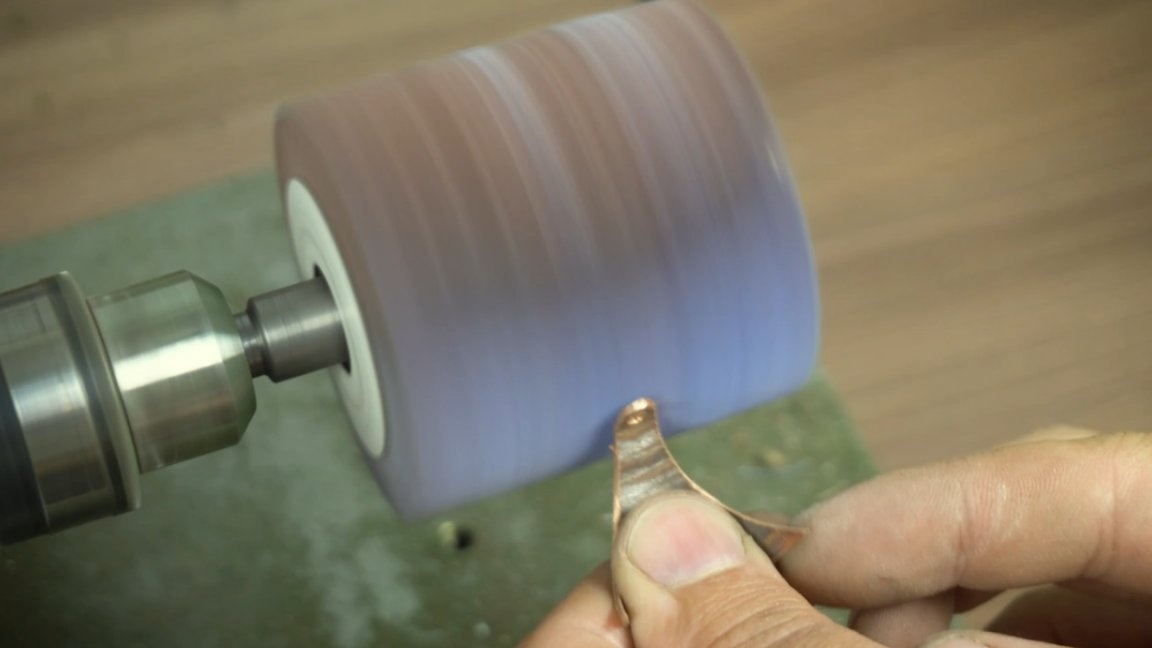
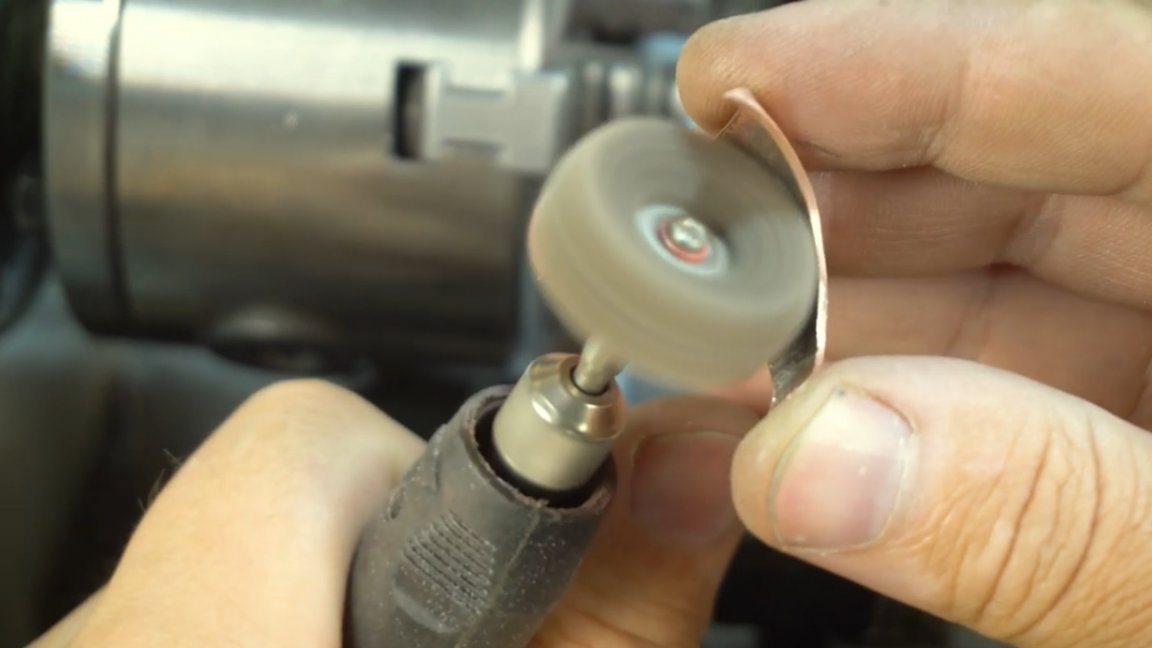
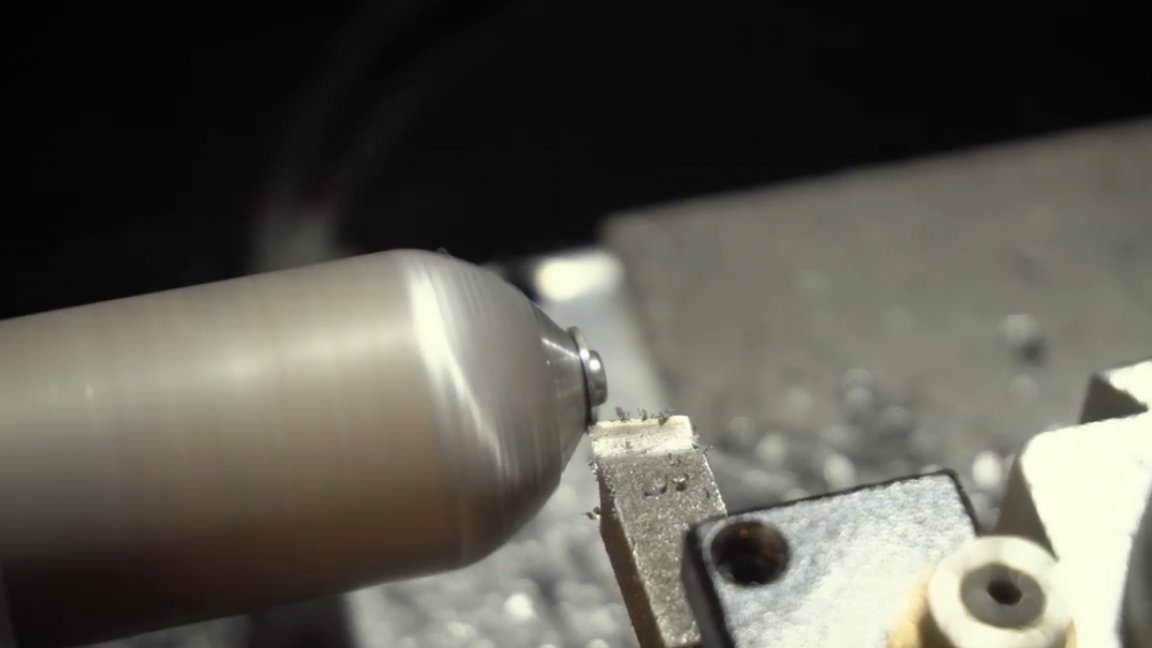
Then we determine approximately how much more metal needs to be removed and grind. A spindle grinder is perfect for this task.

For finishing polishing from the outside, the author used a lamella disk, and for the internal one.
The city is mainly sold exclusively from well-known brands and costs about two thousand rubles. The same, but much cheaper, possible.
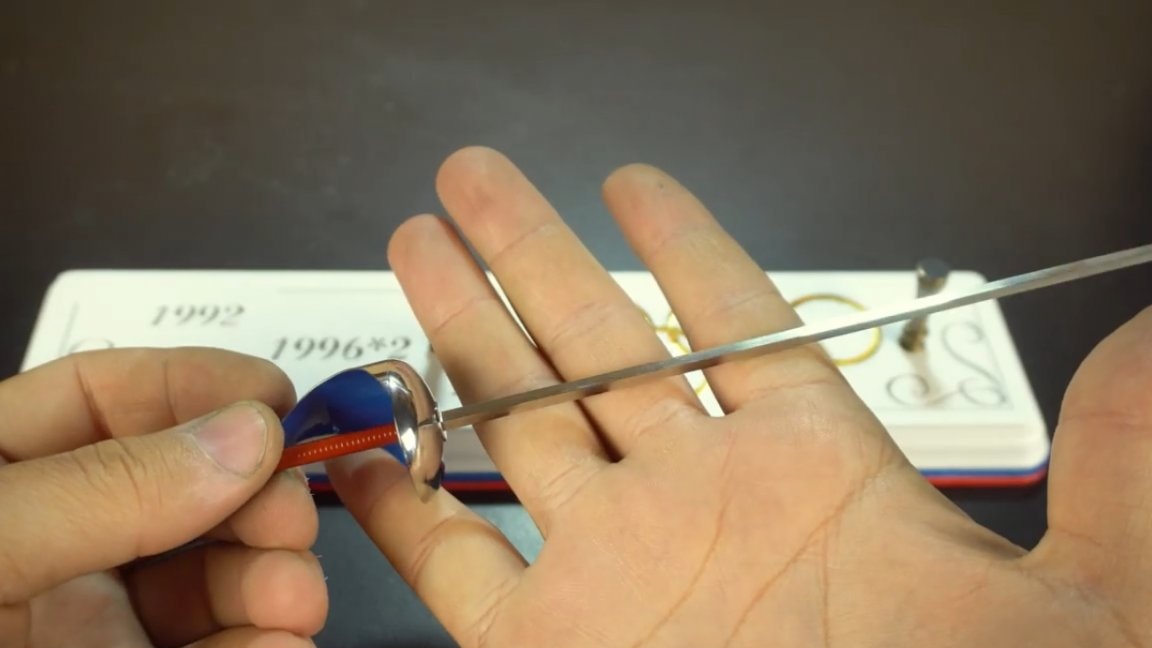
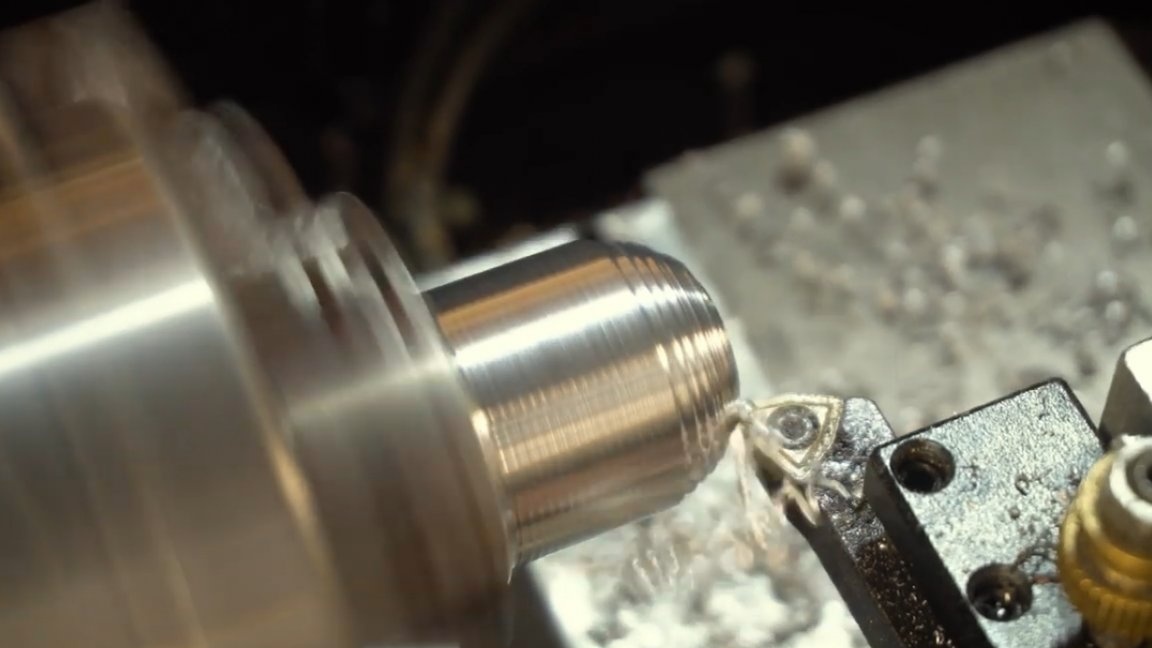
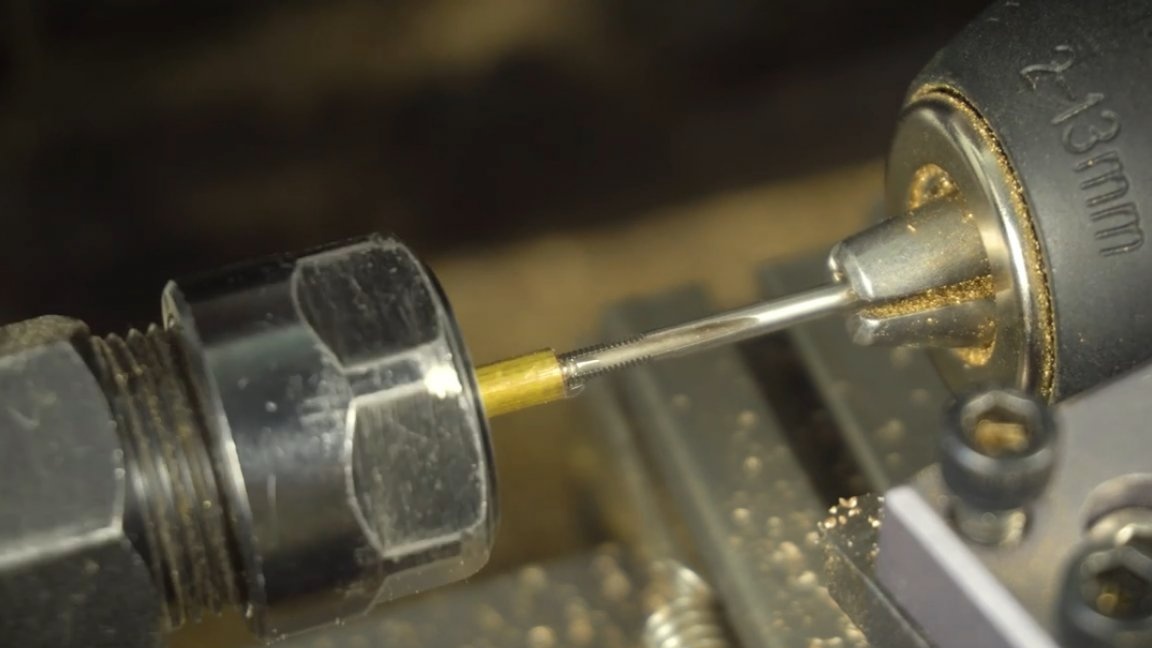
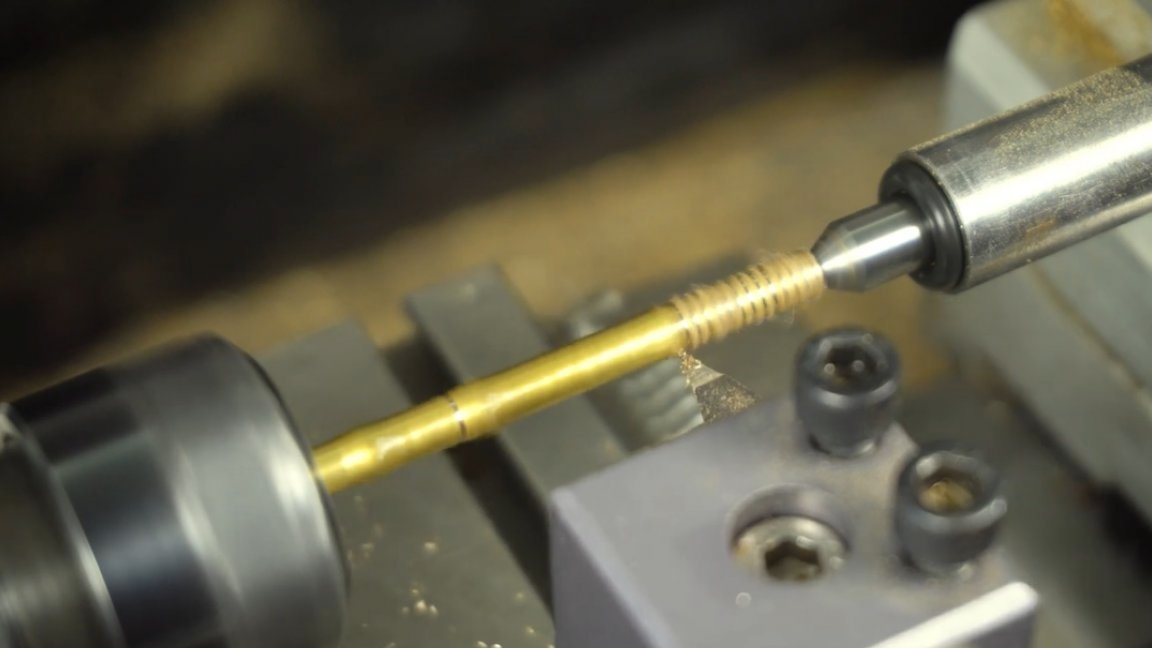
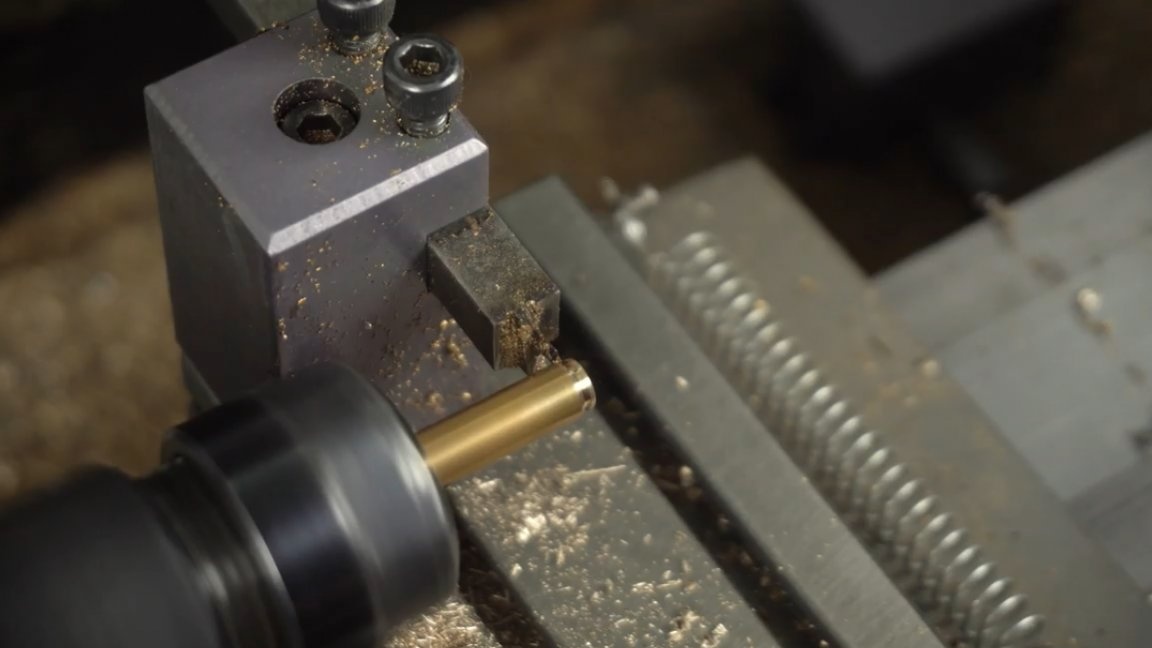
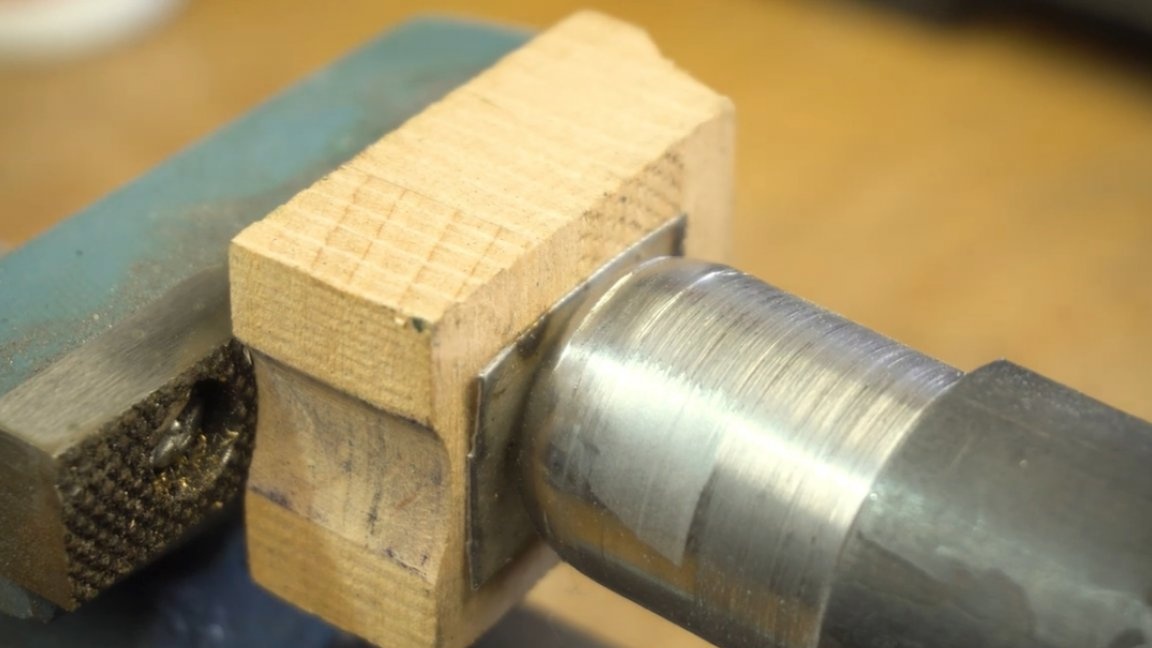
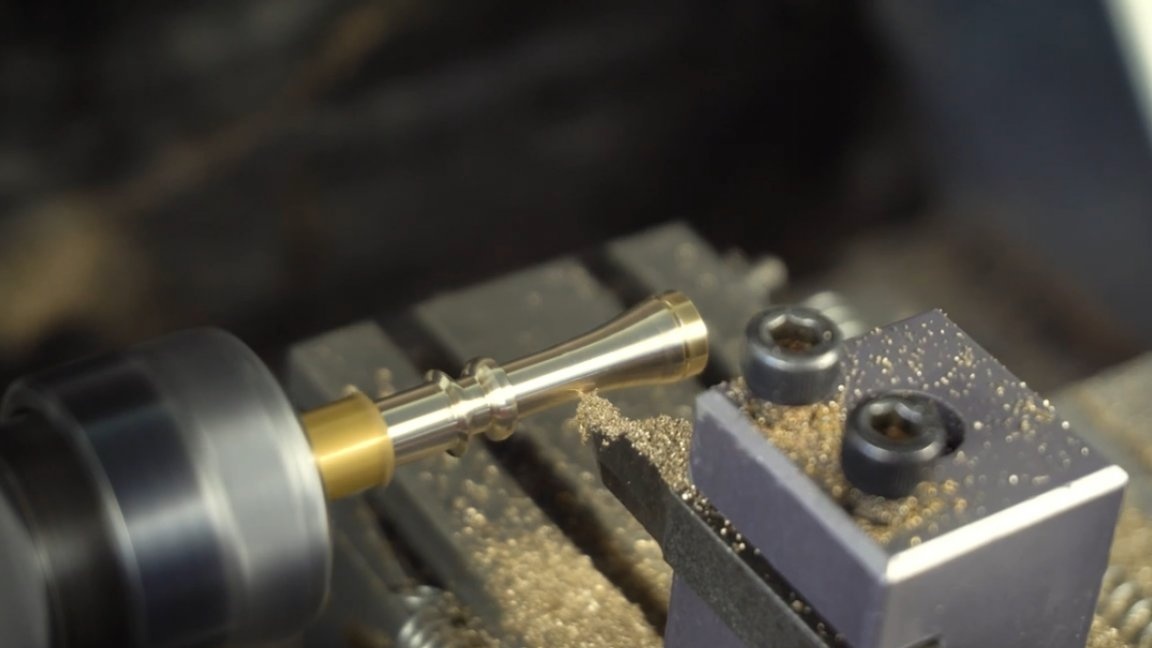
Next stage - the manufacture of the handle. To do this, we take a brass bar with a diameter of 4 mm and cut the threads from both sides.
And to give beauty we will make decorative notches, we will not polish, because in the end we will paint the part anyway.
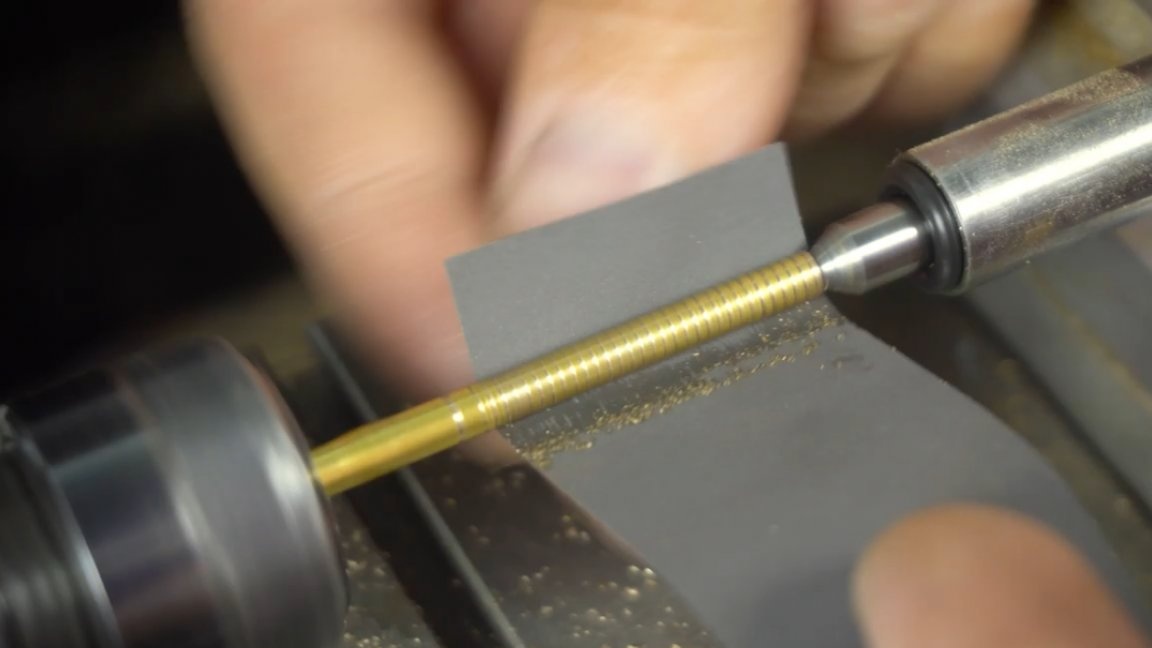

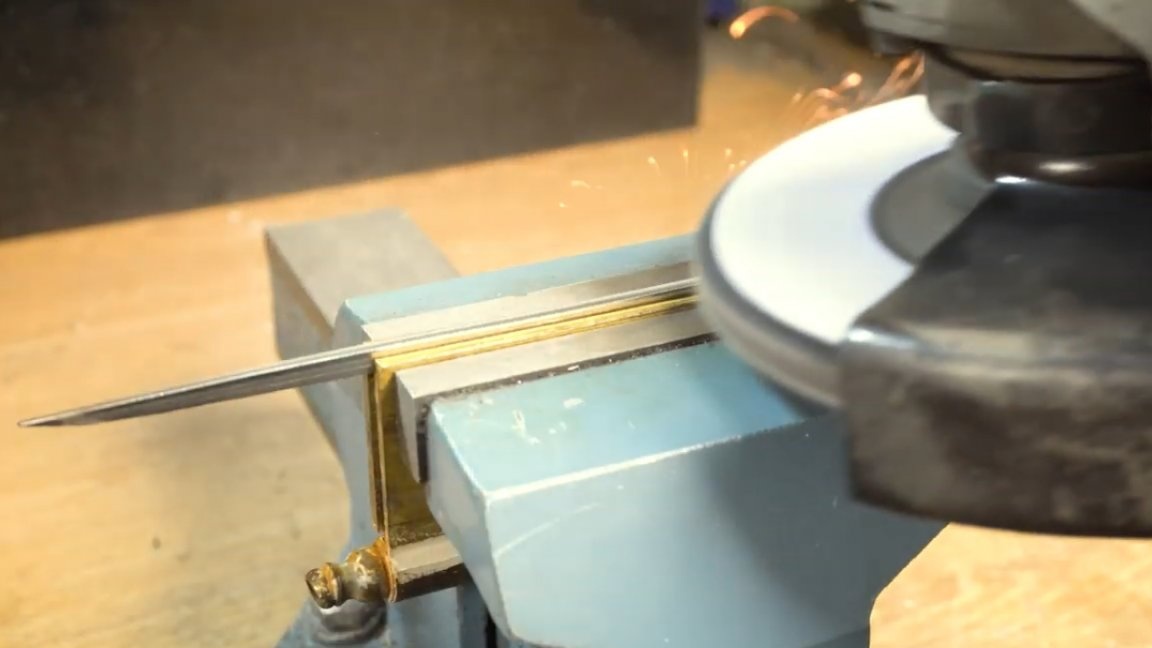
Since the knife is on the side where the handle does not pass hardening, we will cut a thread here that will be screwed into the handle.

In the car shop, the author acquired a vinyl self-adhesive film, it very cool repeats all the bends if you heat it with a building hairdryer. Glue the film on the outside of the guard, and we will paint the inside of it. Before painting, it is necessary to putty the seam and do not forget about the primer.
The author chose a blue color.
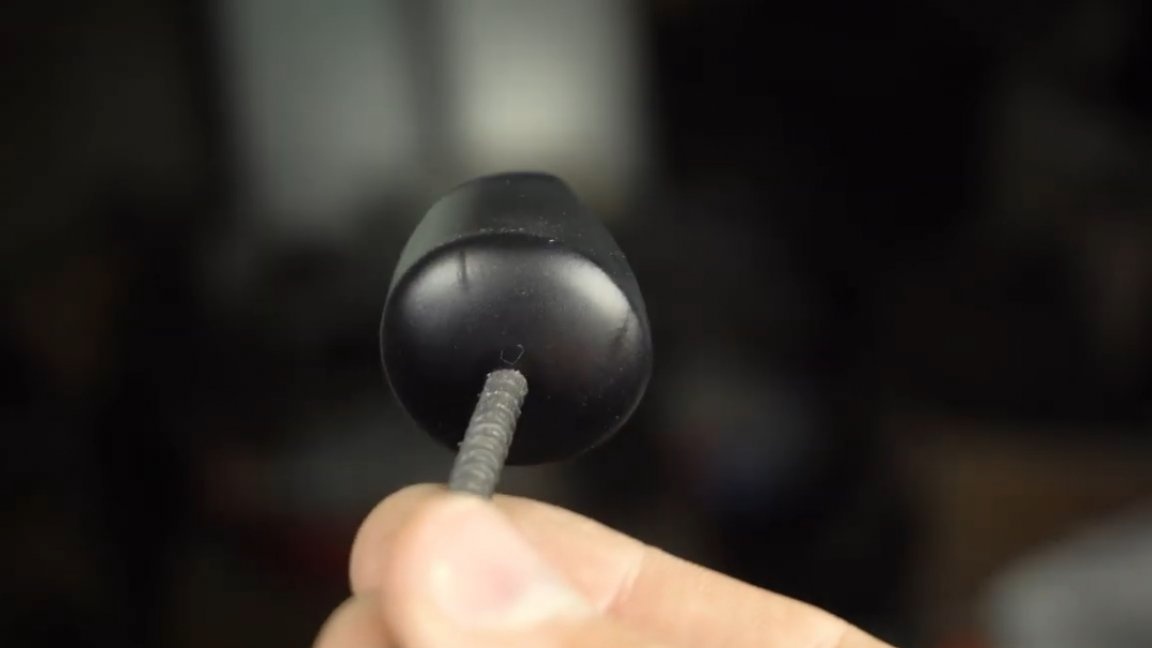
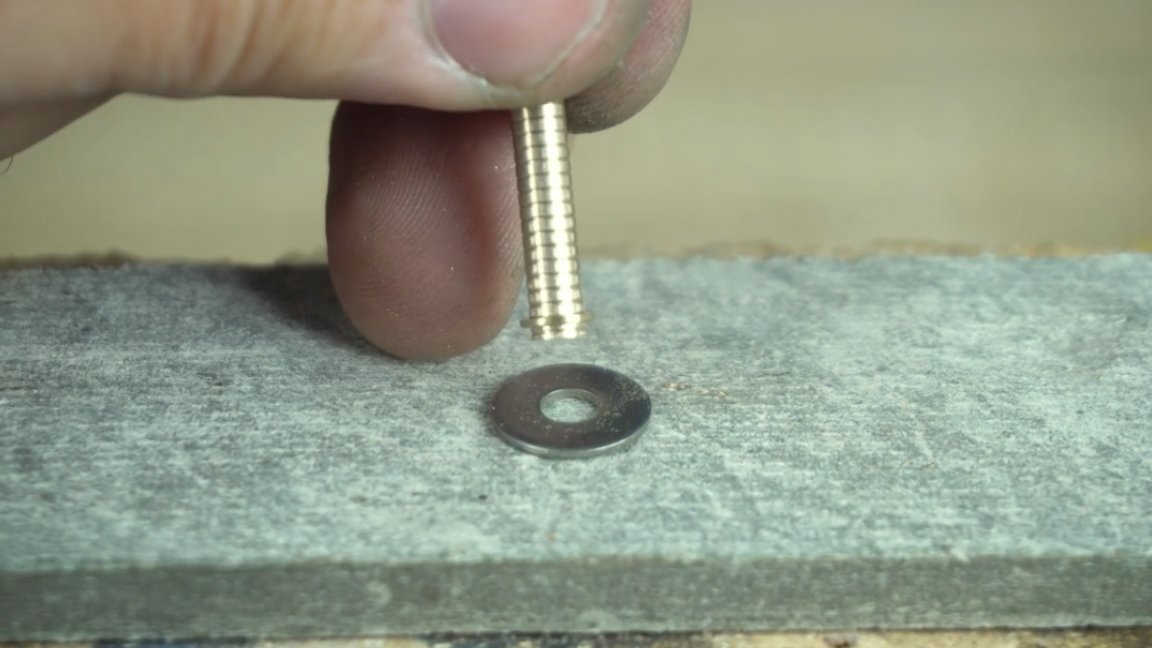
Also for the handle it is necessary to make a small retaining ring, it will press the guard from the inside.
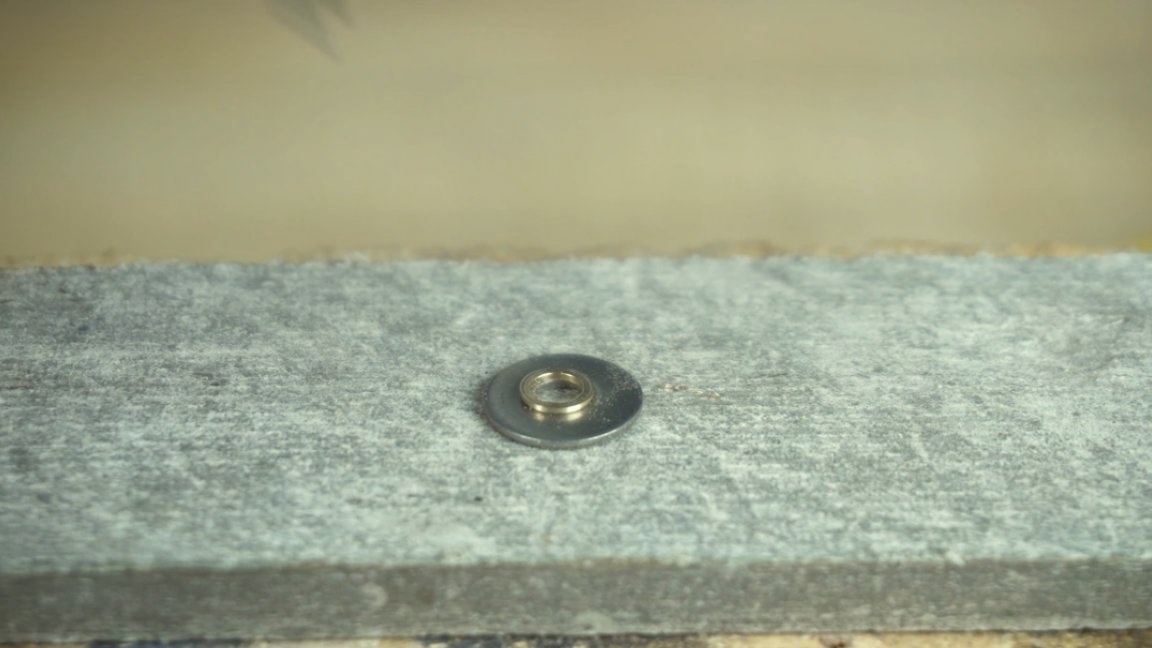
We fix it not flush, but approximately retreating by 1-1.5 mm so that the handle passes through the guard, but at the same time does not go beyond it.
The spacer and the handle itself are painted in red. The author used car paint, and in order for it to completely dry, he warmed it at a low temperature for 4 hours in the oven.

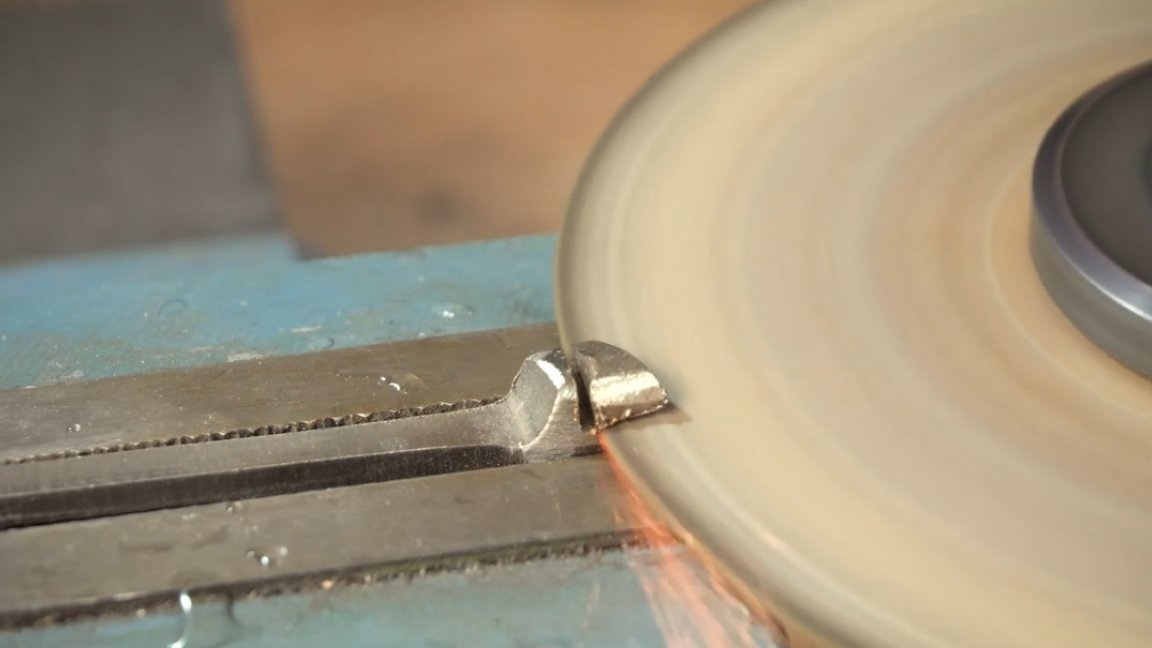
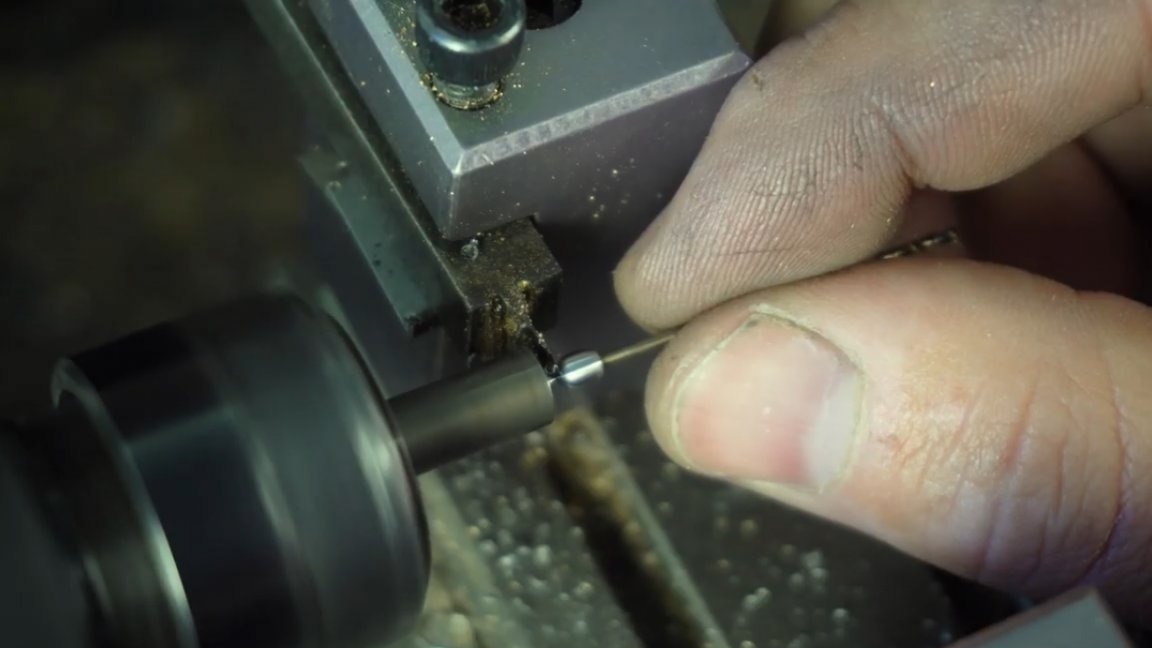
From the side of the blade, in the same way we make a persistent washer from a piece of stainless steel. Next, we drill a hole of the same diameter in it as the thread on the blade.
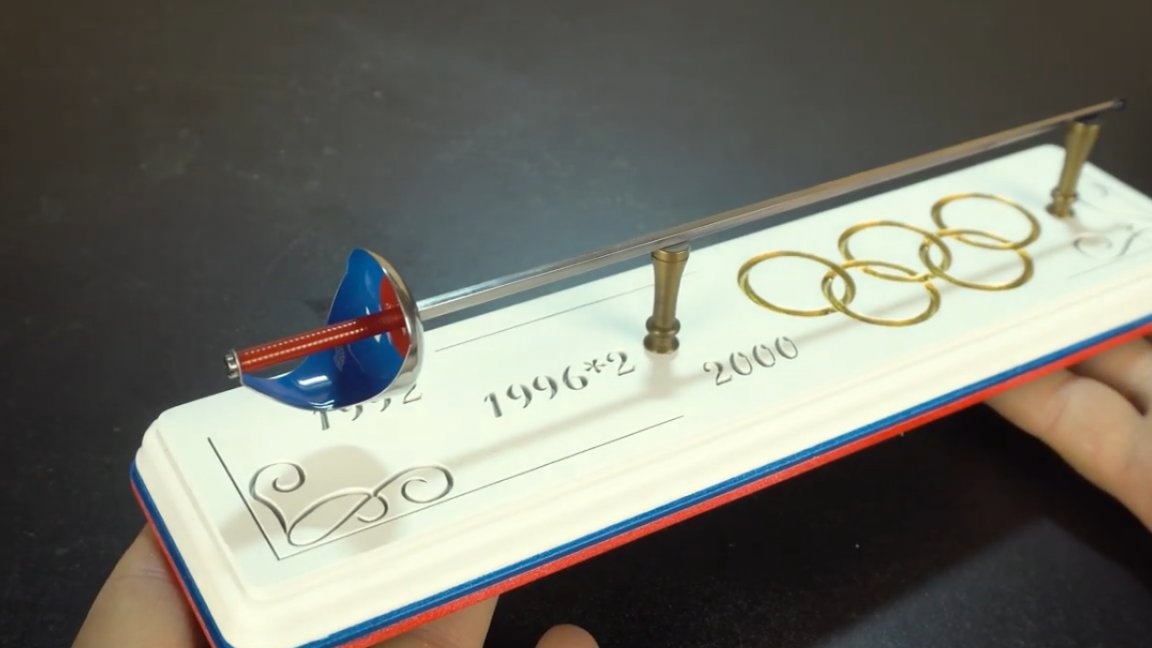
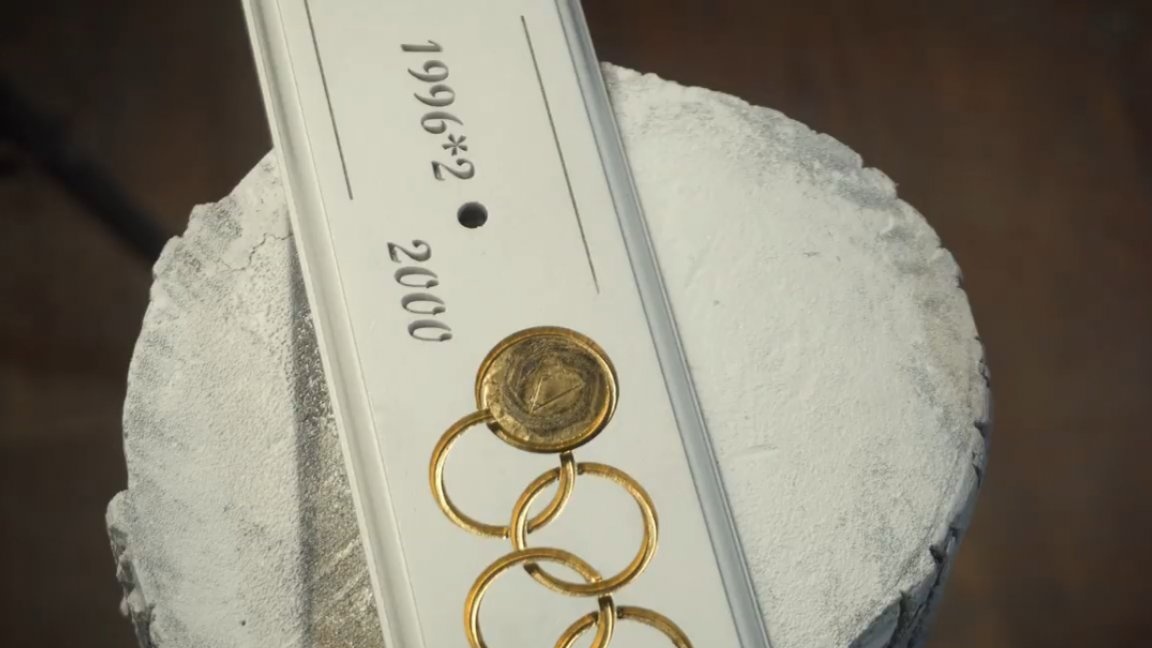
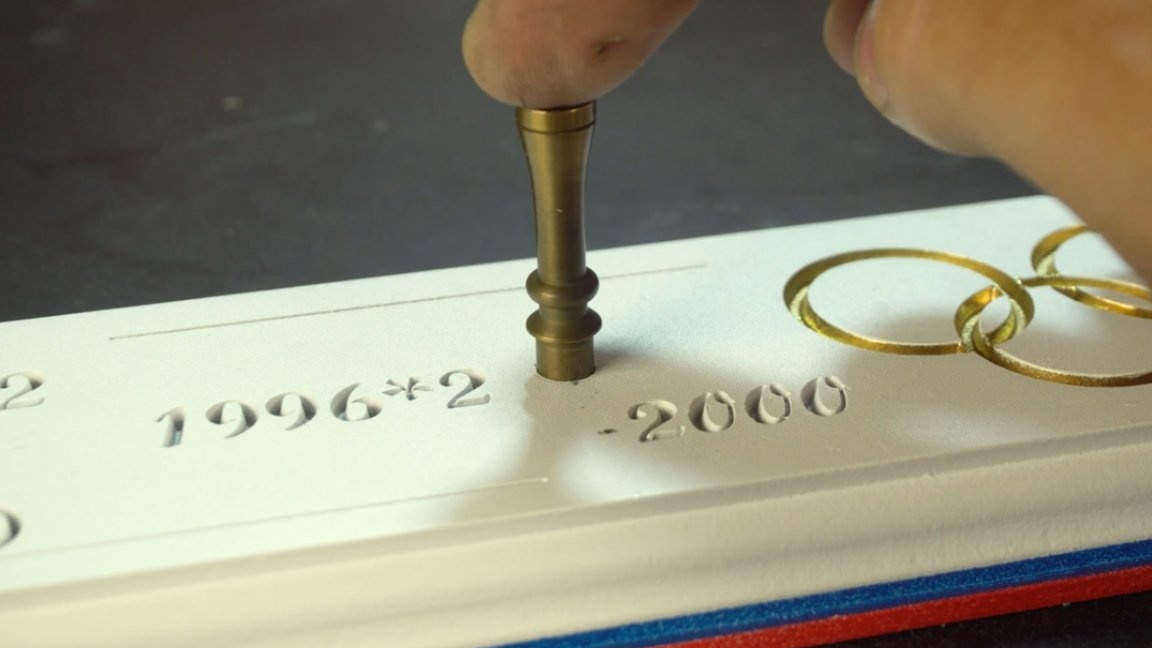
Since this thing is souvenir and small in size, we will make a stand for it so that it can be placed on the table.
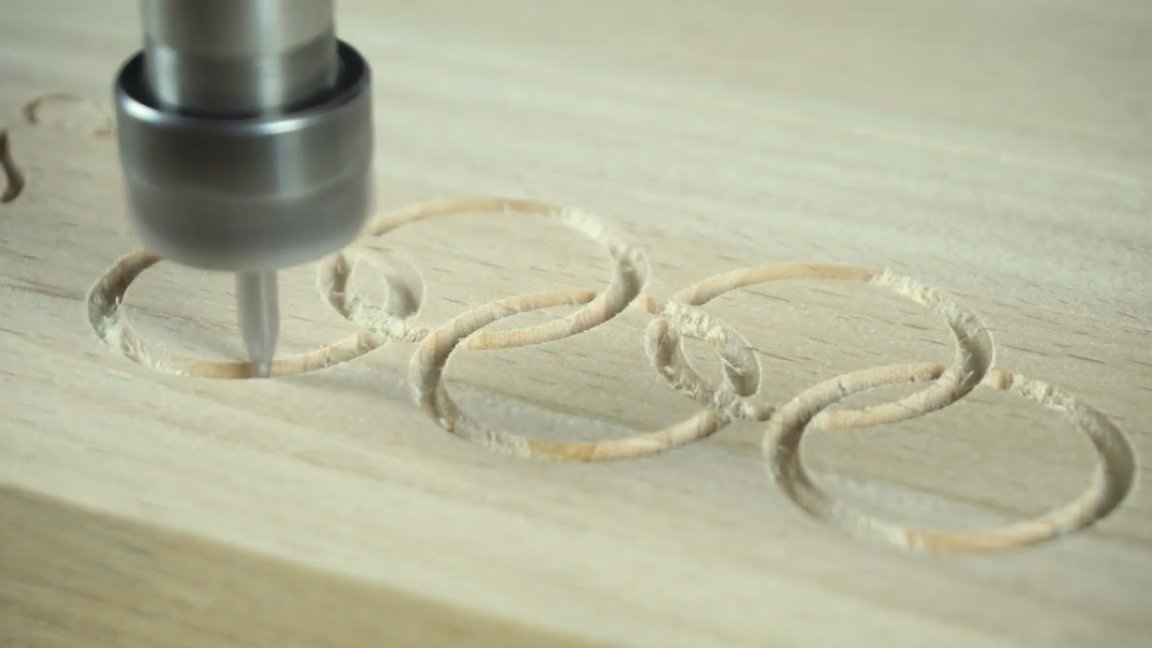

It was also decided to make a small engraving with the Olympic rings and memorable dates.
The base of the stand is made of beech. In principle, one could just cover the product with oil, it would also look good, but we are not looking for easy ways.
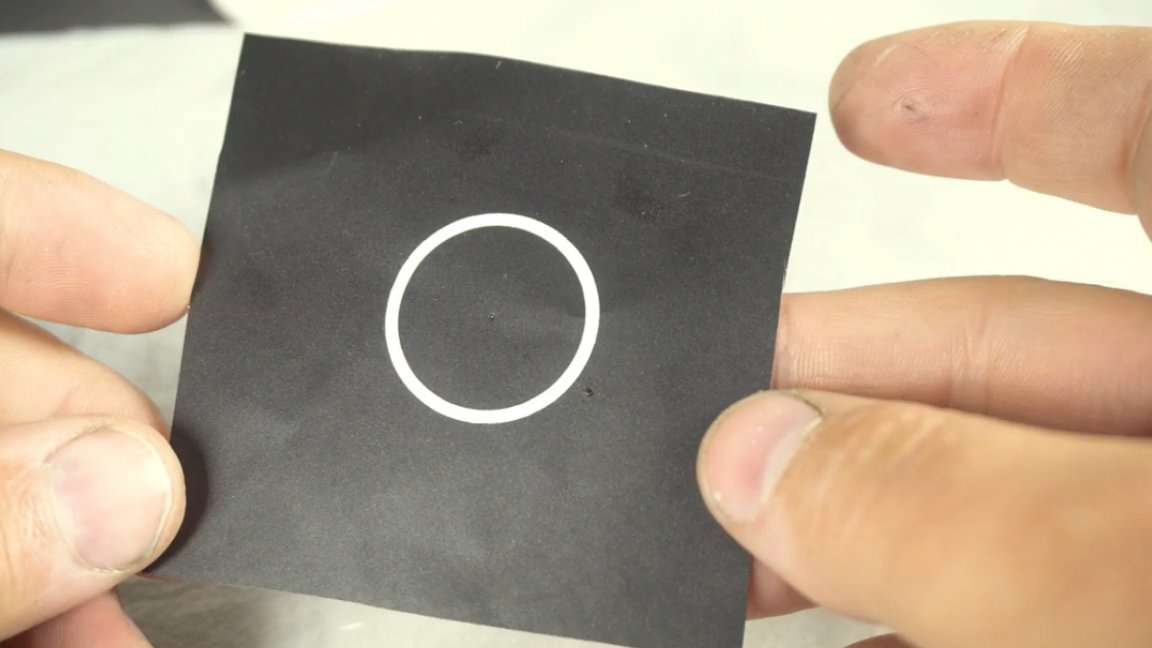
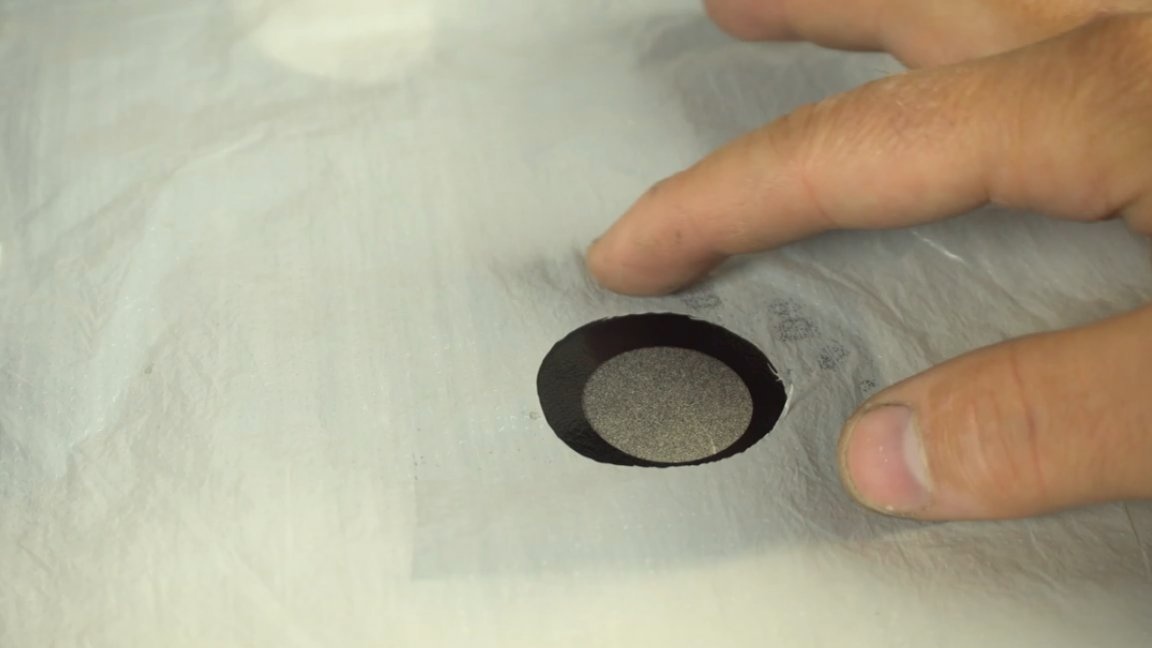
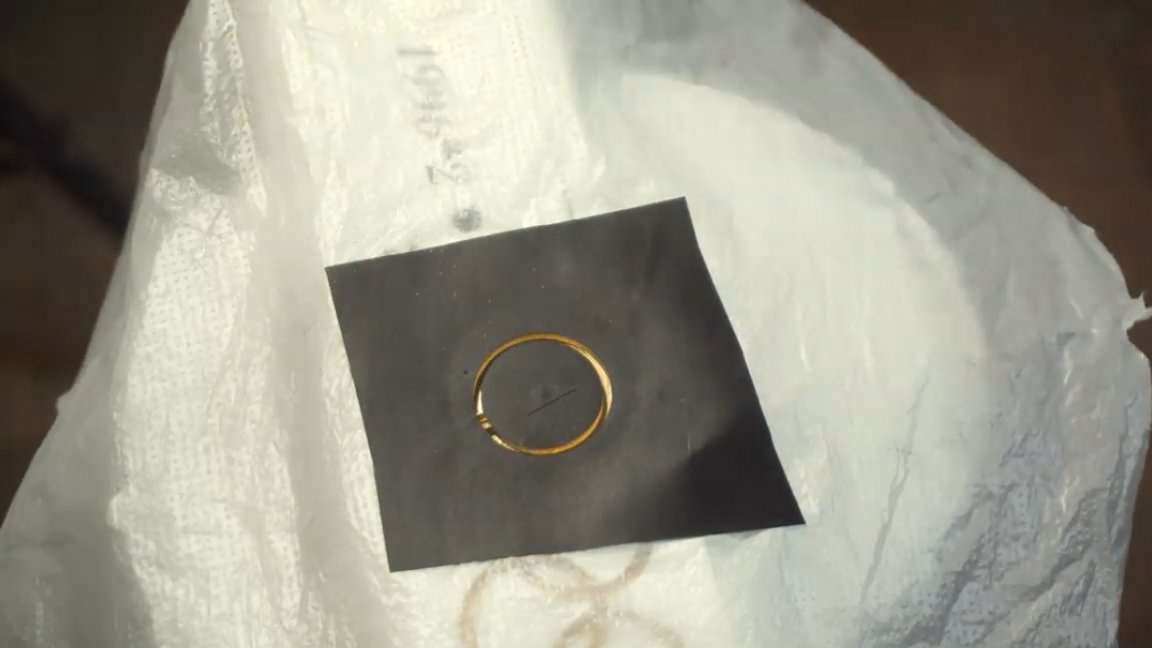
Next, paint the stand in white and paint the Olympic rings with gold paint on a stencil on a sticky basis so that the paint does not stain where it is not needed.

We style vertical racks under a cup, from above there will be neodymium magnets.
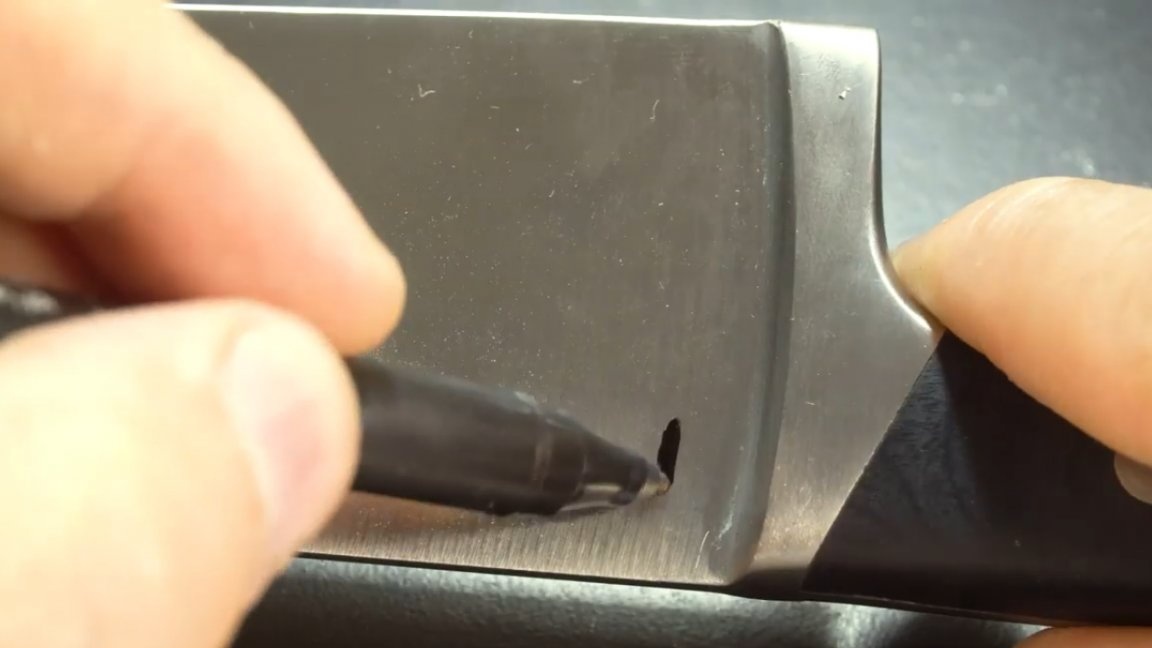
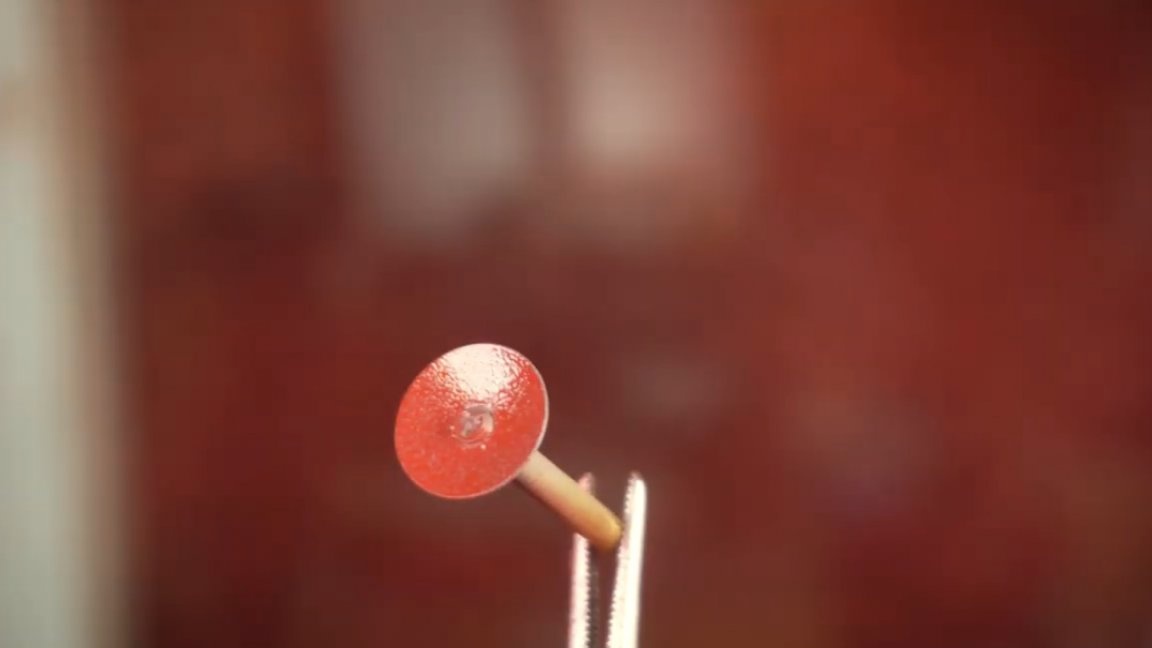
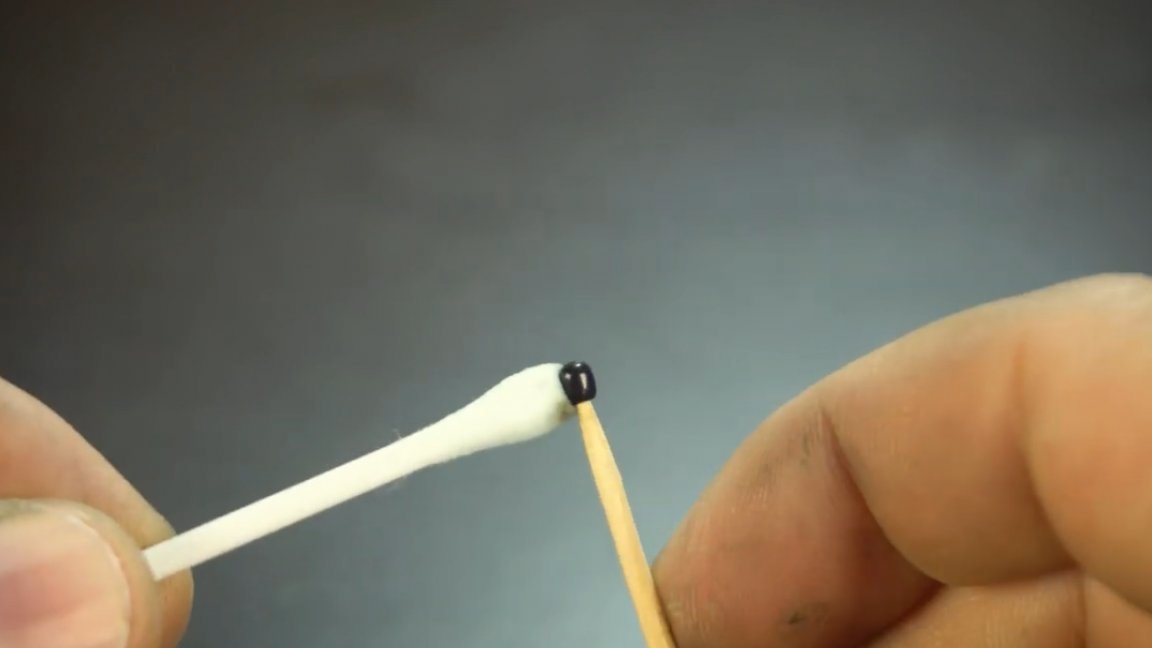
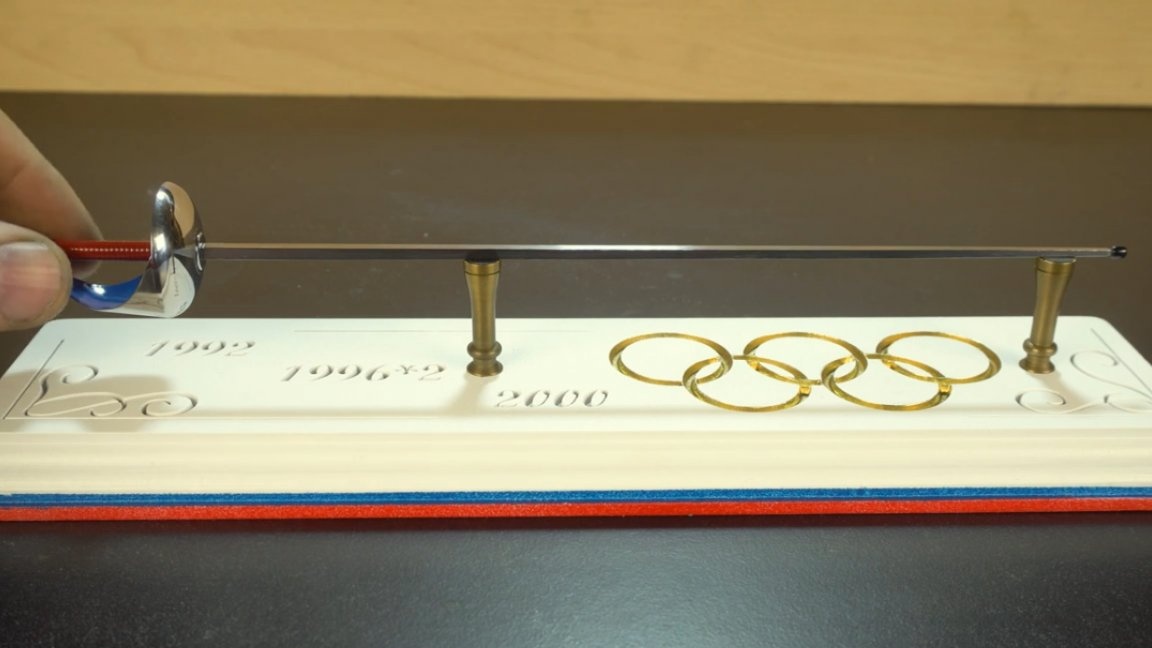
At the end of the blade, an adult sword has a sensor, we will also imitate it.
And finally, the final assembly.

We place the sword on the stand and that's it, the project is completed.
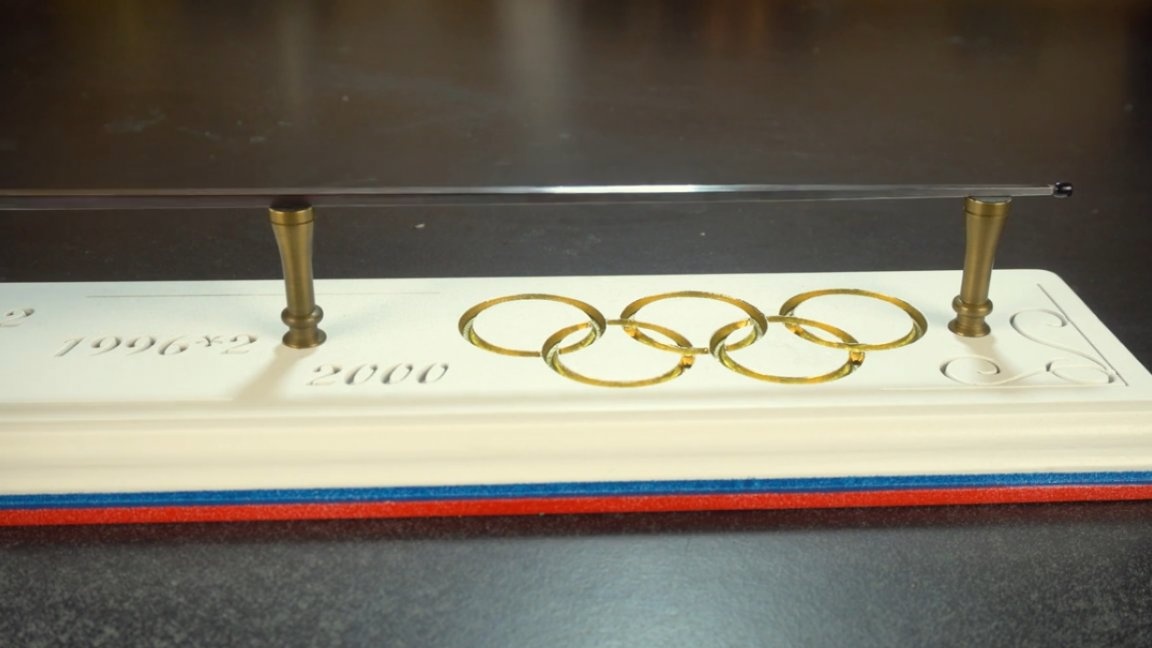
The two lower tiers, on the advice of his wife, were painted red and blue, respectively. As a result, it turned out like a flag, and so it looks more harmonious with the sword itself. Here is such a homemade result.
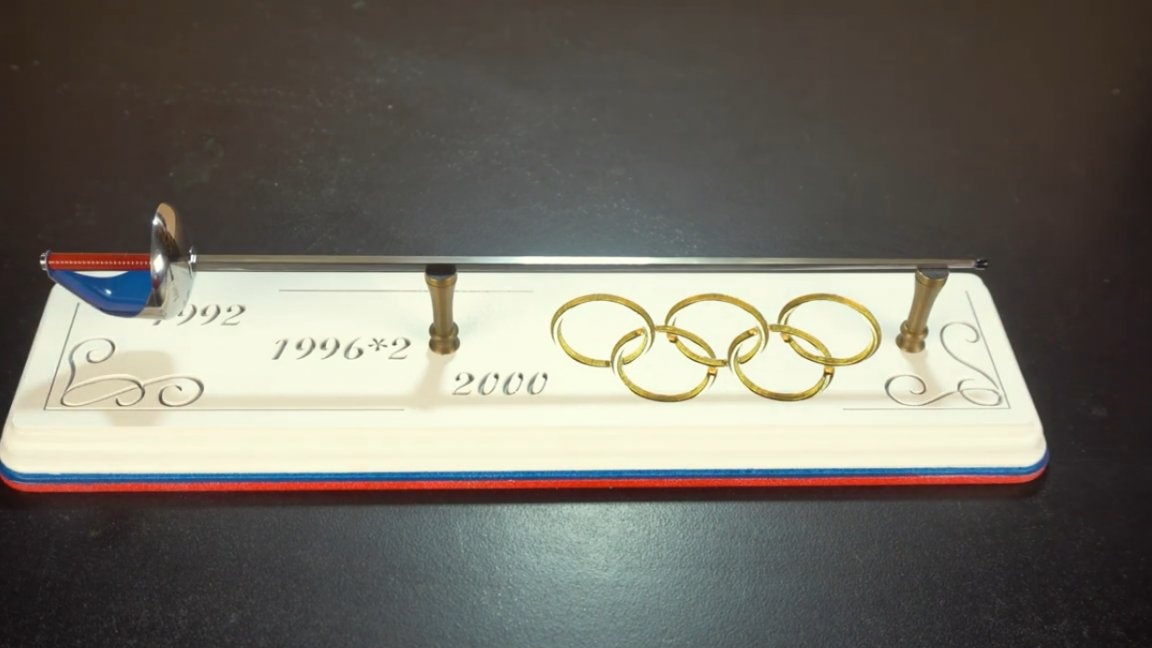
Thank you for attention. See you soon!
Author's video: