
Today we have another project from the author of YouTube channel "Radio-Lab" - a sound amplifier, but not quite simple. This amplifier will support Internet radio, streaming platforms, the ability to create a multi-room system of several modules, and you can manage all this using a special application on your smartphone.
The project will be as budgetary as possible. As a result, we get a small sound amplifier with the ability to connect to the Internet. To implement this project, you will need a building:
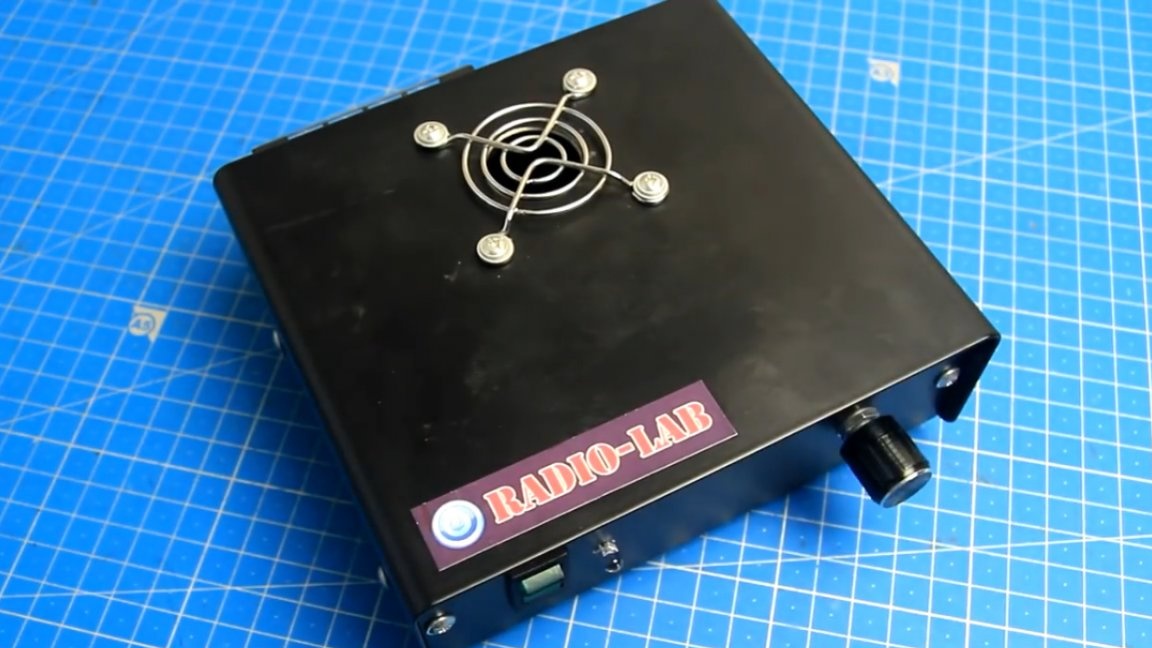
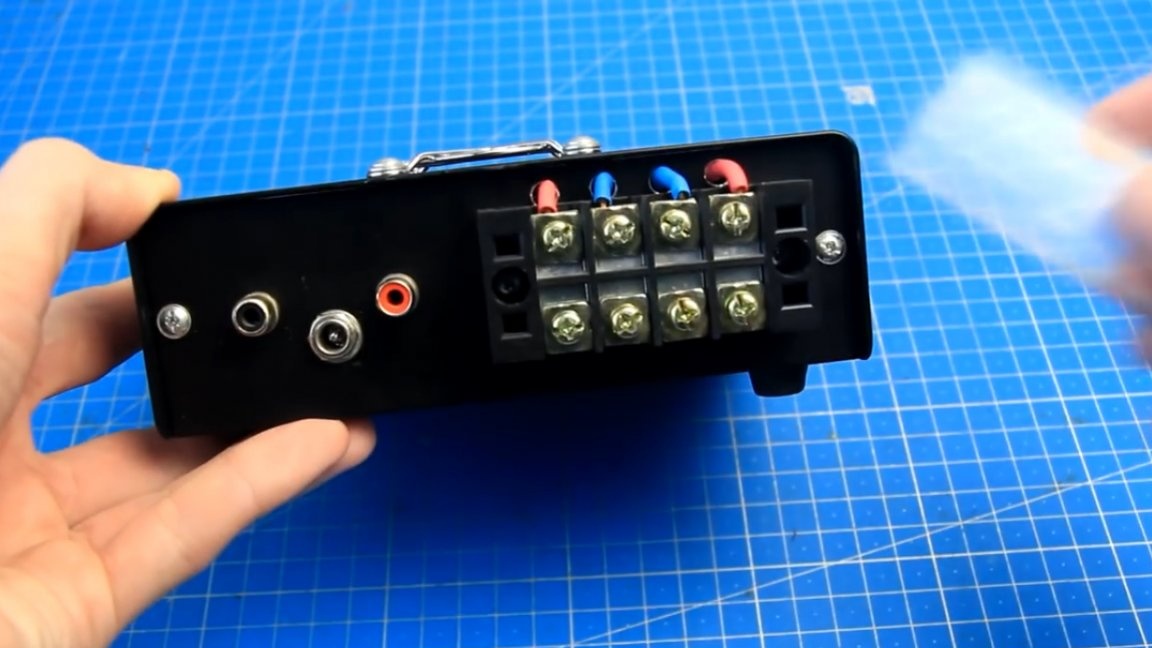
It can be ordered in the online store or bought on the radio market. This case is made of metal, there are ventilation holes on the sides. Also, it already has a block for connecting wires, RCA connectors, a switch and legs.
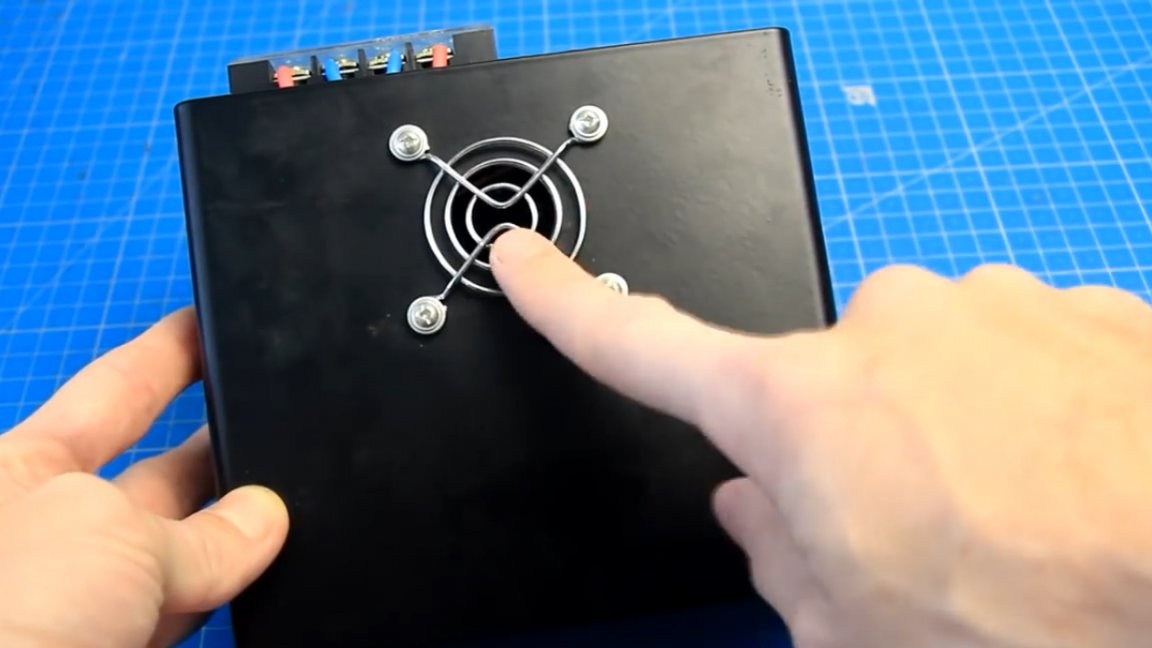
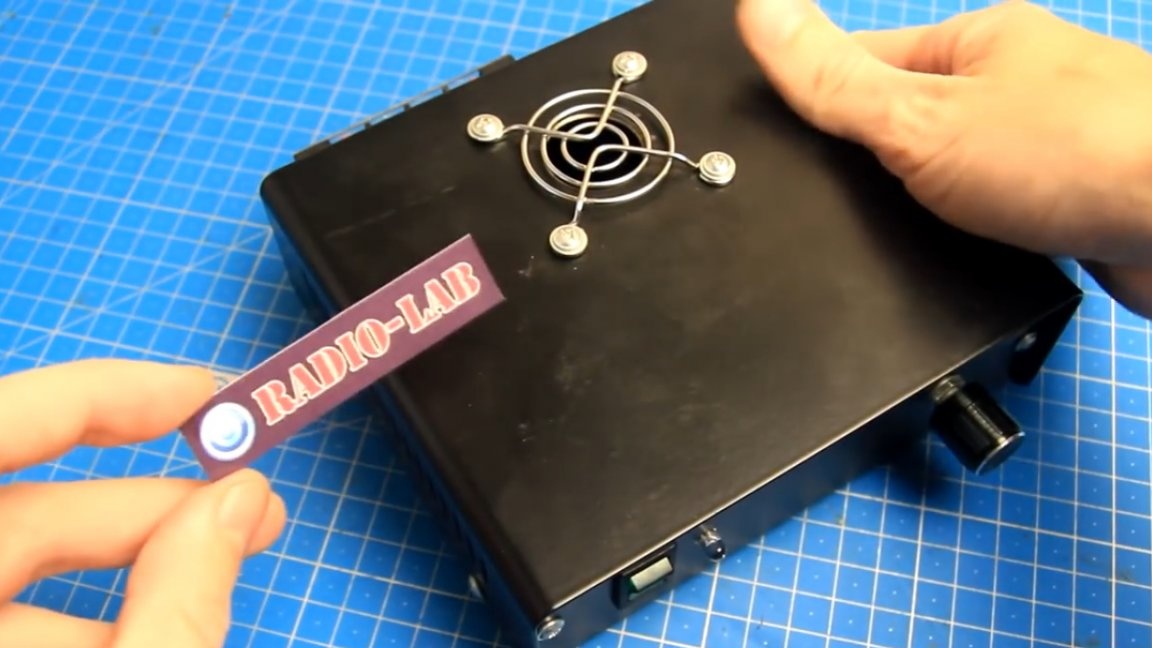
The hole above is covered by a grill from a computer fan.
As we have these two boxes from the company.
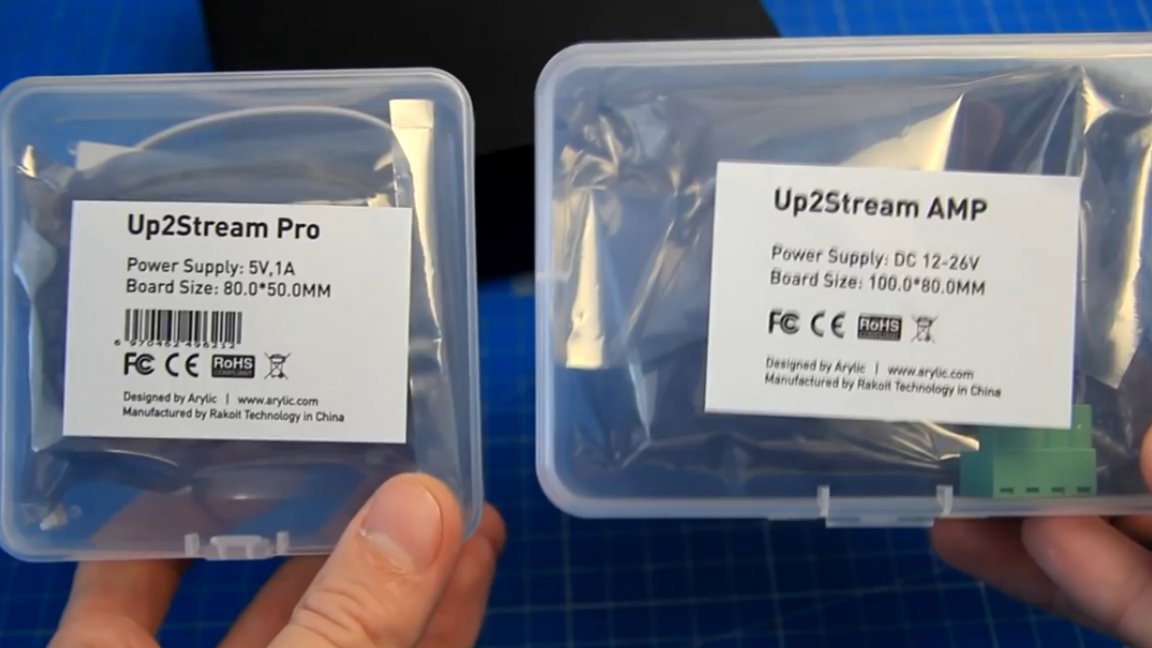
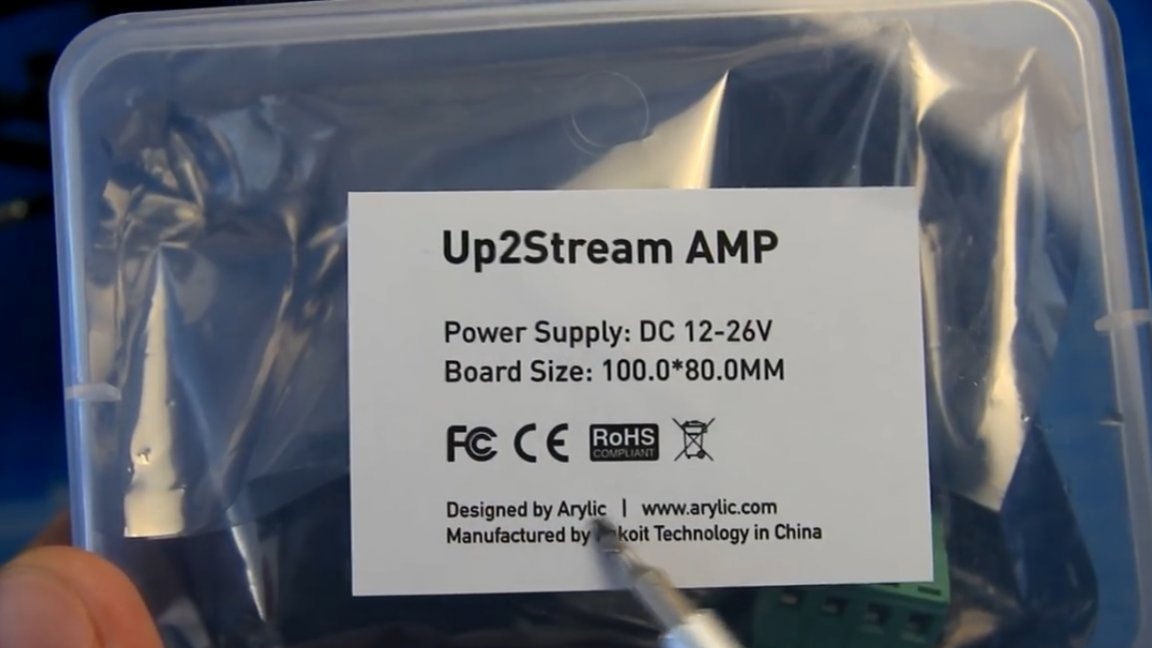
These are sound modules that can work with the Internet. Also, for this project, you need a 220V switching power supply with an output voltage of 24V and a current of 4A.

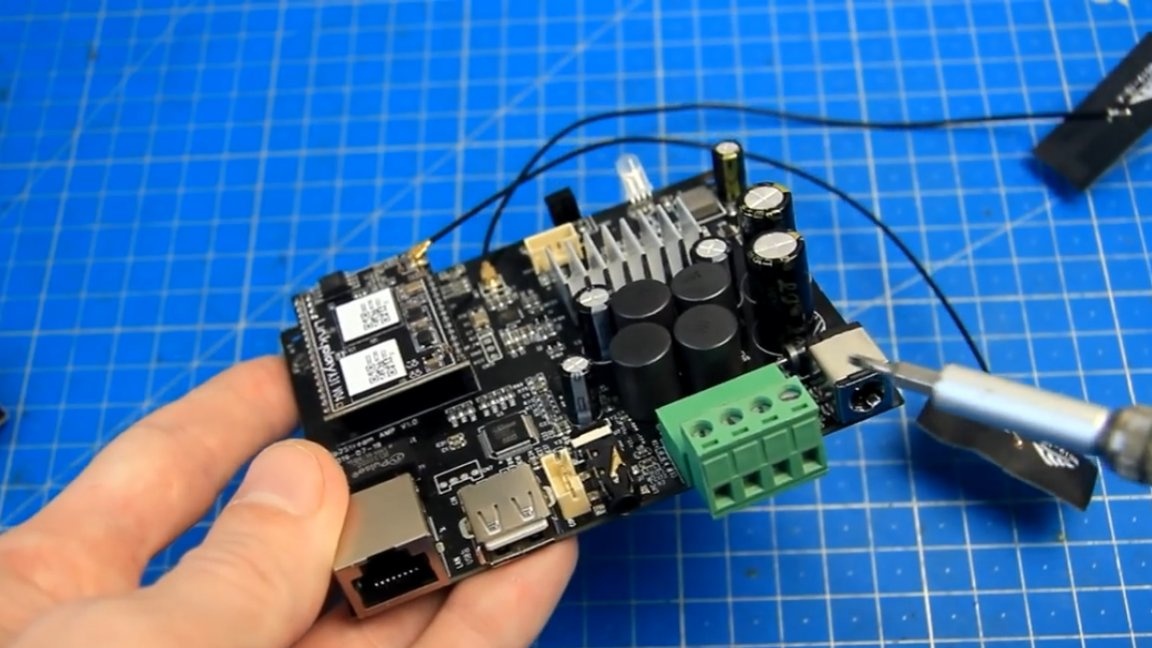
The above modules are essentially music mini computers, which, in addition to Bluetooth and USB, can work with various online music services. Such devices have much more functionality in comparison with conventional Bluetooth modules. Their only drawback is the price.
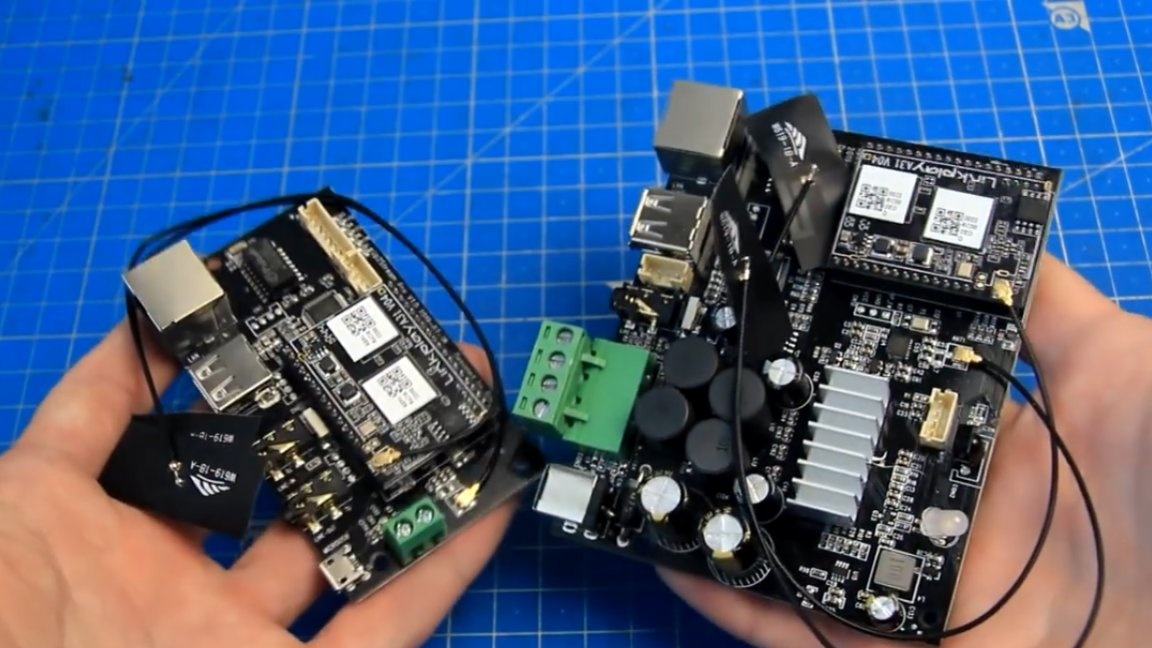
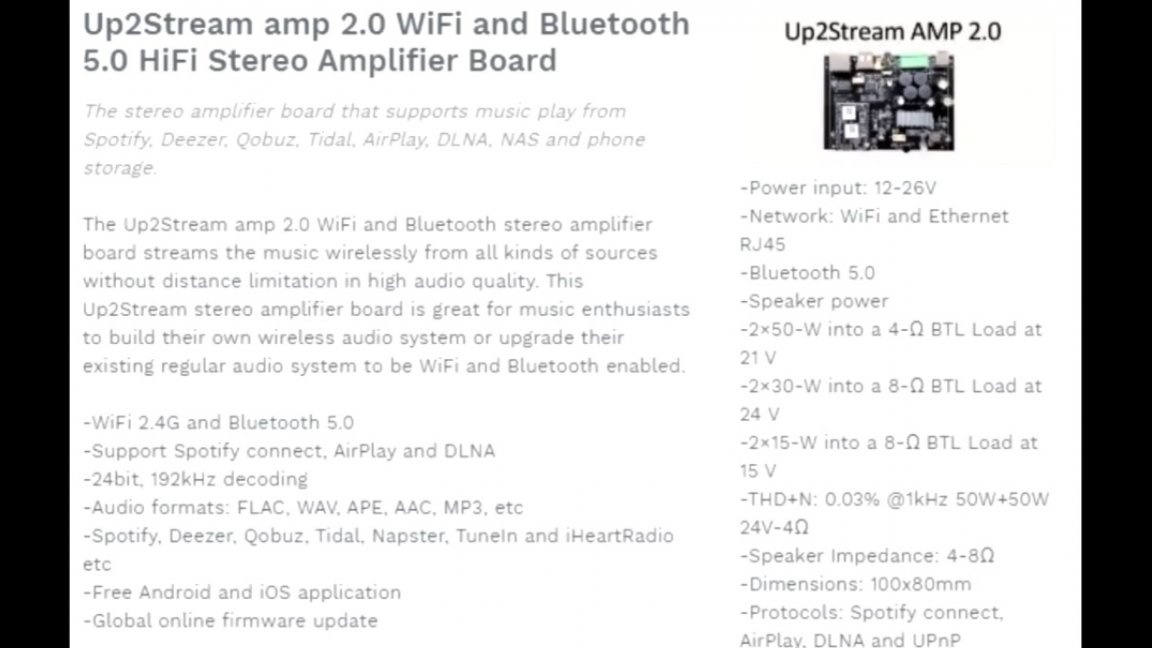
The difference between these two boards is that it already has its own sound amplifier on board.
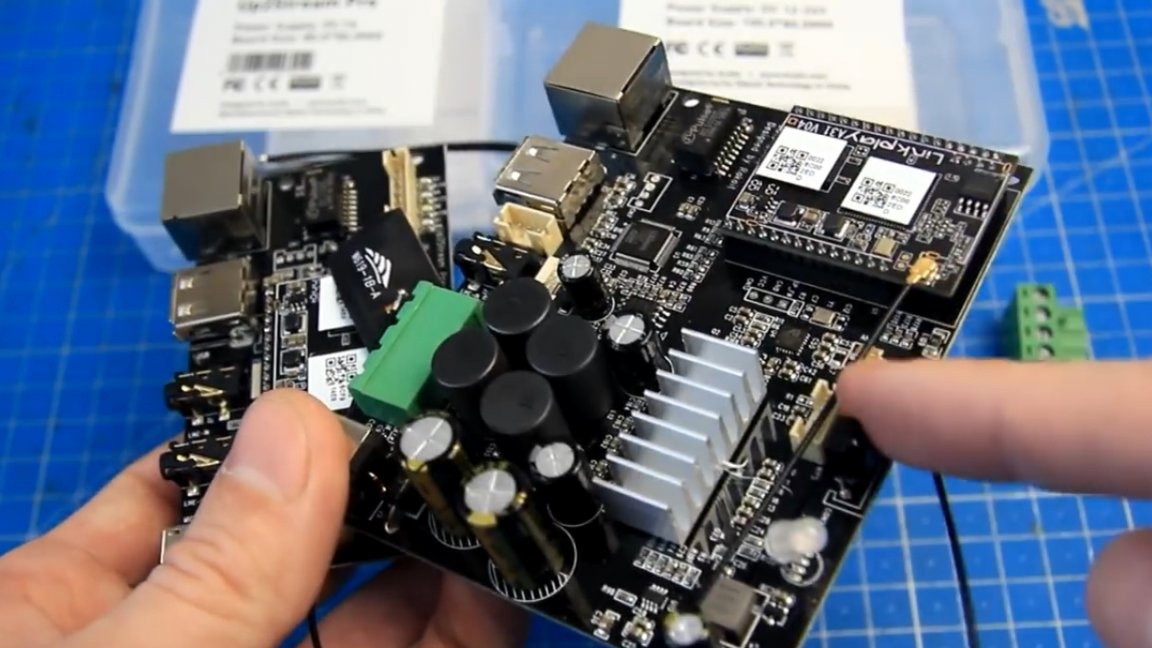
Also on the board there is a larger infrared receiver for working with and an RGB LED for displaying operating modes.

There is no amplifier, so it requires a connection to an external amplifier to amplify the audio signal.
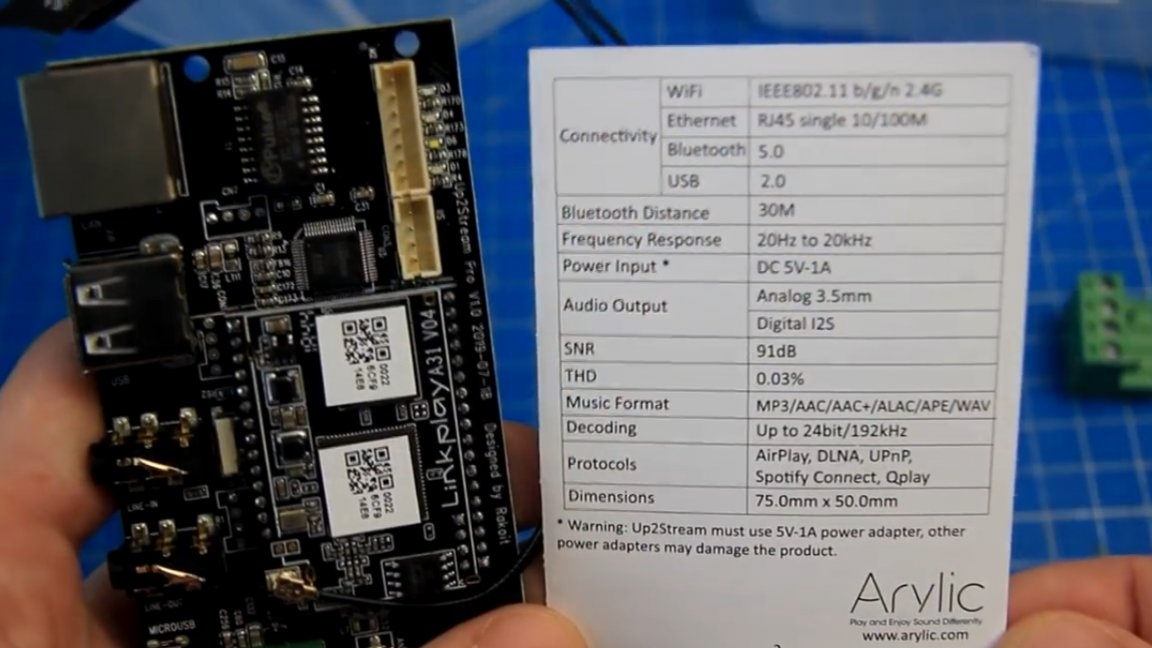
The instructions that came with the boards spelled out all the main characteristics, as well as instructions for connecting them.
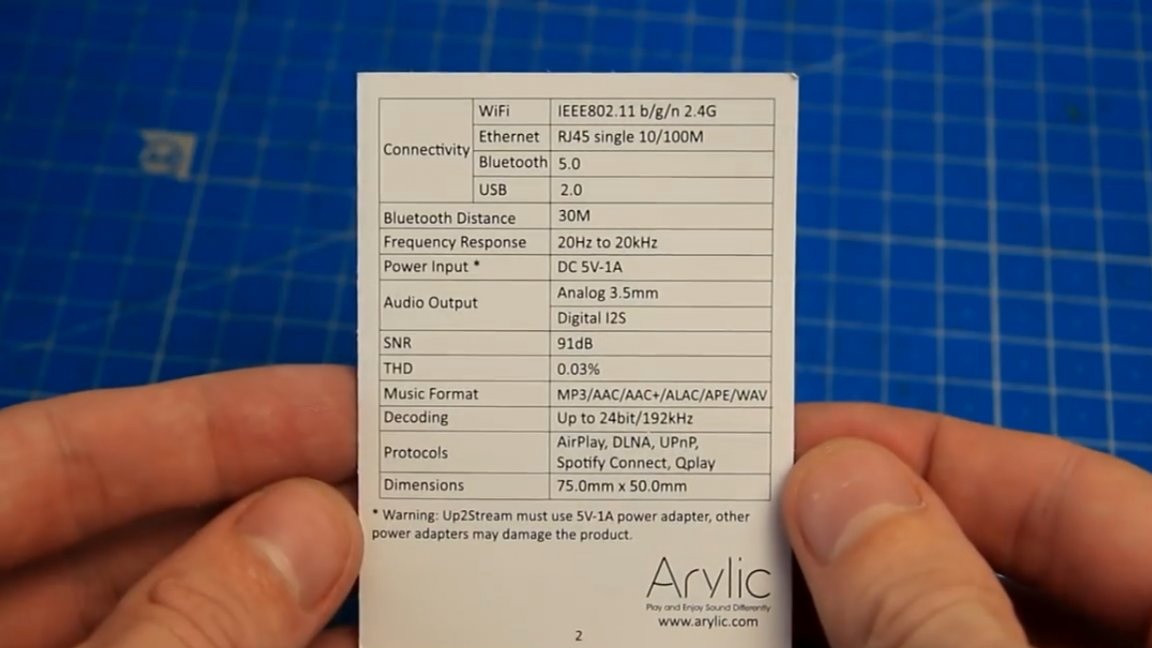
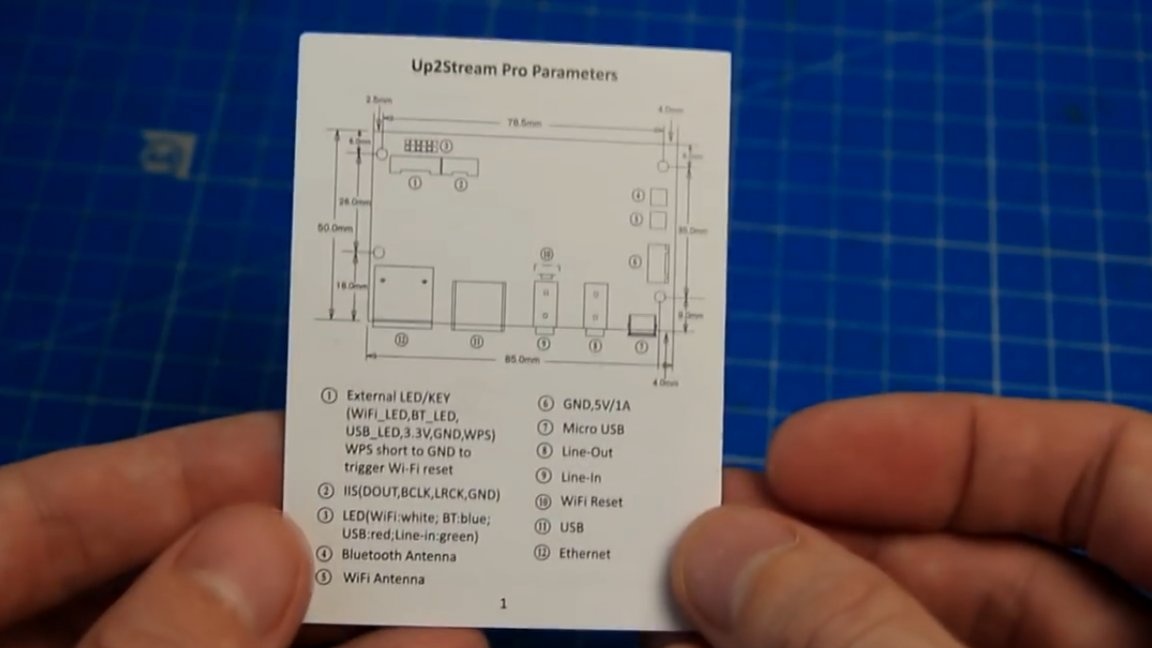
A more detailed description is presented on the manufacturer's website.
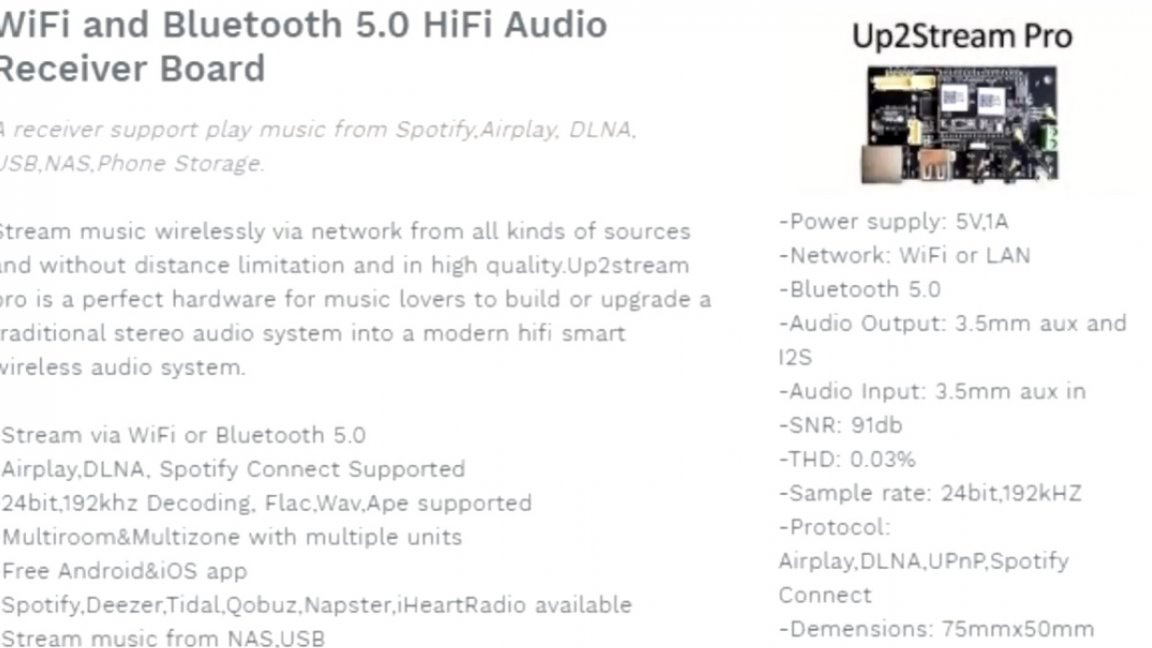
On the smaller board, everything is about the same, only there is a linear output and for connecting 5V power it has a screw terminal block and a micro USB connector.
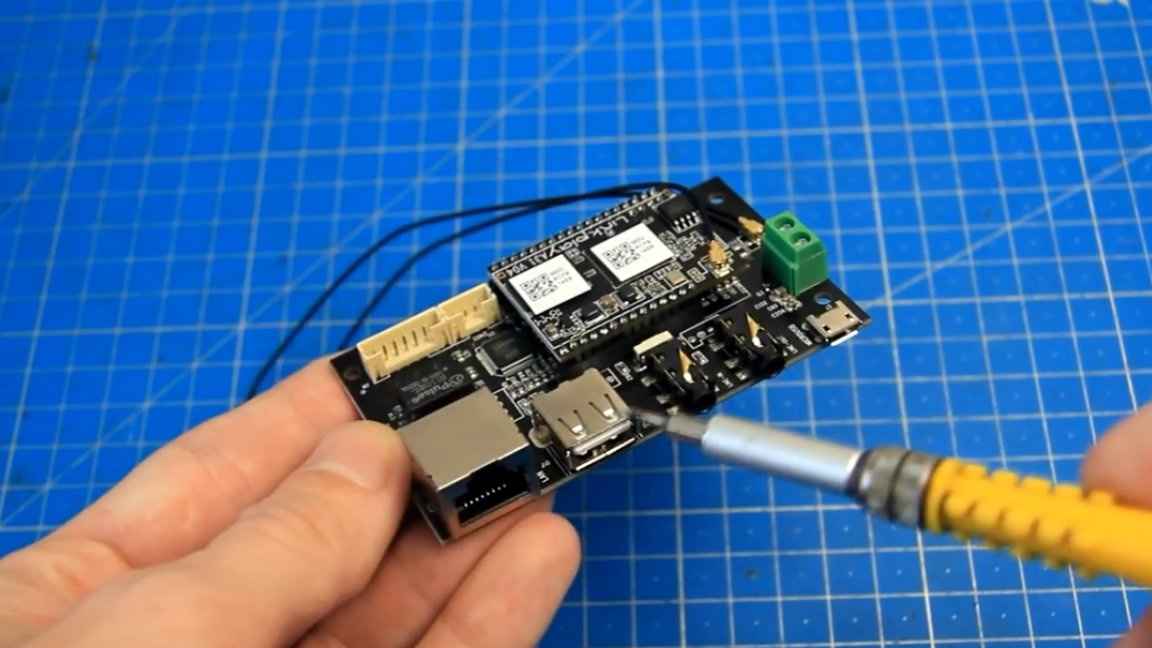
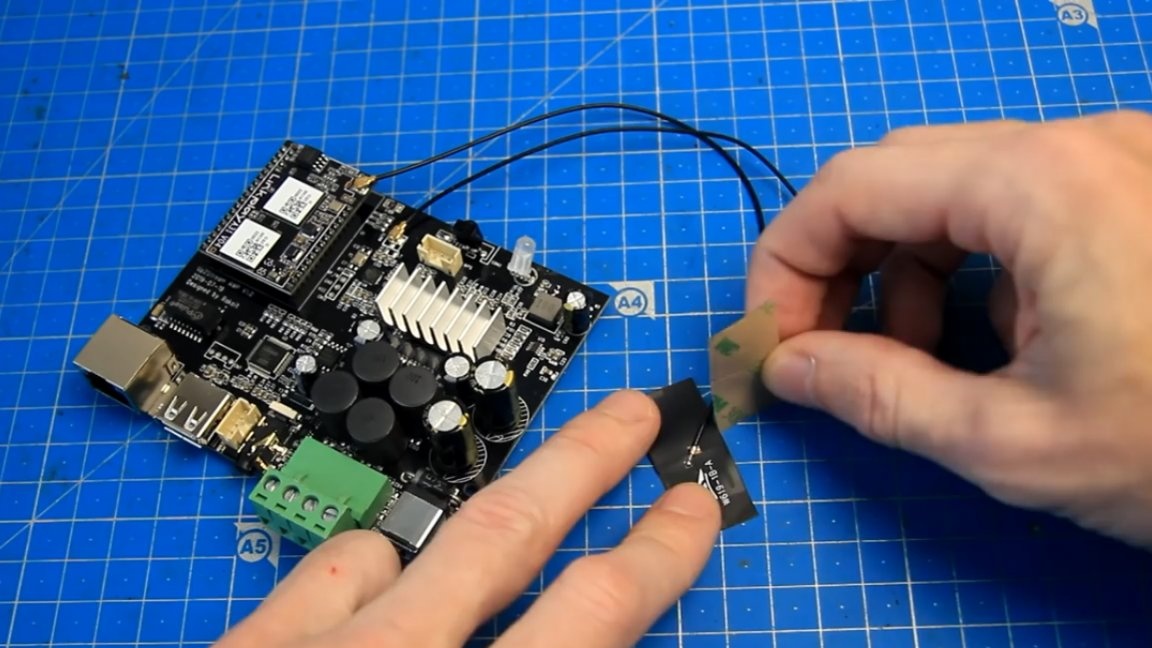
In addition, on both boards there are two wires of Wi-Fi antennas.
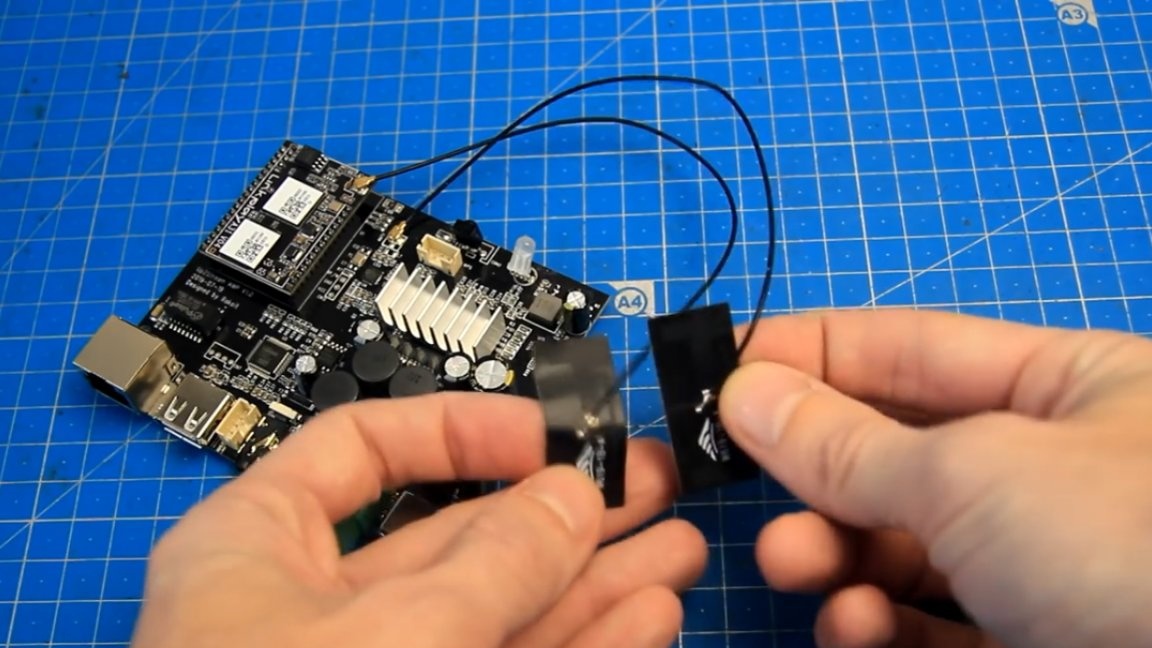
The petals at the ends of the wires are the antennas themselves. According to the attached instructions, they must be placed at a right angle (90 degrees), this is necessary for more confident communication.
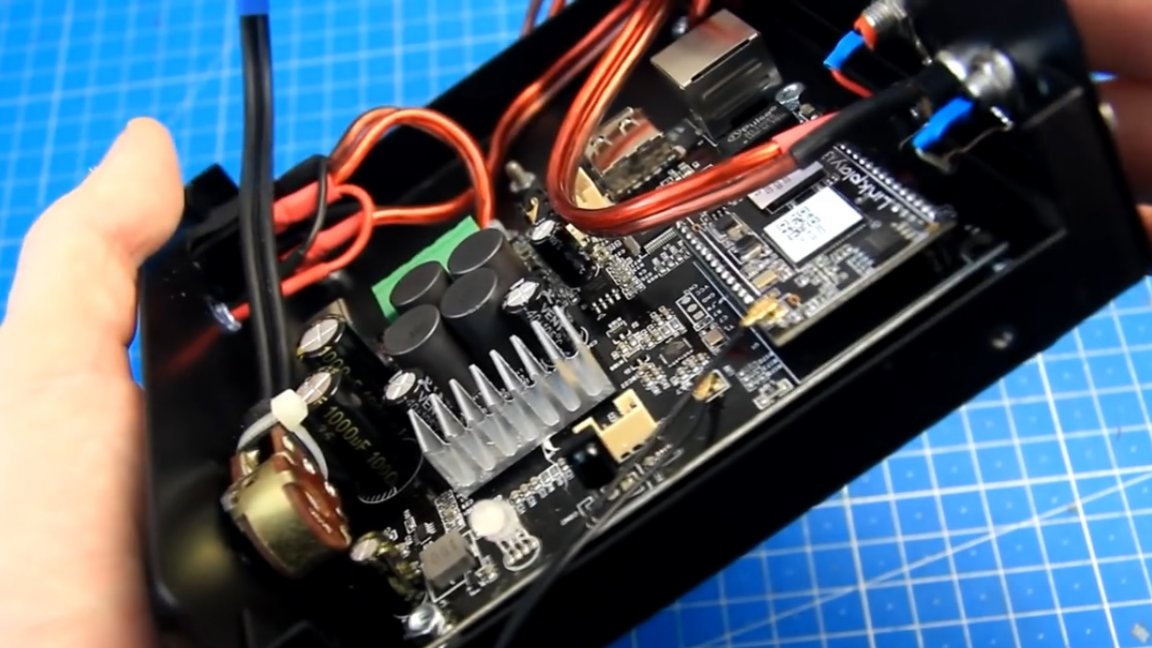
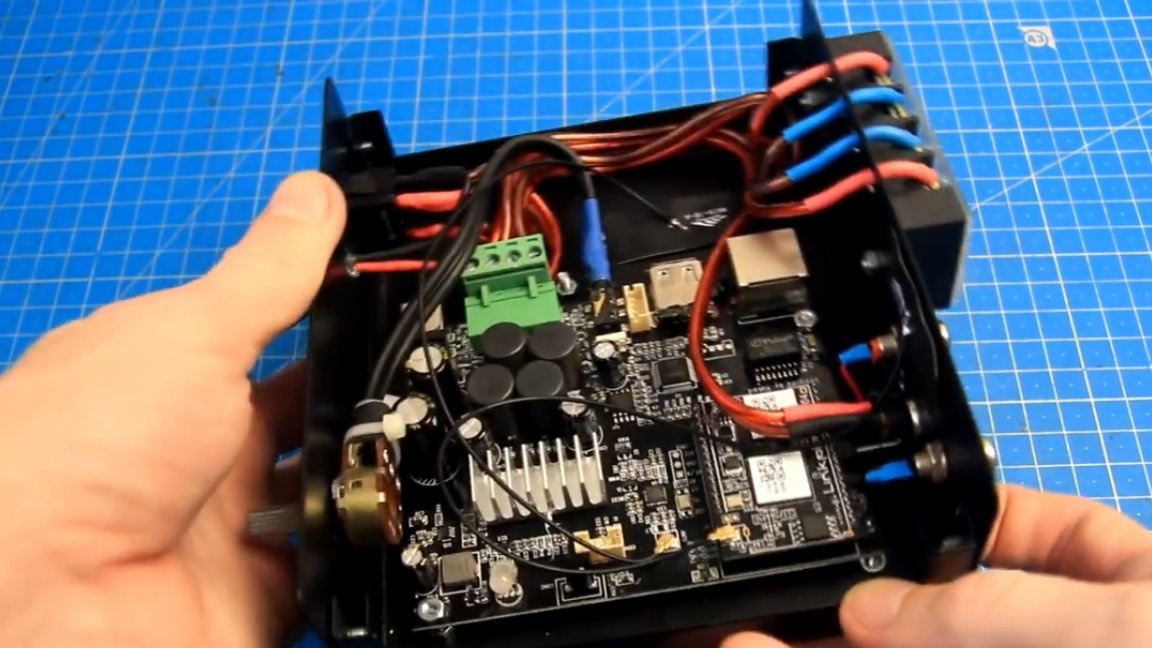
The high-frequency modules on the boards are identical.To build the project, take a motherboard for more, which has a built-in amplifier. This board must be placed in the case.
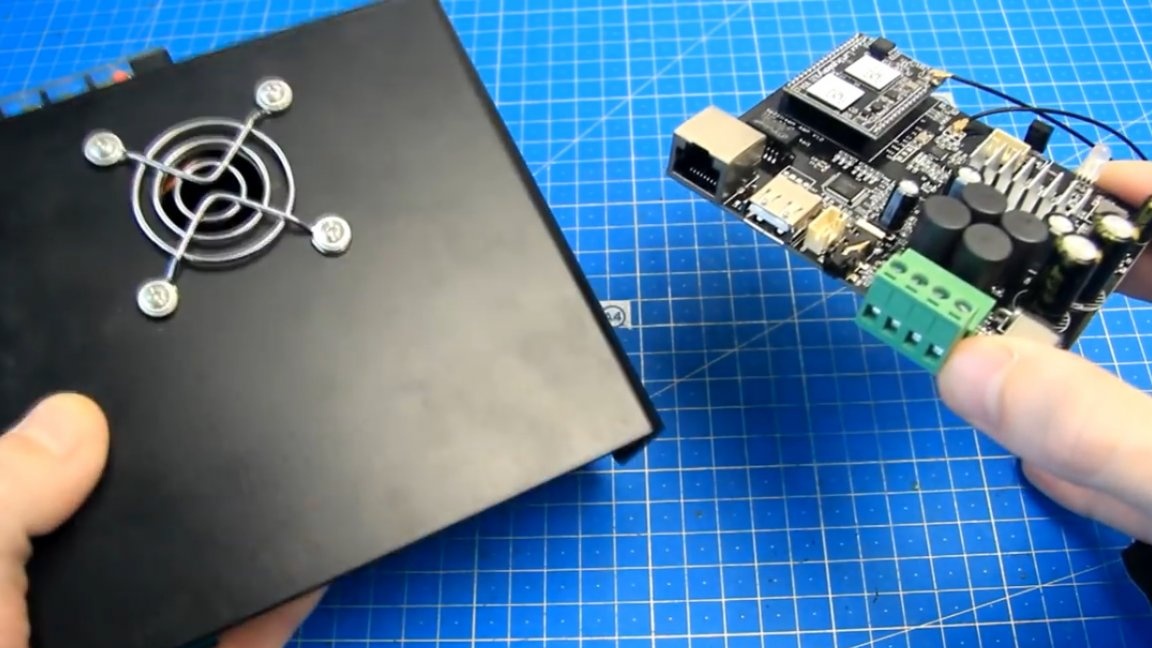
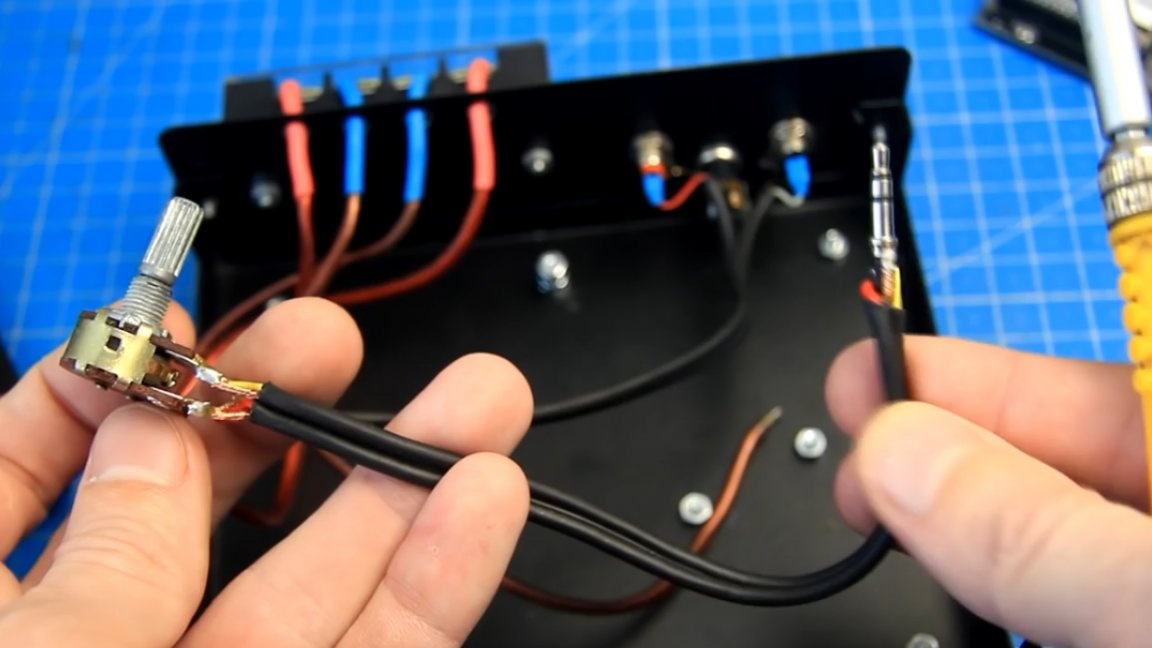
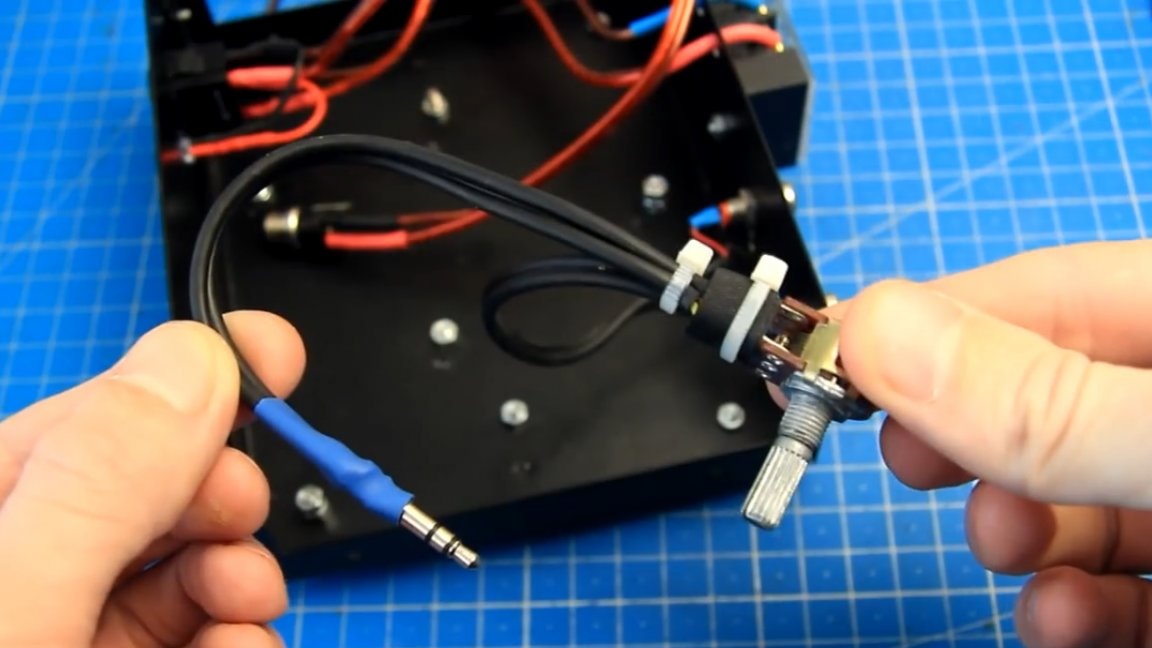
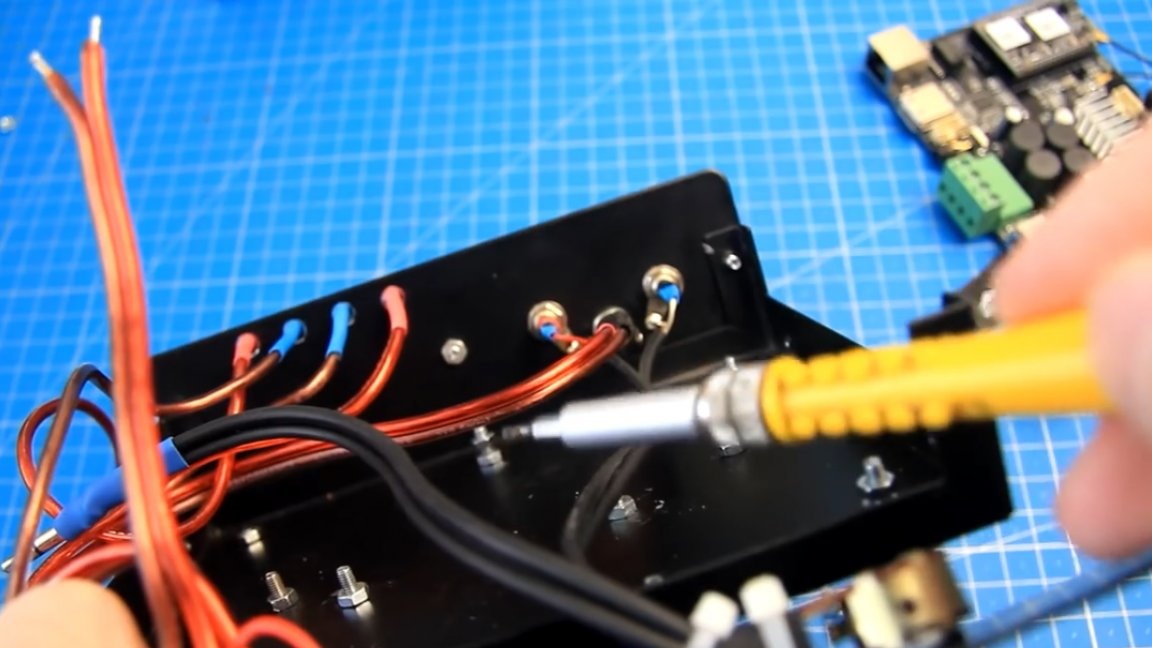
The housing already has the necessary wires for connecting to the amplifier outputs and shielded wires with a variable resistor for connecting the linear input.
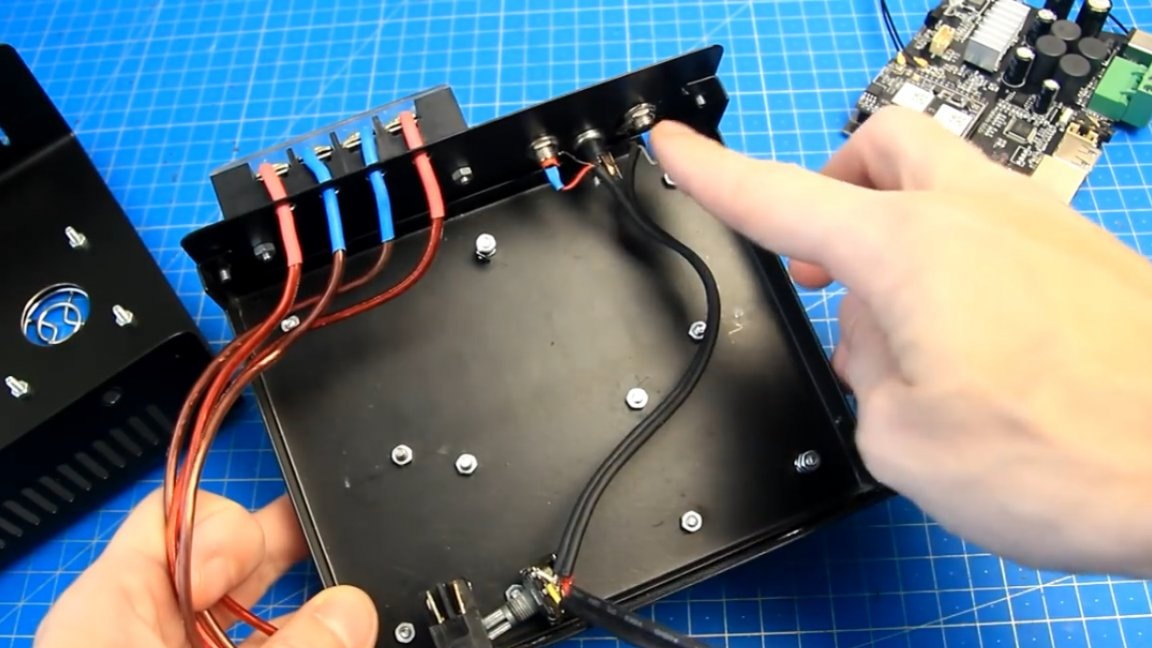
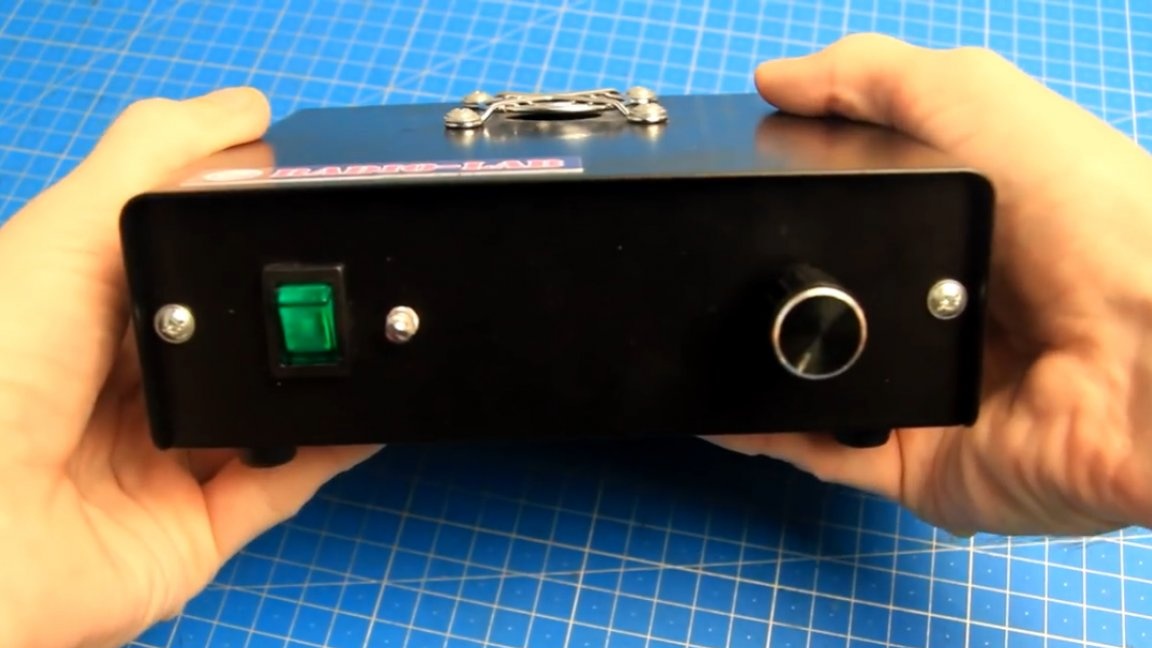
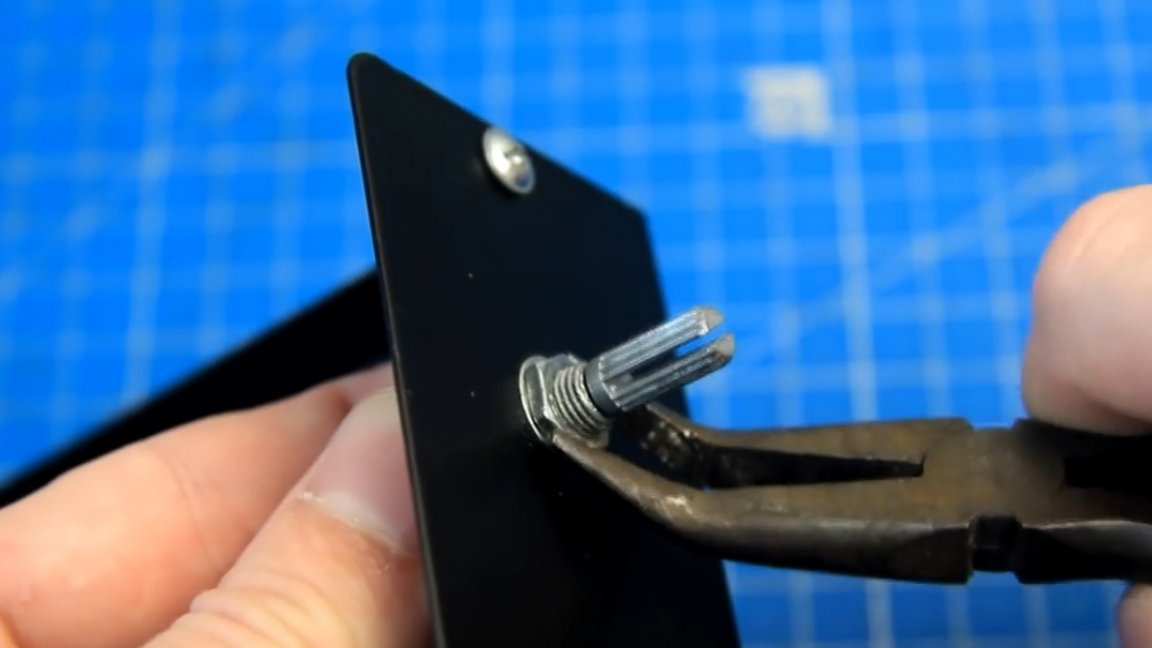
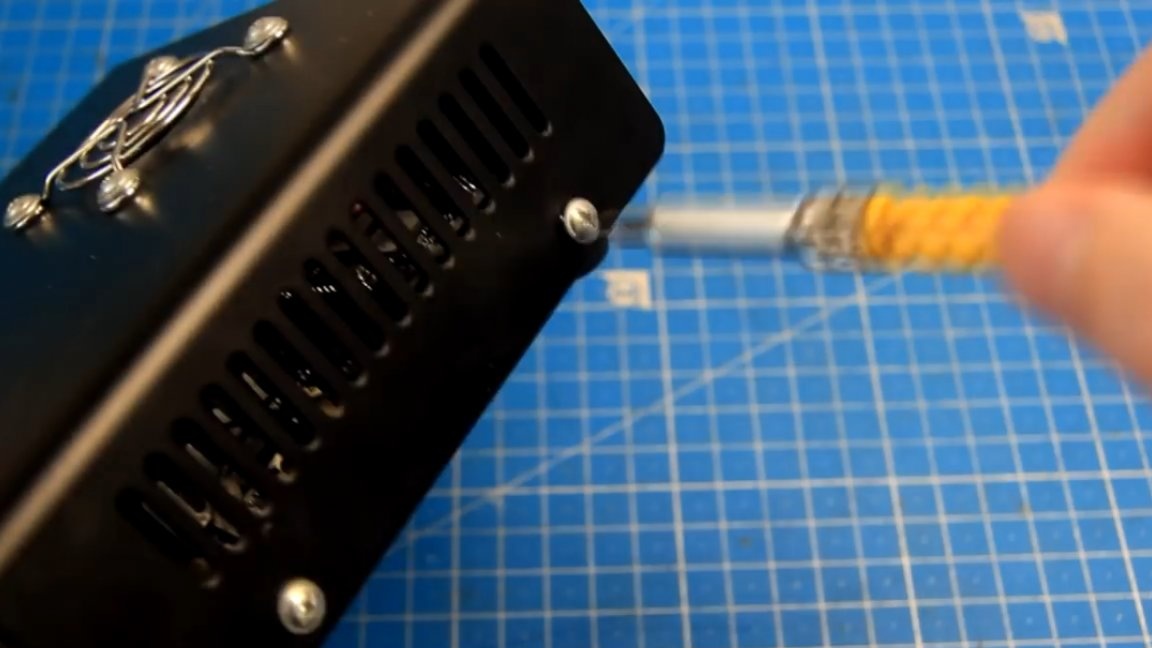
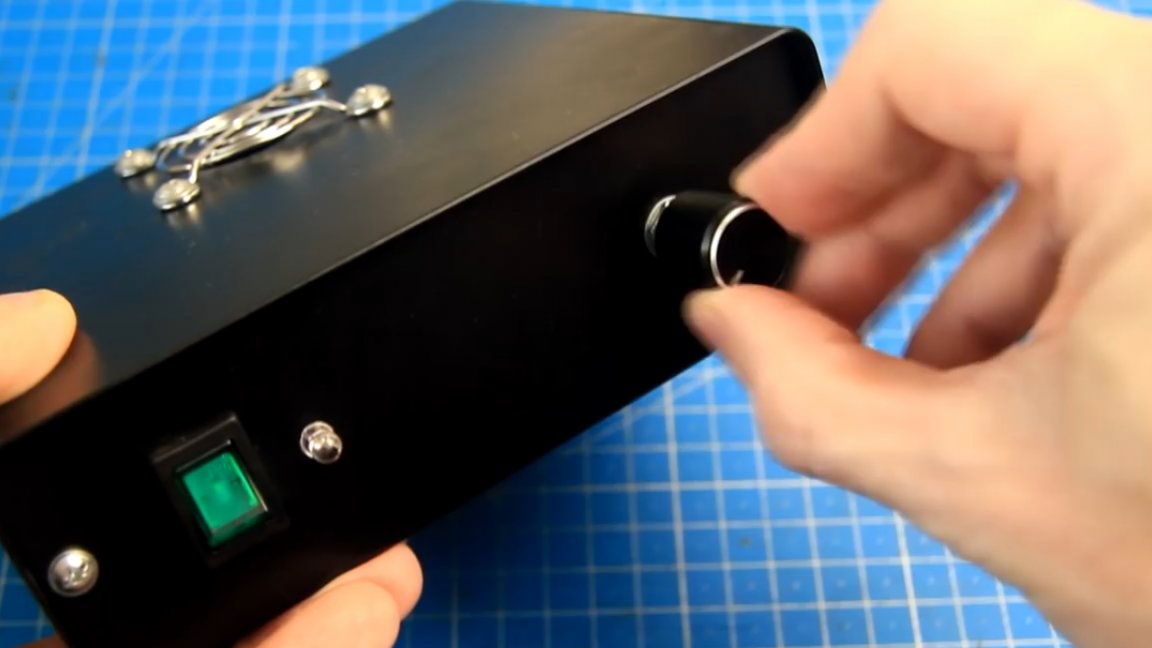
There is also a switch on the front panel. The variable resistor is sealed as follows:

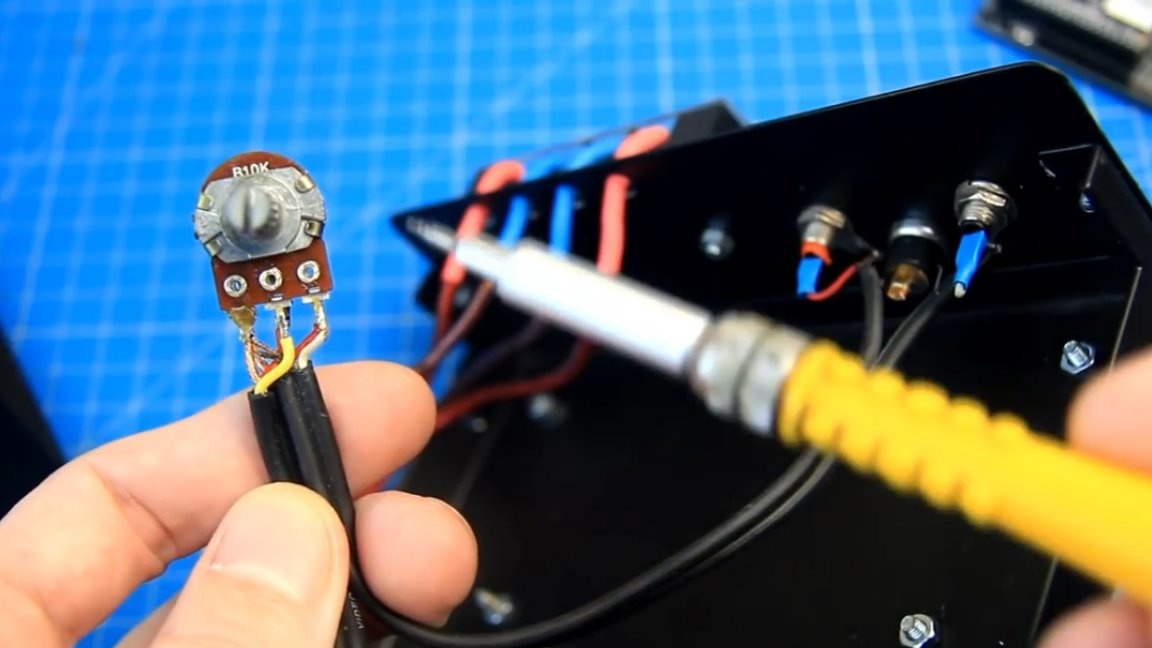
To indicate the inclusion of the amplifier, we will use this LED with a diameter of 5 mm:
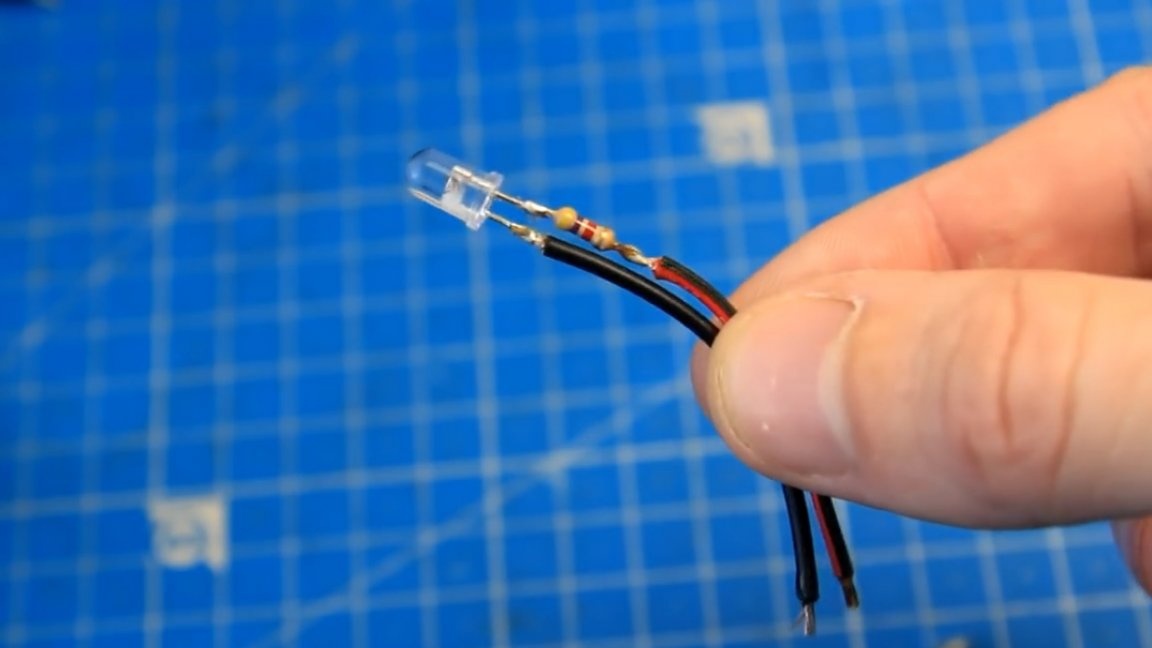
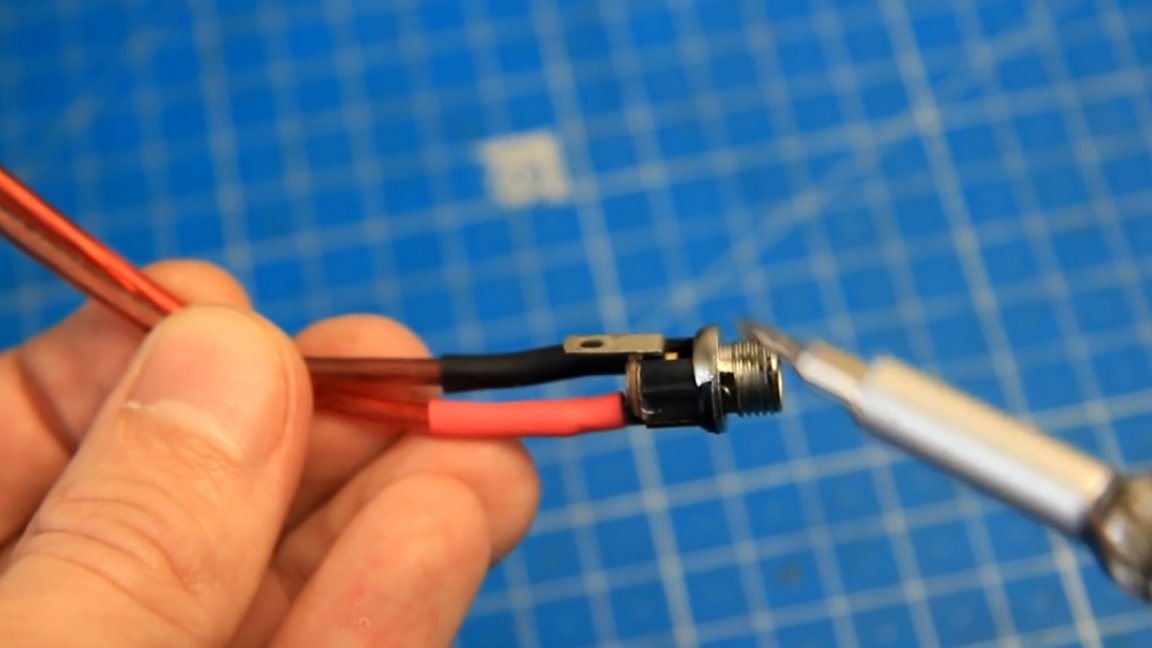
Do not forget about the current-limiting resistor, in this case, 4.7 kOhm. The power connector is like this, under the plug 5.5 x 2.5 mm.
We isolate the line-in wire using heat shrink and fabric tape.
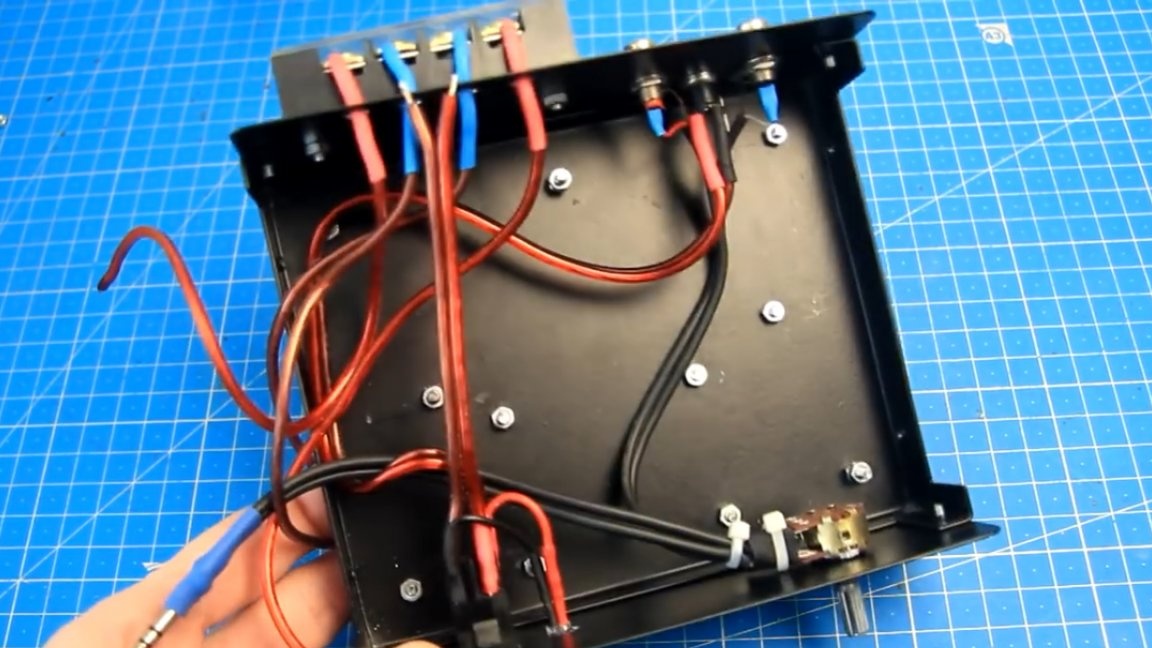
All wires are in place, now you can begin to install the main board of the sound amplifier. Before this, it is necessary to make holes and install M3 bolts with nuts, which will act as racks for installing the board.
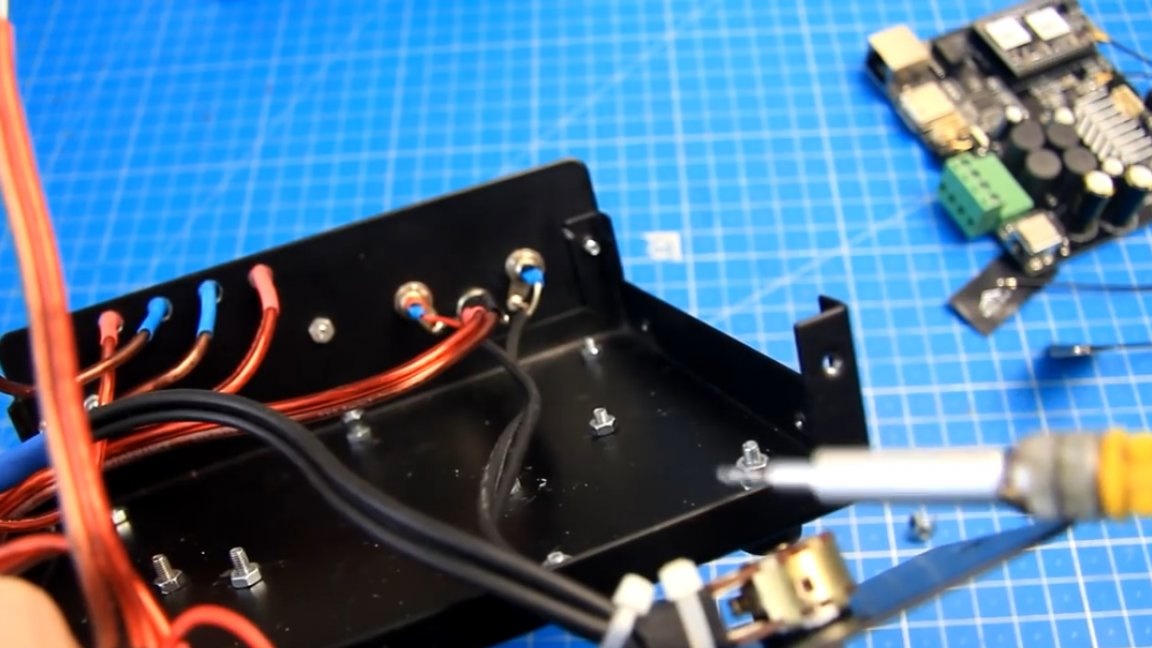
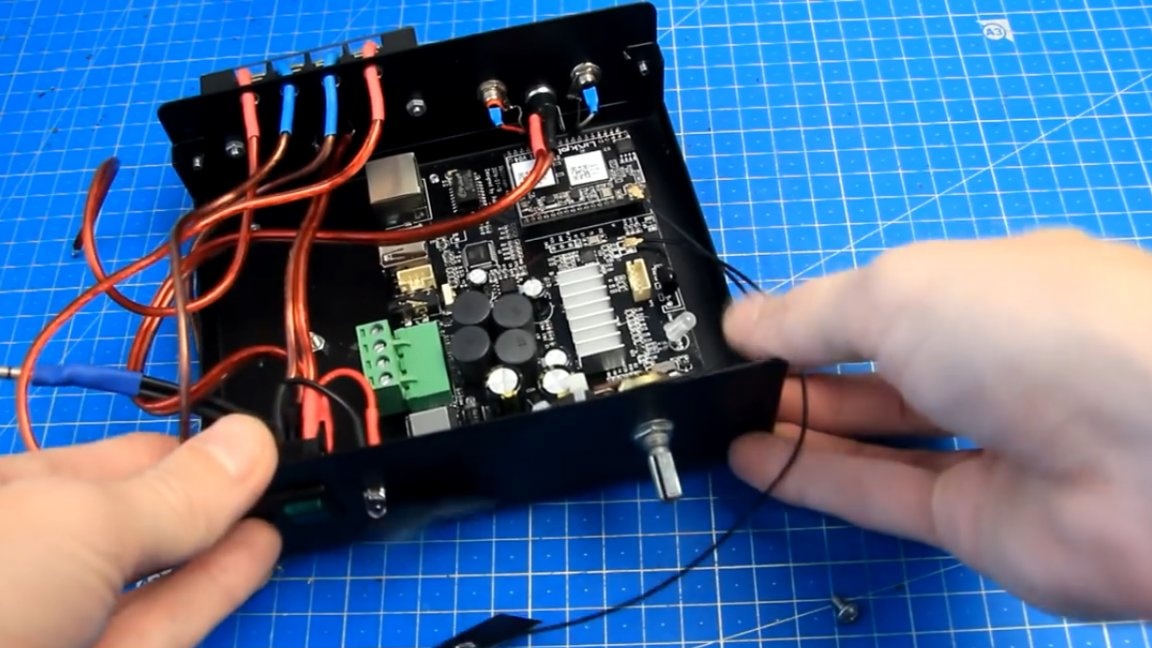
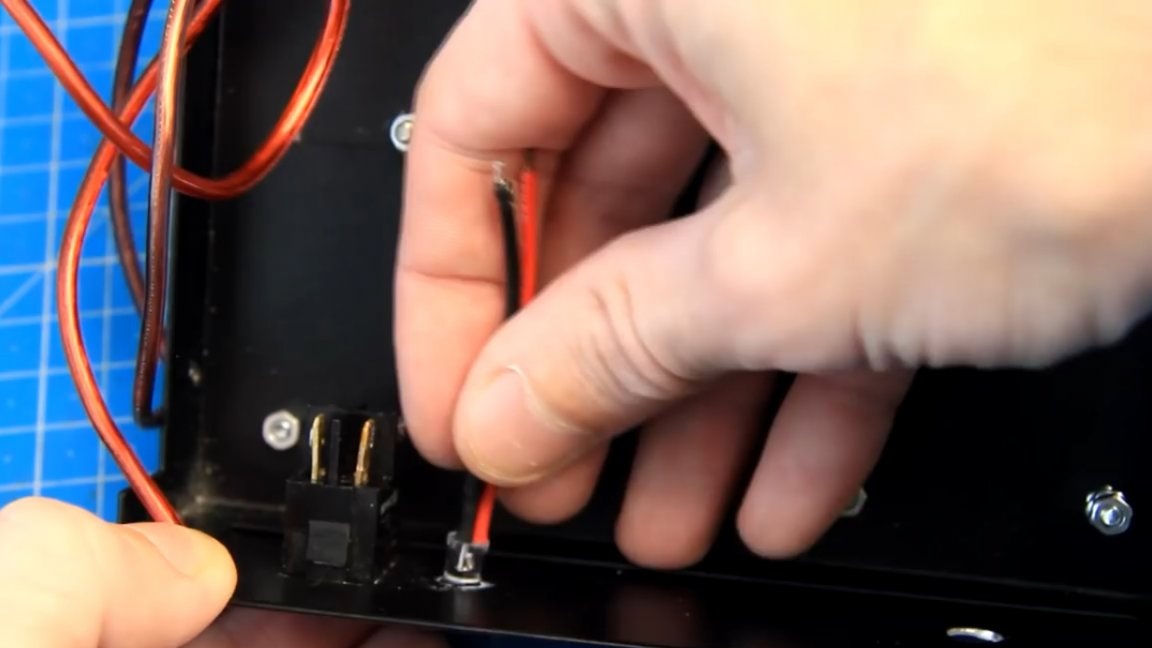
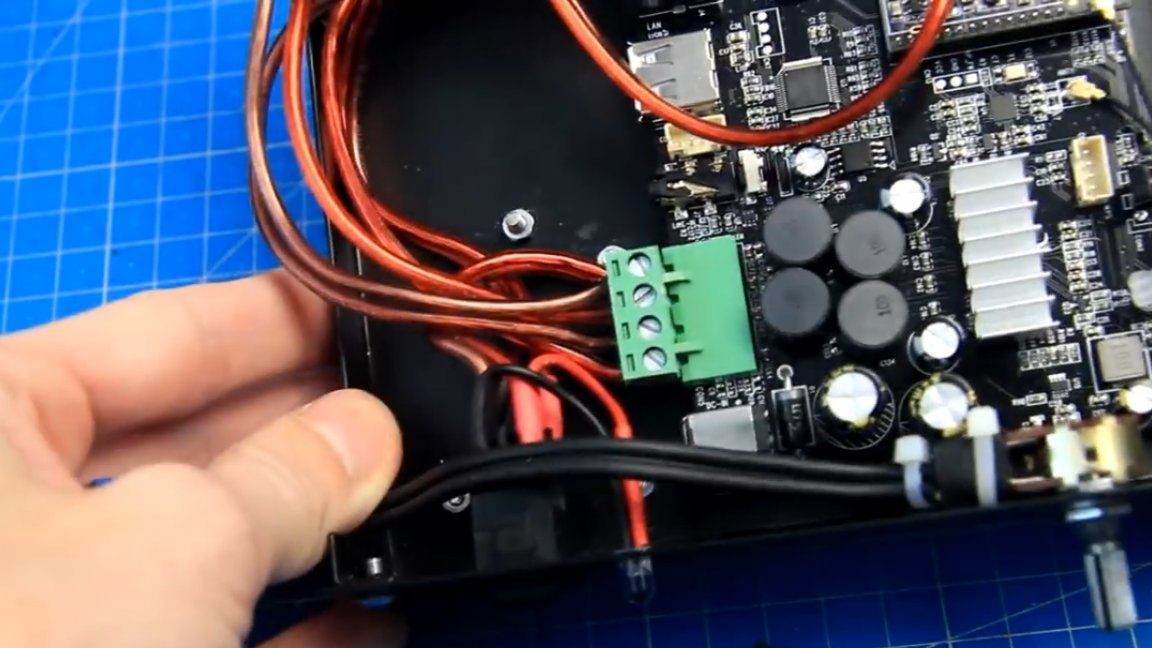
The board is installed in its place, nothing interferes and does not rest. Now you need to solder the power wires. There is a protective diode against polarity reversal on the board, but still it will not be superfluous to check the connection again.
All connectors that are on the board will be located inside the case. The author does not plan to use a network LAN connection, plans to connect only a wireless Wi-Fi network to the router. We fix the board on the rack bolts so that it does not touch the bottom of the case in order to avoid short circuits.
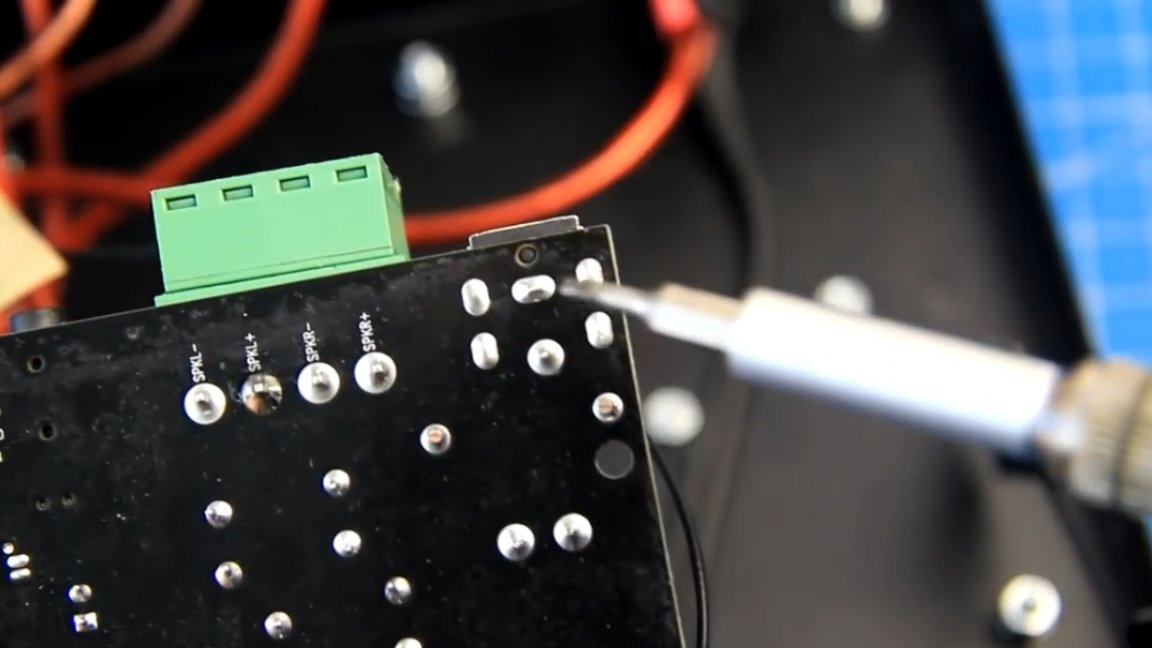
The polarity of the speaker connection is indicated on the underside of the board.
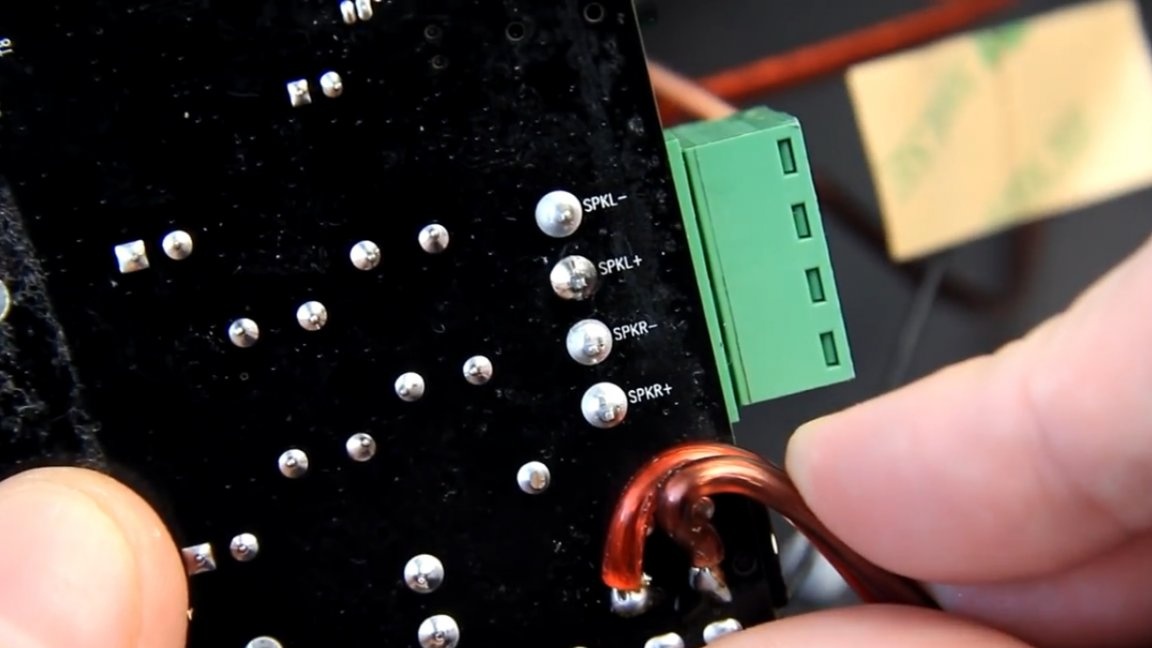
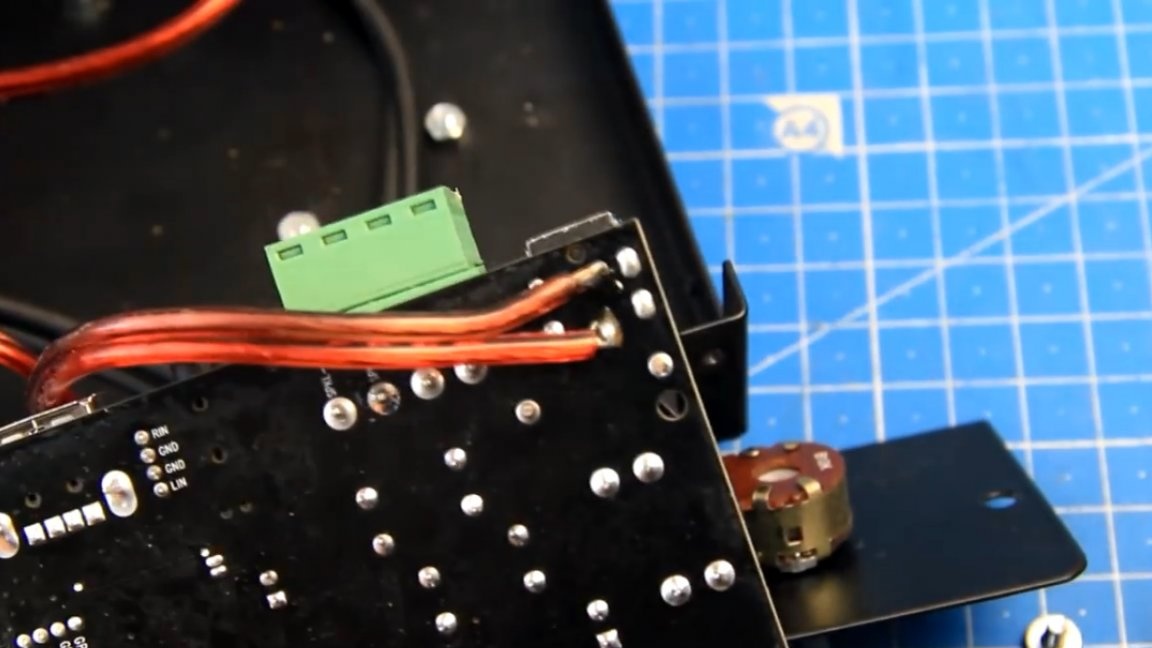
Next, connect the wires to the speakers, and also connect the line-in wire to the board.
Now let's install the Wi-Fi antenna. Of course, a metal case is not the best solution for installing antennas of this type, such a solution can significantly reduce the communication range. As an option, it is fashionable to buy or make do it yourself external antennas, or make the case of wood, plastic or similar materials.
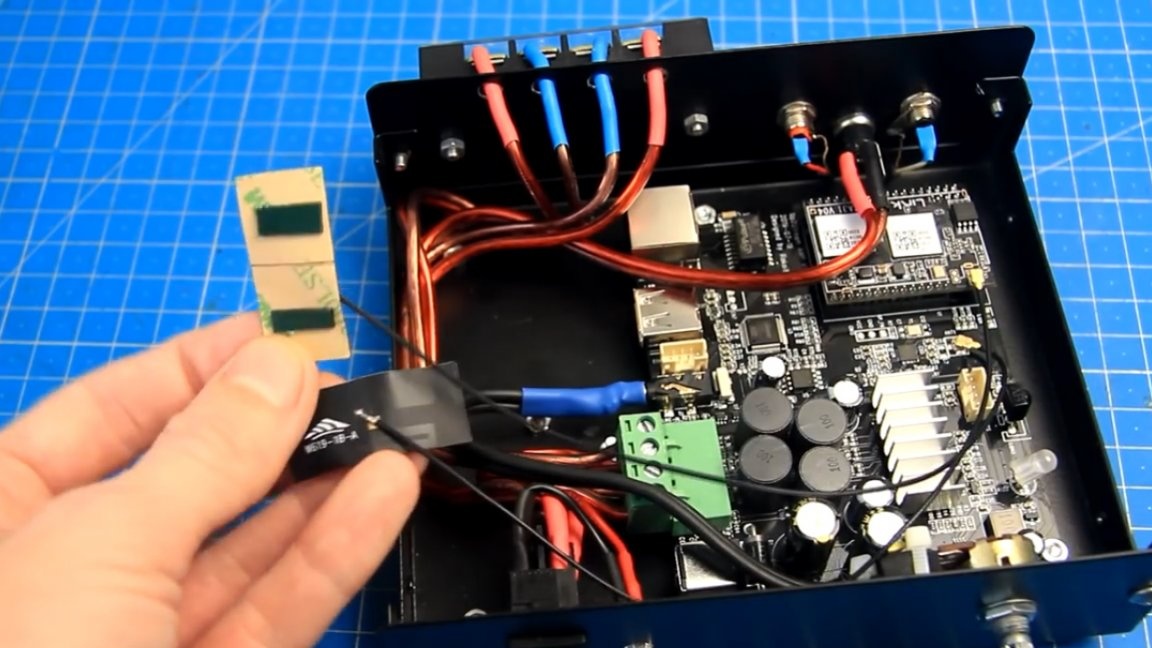
Antennas in their places. There is nothing complicated in the installation; if desired, the wires can still be fixed with ties.
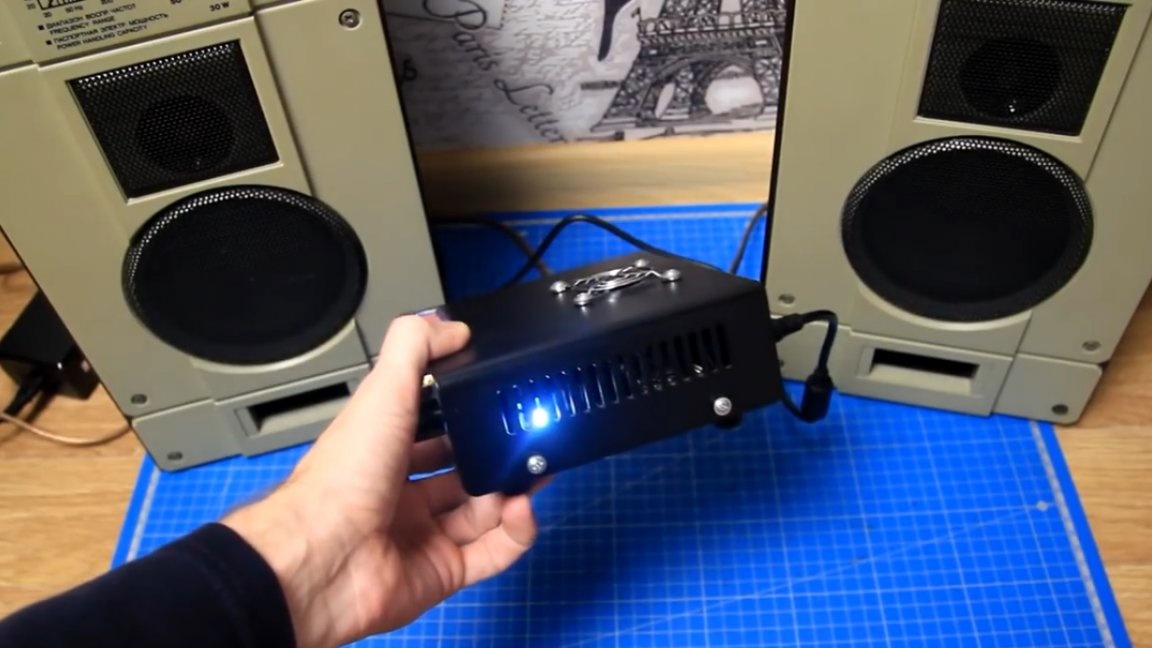
Now let's try to connect the power supply and see if power will come to the main board of the sound amplifier. We turn on the power supply in the 220V network and press the power button on the amplifier.
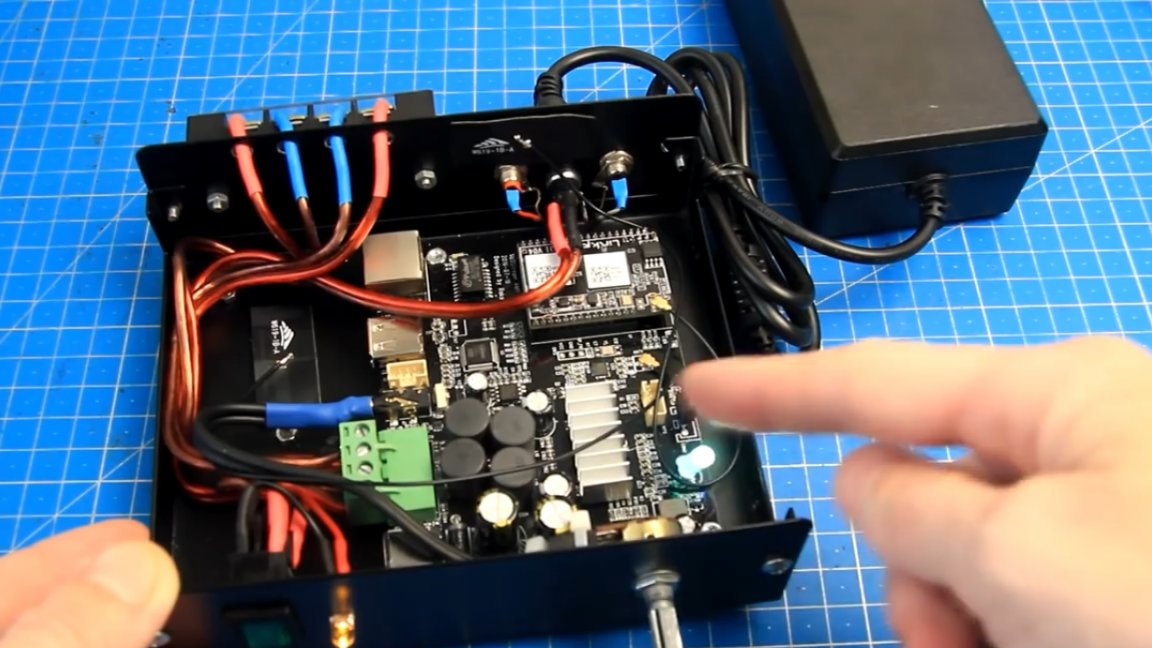
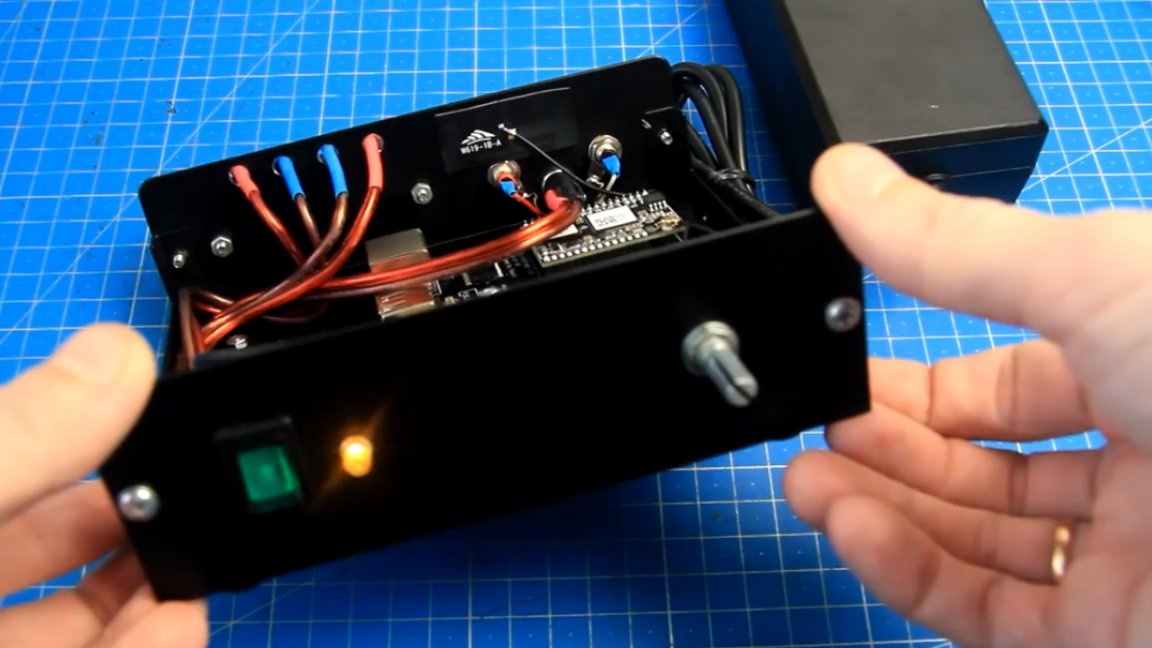
As you can see, the LED indicator located on the front panel lights up. An indicator located directly on the board itself also blinked. You can install the cover in its place.
Also, do not forget to install the handle on a variable resistor.
Here the author printed such a sticker on photo paper and pasted it on double-sided tape, then the logo can be glued to the case.
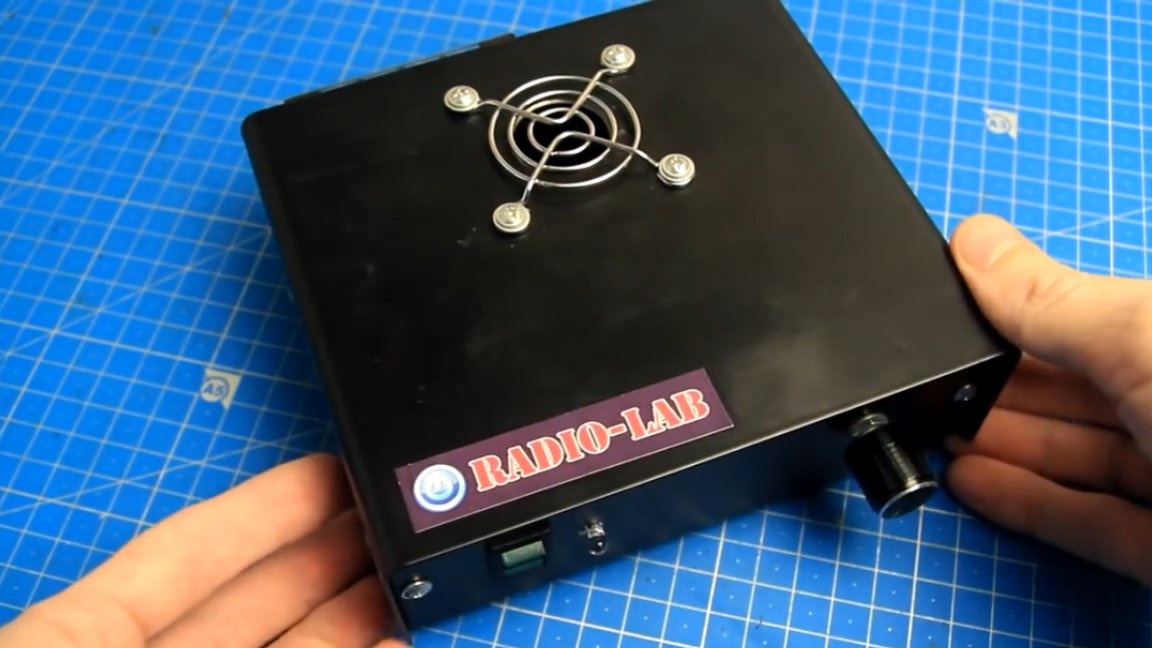
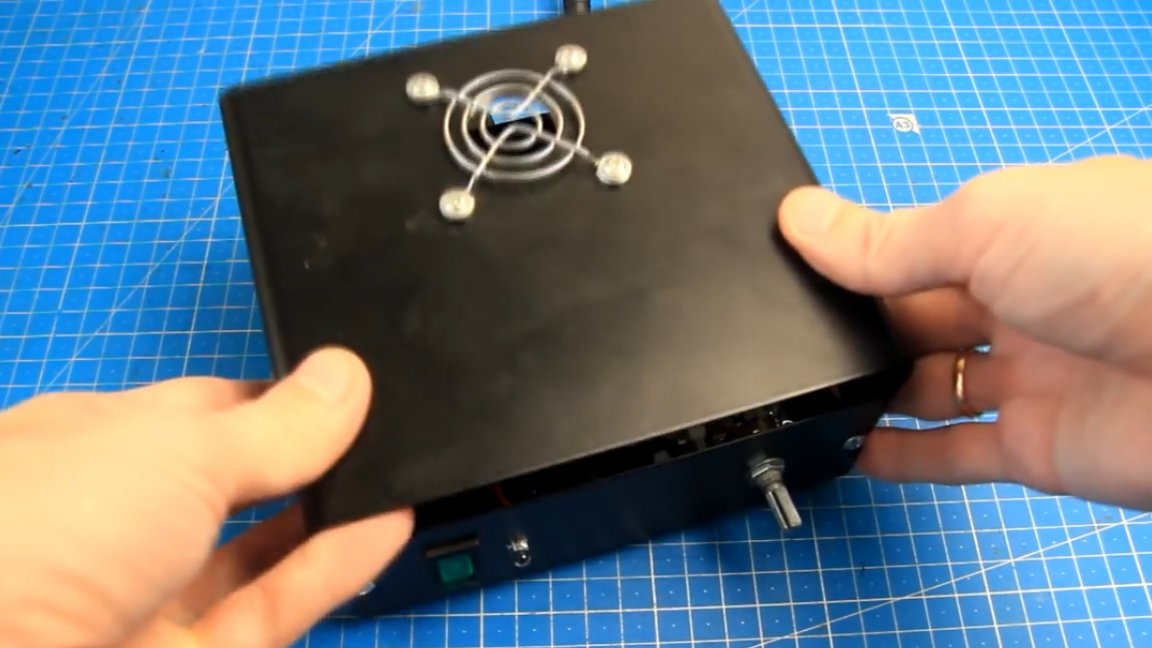
Now we can say that the amplifier is fully assembled.
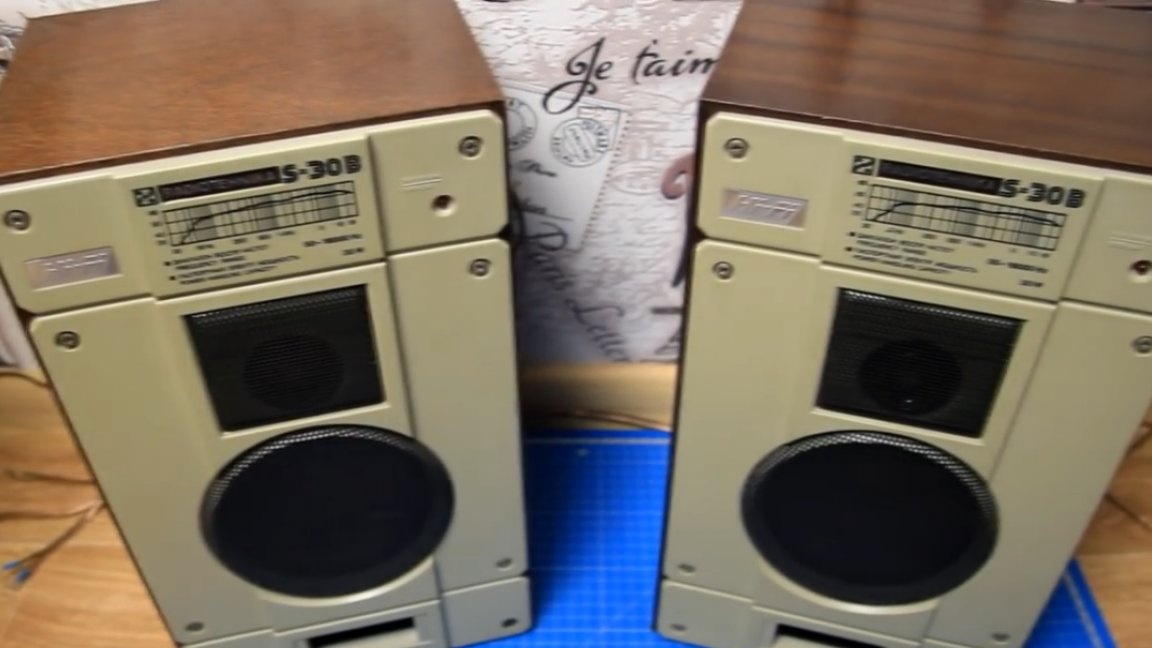
With iron robots finished, then you need to check the performance of the assembled amplifier. As test acoustics will be used speakers Radio Engineering S-30B.
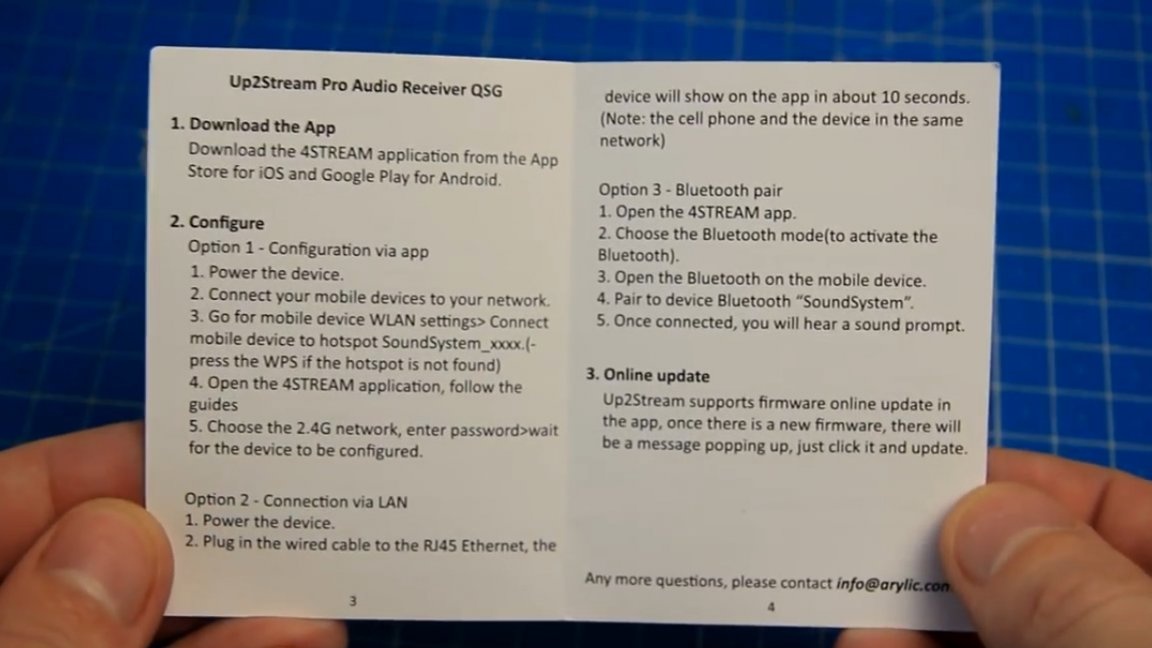
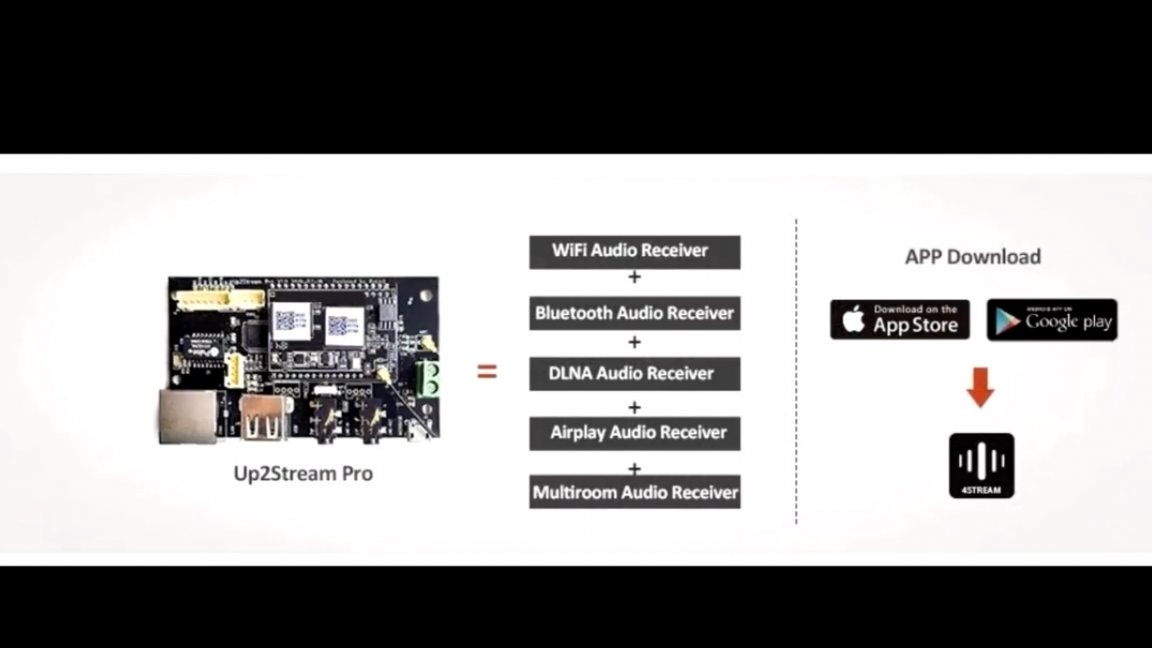
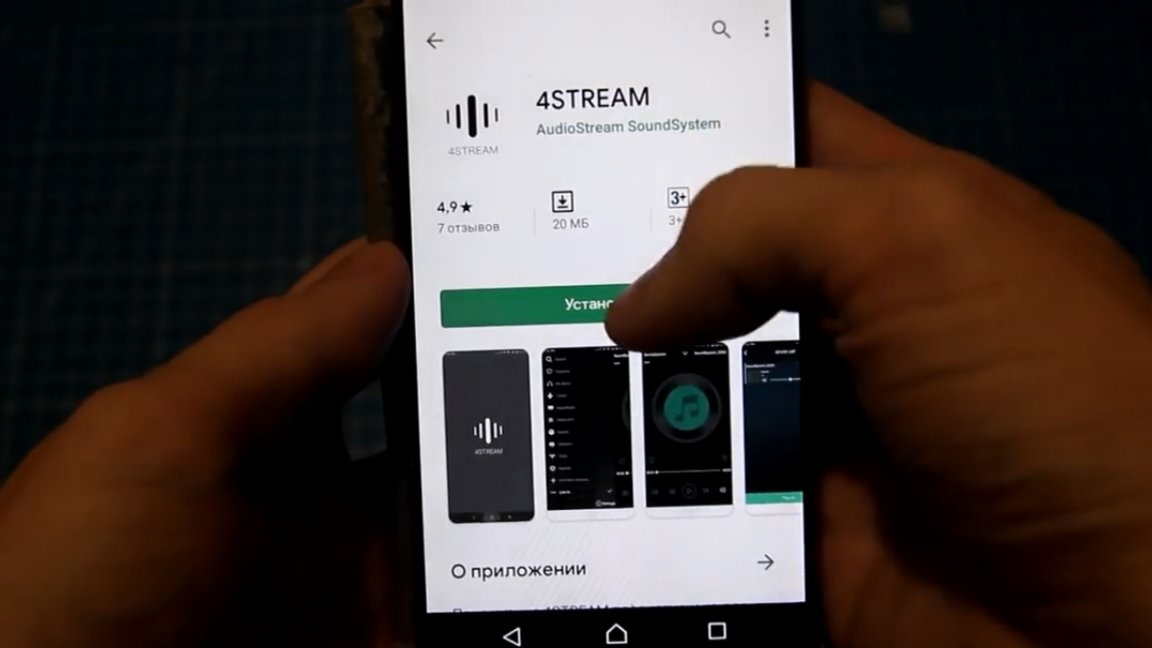
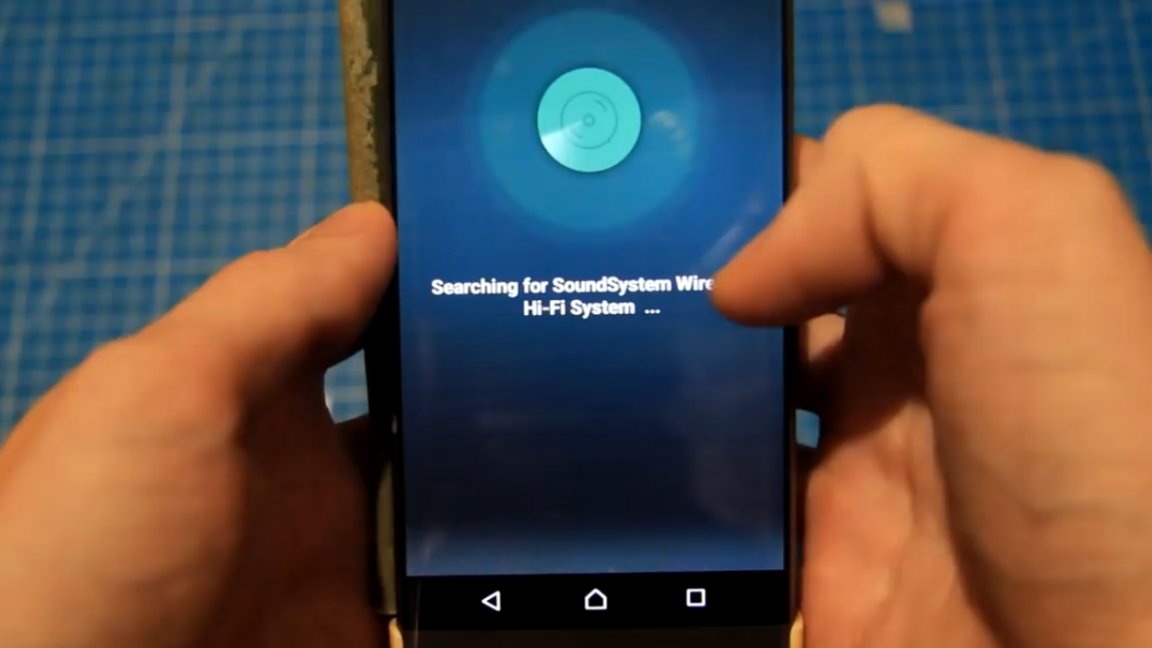
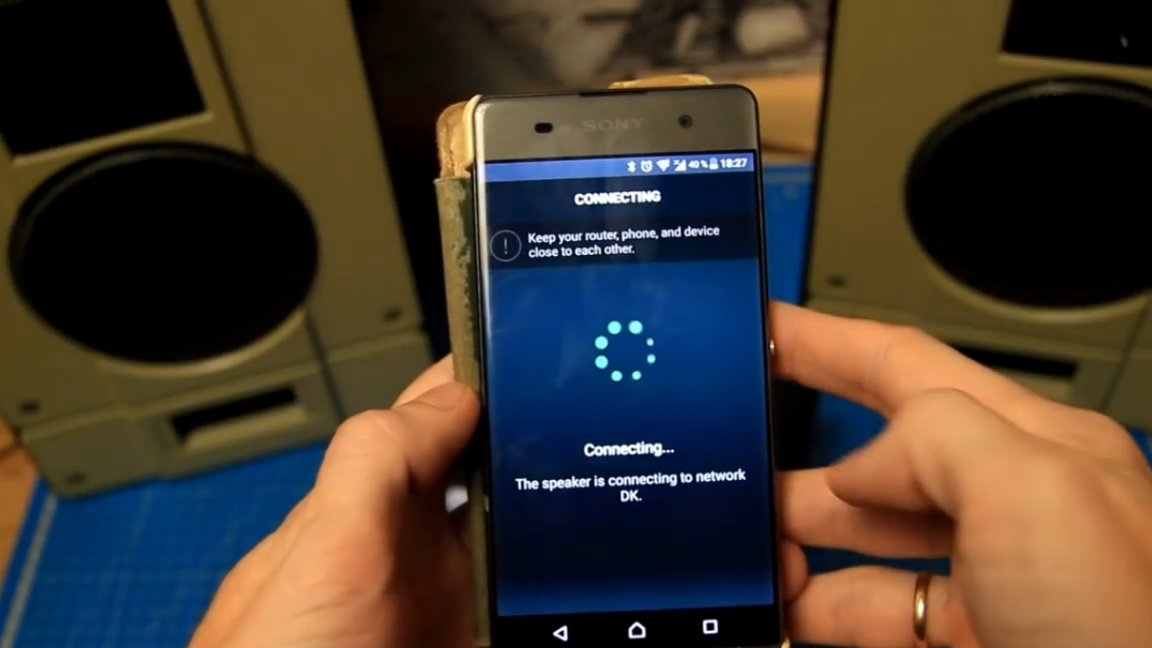
For this board to work with an amplifier on board, you either need a control panel, which the author does not have, or a Wi-Fi network, which in this case just does exist. In the case of Wi-Fi, first of all, you need to download and install the 4STREAM application on your smartphone. In this example, an Android-based phone was used, so we download the application from the Play Store.
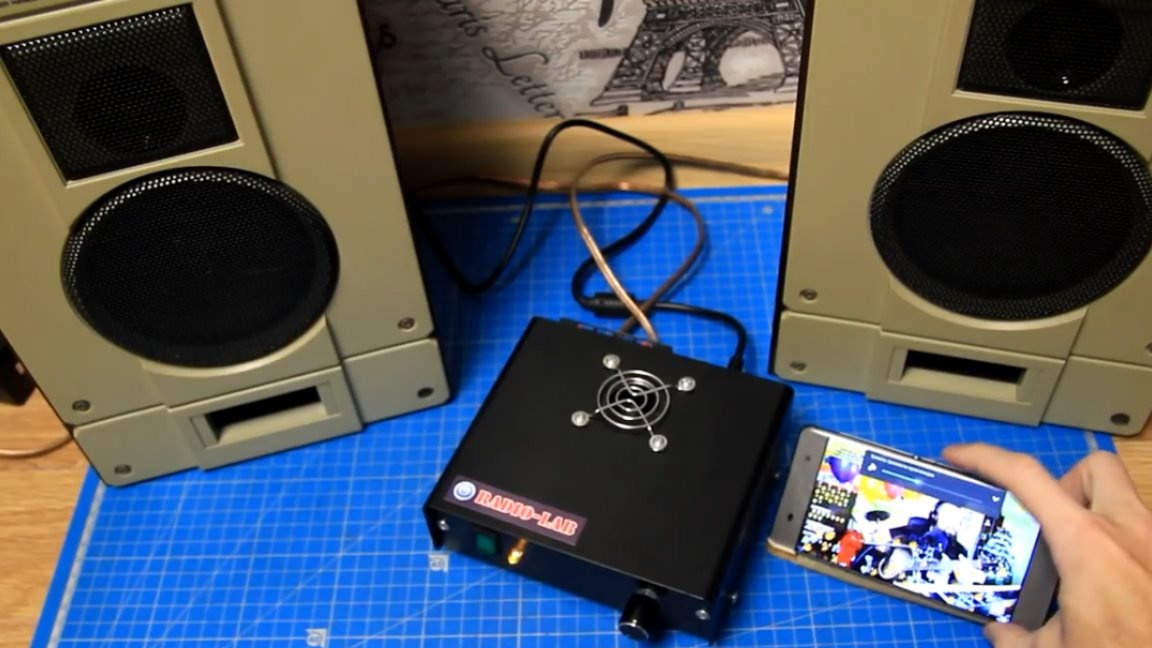
In the following video, the author tried as much as possible to show all the wide possibilities and numerous functions of this device.
By heating. The throttle at the output of the amplifier and the high-frequency module warmed up a bit more. But all temperatures are within normal limits, there is no overheating.
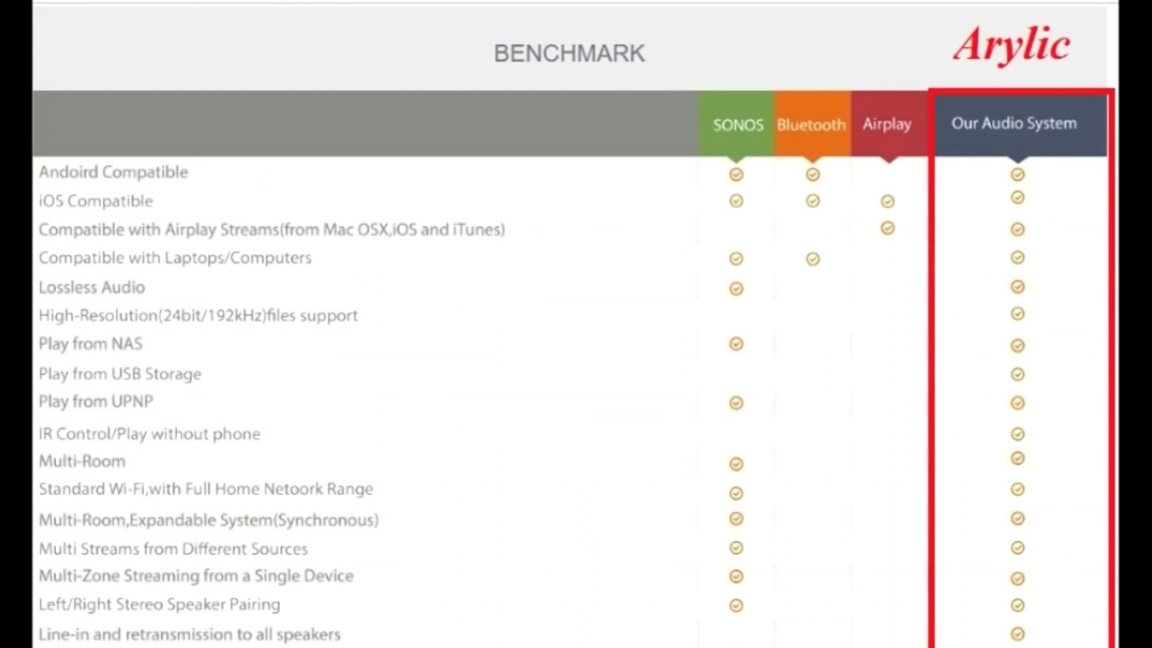
Summarize. These modules provide simply tremendous opportunities for functionality, Bluetooth, USB, AUX, listening to music from your phone, convenient and quick control and settings from a smartphone or computer application, managing multiple devices at once, turning on different music on different devices, you can create the most from multiple devices different groups for playing music, and with the Internet there is an opportunity to listen to just a huge variety of Internet radio stations, use streaming services, etc. Internet radio stations alone are huge for every taste and color of what it costs.Ready-made systems with similar capabilities are quite expensive, and by assembling such a device yourself, you can decently save and spend time on your favorite pastime. If you wish, you can try to repeat or collect something to your taste. This article showed one of the possible options.
That's all. Thank you for attention. See you soon!