
From the article below you will learn how to build do it yourself cycle generator.
On the basis of a bicycle, you can create a generator with which you can power various electronic devices: laptops, phones, and charge batteries!
Necessary materials:
- A support for the bicycle;
- Bicycle frame;
- 24 V DC electric motor;
- DC-DC charger;
- Car battery or some other suitable;
- DC-AC inverter;
- Wires for electrical connections;
- Multimeter;
- self-tapping screws;
- timber 10x10 cm;
- board 10x5 cm;
Specific equipment used by the master:
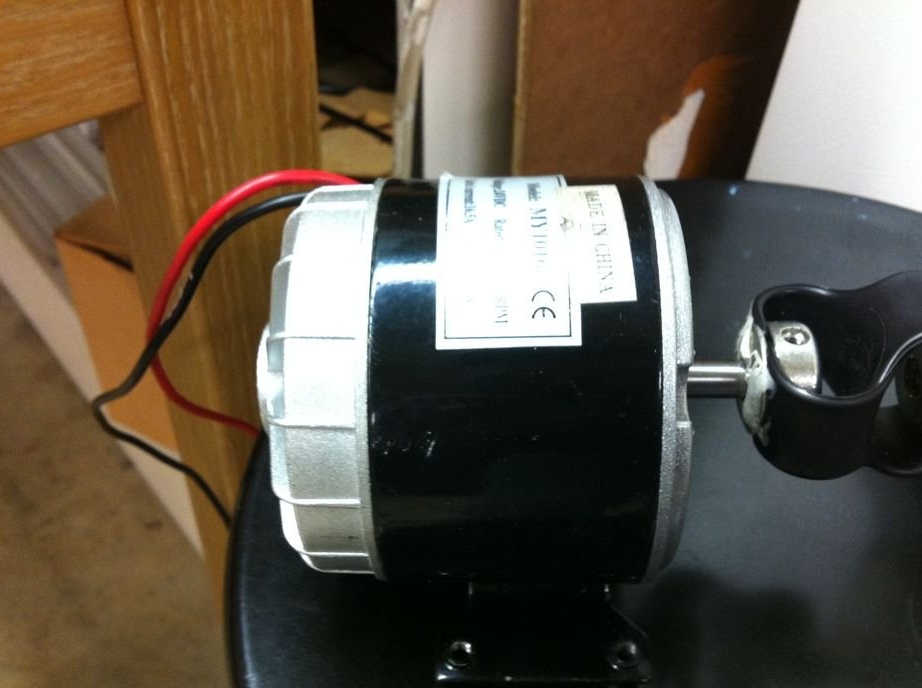
- Electric motor: 24V 300W;
- Battery: 12 V, 18 A, lead acid battery, model 7448k51;
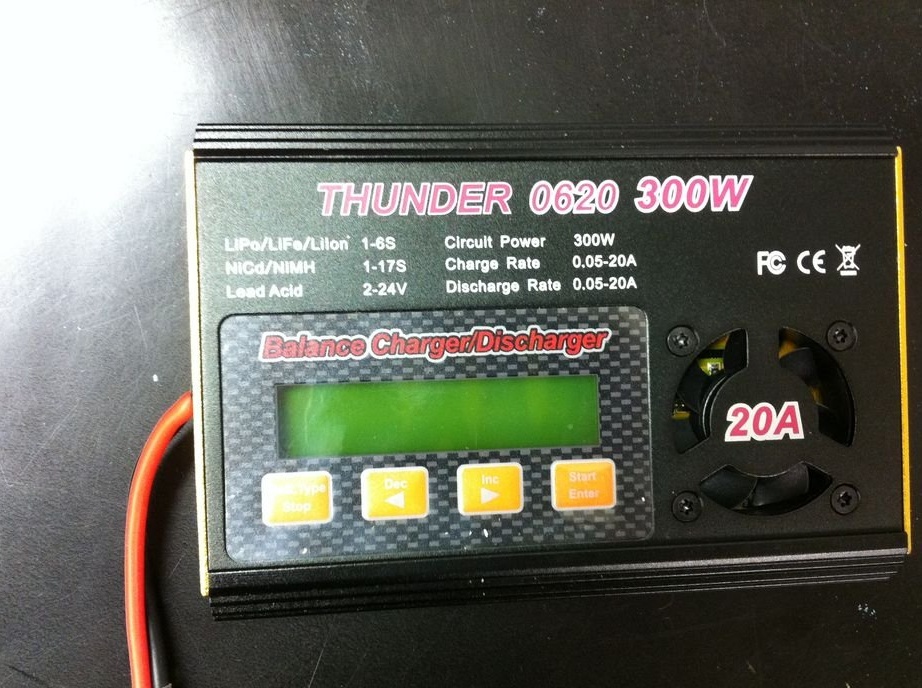
- Charger: Thunder 620 - 300 W, 20 A;
- Inverter: 400 W Model 6987k22;
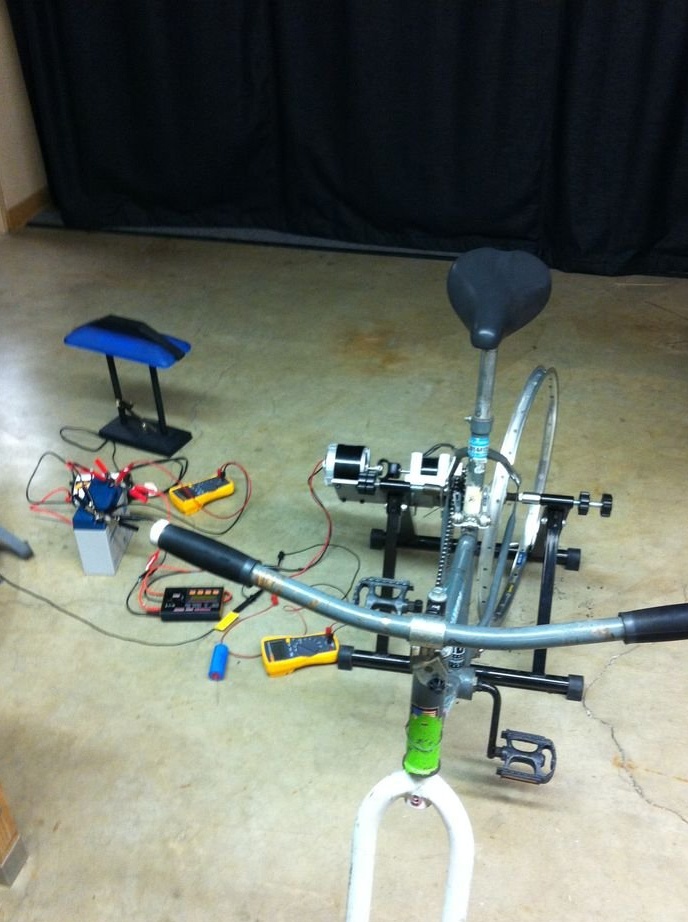
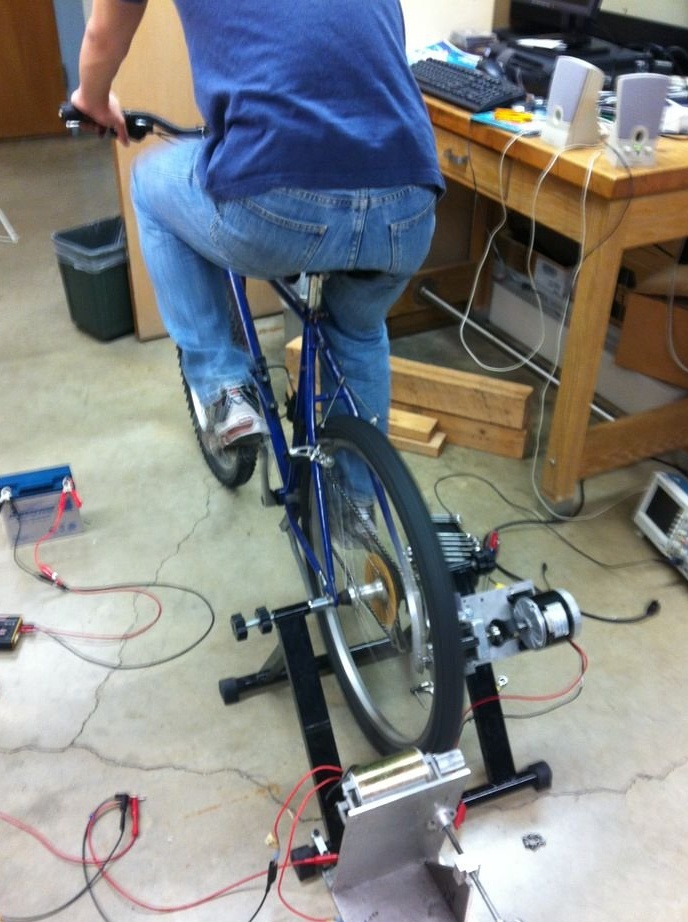
Step 1: Bicycle Frame Stand

In order to bike stood flat in place, needed stand. You can buy it or build it yourself. For the rear wheel, the master used the purchased rack, for the front - homemade.
The purchased stand is very suitable for the rear wheel, because it has adjustment from side to side. This facilitates connection to the engine.
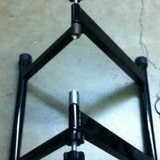
Step 2: Making a Front Wheel Stand

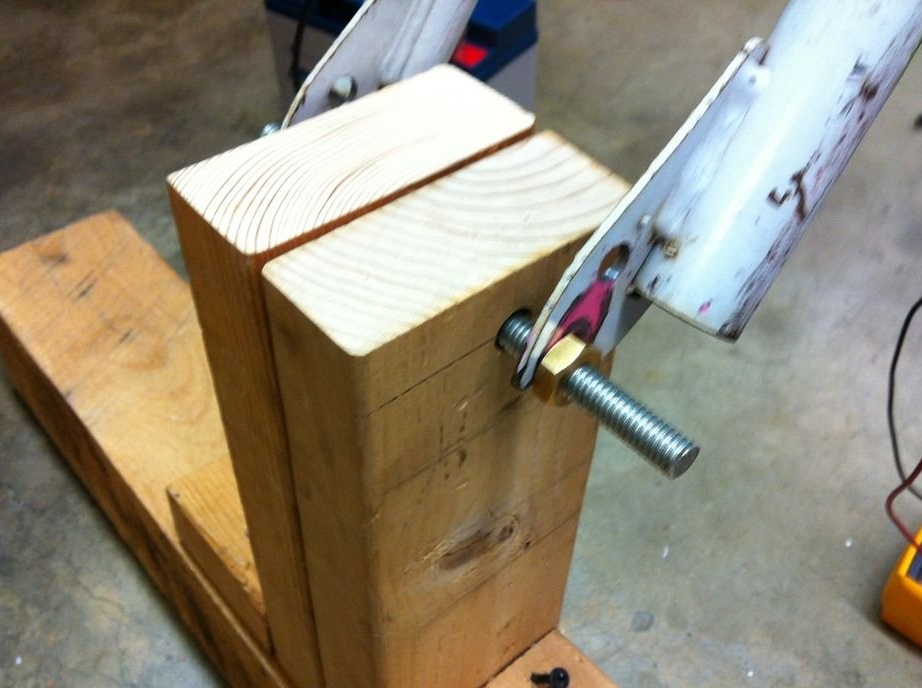
The front stand was made of wood. The base is made of a 10x10x60 cm wooden beam. Using two 5x10 cm boards, the craftsman made a block in which he secured a 9 mm hairpin. A bicycle fork was fixed in this hairpin. The hairpin is mounted high enough to sit comfortably on a bicycle. The distance from the ground was 31 cm.
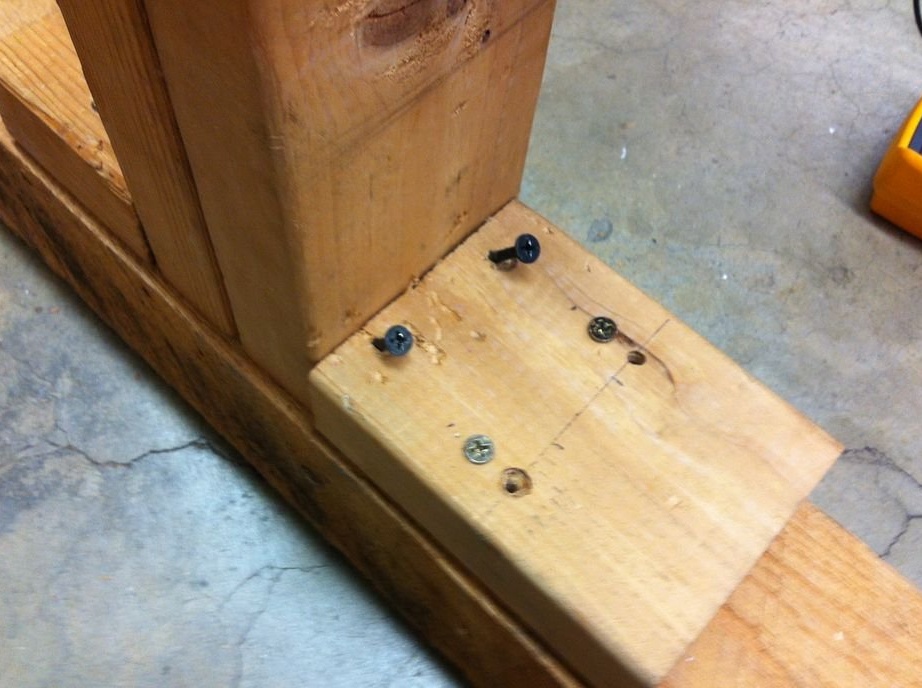
This vertical stand is fixed with support blocks located at the edges. These blocks are also made of 5x10 cm boards and 10 cm long. The whole structure is fixed with self-tapping screws.
Such a fork support is only necessary if only one bicycle frame is available.
Step 3: Bicycle Frame
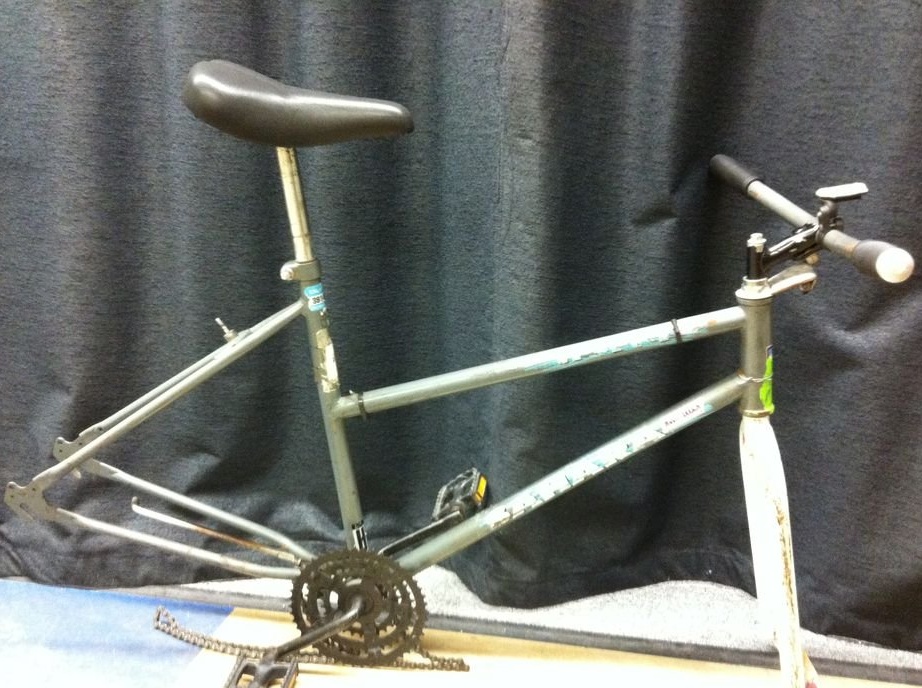
Any bicycle frame will fit absolutely any with a working centerpiece, connecting rods, pedals and a chain.
Step 4: electric motor
There are also two options: you can rotate the motor shaft using the rear wheel or directly with a chain. If you use the rear wheel, you will have to overcome friction, and this, in turn, is energy consumption.
Motor selection:
According to the master, in this homemade a stepper motor, car generator or electric motor will work. He used an electric motor. The engine will produce voltage depending on its speed, and produce current depending on the consumer.
The number of engine revolutions is determined by the ratio of the size of the wheel and the hub on the motor shaft.
Step 5: Rear Wheel Drive Cycle Generator
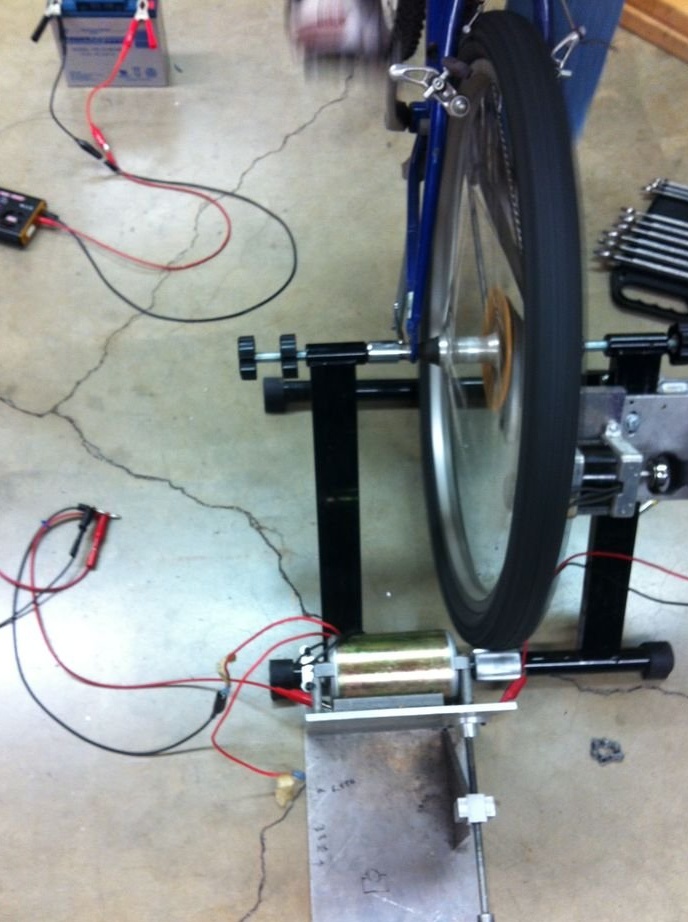
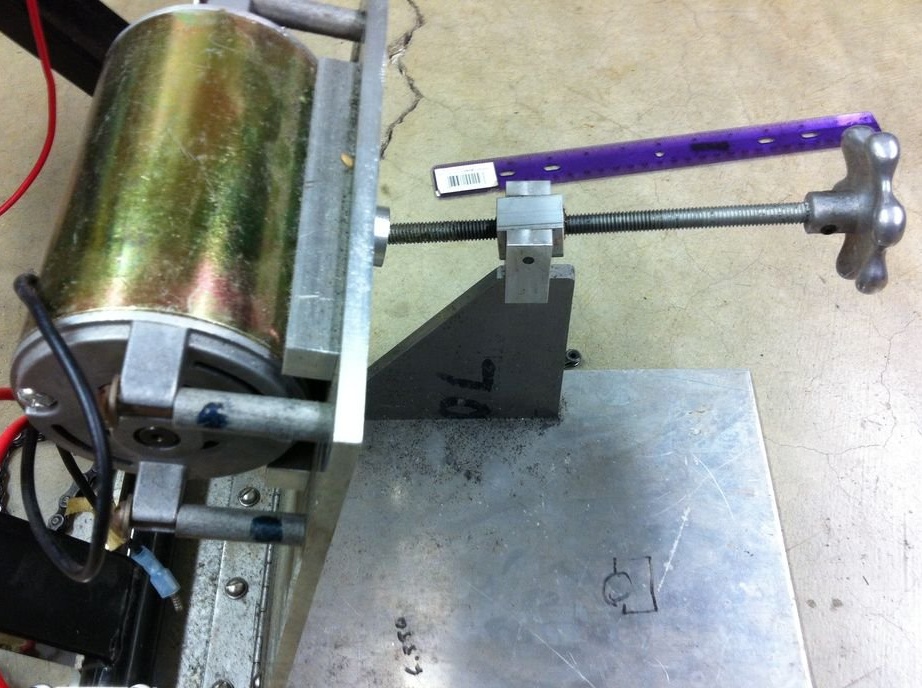
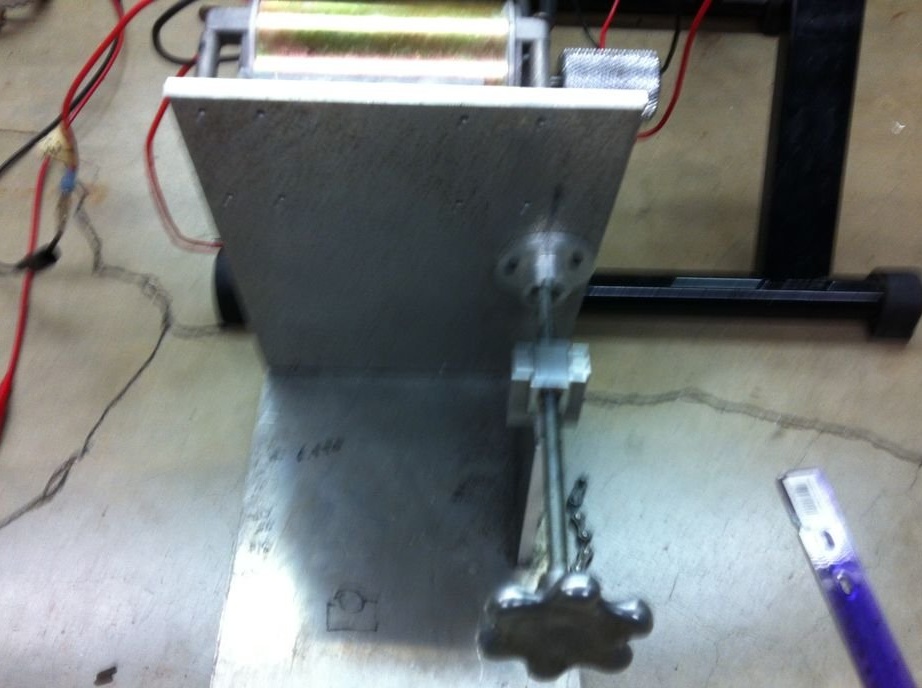
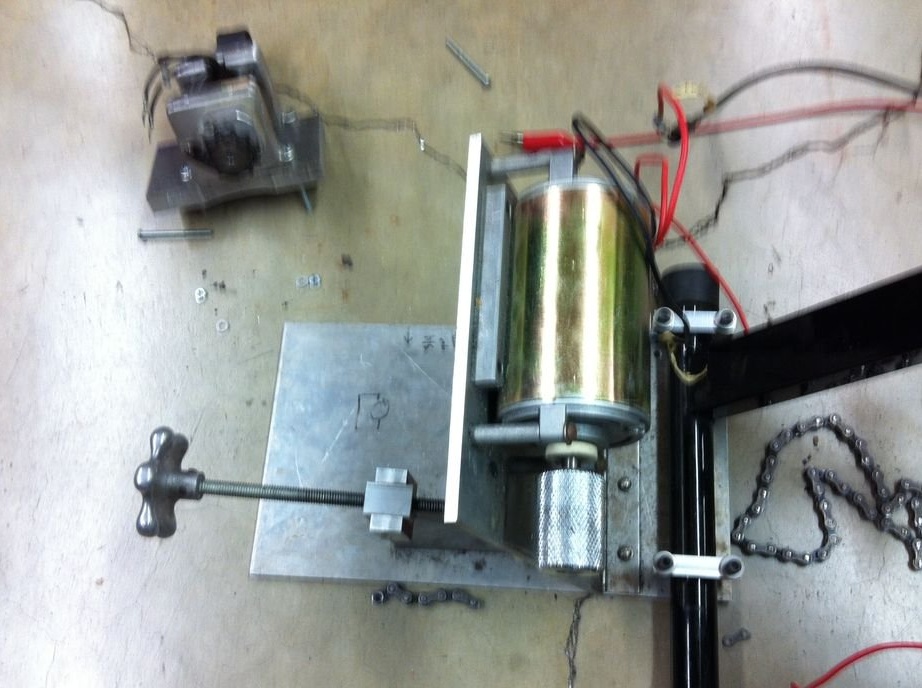
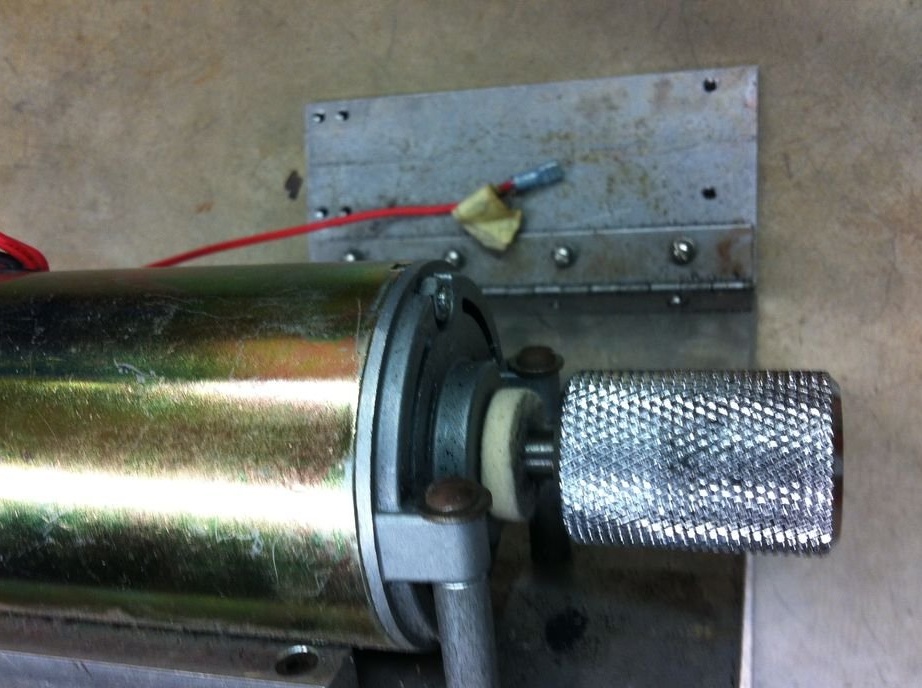

The use of the rear wheel in cycle generators is the most common. On the motor shaft, you need to find a cylinder that has good traction with the wheel. Using a hinge and metal plates, the master assembled fasteners for the engine, which can change the contact density between the cylinder and the wheel. Using a bolt, the angle of the electric motor is changed.
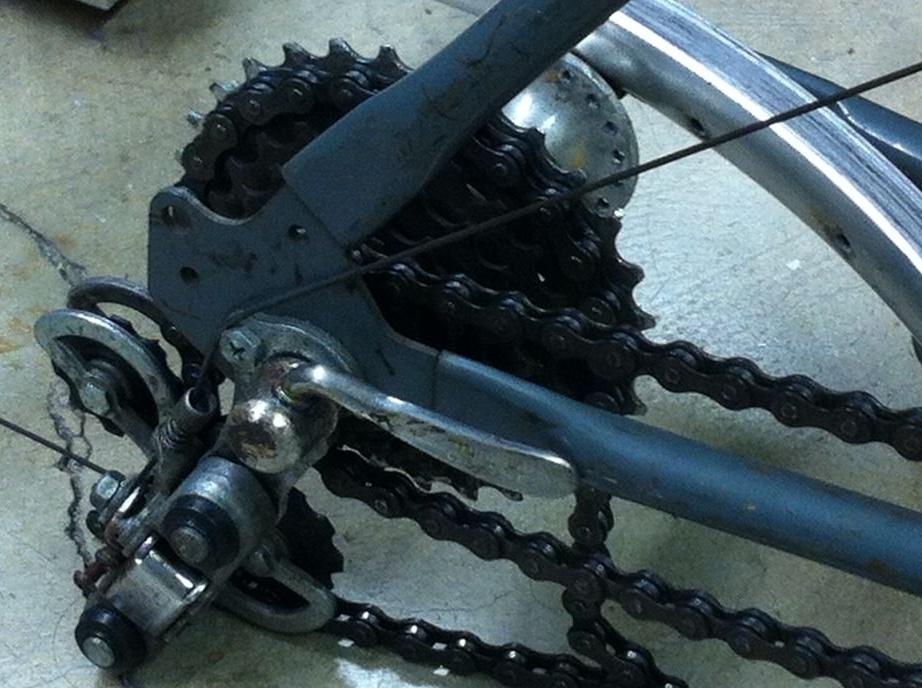
Step 6: cycle generator in a chain-engine link
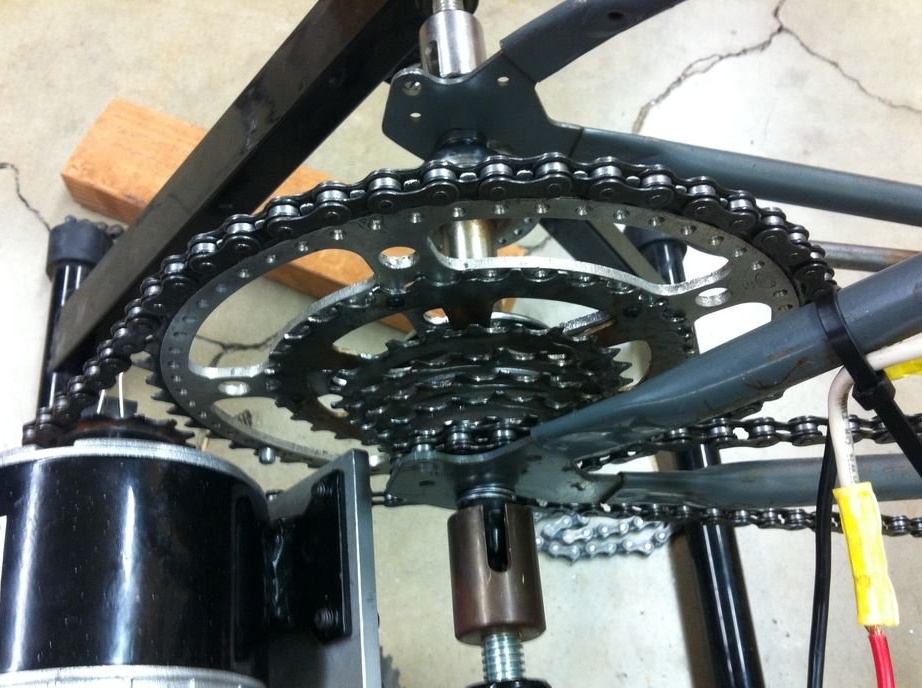
To do this, it is necessary to adjust the main circuit. It should be stretched from a large sprocket in the middle to a small asterisk of the rear wheel. With a speed selector, chain length adjustment is not required.
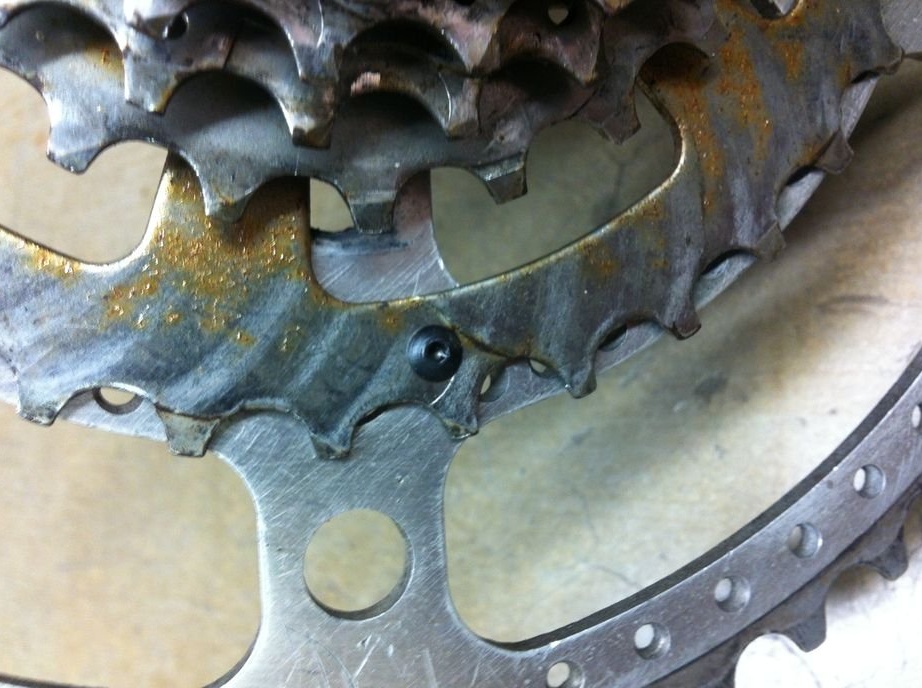
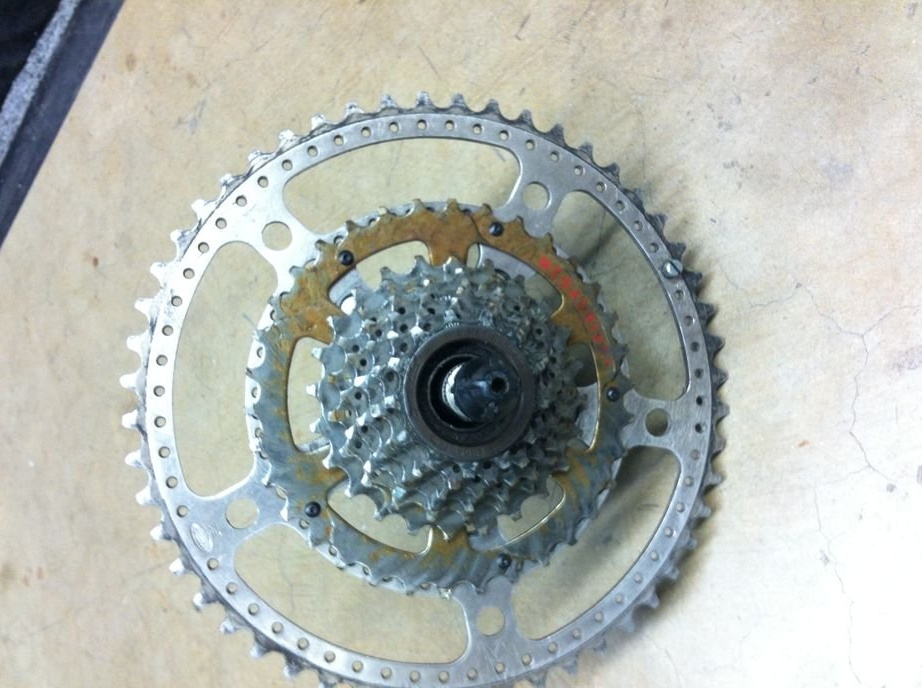
The master riveted a large gear onto the block of gears of the rear wheel, exactly the same as that located on the centerpiece.
A second circuit is required to connect the electric motor and the large rear sprocket. There will be two chains on the gear block of the rear wheel.
The pedals will easily turn, but the voltage that will be generated will be about 3-6 V.
Transmission:
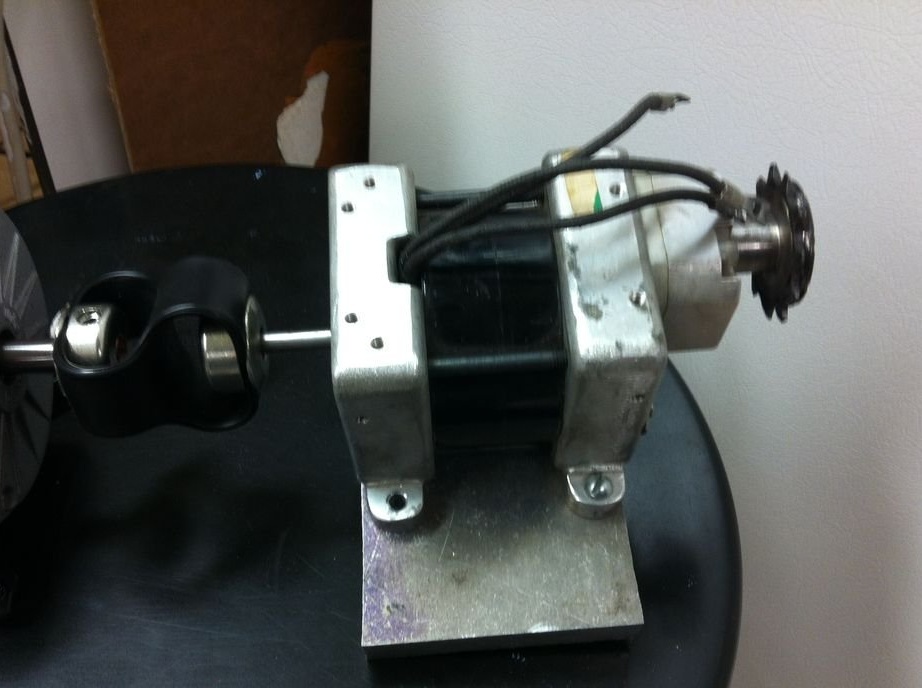
To achieve more revolutions, the master installed a gearbox with a ratio of 1 to 8. This transmission rotates the input shaft and rotates the output shaft faster / slower. An old AC motor was used as a gearbox. The master added a hitch to the output shaft of the gearbox and the input shaft of the motor. With additional revolutions, the voltage will increase. This gearbox has a function that slows down if too much torque occurs. This function will not allow to produce more than 0.7A when the battery is on.
A large asterisk on the rear wheel made it possible to get about 12-15V.
Electric motor:
RPM can also be adjusted by selecting the right engine. In this home-made engine, the characteristics are: 24 V at 2800 rpm.
To get a higher voltage, an electric motor with lower revs will be required, but it will be harder to rotate.
One way or another, the shaft will be rotated by a bicycle chain.
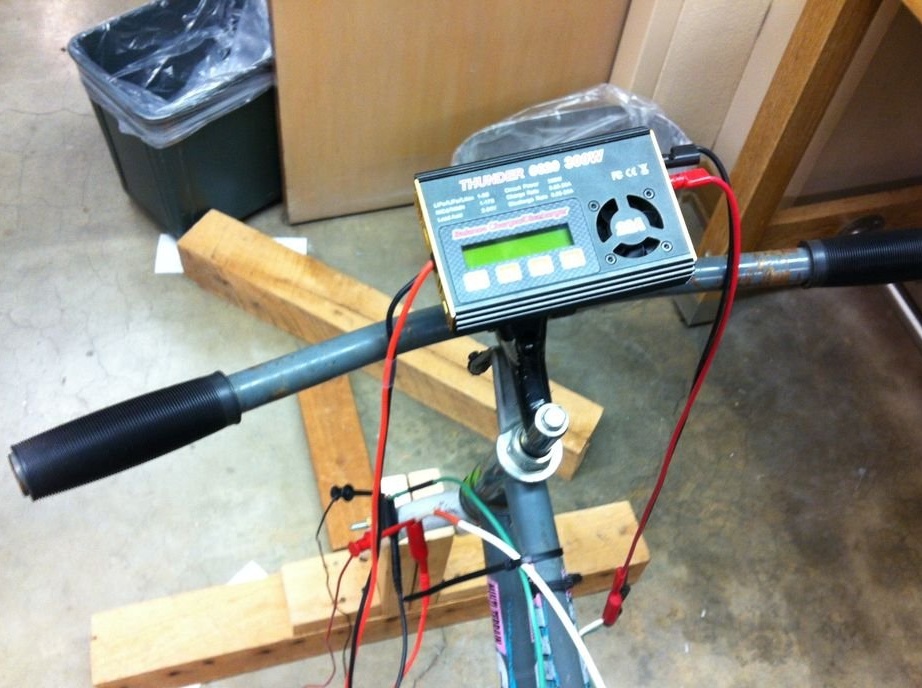
Step 7: Connect the engine to the charger
To charge the battery you need a voltage higher than the output. High voltage will damage the battery.
Charger selection:
The voltage that the electric motor gives out directly depends on the speed of the pedals. The charger of the master accepts from 12 to 24 V. with a charging current of 5.4A. The charger current must match the battery capacity.
Connection:
Measure the voltage that the motor gives out. The positive terminal of the motor must be connected to the positive of the charger, negative to negative. Depending on the direction of rotation, the motor may produce reverse voltage.
It is necessary to ensure that the engine does not give out more than 24V, since the charger will become worthless. In case of excess voltage, it is necessary to consider the wiring diagram with the addition of zener diodes.
Step 8: Connect the battery to the charger
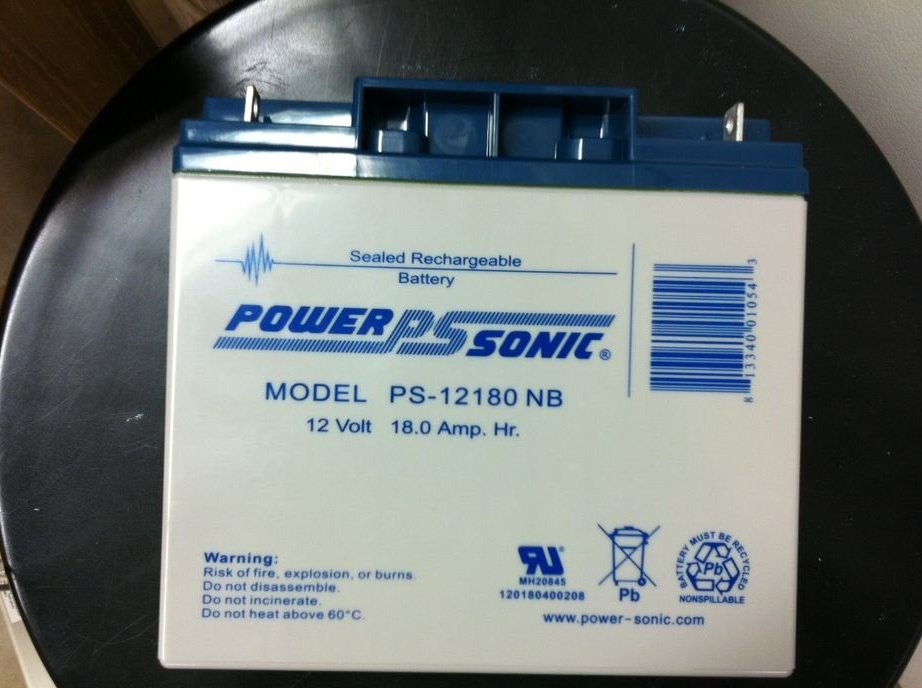
Some gadgets require charging for too long. The battery will come to the rescue. He will hold the charge received. It remains to choose it. The choice of the master fell on a sealed 18-ampere battery.
Step 9: Connect the inverter to the battery
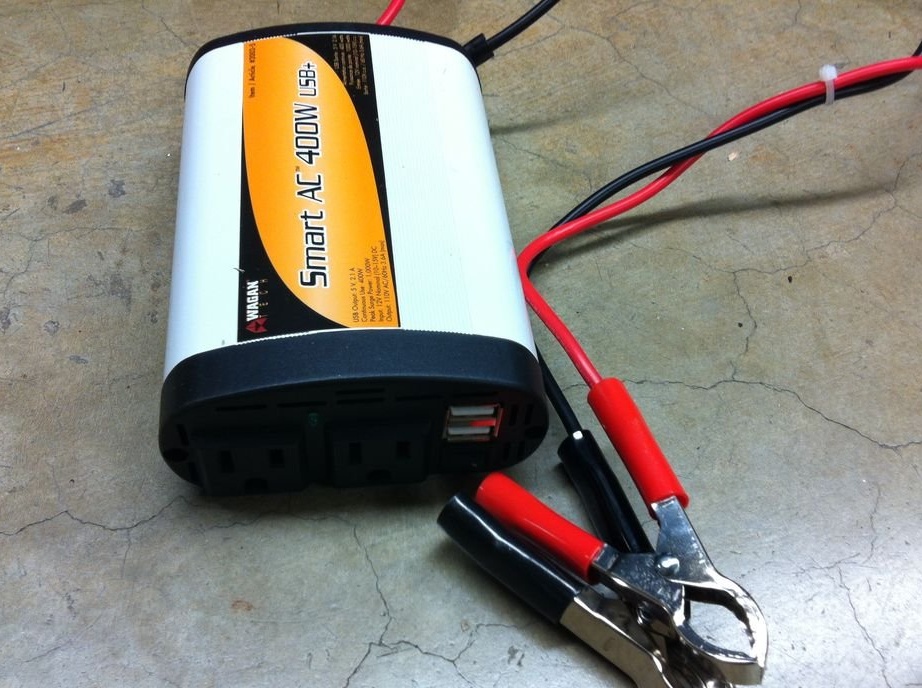
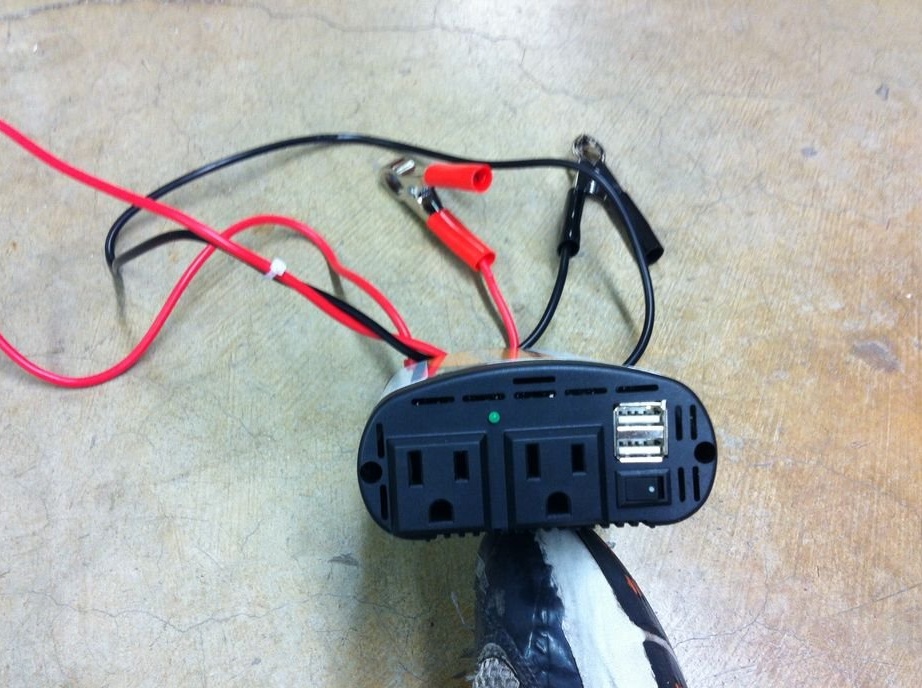
The inverter's task is to convert the battery DC voltage to AC voltage.There are small car inverters that are powered by a cigarette lighter.
Make sure that the output voltage of the inverter is at the line voltage level.
The inverter power is also very important. It will depend on the type of electronic device that will be connected.
Many converters consume only 12 V DC. Therefore, the best inverter is one that can receive an input voltage of 12 to 14 V.
The inverter must be kept open to protect consumers. Air circulation is very important for the inverter to operate, as current conversion creates a lot of heat.
The wizard decided to use the Wagan 400 W model, which has two additional USB ports from McMaster-Carr (model 6987K22). The power that he needs should be at least 250 watts. This converter recognizes the presence of an overload by the input voltage and turns off, thereby protecting the devices.
The master also kindly provided several videos of the system in action.
Rear Wheel System:
Connecting the engine to the charger:
System using chain and gearbox:
If you liked the author’s homemade, then try to repeat and make. Thank you for attention. See you soon!