

Very easy to manufacture, homemade wall mount file holder. This holder is especially suitable for files with long blades.
Greetings to all my colleagues the inhabitants of our sites!
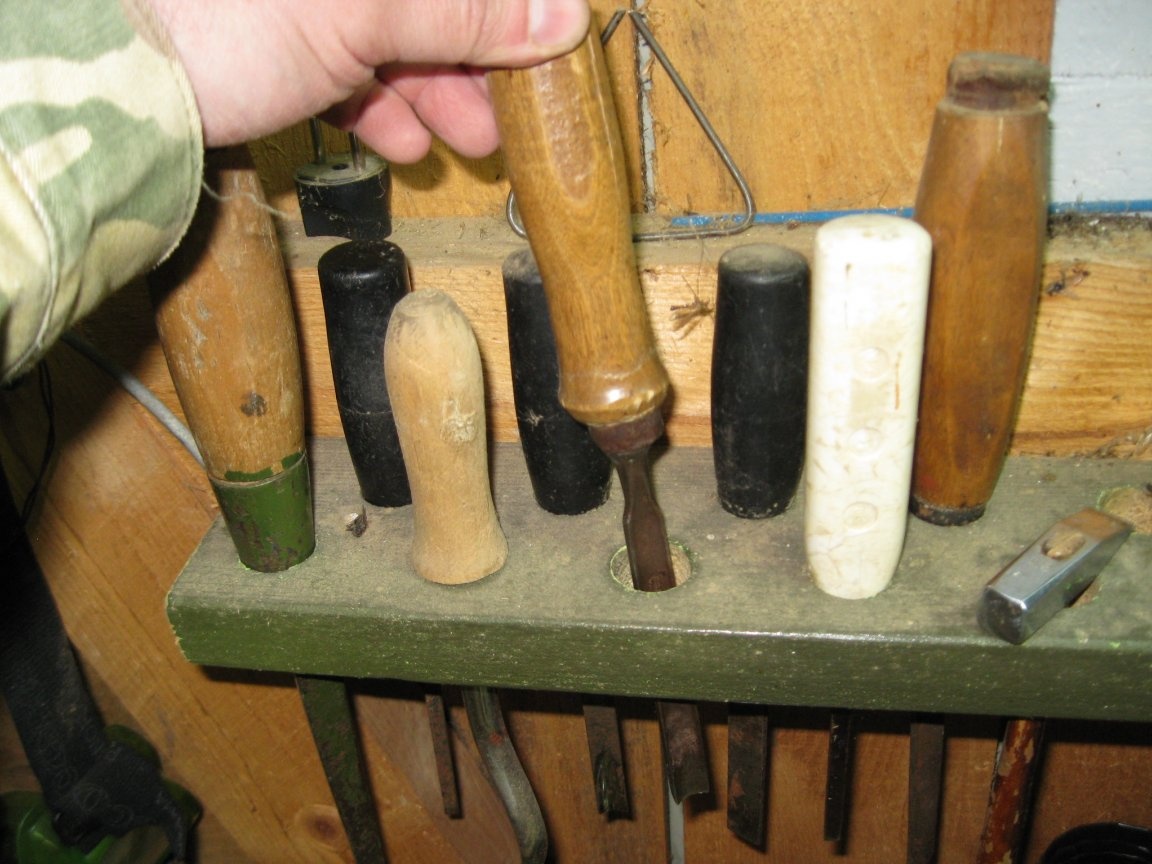
In my workshop, there is a set of files that I often use when working with wood. It actually consists of a set of two files (rasps) for wood, which I have had for a long time, probably since Soviet times. And until now, this kit has served me pretty well.
This is how it looks.
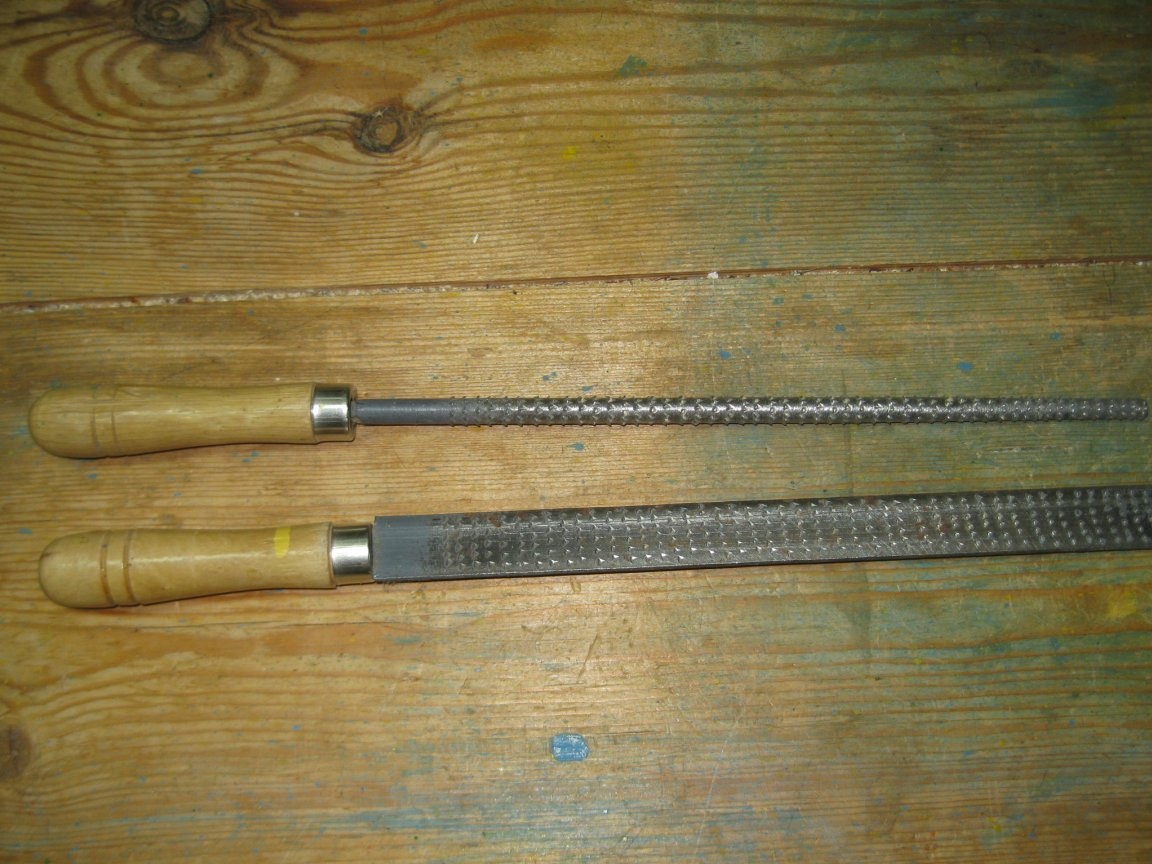
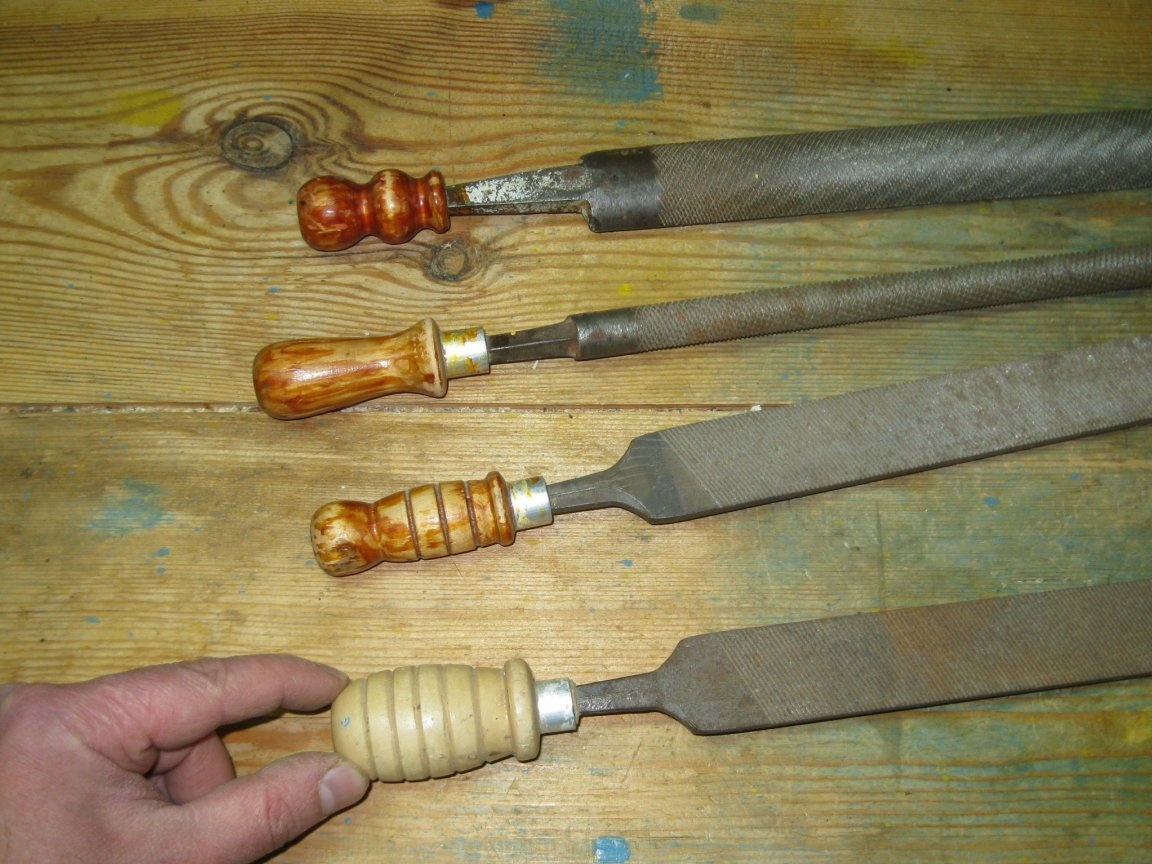
And besides this set, there are several other files with long canvases and a large notch. Although these files can also be used for metal processing, but I mainly use them for working with wood.
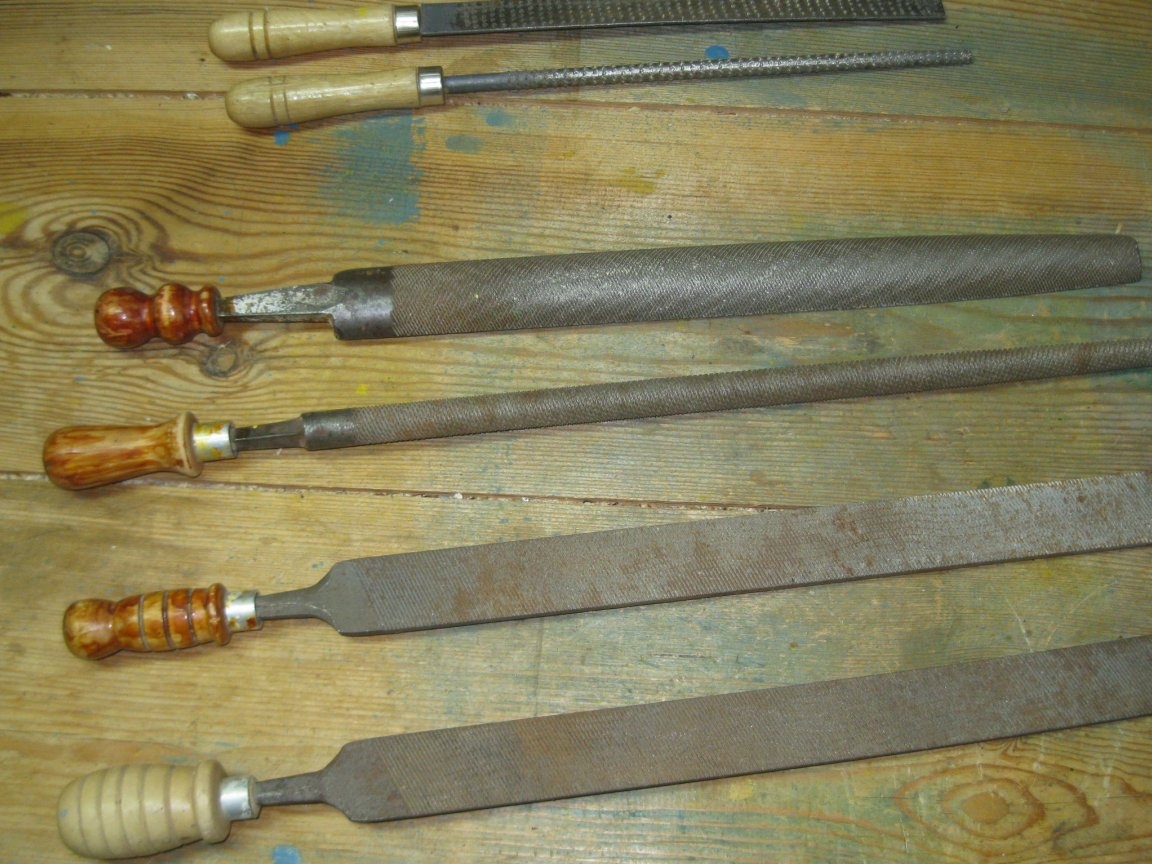
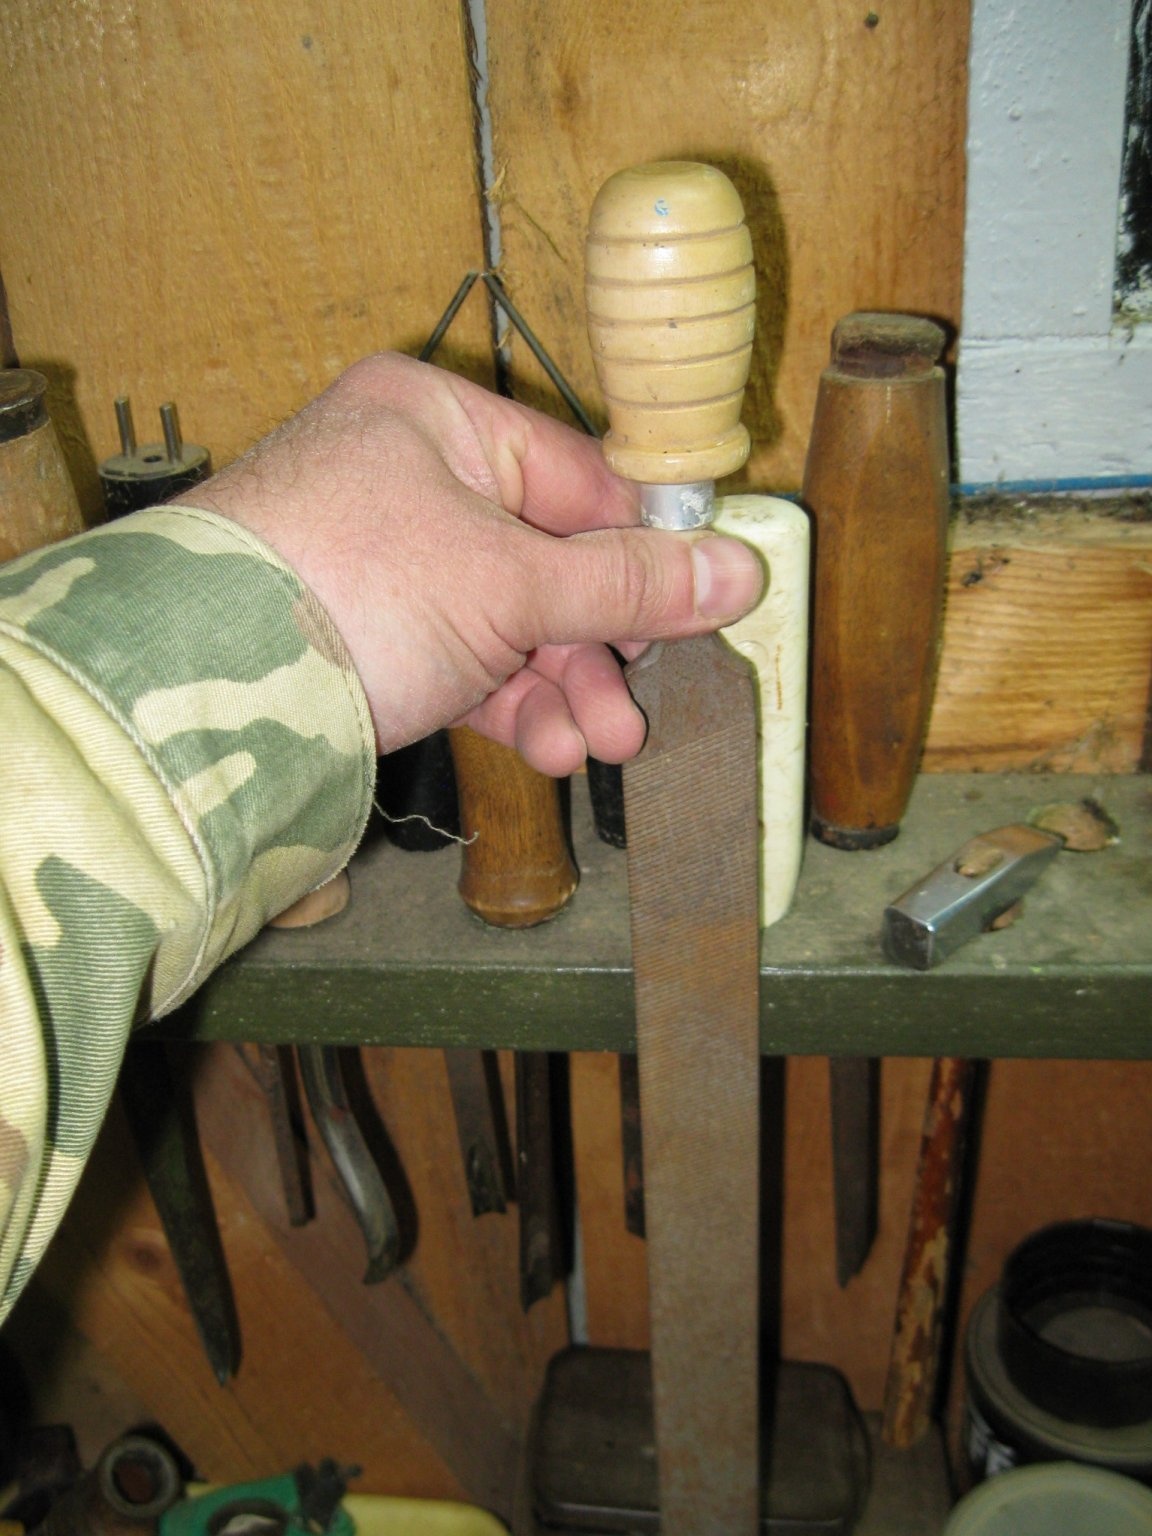
And for these files, I once made such home-made handles here.
It must be said that in spite of the abundance in our time of various electric tools, for example, the same manual milling cutter, it often happens that if you need to make a small notch or groove in a wooden blank, it is easier and faster to use a file on wood.
Therefore, I use my set of files quite often, and it is always at my fingertips.
However, the problem is that so far these files simply lay on my shelf shelf, which was not very convenient. And finally, recently, my hands reached the point of making some convenient holder for these files.
And at first, I wanted to make an ordinary holder from a board with through slots or holes (as is often done in such cases), which would be attached to the wall.
That is, it’s about the type I’ve made a holder for chisels.
However, such a holder is still more suitable for tools with short blades or working parts, for example, for the same chisels. But for files with long canvases, it will not be very convenient, since when removing or inserting such a file into this holder, it will have to be raised very high. In addition, the file of the file will scratch the walls of the slot of the holder all the time.
Therefore, thinking, I decided to go the other way, and make a very simple holder from a wooden board with screws and a washer screwed into it. Actually, these screws will be the cells holding the files.
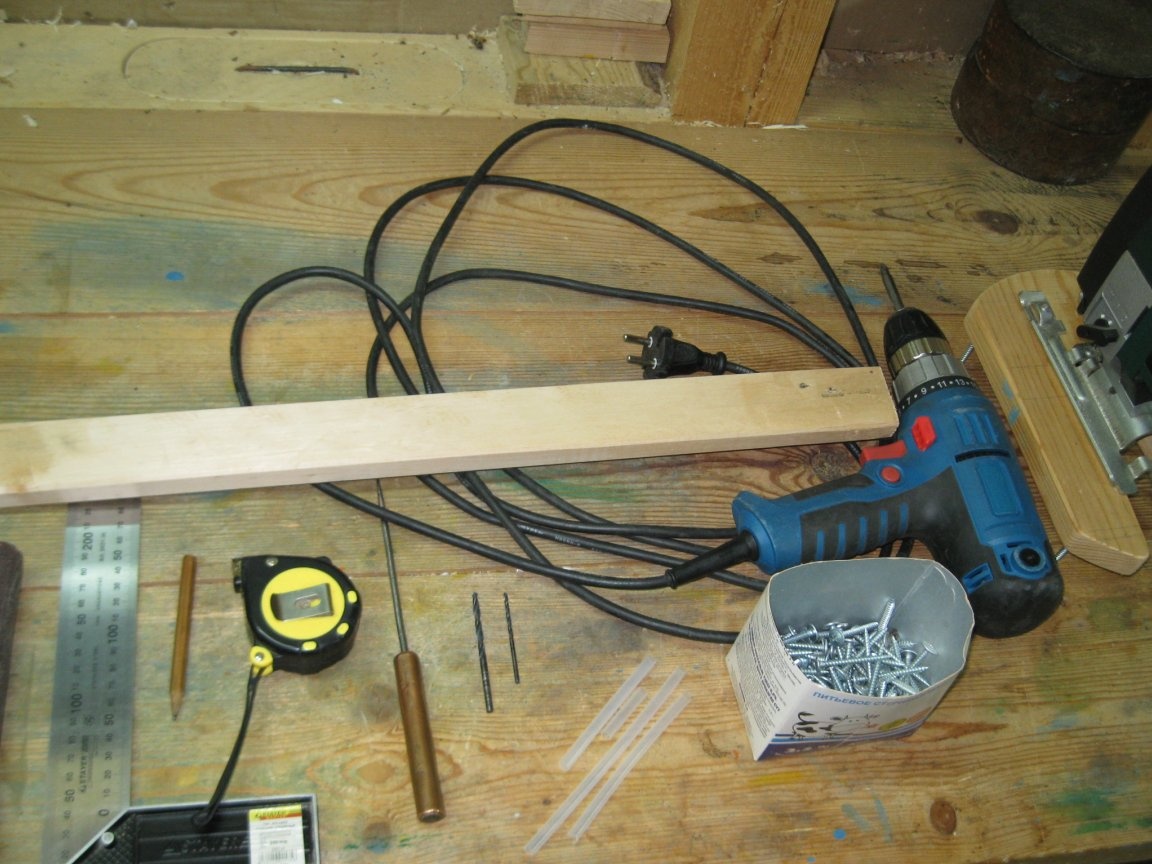
To do this, I needed the following accessories:
Materials and fasteners:
• Wooden plank 2 cm thick, 4 cm wide, and about 40 cm long.
• Screws with a press washer 4.2x40 mm.
• Plastic tubes from bottles of liquid soap.
Instruments:
• Drawing and measuring tools (pencil, tape measure and square).
• Awl.
• Powerful scissors or knife.
• Electric jigsaw with a file for a figured cut.
• Electric drill / screwdriver.
• Drill for metal with a diameter of 2.5 - 3 mm.
• Drill for metal with a diameter of 4 mm.
• Screwdriver bit PH2 or screwdriver for screwdriving.
• Sandpaper.
The procedure for manufacturing the holder.
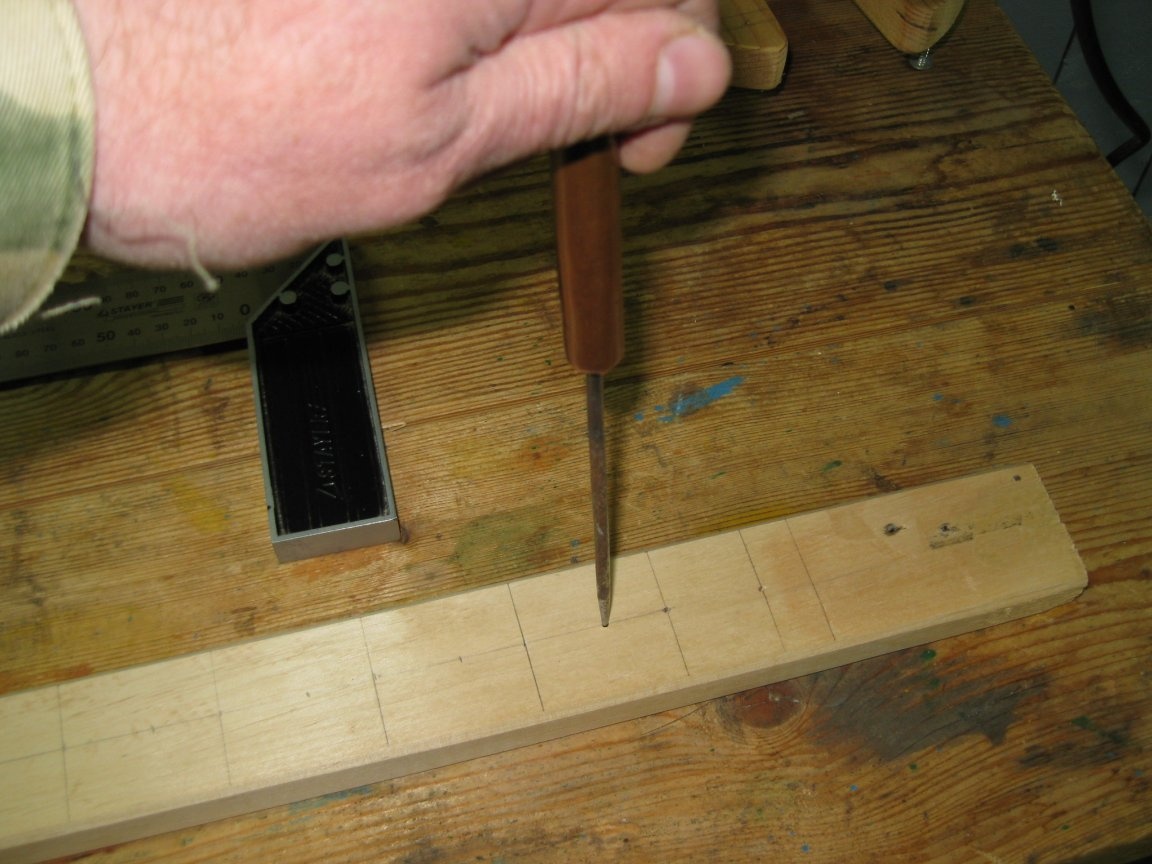
Step 1. Marking the workpiece.
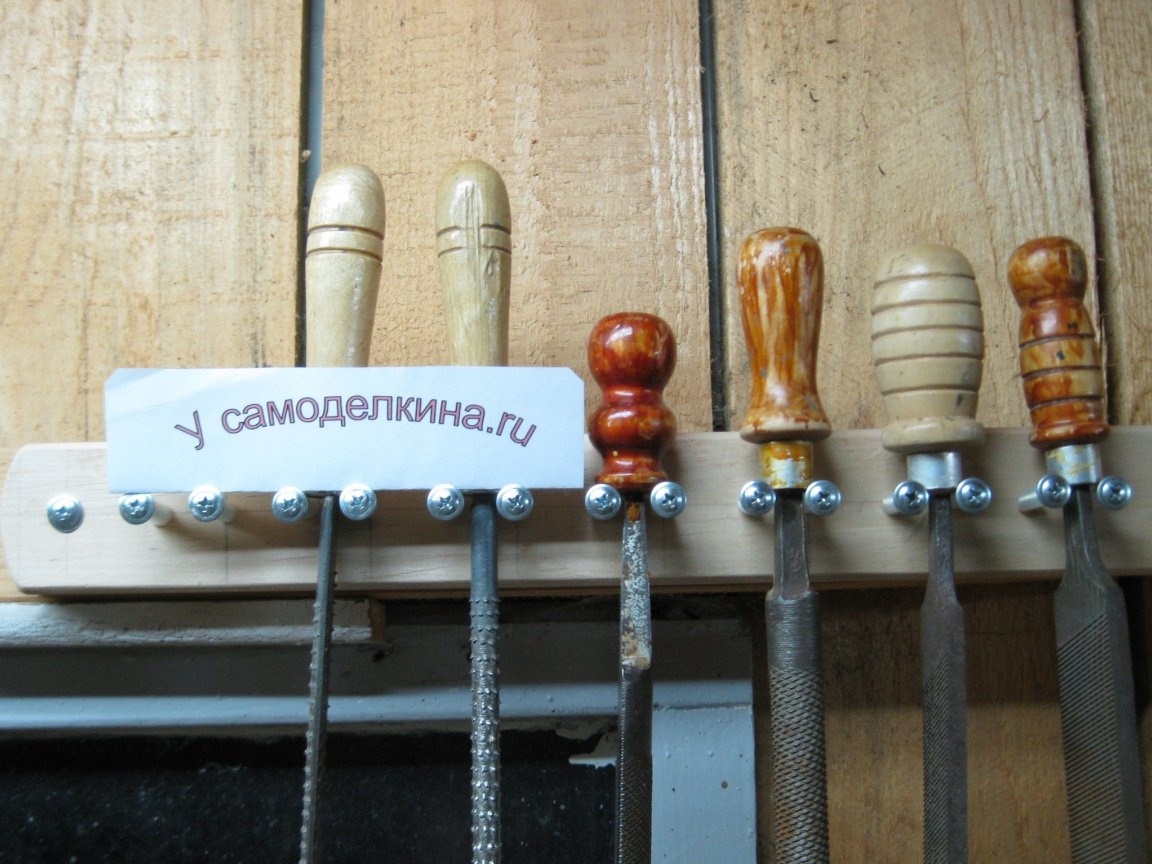
Using a pencil and a square, mark the blank board and mark the centers of future holes for screws with a press washer. In order to keep the files well in the cells and not slip out, I chose the distance between the centers of the pair of screws equal to 19 mm.
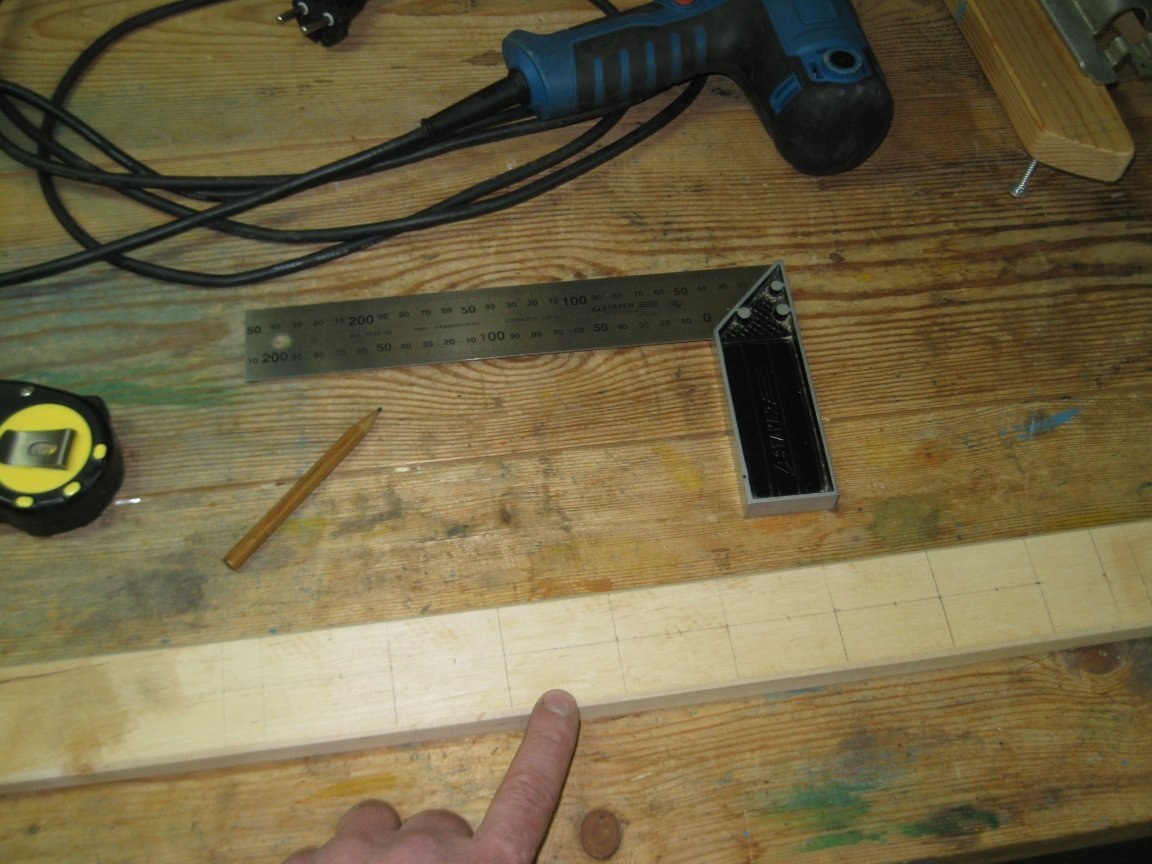
By the way, although I only have six files, I decided just in case to make a holder for seven files, that is, I will have one spare cell.
In addition, at both ends of the plank, I marked the centers of the holes for the screws for attaching the future holder to the wall.
Step 2. Puncture holes.
With the help of an awl, we prick the centers of future holes.
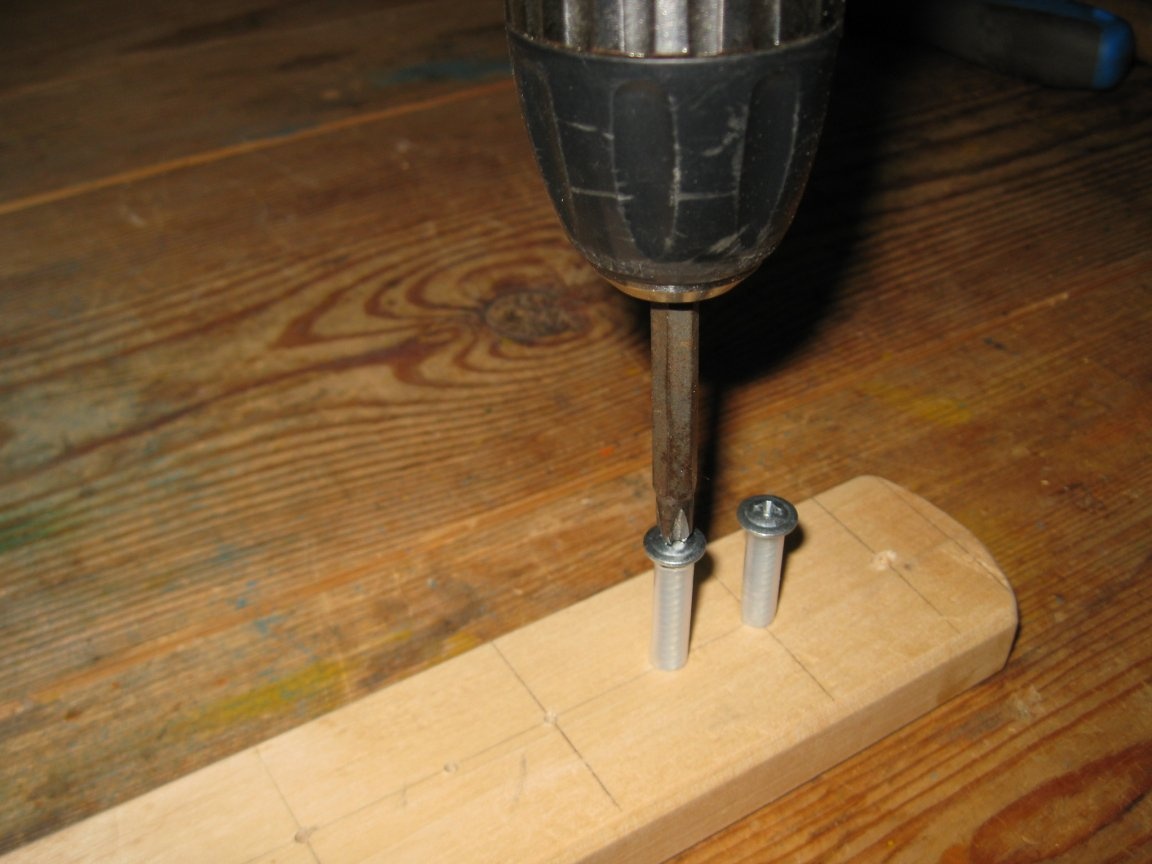
Step 3. Drilling holes.
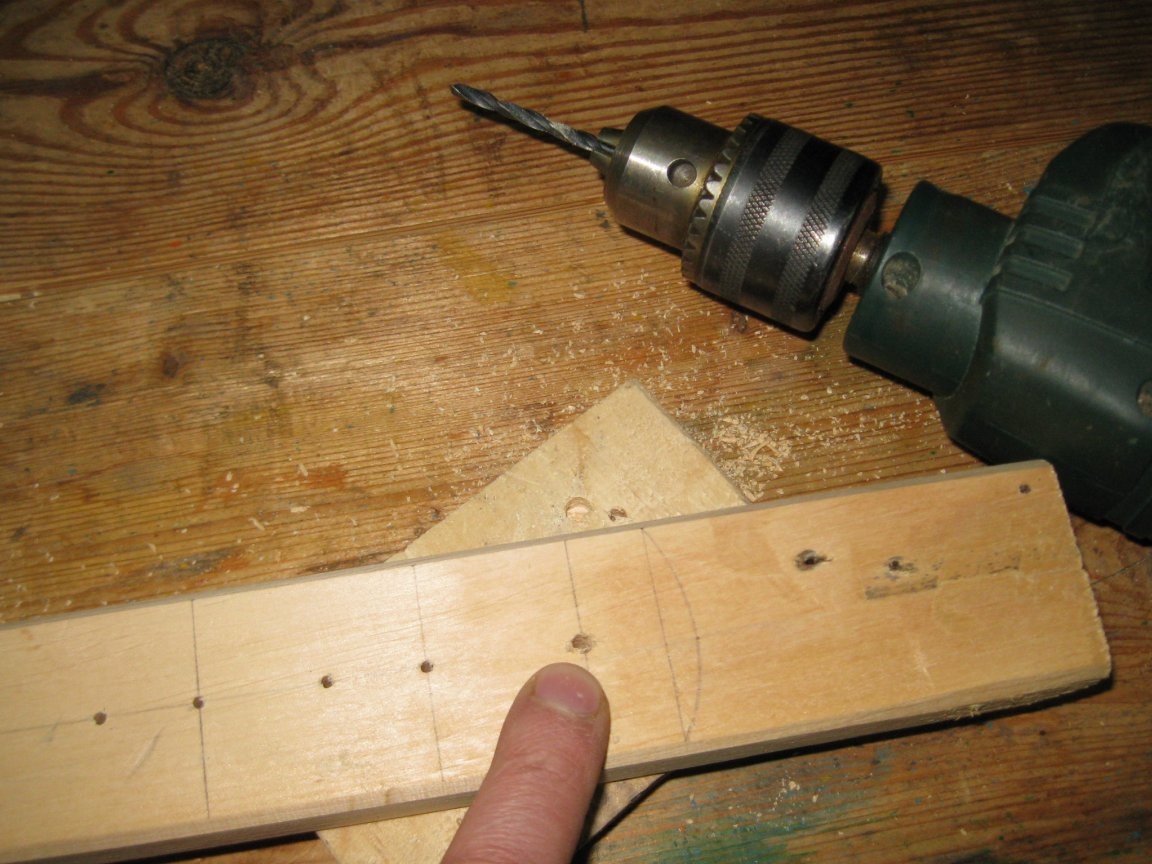
Using a drill with a drill with a diameter of 2.5 mm, we drill holes for screws with a press washer. These holes can be both deaf (15-20 mm deep.), And through, as this is not important.
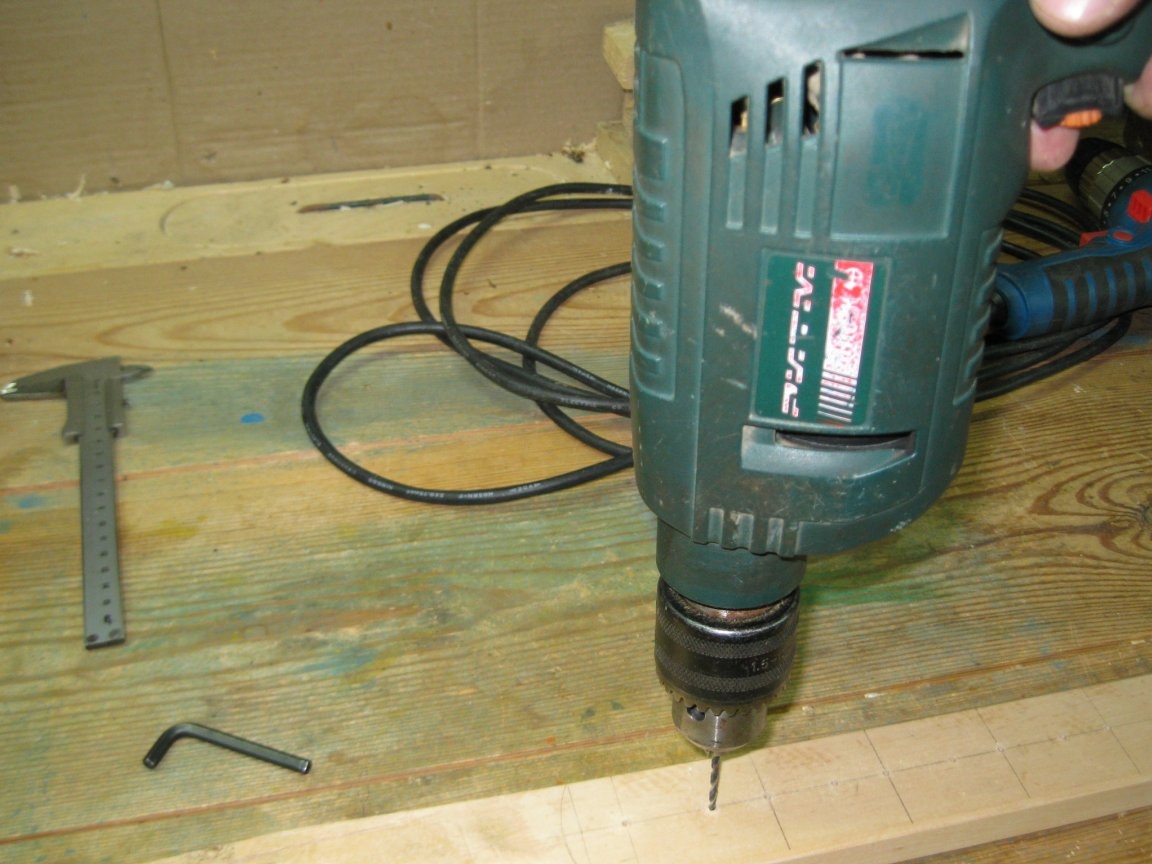
Step 4. Drilling holes for mounting the holder to the wall.
Using a drill with a drill with a diameter of 4 mm, drill a hole at each end of the plank to attach the holder to the wall.
Step 5. Sawing off the holder blank.
Using a jigsaw with a file for a figured cut, we saw off the holder blank from the main board.
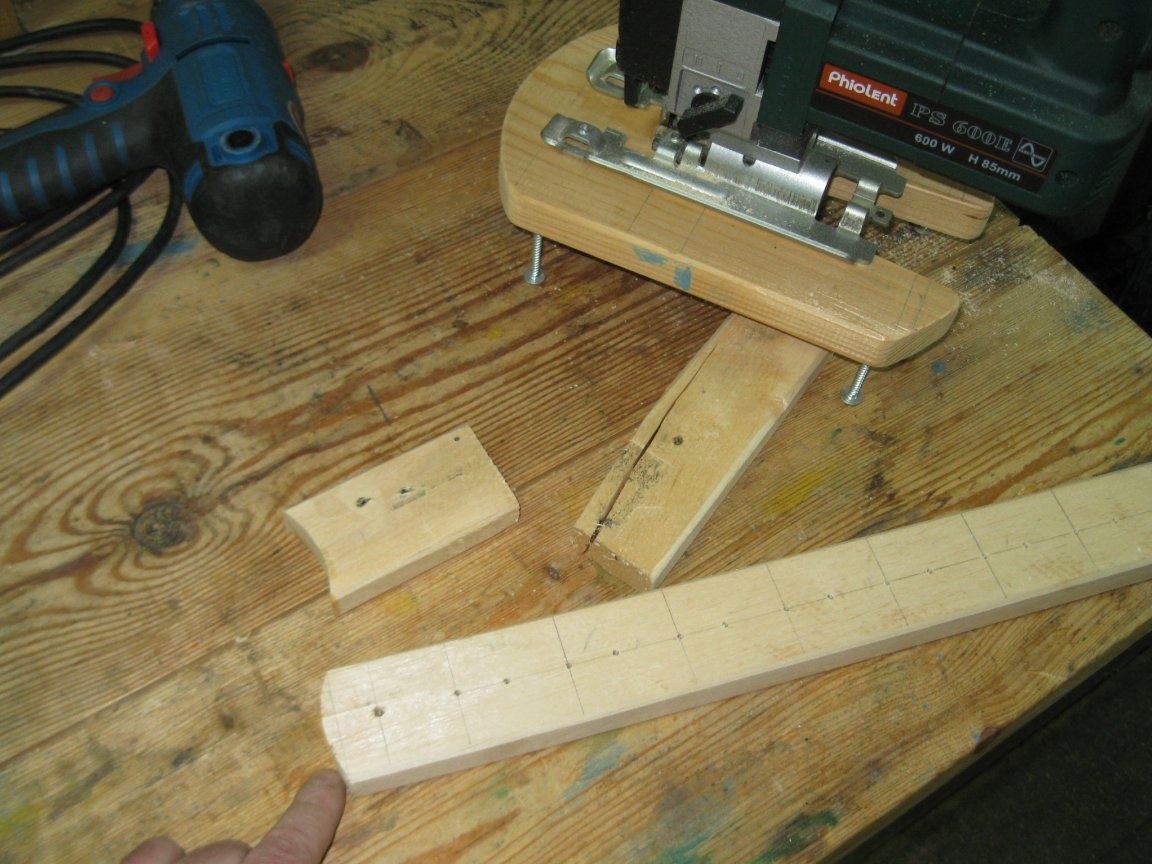
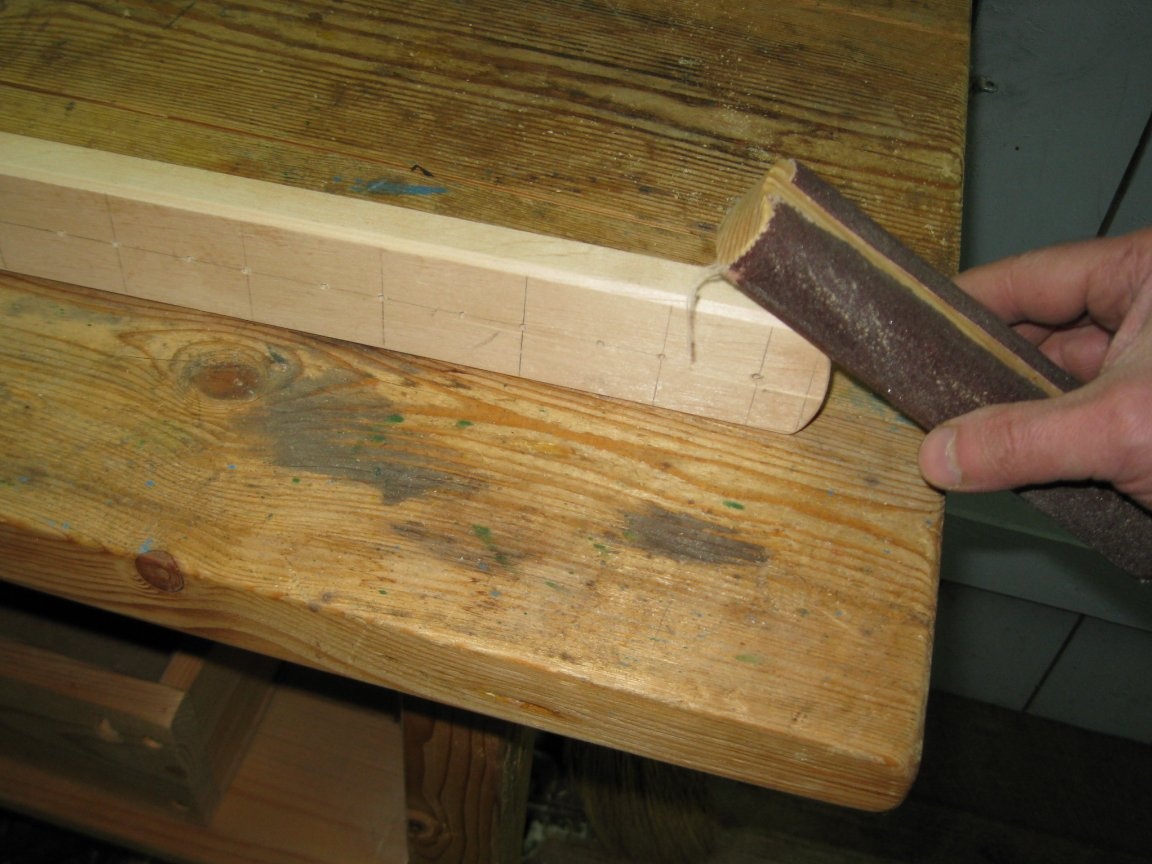
Step 6. Finishing the workpiece holder.
Using sandpaper, we carefully process the front surface of the holder blank, as well as all the edges and corners.
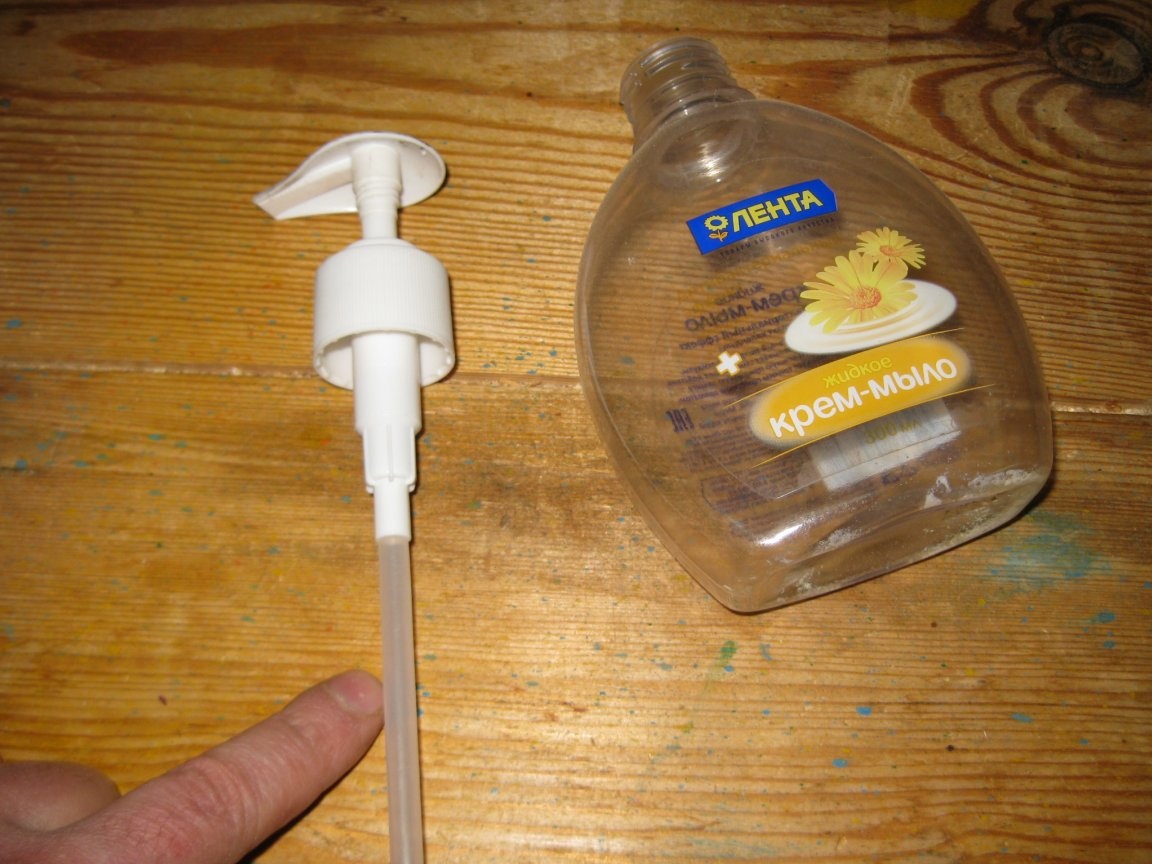
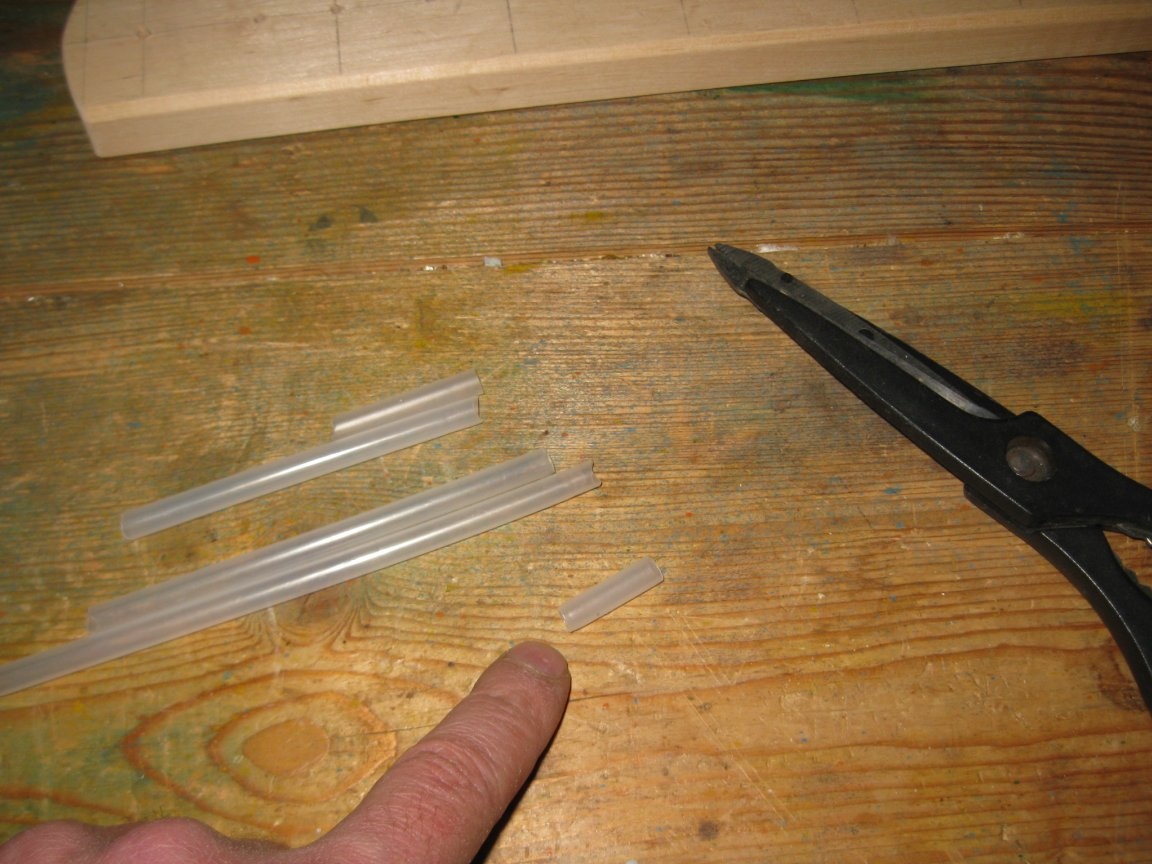
Step 7. Preparation of plastic tubes.
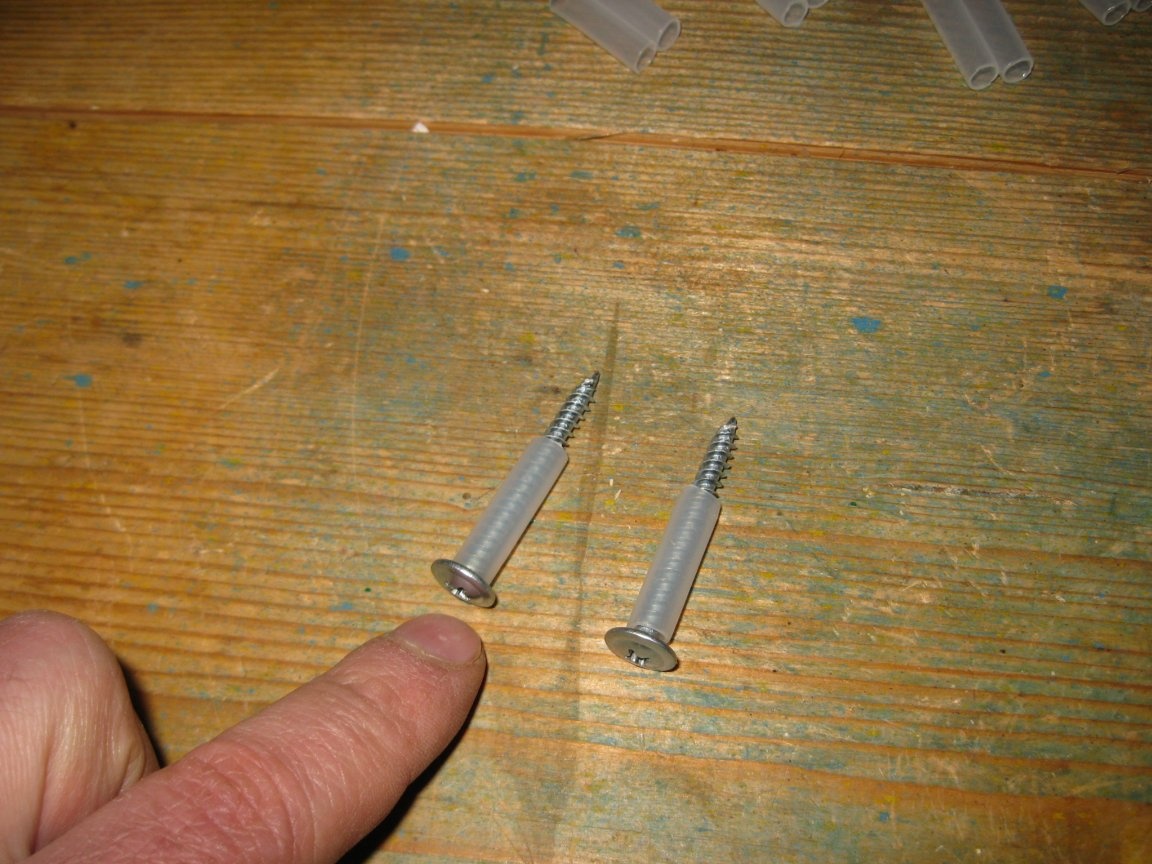
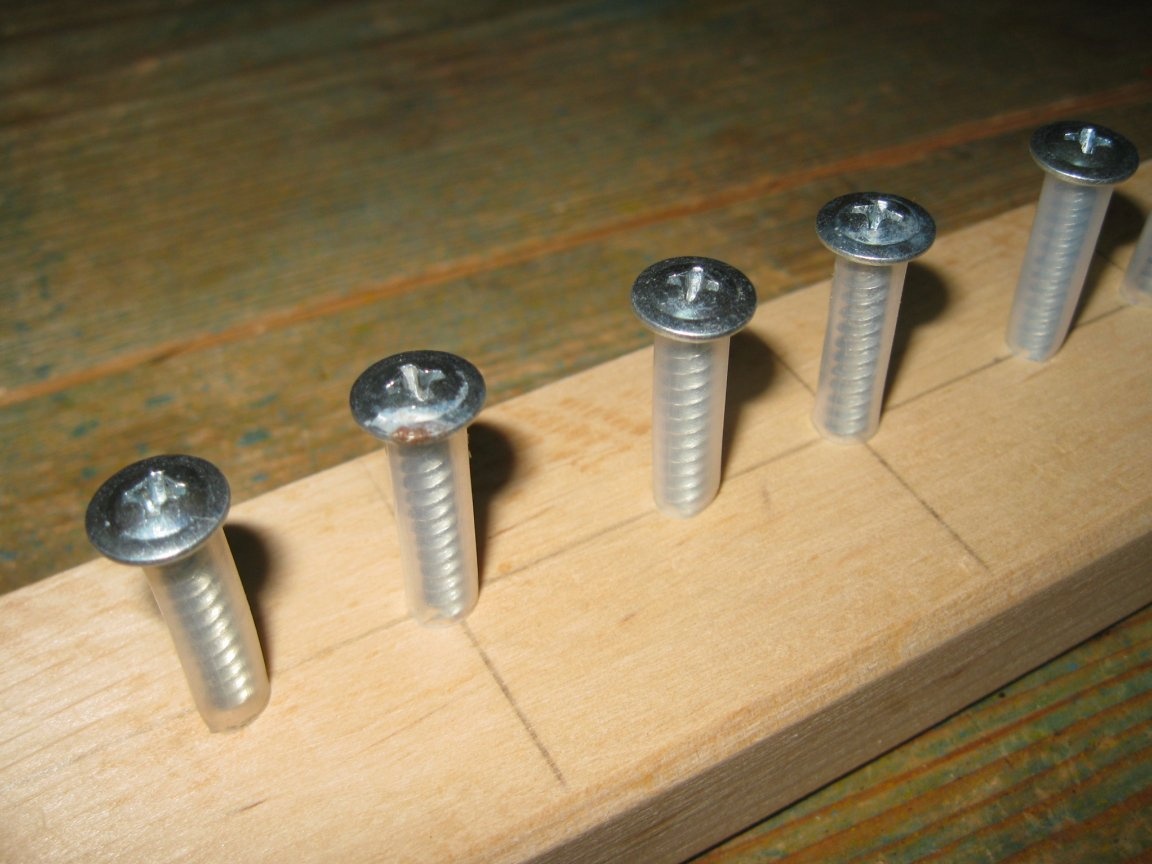
To prevent the files and handles from scratching the threads of the screws, I will put a plastic tube about 25 mm long on each screw.
I decided to take these tubes from old bottles of liquid soap, since the inner diameter of these tubes is just suitable for putting them on screws.
Thus, using scissors, cut off pieces of tubules of the required length.

And then we put the tubes on the screws.
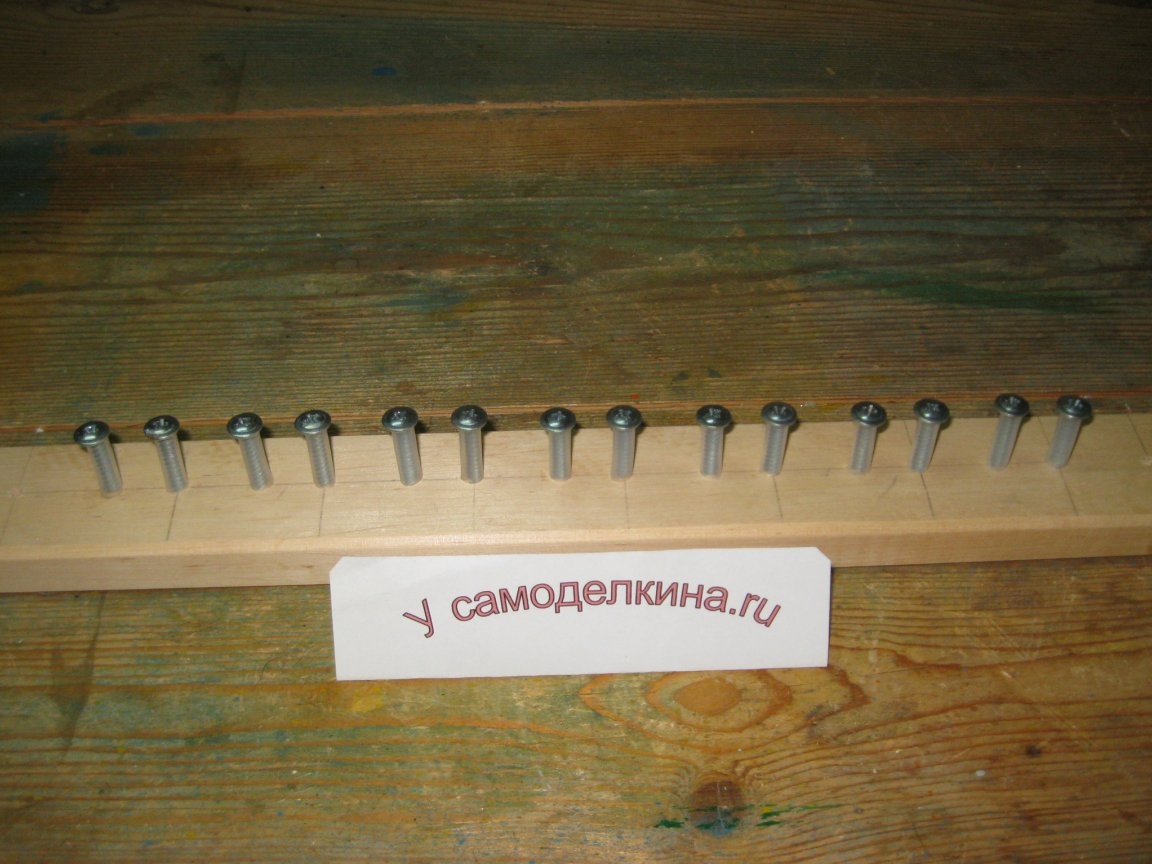
Step 8. Screw the screws into the holes.
Using a screwdriver, we wrap the screws with a press washer with put on tubes in the holes.
You need to wrap it carefully and slowly, so that the tubes on the screws do not hang out.
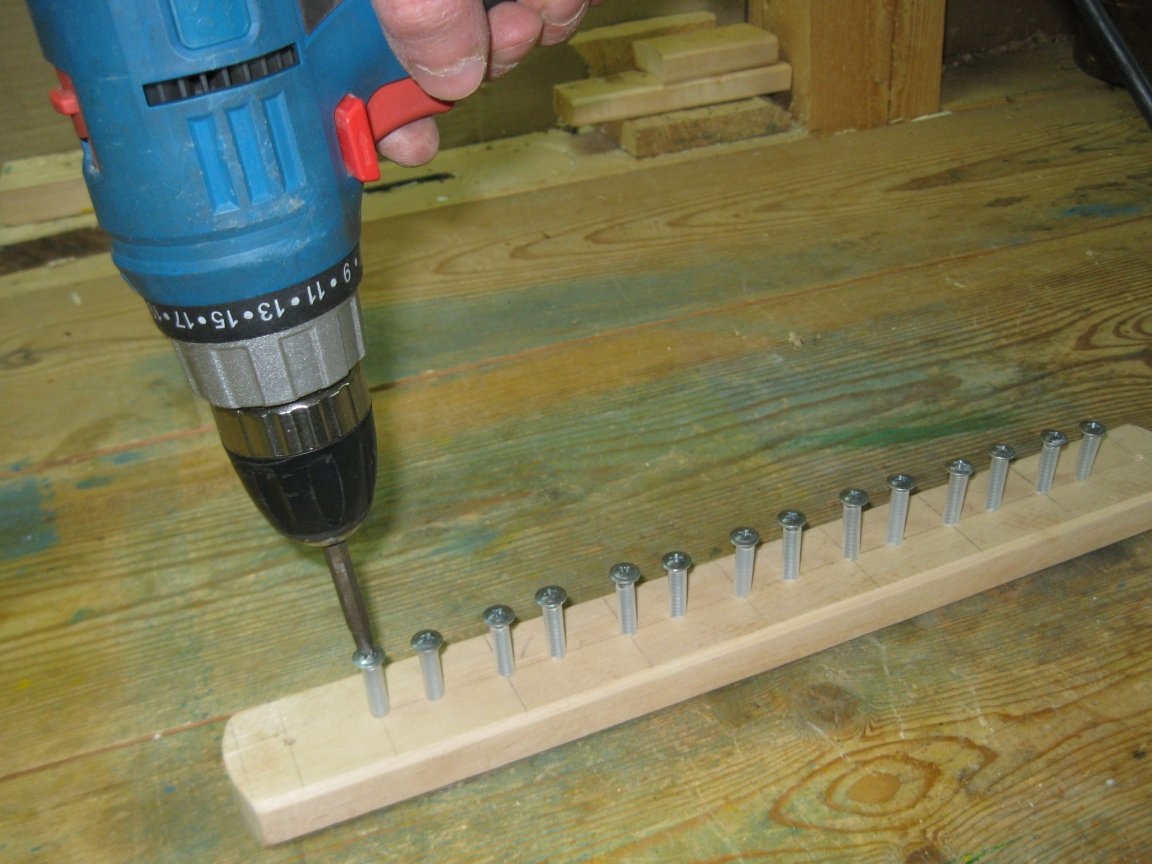
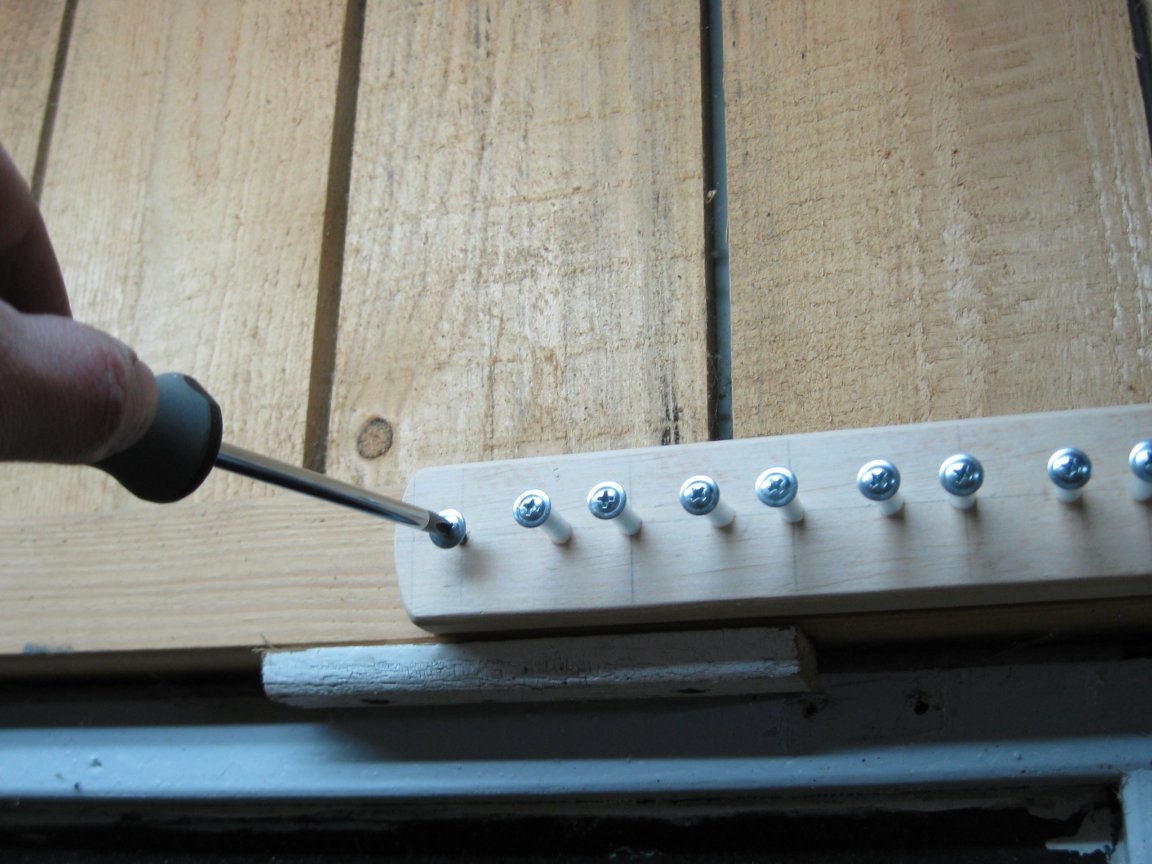
For the final alignment of the screws (so that their heads are at the same height), it is better to use a screwdriver.

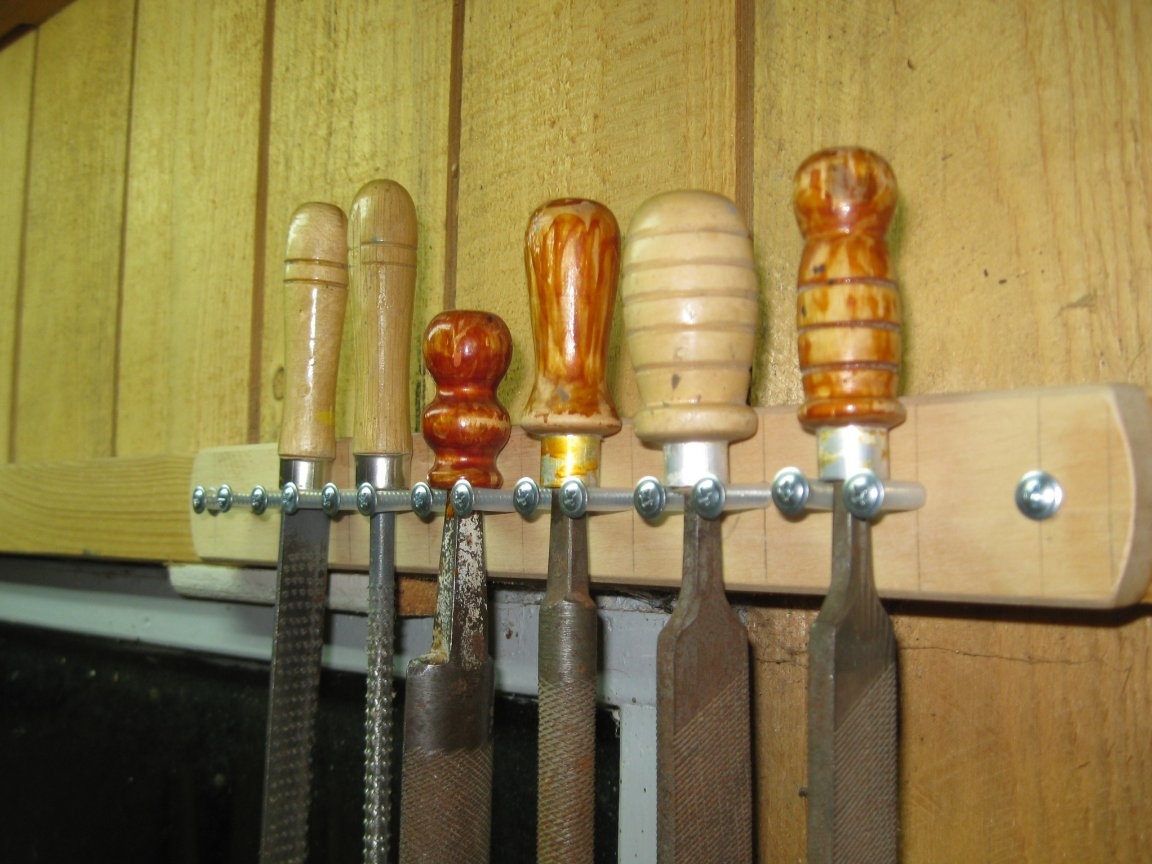
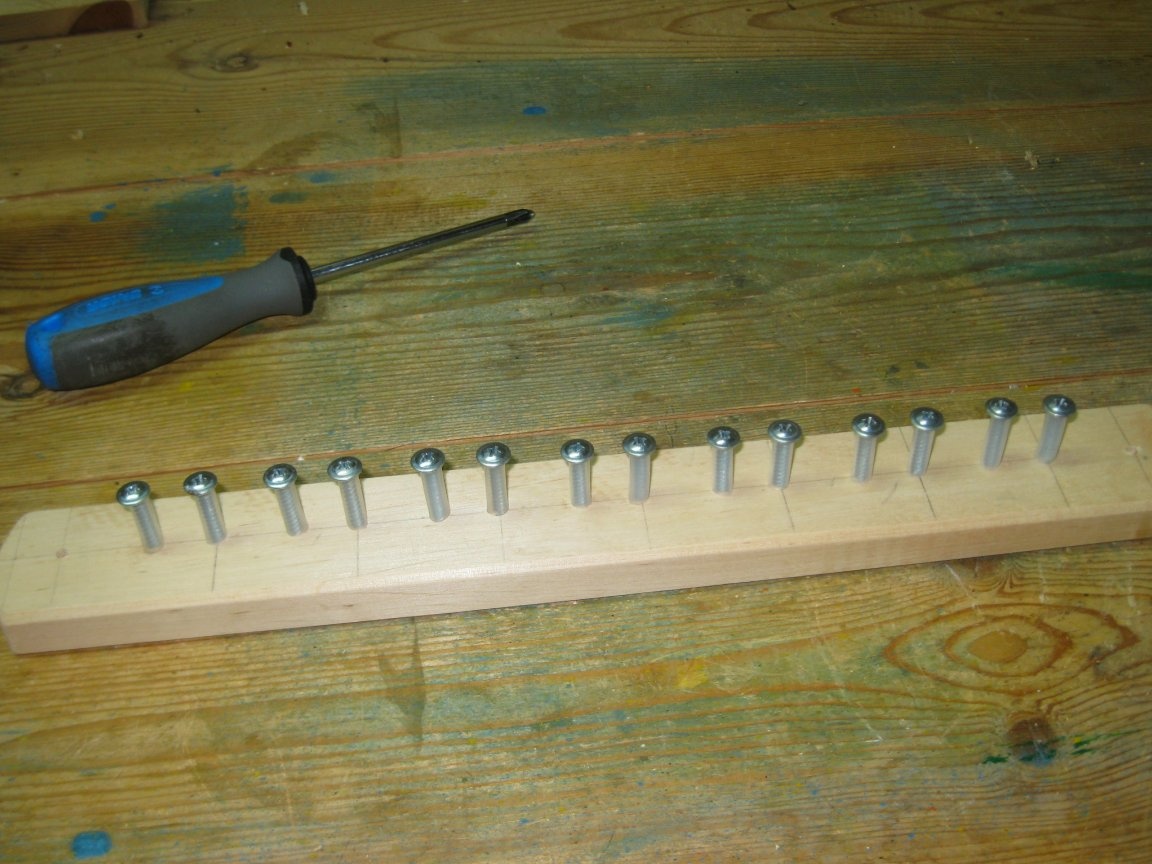
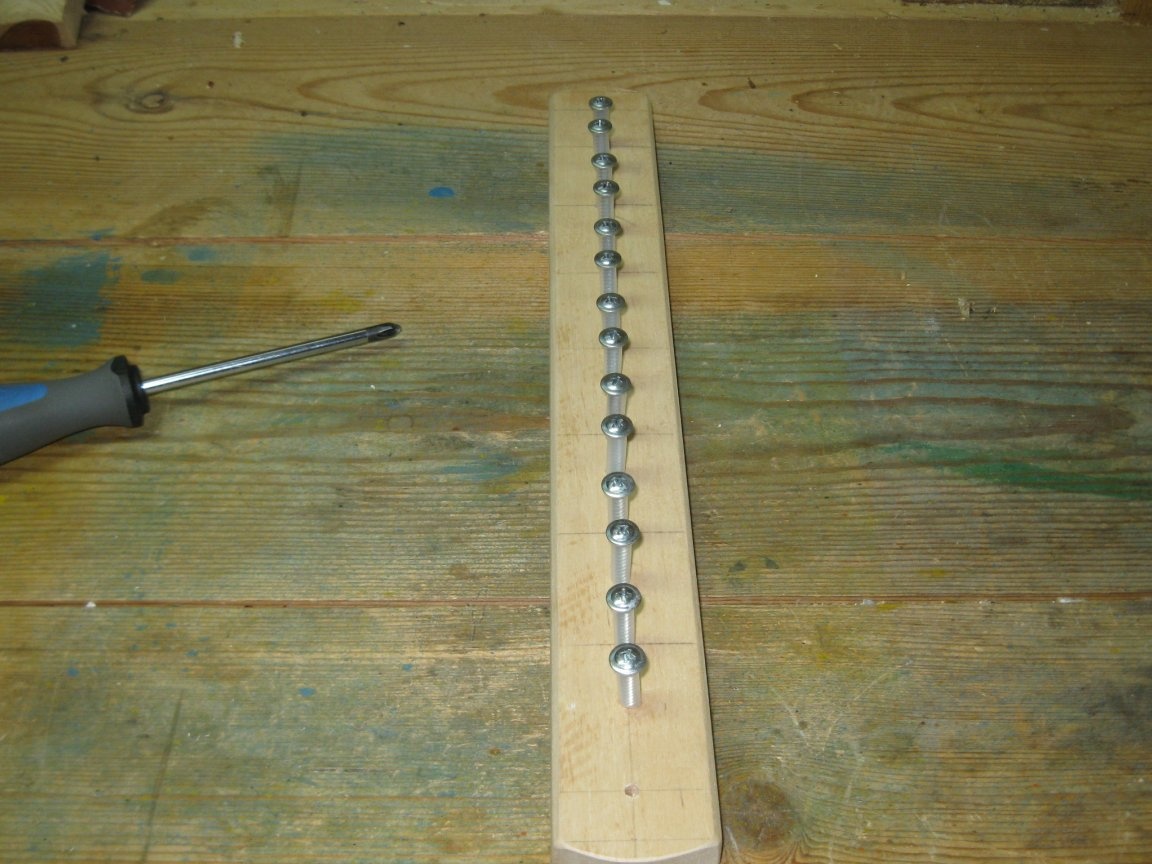
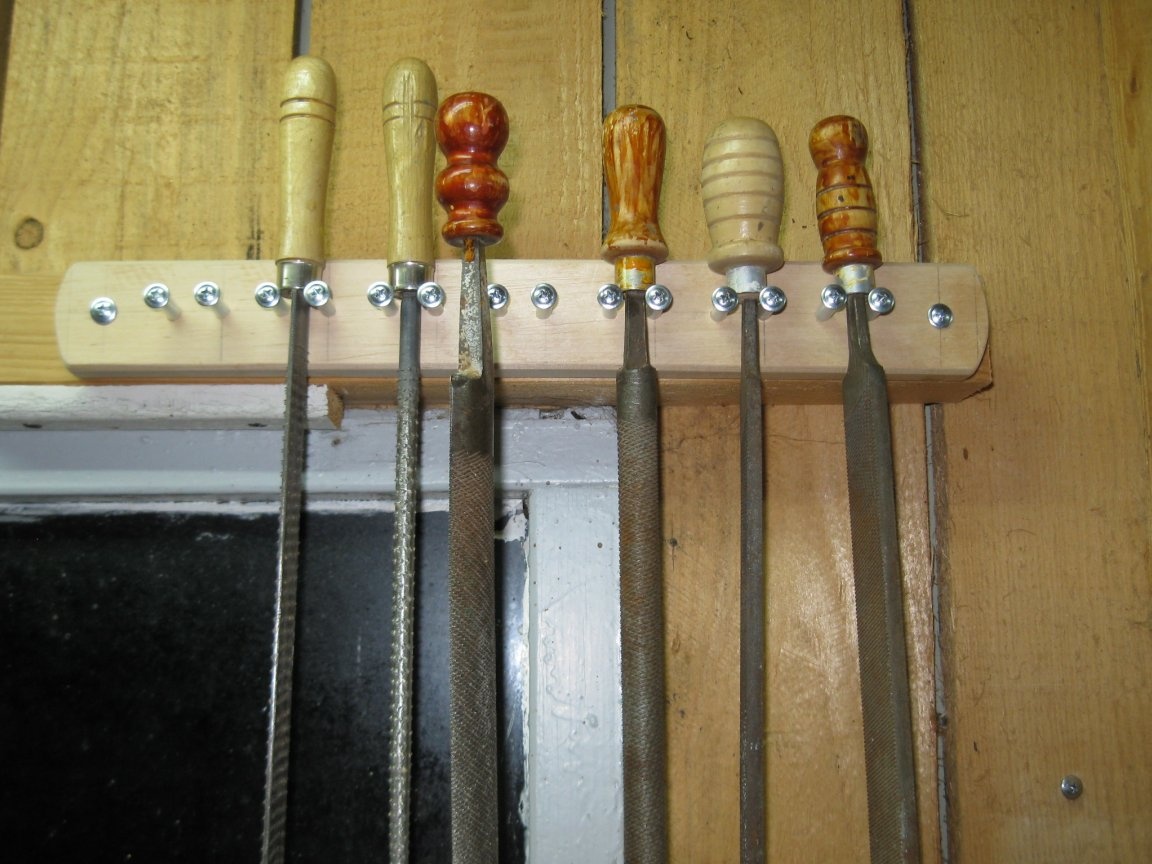
And now, our file holder is ready!
Now you need to fix it on the wall.
I decided to hang the holder in the corner of the window, directly above the workbench.
To do this, we screw the holder to the wall with the same screws with a press washer.
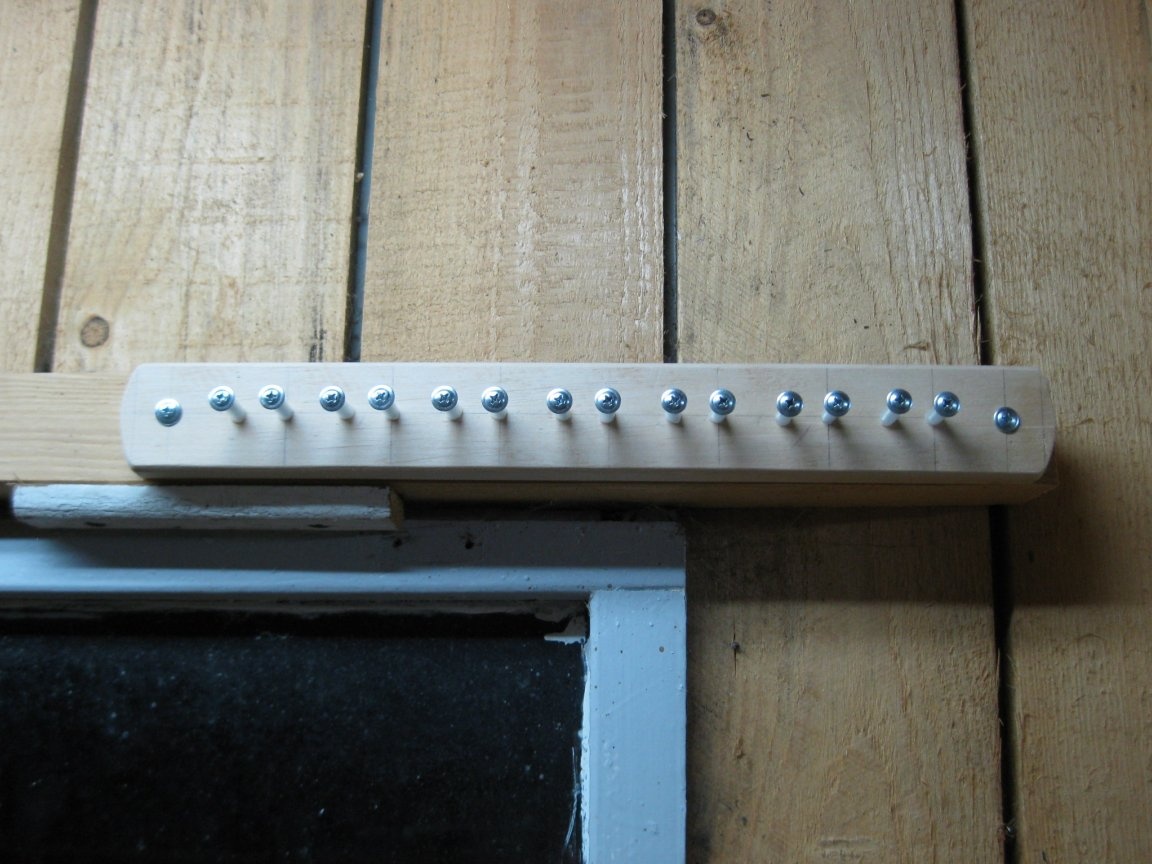
Now it remains only to place files in our holder.
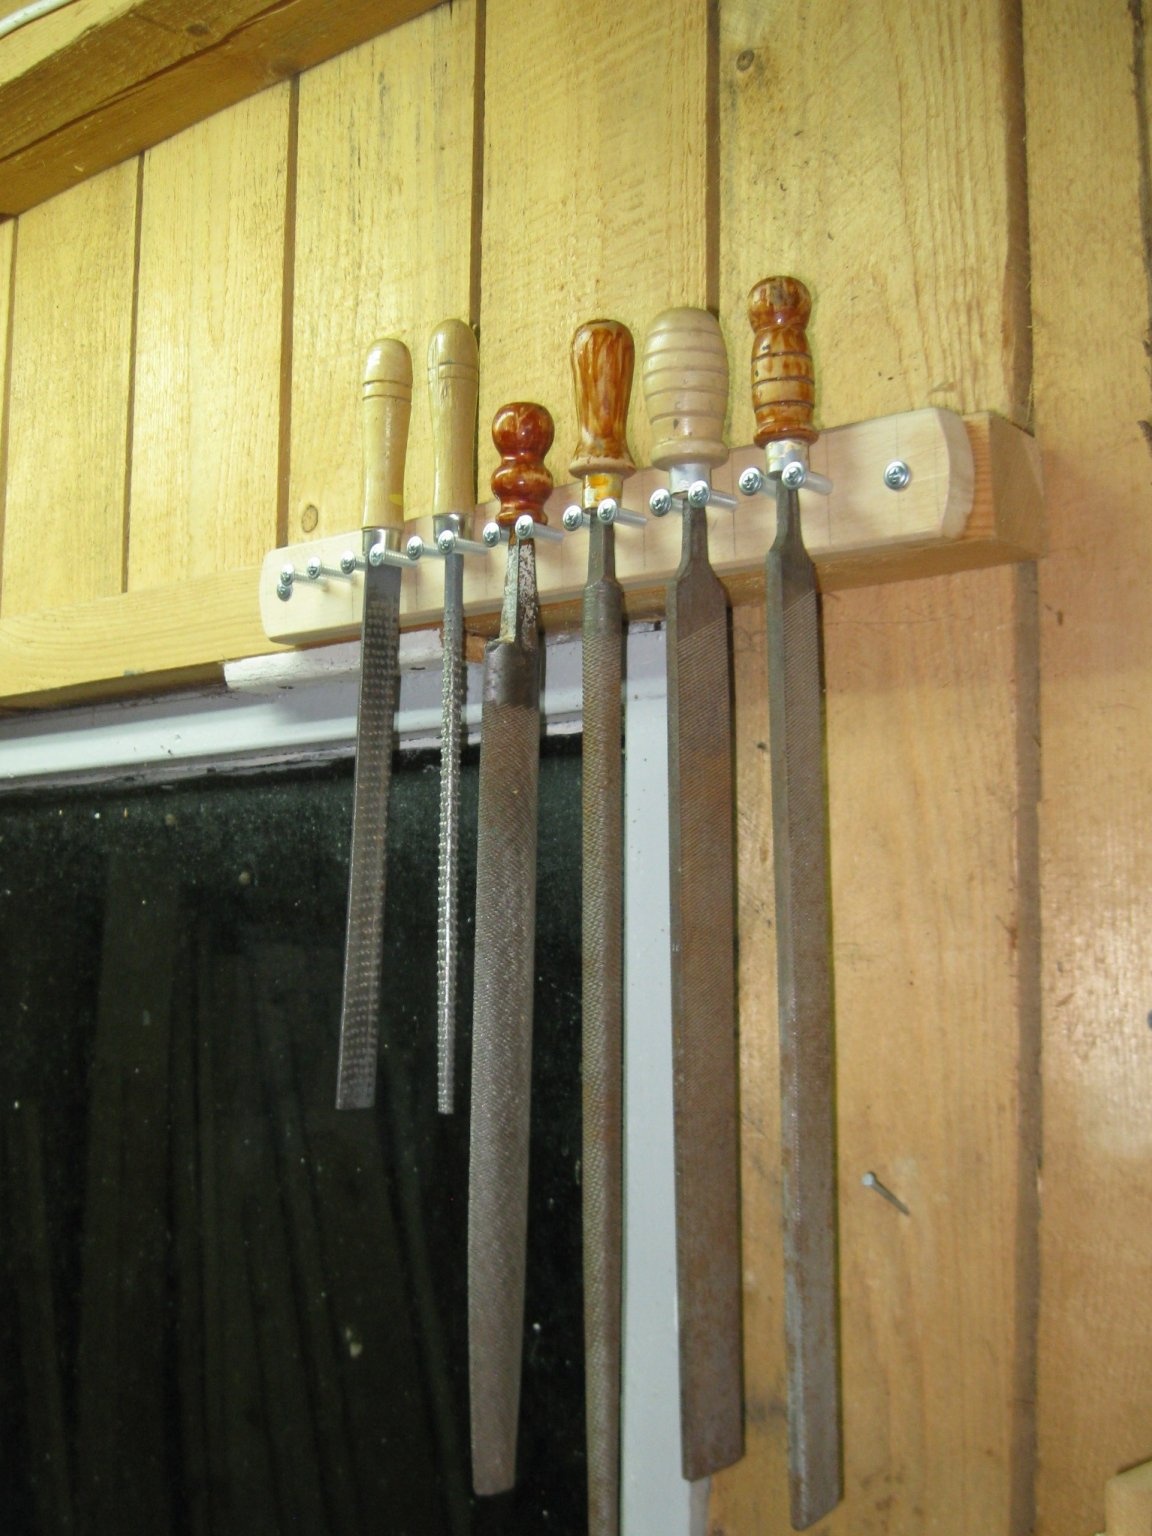

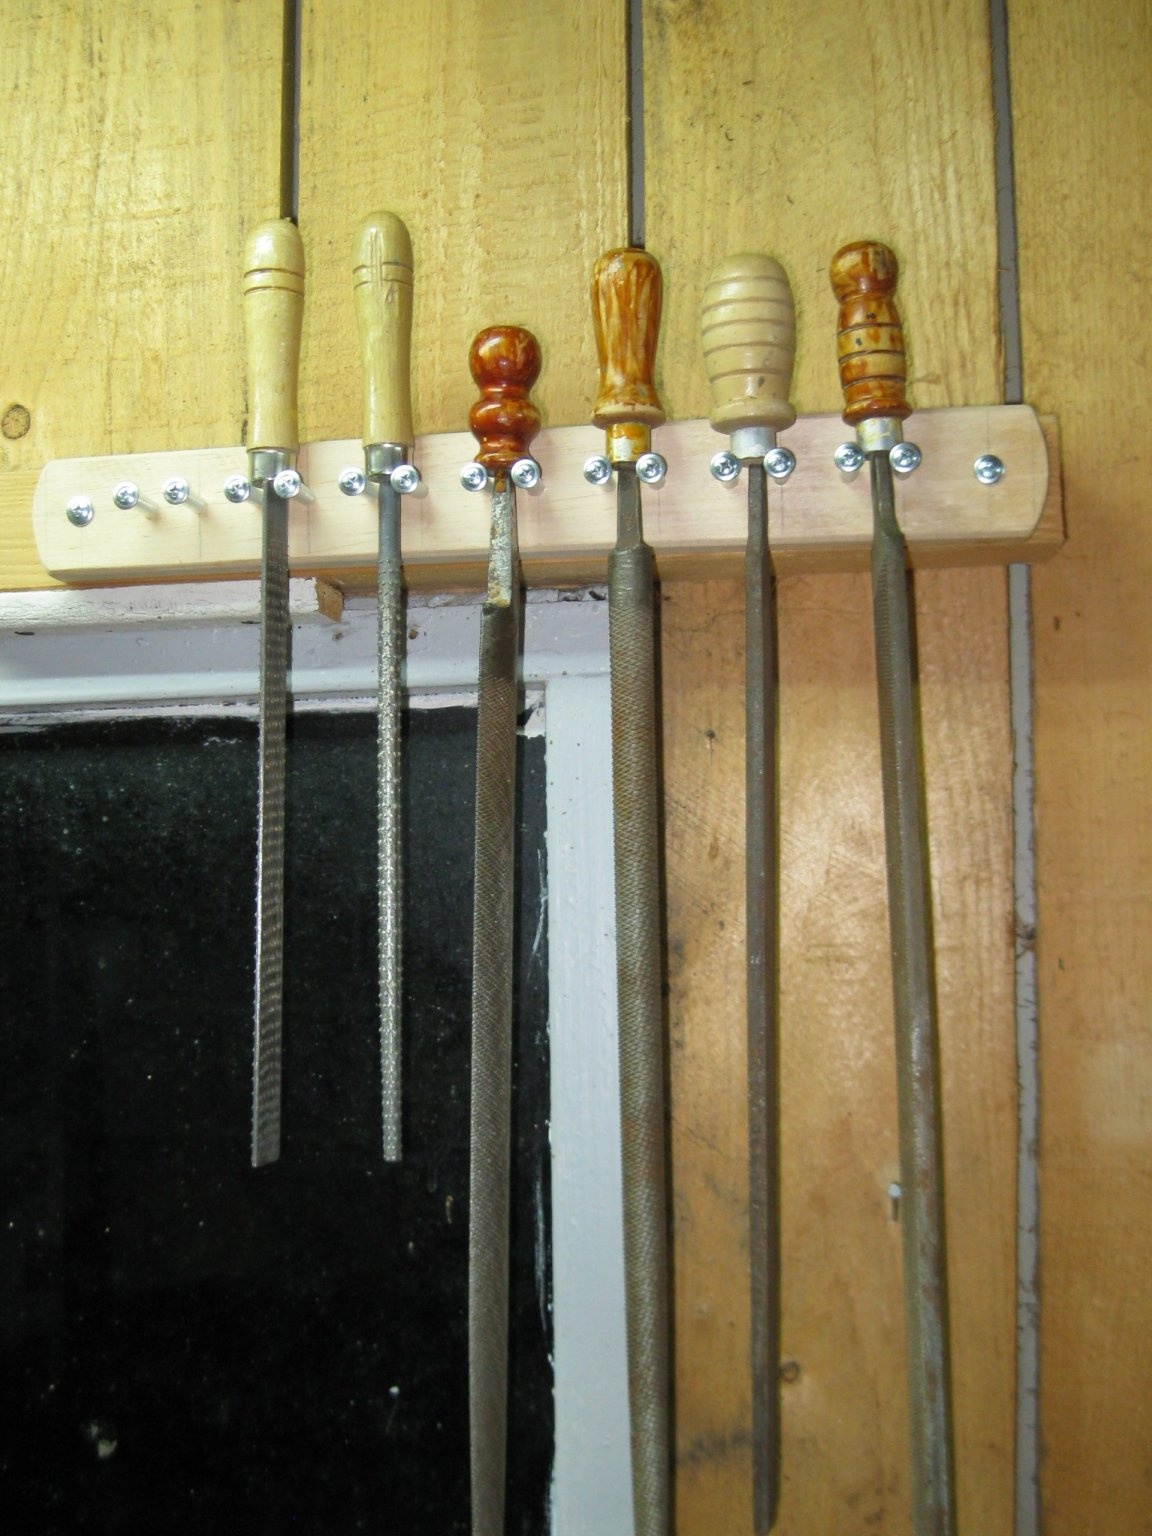
I must say that such a holder was quite convenient.
Files in it hold rather reliably, since they do not give the heads of screws of increased diameter (that is, the press washers themselves) to slide off the screws and fall out of the holder.
At the same time, to remove any file from the holder, you need to take it by the hand with a canvas and only slightly raise it above the screws of the holder (one and a half to two centimeters). Similarly, the file is also hung back on the holder.
Due to this, this holder with files can be placed on the wall high enough (which I actually did).
Well, in conclusion, I want to note that such a holder can be suitable not only for files, but also for other tools with long blades or working parts, for example, files for metal, long screwdrivers, long chisels or chisels, etc.
Although, in principle, this holder can be suitable for tools with a short working part. The main thing is that for such an instrument, the center of gravity is not on the handle, but on the working part itself. In this case, it will hang securely on a similar holder.
Well, this is where I end, and to all my colleagues the settlers of our sites, I wish you good luck and success in your work!