
Many craftsmen often face the need to carve a perfect disc or circle out of wood. This task can be dealt with using a manual electric jigsaw, but the quality will be poor.
In this article, Ivan, creator of YouTube channel “Creates DIY”, will tell you about the manufacture of a simple circular nozzle for hand milling.
This homemade product is very simple to manufacture, and can be repeated using simple tools.
Materials
- sheet plywood
- Steel plate, stud, washer, wing nut
- steel bar
- Sandpaper.
Instruments, used by the author.
— Screwdriver, metal drill bits
— Countersink drill
— Manual frezeremphasis
— Electric jigsaw
— Bulgarian
- Cutting and flap scraping discs
— Semi-automatic welding
— Angle for adjustable angle welding
- Vise, ruler, square, pencil, core.
Manufacturing process.
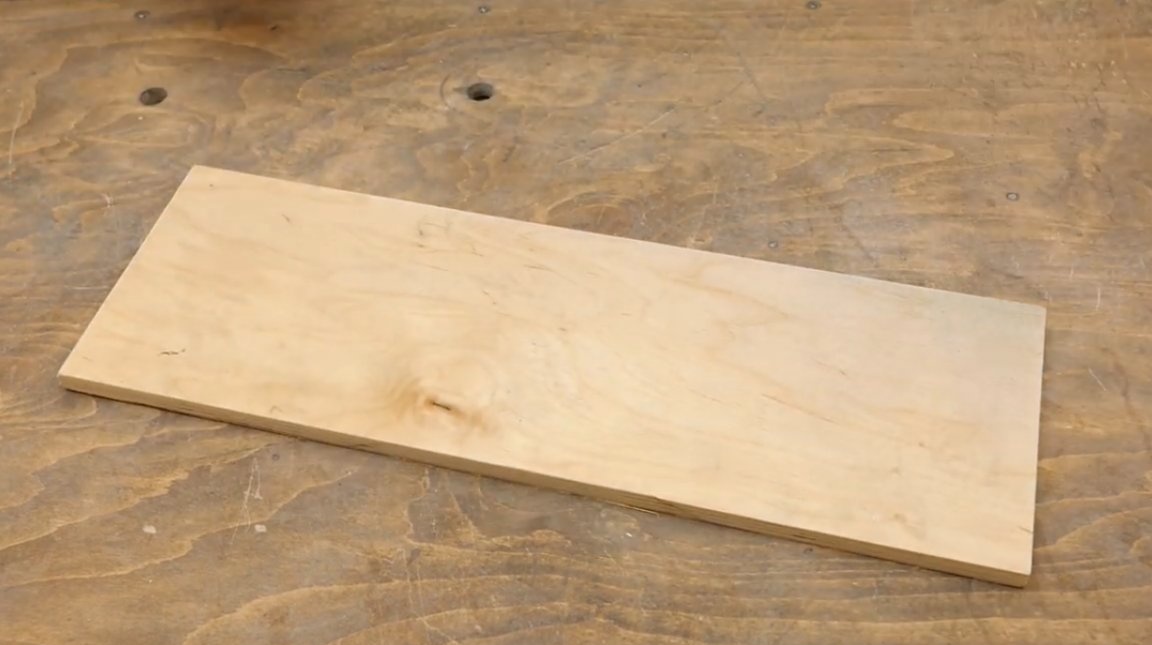
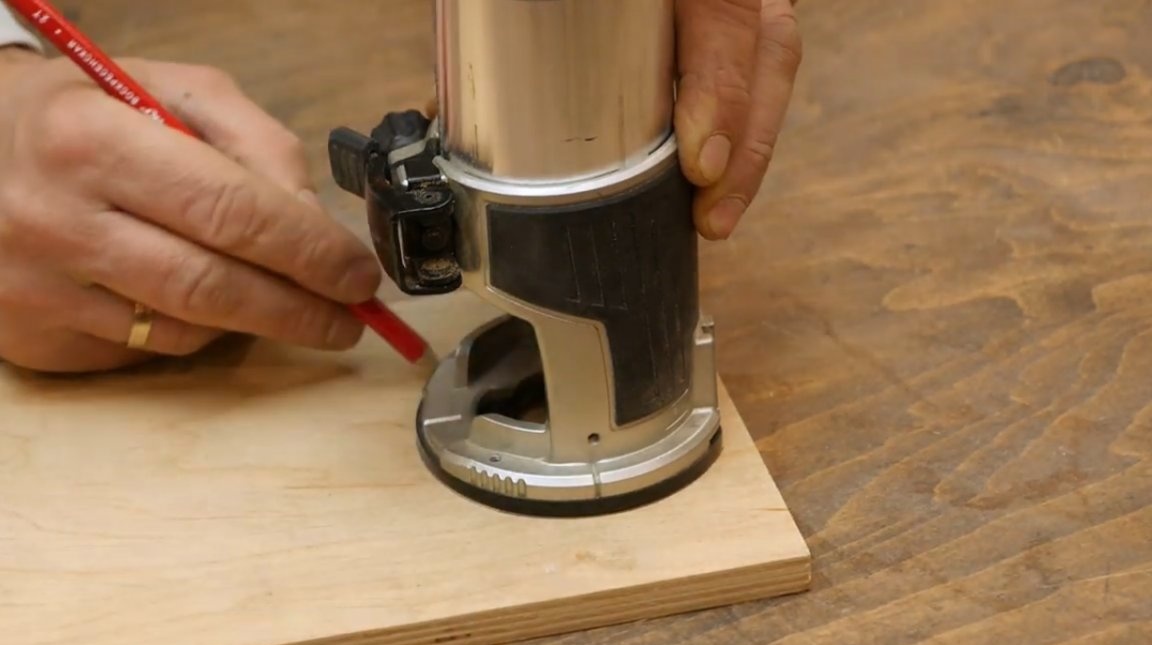
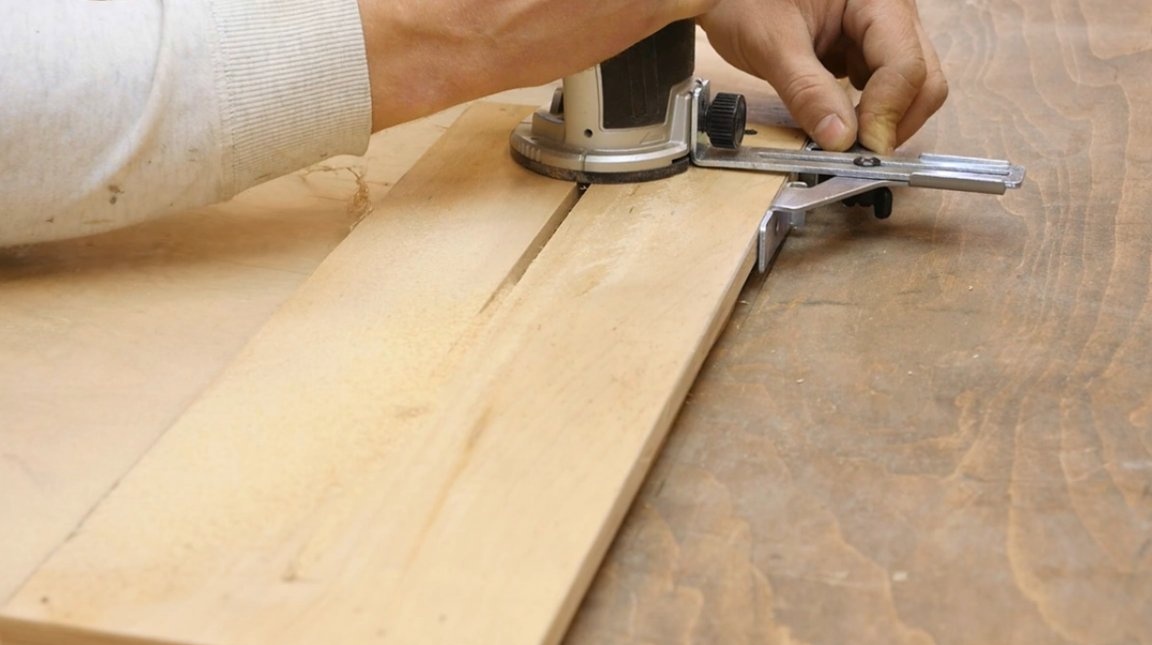
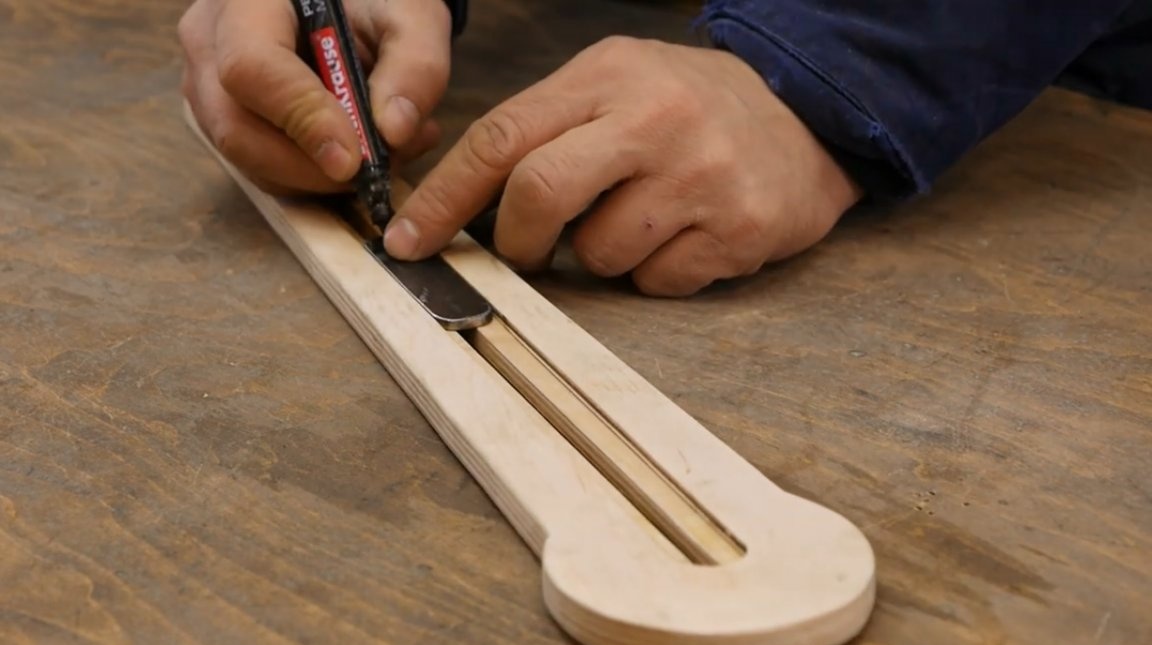
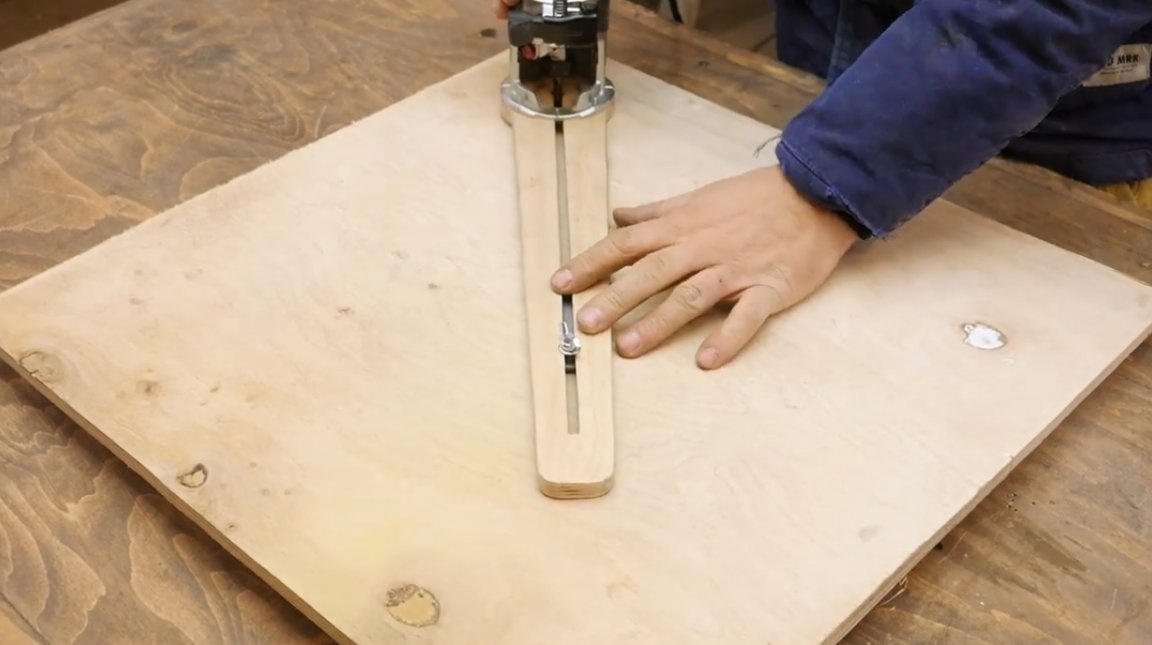
The main material will be sheet plywood with a strip length of about a meter. On one edge of the strip, the contour of the milling cutter foot is marked and the central hole is milled.

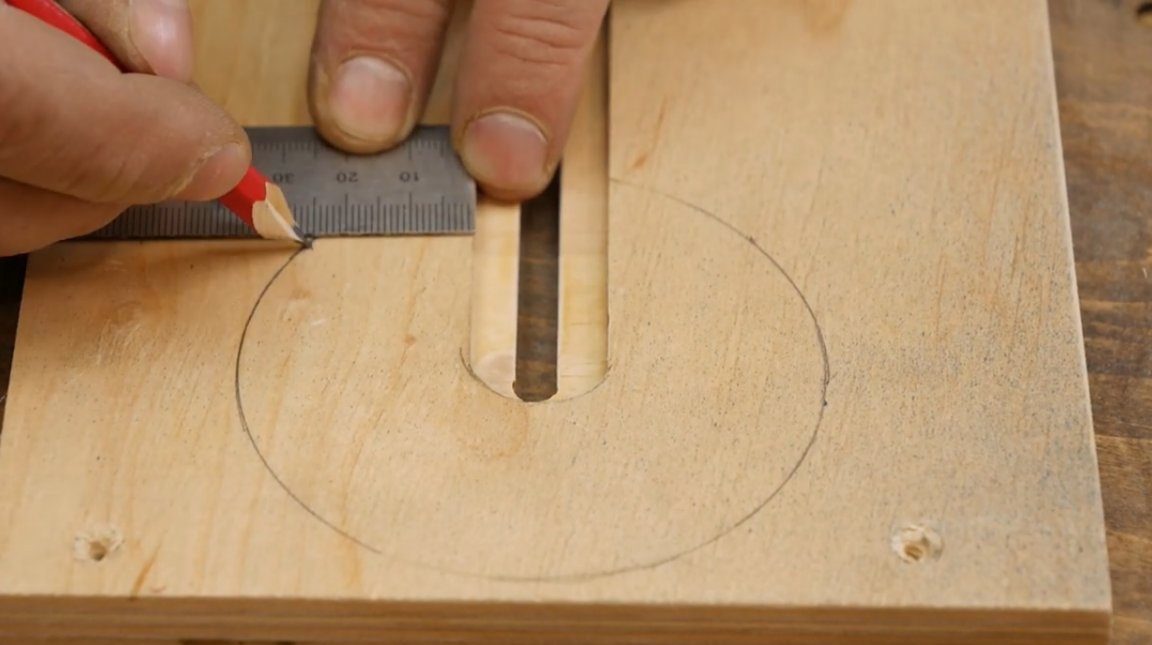
Having marked the central line, the author steps back from it by 10 mm in each direction.
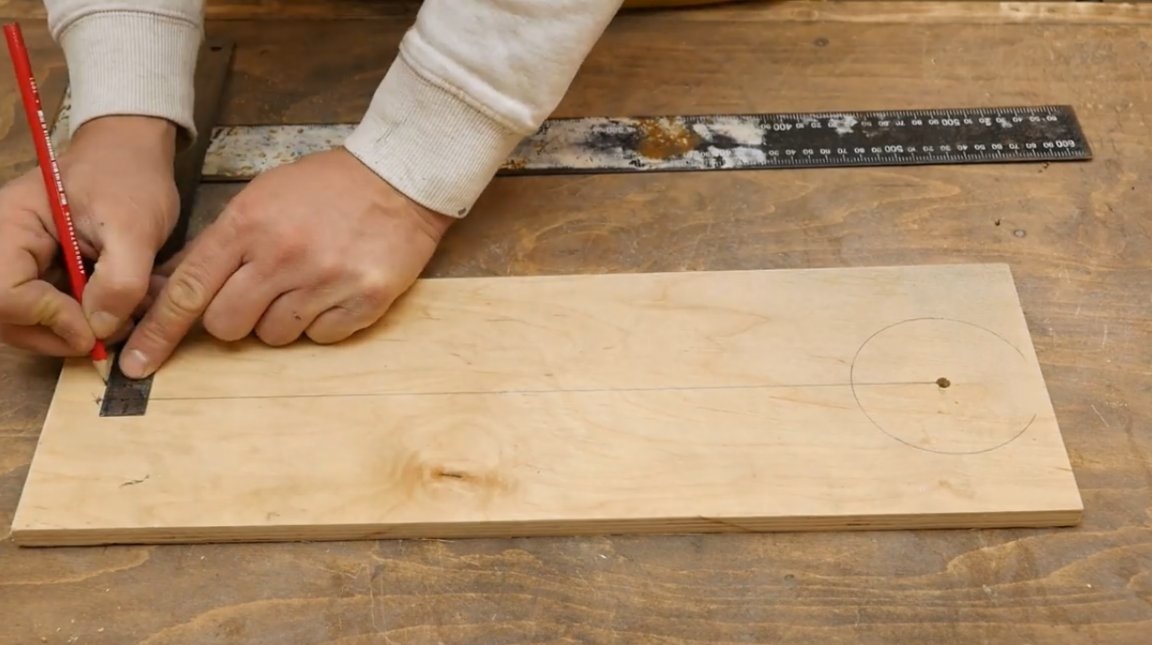
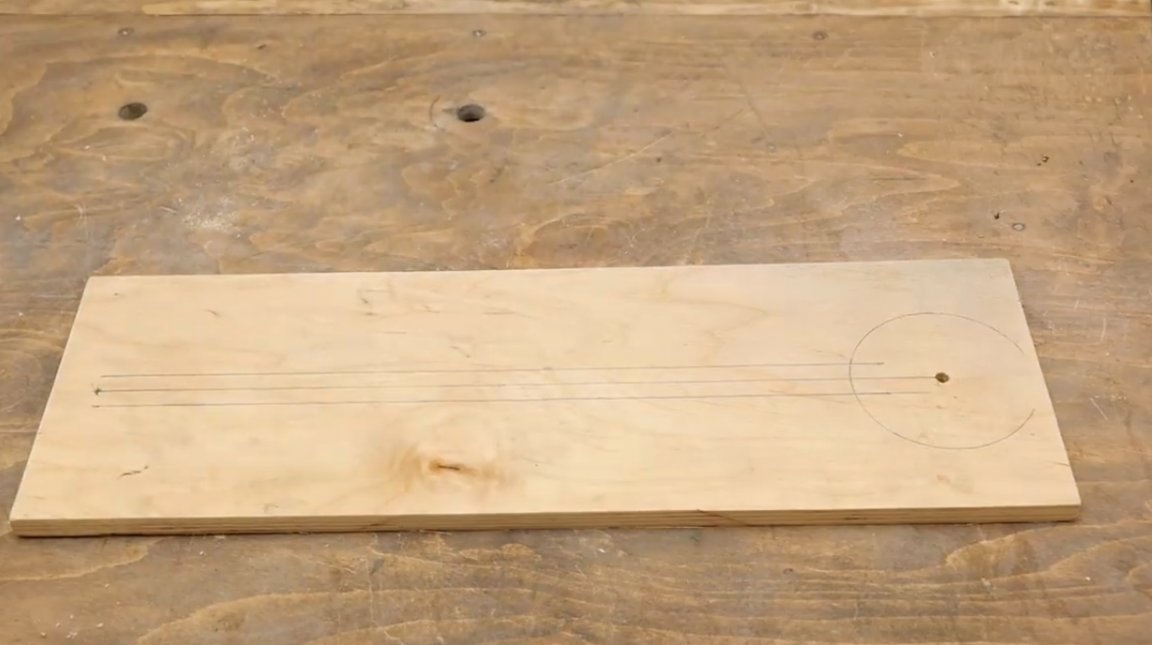
On the edges of the future excavation, roundings are marked.
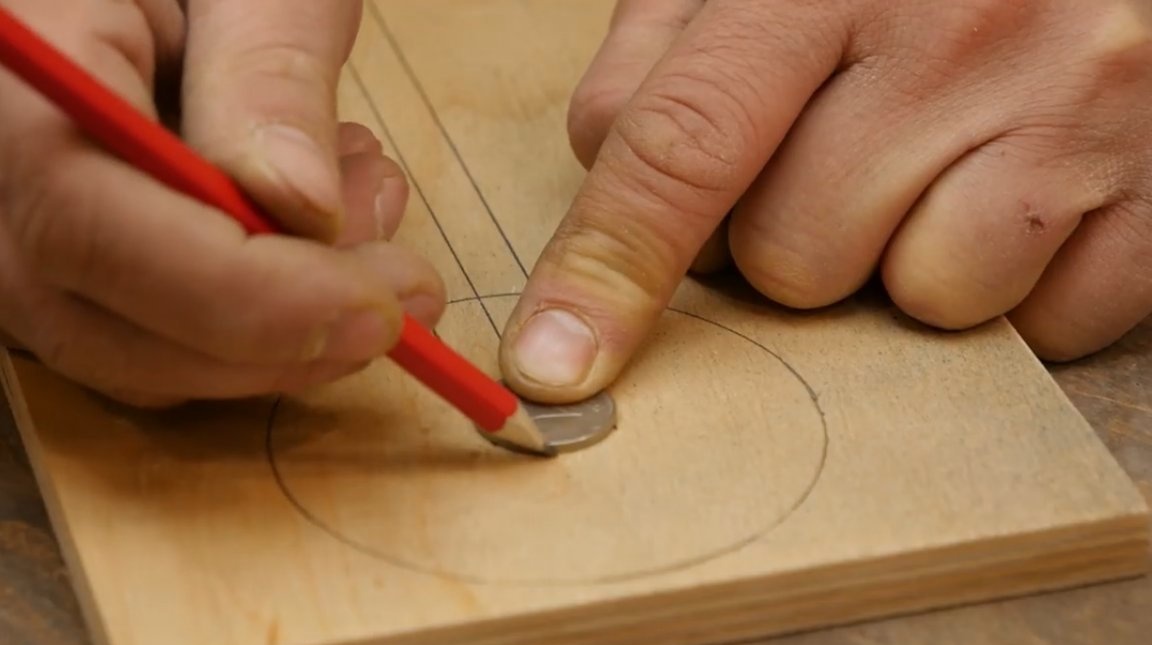
The workpiece is fixed on the workbench and a shallow groove is milled according to the marking. This is done using a milling cutter with a stop. Excess dust can be blown off with a pneumatic compressor.
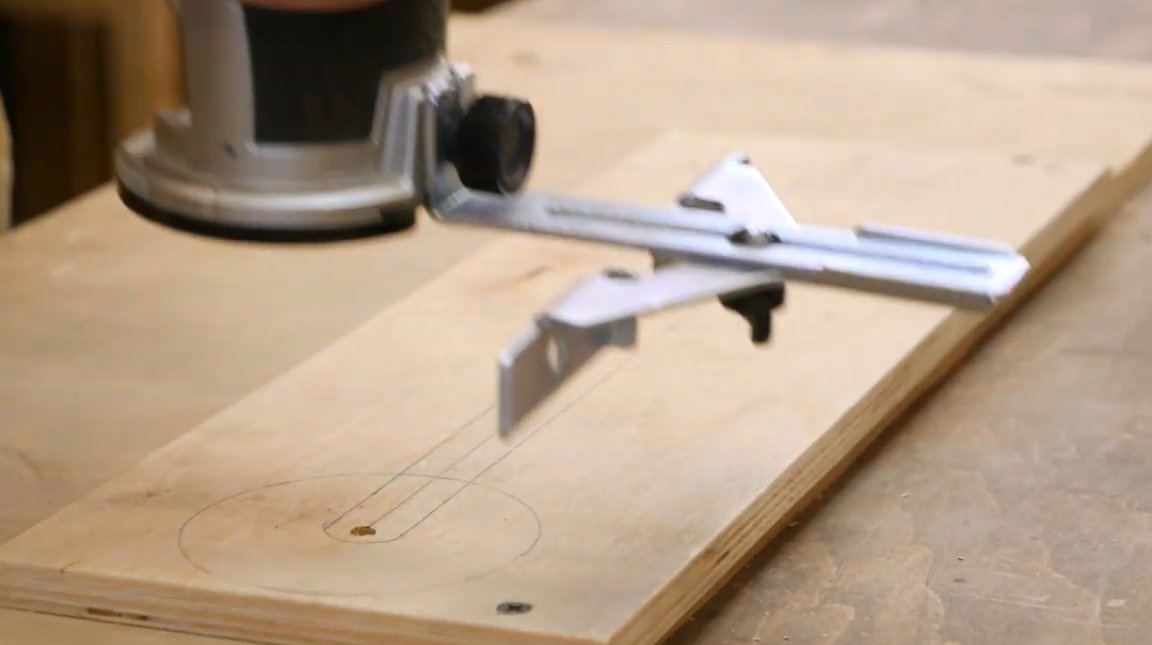

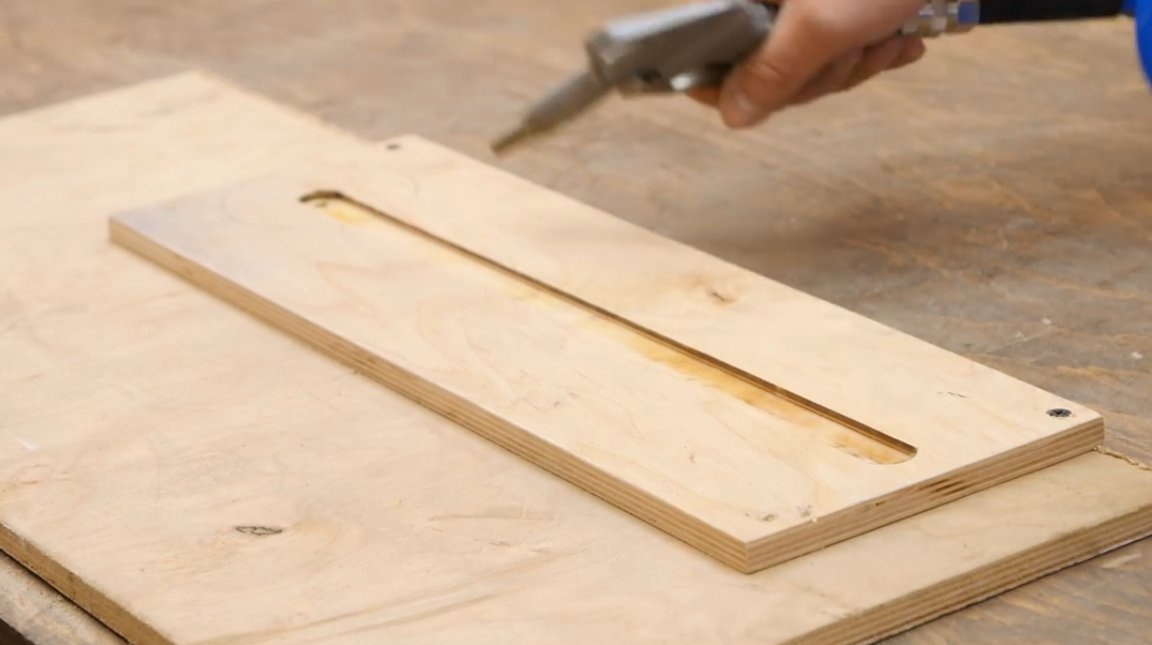
The workpiece is turned over, and the master mills a through groove in it along the width of the cutter. The edges of the resulting grooves are sanded with sandpaper.

Further, the author forms a convenient and ergonomic contour of the future nozzle.

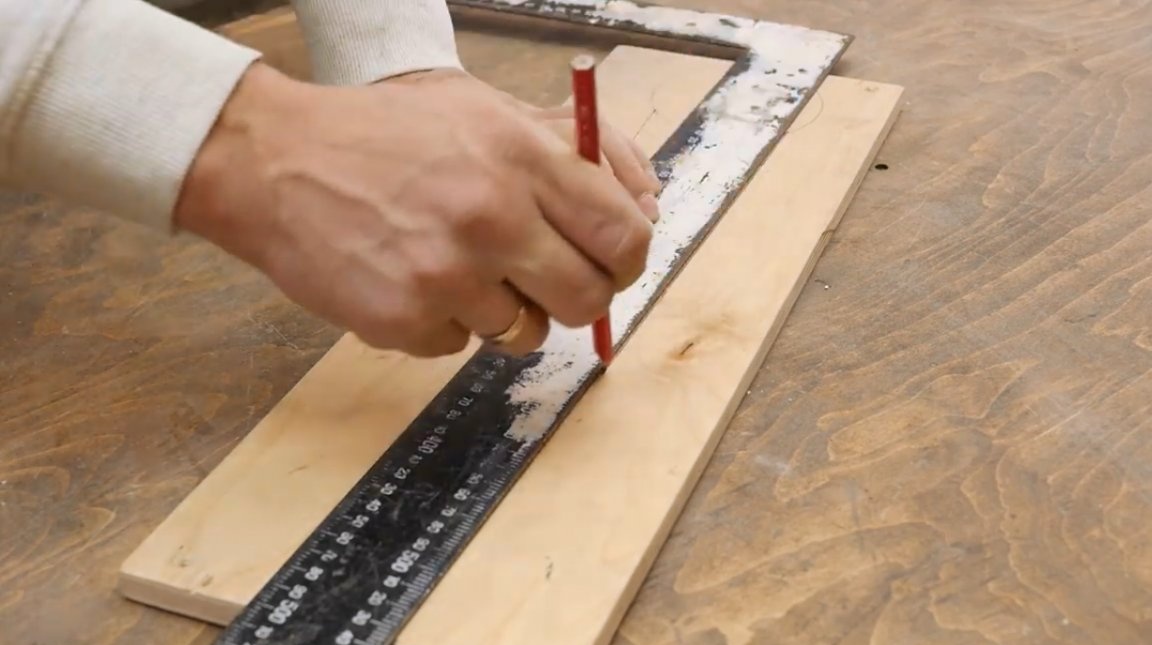

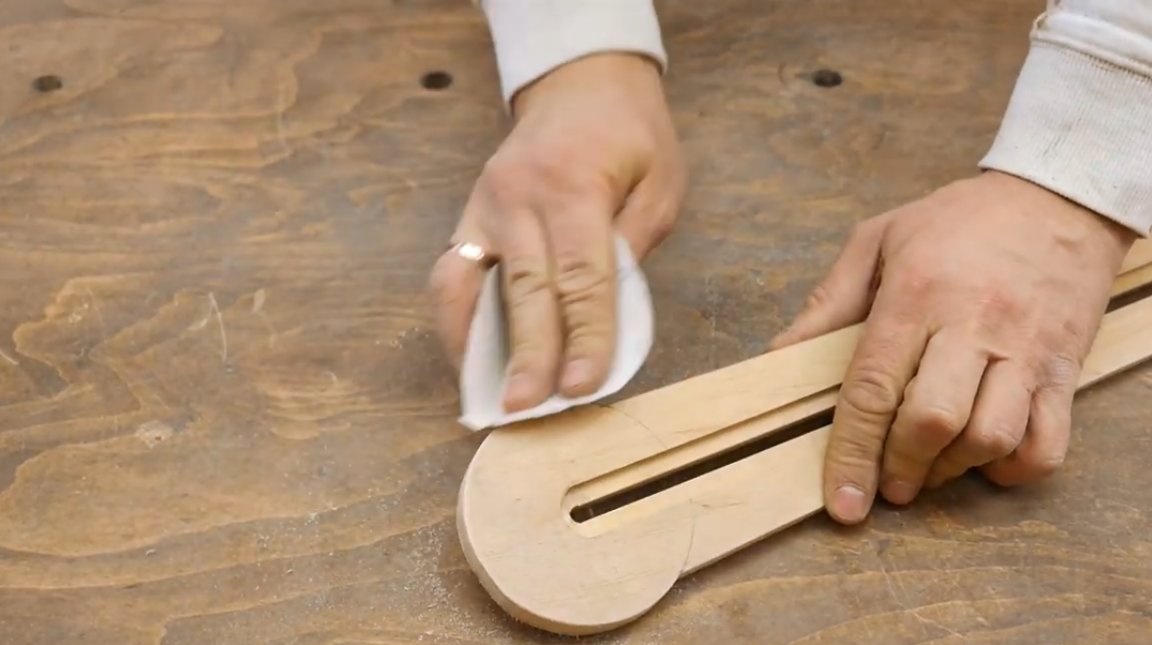
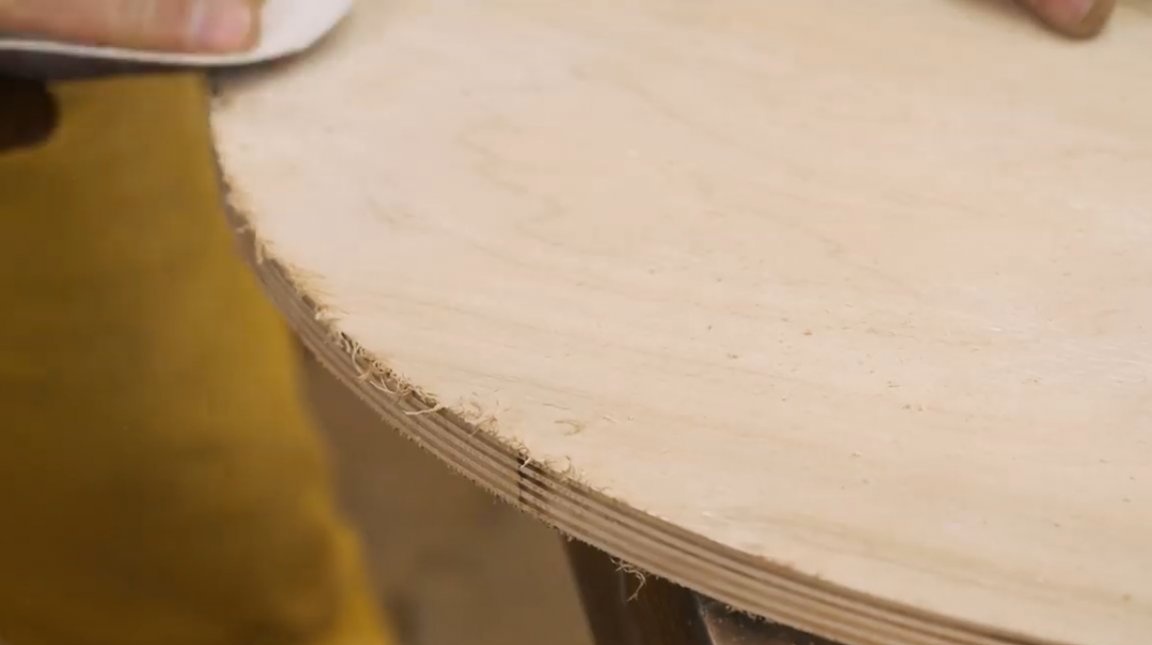
The product is cut according to the marking, all external edges are sanded with sandpaper. This removes burrs.

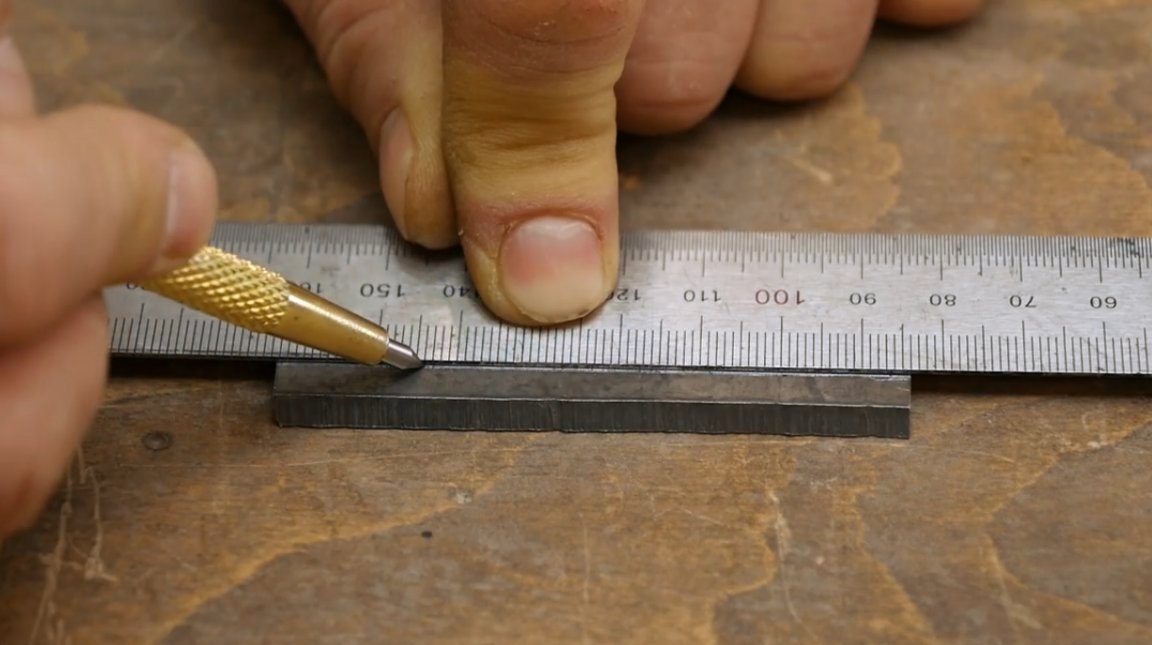
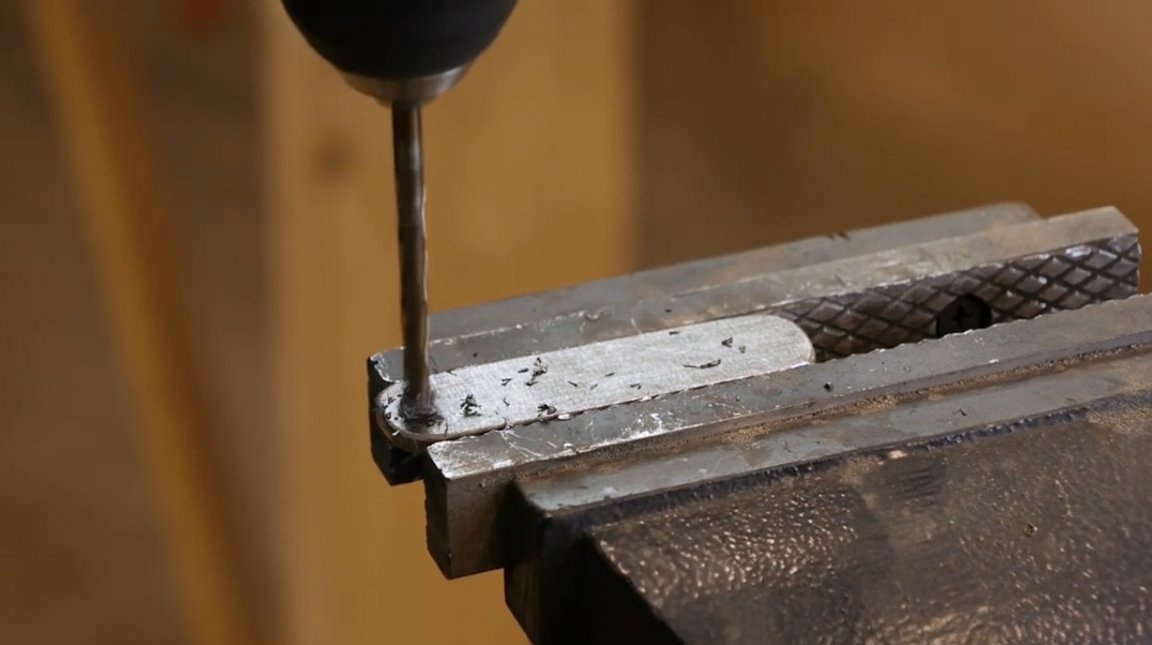
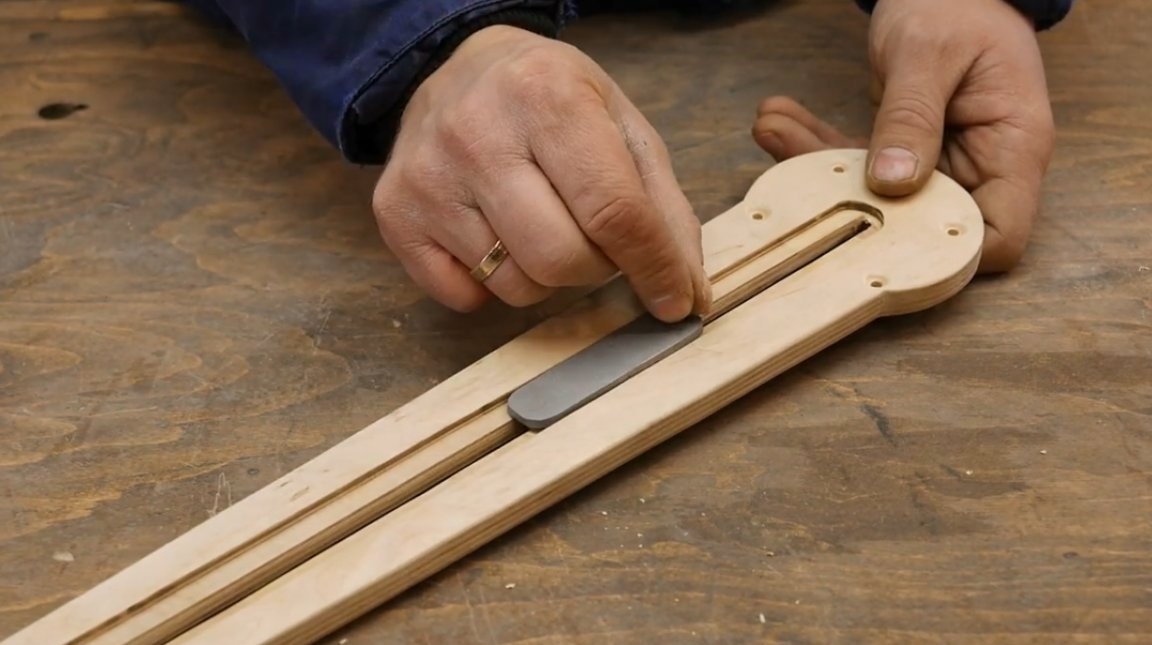
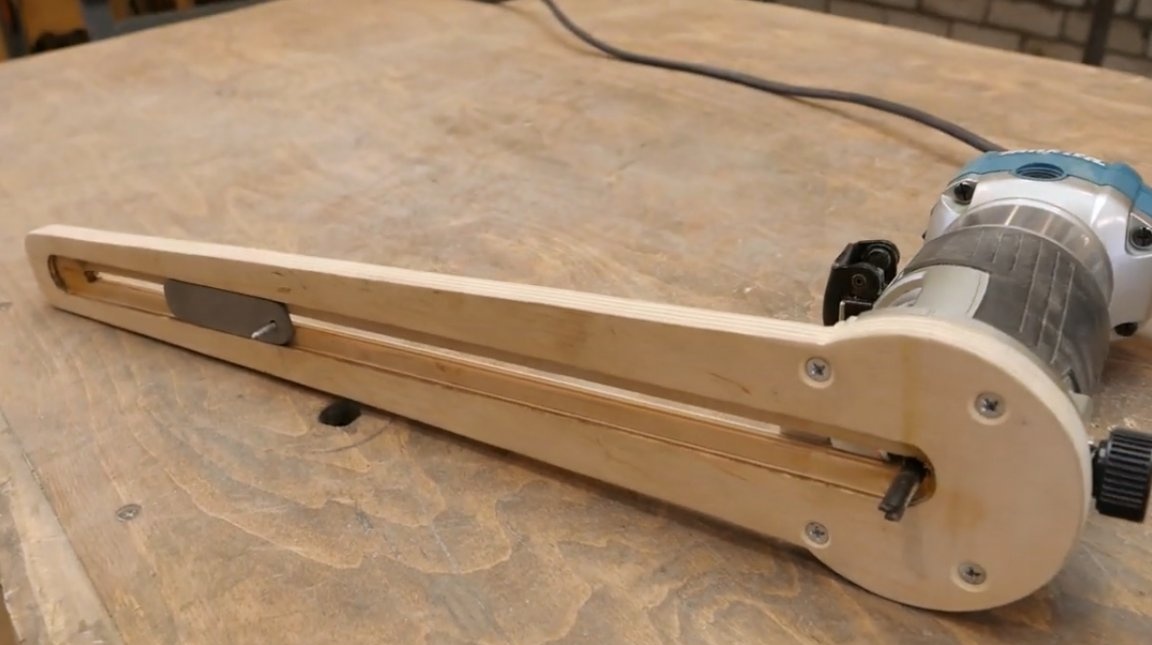
The craftsman picked up a suitable steel strip with a thickness of about 3 mm, marked it along the width of the recess, and cut off the excess with a grinder.

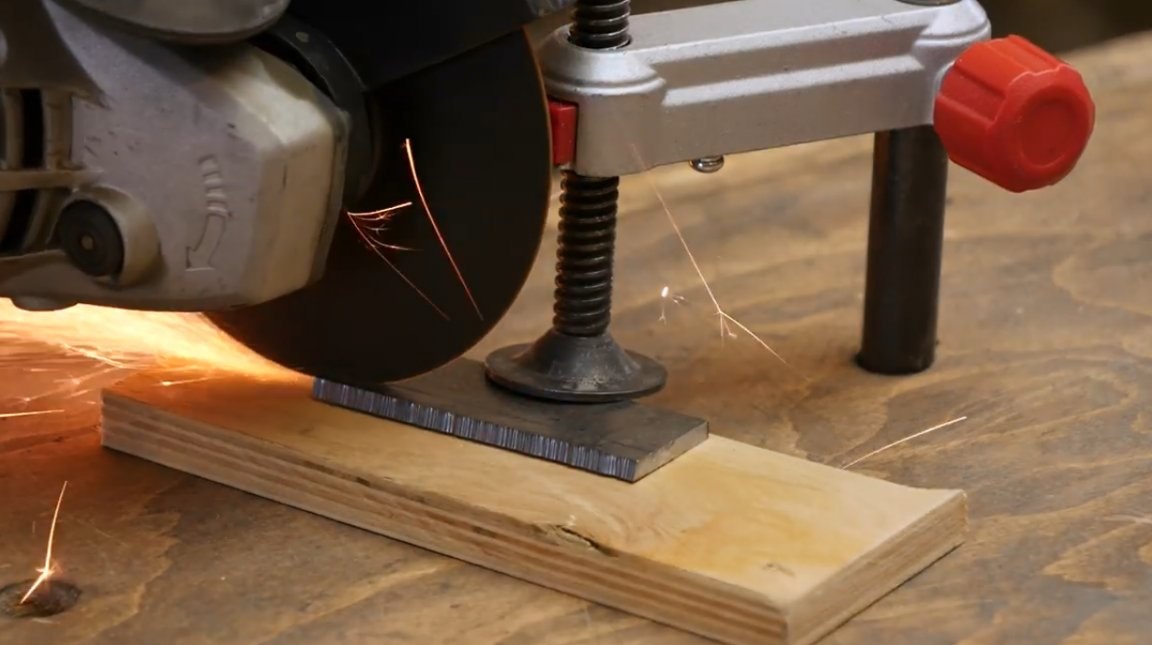
The part is fixed in a vice, and its two ends are rounded off with a stripping petal disk.

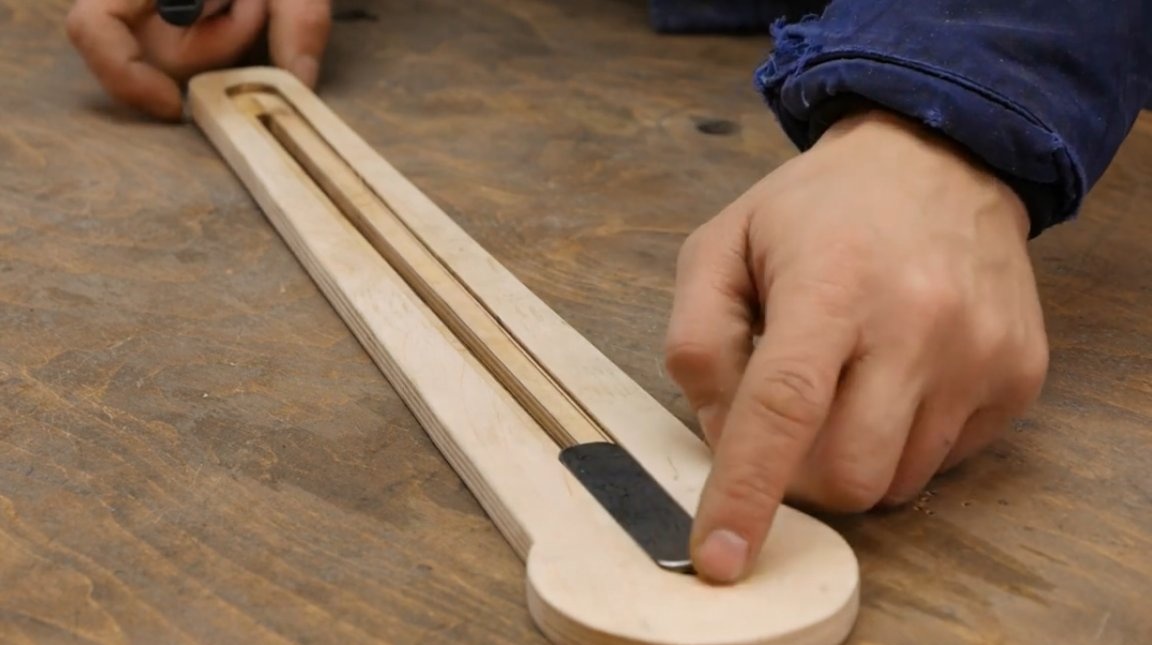
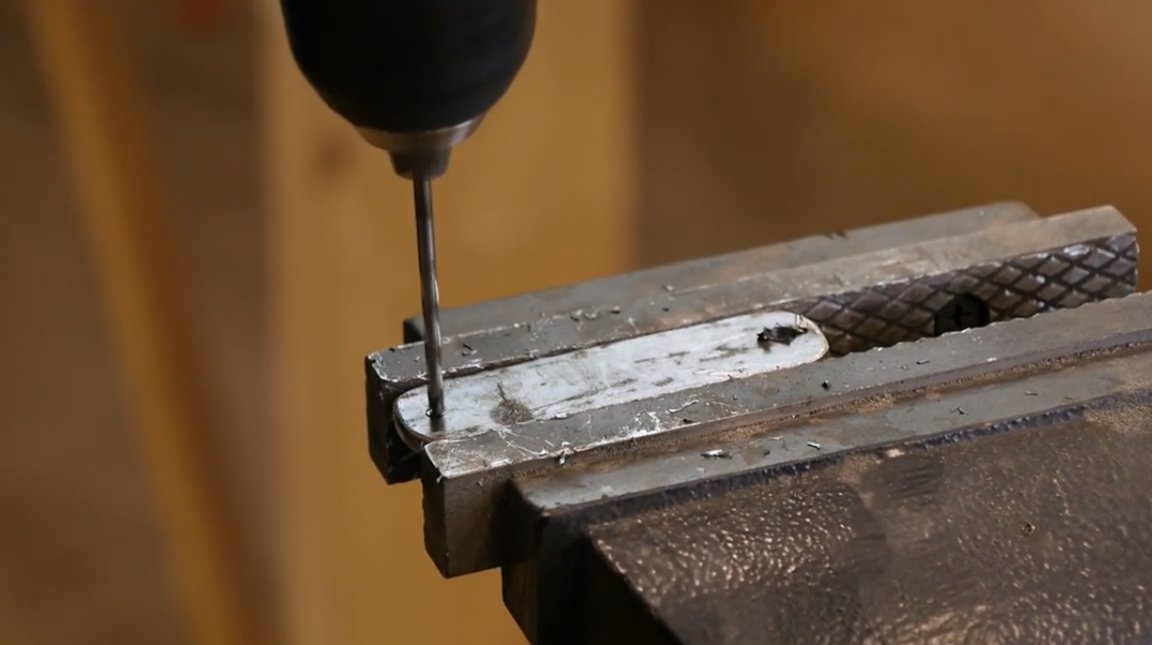
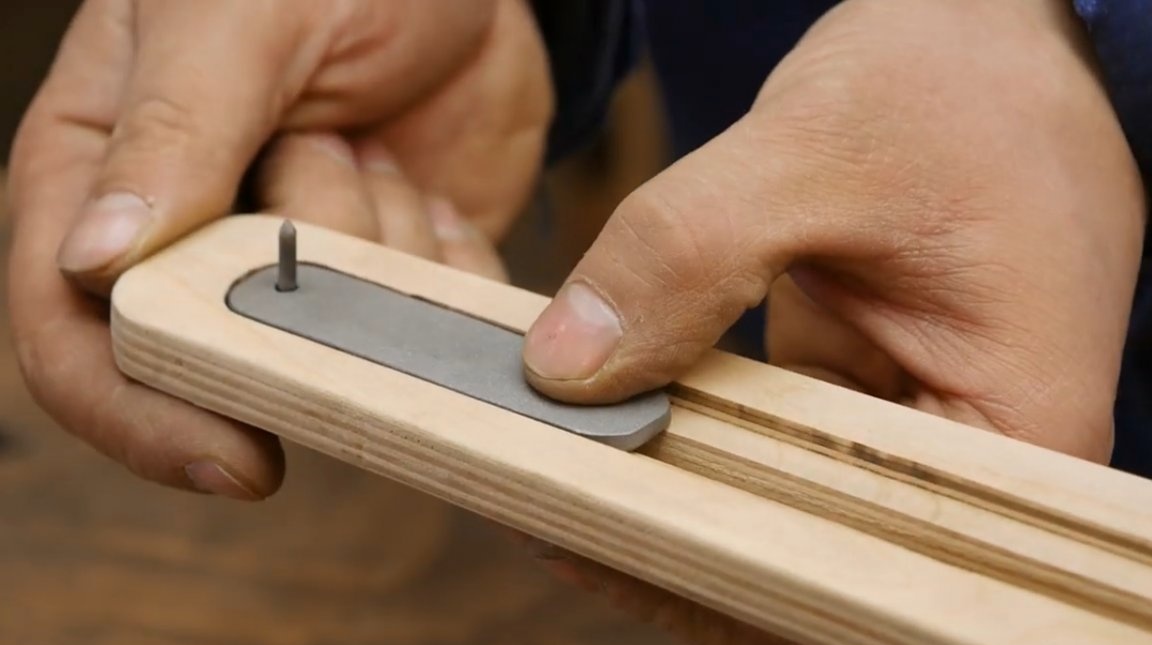
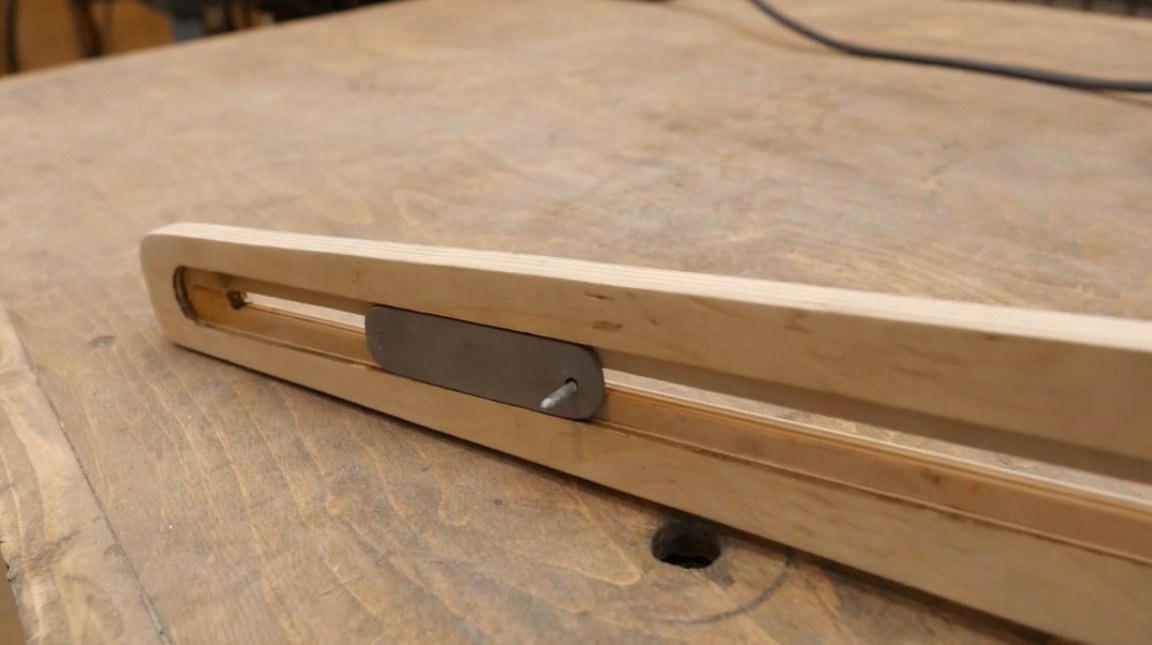
After processing, this plate will slide well inside the groove of the nozzle. It is important that its thickness coincides with the depth of the notch. On its two edges, he marks future holes for the tip and the clamping screw.
Marks are piled on both sides, and holes are drilled with drills of different diameters.

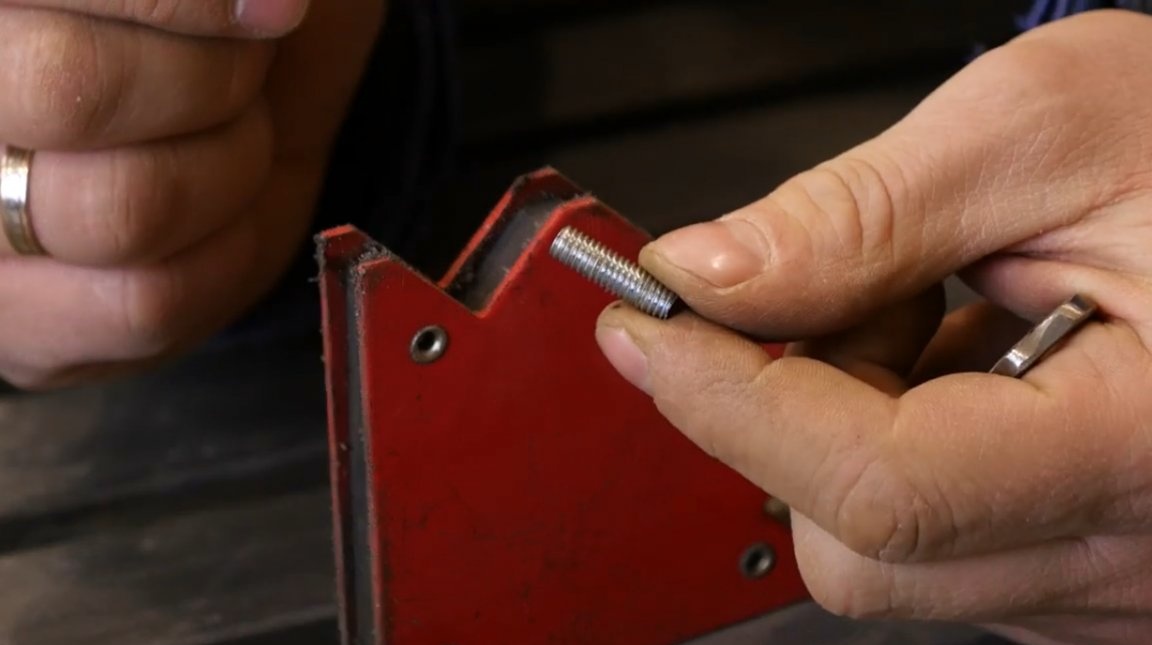
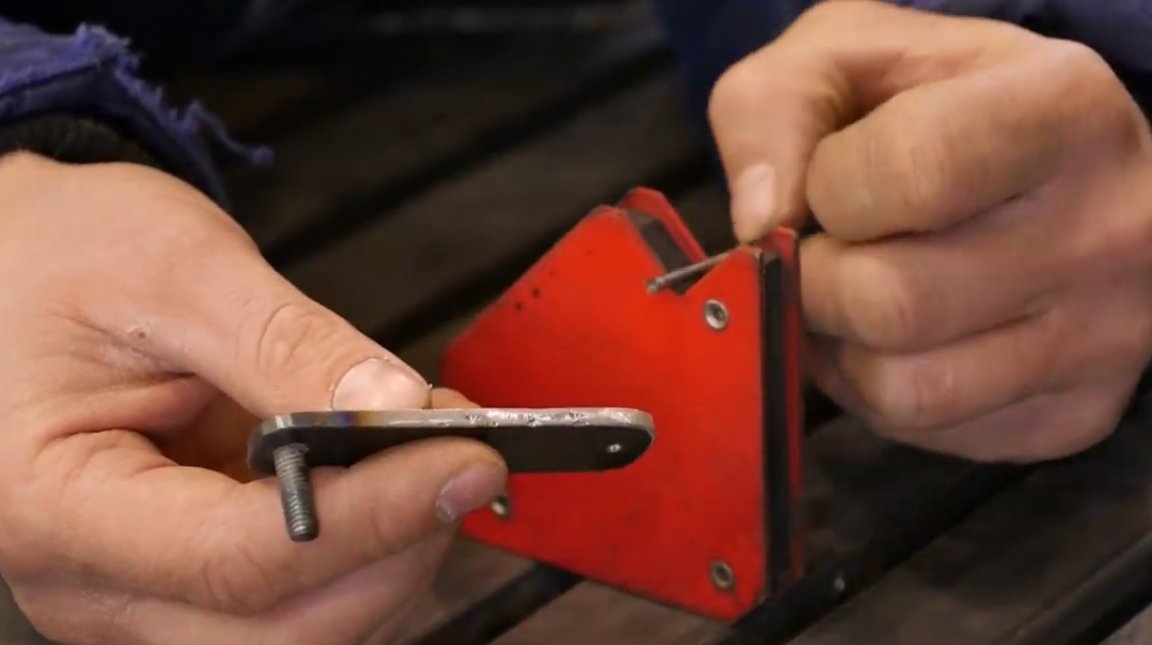
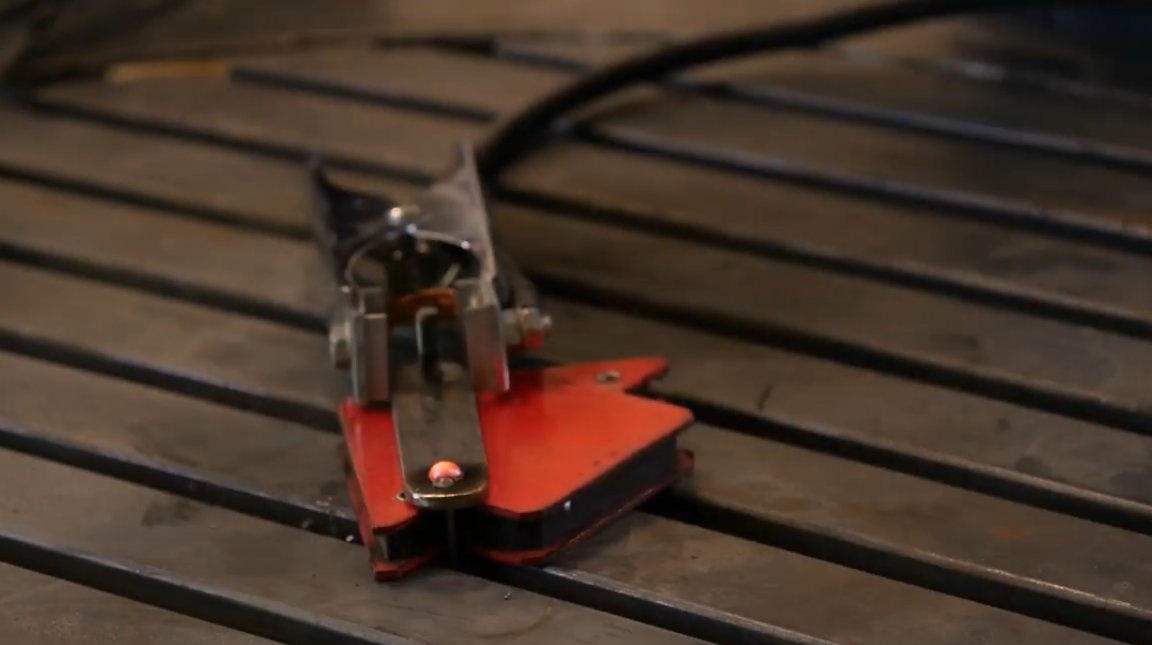
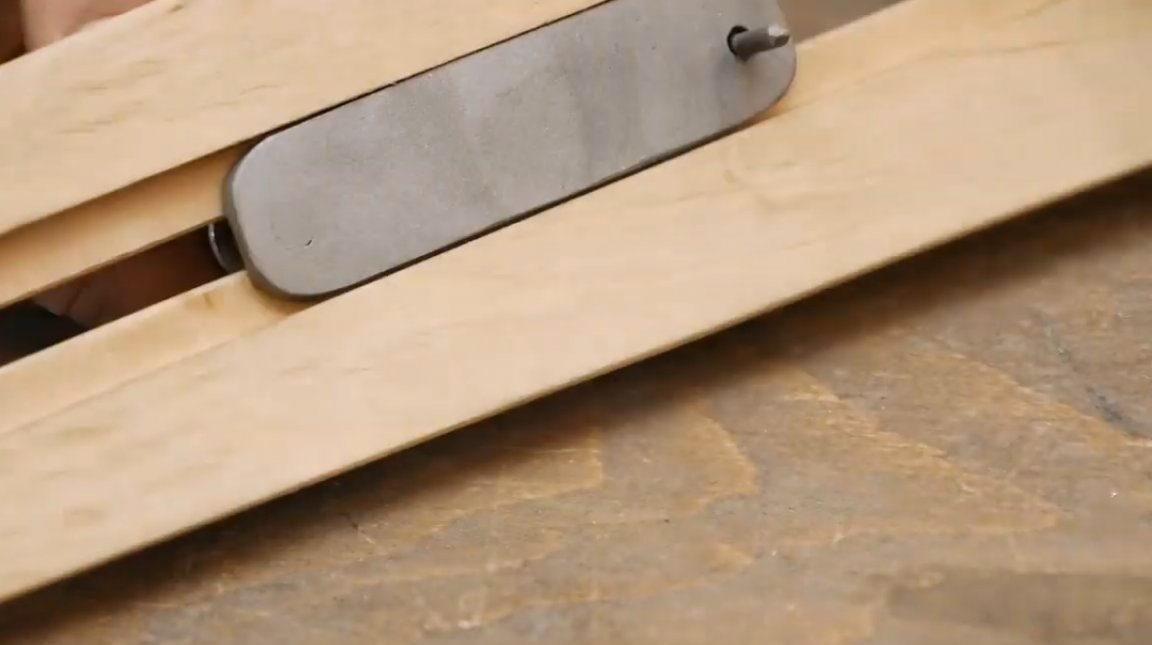
In the first hole, the master welds a piece of steel stud M6, fixing it in the workpiece using a magnetic corner.
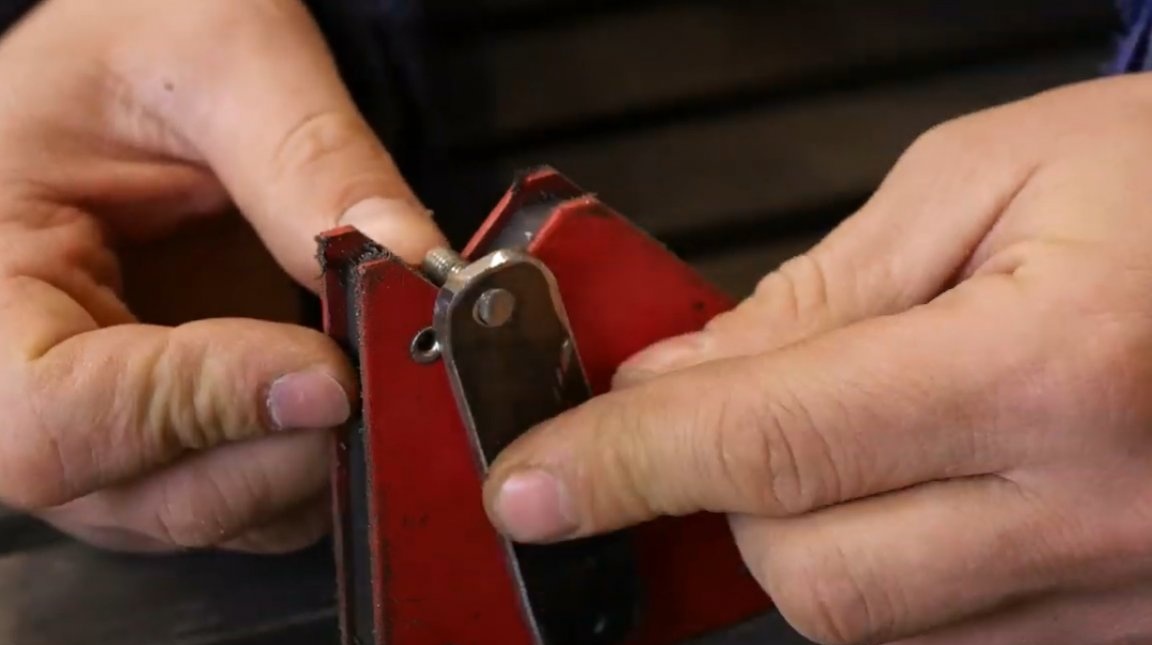

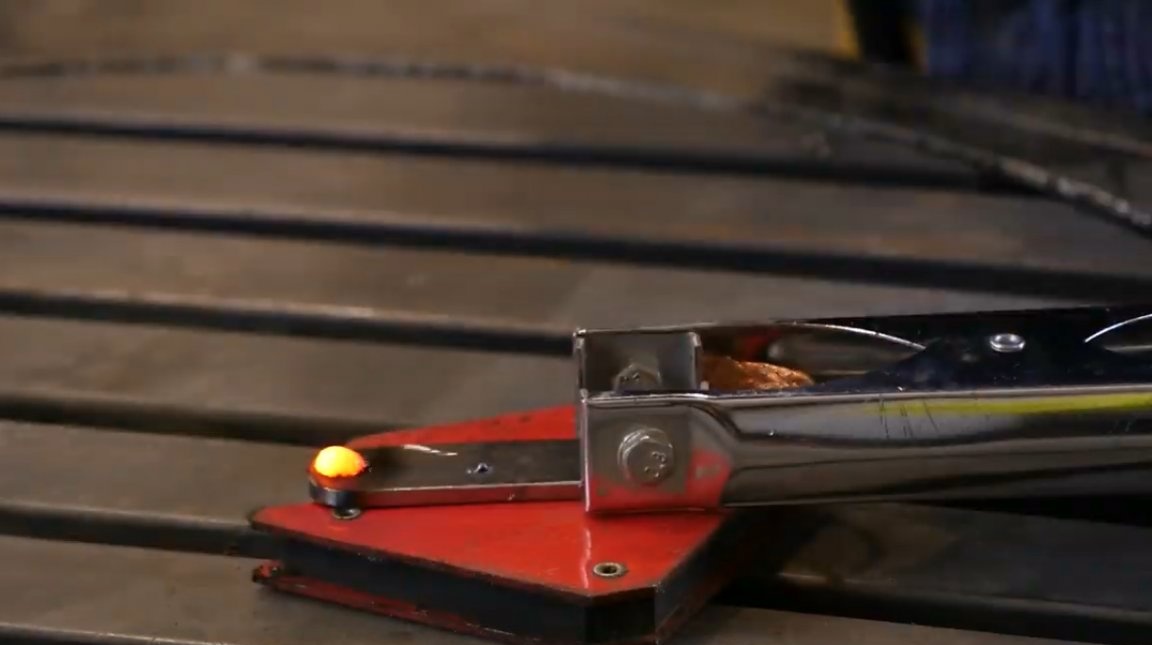
Then, a steel wire sharpened from one end is welded into a thin hole with a diameter of about 1.5-2 mm. Welding seams are ground with a flap disc.
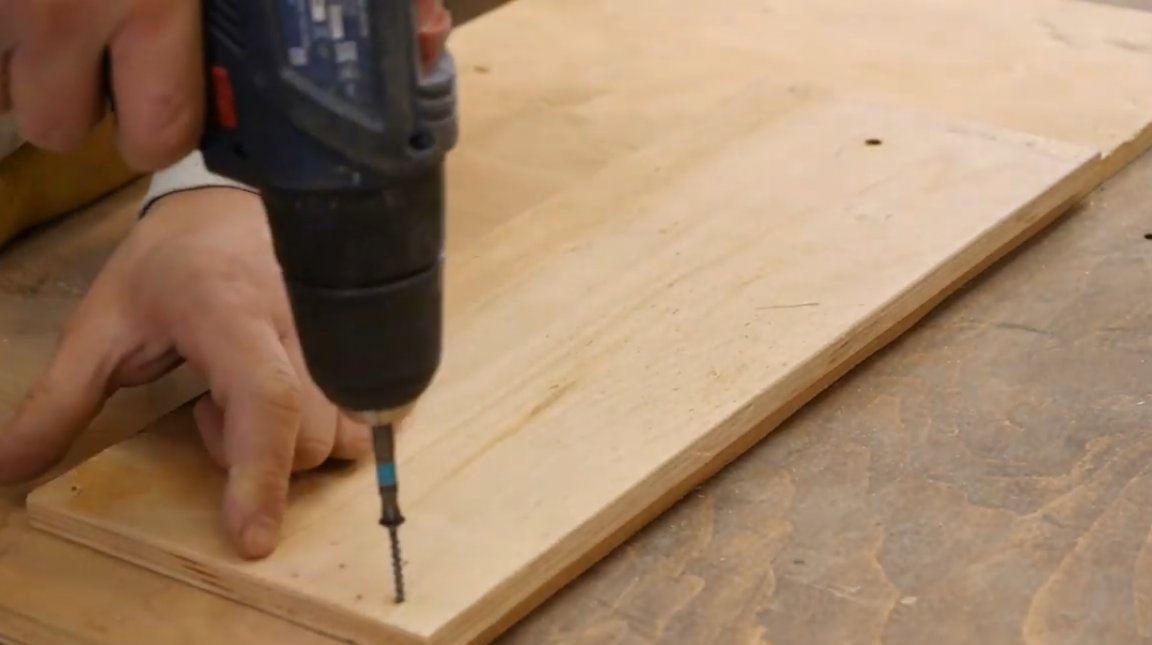
The author removes the sole from the hand mill, and transfers the marking of the holes of the clamping screws to the workpiece.
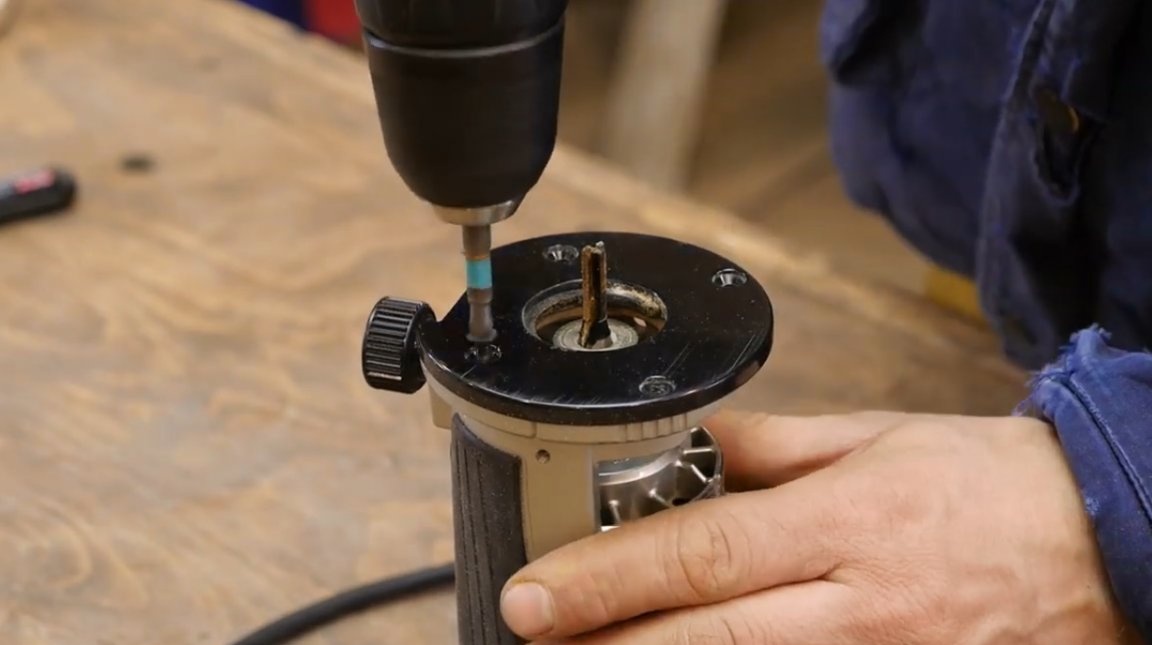

The screw holes themselves are drilled with a countersink drill.
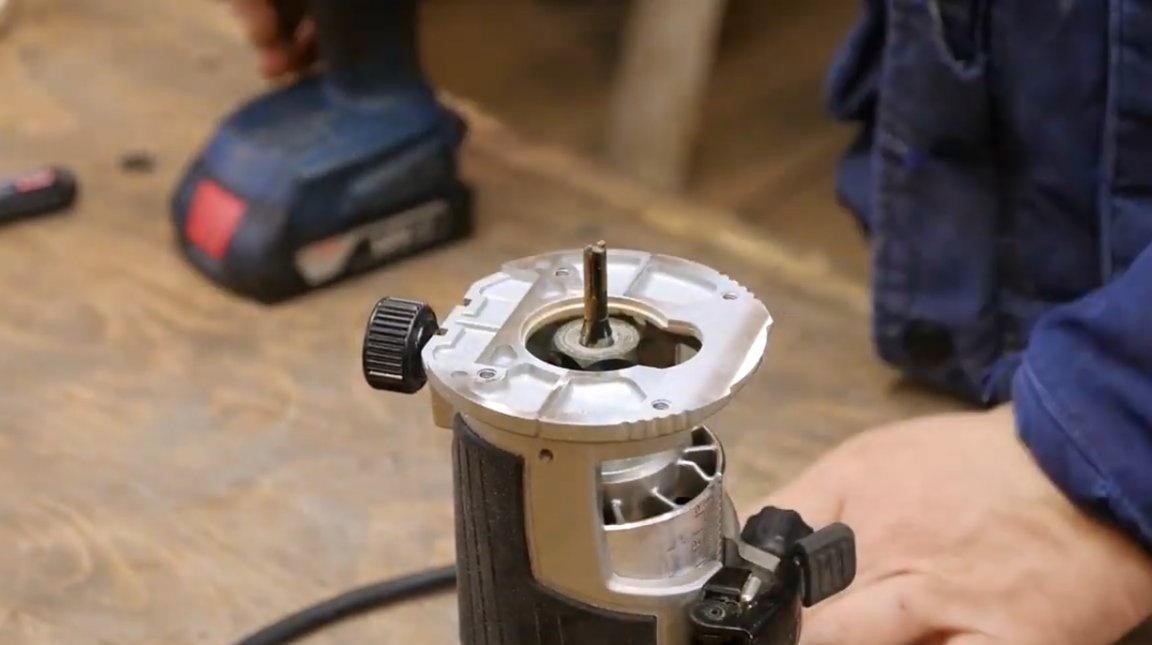
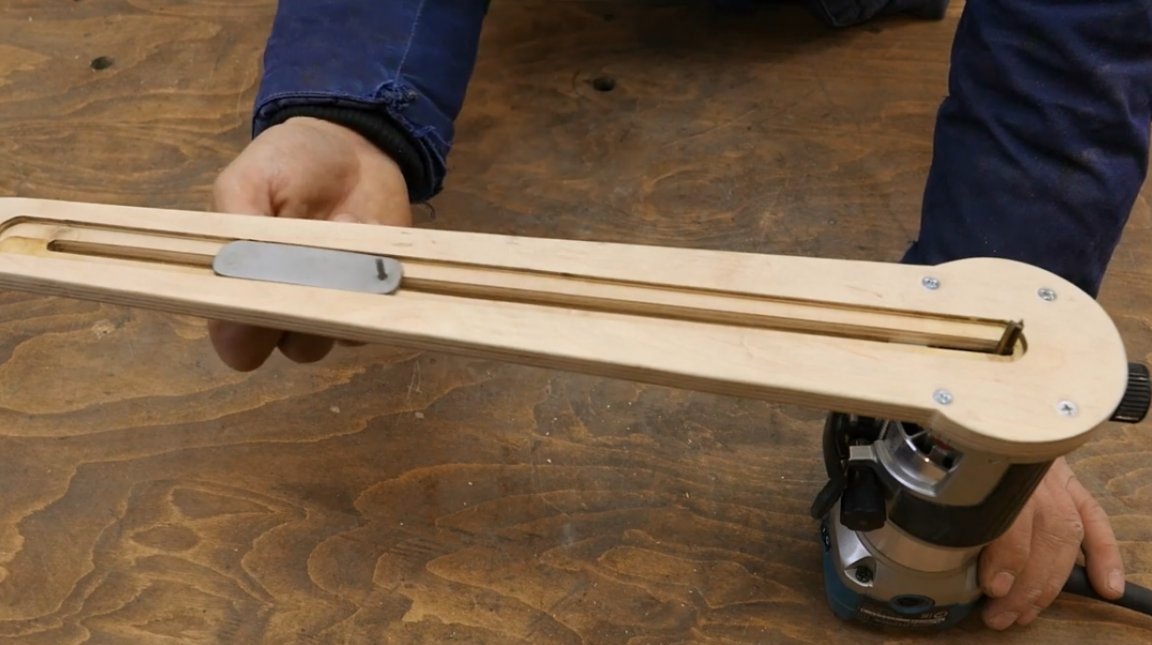
The steel insert is fixed to the base of the nozzle with a washer and wing nut.

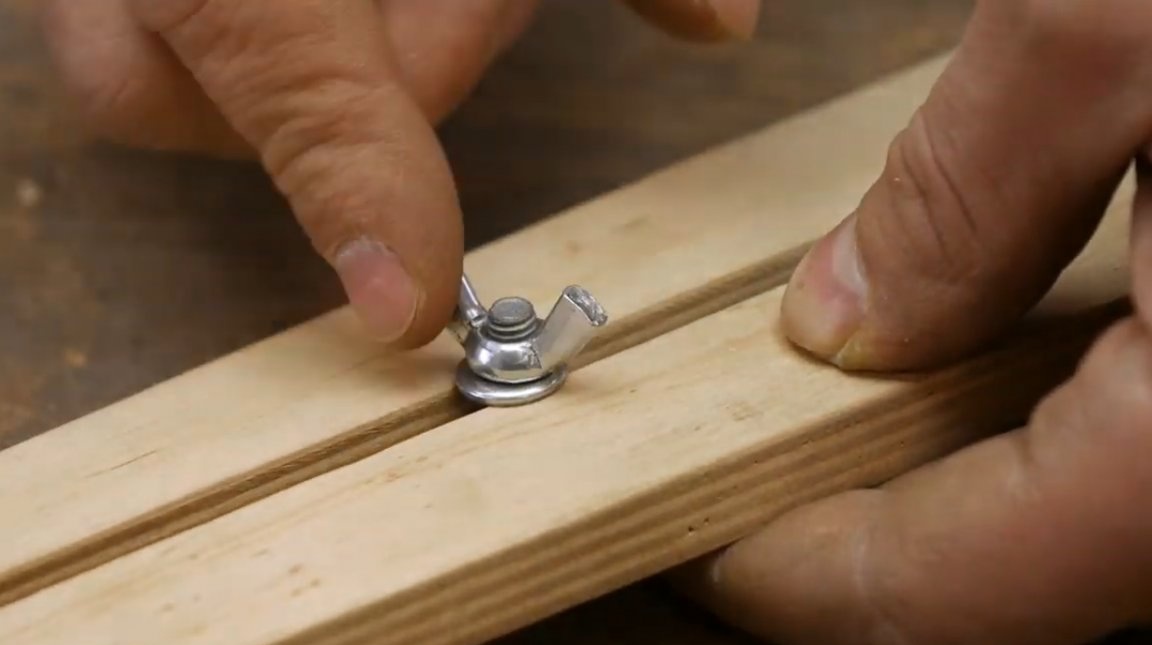
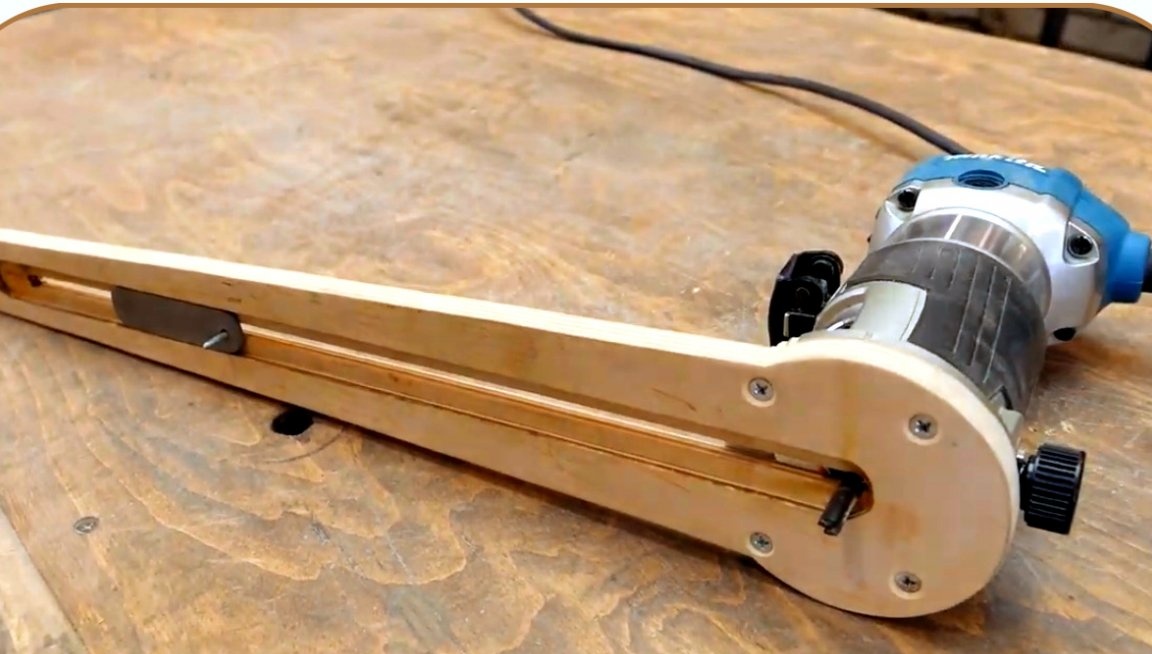
The nozzle can now be screwed to the mill body.

This is how the tab will move along the body, for working with large radii - the needle is installed in the outside, and for small - inward.
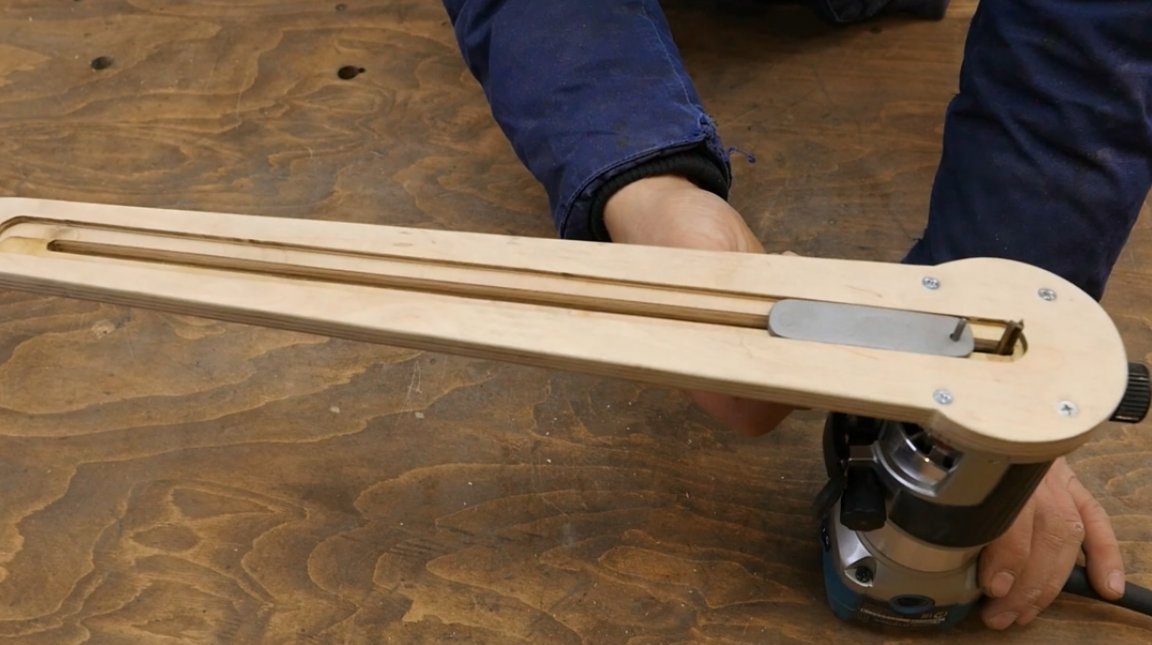
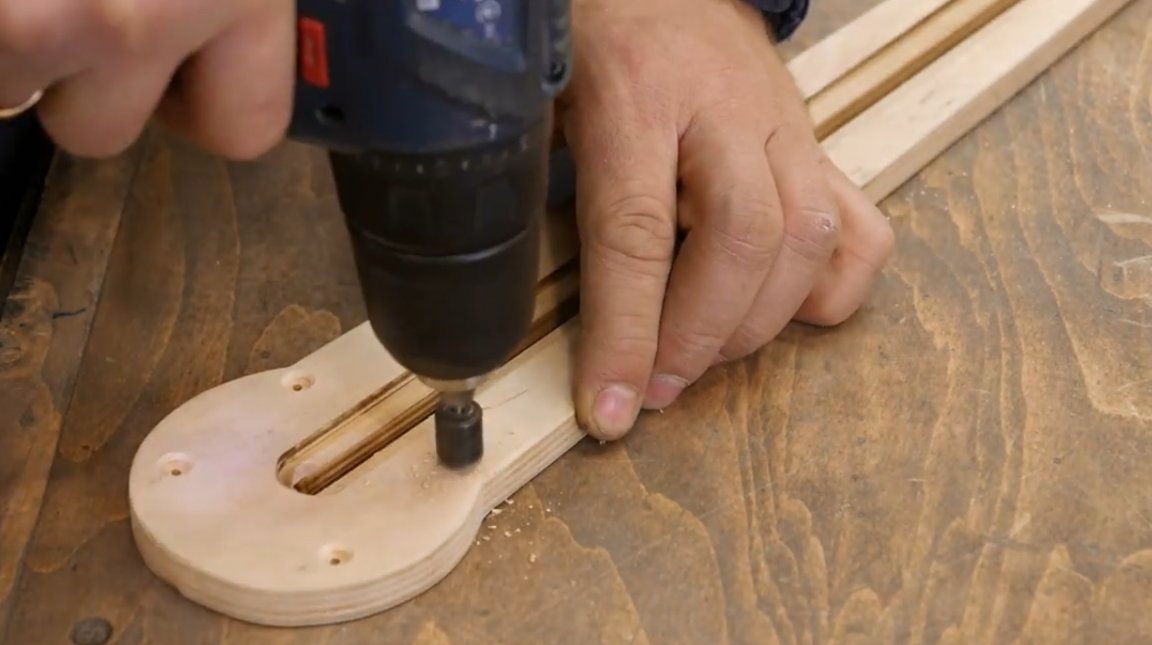
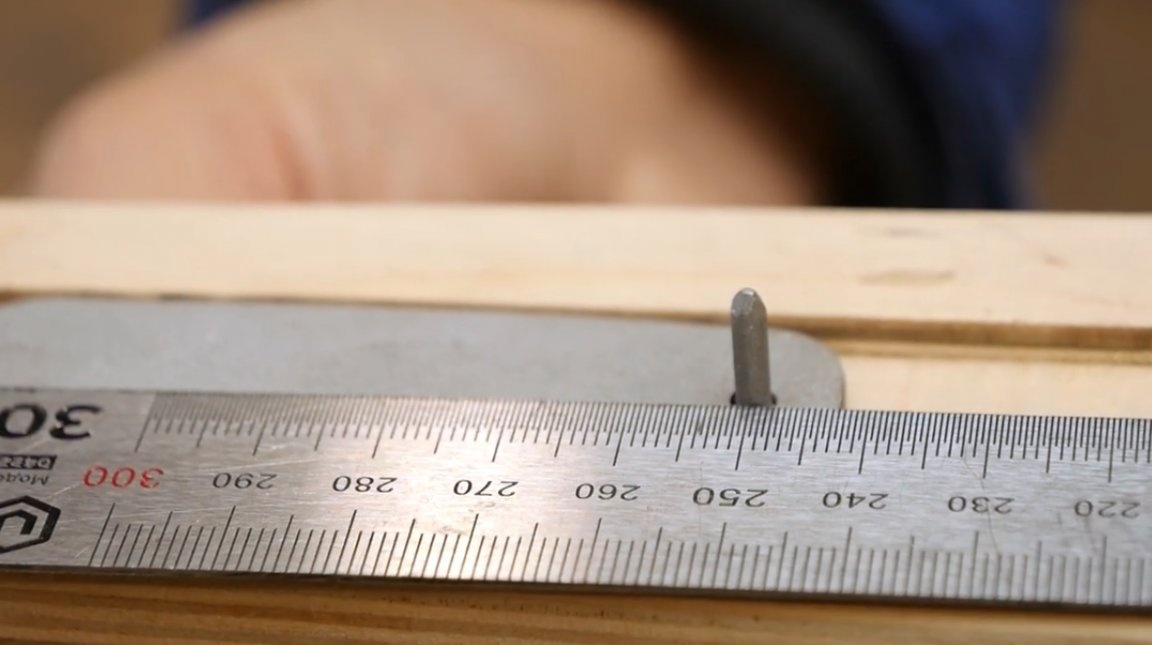
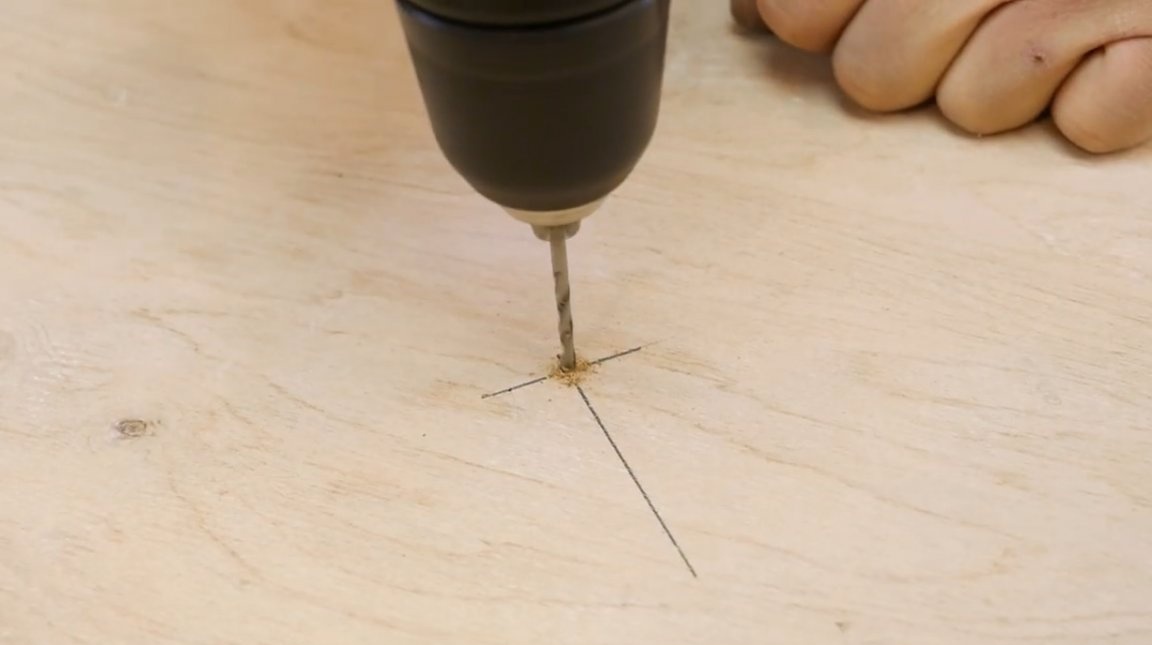
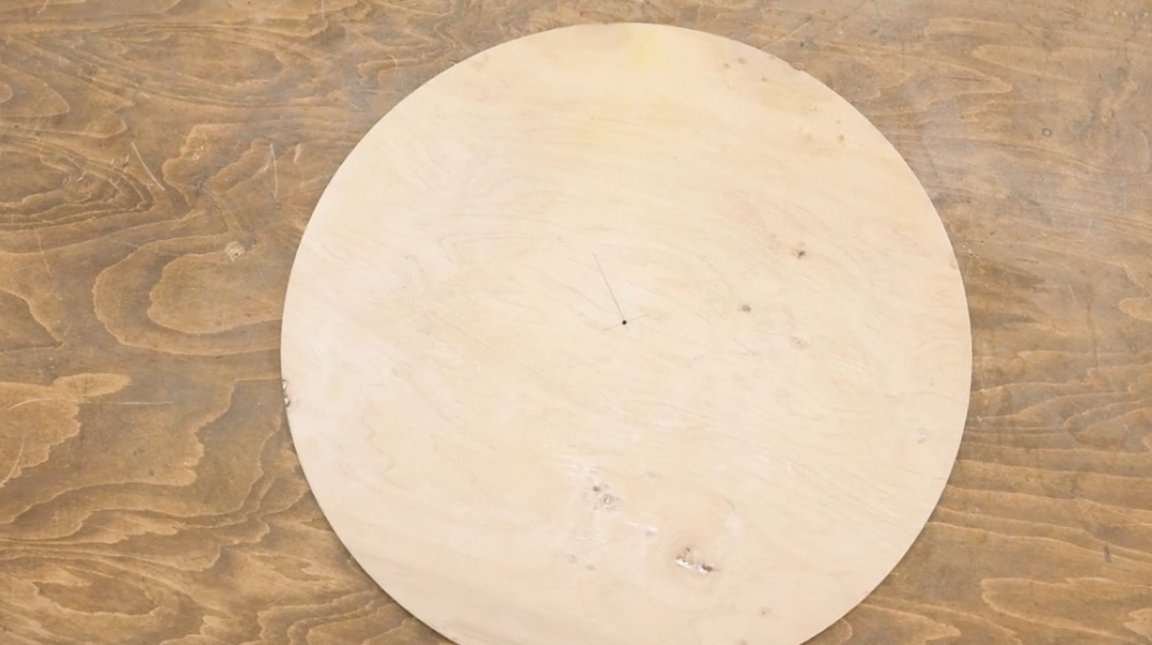
The author will cut a circle with a radius of 250 mm, and fixes the needle in this position, given the diameter of the cutter itself.
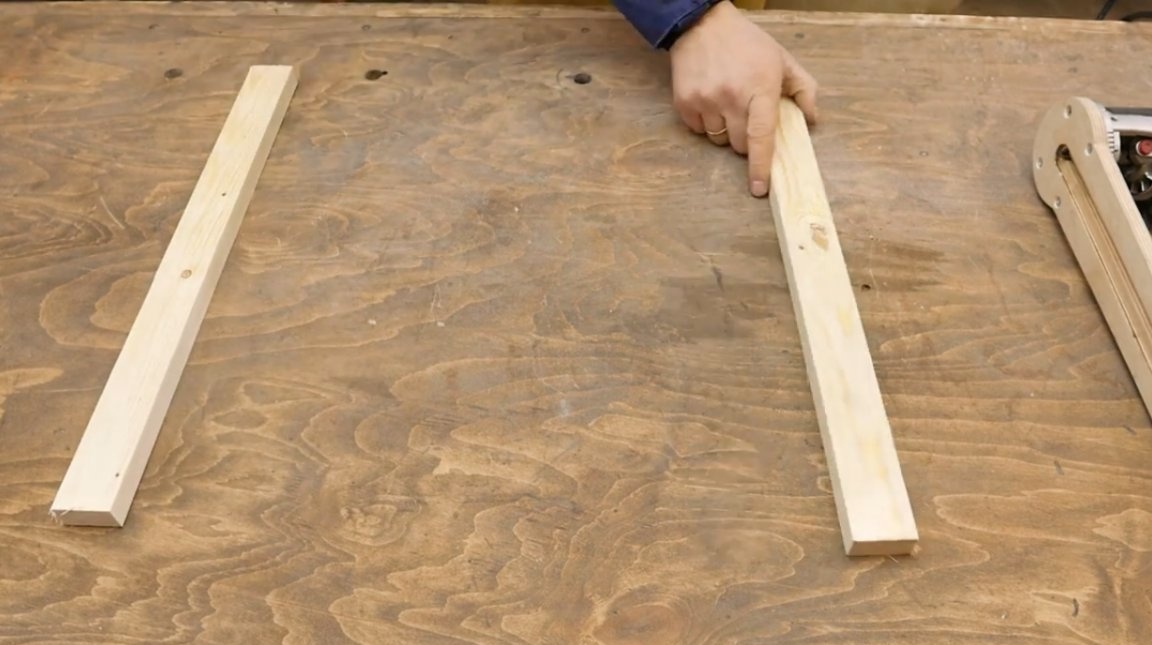
Two boards are placed under the plywood sheet, the center is on it, and a hole for the needle is drilled in it.

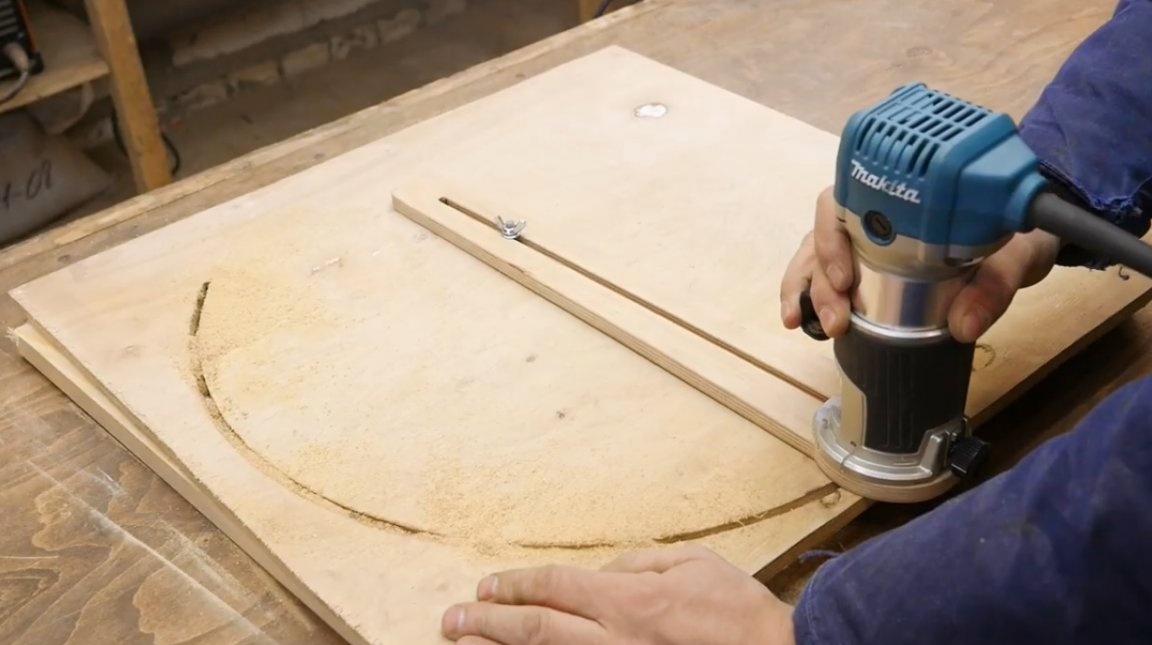
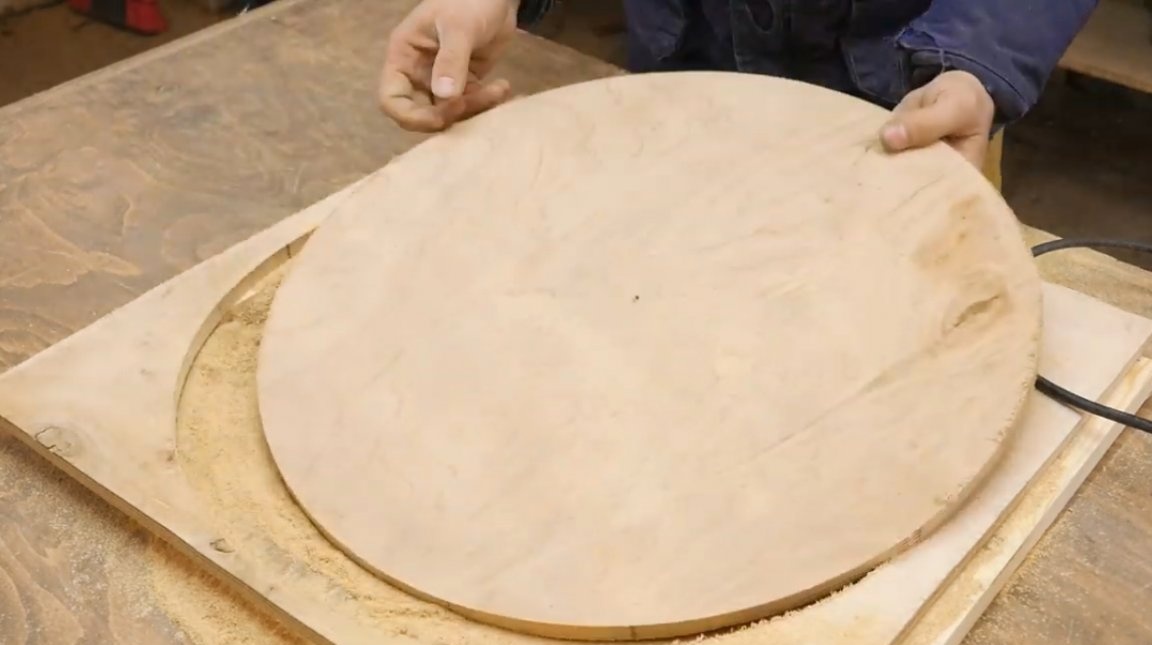
Everything is ready, you can cut a disk from sheet plywood. The author performs this in several passes, gradually increasing the overhang of the cutter.
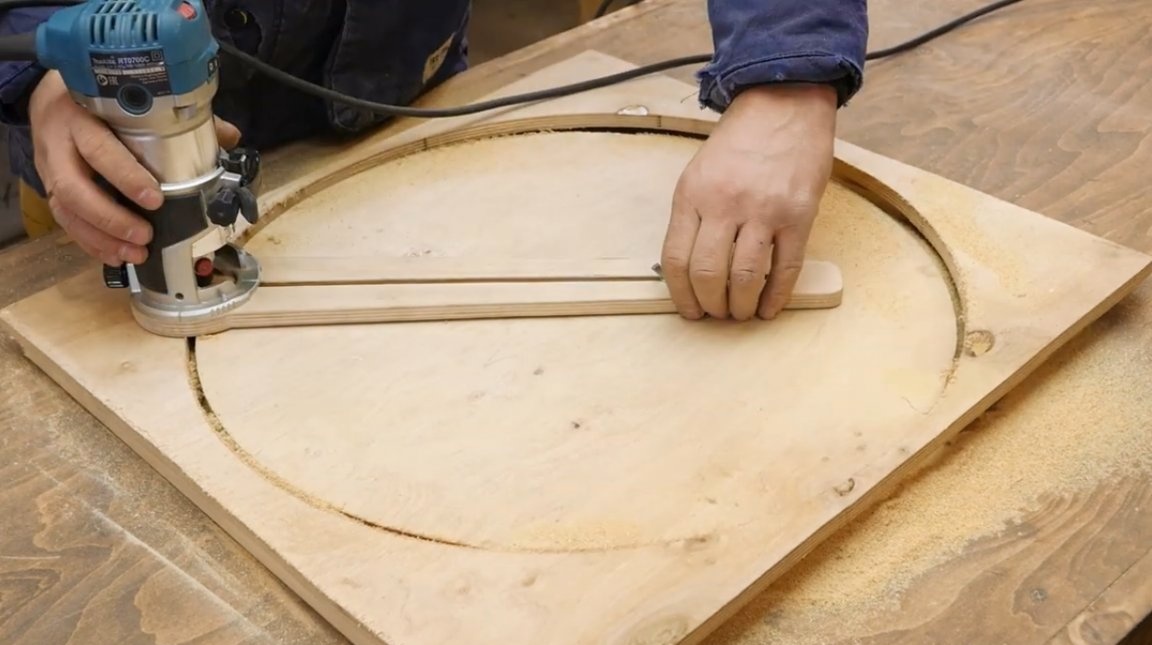
The edges of the resulting product are sanded with sandpaper, and the disc is ready.
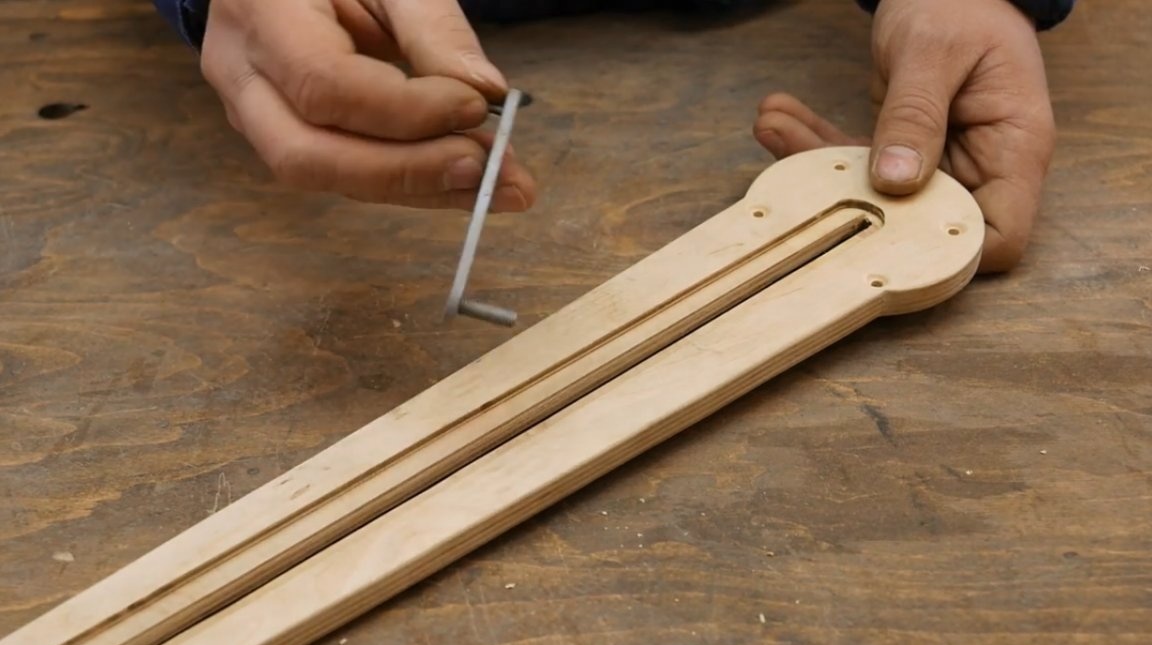
Here is such a simple device It turned out from the master. The minimum radius of the resulting circle is only 20 mm, and the maximum possible is 800 mm. Although you can make the base longer, but Ivan himself limited himself to just such parameters.
I thank the author for a simple but useful tool for the router. Now in the workshop you can do various radius products, discs, rings, and the like.
If you have interesting homemade products, share them on this site. Here you will get a real reward, not a “bunch of green stuff" at the entertainment forum.
All good mood, good luck, and interesting ideas!
Author video can be found here.