
I welcome all fans to craft, I propose to consider instructions for the manufacture of a small miter saw with a broach do it yourself. Such homemade You can cut fiberboard, plywood, boards and other similar material. The advantage of homemade is that it makes little noise, consumes little fuel, and due to the low power of the motor, homemade is relatively safe. As the basis used motor 775, with direct drive, it rotates the circular disk by 110 or 125 mm. The author made a broach out of a furniture slider, everything is going quickly, and the machine works perfectly. If the project interests you, I propose to study it in more detail!
Materials and tools used by the author:
Material List:
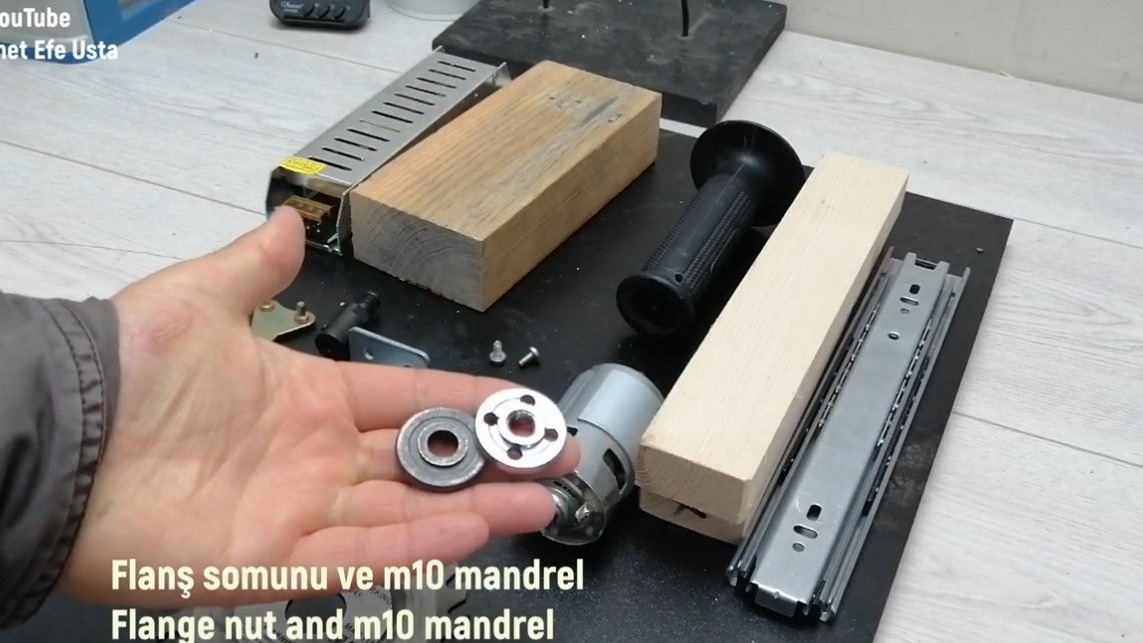
- motor 775;
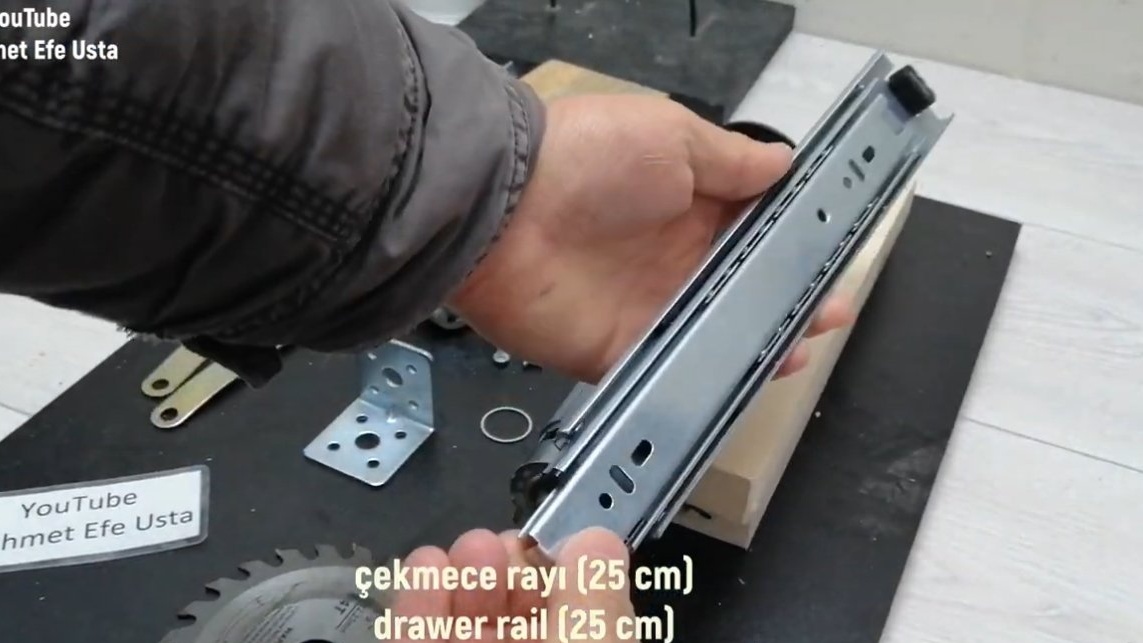
- furniture slider;
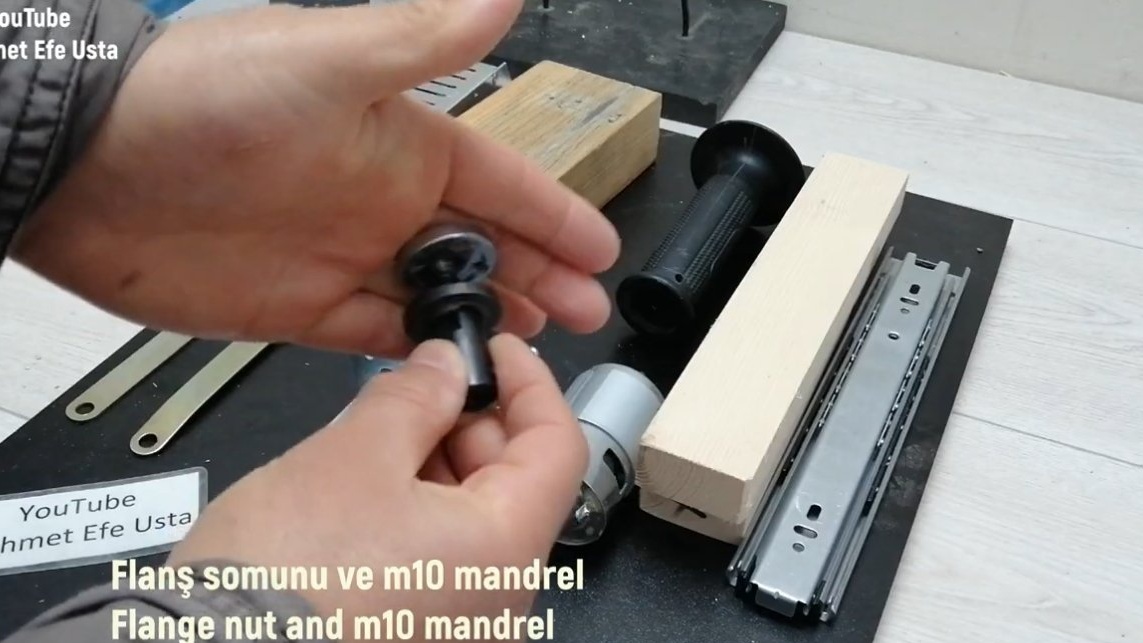
- "Bulgarian" flange M10;
- circular disk 125;
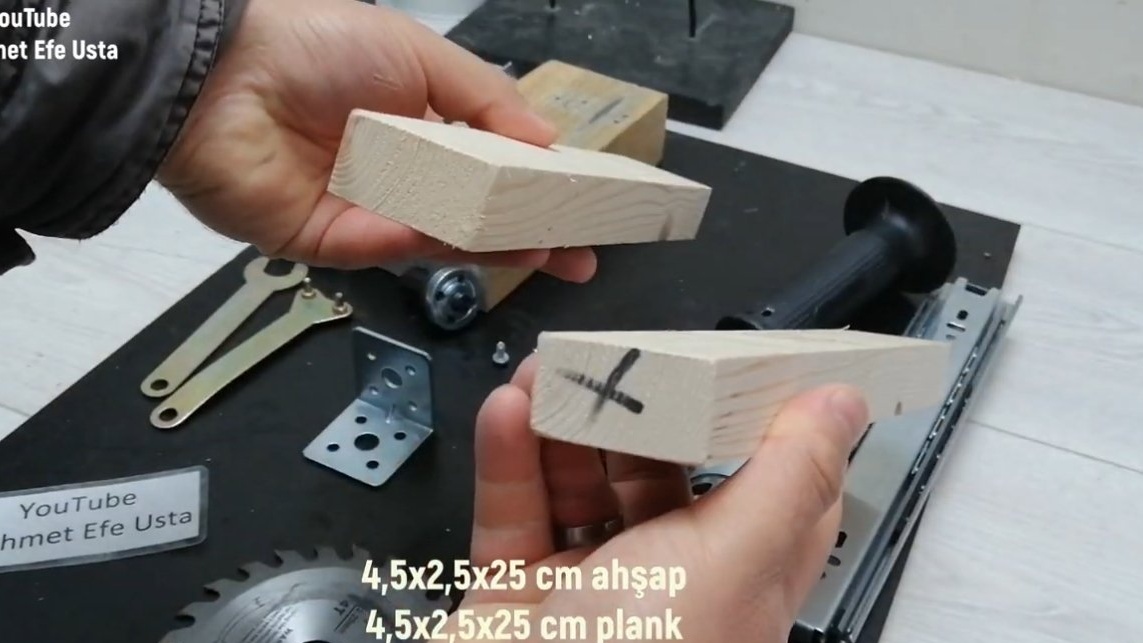
- wooden bars;
- furniture fixing corners;
- self-tapping screws;
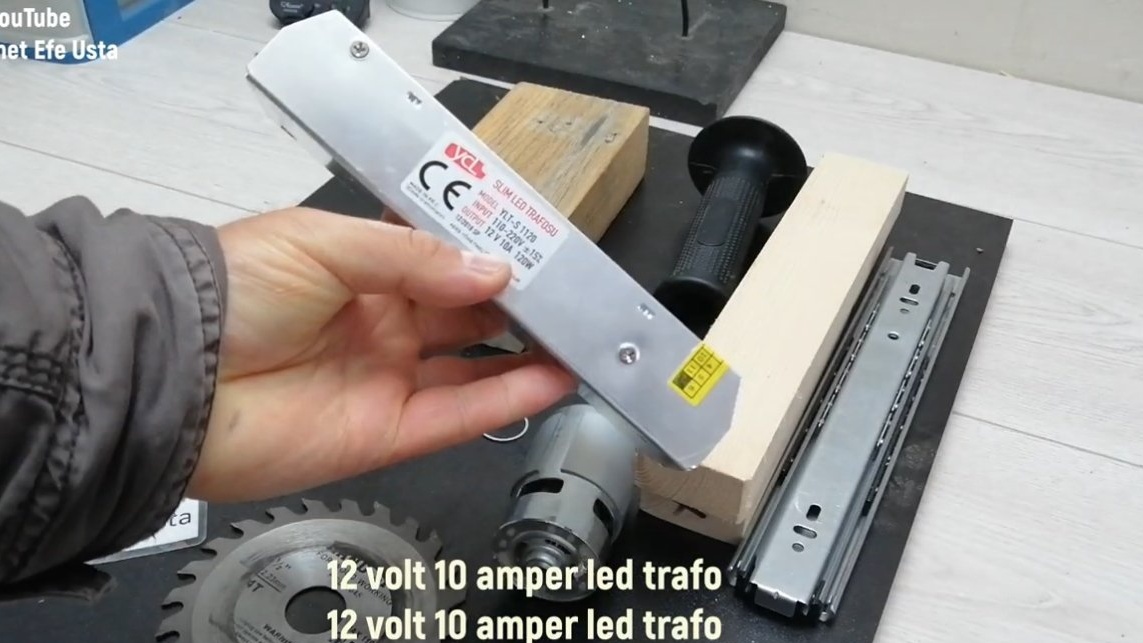
- power supply unit 12V / 10A;
- removable handle from the grinder;
- plywood, chipboard or other base material;
- bolts and nuts "lamb".
Tool List:
- a hacksaw;
- square;
- roulette;
- screwdriver, drill;
- clamps.
Homemade manufacturing process:
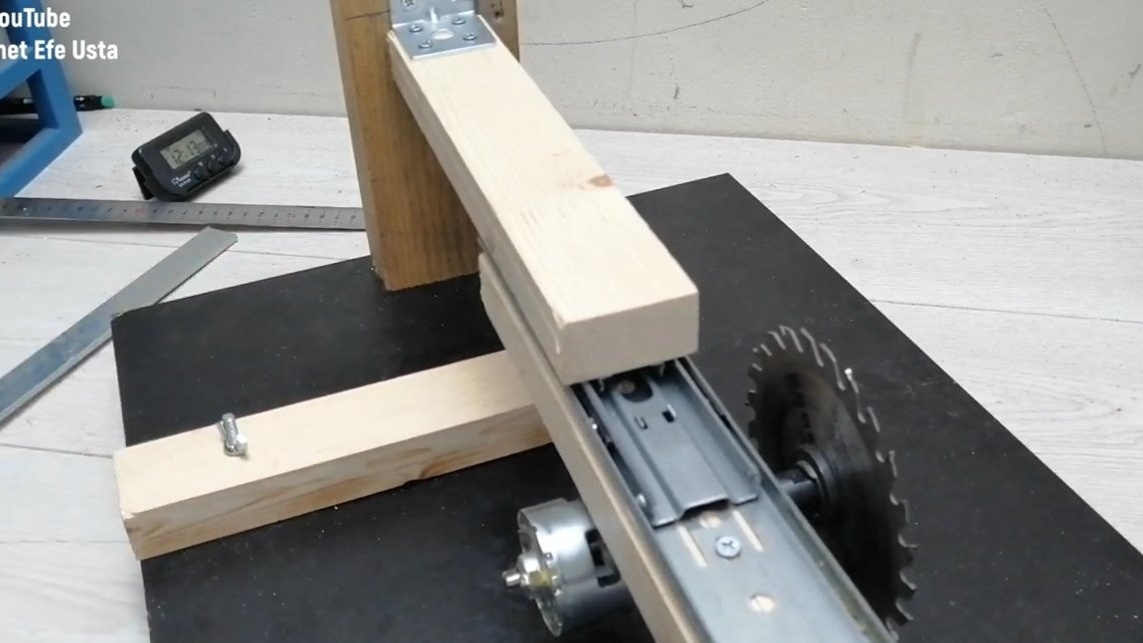
Step one. Stand and base
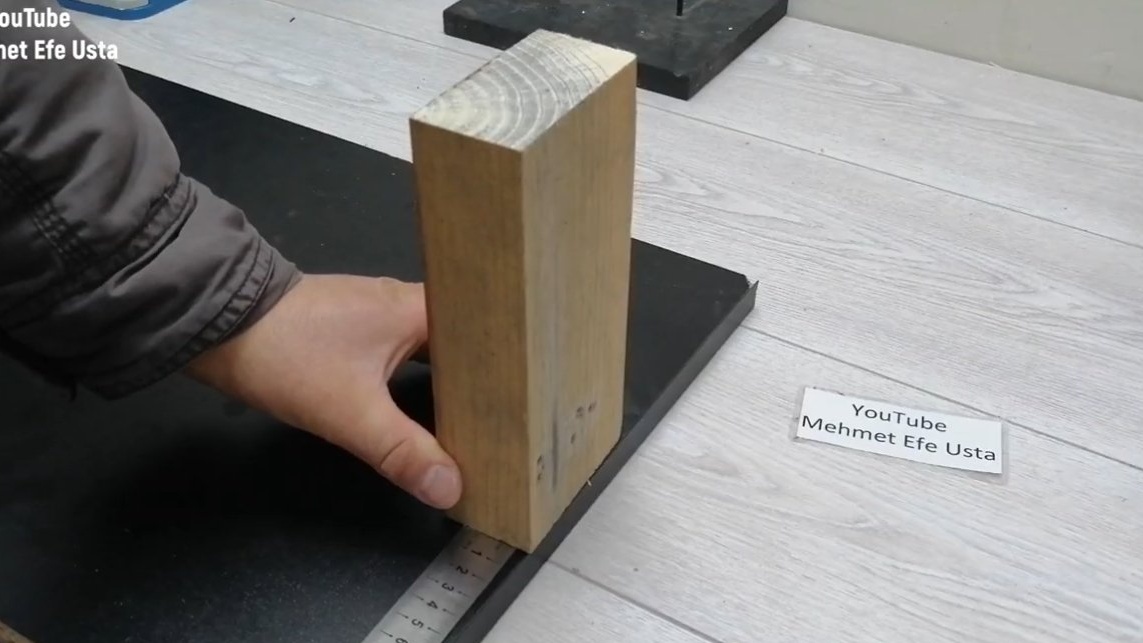
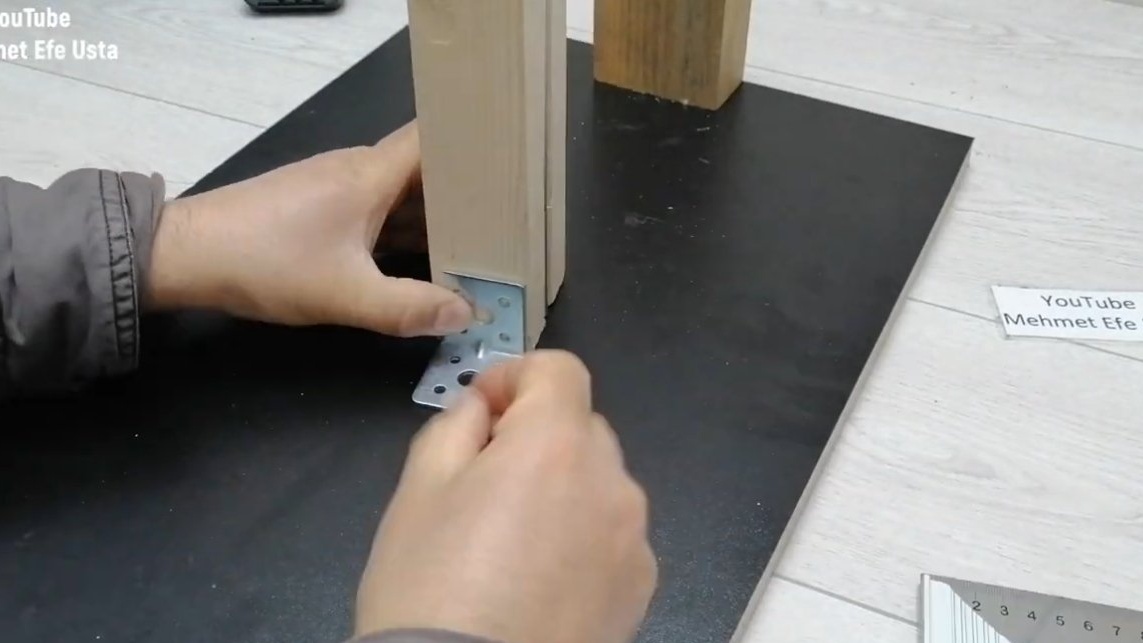
First of all, we will need to fasten the rack to the base. Particleboard and plywood are suitable as a base; you can also sheathe a fiberboard OSB sheet. You need to fasten the stand to the base clearly at right angles, you can use a piece of the bar as it. For the stand to stand upright, its end must be cut off clearly at right angles.
We fasten the rack with screws, and for reliability, you can coat everything with carpentry glue.
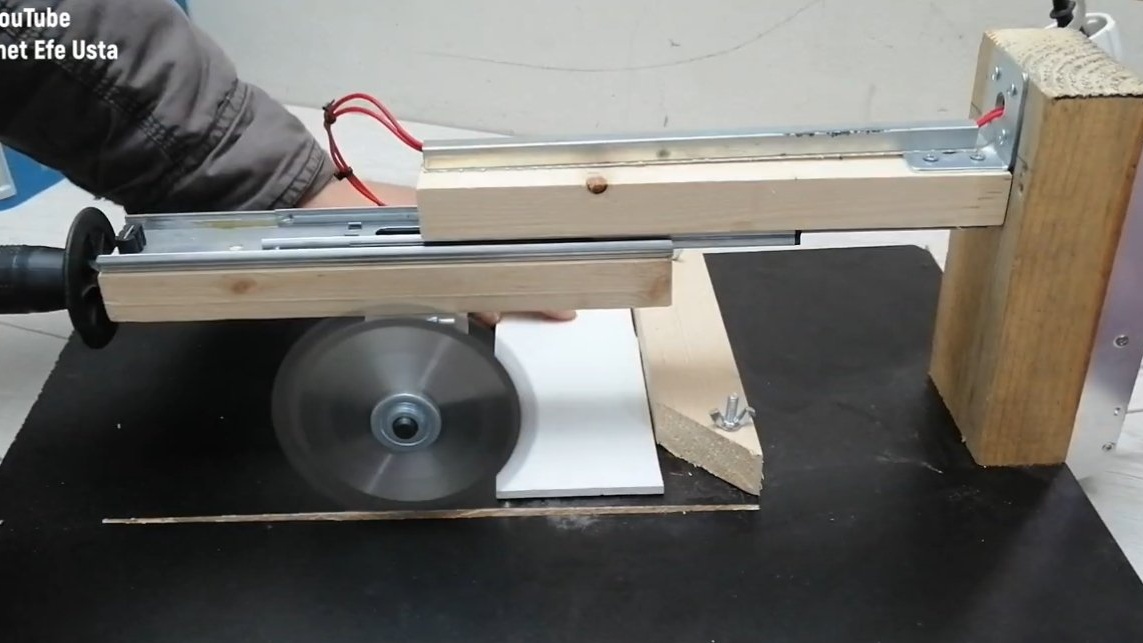
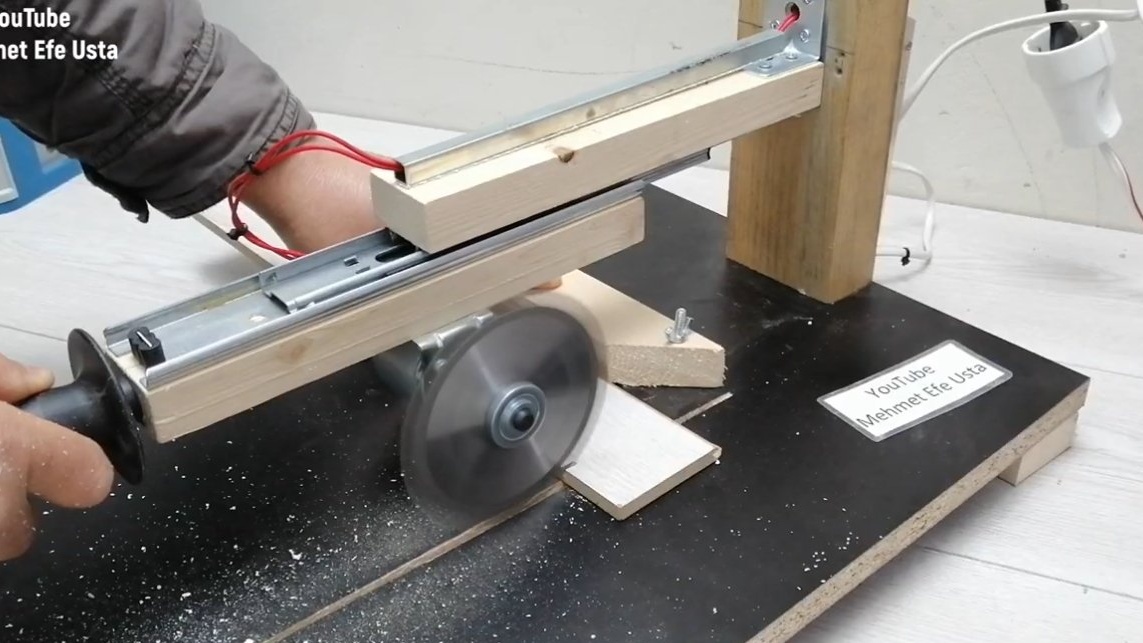
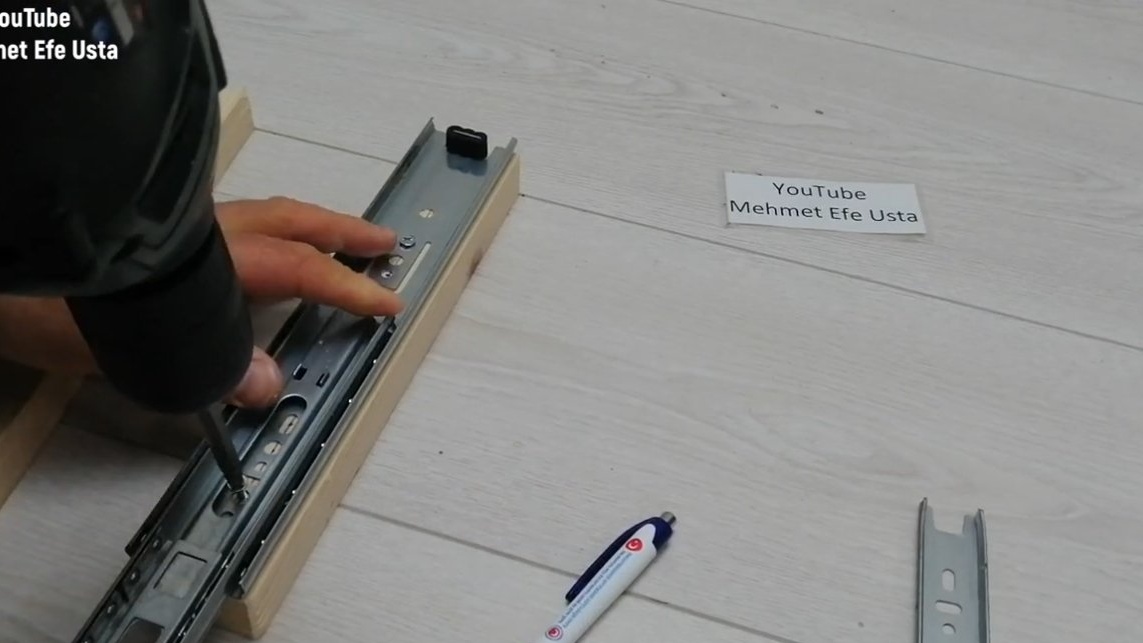
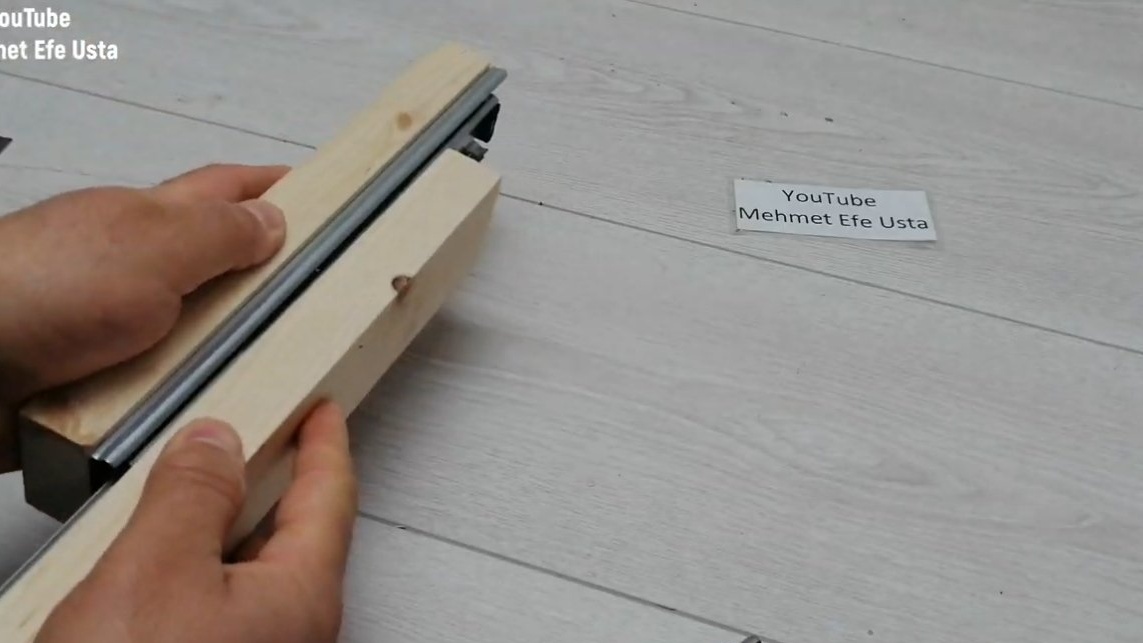
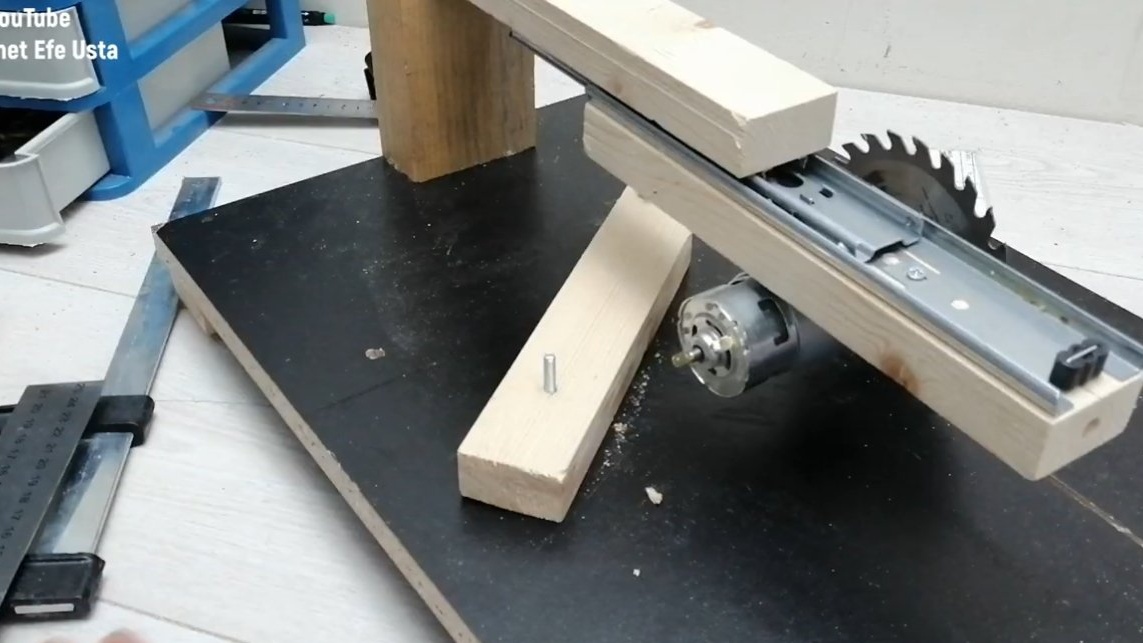
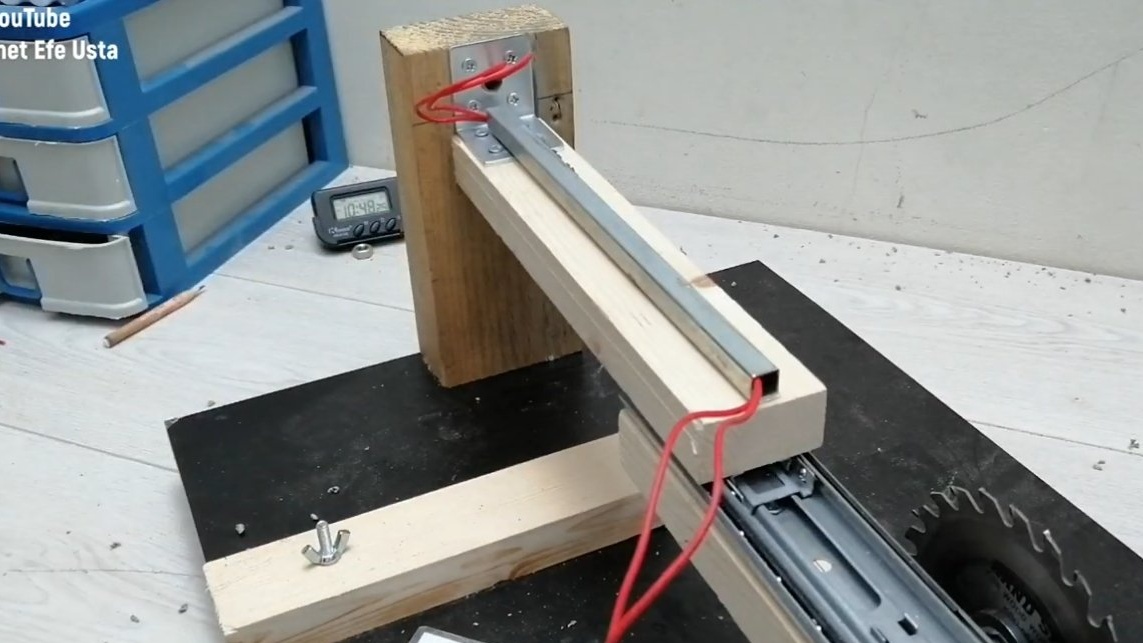
Step Two Broach
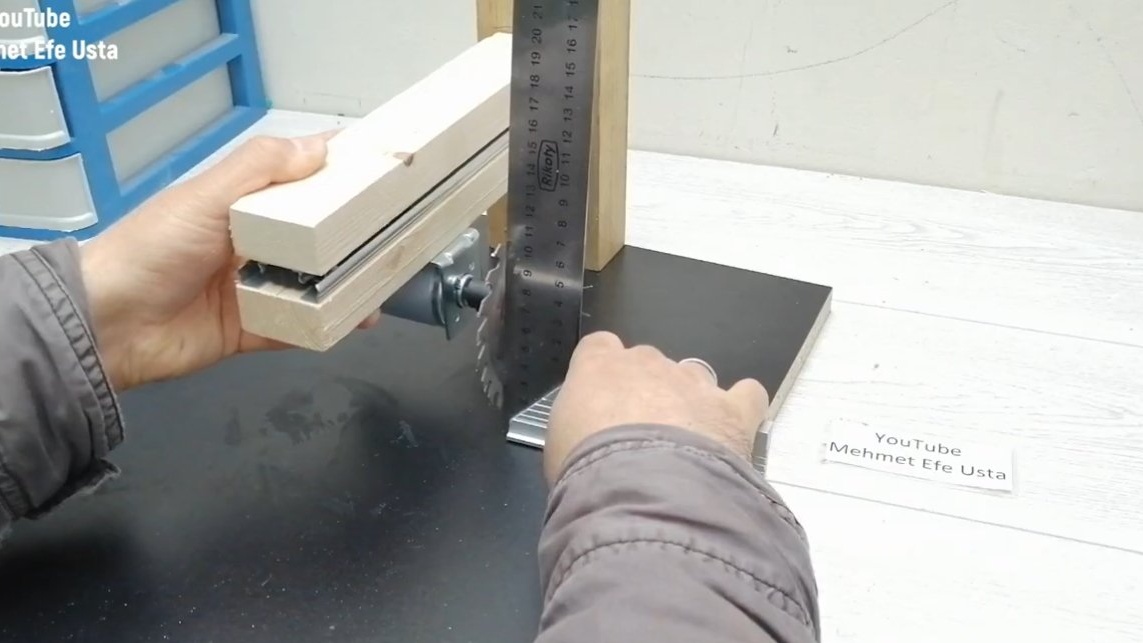
We make a broach, for this we need two bars or two thick boards that will not bend. The slider consists of two halves, we attach each to a separate bar.
The author chose the slider as wide as possible, it is strong and will work for a long time without backlashes.
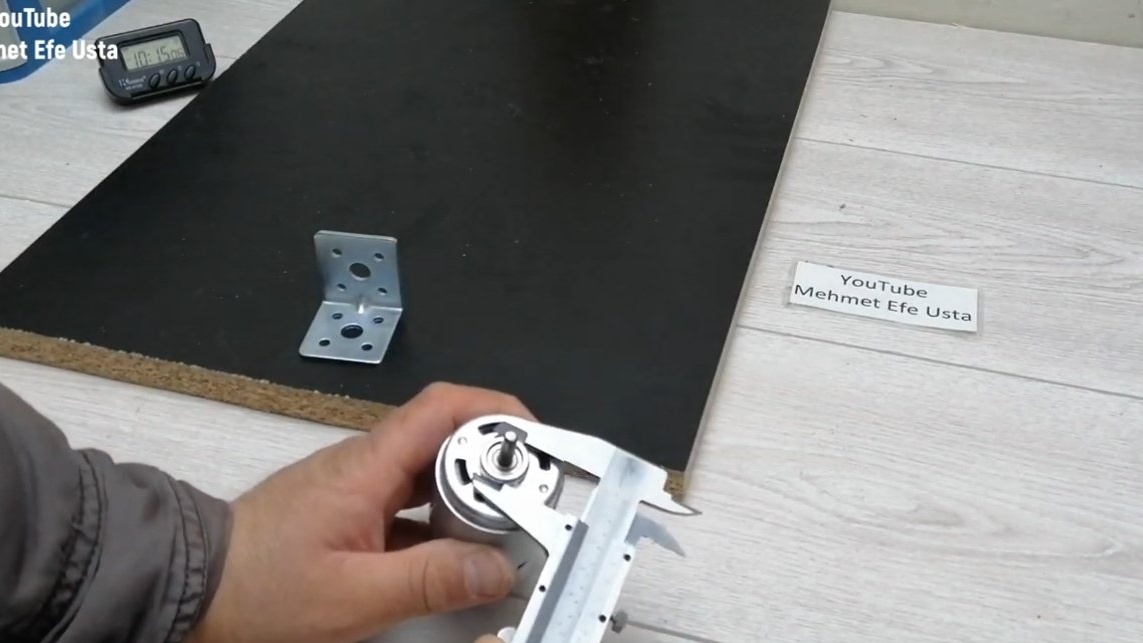
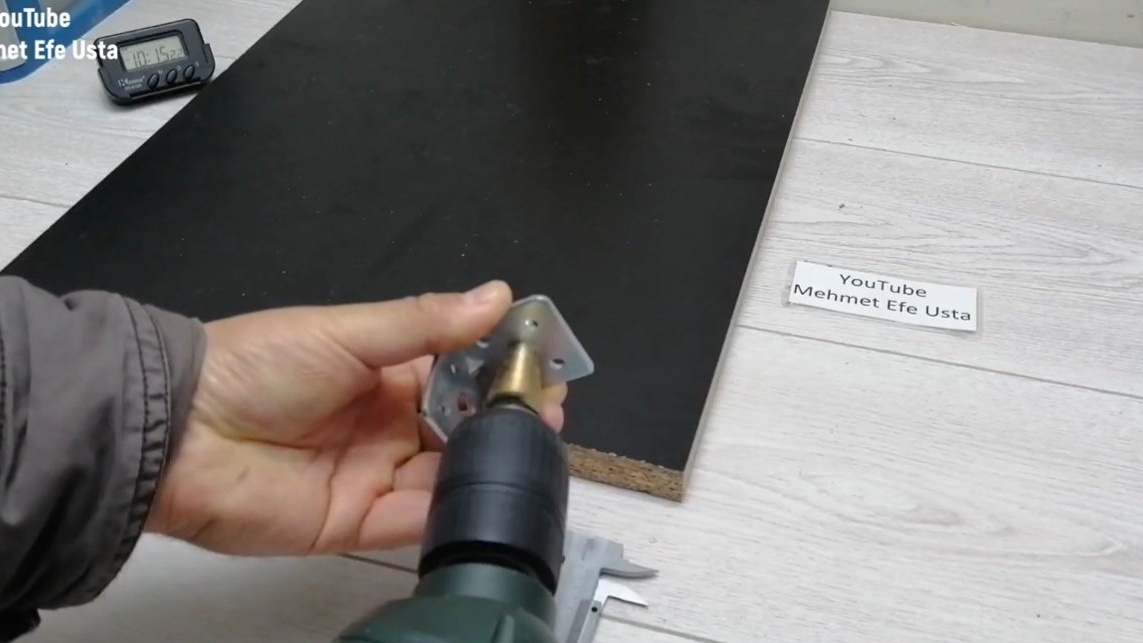
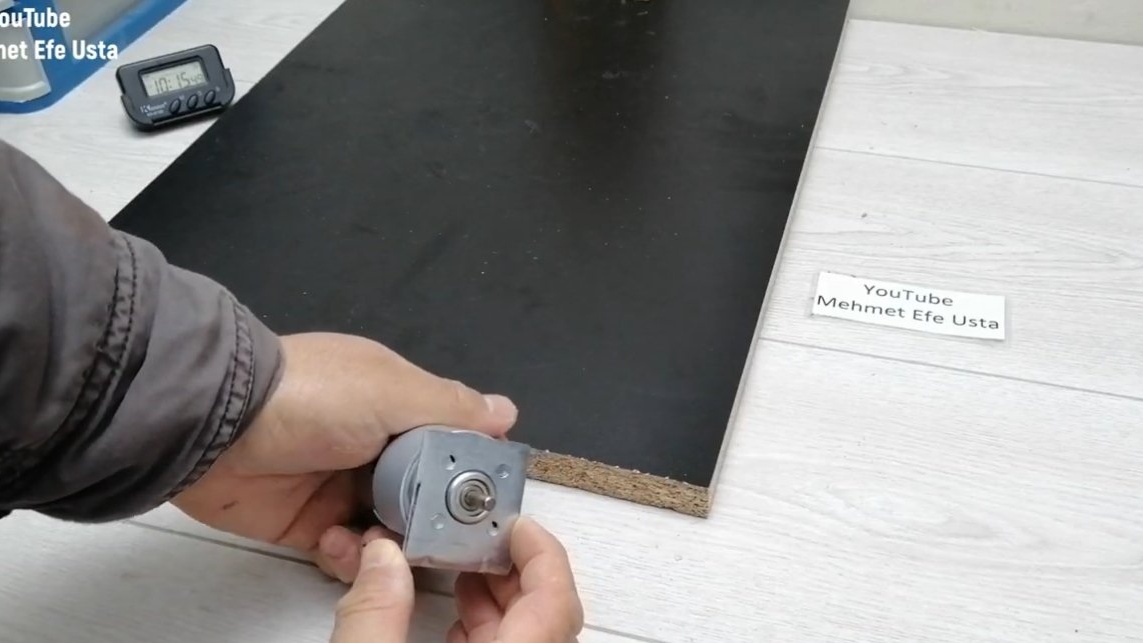
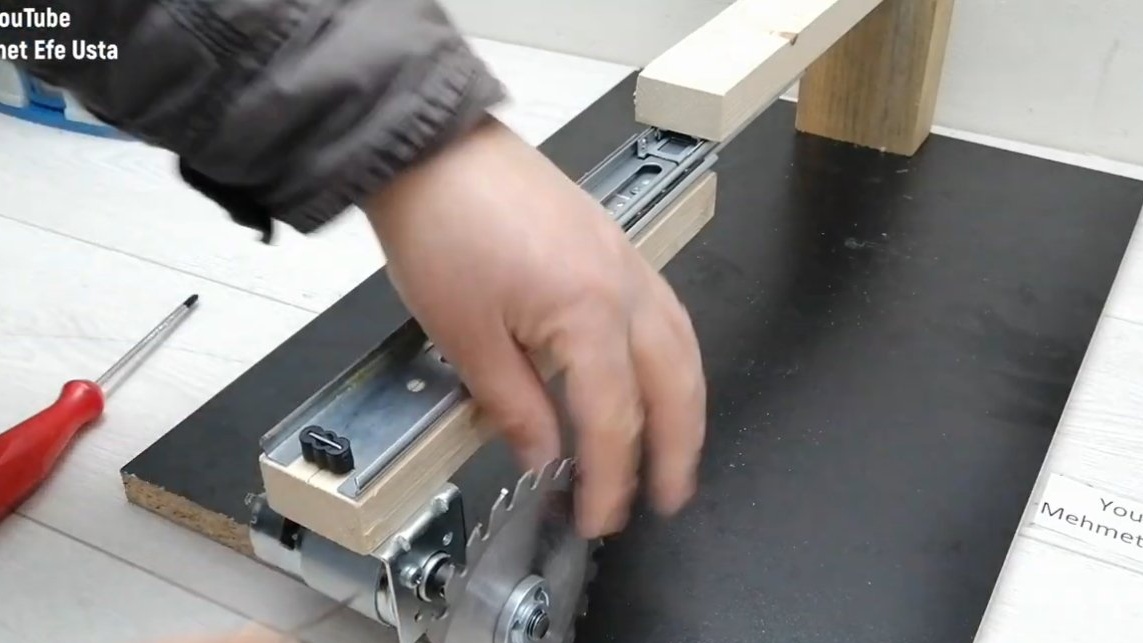
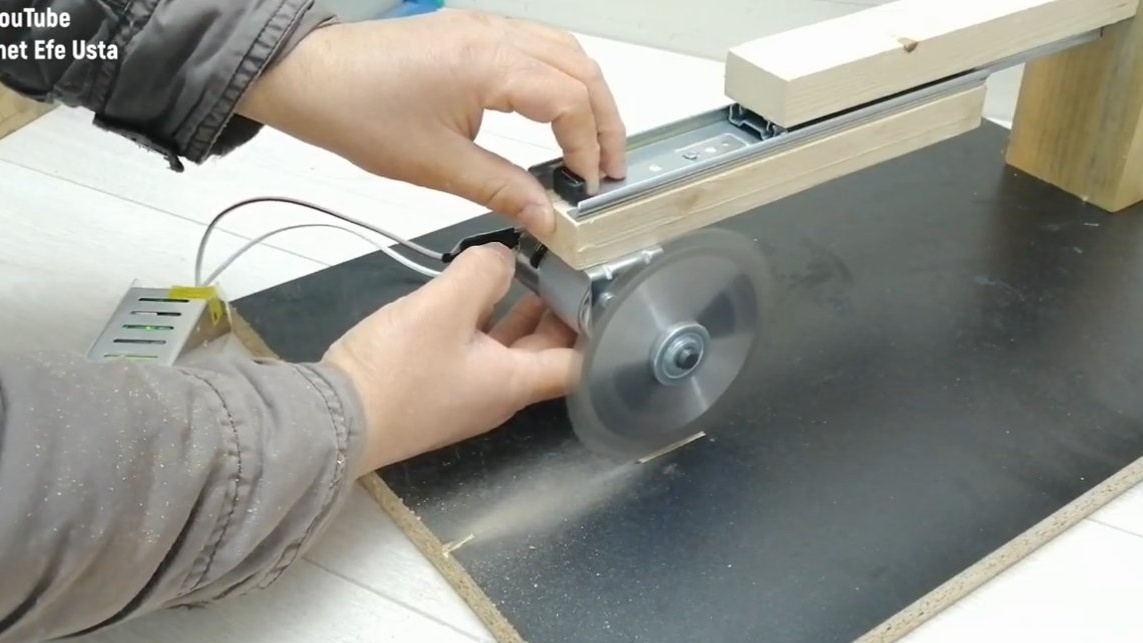
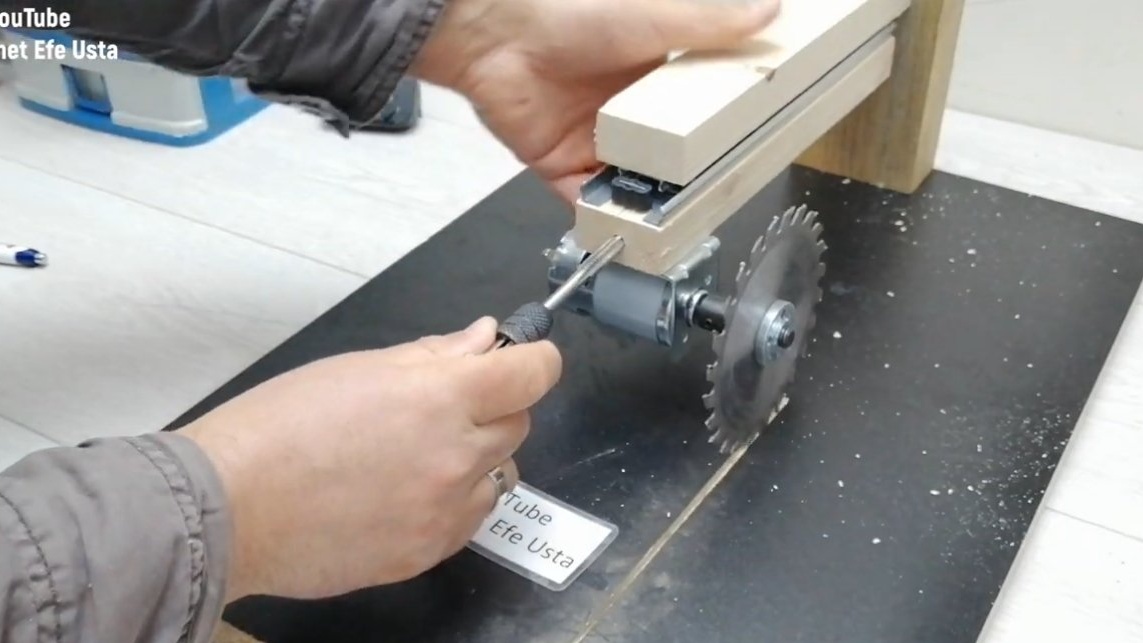
Step Three Motor installation
Under the 775 motor, the author forgot to buy ready-made fasteners and decided to make it himself. We take a fastening furniture corner, drill the necessary holes in it and fasten the motor with screws.Fasteners themselves are attached to the broach using self-tapping screws.
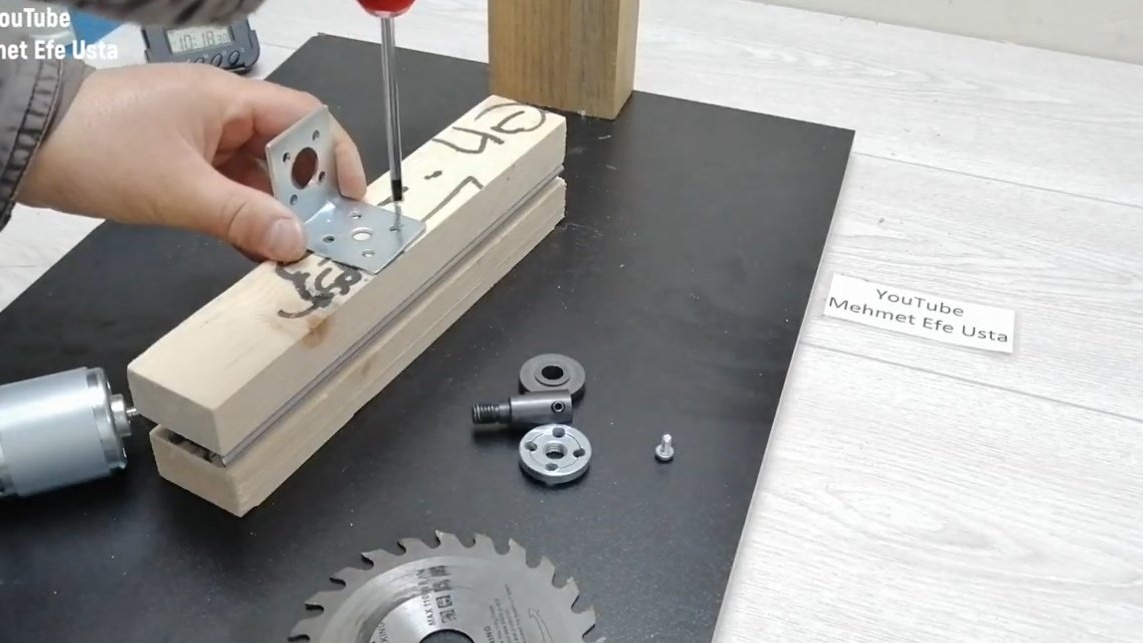
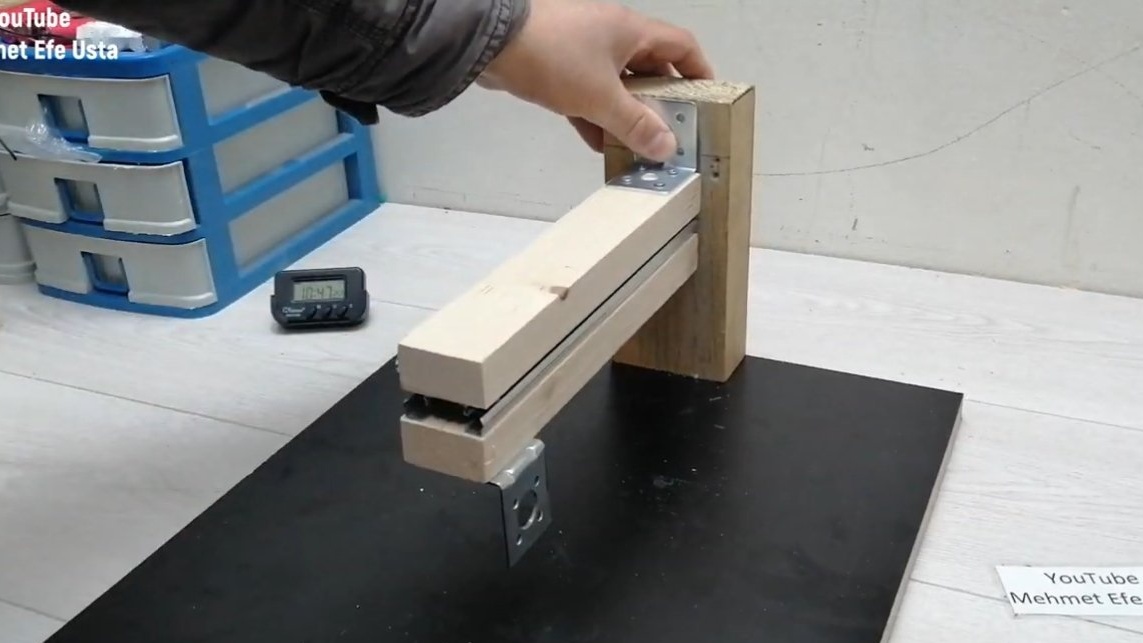
After carefully aligning the broach, it can be attached to the rack, for fixing we use a mounting bracket, screws, it will not be superfluous to smear the joint and glue. This connection should be as rigid and strong as possible, the accuracy of cutting the machine will depend on it.
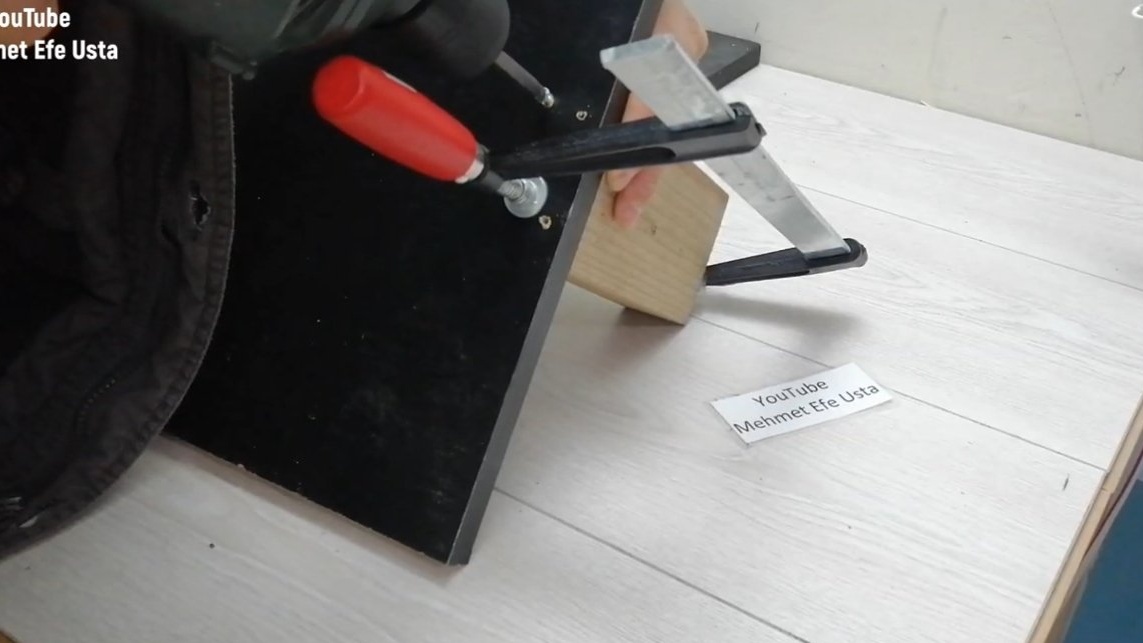
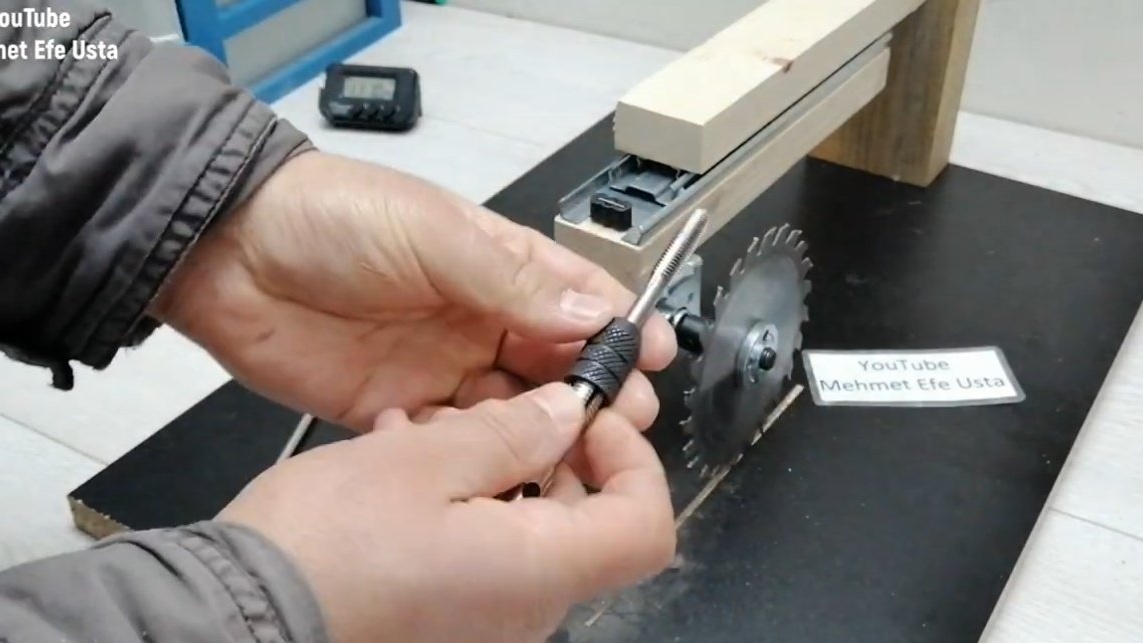
Step Four A pen
The author used the finished broach control knob, the handle from the grinder went perfectly. To fix the handle, the author cut the thread directly in the tree, if then the handle is wrapped in glue, it will hold very securely.
Step Five Emphasis and wiring
The author also made an emphasis of wood, the block is fixed with bolts and nuts of the “lamb”. We drill holes in the right places, depending on what angles you will use, often 90 and 45 degrees.
In order not to interfere with the wiring, the author attached a piece of a square pipe to the broach bar and led wires through it.
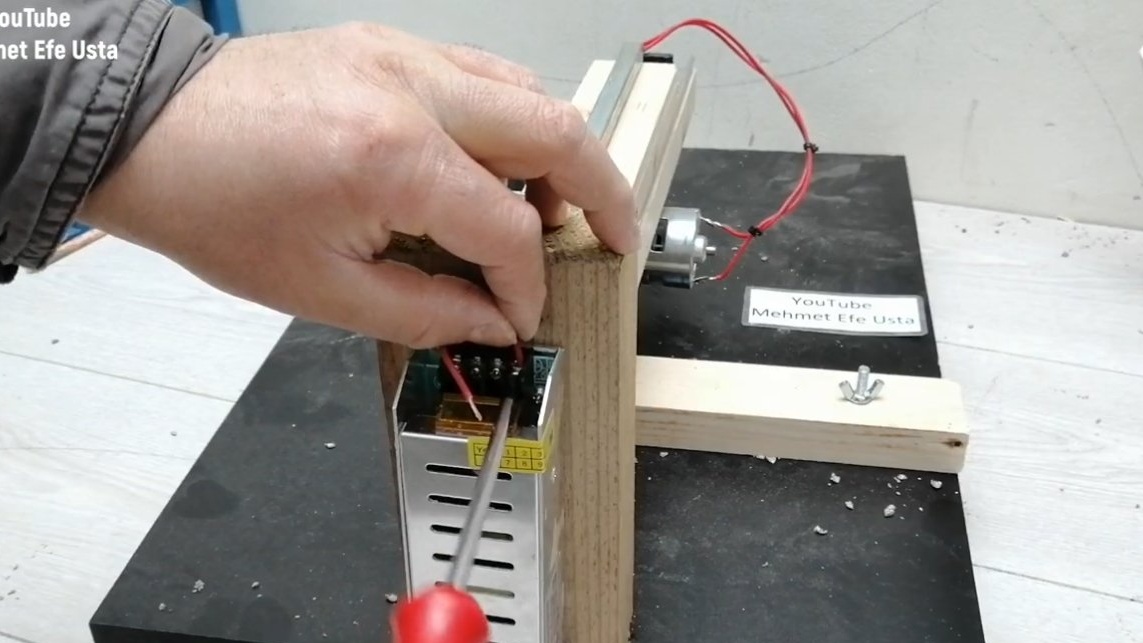
Step Six Power supply and tests
The author placed the power supply on the back of the vertical rack, the author will power the motor with a voltage of 12V with a current of 10A. In general, such a motor can be connected to a 24V source, but the speed can be very high, and the motor will work this way almost to the point of possibility.
Of course, for safety and convenience it would be nice to place the switch in a convenient place, and even better to make a button directly on the handle.
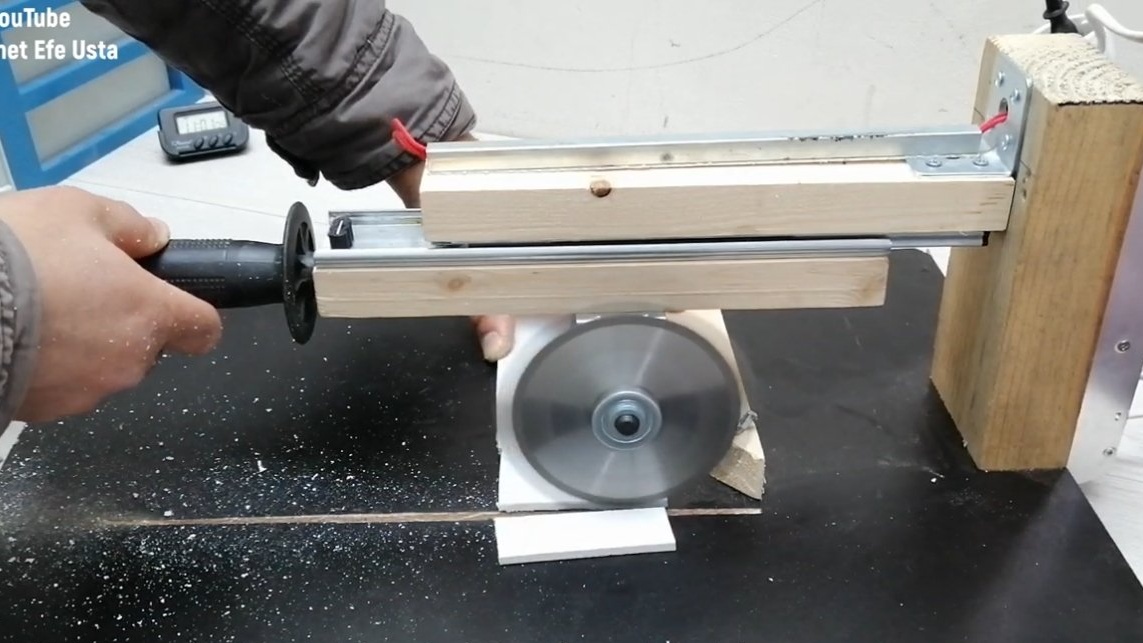
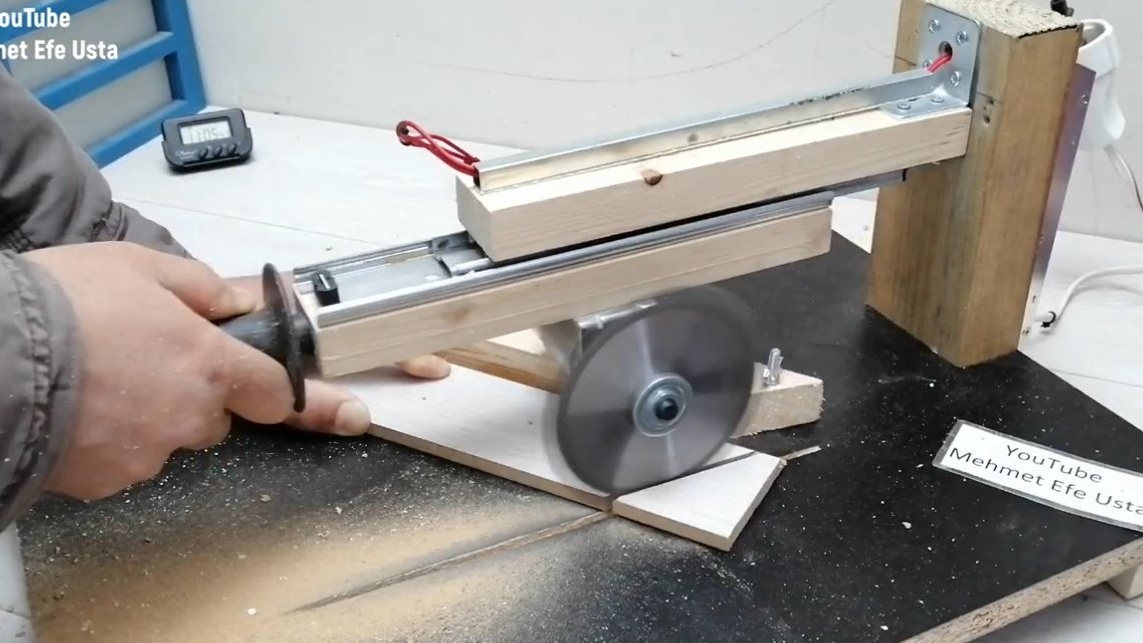
The homemade product is ready, the author easily cuts fiberboard, thin plywood and boards. Of course, the motor power is not large and it can sometimes slow down, so it is better not to press hard on the disk. However, from a 12V power supply, the motor is unlikely to burn out even in the event of a complete stop, but you need to make sure that it does not overheat.
The project is completed on this, I hope you liked the homemade work, and you found useful thoughts. Good luck and creative inspiration, if you decide to repeat this. Do not forget to share your ideas and homemade things with us!