

If your kitchen has an unlit space above the wall cabinets, you may be surprised at how amazingly the atmosphere changes in the LED lighting for the kitchen that you can create do it yourselfusing LED modules or LED strips.
Making the lighting on top of the cabinets is much easier than placing it under them due to the fact that the light sources themselves, LED modules or tapes are not visible, and thus the design does not need to be hidden from prying eyes, as is the case with the location of the LED lighting under the kitchen shelves. So, if you are interested in our project, get ready to see how your kitchen will be miraculously transformed with a new highlight.
What do you need to highlight the kitchen:
- LED modules giving warm white light;
- power supply for LEDs 12 V, 40 W;
- connecting wire 0.6 mm square;
- power cord with plug.
1 step. Measuring and preparing the installation location of LED modules
We must measure the space that we want to illuminate, not only the length, but also the height to the ceiling - this will help you determine the power of the LED modules when they are purchased.
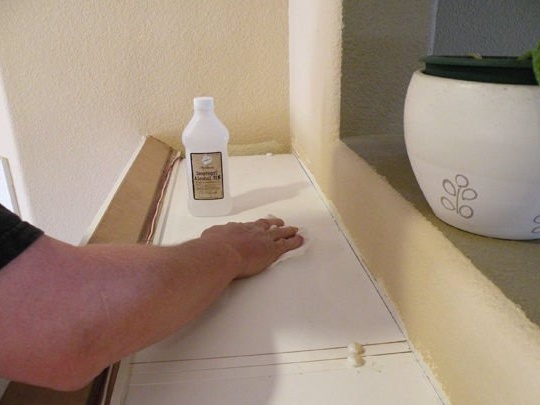
Next, you need to prepare and clean the top surface of the shelves so that the double-sided tape securely holds the backlight elements. To do this, wipe the surface with alcohol and wait enough time for it to evaporate. If you have an uneven surface with severe contamination that you cannot clean, then you can always fasten the modules with screws, and LED strips with connection clamps or a special aluminum profile.
2 step. Installation of LED modules or backlight strips.
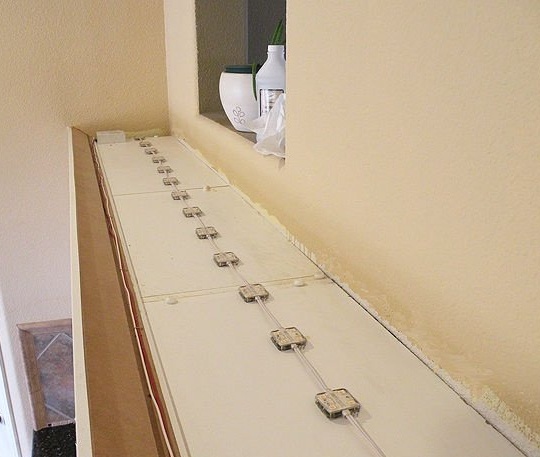
Now that we have prepared the installation site, you can glue the double-sided tape and fasten the elements of our kitchen LED backlight - modules or tapes. Make sure to press them firmly enough so that the tape adheres securely to
structural elements and the surface of the shelves.
3 step.We mount the power supply of LED modules
Now that we've fixed our LEDs, it's time to install a power supply for low-voltage LED designs.
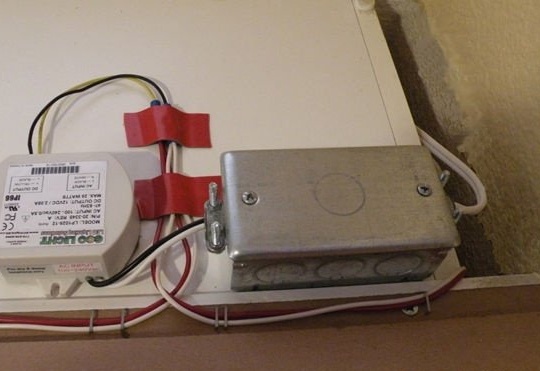
Most LED modules and tapes are powered by low voltage direct current. In this case, we use a power supply transformer type direct current 12 V 40 W with an input voltage of 220 V AC. If you have no experience with high voltage electricity, ask a more experienced friend to help you connect the backlight power. Never connect an energized power supply. Connect the power supply to the network, and to its output - LED lighting. In no case do not leave wire connections bare, use connectors or heat shrink tubing when soldering.
Once you have installed the transformer power supply, you can apply power and, thus, proceed to check the backlight.
If it lights up, then you did everything right. If not, then we have either a poor connection of the wires, or the polarity of the wires in some section of the circuit is mixed up.
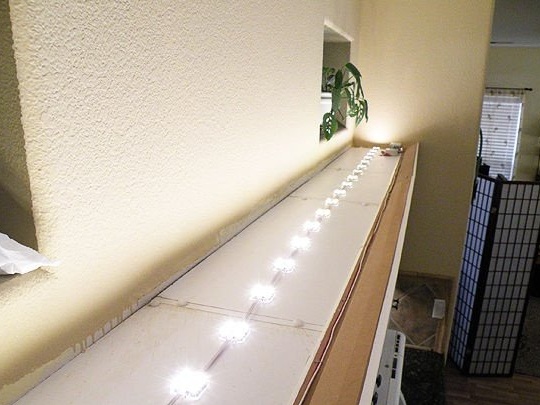
Updated view of the kitchen
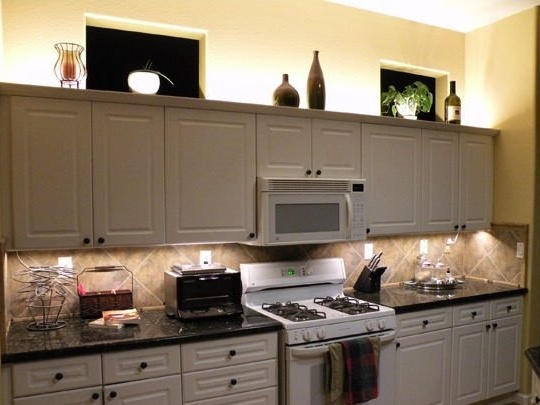
Once your do-it-yourself LED kitchen light finally lights up, you can clean your workspace and add attractive decor elements, such as flower pots, to the space lit above the cabinets. As you can see in the image, the backlight brings a whole new atmosphere to the kitchen, adding coziness, convenience and appeal.