
From matches it’s very easy to create voluminous crafts. For example, you have a toy castle or town, why not complement it with a makeshift bridge? You won’t immediately say that it is made of ordinary matches - it looks so beautiful and natural.
We will need:
- matches with a margin;
- acrylic paints;
- cardboard about 2 mm thick;
- packaging of toothpicks;
- glue, a candle.
Step 1
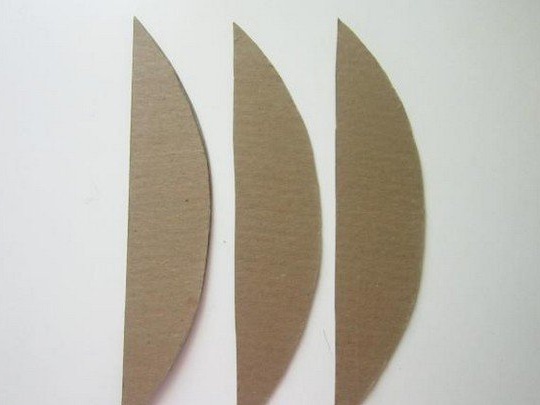
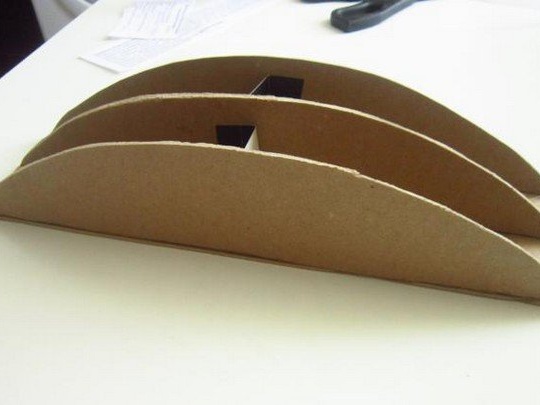
Cut half-oval 30 cm long, about 6 cm high at the peak, from cardboard. Cut only four blanks, glue two together.
Step 2
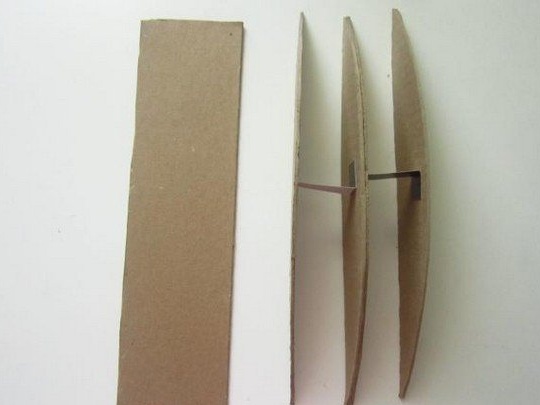
Next, cut three parts and connect them together. The distance between the parts should be equal to two matches. Cut a rectangular pallet out of cardboard and glue it.
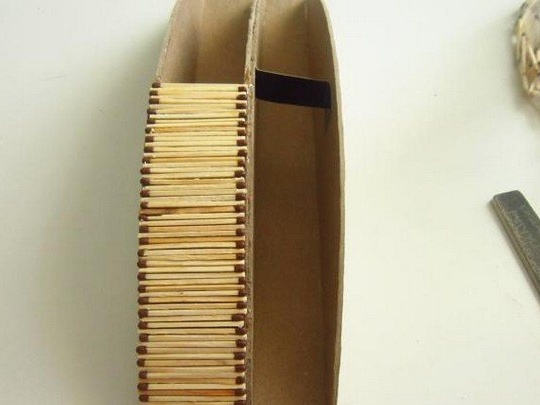
Step 3
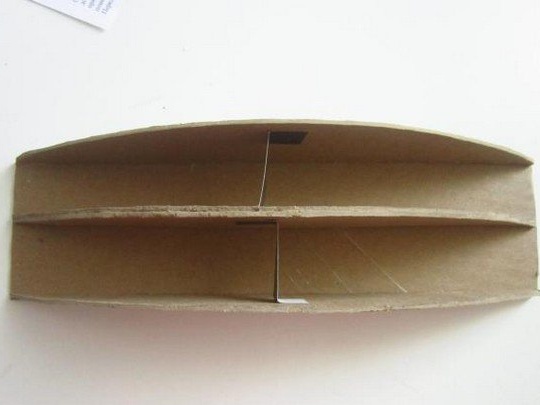
What should happen, you see in the photo. Do not forget - the width is exactly 2 matches! This is very important, otherwise a flat bridge will not work.
Step 4
The basis for the future bridge is ready.
Step 5
That's the most interesting thing - working directly with matches. Coat them with glue and fold them onto a cardboard structure. First do it on one side.
Step 6
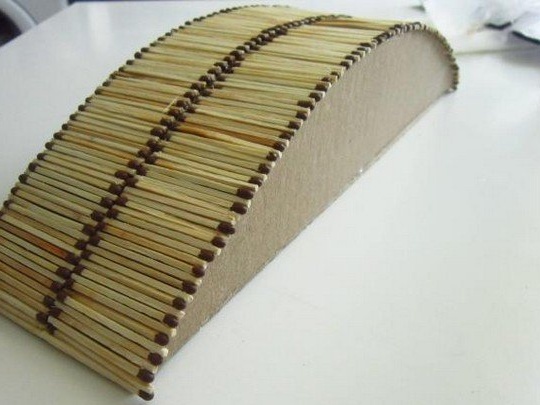
Then cover the second side with matches smeared with glue. For beauty, you can alternate the location of the edge of the matches with gray.
Step 7
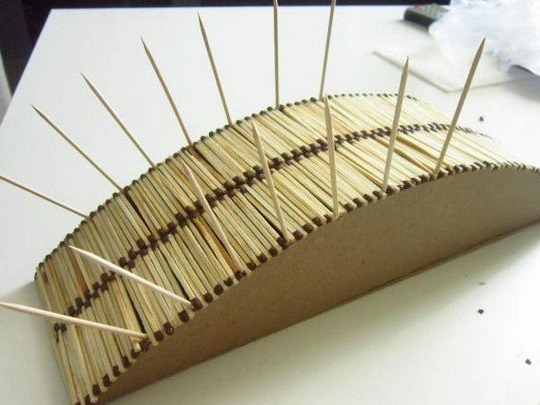
Take the toothpicks, grease the tip with glue and insert them into the edge of the bridge, keeping an equal distance.
Step 8
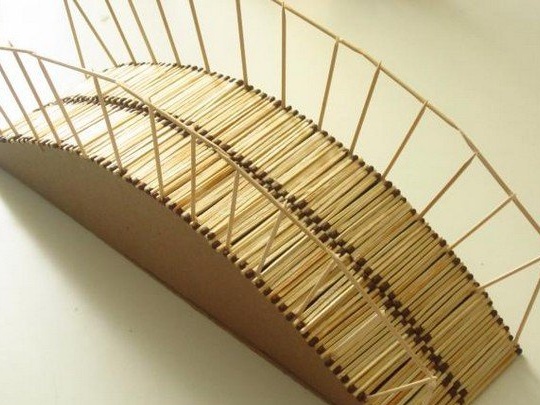
From the toothpicks make a railing for the bridge. Wait for the glue to dry, holding the parts with your hands so that they do not fall apart.
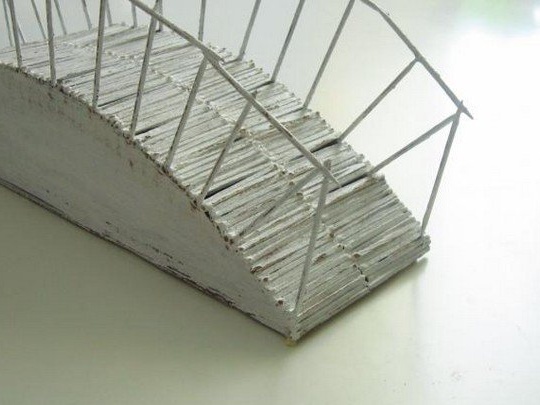
Step 9
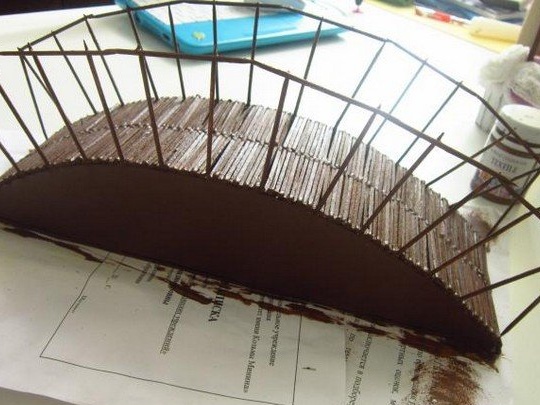
The match bridge is ready. It remains to paint it with brown paint, then lightly rub it with a candle and paint it with white paint. Next, wipe a little sandpaper to give the craft an antiquity.
The bridge is ready. Here is such a fascinating craft from matches!