

You in the garage Have you found an old bicycle headlight that hasn't been working for a long time? The first thought is to throw it away! But you can put it into action by making a spectacular lamp that will definitely bring zest to your home or country interior! It was such an idea that visited the head of the author of this master class, who decided to create a lamp from the headlight of a bicycle!
We will need:
- a large bicycle metal headlight;
- spring from the seat;
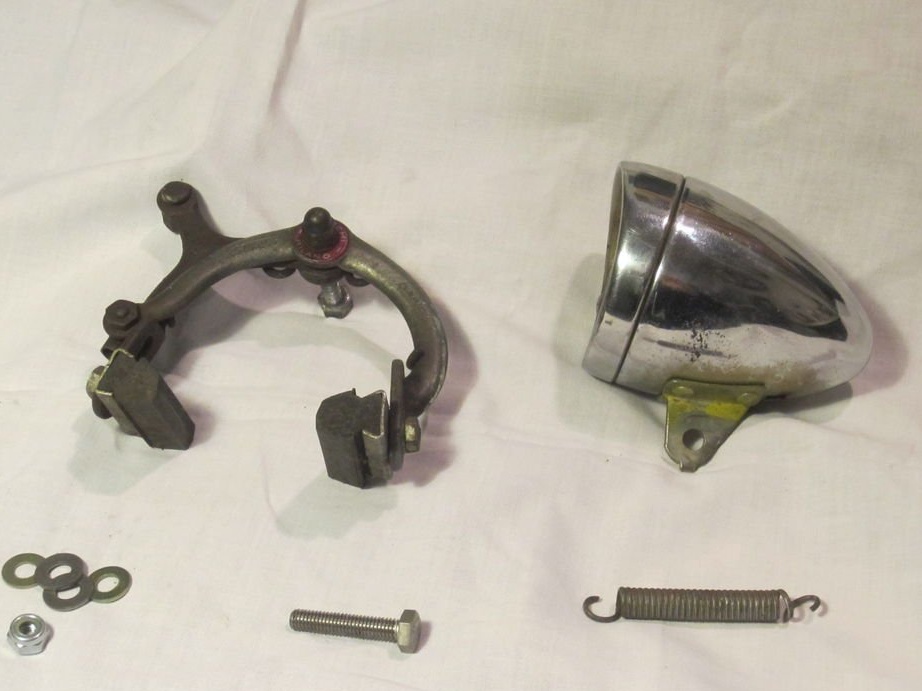
- rear brake caliper;
- nuts and washers;
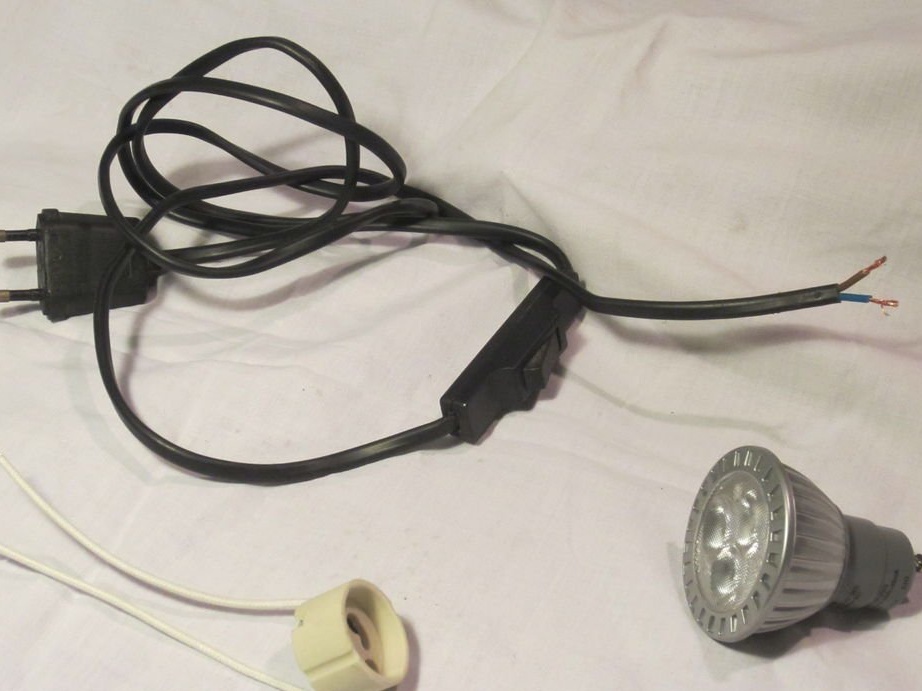
- power cord with switch and socket;
- LED lamp;
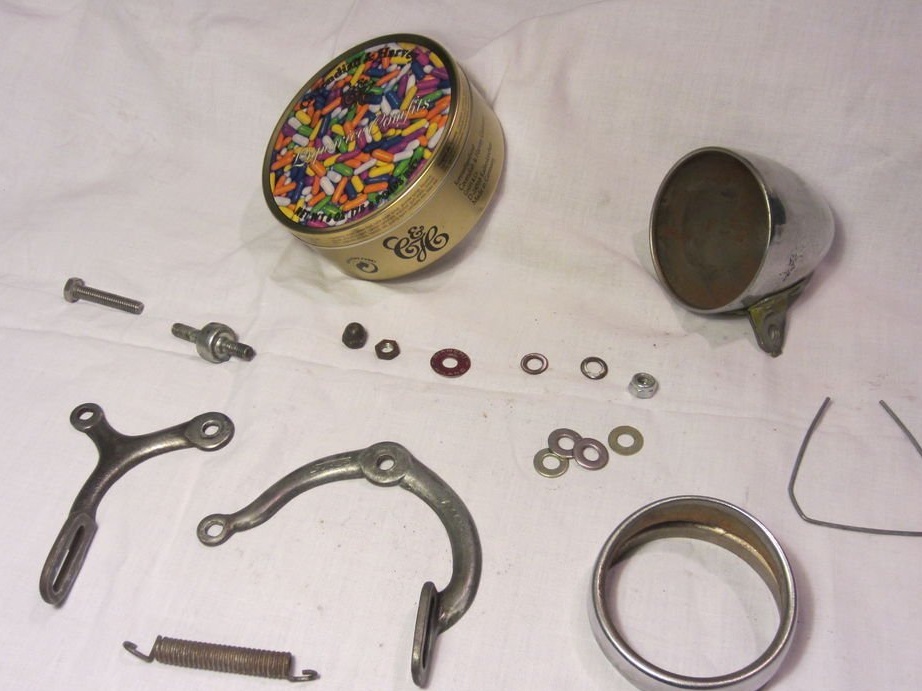
- tin can;
- a segment of a thermoshrinkable tube or PVC insulating tape;
- pliers, wrenches, flat screwdrivers, wire cutters, soldering iron, vernier calipers, solder, Dremel.
Step 1
Are all the necessary materials at your fingertips? Then we get down to business, first the author took out all the internal contents from the bicycle headlight, then completely disassembled the rear brake caliper. Start and you work on the future lamp with these steps.
Step 2
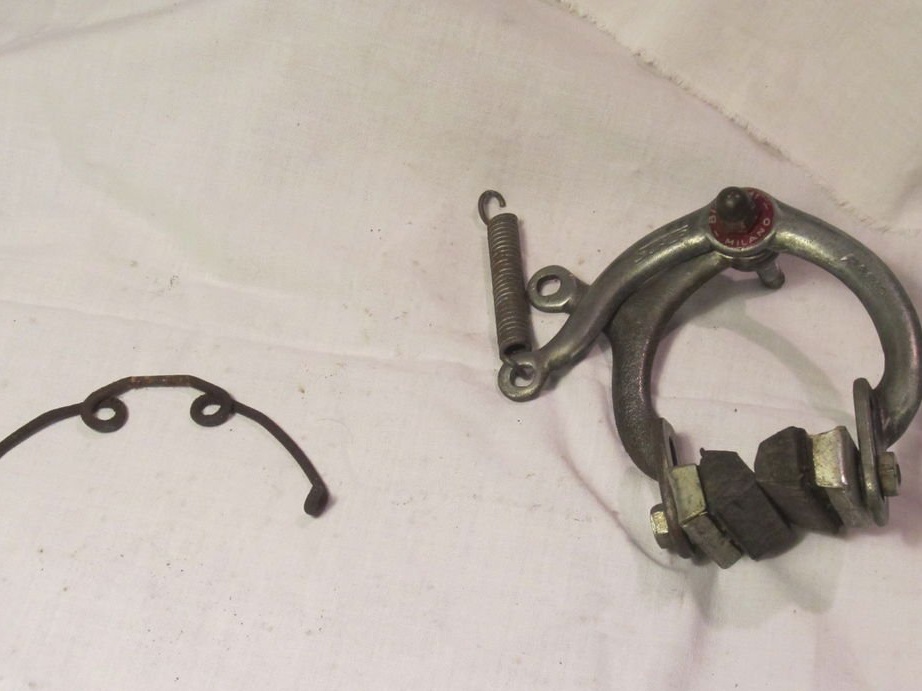
Next, you need to clean the caliper, reassemble it, as shown in the picture. In the back of this part, fix the spring, only first clean it of dust and dirt, if any.
Step 3
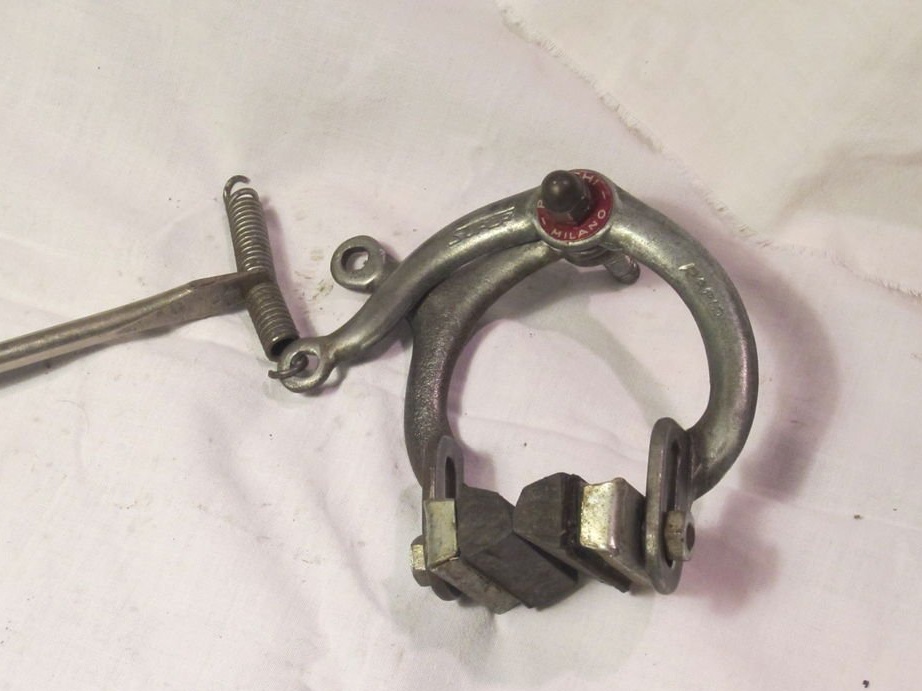
Use a pair of wire cutters to shorten the spring and leave a free loop for making the hook. Secure the second end of the spring with a makeshift hook on the second caliper ring. The photo shows in detail how this is done.
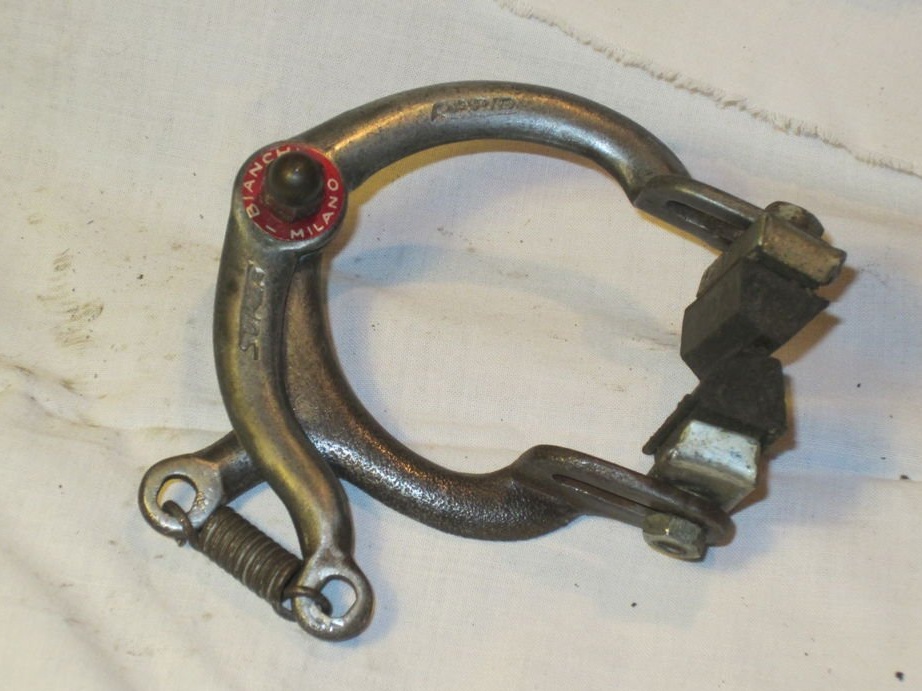
Step 4
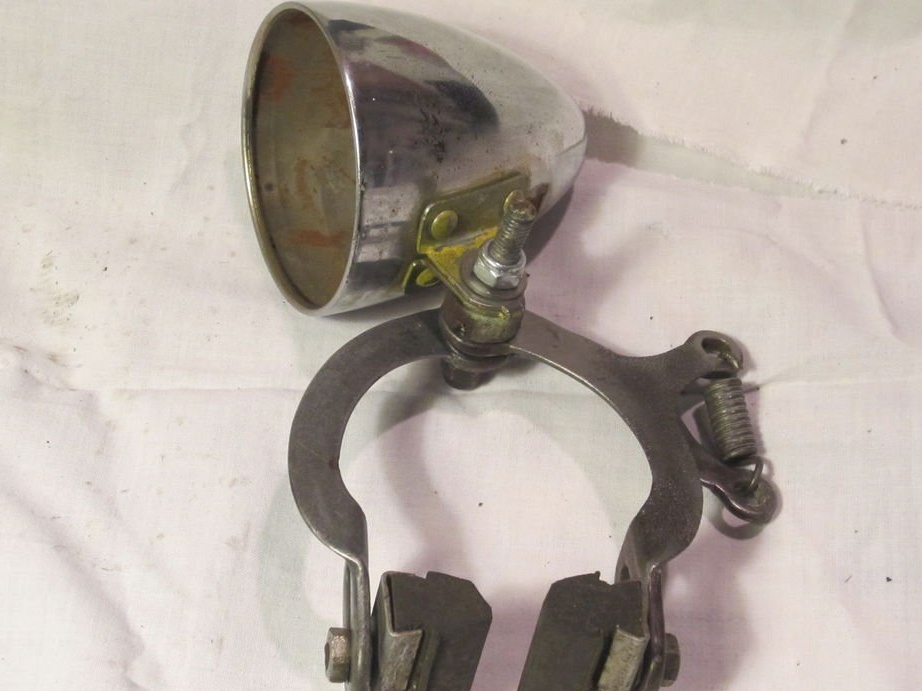
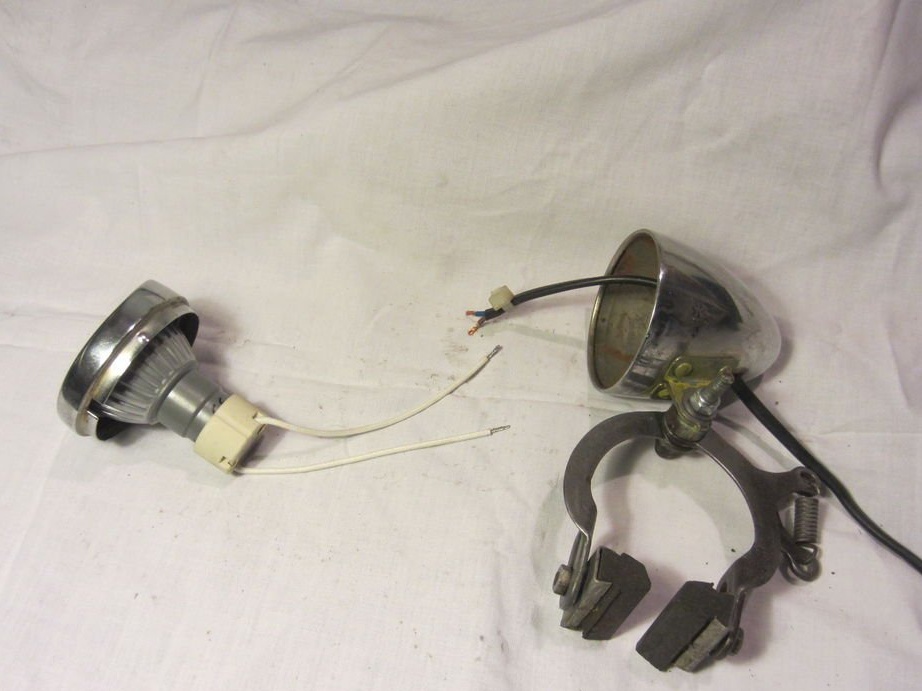
Attach the bicycle headlight to the caliper using washers, nuts, and screws to secure it. Tighten them more tightly, but at the same time so that you can manually adjust the position of the headlight so that it shines exactly where you need it.
Step 5
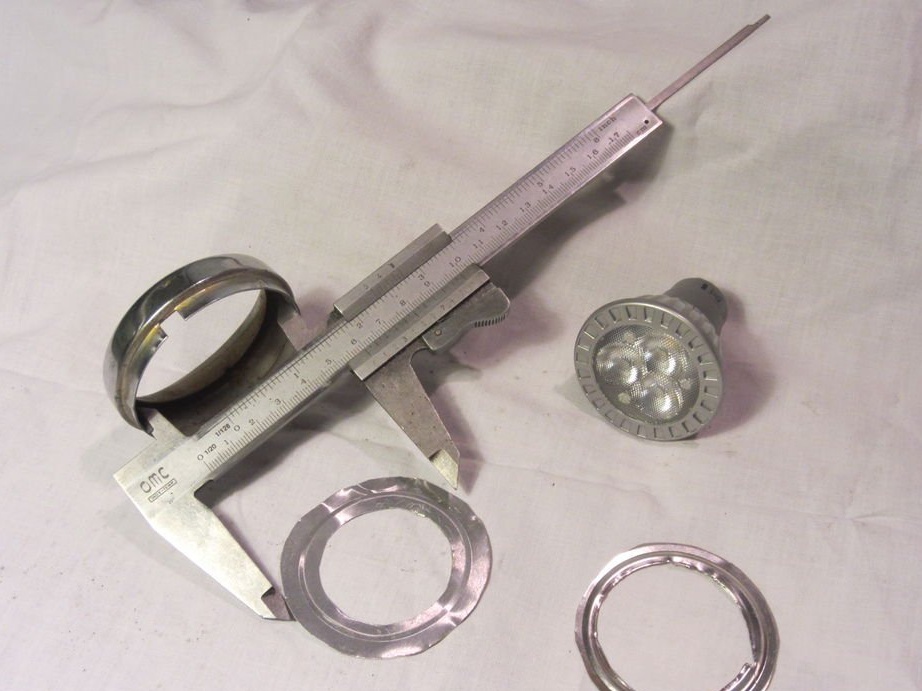
Create a fixture for the LED lamp. For this purpose, an ordinary tin can is suitable. Using a caliper, measure the outer diameter of the bulb, as well as the inner diameter of the headlight. Based on the data obtained, cut the tin rings.
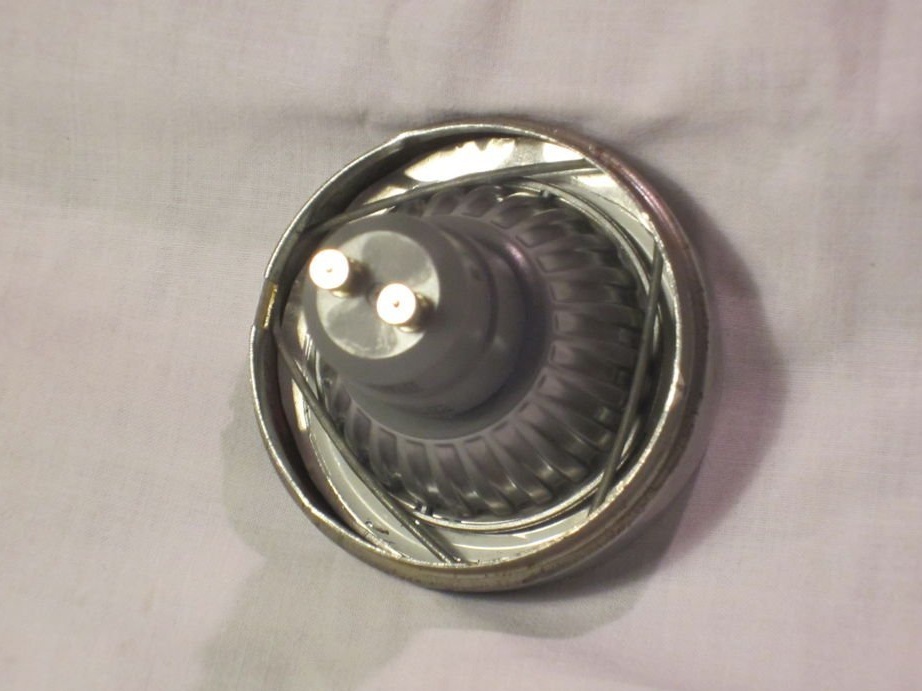
Then bend the rings, attaching them immediately to the LED lamp. Please note - the author has all the bends neat and even, try to do the same. Use protective gloves during operation, otherwise there is a risk of injuring your hands.Fasten the rings to the LED lamp with a triangular spring.
Step 6
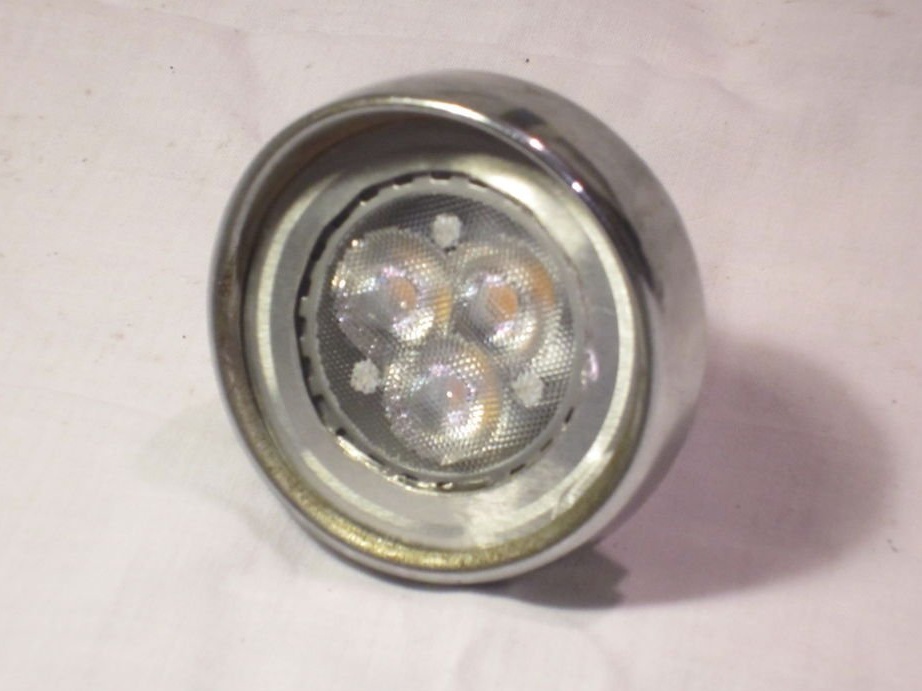
Now plug in the power cord. If your hole is too narrow, you can expand it with the Dremel tool. On the back of the bicycle headlight, fasten shrink tubes, solder the wires. Now insert the lamp itself into the headlamp, check whether everything is connected correctly to you.

If you followed the advice of the author of this lesson, then you have a nice and interesting lamp from the headlights of a bicycle. Now you can attach it to a shelf, table, or any other surface that is convenient for you to illuminate. Fix the original lamp with brake pads, the direction of light is manually adjusted.