
The desire to ascend to heaven probably never left a person. In this instruction, we will take a step towards the dream and make do it yourself quadrocopter.
Step 1: Build the Frame


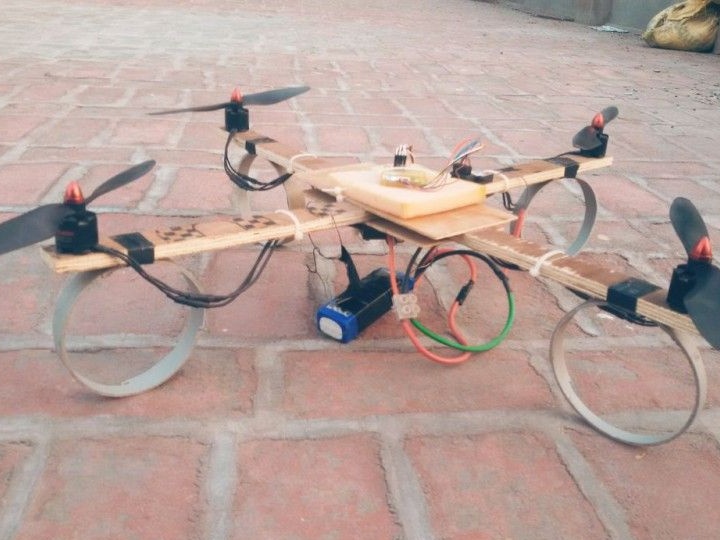
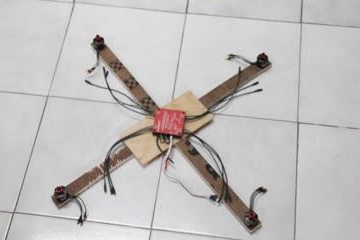
We look at the picture and on the model we simulate the quadrocopter frame. At the heart of this device will be a wooden frame. To make it, you will need wooden slats of the following sizes: 60x3x4.4 cm and 57x3x4.4 cm, as well as a rectangular board 15x6x0.2cm. Next, using glue and nails we make a “cross” design, which will serve as a frame.
Step 2. Preparing the motor
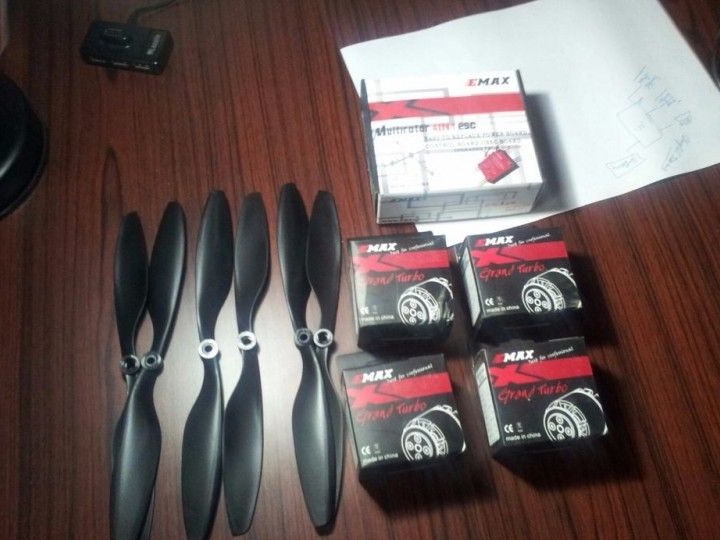
At this stage, it's time to install the motor, propeller and speed control device (all items can be purchased on the Internet).
To make a quadrocopter from this instruction, we used the EMAX MT2213 935kv engine, 24 centimeter screws, EMAX 4in1 ESC.
Step 3. Engine Installation
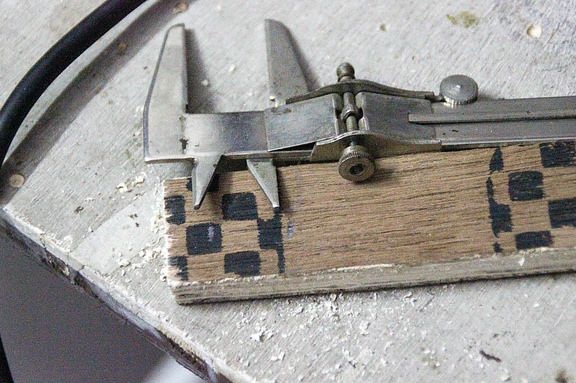

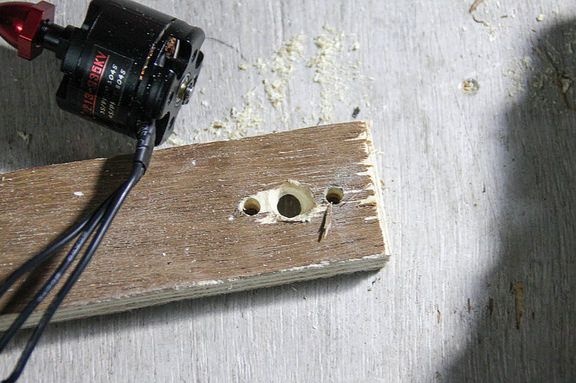
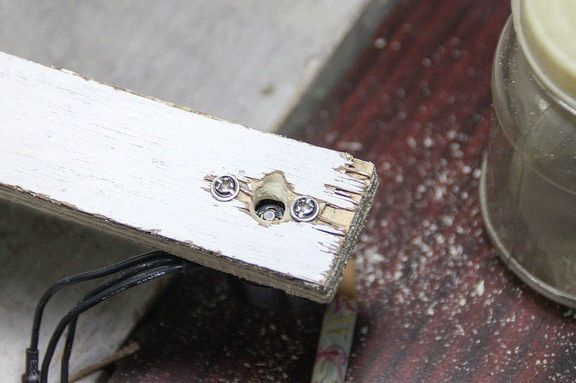
Having resorted to a vernier caliper and a pencil, we put markings on the base and drill it with a drill, then we fix the motor with the corresponding screws.
Step 4: Install the speed controller
After the stage with installing the engine on the lower part of the frame, we install the couplers of the speed controller and the wire, after that - the battery.
Step 5: Attach the Chassis
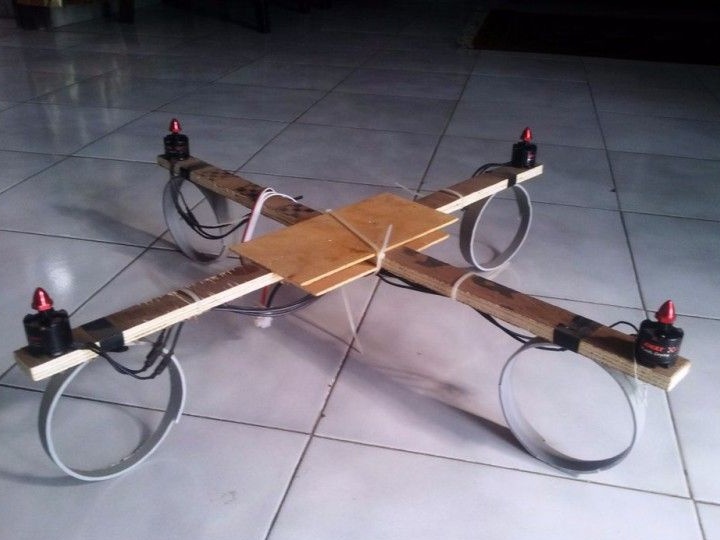
For the manufacture of the chassis, it is possible to cut off a 2 cm wide pipe with a diameter of 15 cm from the pipe, in an amount of 4 pieces and fasten them to the frame with tape. This step is intended for a smooth landing of the quadrocopter to the surface.
Step 6: Mounting the Quadrocopter Controller
It is he who stabilizes the flight of the device and is the main element of this process. Leaders of sells:
• "ArduPilot" - based on ArduinoIt features high performance.
• “DJI Naza” - an “advanced” controller, in the price segment, more expensive than the above, but with a set of different functions.
• "OpenPilot CC3D" - based on the STM32 and MPU6000 and six channels. It can also be reflashed.
• “NAZE32” is an intricate device with which experienced specialists work.
• "KK2.1" - the most popular on the Internet, equipped with an AVR microcontroller, has a liquid crystal display.
• "KKMulticontroller" - based on Atmel AVR, considered a bit outdated model.
Step 7: Installing the Remote
In general, the models are diverse from expensive - Futaba, Spektrum, to low - Turnigy and Flysky. To make this quadrocopter, you will need a 4-channel control panel.
Step 8: Installation and Setup e "Fillings"
According to the video instructions, we install all the available electronics.
Step 9: Test Time
Before you start the quadrocopter, you need to test the first flight, which is what we do.
Step 10: Launch
We attach and connect the battery to the bottom of the frame and install the quadrocopter on an open, flat surface. We move further away and use the remote control to start the device and enjoy the flight.
So with the help of this instruction we made a quadrocopter, although we are not aircraft designers! Do not stop there, and good luck in all your endeavors!