
The article presents a method of how to make a robot such as photokinetics without using soldering. Svetokinetics are called robots that are equipped with one or more LEDs that work according to certain algorithms. When working is robot creates various light effects.
To assemble such a photokinetics, you will need a minimum of materials and tools. If there are several such robots, in the end it will be possible to create a whole light show. If you turn on such a robot, it will begin to rotate, sending light beams in different directions. It is best to monitor the work of such a robot in a dark room or at dusk. Also, for the robot to work efficiently, you need to stock up on batteries with a good charge of energy.
You can see how the robot works in the video:
Materials and tools for the manufacture of the robot:
- plastic case (from shoe covers);
- any LED;
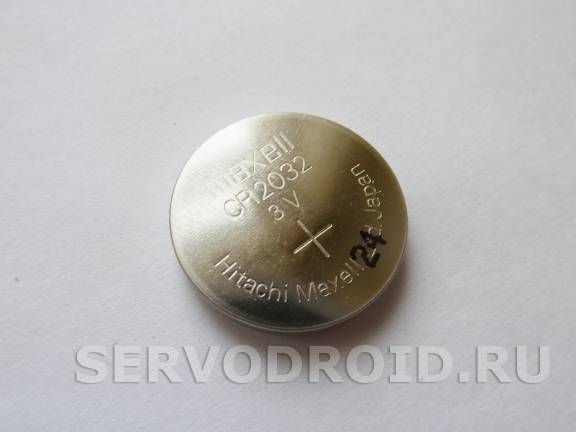
- a CR2032 battery with a current of 3V is needed as a power source;
- black insulating tape;
- A small motor operating at a voltage of 3-5 volts;
- a plastic pulley for a motor.
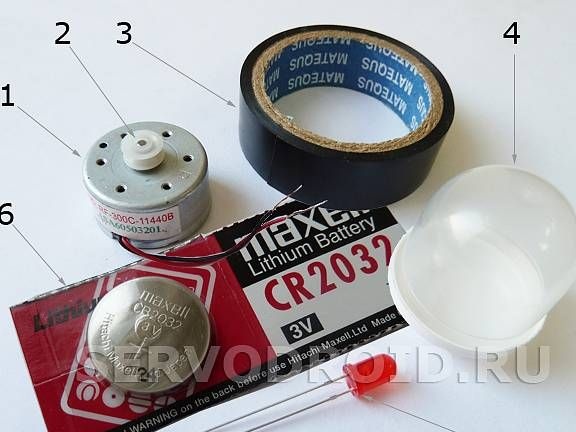
All components will be located inside the case. As LEDs, you can choose any, preferably as bright as possible. The color of electrical tape is also not fundamental.
The manufacturing process of the robot:
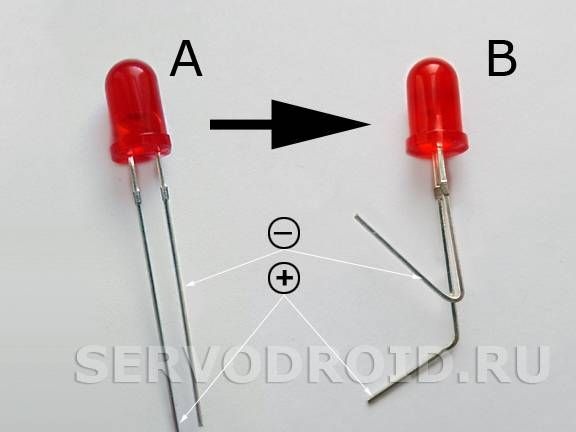
Step one. Forming diode contacts
Before installing the LEDs, it is necessary to form their contacts. For these purposes, you need to use pliers. If we are talking about imported LEDs, then their long contact means the anode, that is, a plus. A short contact is the cathode, a minus is connected here. If the polarity is reversed, the diode will not glow. The LED contacts need to be bent as indicated in the picture.
The author does not recommend the use of dimming LEDs for these purposes.
Step Two LED installation
In order to install the LED, you need high-quality electrical tape. The most important thing is that the tape has good stickiness, otherwise the whole structure will fall apart during the operation of the robot.
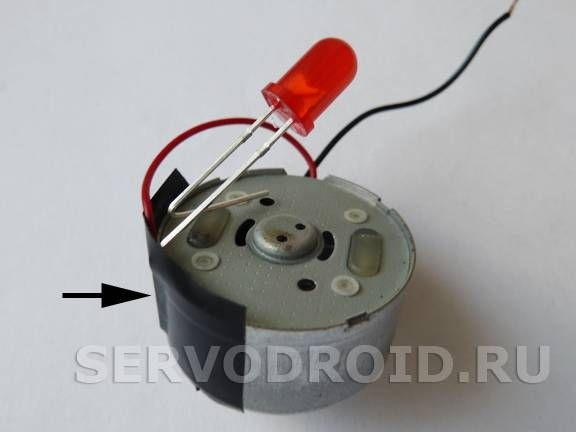
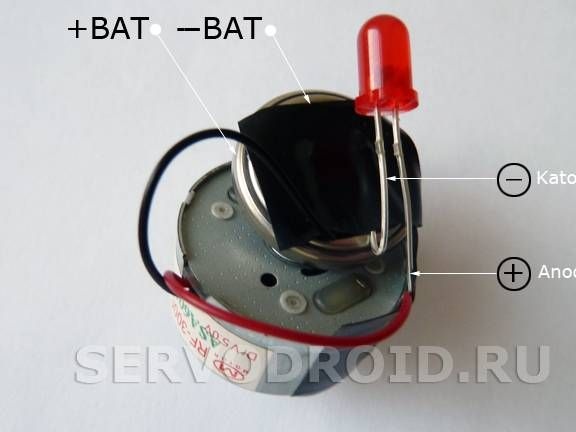
Now you need to take the motor with a pulley mounted on its shaft.The diode must be attached to the motor so that its anode lies on the housing and in contact with it. Next, the contact must be glued to the motor with a piece of electrical tape 2 cm in size. At the same place, you need to run the red wire from the motor. So the diode will be connected to the positive contact of the motor through the motor housing. At the final stage, you need to carefully press the electrical tape, finally fixing the contact.
Step Three Install the power source
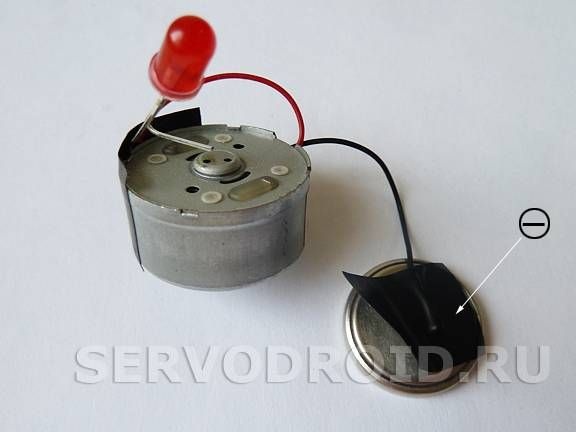
For the robot to work properly, the installed battery must be fresh. The plus pole on the battery is indicated by a plus; this is the largest battery contact in terms of area. You need to take the black wire from the motor and use an electrical tape to attach it to the negative terminal of the battery. Then the battery must be installed in such a way that it fits on the metal housing of the motor. And the cathode of the LED can now be run under the electrical tape by connecting to the negative terminal of the battery. When the circuit is closed, the motor should begin to rotate, and the diode will light up. Now the circuit needs to be opened by slightly diverting the battery from the motor.
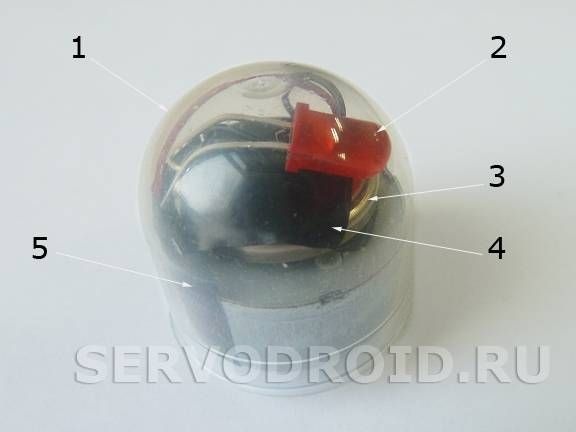
Now it remains to install electronic part in the housing. In this case, a case from shoe covers is used, or rather its upper part. After the design is placed in the housing, due to the clamping effect of the motor, it will hold firmly.
The rotation speed of the robot can be adjusted. The deeper the engine will be in the housing, the faster it will rotate.
That's all, the robot is ready for testing. Now you need to close the circuit again, turn off the light and enjoy the unique lighting effect.