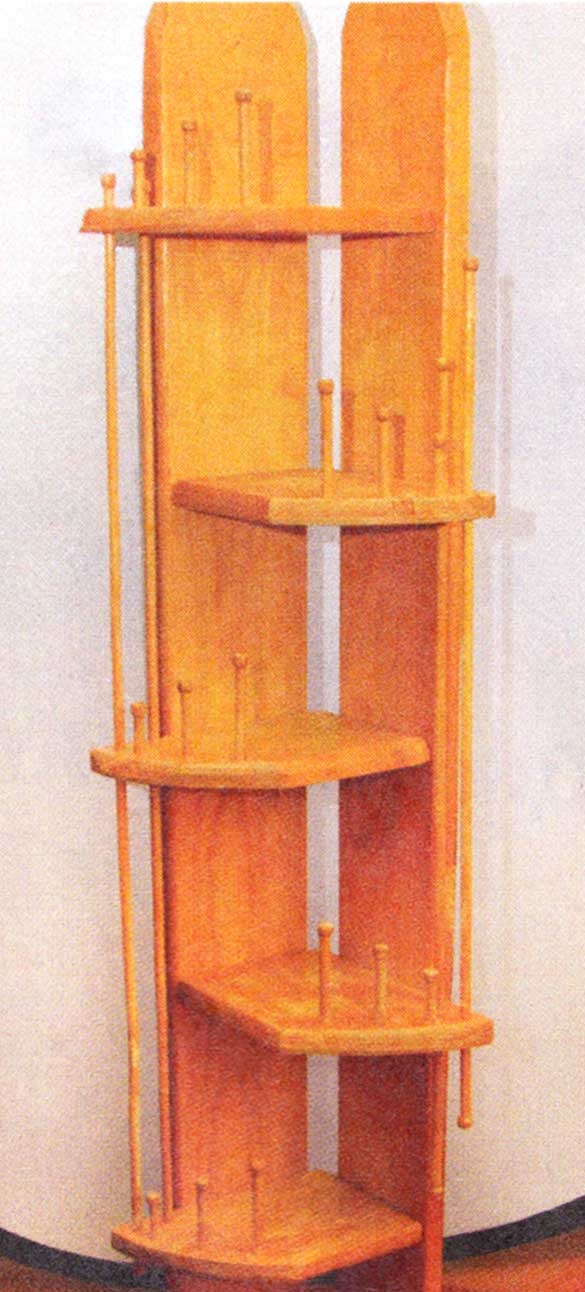
The original corner shelf not only serves as an additional place for storing items, but also favorably decorates the corner space.
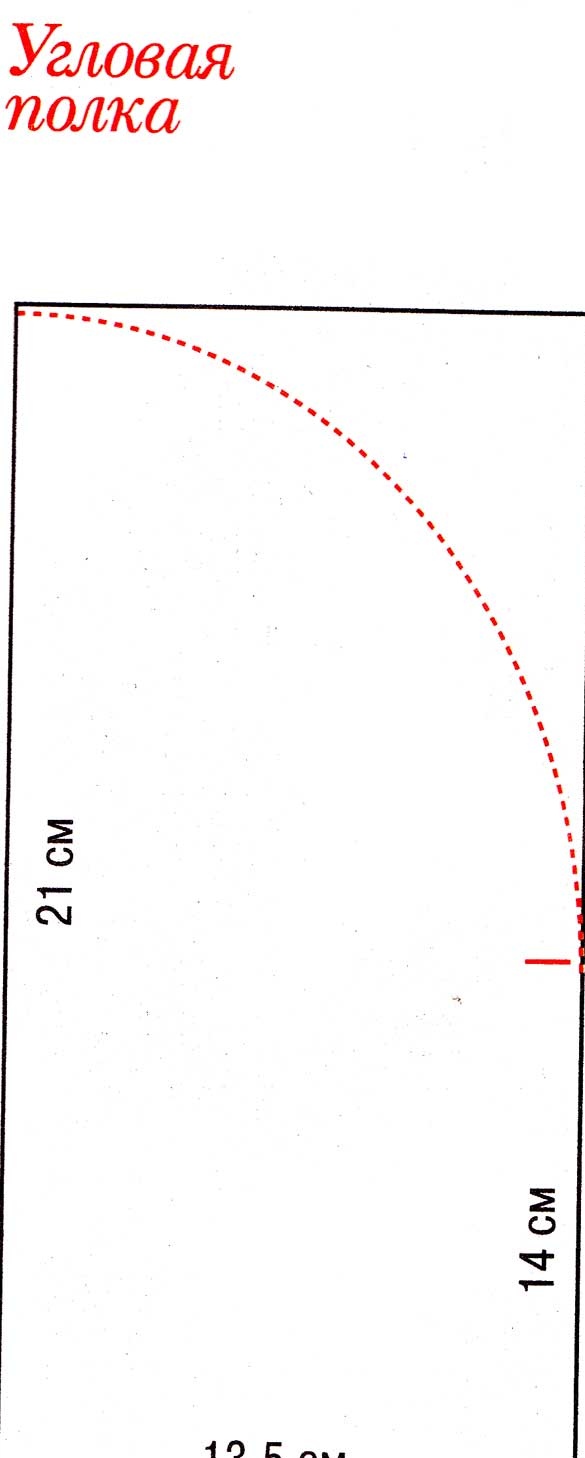
For the manufacture of shelves will require quite affordable and simple materials. Pine boards with a length of 119 cm, a width of 13.5 cm, a thickness of 2 cm - 2 pieces for vertical racks of the product. The edges of the boards must be rounded with a jigsaw. Horizontal racks with decor of round elements and balls are attached to the vertical posts.
For the manufacture of horizontal shelves, 5 boards with a length of 21 cm and a width of 13.5 cm will be required. We round off one long side of each board with a jigsaw, starting from the corner, while the short side will be 14 cm long. The ends are treated with PVA glue. Each received part is attached to vertical posts using 4 self-tapping screws in a checkerboard pattern (photo 1). The distance between the shelves is determined arbitrarily.
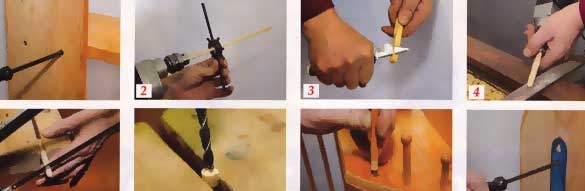
To make decorative details that are limiters for each shelf, take 6 sticks of wood 85 cm long, round them with a drill and dies M10 (photo 2). Lightly chop sticks (photo 3) if they do not fit in diameter to the die. Four blanks are used as through - whole, the rest are cut into pieces - 8 cm, 6 cm, 4 cm and 2.5 cm.
For 23 spherical decorative details, a birch hard rock blank is required. Using an M14 die and a drill, we produce 8 cm long parts. We round off the workpiece with a file at speed (photo 4). You can use sandpaper glued to a plywood base. We clamp the wooden blanks in turn in a vice, then saw off the details 1 cm long (photo 5). We take a drill for wood with a center-finder d0.8, drill holes with a depth of 0.2 - 0.4 cm in the details (photo 6). We put the resulting balls on sticks using PVA glue.
We drill a d0.8 drill in the shelves of the recess 1.5 cm long, treat the round sticks with PVA glue and carefully insert them into the holes. We varnish.
To hang the finished shelf on the wall, we take and fix the metal “ears” on each vertical part using two screws (photo 8).
The wooden corner shelf is ready!