
Materials and tools for manufacturing:
- two automobile generators (of the same model);
- electric welding;
- copper wire 0.61-0.71 mm;
- powerful neodymium magnets;
- PVC pipe with a diameter of 16 cm;
- jigsaw;
- grinder and other elements.
The process of making a windmill:
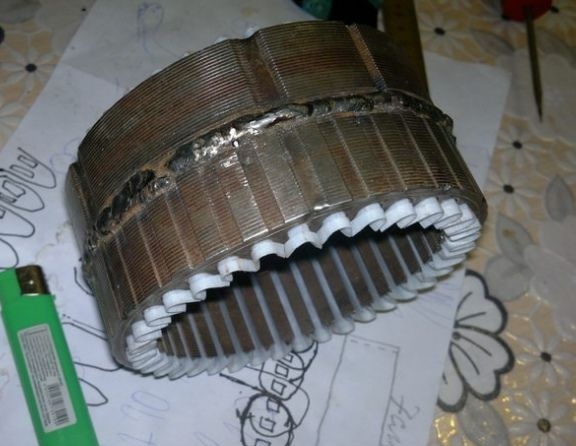
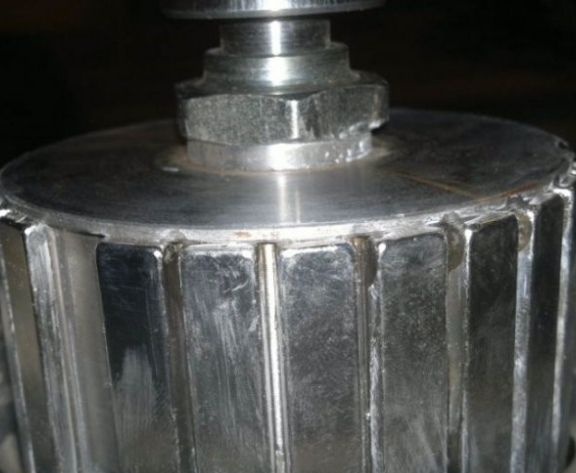
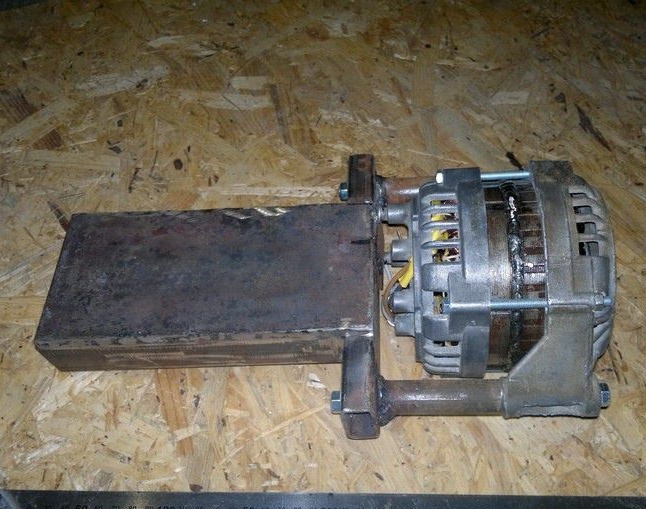
Step one. We start with the generator. Make the stator
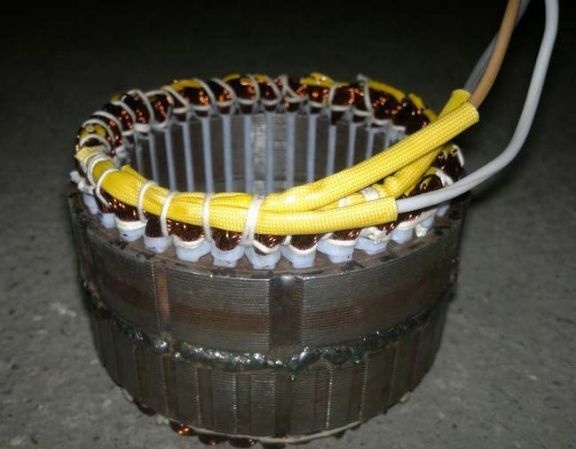
To get the generator of the required power you need to find two identical generators and disassemble them. It should end up with two stators whose sections coincide. If the exterior of the case is slightly different, this is not scary. Next, two stators are well welded by welding. After that, insulation can be inserted into the slots. Then you can make coils. Bulk type coils are used here, that is, they are first wound and then simply inserted into the grooves. This greatly simplifies the generator assembly process.
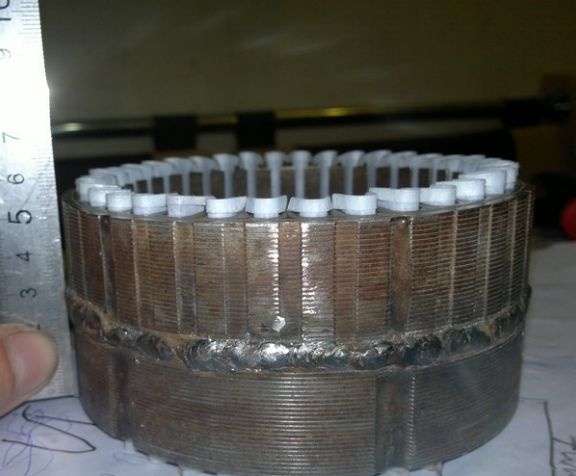
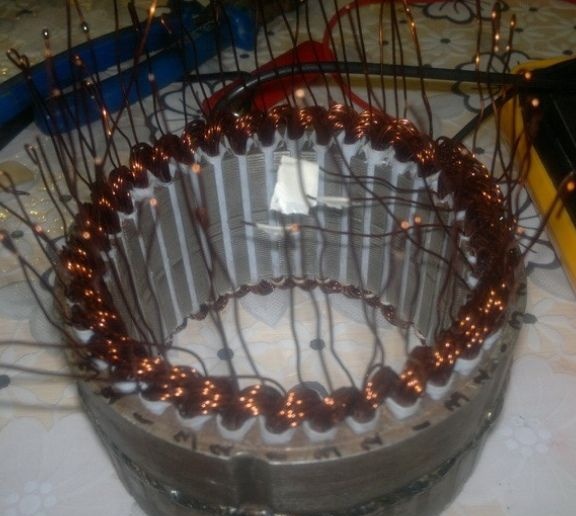
The diameter of the wire used by the author is 0.71 mm, while 27 turns pass right into the grooves. Due to the fact that such a generator will be used to charge a 24 Volt battery, it is best to use a wire with a diameter of 0.61 mm, in which case 35 turns will enter. This will allow the battery to start charging earlier and faster.
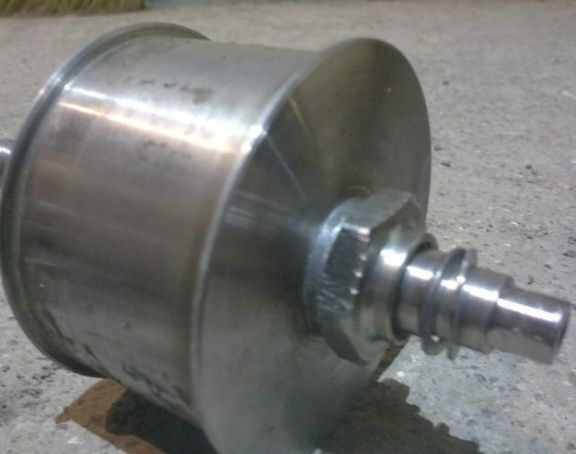
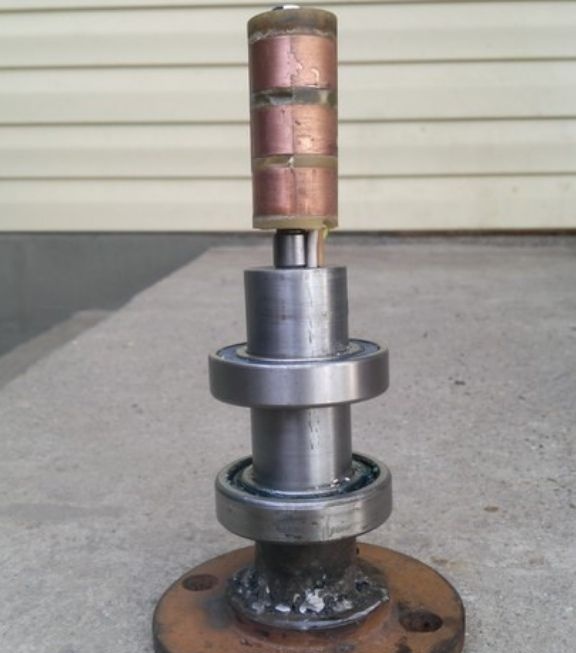
Step Two Create a rotor
The rotor is made on a lathe, any turner will do this job without any difficulty. Magnets are installed on the rotor, during rotation they will generate currents in the stator winding. According to the author, this design allows you to start charging the battery already at 300 rpm.
The main problem with this design is sticking, that is, the rotor is quite difficult to move from the starting point so that it starts spinning. Such a problem is solved experimentally, the magnets must be displaced.
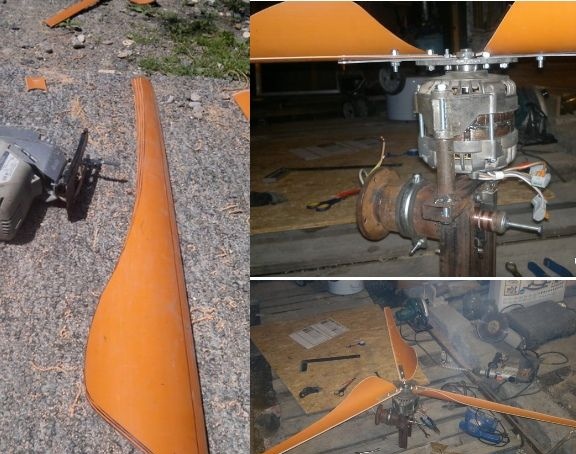
Step Three We strengthen the generator housing
The rear bearing of the generator is located on a plastic sleeve and is no longer fixed.In this regard, under load, it may fall out. To solve this problem, it was decided to additionally fix the bearing with a metal plate. You can also fix the front bearing, here it already depends on the design features of the generator.

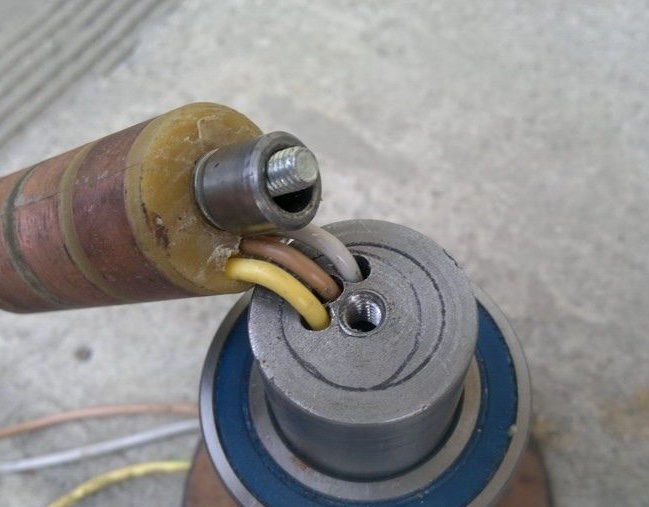
Step Four Generator brush assembly
The problem with the generator brushes is that they are connected through very thin wires that are designed for a load of no more than 3A. In this regard, it was decided to install two brushes on each ring. As for fixing the knot from the rings, all this happens with the help of epoxy.
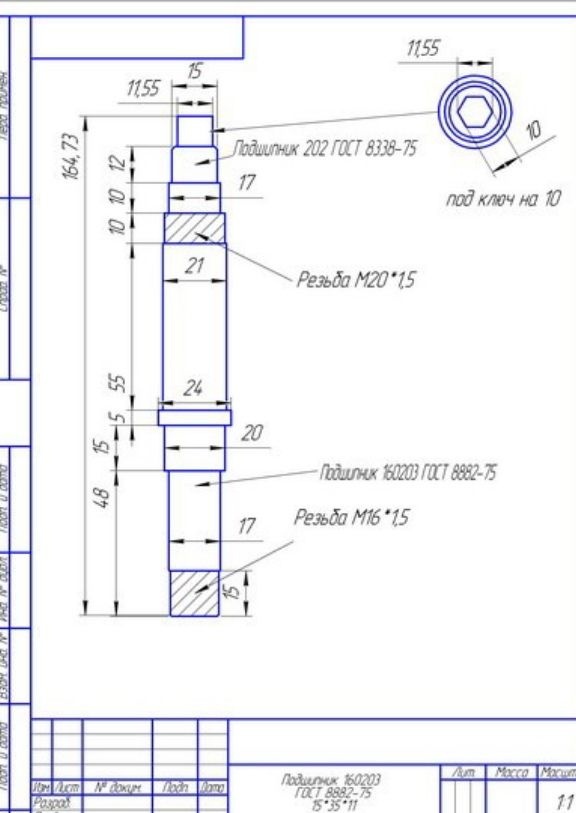
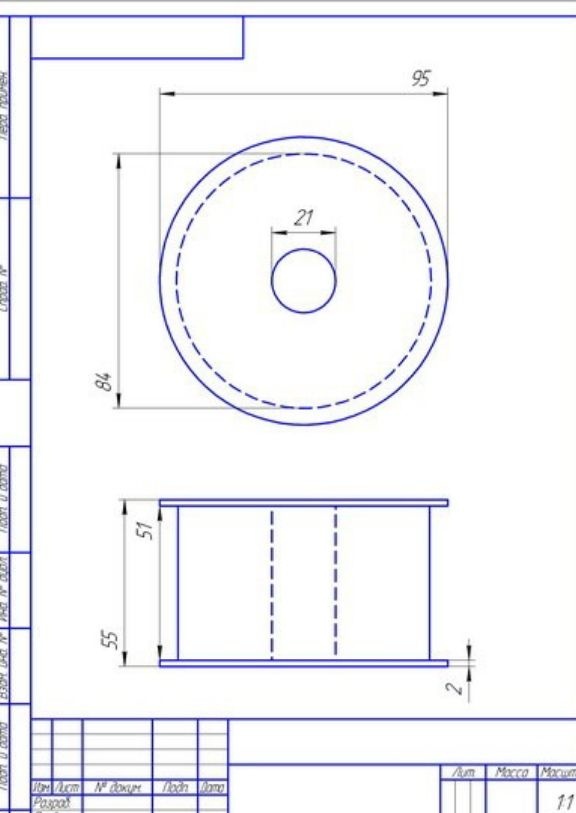
Step Five Making the foundation for a windmill
For reliability and ease of disassembly, the bearings of the rotary axis are mounted using clamps. The center of the axis should be placed offset from the axis of the generator. This is done in order to avoid damage to the system when the wind is too strong. In this case, the tail will fold.
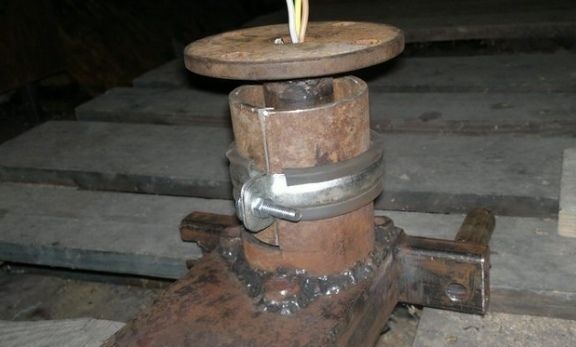
As for the generator frame, how it is arranged can be seen in the photo.
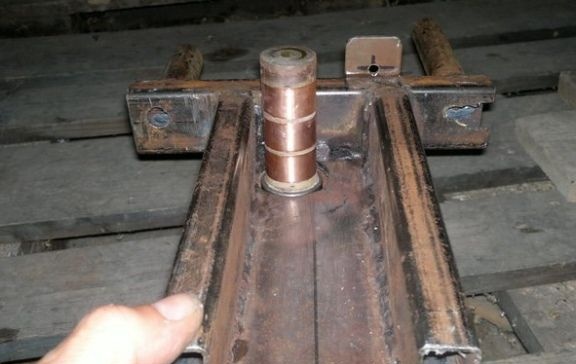
Step Six We make a screw
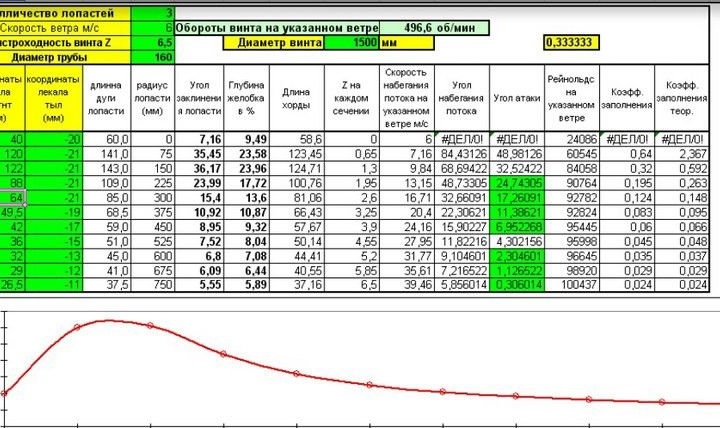
The screw is made of PVC pipe with a diameter of 160 mm. First, you need to make the necessary marking on the pipe, and then just cut the blades with a jigsaw. Nail files should be used thin and short. If there is no jigsaw, you can cut the blades with a hacksaw for metal, but it will be much longer. Well, then the blades are attached to a metal rail with bolts and nuts and you get a ready-made screw. In order to cut a screw with the necessary characteristics, there is a special plate, and you need to navigate it.
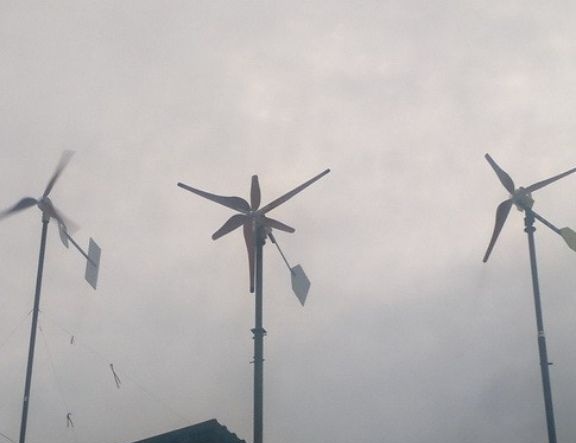
That's all, the wind generator is ready for this. You can lift it higher above the house and enjoy free energy. The author already has three pieces, in total with a wind of 8 m / s they give out up to 420 watts of power. If a car will be used as a generator, then he needs to do as much propeller as possible, since in this case the battery starts charging from the first revolutions and a big load goes on. If we talk about the generator from the motor, then the revolutions are important there, so the screw is made smaller or you have to install the multiplier.
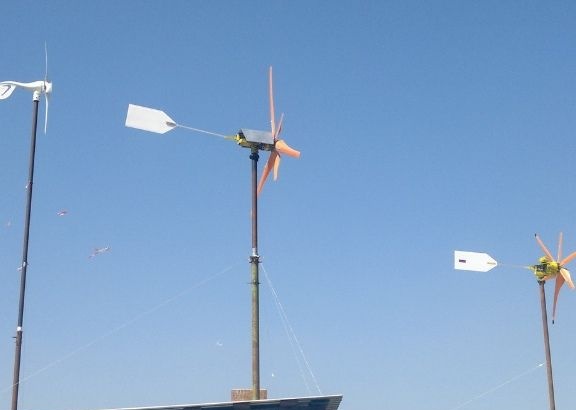
Even with a not strong wind, the generators work and give out a certain amount of energy, which allows you to keep the battery charge at the proper level. So far, the author only has a Berret boiler from such a power source. Now is the heating season, and the boiler stably emits about 80 watts / hour. Another 100 watts goes to the work of LEDs, which are housed. At the same time, the voltage on the battery does not sink below 24 volts even at night.
The system has a controller, if there is too much energy, it is discharged into the heating system.