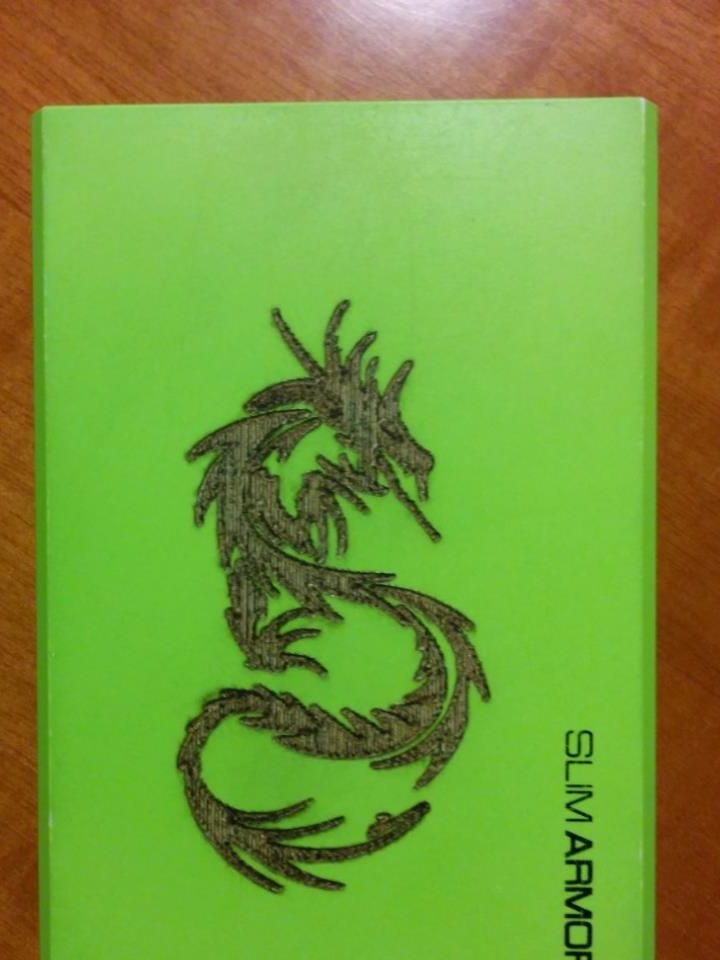
The author took 4 months to assemble such an engraver, its power is 2 watts. This is not too much, but it allows you to do engraving on wood and plastic. Also, the device can cut a cork tree. The article has all the necessary material for creating an engraver, including STL files for printing structural units, as well as electronic circuits for connecting motors, lasers and so on.
Engraver video:
Materials and tools:
- access to a 3D printer;
- 5/16 "stainless steel rods;
- bronze bushings (for plain bearings);
- diode M140 at 2 watts;
- radiator and coolers to create cooling of the diode;
- stepper motors, pulleys, timing belts;
- Super glue;
- wooden beam;
- plywood;
- bolts with nuts;
- acrylic (to create inserts);
- G-2 lens and driver;
- thermal grease;
- protective glasses;
- controller Arduino UNO;
- drill, cutting tool, screws, etc.
The process of making an engraver:
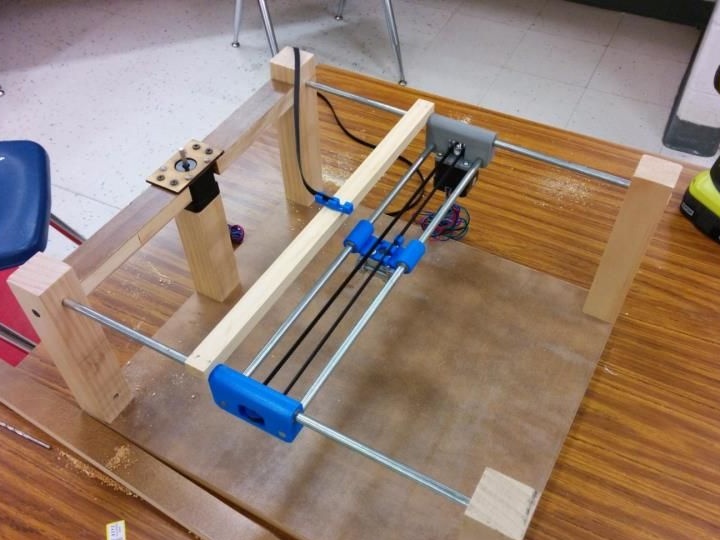
Step one. Create the Y axis
Autodesk Inventor first needs to design a printer frame. Then you can begin to print the elements of the Y axis and to assemble it. The first part, which is printed on a 3D printer, is needed in order to install the stepper motor on the Y axis, connect the steel shafts and provide sliding along one of the shafts of the X axis.
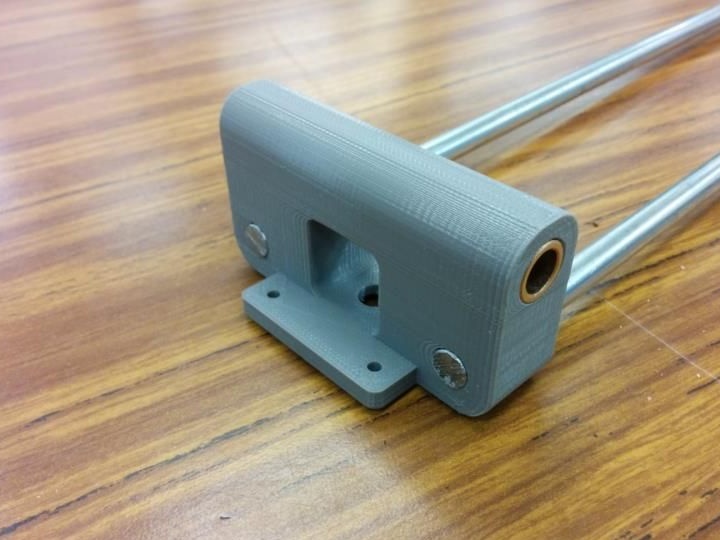
After the part is printed, two bronze bushings must be installed in it, they are used as sliding supports. To reduce friction, the bushings must be lubricated. This is a great solution for such projects, as it is cheap.
As for the guides, they are made of stainless steel rods with a diameter of 5/16 ". The stainless steel has a small coefficient of friction with bronze, so it is great for plain bearings.
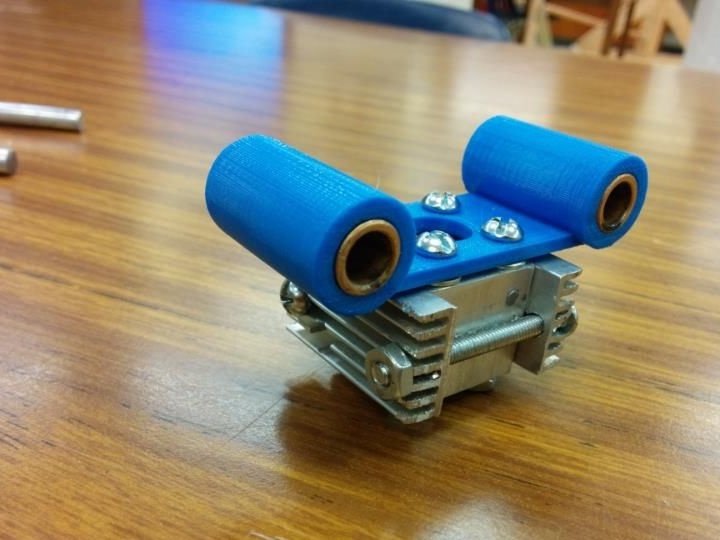
A laser is also mounted on the Y axis, it has a metal case and is heated quite strongly. To reduce the risk of overheating, you need to install an aluminum radiator and coolers for cooling. The author used old elements from the robot controller.
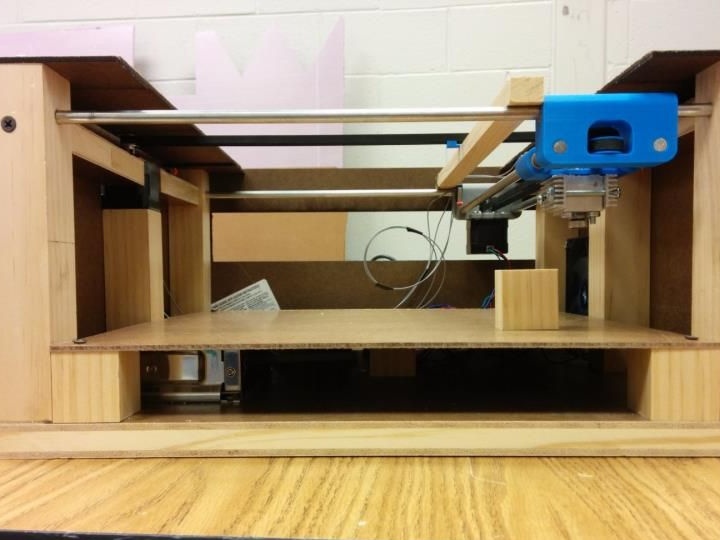
Among other things, in the block for laser 1 "X1" you need to make a hole 31/64 "and add a bolt to the side face. The block is connected to another part, which is also printed on a 3D printer, it will move along the Y axis. toothed belt.
After assembling the laser module, it is mounted on the Y axis. Also at this stage, stepper motors, pulleys and timing belts are installed.
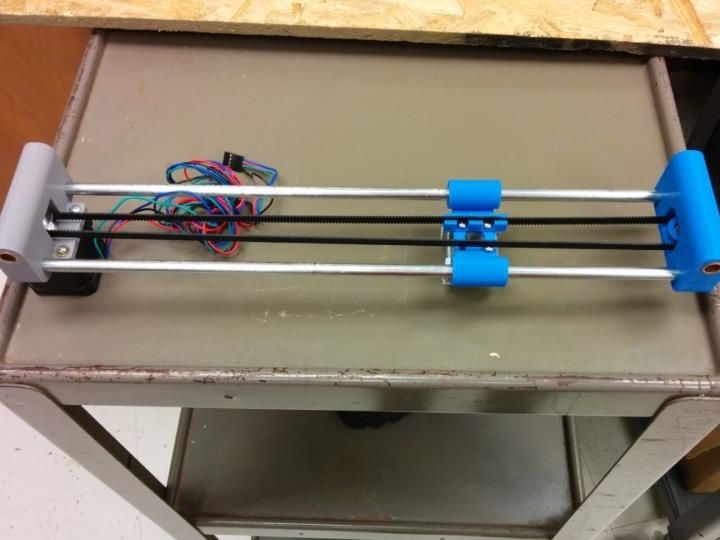
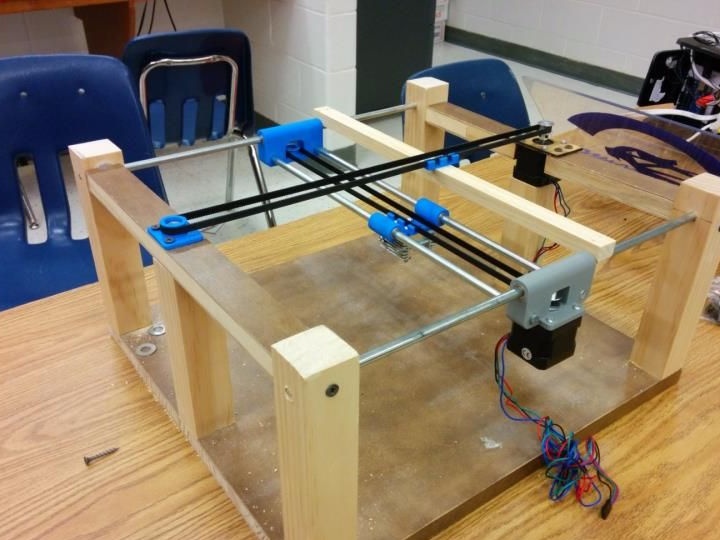
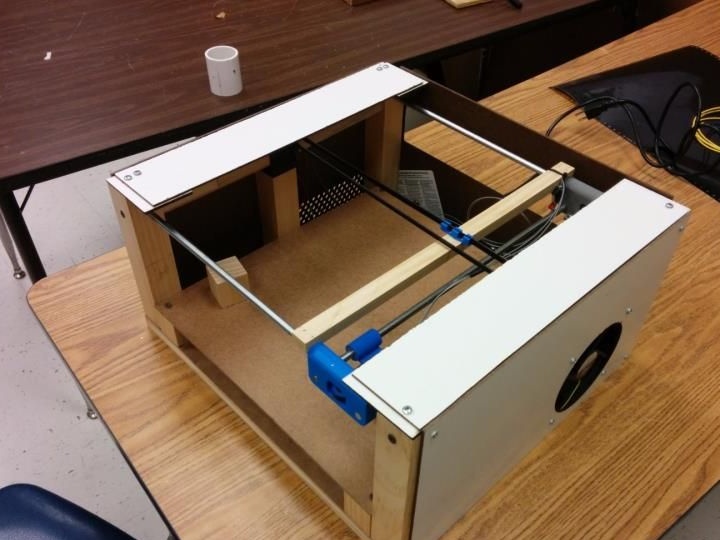
Step Two Create the X axis
To create the base of the engraver, a tree was used.The most important thing is that the two X axes are clearly parallel, otherwise the device will wedge. To move along the X coordinate, a separate motor is used, as well as a drive belt in the center along the Y axis. Thanks to this design, the system turned out to be simple and works fine.
Super glue can be used to fasten the cross beam that connects the belt to the Y axis. But it is best for these purposes to print special brackets on a 3D printer.
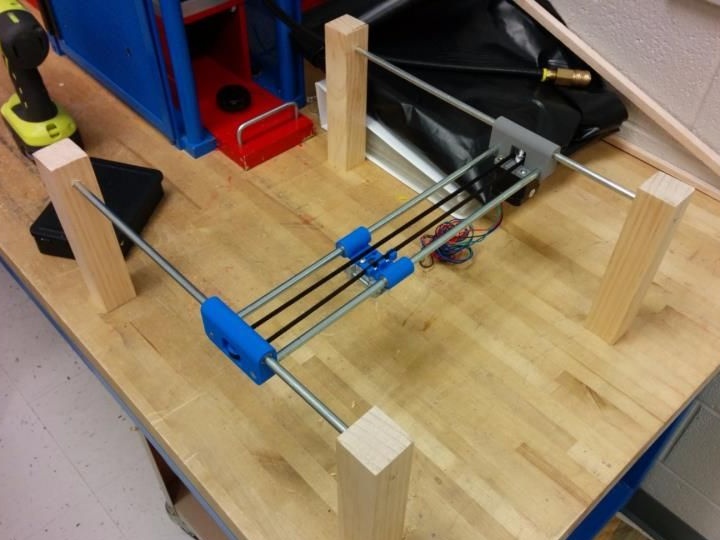
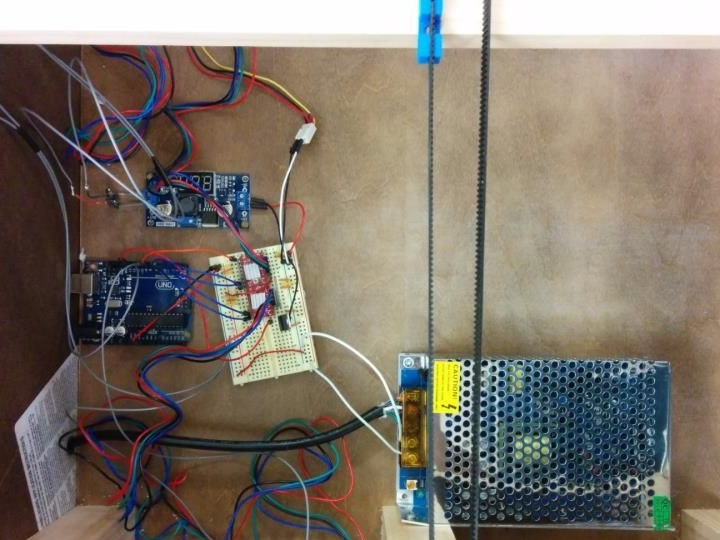
Step Three We connect and check the electronics
IN homemade a diode of the type diode M140 is used, you can buy a more powerful one, but the price will be higher. To focus the beam, you need a lens and an adjustable power source. The lens is mounted on the laser using thermal paste. Work with lasers only in safety glasses.
To check how electronics work, the author turned it on outside the machine. A computer cooler is used to cool the electronics. The system runs on the Arduino Uno controller, which is associated with grbl. So that the signal can be transmitted online, the Universal Gcode Sender is used. To convert vector images to G-code, you can use Inkscape with the installed gcodetools plugin. To control the laser, a contact is used that controls the operation of the spindle. This is one of the simplest examples using gcodetools.

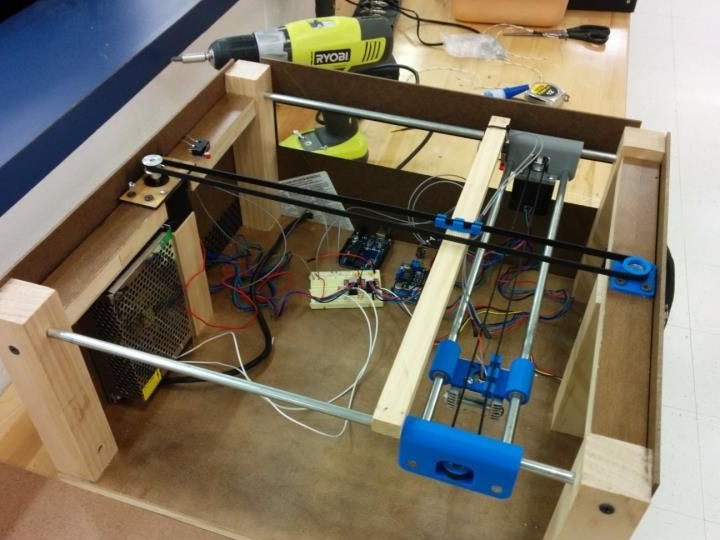
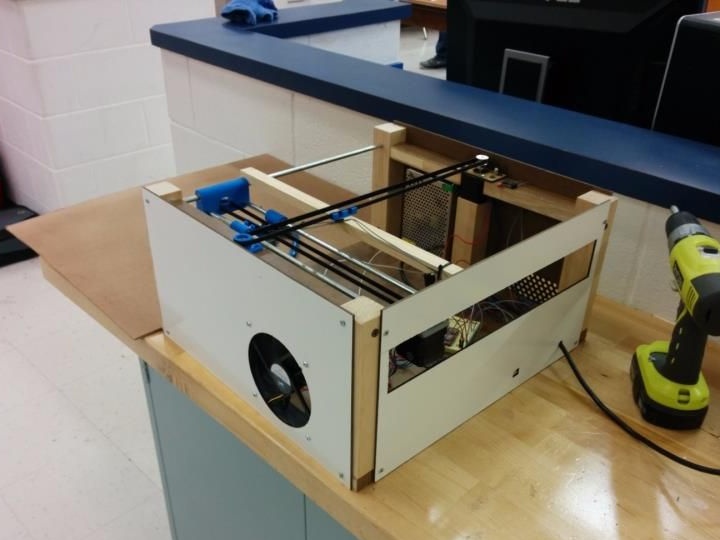
Step Four Engraver body
Side faces are made of plywood. Since the stepper motor slightly extends beyond the body during operation, a rectangular hole must be made in the rear face. In addition, you must not forget to make holes for cooling, connecting power, as well as a USB port. The edges of the upper and front parts of the body are also made of plywood, and acrylic walls are installed in the central part. Above all the elements that are installed in the lower part of the box, an additional wooden platform is attached. It is the basis for the material with which the laser works.
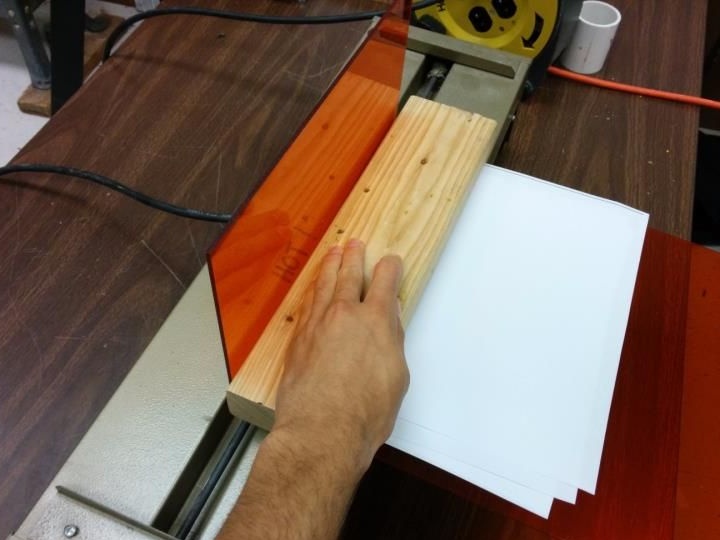
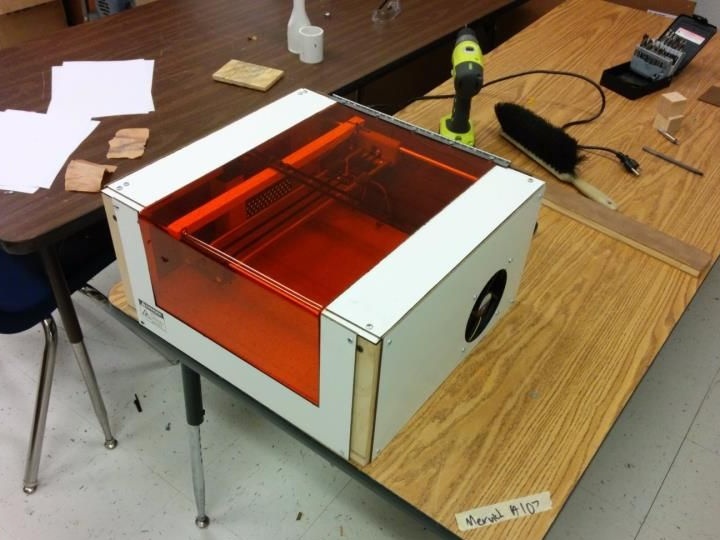
For the manufacture of walls, acrylic is used in orange, as it absorbs laser rays perfectly. It is important to remember that even a reflected laser beam can seriously damage the eye. That's all, the laser is ready. You can start the test.
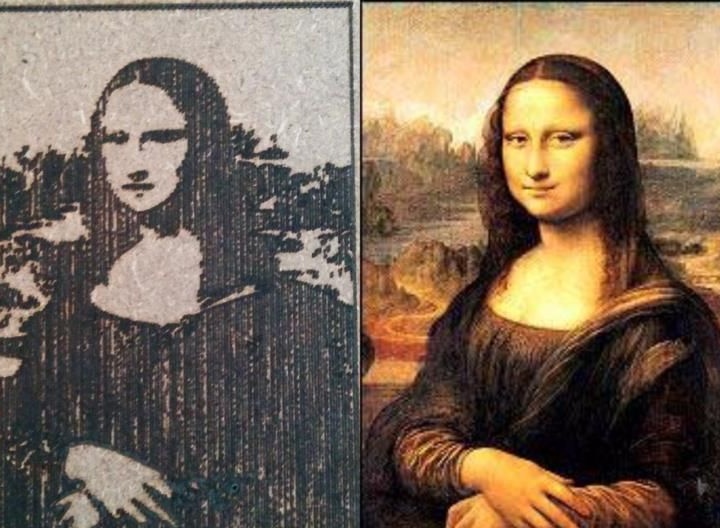
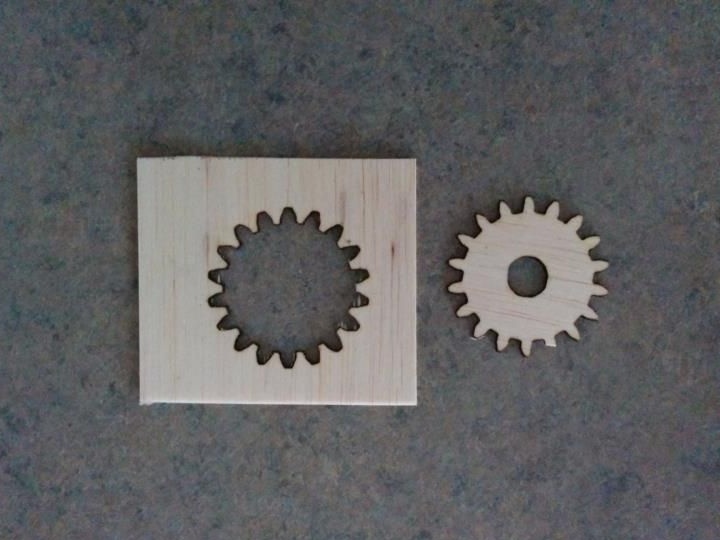
Of course, complex images are not very high quality, but a simple engraver burns out without difficulty. Also, using it you can easily cut a cork tree.