
In the construction of buildings, builders use both new and fundamental old ones, striking in their practicality. For example, the four-pitched roof has been known to people for a long time.
The four-pitched roof is a very popular type of roof, allowing you to give the house an original look. It is often used in projects of fairly large houses, since it looks more compact and neatly gable with pediments. The construction of a four-pitched roof can be simple or include various elements - skylights and dormers, for example, very enliven the structure and make it unique.
The four-pitched roof compares favorably with the gable roof not only in appearance. It protects the building much more reliably from rain, snow and wind. The design of such a roof is more complicated than that of a gable roof, but for a small house or gazebo made do it yourself a four-pitched roof is not particularly difficult.
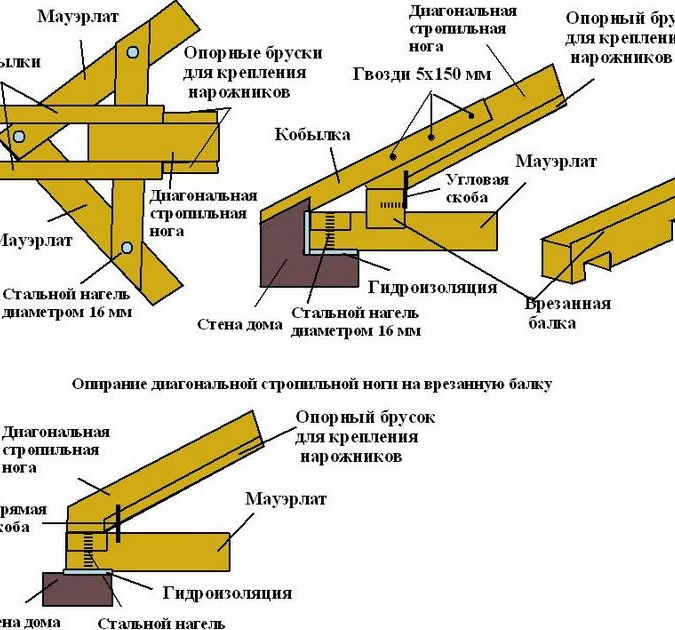
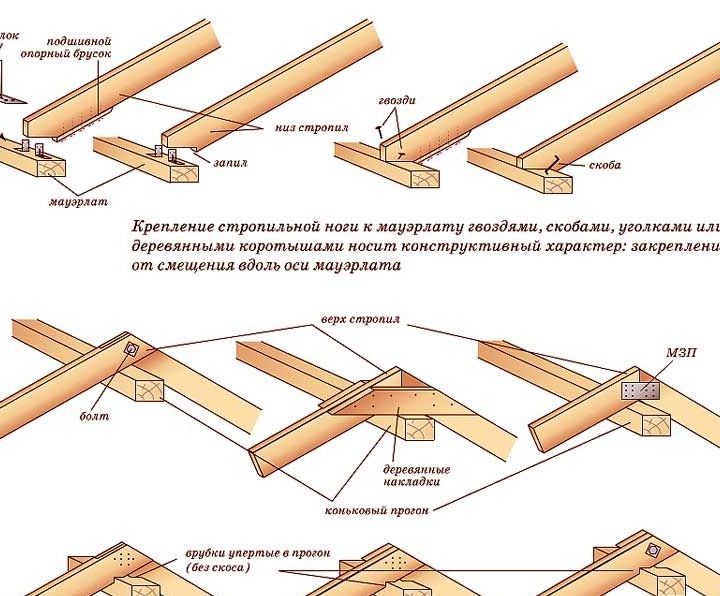
In order for the load from the rafter system, roofing, and snow on the roof in the winter, to be evenly distributed, longitudinal elements are laid on top of all the bearing walls - mauerlat and beds. They are made from a beam of 100x150 mm or 150x150 mm, and in some cases from reinforced concrete beams. When building a house on their own, they usually use wood - this material is easier and more convenient to process, so we will consider it. The timber is laid on the walls and secured with anchor pins. Studs are installed during the construction of walls, buried in masonry. In wooden structures, the upper crown of the log house serves as supports. Between the Mauerlat and the wall, waterproofing of two layers of roofing material is mandatory
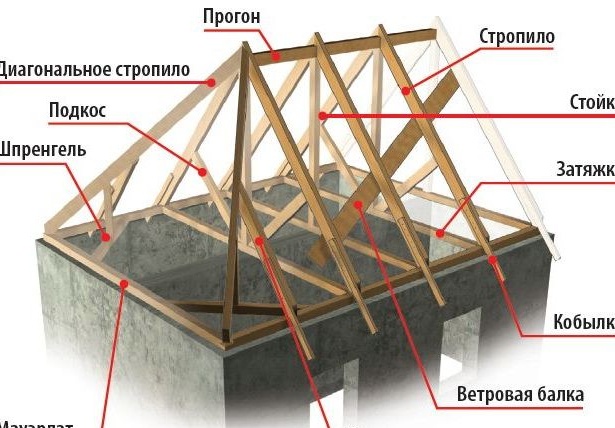
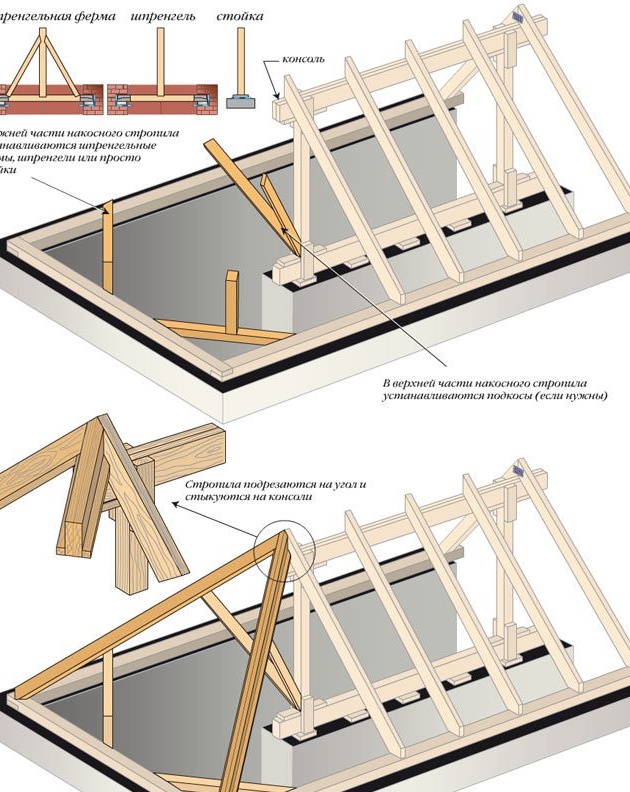
Install support racks on beds or floor beams. They are leveled using a plumb line or a water level, after which they are fixed with temporary supports from the boards for self-tapping screws. The racks are fixed to the bed or the ceiling using a corner and metal plates-overlays. Racks for a hip simple roof are placed in a row in the center of the roof, under the ridge.The distance between them should not be more than two meters. To erect the tent roof, the racks are placed on the diagonal lines at an equal distance from the corner. The racks should form a rectangle that repeats the shape of the perimeter of the house. The height of the racks is determined by the design of the roof.
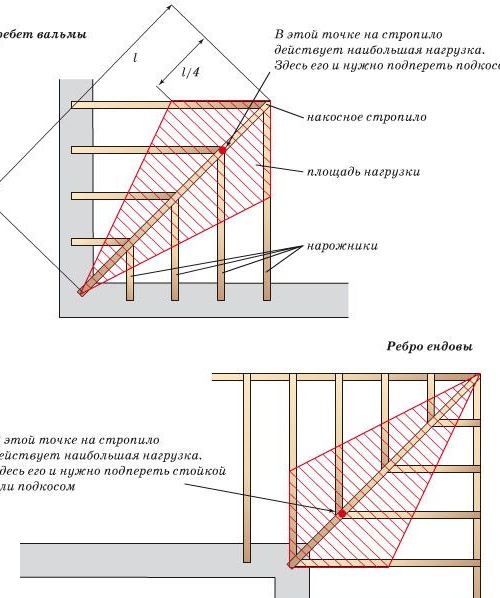
The side rafters on a simple hip roof are installed similarly to the layered rafters of a gable roof: a board with a width similar to the width of the rafters is applied to the ridge beam in the region of the extreme rack - 150 mm. A template is performed on it. The board for the template can be taken not so thick and heavy, and 25 mm of thickness is enough. On the template mark the upper gash, with which the rafter will rely on the ridge beam, cut it out. After attaching the template to the ridge, they mark out the lower gash, with which the rafter will rest on the Mauerlat. The finished template is applied to the ridge run in the places of installation of the side rafters, checking the need to fit each rafter in place. If the template is perfect, the rafters are marked and sawn according to the template in the right amount. They are installed on the ridge run and Mauerlat and fixed with the help of corners and screws or on the brackets. Rafter pitch - from 0.5 to 1.5 meters.
Materials: rafters 150mm, board 25 mm, nails, screws, insulation, tile, roofing material.
Instruments: hacksaw, hammer, screwdriver, ax, cutting circular saw, drill.
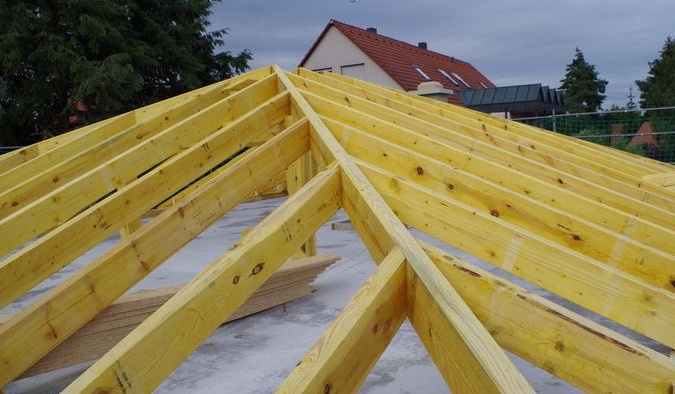
To begin with, the author gives us to study the assembly scheme of a four-gable roof and its features in the design.
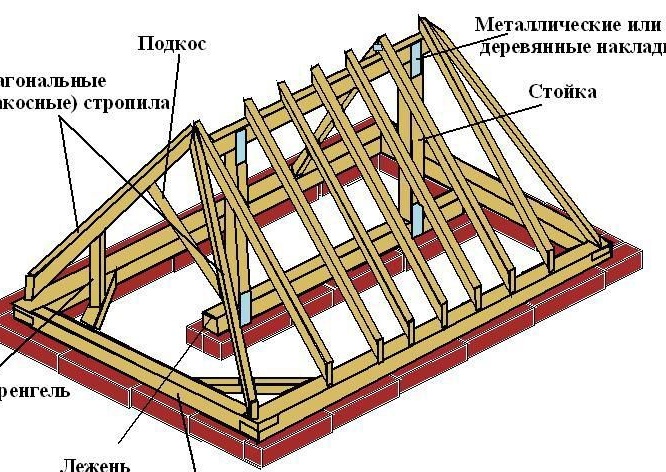
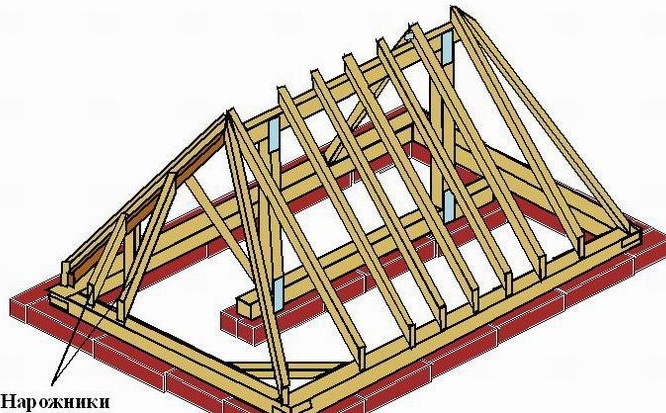

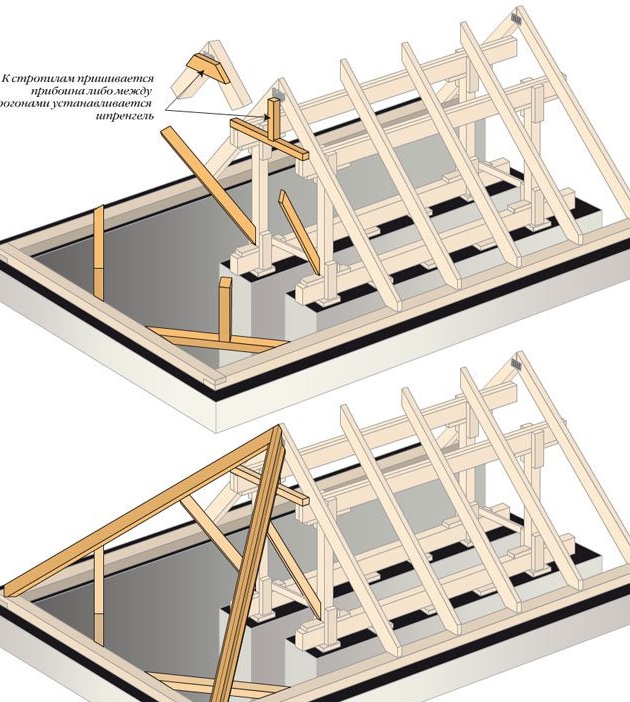

Next, proceeds to the assembly of the rafter structure.
When installing this rafter system, there are some rules depending on the terrain and weather conditions, if the terrain is rainy, the slope angle is up to 60 degrees.
[center]
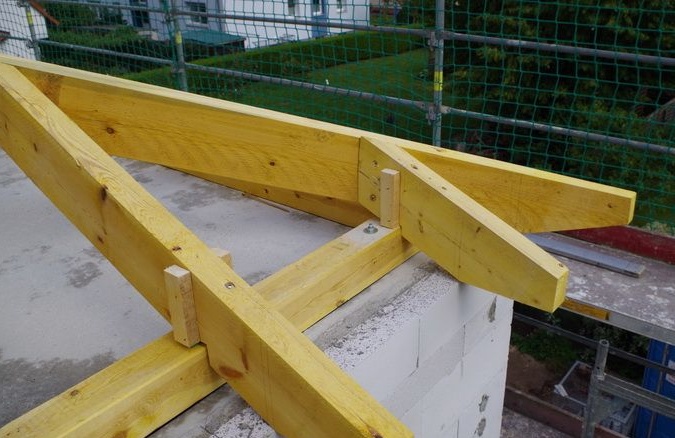
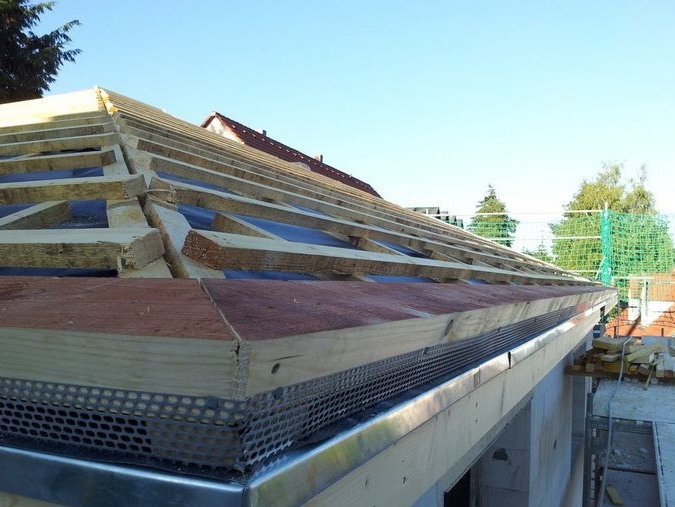
This is how the end of the roof is arranged, where the pediment would have been in an ordinary building.
Straps are located at an angle, which makes the structure stronger.
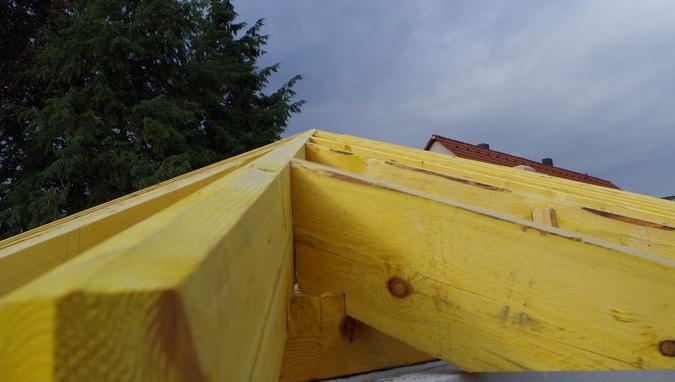
Turning directly to roofing, the author again gives us the scheme for the correct installation of all layers of the roof.
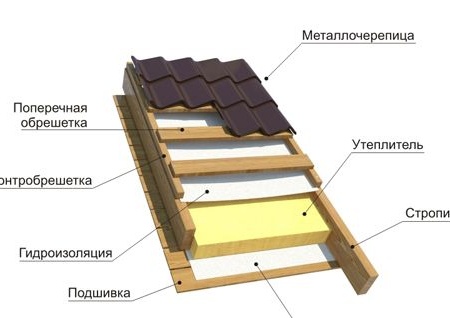
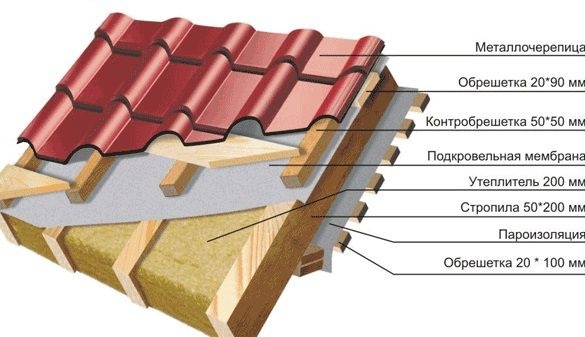
Then the crate is laid, the insulation is insulated, an insulating film, another counter crate is laid on top of this pie, it is designed to create a space between the main roof and the roof itself.
A grill is installed at the bottom so that the roof breathes and moisture comes out.
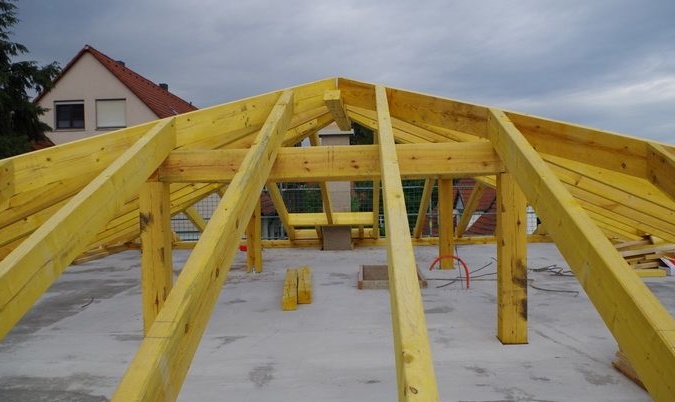
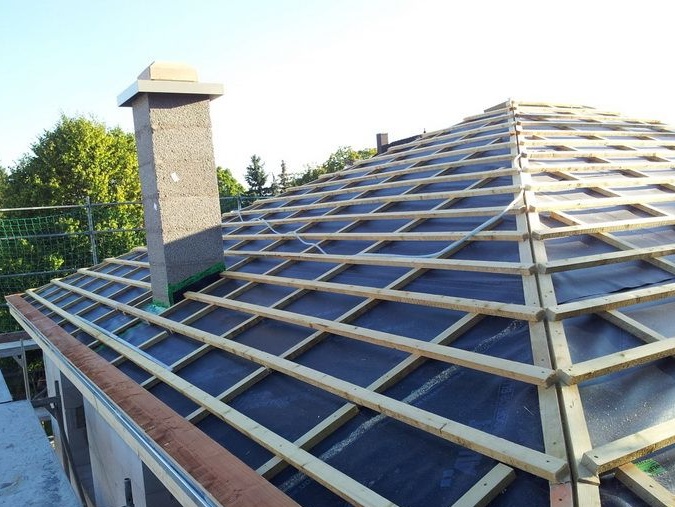
The roof is installed and ventilation is installed.
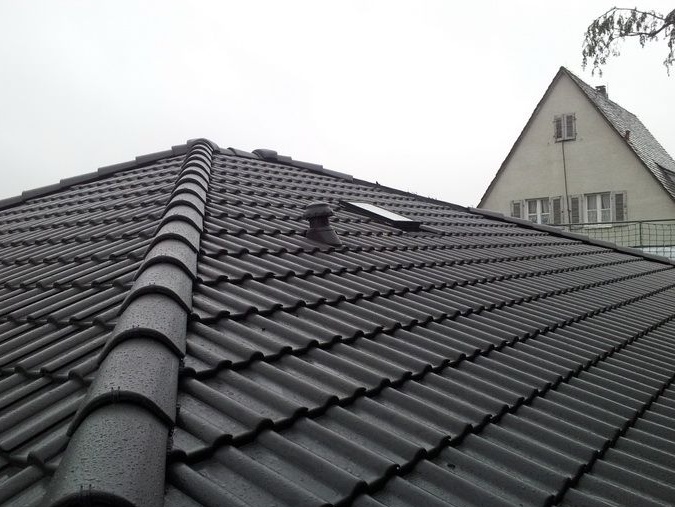
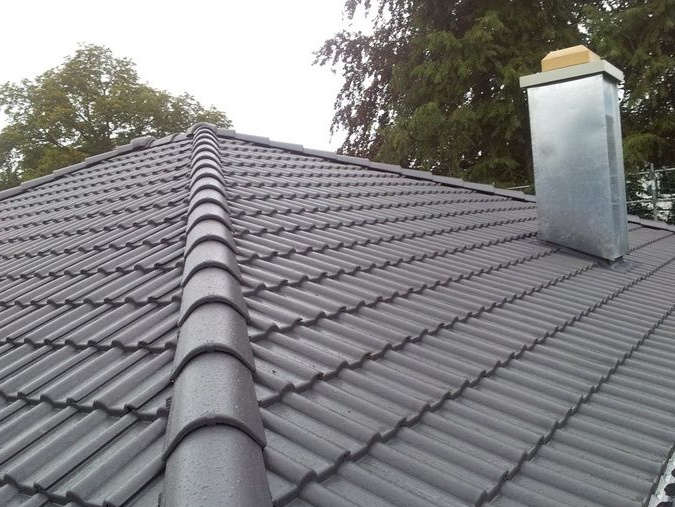
The installation of the roof is completed. This roof will last more than a dozen years for its owners. This design can withstand a strong hurricane and hail.