
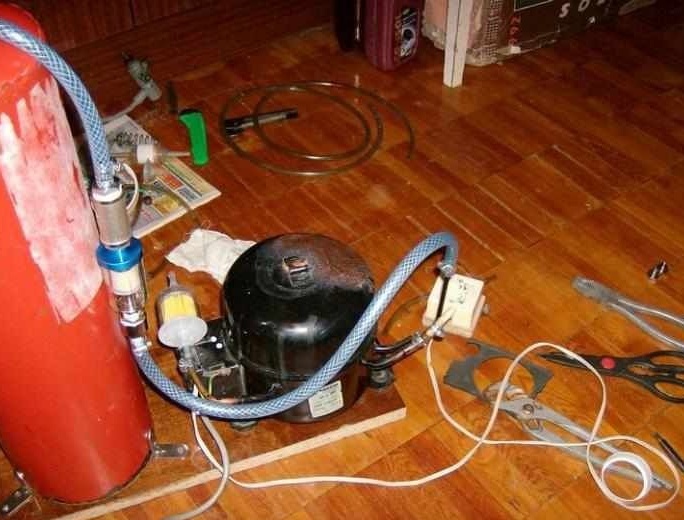
Making yourself a small airbrush compressor is very simple. For these purposes, you will need a small air compressor, as well as a container in which air will accumulate under pressure, in other words, a receiver. As a compressor, the author for this homemade used a compressor from the refrigerator. As for the receiver, the OHP-10 fire extinguisher was excellent for these purposes, the volume of which, when measured, turned out to be 10.5 liters instead of the declared 8.5 liters, the fire extinguisher was produced almost for free. The author of the homemade cost no more than 2000 rubles.
Materials and tools for homemade:
- fire extinguisher OHP-10 or other suitable;
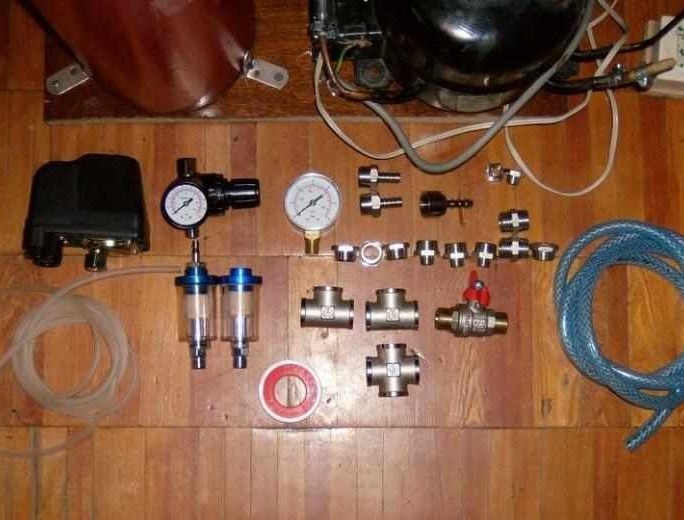
- pressure switch PM5;
- two water separator filters;
- one fuel filter;
- reinforced PVC hose (inner diameter 10 mm);
- gearbox with pressure gauge;
- pressure gauge for measuring pressure inside the receiver;
- tape FUM;
- pliers, keys and other tools.
The process of making an airbrush:
Step one. Extinguisher preparation
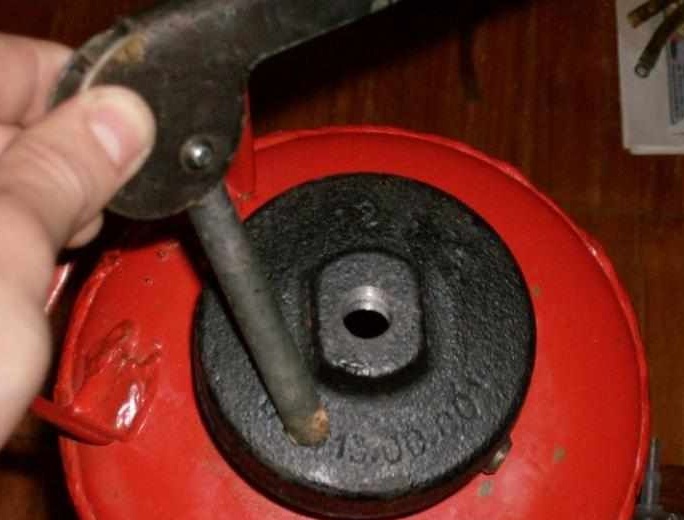
The first step is to free the fire extinguisher from its contents. This must be done in an open area.
Now you get an empty cylinder, you need to screw it to the base. This process will not be difficult for anyone.
Remove all contents from the lid, including from the fire extinguisher. As a result, the cylinder and cap should remain.
Step Two DIY assembly
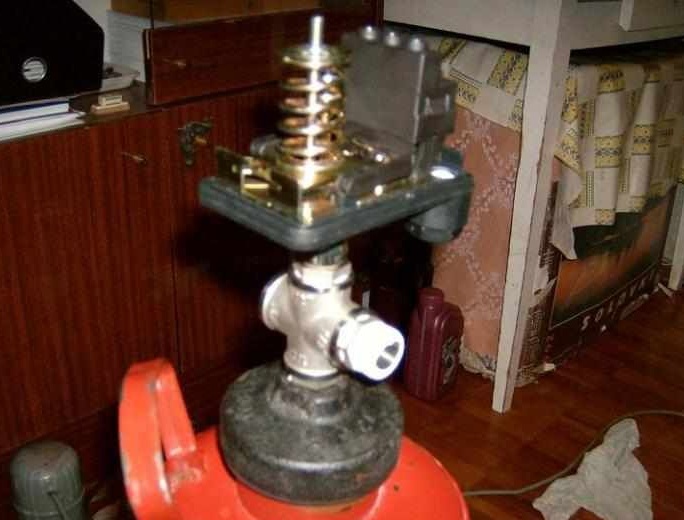
In the cast iron lid, you need to cut the pipe thread 1/4 inch. On the wide thread of the cylinder, you need to wind the FUM tape for tightness, and also make a rubber gasket if the native one is lost or damaged. It can be made from a car camera. Well, then a cast-iron lid is screwed on.
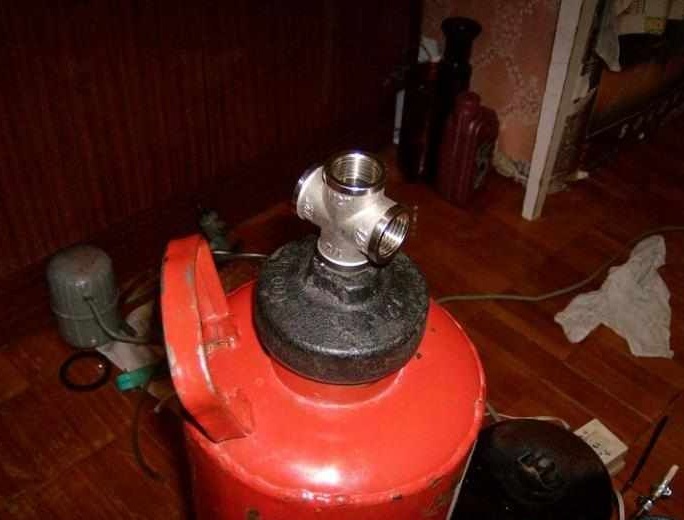
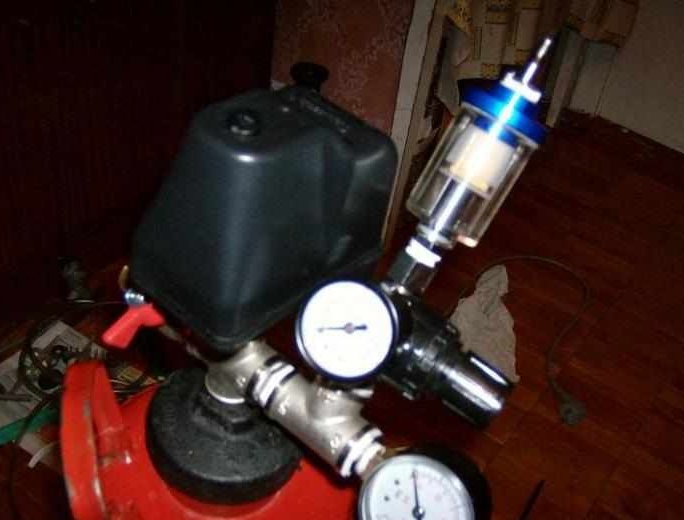
Then, a 1 / 4HP 1/2 inch adapter is screwed into the hole in the lid. Then you need to screw the 1/2 inch cross. Of course, all connections must be sealed with the help of the FUM tape.
A pressure switch must be screwed into the adapter with 1 / 2НР-1 / 4НР, the adapter 1 / 2НР-1 / 2НР is also screwed on the side.
The author screws a tee on the side.
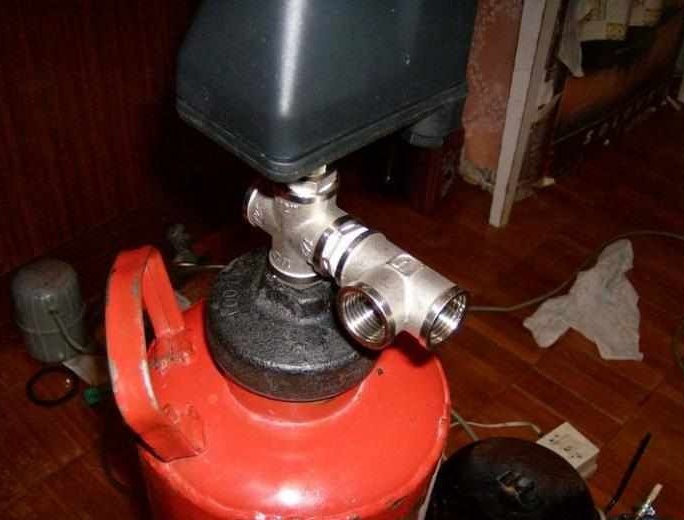
Subsequently, the reducer is screwed onto the tee with the help of a 1 / 2НР-1 / 4ВР adapter, it has a 1 / 4НР thread.
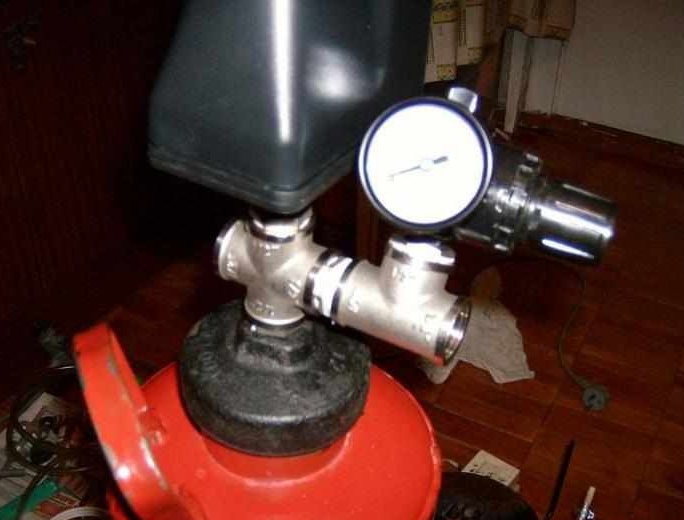
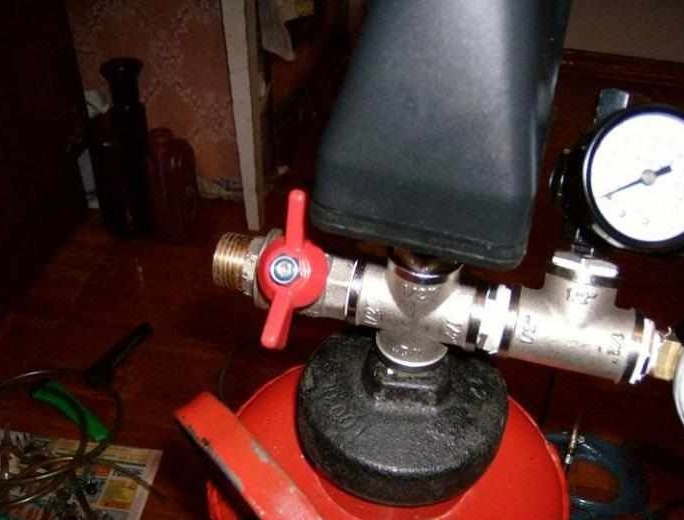
On the other hand, again through the adapter 1 / 2НР-1 / 4ВН, a manometer is screwed on, there is also a 1 / 4НР thread on it. On the opposite side of the cylinder it is necessary to screw in the valve, with the help of it, air will descend from the cylinder. The valve has a 1 / 2HP thread.
A filter-water separator must be connected to the gearbox, 1 / 4HP thread is used here. It is important to install the filter at the right angle. The drain hole should be at the lowest point.
Then you need to make another filter line. On the inlet side there is a 1 / 2BP fitting connected through an 1 / 2HP-1 / 4BP adapter. It must be screwed onto a filter that has a 1 / 4HP thread. What should result in the end can be seen in the photo.
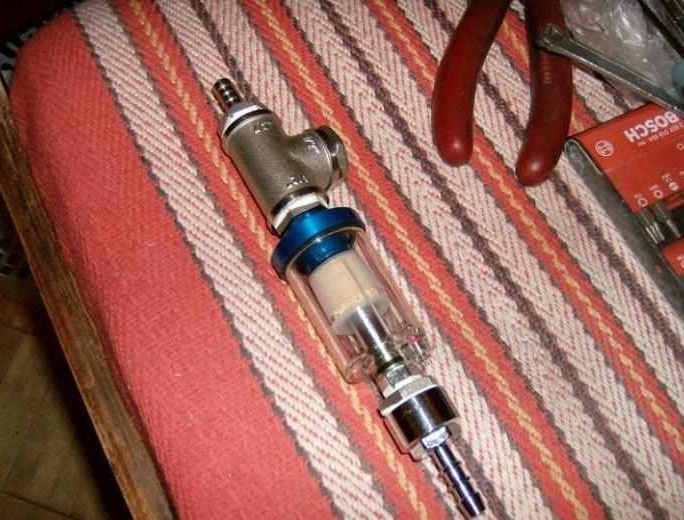
The adapter 1 / 4HP-1 / 2HP must be screwed into the filter hole 1 / 4BP, and then a tee is screwed to it. On one side, the tee is jammed with a 1 / 2HP plug, and a 1 / 2HP fitting is screwed in on the opposite side.
Step Three Final build phase
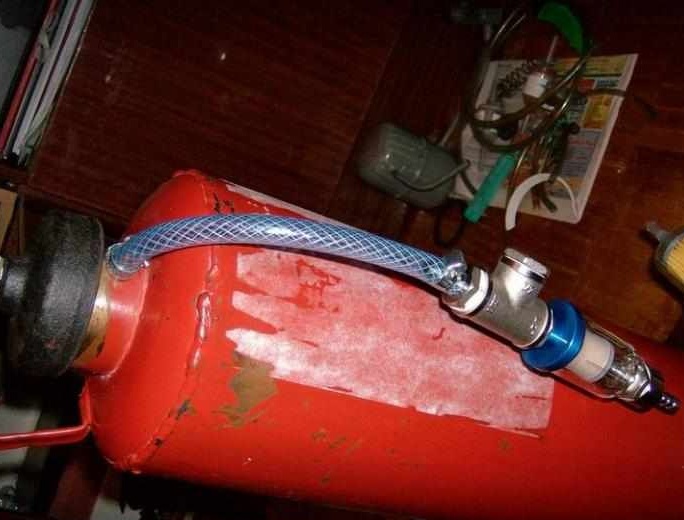
Now you need to take a reinforced hose and wind it onto the fitting that exits the fire extinguisher, which acts as a nozzle. The hose is fixed with a clamp. On the other hand, a fitting from the filter is inserted into the hose, it is also attached with a clamp.
After that, the hose is again connected to the filter and is connected already to the compressor tube. Everything is pulled together by clamps.
At the final stage, a similar fitting must be screwed into the outlet of the 1 / 4BP filter. a silicone tube is perfectly put on it, which does not even need to be fixed with a clamp. Well, the other end is connected directly to the airbrush.
Due to the fact that the pressure behind the gearbox is small, when compared with the receiver, the tube can withstand it without any problems.
The compressor requires care, it is necessary to change the oil in it. To do this, you can find three tubes on the compressor, one of them will be sealed, it is through it that the oil is replaced. You can either drill the tube or have a bite with pliers as an author. Next, you need to drain the oil from the compressor, it will turn out about 300-350 grams. In place, you can add 10W40 car oil. This oil ideally protects the compressor elements from wear and does not absorb moisture.