

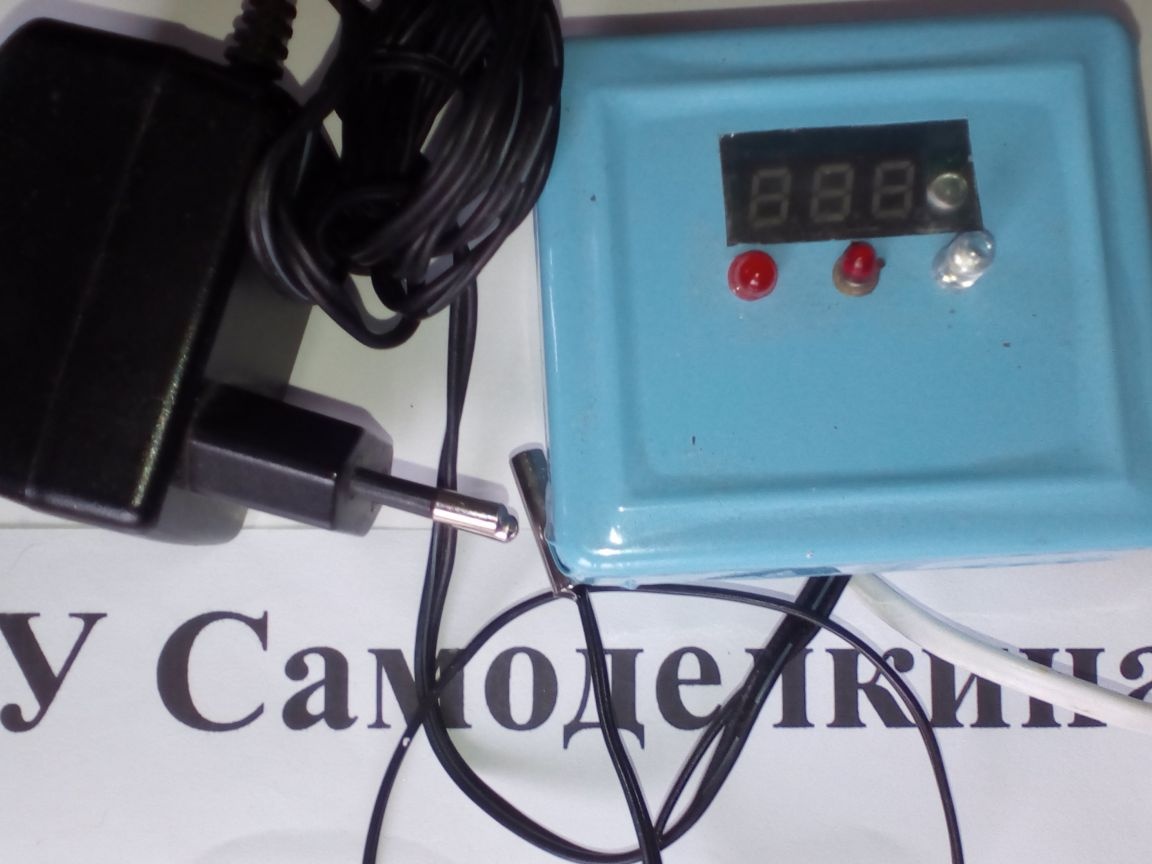
To make a homemade incubator, I needed to purchase a temperature controller. The requirements for it were such a small size, low cost, powered by 12 V DC, a powerful executive relay (to withstand a significant load), indication of indications, setting of parameters with control buttons, accuracy of temperature measurement and maintenance of set parameters and, of course, reliability.
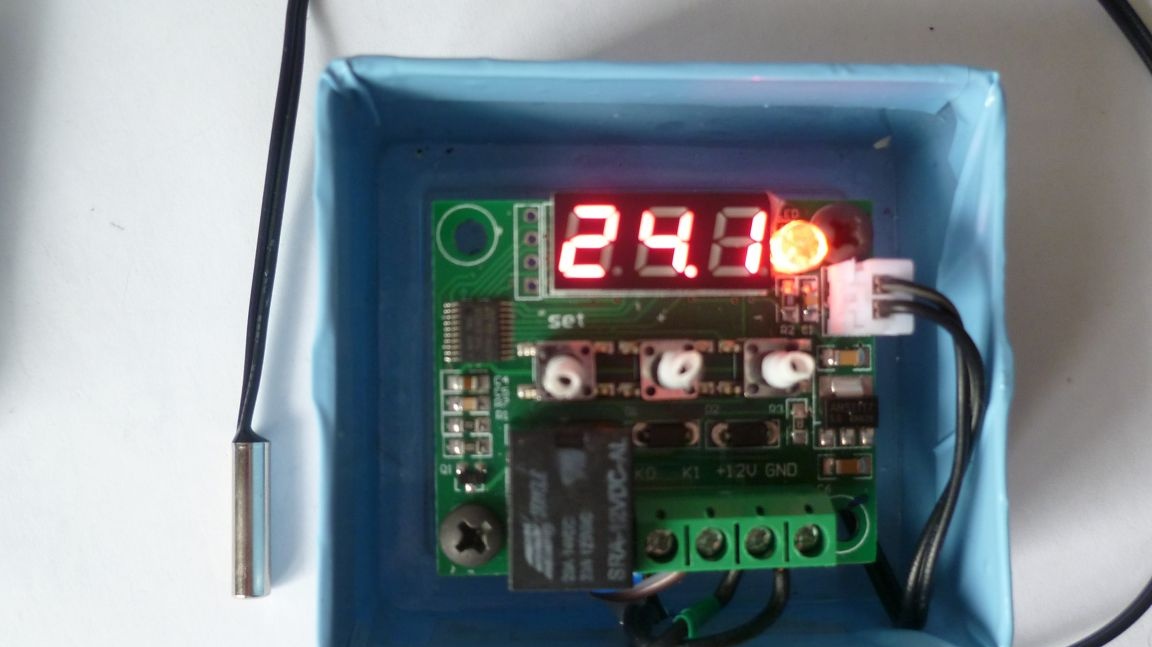
On the Internet, I came across such a device. Reviews about him met my requirements. He came to me from Aliexpress website. You can apply this regulator in many places - electric heating, incubators, refrigerators, drying cabinets, water heating systems, protection of electrical equipment, measuring the temperature of the vehicle's coolant, followed by turning on the fan of the greenhouse, baths, heated floors, heating pipes, etc ... The regulator itself comprises e boards with 3 control buttons installed: SET The SET button is used to select a mode and set parameters, and with the and buttons you can directly change the data of programmable parameters. The LED indicator has three categories. The temperature meter itself is based on a thermometer installed in the case, has a wire length of 30 cm.
The limits of regulation lie in the zone from -50.0 to 110.0 degrees. You can connect loads up to 15 A (at 12 V DC) and up to 5 A (when supplying the load from a 220 V network)
The device is powered by 12-14 V DC. Measurement accuracy is within 0.1 Celsius. The current consumption of the regulator is 35 mA when the relay is running: 65 mA. In my article I will tell you how to configure and upgrade this thermostat a bit.
The process of setting the W1209 temperature controller is shown in the video:
The list of tools and materials
-knife or scissors;
-screwdriver;
soldering iron;
-tester;
- a plastic tube from ear sticks or a fountain pen rod;
-malfunctioning LED with a diameter of 5 mm-4 pieces;
-Plastic racks-4 pcs;
-connecting wires;
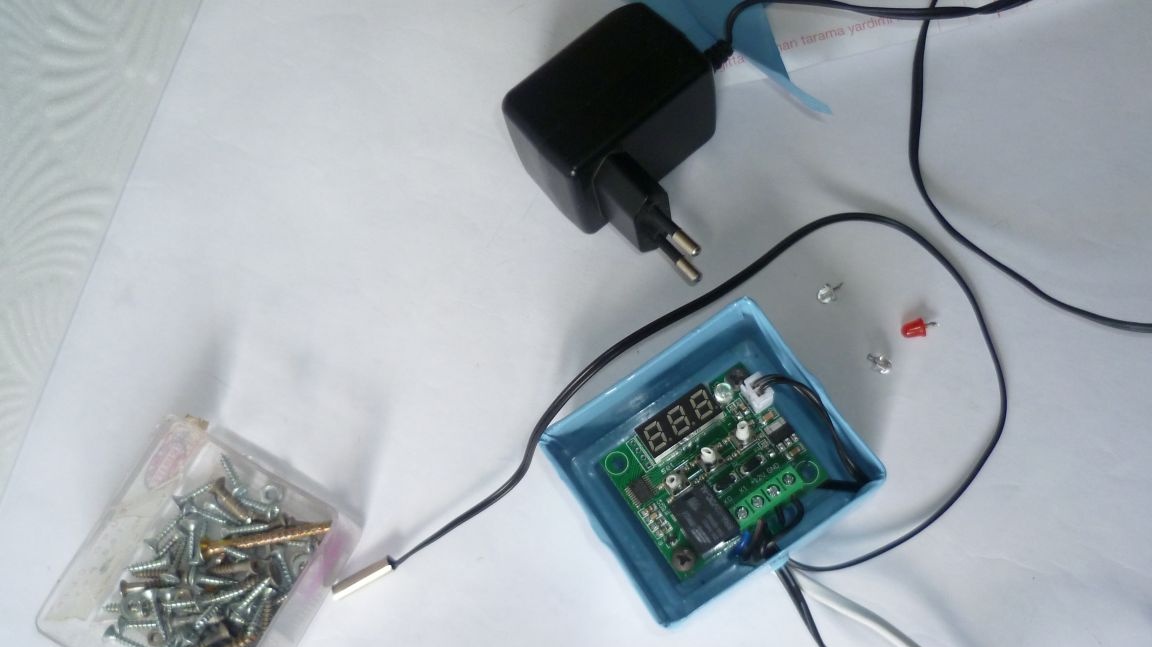
-12V power adapter;
-screws;
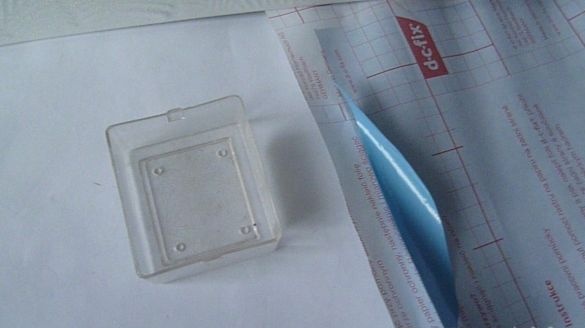
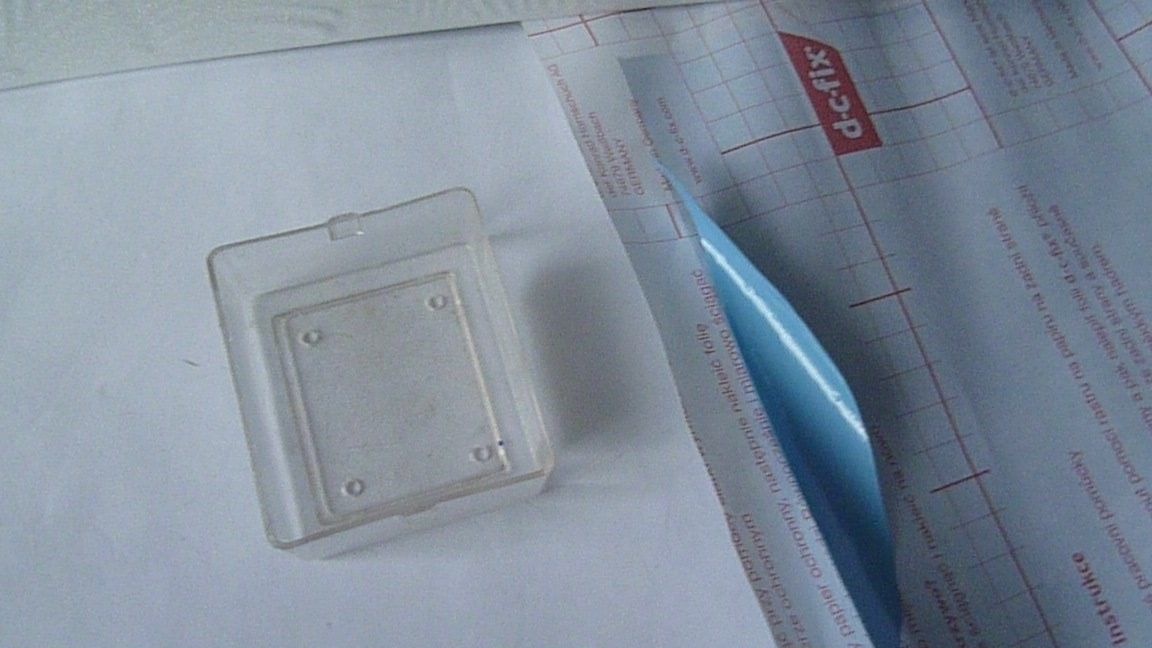
- a plastic box from under screws with a transparent cover;
-adhesive tape.
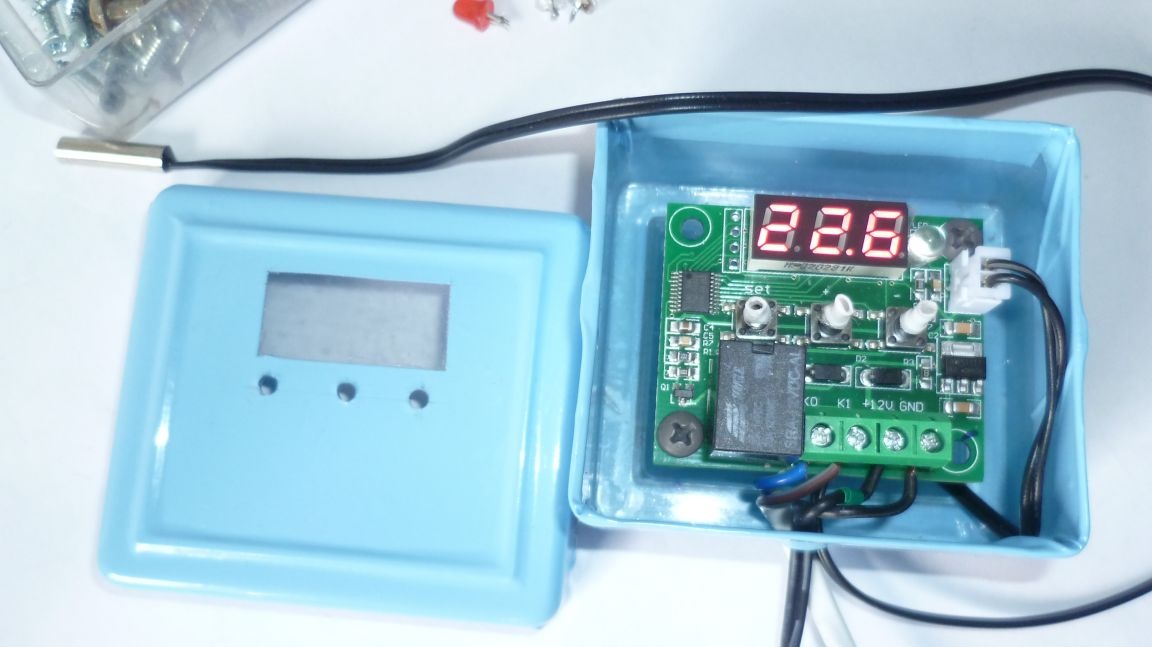
Step one. Case manufacture.
The disadvantage of the board is that it is not suitable for installation in the case, the buttons and indicator are located below the relays and terminals.
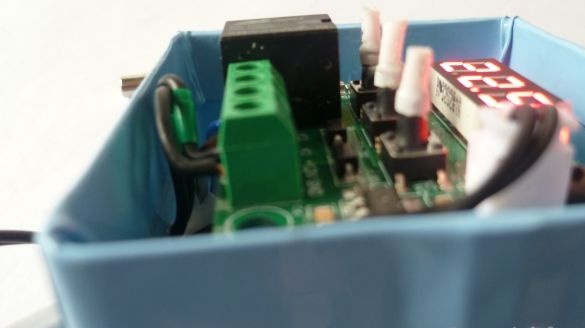
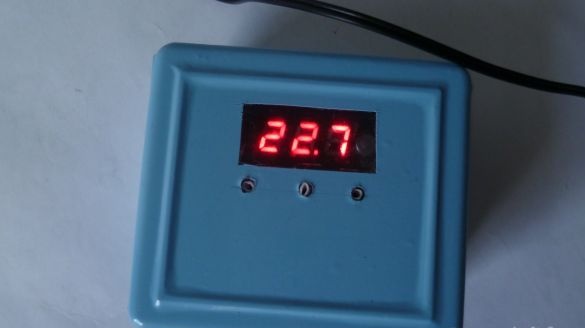
Craftsmen have a different layout for the board of this regulator - who cuts the windows in the case for indicators, relays, connectors, some solder the buttons and the indicator, then mount them separately But I decided to install the board in a transparent case, a box came from under the screws.
First I wanted to paint it by pre-gluing a window for the LED indicator screen. But then he changed his mind and decided to tape it with self-adhesive tape (there were pieces from the repair left). It turned out quickly and in my opinion it seems to be not bad. After we make a window in the film for the LED screen and drill passages for the buttons

Step Two Installing the temperature controller electronic board.
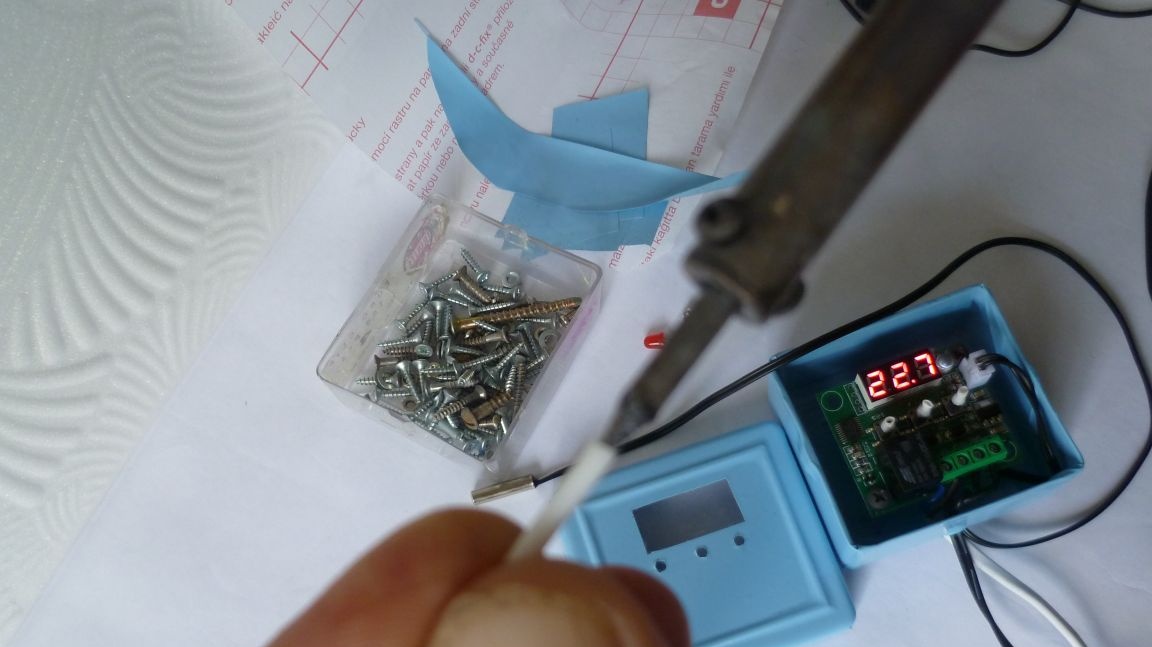
The temperature controller board was installed on racks from a plastic tube (from a ballpoint pen) as close as possible to the top cover. We make pushers of buttons from a plastic tube from cotton swabs or from the ballpoint pen. Then at one end of the tube we increase the diameter with a warm soldering iron and put on the buttons. The tube sat tight as it expanded with a soldering iron to the cone.
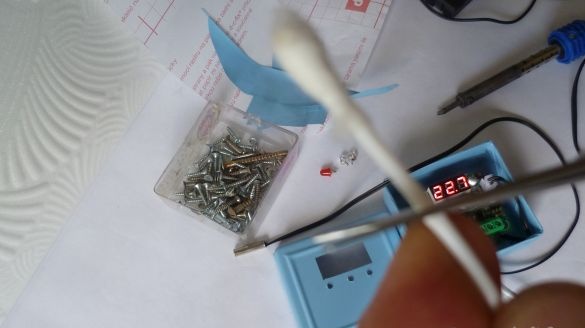
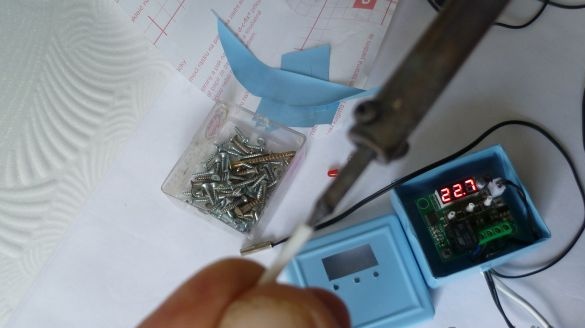
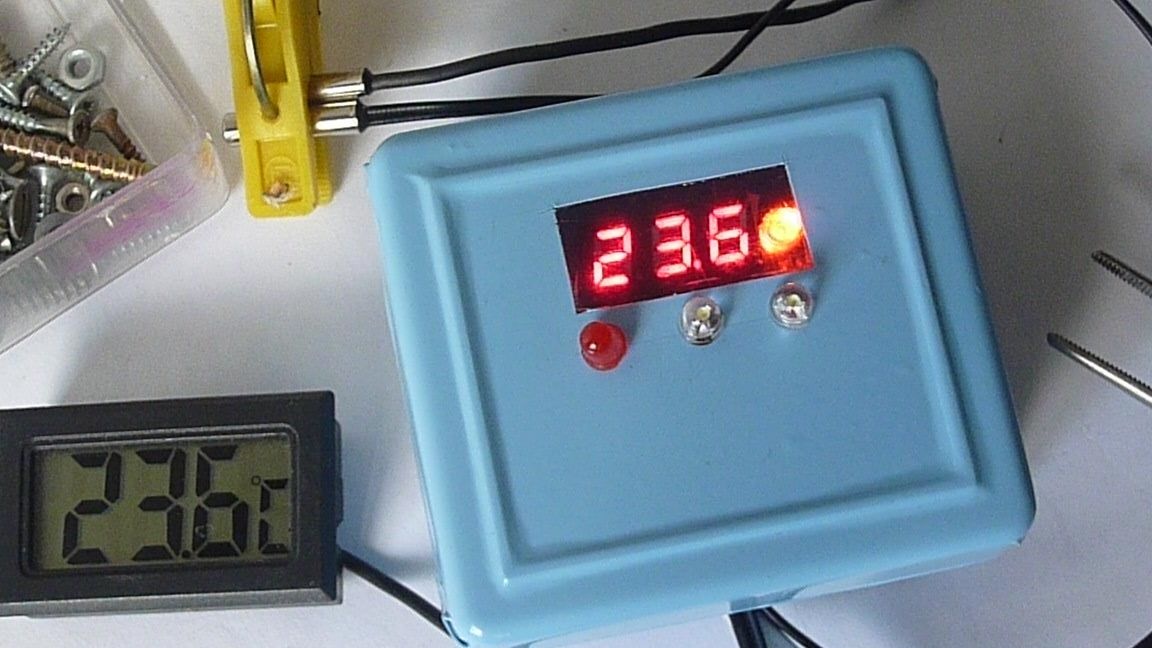
After we close the top cover and insert defective LEDs on the protruding pushers, after biting off part of the legs, they will be the buttons themselves.

There is an LED on the board to control the operation of the relay. It was hard to see from under the cover, I pasted on it the transparent part of the burnt-out LED, it became much brighter.

Step Three Check and adjust the regulator.
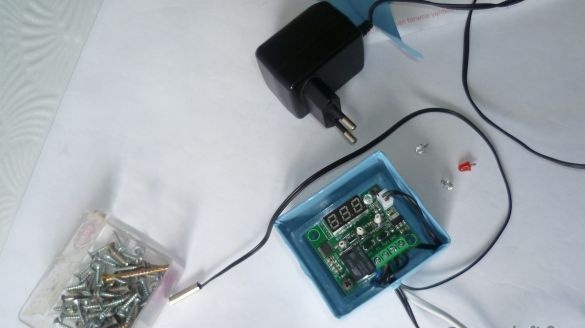
I connected a 12 V adapter to power the thermostat (you can use any 12 V power supply and a current of 0.1 A). I compared the temperature readings with a reference electronic thermometer, as a result they turned out to be the same.

It’s easy to set up the regulator. To enter the programming mode, press and hold the SET button for 6 seconds, then adjust with the buttons. To save the settings, press and hold the SET button, or do not touch the buttons for 10 seconds. All settings of the thermostat will remain in the non-volatile memory of the controller even after turning off the power to the device.
Setup Modes
P0 cooler or heater mode C / H
P1 hysteresis setting 0.1-15 degrees (difference in relay switching mode)
P2 setting the upper operating temperature limit
P3 setting the lower operating temperature limit
P4 temperature adjustment
P5 relay on delay (0-10 sec.)
P6 emergency temperature rise. P4 mode is used to fine-tune readings on a model instrument.
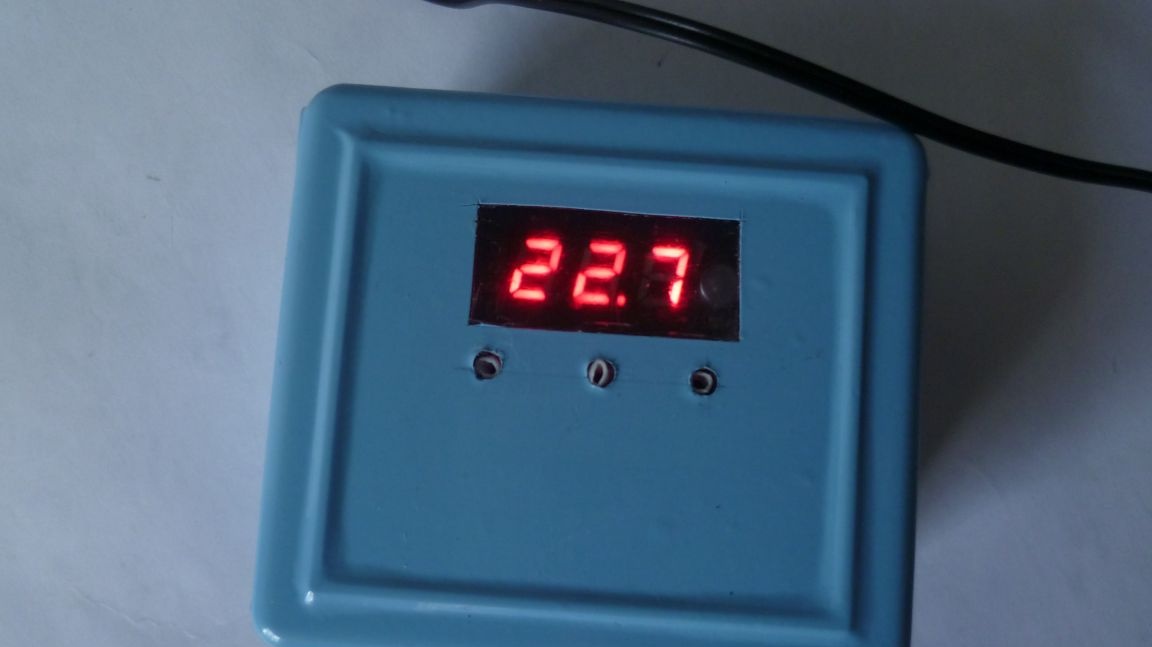
On this, all the improvements and alterations are completed. As a result, having mounted the circuit board in the box, we protected the device from moisture, mechanical damage to the electronics and did not allow the electric shock of people. After alteration, you can use the thermostat for its intended purpose.
In general, this is a good inexpensive device (100 rubles) with great opportunities in the field of application.
The list of tools and materials
-knife or scissors;
-screwdriver;
soldering iron;
-tester;
- a plastic tube from ear sticks or a fountain pen rod;
-malfunctioning LED with a diameter of 5 mm-4 pieces;
-Plastic racks-4 pcs;
-connecting wires;
-12V power adapter;
-screws;
- a plastic box from under screws with a transparent cover;
-adhesive tape.
Step one. Case manufacture.
The disadvantage of the board is that it is not suitable for installation in the case, the buttons and indicator are located below the relays and terminals.

Craftsmen have a different layout for the board of this regulator - who cuts the windows in the case for indicators, relays, connectors, some solder the buttons and the indicator, then mount them separately But I decided to install the board in a transparent case, a box came from under the screws.
First I wanted to paint it by pre-gluing a window for the LED indicator screen. But then he changed his mind and decided to tape it with self-adhesive tape (there were pieces from the repair left). It turned out quickly and in my opinion it seems to be not bad. After we make a window in the film for the LED screen and drill passages for the buttons
Step Two Installing the temperature controller electronic board.
The temperature controller board was installed on racks from a plastic tube (from a ballpoint pen) as close as possible to the top cover. We make pushers of buttons from a plastic tube from cotton swabs or from the ballpoint pen. Then at one end of the tube we increase the diameter with a warm soldering iron and put on the buttons. The tube sat tight as it expanded with a soldering iron to the cone.

After we close the top cover and insert defective LEDs on the protruding pushers, after biting off part of the legs, they will be the buttons themselves.
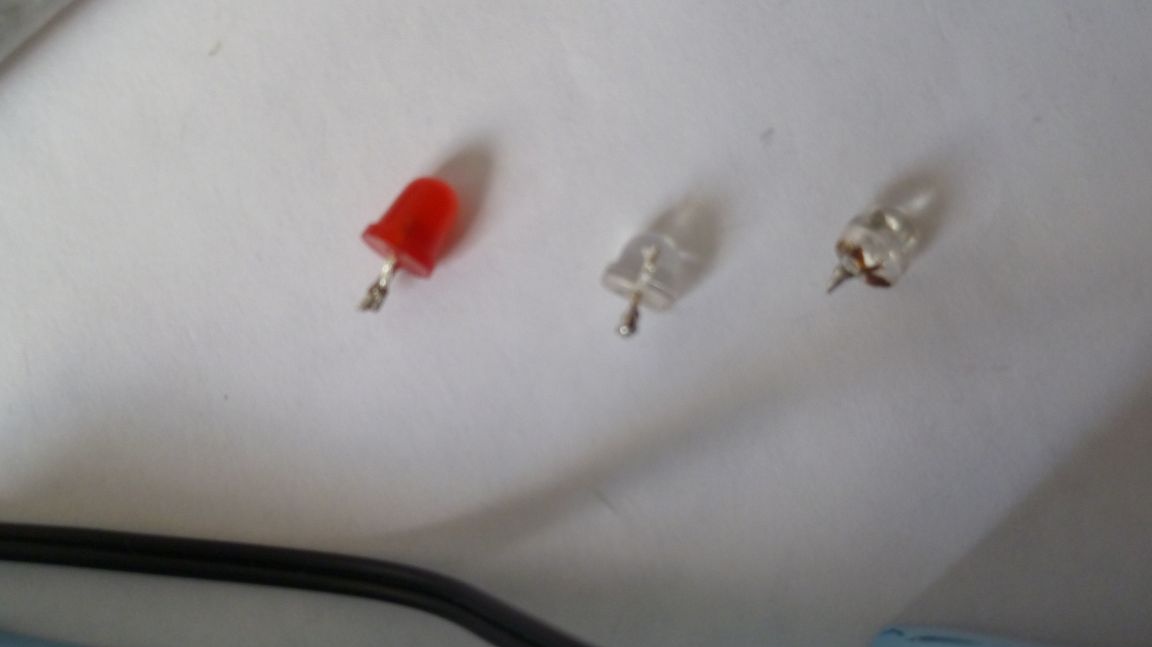
There is an LED on the board to control the operation of the relay. It was hard to see from under the cover, I pasted on it the transparent part of the burnt-out LED, it became much brighter.
Step Three Check and adjust the regulator.
I connected a 12 V adapter to power the thermostat (you can use any 12 V power supply and a current of 0.1 A). I compared the temperature readings with a reference electronic thermometer, as a result they turned out to be the same.
It’s easy to set up the regulator. To enter the programming mode, press and hold the SET button for 6 seconds, then adjust with the buttons. To save the settings, press and hold the SET button, or do not touch the buttons for 10 seconds. All settings of the thermostat will remain in the non-volatile memory of the controller even after turning off the power to the device.
Setup Modes
P0 cooler or heater mode C / H
P1 hysteresis setting 0.1-15 degrees (difference in relay switching mode)
P2 setting the upper operating temperature limit
P3 setting the lower operating temperature limit
P4 temperature adjustment
P5 relay on delay (0-10 sec.)
P6 emergency temperature rise. P4 mode is used to fine-tune readings on a model instrument.
On this, all the improvements and alterations are completed. As a result, having mounted the circuit board in the box, we protected the device from moisture, mechanical damage to the electronics and did not allow the electric shock of people. After alteration, you can use the thermostat for its intended purpose.
In general, this is a good inexpensive device (100 rubles) with great opportunities in the field of application.