

The use of energy-saving technologies allows us to significantly reduce financial costs. In lighting, LED technology has already firmly and rightfully won its place. In terms of energy efficiency, LED lighting products come first. The cost of these devices is gradually decreasing. The advantage is also the possibility of obtaining any spectrum of the light flux and a longer service life.
Previously, I tried to make LED lamps based on housings from aerosol cans, but due to the small size in this case, an insufficient number of LEDs was placed. I decided to do something more impressive. An old aluminum baguette was found in the pantry. It is a U-shaped profile with plastic plugs on the sides. A great option for the lamp housing.

This article describes how to do it yourself make led lamp.
See the entire manufacturing process in the video:
[media = // www.youtube.com/watch?v=FBN7F0RG89E]
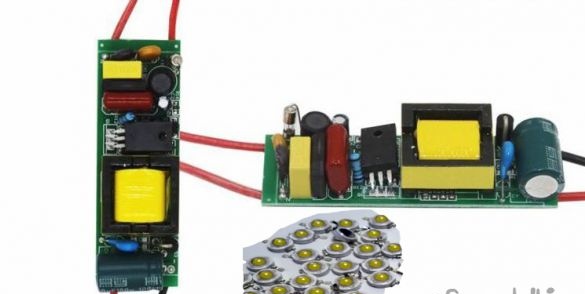
The list of tools and materials
-screwdriver;
-knife or scissors;
soldering iron;
Cambridge;
-aluminium foil;
-connecting wires;
-driver for 24W LEDs, current 0.3A-1pc;
- LEDs 1W cold white and warm white - 24 pcs;
-Double-sided tape;
-aluminum profile from a baguette;
- thermal paste.
Step one. Preparing the housing of an LED lamp.
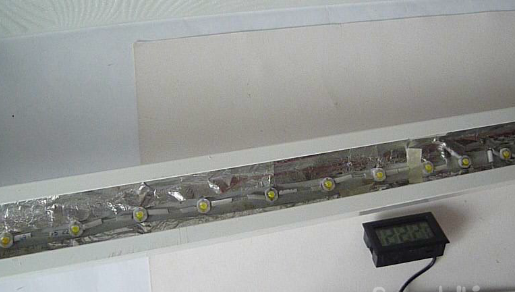
I needed a case length of about 70cm. Cut off part of the profile by these sizes. We remove the plastic plugs so that they would not interfere with the installation of LEDs and drivers. We mark with a pencil the places for installing the LEDs.
Step Two Assembly of the LED lamp.
Using thermal paste, we glue the LEDs on the markup. I had only twelve LEDs of a cold white glow and the rest of a warm white glow. But in the end we got mixed white light with a slight yellow tint (it’s even more pleasant than yellowish light from an incandescent lamp).
Further, observing the polarity, we solder the LEDs, putting on the place of soldering cambric. For a better distribution of the light flux on the inside of the profile, we will lay aluminum foil. It will serve as a reflector of light. You can fix it with pieces of transparent tape.
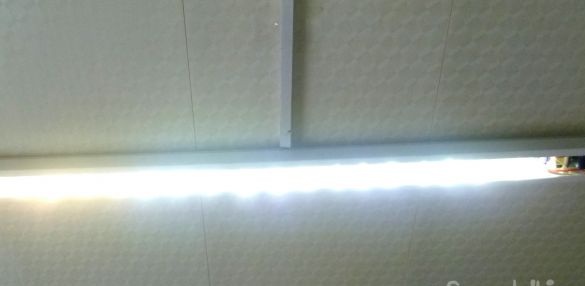
We mount the driver on the edge of the housing of the LED lamp by gluing it to a double-sided tape (during operation, it also heats up and heat will be removed through the tape to the body). We connect the wires from the LEDs and the 220V network. We install plastic side plugs and the lamp is ready for testing.
Step Three Test LED lamp.
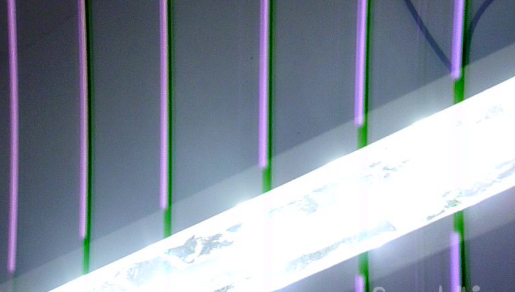
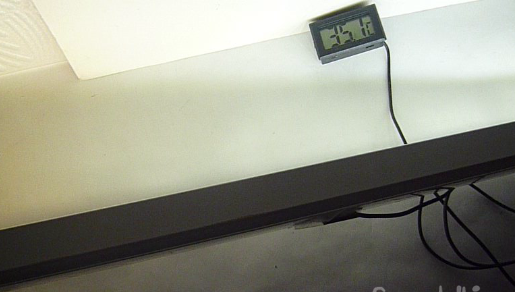
A sensor was glued to the body of the LED lamp with tape electronic thermometer for measuring the heating temperature of LEDs. We include 220V in the network. The light is quite powerful, so that the picture on the camera flashes.
After fifteen minutes of operation, the digital thermometer showed 35 degrees, which indicates a good heat sink profile.
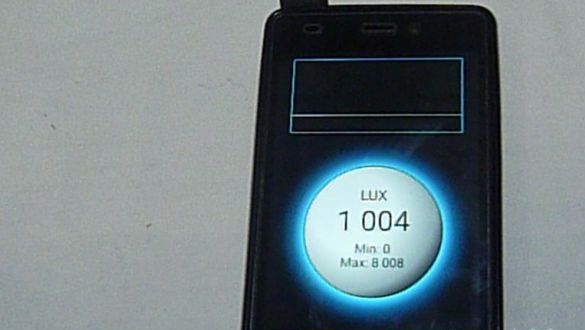
It was interesting for devices to compare the illumination with a 100W incandescent lamp. But I don’t have a light meter, and using the application on the Lux Meter phone (you can download it on the Play Market) you can at least roughly do it. I placed a 100W lamp near the lamp and measured it. The test of the lamp showed that the illumination is about the same as that of a 100W incandescent lamp, but the spectrum of the glow is much more pleasant by eye.
As a result, we have four times less power consumption (24 one-watt LEDs).
You can choose for the future whatever the plastic diffuser on the lamp will look more aesthetically pleasing and the light will be softer. To make such a LED lamp on your own is beyond the reach of any beginner and this will not lead to a large investment of time and money.
The whole alteration went a couple of hours of free time and 222 rubles (LEDs with Aliexpress 24x3 = 72r and driver 150r). Baguette from curtains for free, wires similarly matched from garage trash.