

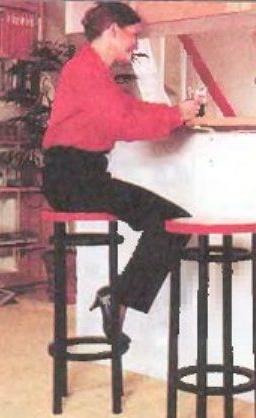
A good bar stool will add amenities not only to visitors to public institutions, but also to owners of urban apartments or suburban real estate. A self-confident craftsman will need very little time to make several copies to the joy of the family.
Tools and materials:
To implement both options, you will need available materials and a minimum set of tools, which you will have no problem purchasing at any hardware store:
- array, plywood, furniture plate;
Self-tapping screws, PVA glue;
- screwdriver, jigsaw, grinder;
-bits, screw and feather drills.
The first version of solid wood
The bar stool perceives significant loads, so the skeleton is better made from hardwood (birch, oak, ash), and for the seat in sight, the easily processed pine will fit.
Step one: making blanks
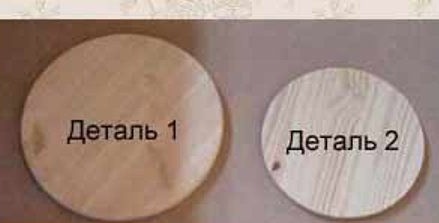
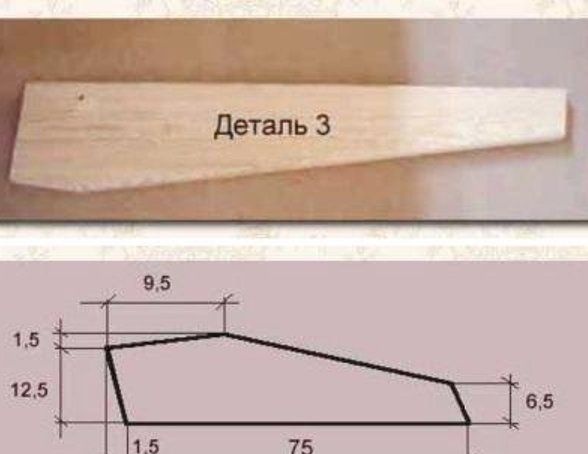
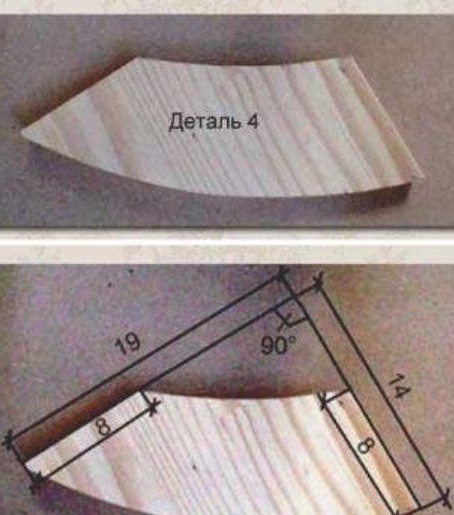
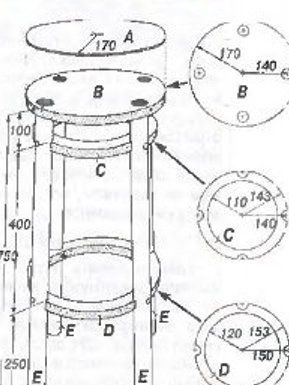
Four legs and a circle with a diameter of 360 mm are cut out from an array of 30 mm with a jigsaw, and for stiffeners and a technological assembly circle of 260 mm, a material with a thickness of 20 mm is needed. Even better, the last part hidden from the eyes of the finished product is cut out of plywood, which is difficult to process from the ends, but has high fracture strength in all directions. The fibers of the array should be oriented along the long lines of the workpieces; the presence of a cross-layer is unacceptable.
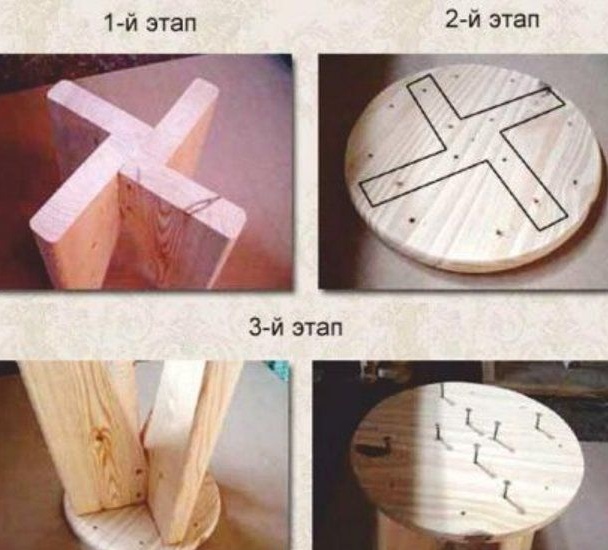
Step Two: Build a Chair
The drawings indicate the overall dimensions of the workpieces and the location of the holes. When drilling across the fibers, a drill with a diameter of 6 mm is used, at the ends 3 mm. The legs are attached to the small circle and between each other with 5x80 screws, the seat is attached to the small circle with 5x40 fasteners, and the stiffeners are located on the floor side with a corner and 5x20 screws. For greater structural strength, the abutting surfaces of parts can be coated with a thin layer of PVA glue.
Step Three: Surface Finish
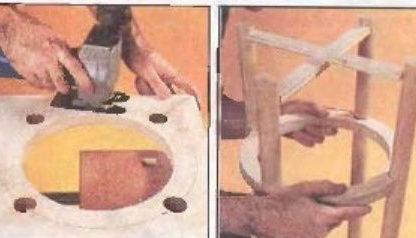
Curly machining of the remaining edges of the parts is performed with a manual milling cutter or simply blunt with a planer. Then, all surfaces are carefully sanded by hand with a sandpaper wound on a bar or a grinder of any type. It is advisable to repeat the operation several times, slightly moistening the surface after each and allowing the parts to dry.As a result, after the subsequent application of the stain, the pile of trimmed fibers almost does not rise, and the final stage of applying the varnish allows you to get a smooth protective film.
The second option with round legs
In this design, chiseled balusters or pieces of holders for agricultural tools with a diameter of 30 mm are used as legs, but it is possible to take blanks of a different size and make appropriate adjustments to the drawings.
Step one: making blanks
A simpler form of self-sawing parts from plywood simplifies the layout, but you will need to use a 30mm feather drill. At high revolutions of the drill, it is inconvenient to work with it, therefore, it is necessary to use a rotator for sampling blind holes in the lower mounting circle.
Step Two: Build a Chair
The upper edge of the legs is inserted into the sockets of the mounting circle on the glue. It should be borne in mind that polyvinyl acetate compositions (PVA and other brands) do not have moisture resistance, therefore, if it is planned to operate in a damp environment, it is better to use synthetic carpentry glue. The rings used instead of stiffeners, cut from plywood 25-30 mm thick, are connected to them with 6x70 furniture bolts, which have beautiful decorative hats. Their color is selected so that in the finished product they harmoniously fit into the overall picture. The upper one is 10 cm from the seat, the lower one is 25 cm from the floor, all dimensions are indicated on the drawings.
Step Three: Surface Finish
Grinding with a hand grinder or sandpaper, in order to avoid blunting of the cutting tool, abrasive grains stuck between wood fibers, should be done after sawing and drilling. Next, uniform stain is applied (preferably with a foam swab, not a brush) and varnishing. The last operation is best done with a spray gun in a room with dust-free air.
Conclusion
The work is over, it's time to please the result home and demonstrate the fruits of their masterful work to guests who are likely to appreciate the originality of chairs that are different from bored standard designs. The durability of the products will depend primarily on the quality factor of the materials used, so it’s not worth stinting especially.
Good luck with your plans!