

Hello to all lovers homemade. One of these days, the handle on my little soldering iron broke, of course I was a little offended that with a little pressure the factory handle cracked, but I thought and decided that it would not be so difficult to make it home conditions, having a turning machine, which, by the way, I also assembled myself. I chose the material, of course, wood, since I really like working with it. Before you start manufacturing pens, you need to decide what you need from tools and material.
To make a pen for a soldering iron do it yourself will need:
* Hardwood
* Wood lathe, in my case, homemade
* A pair of bolts
* Heating element and tube with a soldering iron
* Sandpaper
* Electric drill
* Drill
* Hacksaw
* Wire for connecting a soldering iron
That's all you need to make a pen for a soldering iron.
Now we turn to the manufacturing process.
I suggest you familiarize yourself with the video material in which I filmed the entire workflow.
Step one.
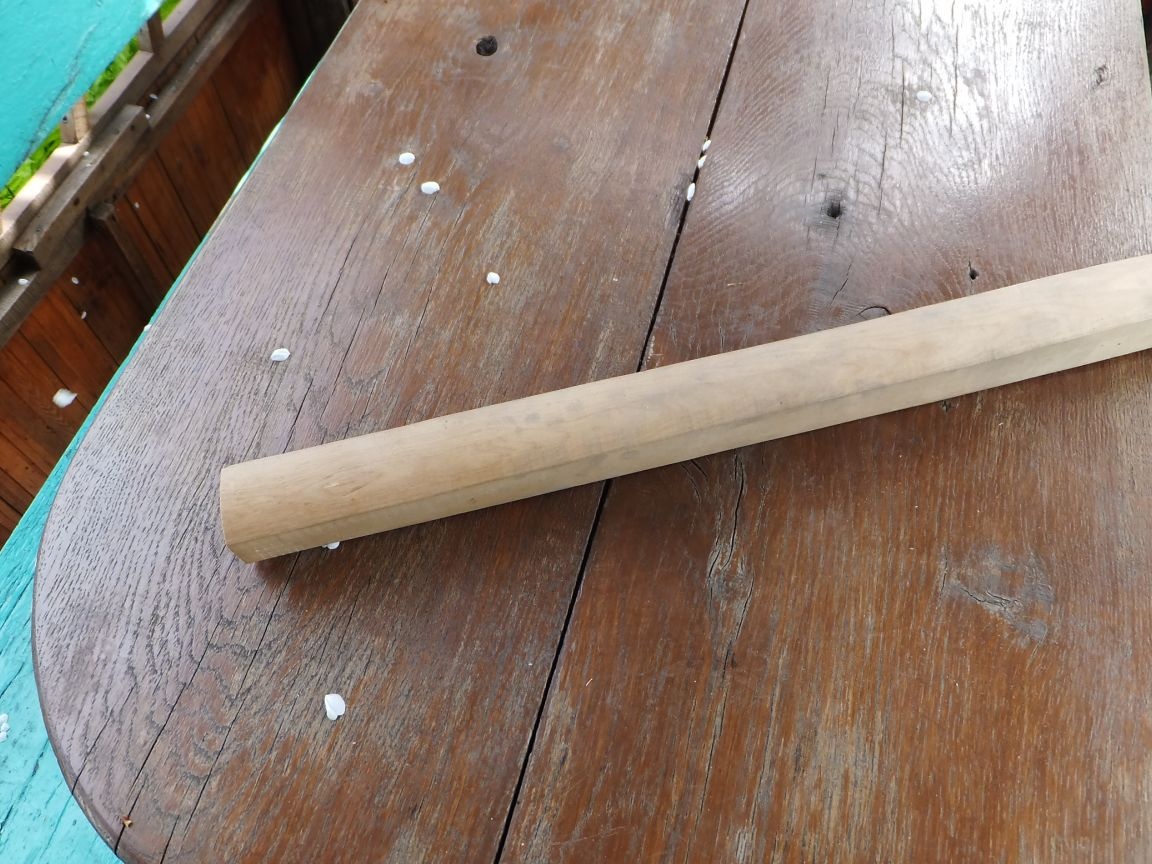
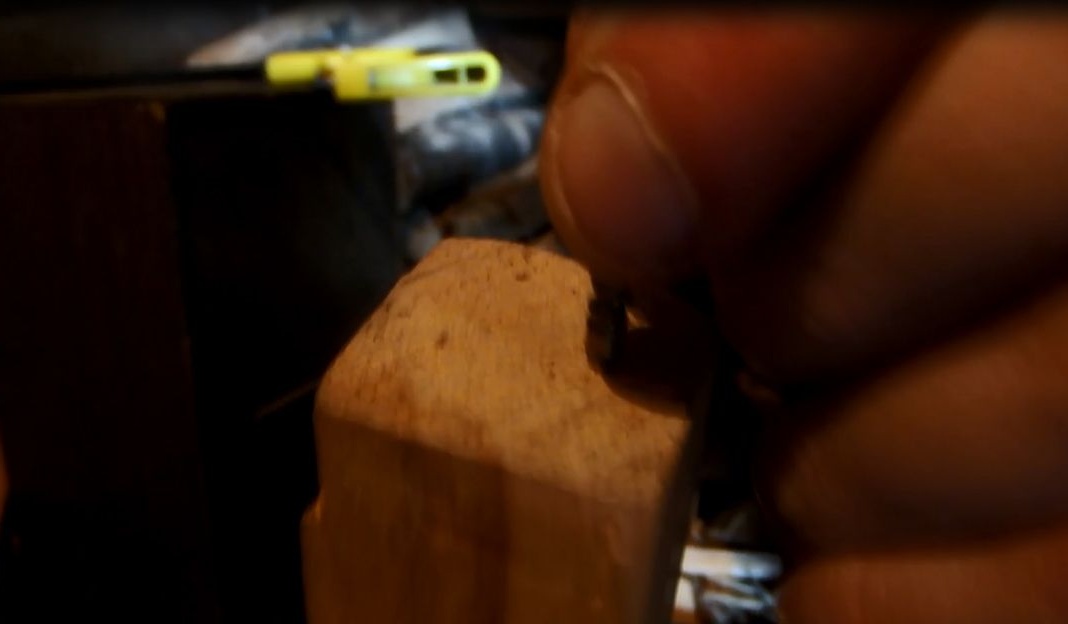
First of all, you need to choose a hardwood blank, for example, oak. Next, approximately measure out the desired segment, which must be sawed off with a hacksaw in metal. The size of this segment is directly proportional to the size of your hand, as this will determine the convenience of using a soldering iron in the future. Also for even greater convenience, you can make finger grooves, but this is everyone’s business.
Step Two
It's time to fill the workpiece in the machine, but before that you need to make marks for fixing in the front headstock of the machine. Slightly press the workpiece to the front headstock of the machine to leave traces of teeth.
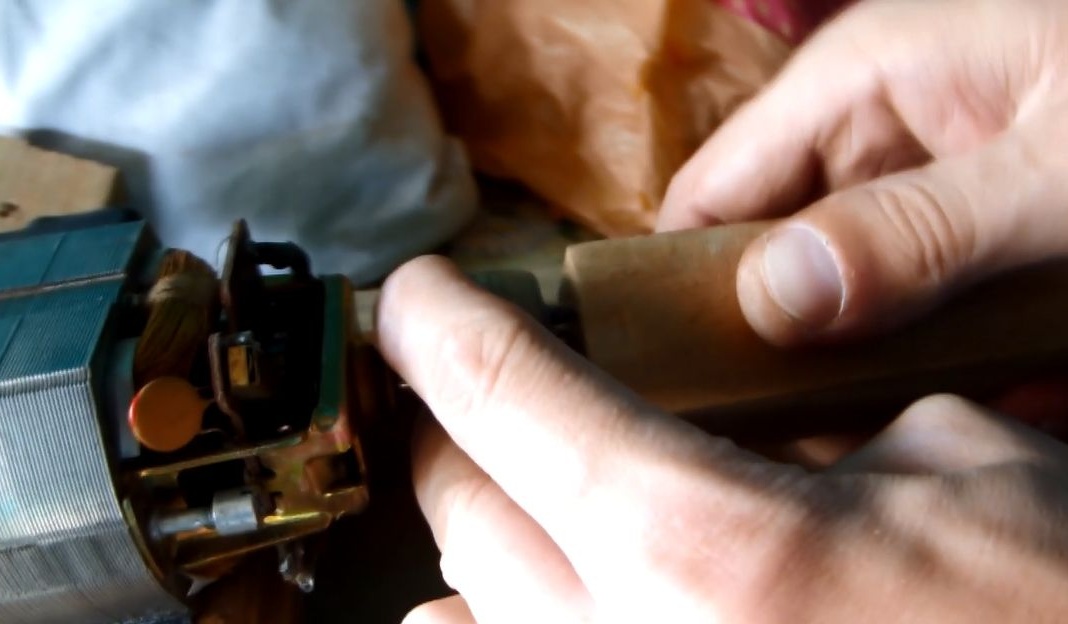
After that, we screw holes with a nail, due to which the workpiece will be held.
Further, the same thing needs to be done with the central tooth and the center of the tailstock, it can be filled a little on the workpiece, thereby obtaining a sufficient recess.
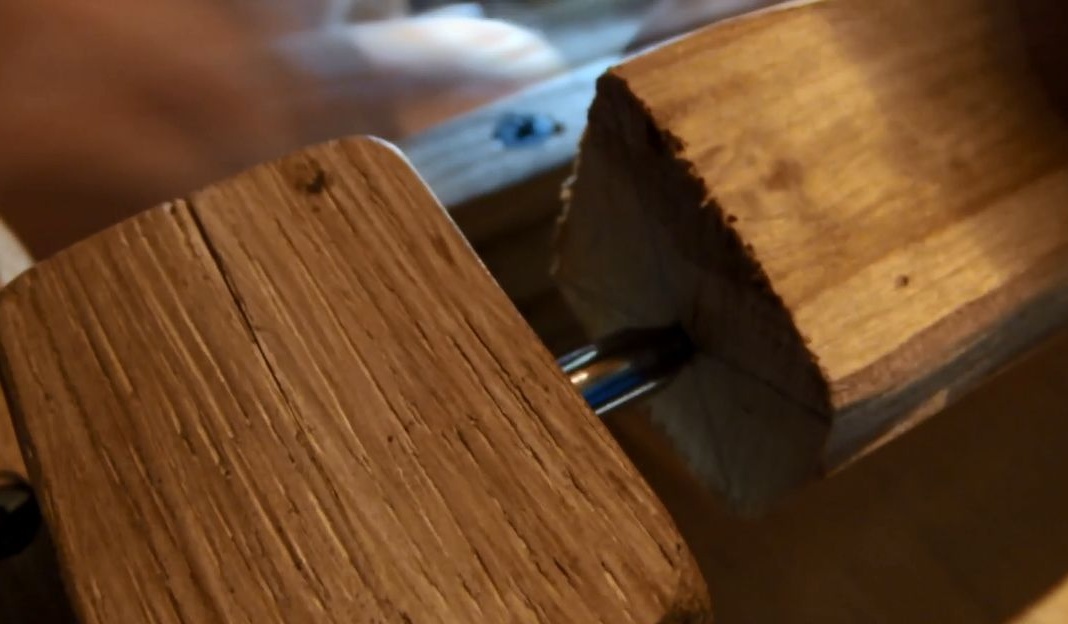
An important point, if you slightly screw these holes for mounting on the machine, then the chance that the workpiece will fly out will increase, so it’s better not to rush and do everything as high as possible.
Step Three
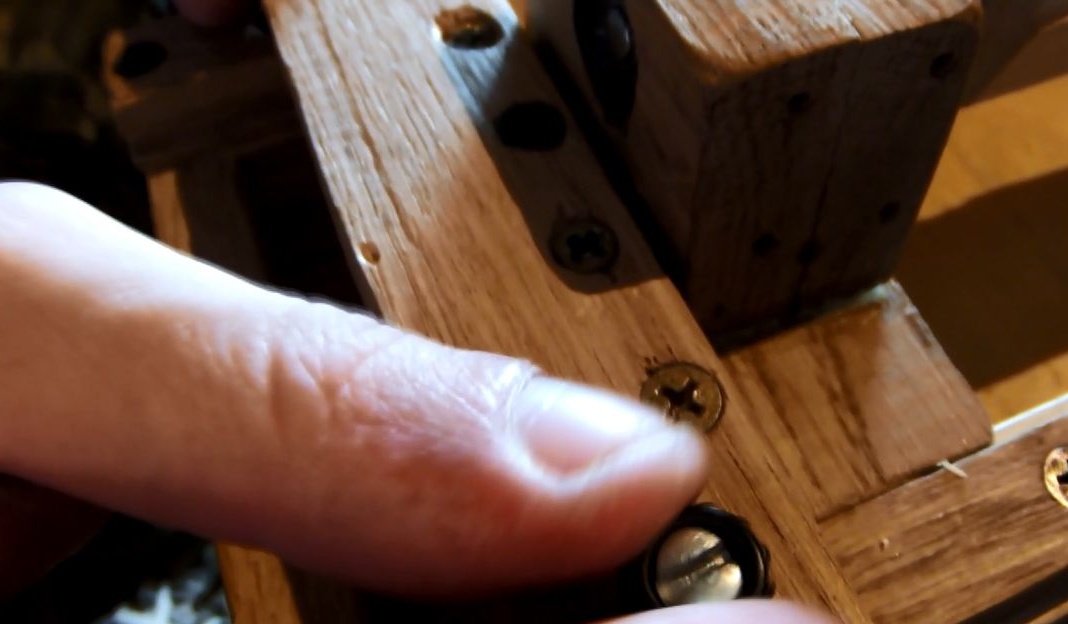
We press the workpiece with the tailstock and fix it with two screws so that it is stationary during operation.It is not necessary to lubricate the fastening place of the workpiece and tailstock, since its axis is mounted on a pair of bearings, which eliminates friction on the workpiece.
Step Four
After the workpiece is confidently fixed on the machine and the chances that it will fly out are almost zero, you can proceed to turning.
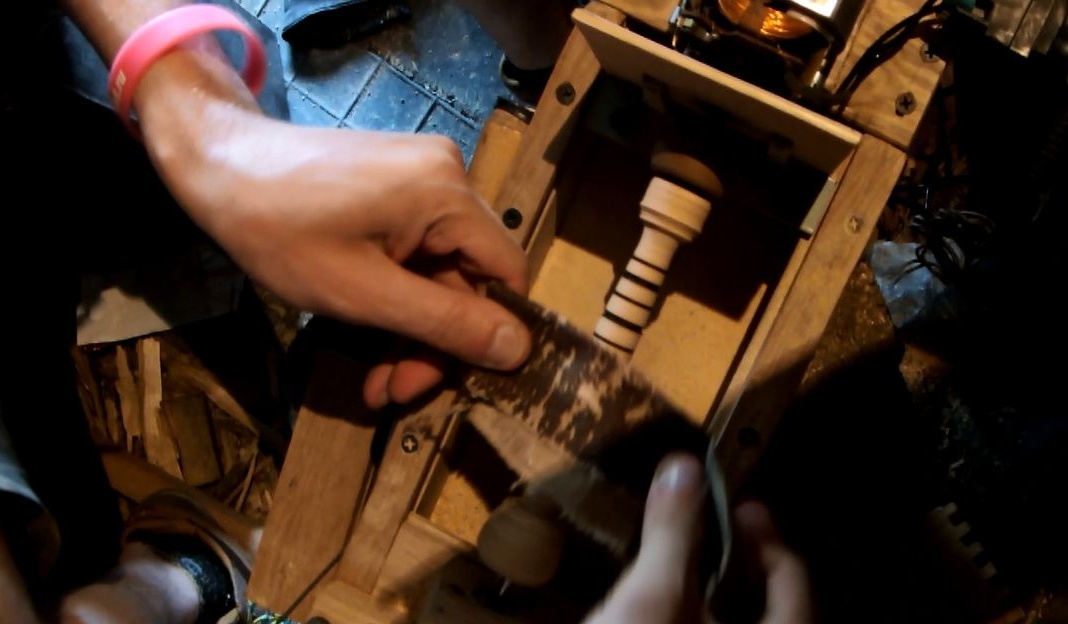
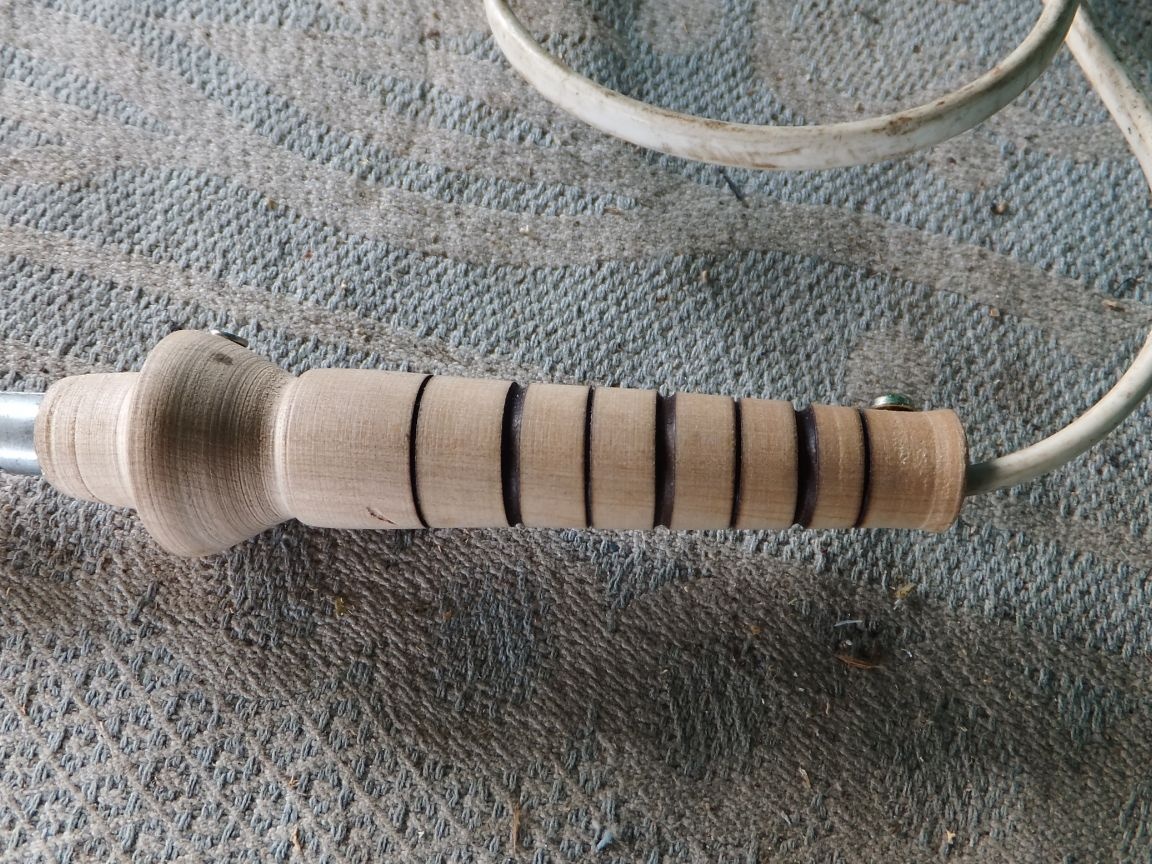
Wear safety glasses before turning on the machine.. Using a cutter, we grind out something similar to a handle with a growing cone at the end from a wooden blank, so that when soldering there is where to rest against, and also not to get burned.
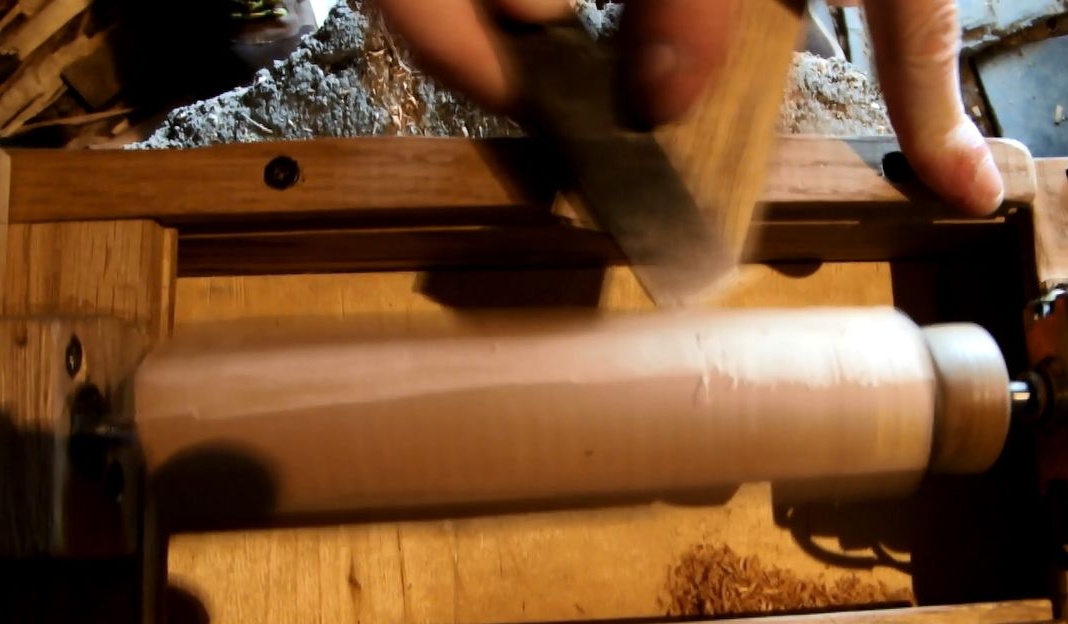
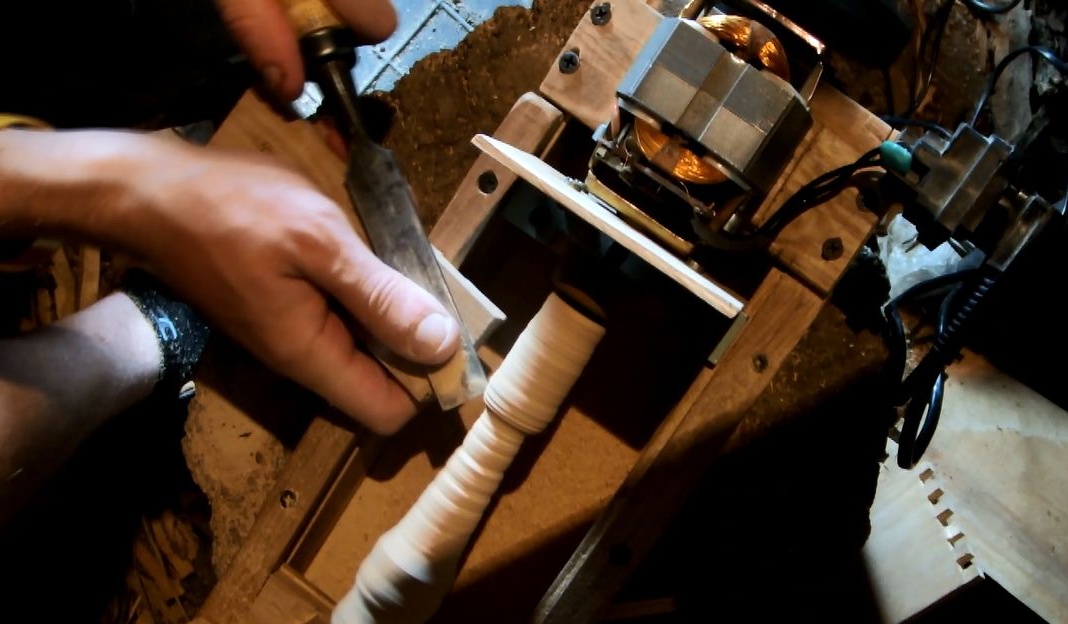
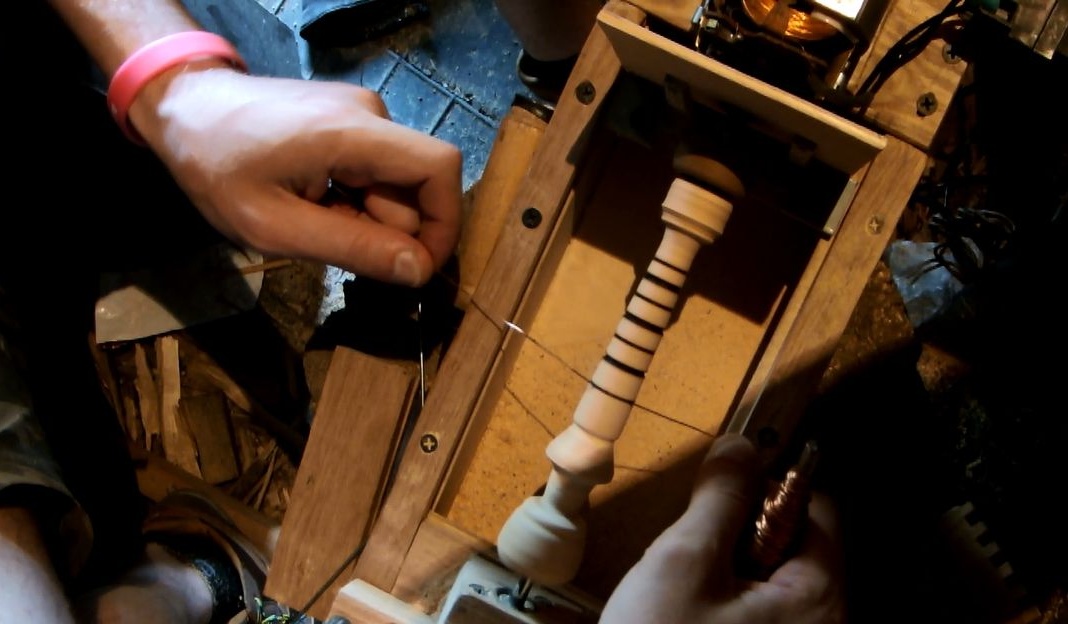
You can give a pen aesthetics in different ways, for example, I decided to make black strips of large and small size with a wire, which burns in the groove blank due to friction.
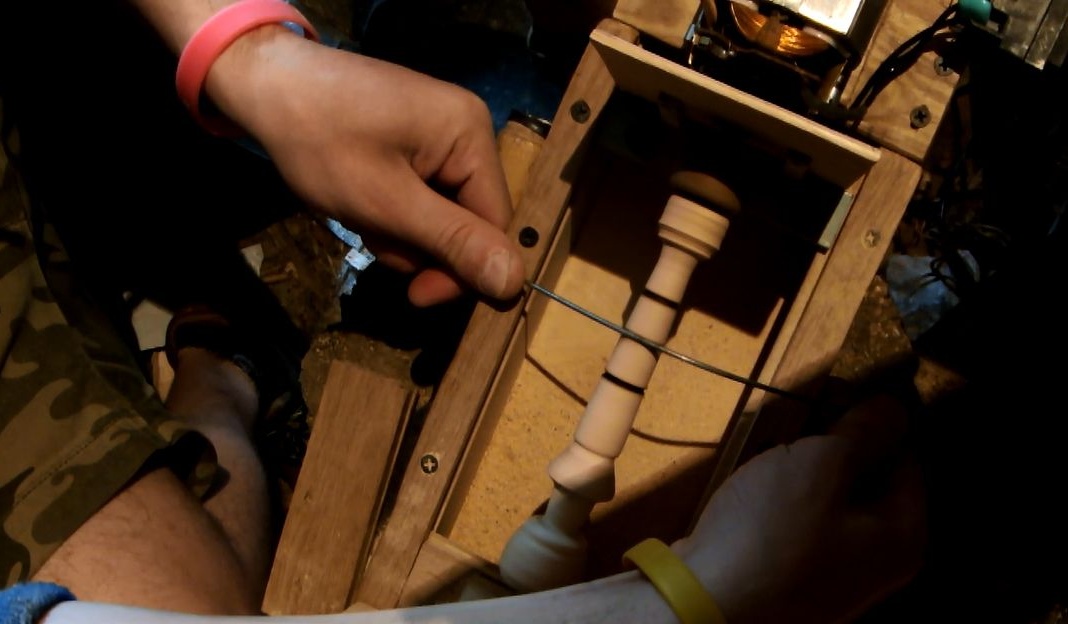
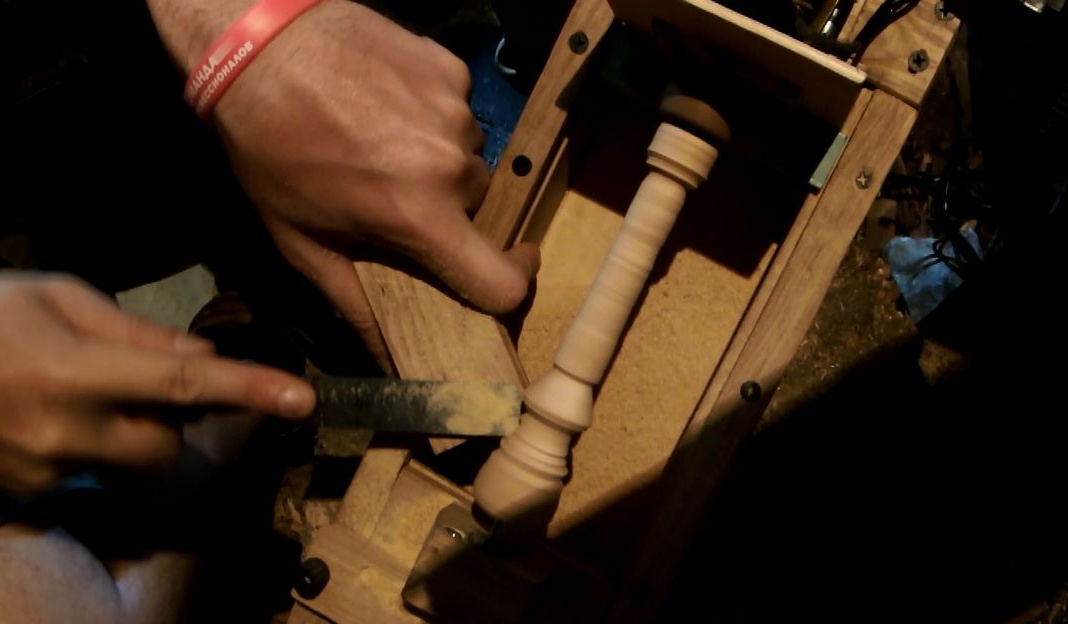
Step Five
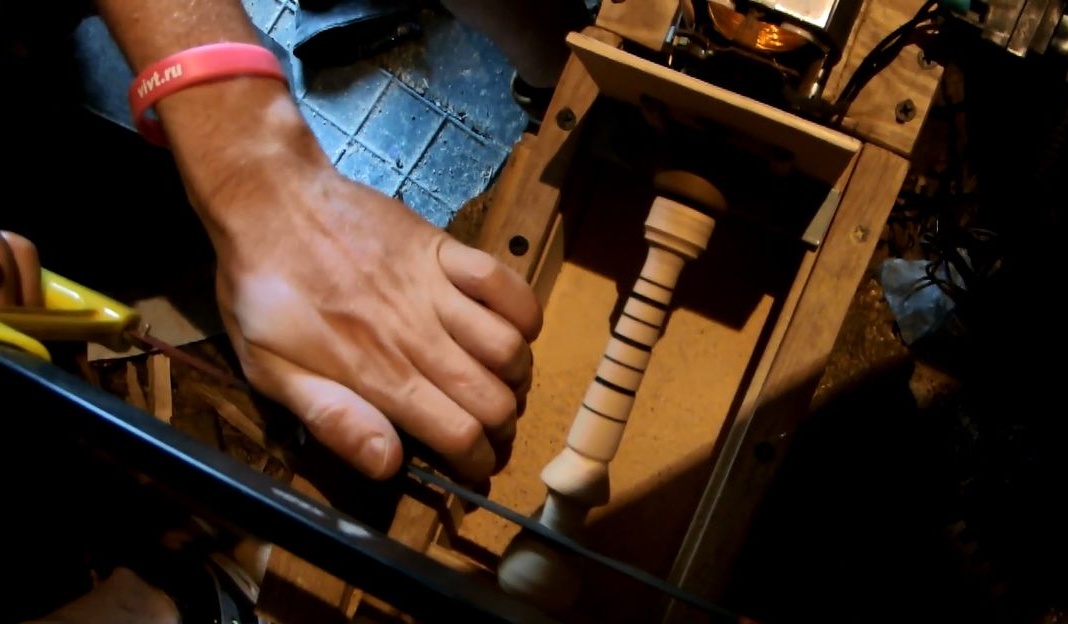
We grind the finished part with sandpaper, for this with a small emery, slightly press on the workpiece and drive along its entire length. If traces of sandpaper are visible, then reduce the graininess and repeat this step again.
We cut off the excess parts from the workpiece with a hacksaw in metal.
Step Six
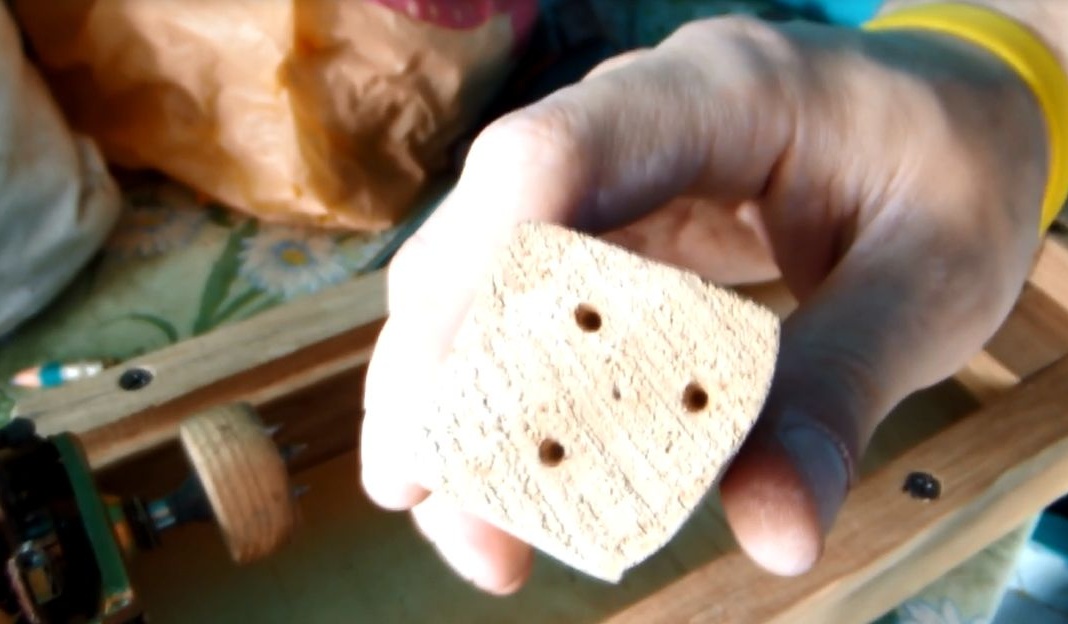
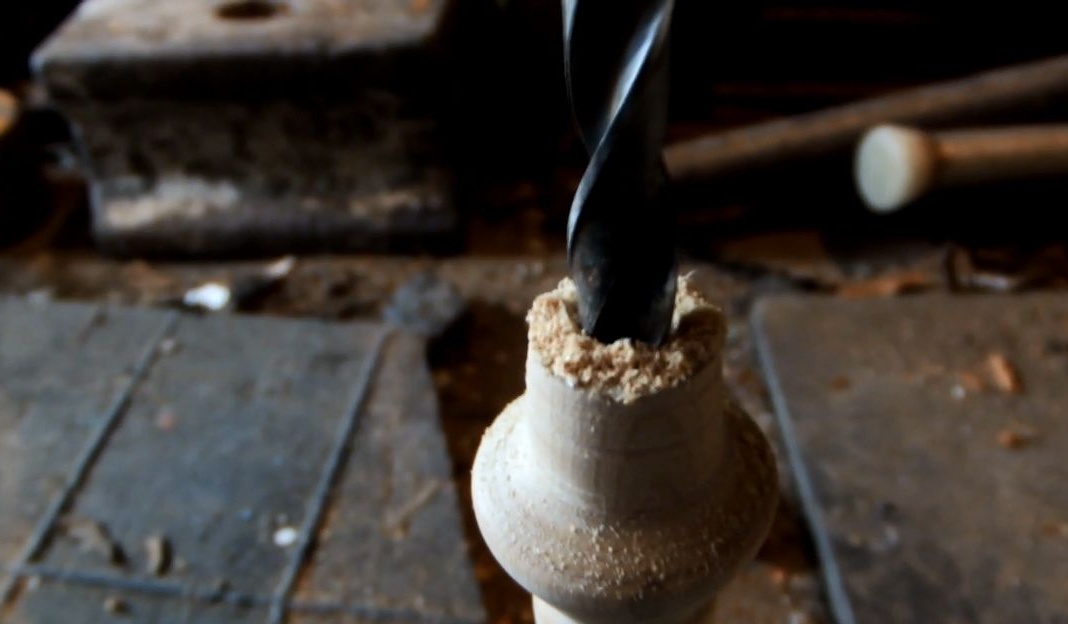
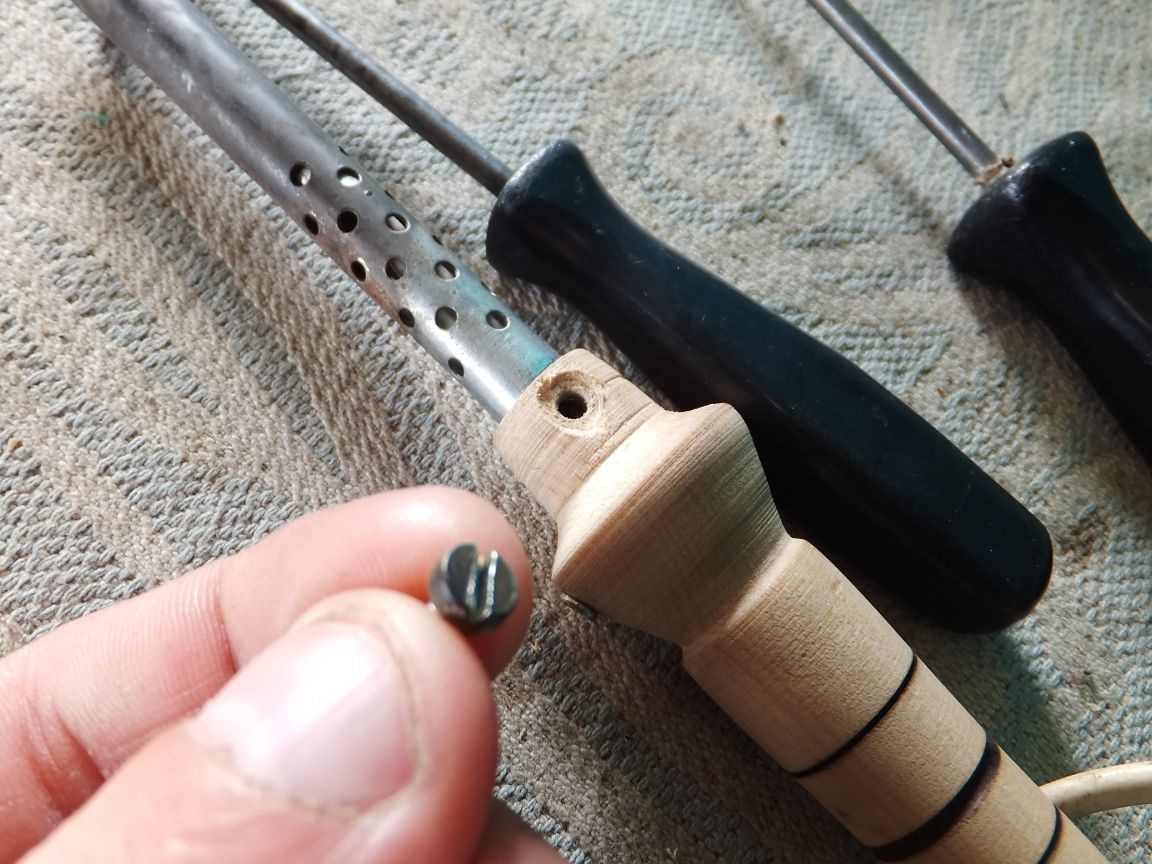
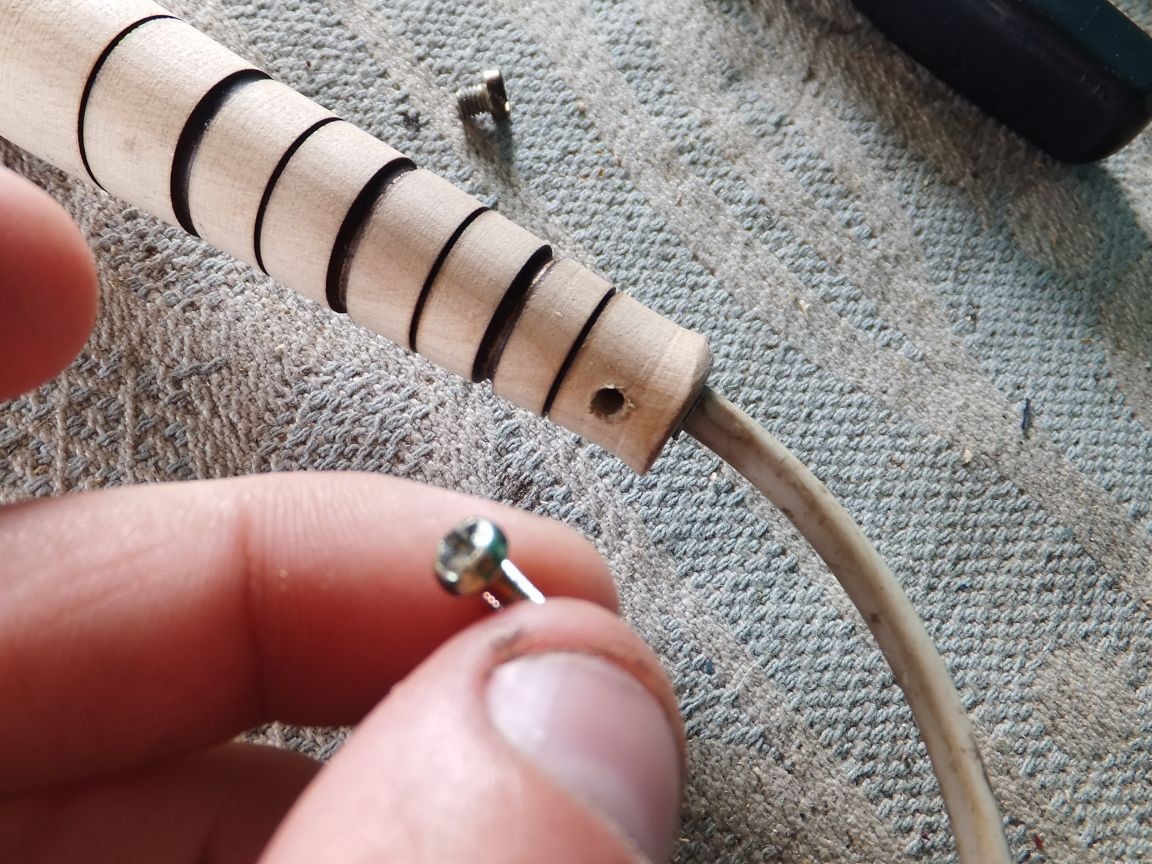
We install a drill in the drill, equal in diameter to the soldering iron tube, into which the heating element is installed and drill a hole in the handle, from the reverse side we pass a smaller drill in order to pass the power cord.

Seventh step.
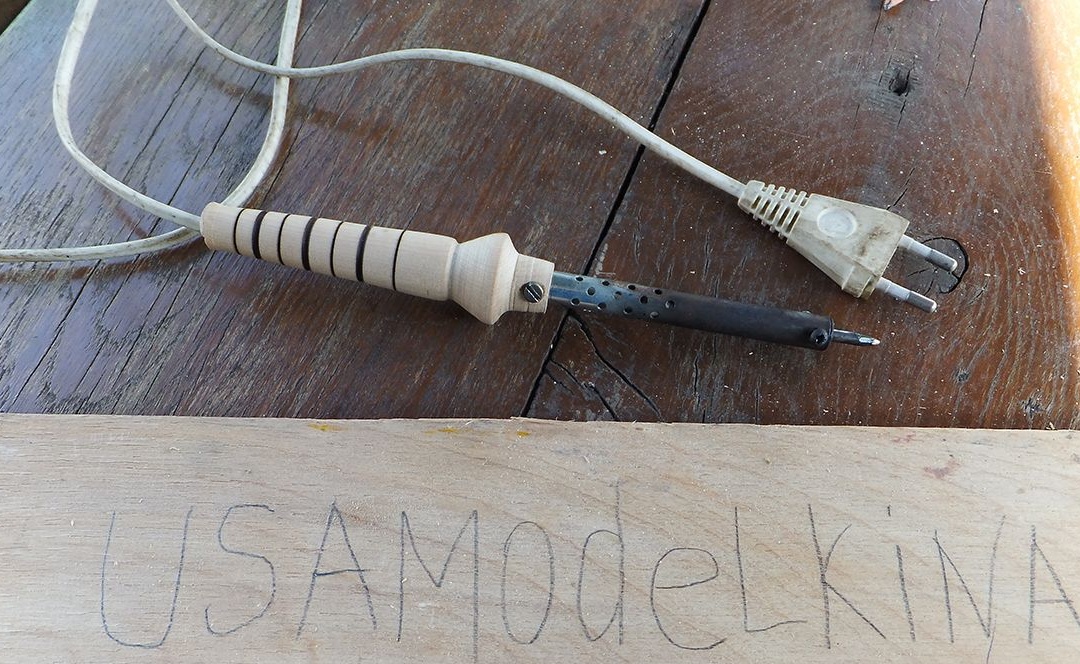
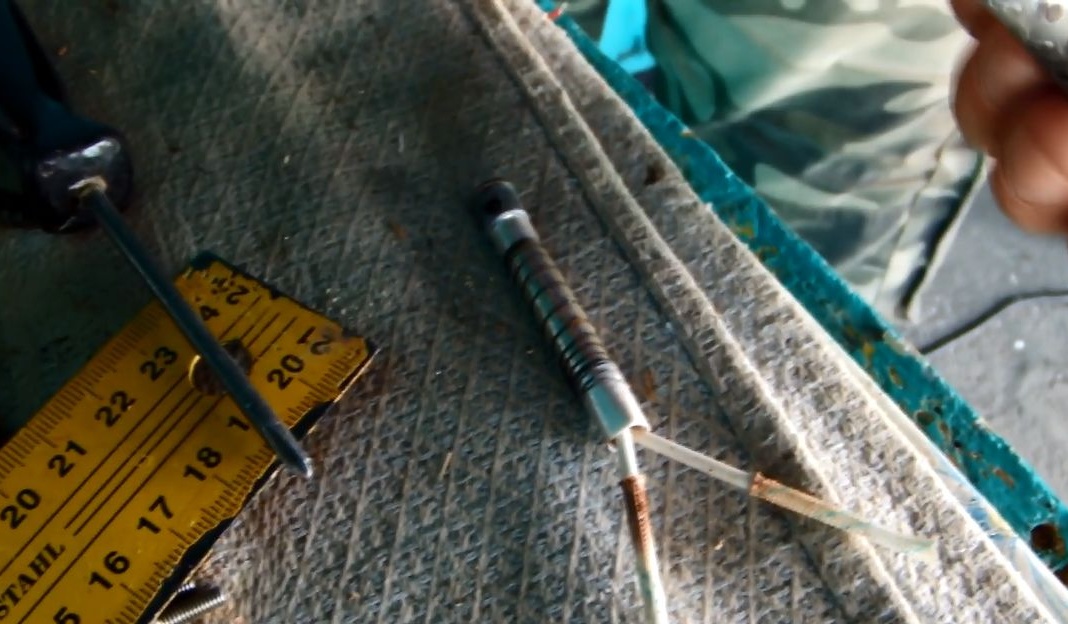
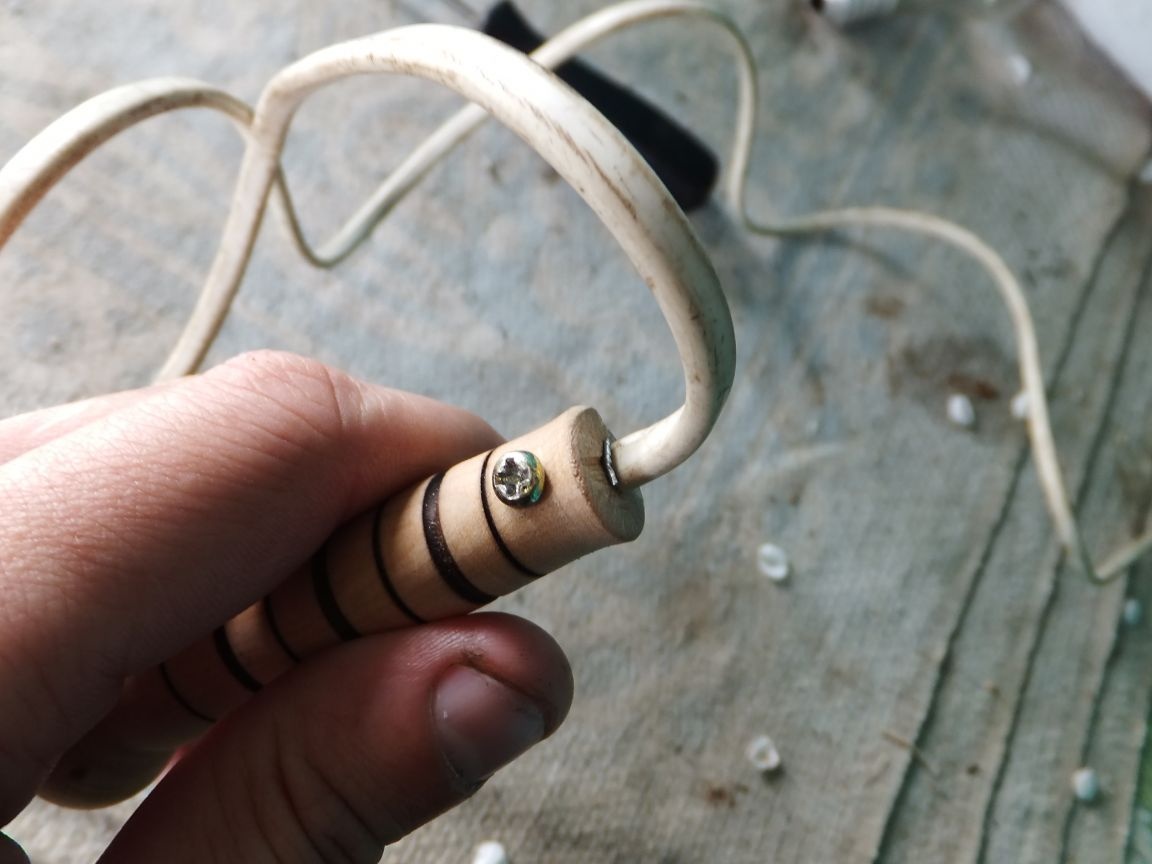
Pass the power cord with the plug into the handle and connect it to the heating element fixed to the tube. We screw this tube to the handle with a screw and at the end we fix the wire, also with the screw.
We put the sting in the soldering iron and fix it with a screw.
On this, the homemade soldering iron handle is ready and now it can be used for its intended purpose.
A little about the handle when using, it holds confidently, does not play and does not heat up when soldering. In the future, I will cover it with varnish, thereby protecting it from pollution and other adverse effects.
Thank you all for your attention and good luck in the new homemade products.