» Fixtures » Instruments "The simplest curvimeter from the elements of a burned" grinder "with your own hands

The simplest curvimeter of the elements of a burned "grinder" with your own hands

Hello. Yesterday I made the simplest curvimeter and I want to share with you the technology of its manufacture.

Periodically, it becomes necessary to measure the length of the curve line. For example, when working with a pipe bender, or in the manufacture of decorative elements ("curls") for cold forging, the material must be cut to a certain length to make the part. And how to find out that length? ))) So you have to figure it out approximately, cut off with a margin, and then, after manufacturing, cut off and throw away the excess ... So the idea arose to acquire a curvimeter.

The network has a lot of descriptions of the simplest such device, which does not even have any scale. The essence of his work is that the impeller does not rotate freely on the axis, but is screwed onto the axis by means of a thread. The master turns the wheel all the way, and then rolls it along the curved line on the sketch of the part. In this case, the wheel is turned on the thread for a certain number of revolutions. It is enough to turn the device over and roll it with a wheel all the way along the ruler, or tape measure - at the point at which it will be wrapped again until it stops and you need to read the readings. This will be the length of our curve line.

Here is such a curvimeter and I decided to collect ... I decided I decided, but my hands didn’t reach .... And so, being at my construction site, I decided to make a garden bench from the remains of building materials. I drew a sketch ... And again, before using the pipe bender, it would be nice to know the length of the section of the profile pipe, so as not to cut too much ... I thought ... Yes, and decided to collect the curvimeter first ... Construction is, of course, not a workshop but there was everything necessary ... Yes, and devicesomething primitive - you can collect it and "on the knee".)))))

So what I needed:

1. Clamping nut from angle grinder.
2. The handle from it is the same.
3. Trim stud M14.
4. Nut M14 (2 pcs.)
5. Scrap metal strip 25 to 4 mm.

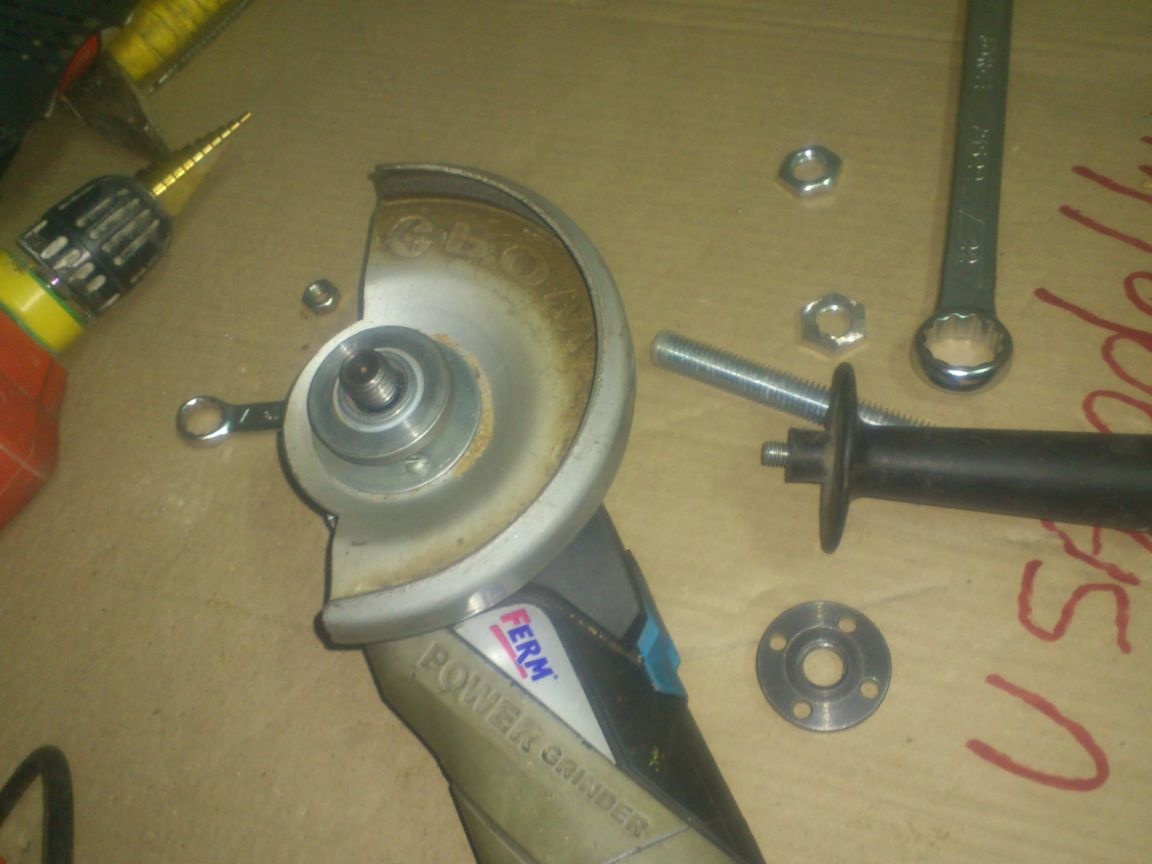
I have long decided to use the nut from the "grinder" as the impeller - this is a finished wheel with a thread inside! I also decided to take the handle “grinder” - it makes no sense to handshake something myself, if there are ready-made solutions! In addition, I have enough of this good - in the workshop there is a box with the remains of a power tool! Periodically, these residues act as "donors", only ... Nuts and arms do not break (in the angle grinder, the rotor and gearbox usually fail), and therefore there are a lot of them.So, "with a black sheep - even a tuft of wool!" )))))

But this box is in the workshop. I’m at a construction site ... And therefore, without further ado, I dismantled one of my grinders!


Then I will complete it! Fortunately, the elements are the same standard !!!
So, there is a wheel!
As you know, on the spindles of all grinders, the thread is the same - M14. Therefore, it is necessary to use a stud with such a thread as the axis. I used this pin in the manufacture of the carriage and vice of my cutting machine, so I had trimmings.

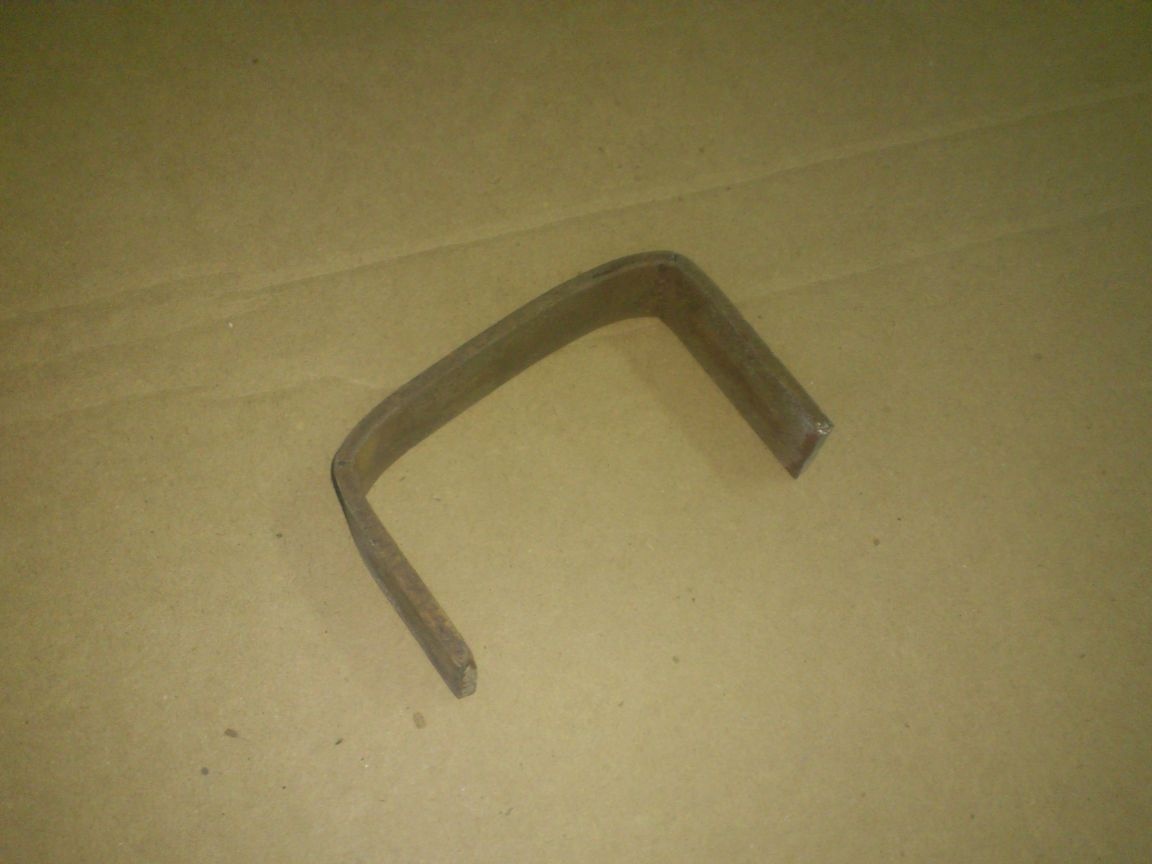
For the manufacture of the bracket, in which the pin axis will be mounted, I used a 25 mm strip, a piece of which I found in my scrap metal.

Cut off about 20 cm, and bent it, leaving the middle part about 6 cm long. (I proceeded from the length of the studs. It would be nice to do it in a vise, but the vise remained in the workshop ... And so I slightly sawed the grinder and bent it with a hammer, using a sledgehammer as an anvil ... (But so what! ... But then "now" and not "later" ...))). The result is such an arm:

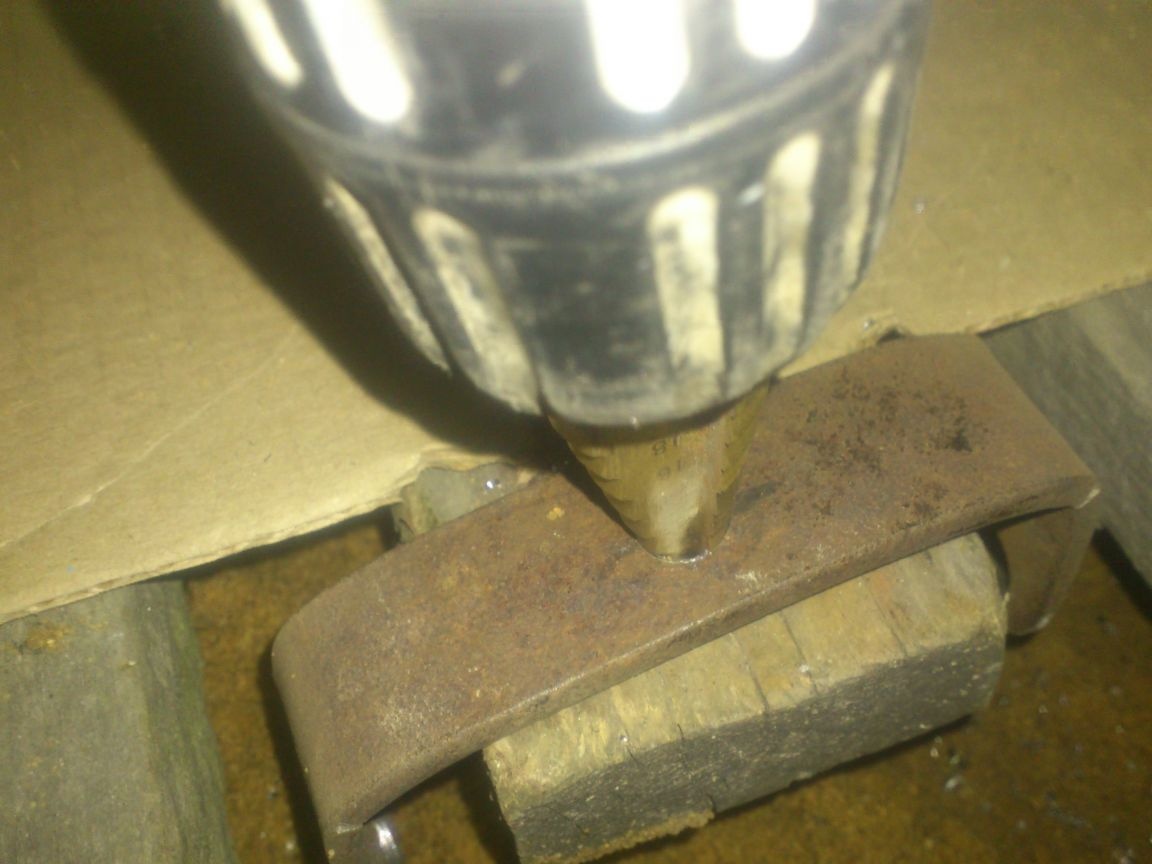
Noting three centimeters from the "back", I drilled holes in each of the "horns", 14 mm in diameter, using a drill and a step drill:


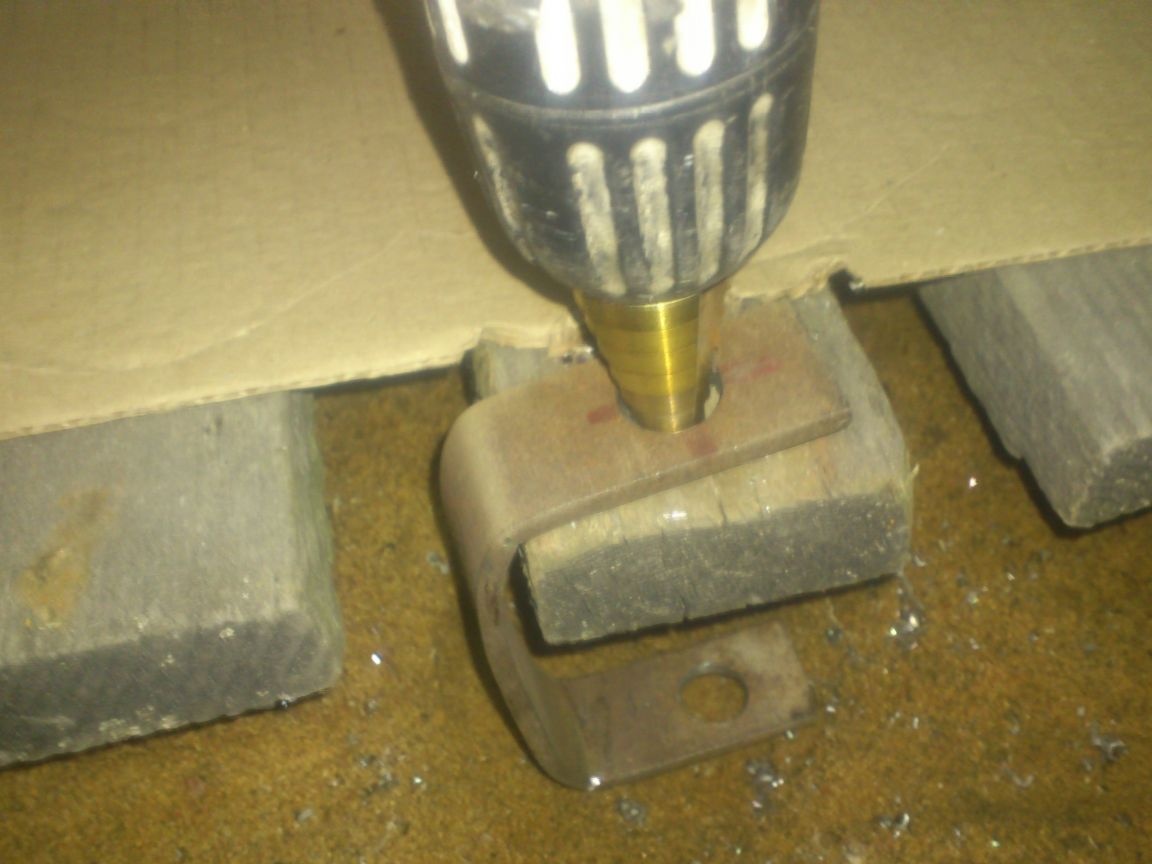
On the “back” I drilled a hole with a diameter of 8 mm for fixing the handle (All the handles of small “grinders” have an M8 screw. An exception is the Bosch grinders, the handles of which have an M10 thread).

I worked all the same step drill. (A convenient thing, I tell you ... And you can drill a huge diameter with a household drill, and you won’t break it, no matter how hard you try!)))). True, there are drawbacks - the material is not thicker than 5mm, and difficulties in sharpening ....

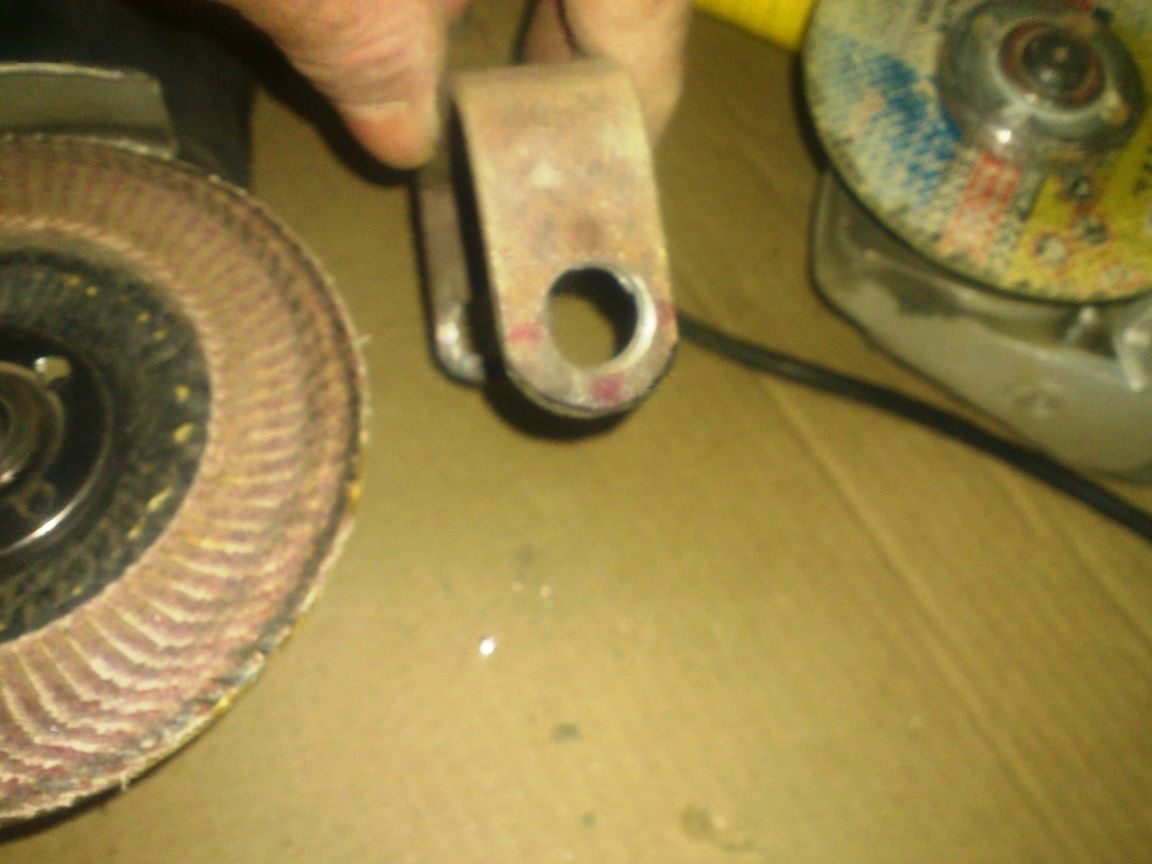
Further, I cut off the excess with the grinder, and rounded the other, using the emery-petal circle. He gave a more finished look, so to speak:

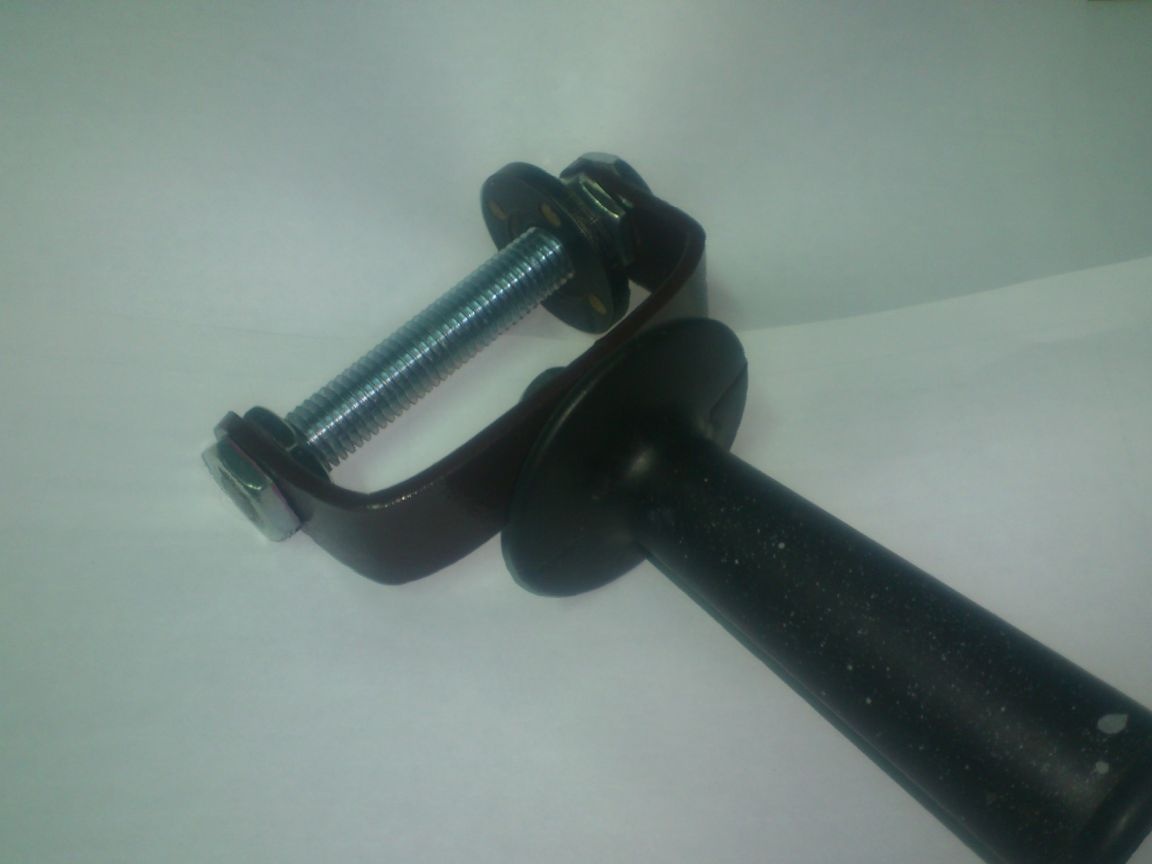
All. You can start assembling.
Initially, I thought just to weld the stud to the bracket. “Drop” on both sides, and that’s all ... But, during the assembly process, I noticed that in full speed my curvimeter goes a little more than three meters. (By chance, it happened so roundly))). Therefore, I decided to fix the stud in the bracket with nuts. Then it will be possible to adjust the full stroke length accurately! It is unlikely that I will ever measure something longer than 3m, but .... what if ?! ))). Let this option be - you roll it all the way, turn it over, and roll on, knowing that you turned it exactly at three meters.

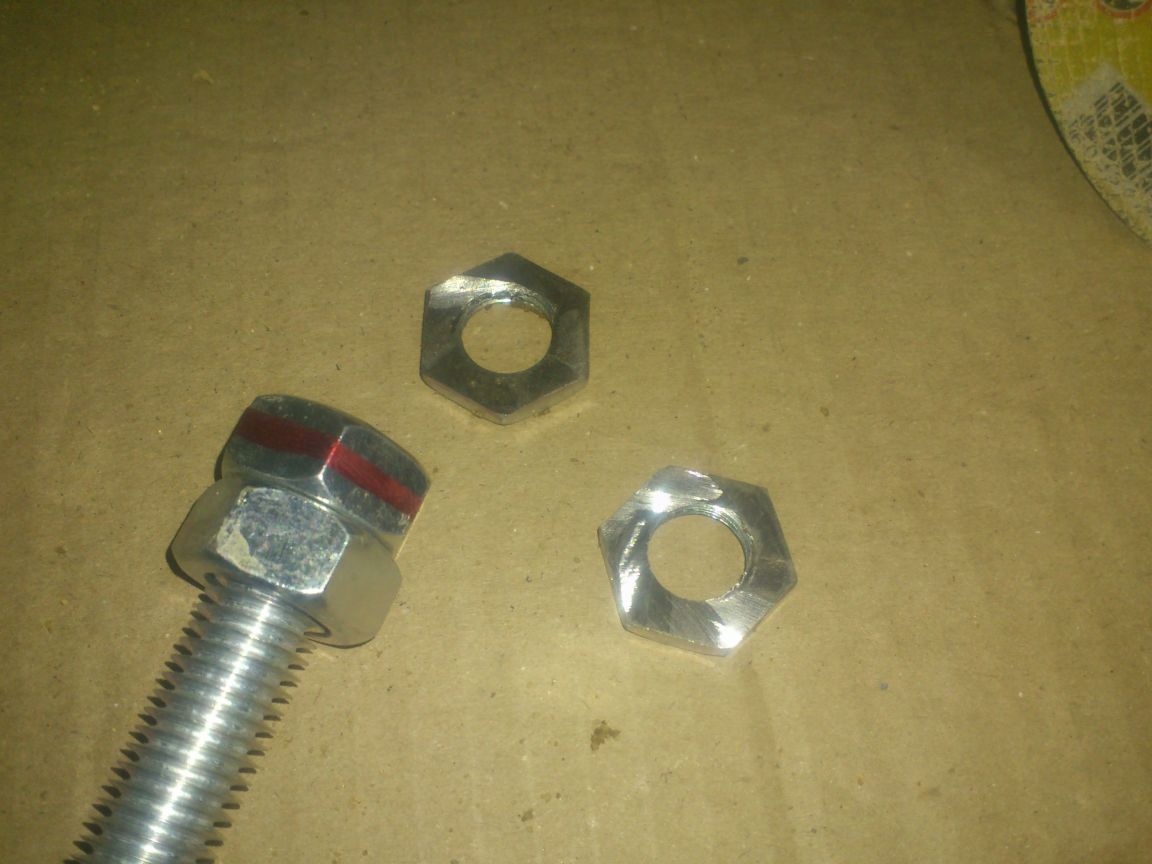
On each side it was necessary to screw on two nuts - one inside the bracket, and the second to clamp the outside ....
The design was very cumbersome (M14 nuts are not very small))). And I decided to just cut two nuts in half. (I don’t know what affected more - the bulkiness of the design, or the fact that I only had three ... One was missing!))))

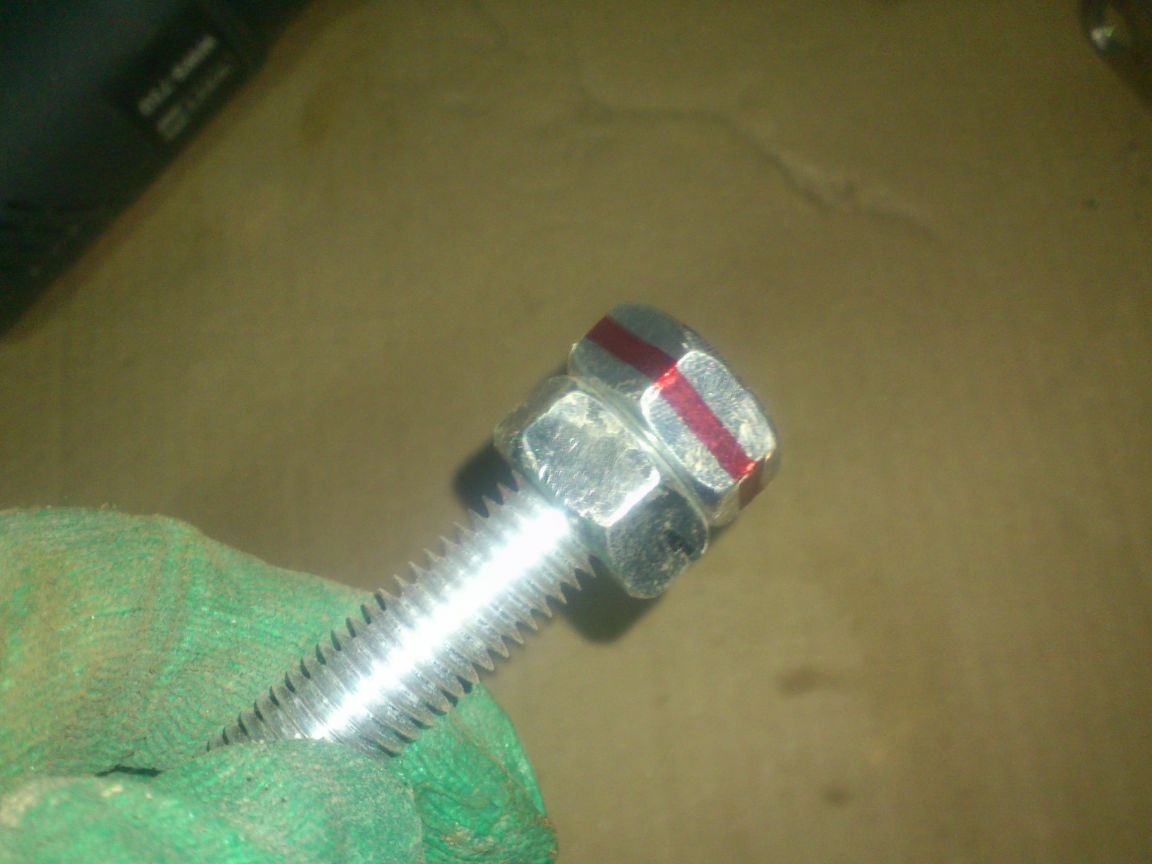
..Since, as I said, I did not have a vise close either, so I decided to use a hairpin. He screwed the nut a little bit, a couple of turns and locked it second. Then I marked it halfway, using the eye as a vernier caliper, and the nail as a thickness gauge)))):

And he cut it in half, holding a stud with nuts with one hand and a grinder with the other. Sorry, I didn’t have a third hand for the camera)))):


All!!! The curvimeter is ready;


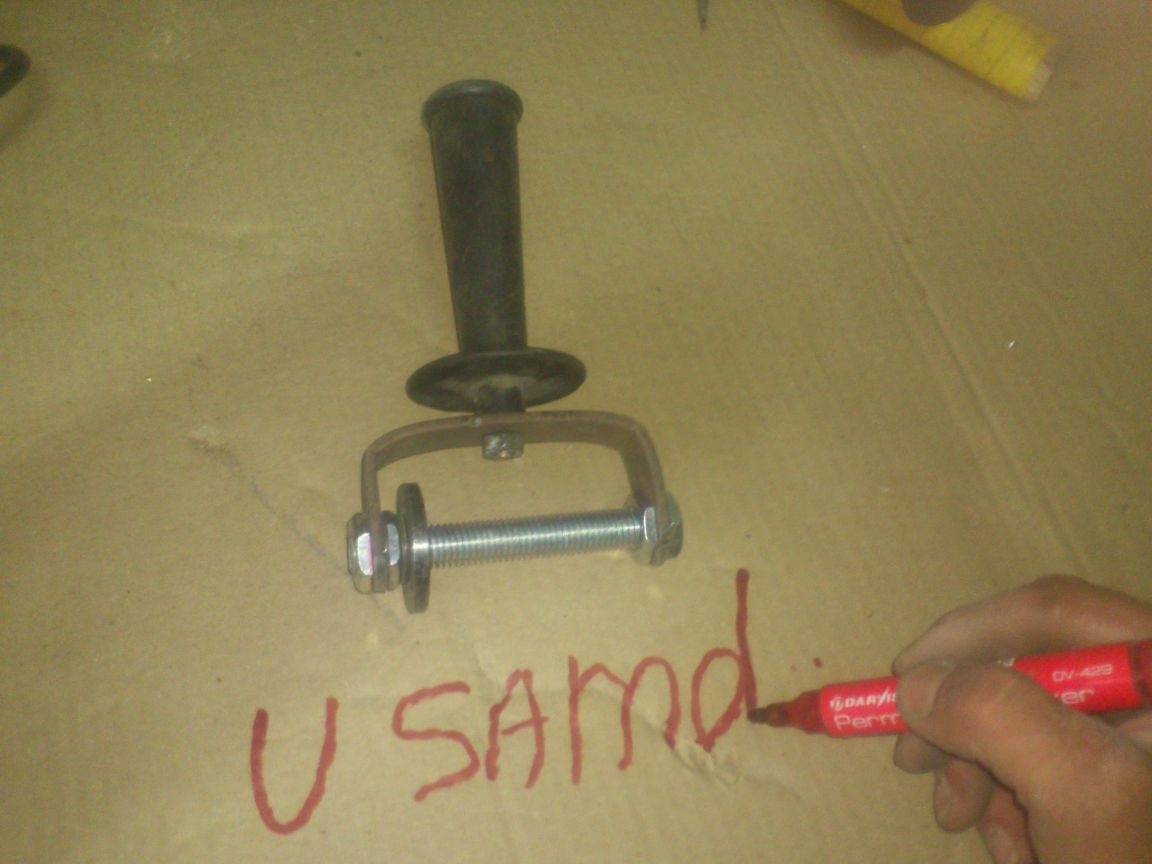
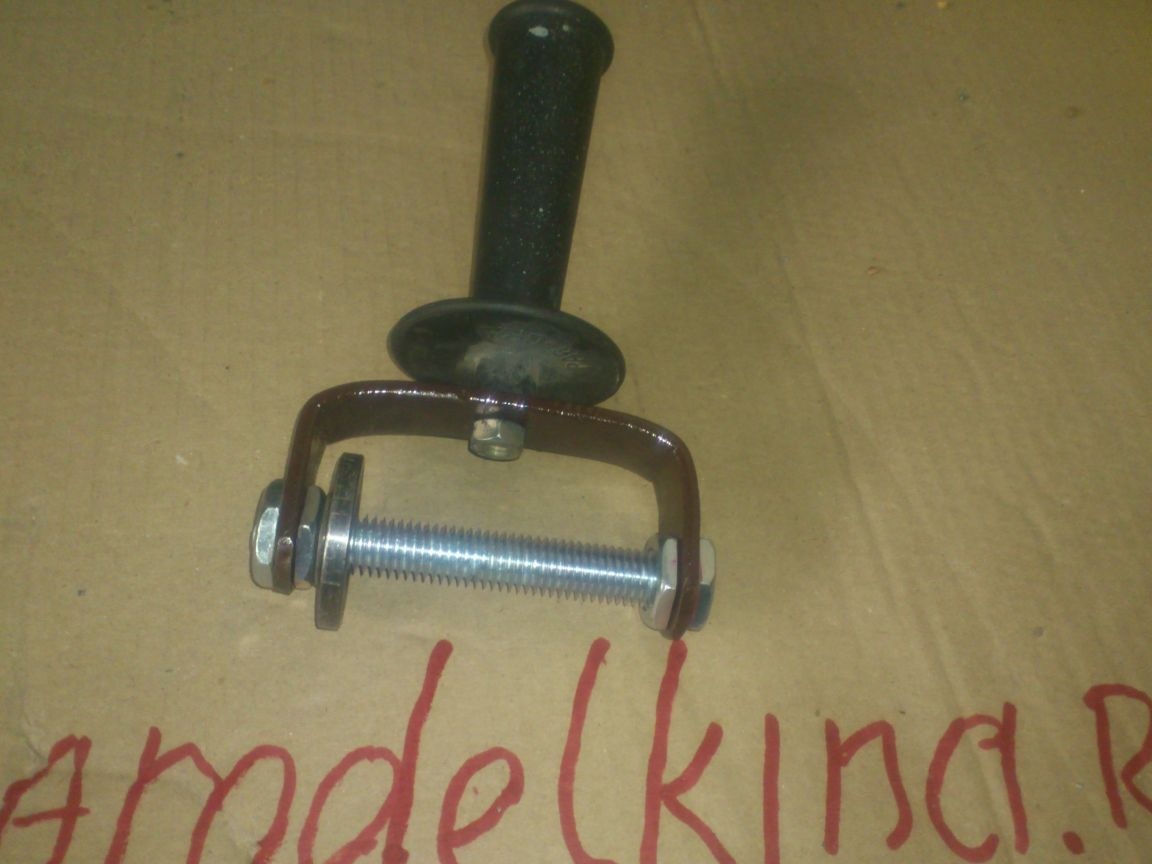
STOP !!!! .... Not ready yet !!! Need to paint! I disassembled it, sprayed it with a spray can, pre-heating the metal with a hairdryer (It dries very quickly).

Now ready:


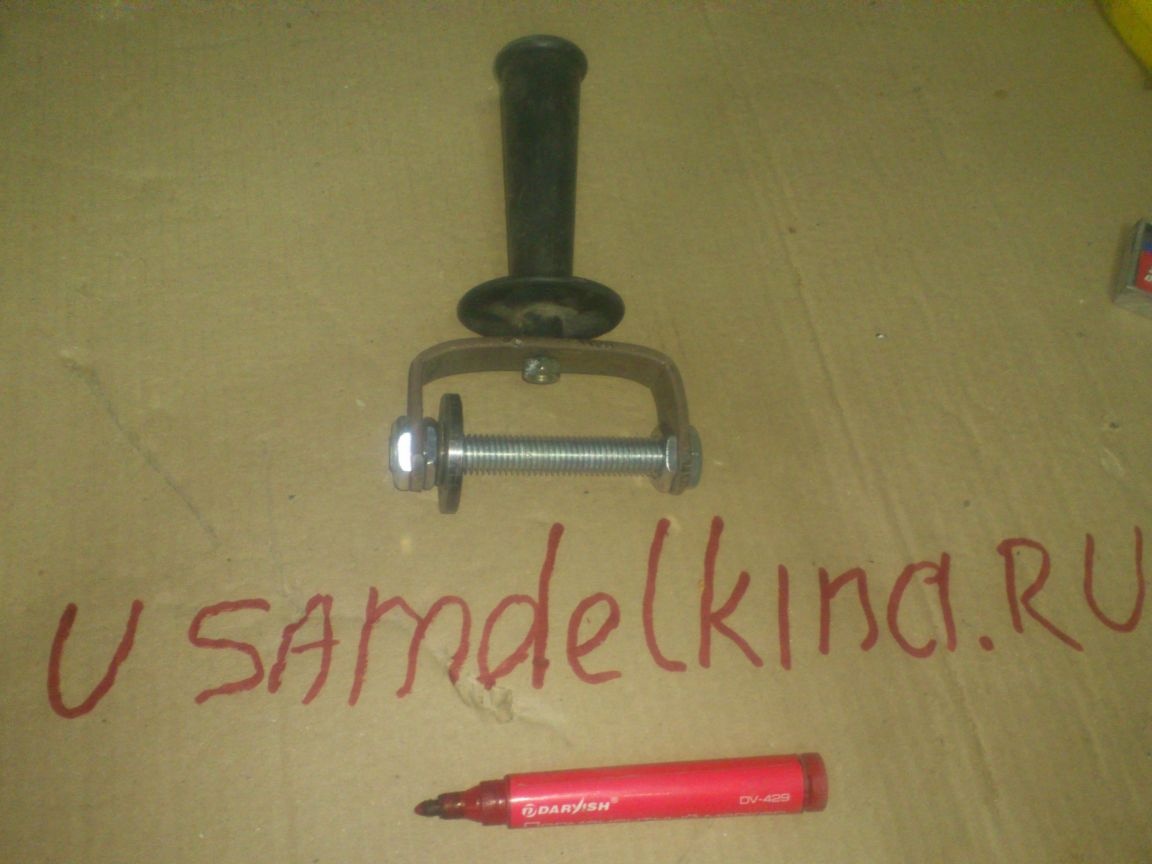
Stop!!! Again the "cant" !!!! The name of the site with an error wrote ....
Okay, redo it.)))))


True, I didn’t start to do that bench that evening.)))). I played with a curvimeter.)))). Nothing! There will be another day off ....
... I will add, two days later. Thanks for the advice in the comments. Here is a short video review:
10
10
10

Add a comment

    • smilesmilesxaxaokdontknowyahoonea
      bossscratchfoolyesyes-yesaggressivesecret
      sorrydancedance2dance3pardonhelpdrinks
      stopfriendsgoodgoodgoodwhistleswoontongue
      smokeclappingcraydeclarederisivedon-t_mentiondownload
      heatirefullaugh1mdameetingmoskingnegative
      not_ipopcornpunishreadscarescaressearch
      tauntthank_youthisto_clueumnikacuteagree
      badbeeeblack_eyeblum3blushboastboredom
      censoredpleasantrysecret2threatenvictoryyusun_bespectacled
      shokrespektlolprevedwelcomekrutoyya_za
      ya_dobryihelperne_huliganne_othodifludbanclose
12 comments
Author
Feel free to ask! )))
You’re asking not from me, I think, but from that roulette on which he will be rolled! ))))
I can only assume that it depends on the country where the roulette was bought! If, for example, this is the USA, then inches! )))
I’m embarrassed to ask ... what kind of unit does the device have? xaxa
Quote: Valery
"Rubberized." I bought a rubber wheel, tightly got into the groove, like a glove!


Thanks, for the "ideological inspiration"! )))). This idea (about a rubber wheel) flashed through my mind at the very initial stage, but was immediately canceled because it seemed difficult to realize (I then "bumped" in the absence of a lathe). After your comment, “got into the head of the monkey” again, and since there was a lot of time to think (I drove a couple of hours behind the wheel), I began to figure out how to “win” it without a machine ...
... It is FOR MY NEEDS and in the old version it did a good job, but .... it’s definitely better !!!!

Always happy to help. It turned out very well.
ok But he himself is also well done that he figured out how to make a groove without a lathe. I was too lazy to write about it, I thought he would figure it out, there’s a chuyka.))) I’m glad that I was not mistaken. There are several more ways to do something similar, but only later.
About the "rubberized" wheel, it will not only be "more interesting to ride"
more convenient, but the measurement accuracy will be higher. It’s even a shame to call it KURVAmeter.)))
Author
"Rubberized." I bought a rubber wheel, tightly got into the groove, like a glove!


Thanks, for the "ideological inspiration"! )))). This idea (about a rubber wheel) flashed through my mind at the very initial stage, but was immediately canceled because it seemed difficult to realize (I then "bumped" in the absence of a lathe). After your comment, “got into the head of the monkey” again, and since there was a lot of time to think (I drove a couple of hours behind the wheel), I began to figure out how to “win” it without a machine ...
... It is FOR MY NEEDS and in the old version it did a good job, but .... it’s definitely better !!!!
Author
Tomorrow I’ll rubberize ....
.... Thanks for the tips. Something has already been done. I shot a short video review, in which, by the way, I mentioned them. Now add to the article
Quote: To Delusam
Rather, I would recommend rubber. Make a groove in the center in the form of a groove and put on a rubber ring D 5-7 mm.

This, of course, is correct, but for "field" conditions, you can try a couple of turns of "paint brushes".
As I understand it, it does not have a scale and works on the principle of 10 turns forward-10 backward. In this case, it would be nice to add some kind of retainer, in the form of a nut or wire. I will explain. Measured until brought to the right place, shot down. Or you can put a mark on the wheel, measure how long one turn is and then count when measuring.
Quote: Valery
I stink ...)))


Constructive healthy "stink" we are always happy! )))))
A smooth metal wheel rotating on a thread (which has the property of clogging and “sticking”, working conditions) can serve to “slip” the impeller. Which will naturally affect the measurement results.

.. I was also afraid of this, but nevertheless, she rolls perfectly on paper and does not slip. The nut on the thread loosens very freely. The thread is large, rolled, not cut. Apparently, they gave a gap to the “serious” galvanizing, but they made it thinner)))). At the very least, “fired” by the finger, the nut easily goes all the way.
And I also think of cutting edges across a file. And I also want to polish the “hub” and nuts to completely eliminate “sticking” when the nut stops in the edge. (He is already almost nonexistent).
There’s going to be time tonight ... I’ll try to make a short video review of his work.

Of course it will ride on paper (and even “brand new), but it’s harder on glands. And the notches in this case will be ineffective. Rather, I would recommend rubberizing. Make a groove in the center of the groove and put on a rubber ring D 5-7 mm.
Author
I stink ...)))


Constructive healthy "stink" we are always happy! )))))
A smooth metal wheel rotating on a thread (which has the property of clogging and “sticking”, working conditions) can serve to “slip” the impeller. Which will naturally affect the measurement results.

.. I was also afraid of this, but nevertheless, she rolls perfectly on paper and does not slip. The nut on the thread loosens very freely. The thread is large, rolled, not cut. Apparently, they gave a gap to the “serious” galvanizing, but they made it thinner)))). At the very least, “fired” by the finger, the nut easily goes all the way.
And I also think of cutting edges across a file. And I also want to polish the “hub” and nuts to completely eliminate “sticking” when the nut stops in the edge. (He is already almost nonexistent).
There’s going to be time tonight ... I’ll try to make a short video review of his work.
Author
Thanks for the flattering assessment ...
... As for the style of the article - it just influenced the mood! ))) It was in the evening when he wrote, good, and therefore wrote in that tone ... (Many people say that my sense of humor is dangerous!)))). Sometimes does not know the measure.))
And about the "work on the knee" - so I often do just that. For some reason, I am always terribly limited in time, and I want to do a lot, so I "sculpt along the way" without delay ... So to speak, I do not want to "pull the rubber by the tail in a long box for the sake of a simple product!" )))))
At first you yourself answered your remark: made from what was at hand. )))
But with
Head!
absolutely agree.
I would very much note this article and even call it a real practical guide. Not in a specific device, but in how the truly creative process of manufacturing the desired device is described under conditions of material limitations. I really liked how Valery described his thoughts and decisions on individual actions: "goal - limitations - opportunities - solutions, choices - decision choice - execution."
Head! I blinded him from what was.)))
I stink ...))) A smooth metal wheel rotating on a thread (and it has the property of clogging and “seizing”, working conditions) can serve to “slip” the impeller. Which will naturally affect the measurement results.

We advise you to read:

Hand it for the smartphone ...