
What is a tumbling and why is it needed. We open the Wiki and read: Tumbling - the technological process of machining parts, cleaning and pre-treating the surface of parts from various materials, metals, ferrous, non-ferrous and precious alloys, polymers, glass, ceramics, minerals, wood and others. It is used for processing ornamental stones, wood products, knives, as well as small workpieces and parts from dross, burrs, molding earth, and also to improve the surface quality of products - polishing.
Tumbling is performed in various ways, for example: mechanical, electromagnetic. In turn, the mechanical method is divided into vibrational or rotating. Tumbling can also be done dry or wet. Various abrasive acts as a filler. Material and shape of tumbling bodies, buffer solution - are selected based on the material. By the way, tumbling is used even in the food industry, for example, after stamping dumplings, dumplings, etc. in order to remove burrs, flour, dust, sharp edges, giving the product an excellent presentation.
This article will examine how the author made a tumbling installation with a rotating drum and the possibility of both dry and wet tumbling. The author called his product "Roar"
Tools and materials:
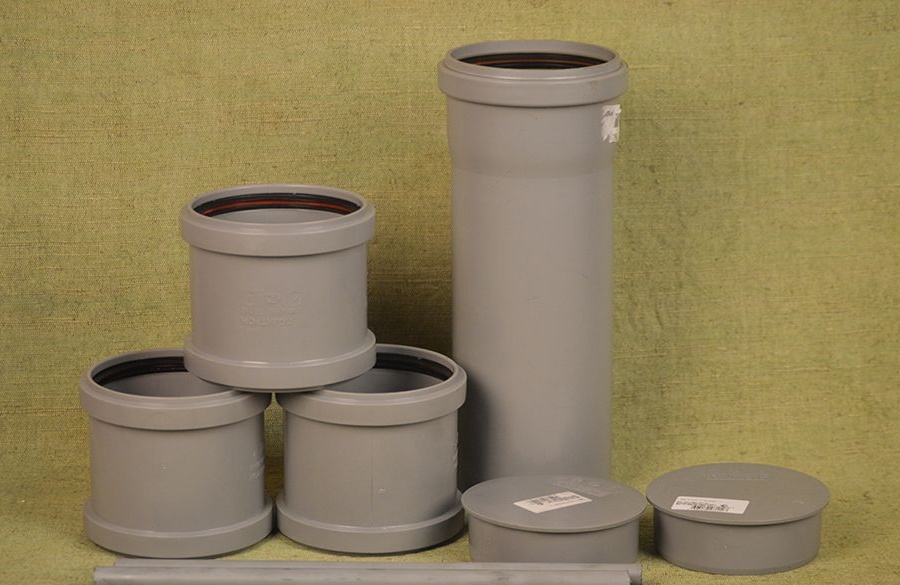
- Sliding repair clutch Ø 110mm - 3 pcs;
-Pipe length 500 mm Ø 110mm - 1 pc;
- Plugs Ø 110mm - 2 pcs;
- PVC tube;
-Molts: 4;
-Aluminum bar;
-Cork from champagne (plastic);
-Ears;
-Wire Ø 4mm;
-Rubber tube;
-Metal rod Ø 12mm;
-Bearings - 4pcs;
-Dyurite pipe;
-Textolite;
-Plywood;
-Fasteners;
-Metal plate;
- Corner;
-A pen;
-Motor reducer;
- Toggle switches;
-Capacitor;
-The wire;
-Sealing cuff;
- Loops;
-Paint
-Lathe;
-Ushm-ka;
-Drill;
-Screwdriver;
-file;
-Hacksaw;
- Sealant;
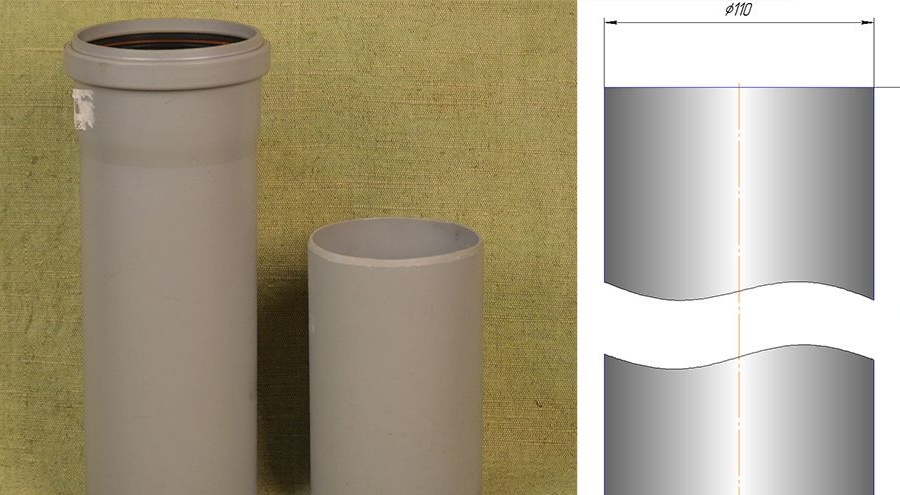
Step One: The Drum
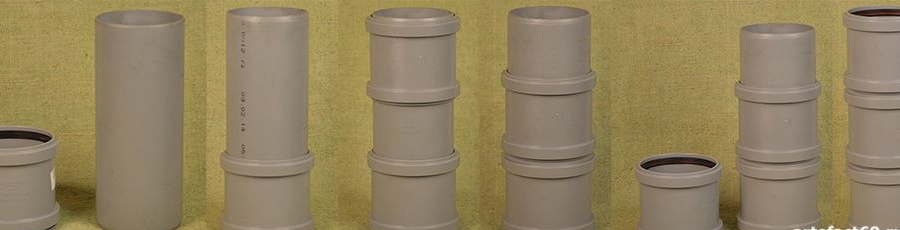
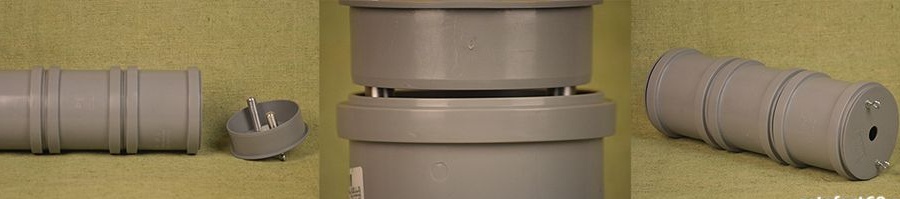
The first step the author made a drum. A piece of 263 mm long is cut from the sewer pipe. Chamfers on one side of the pipe.
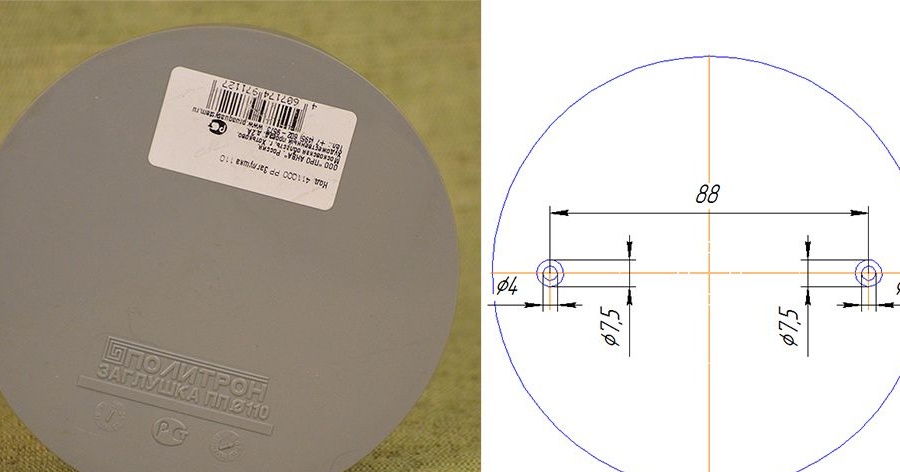
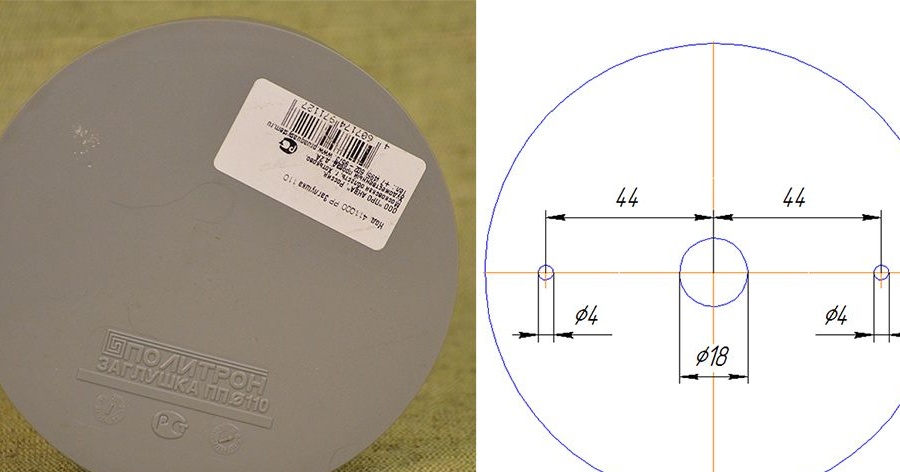
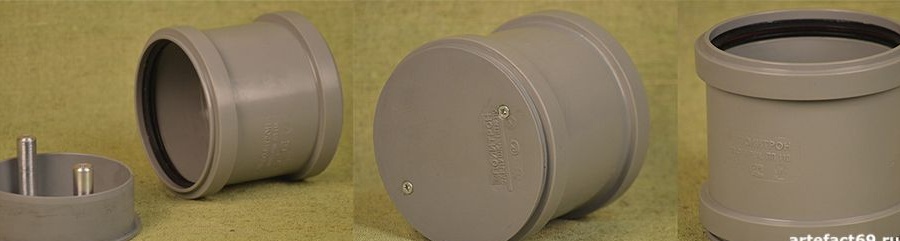
There are two plugs on the drum. The top (vertical position of the drum when loading) will be removable.
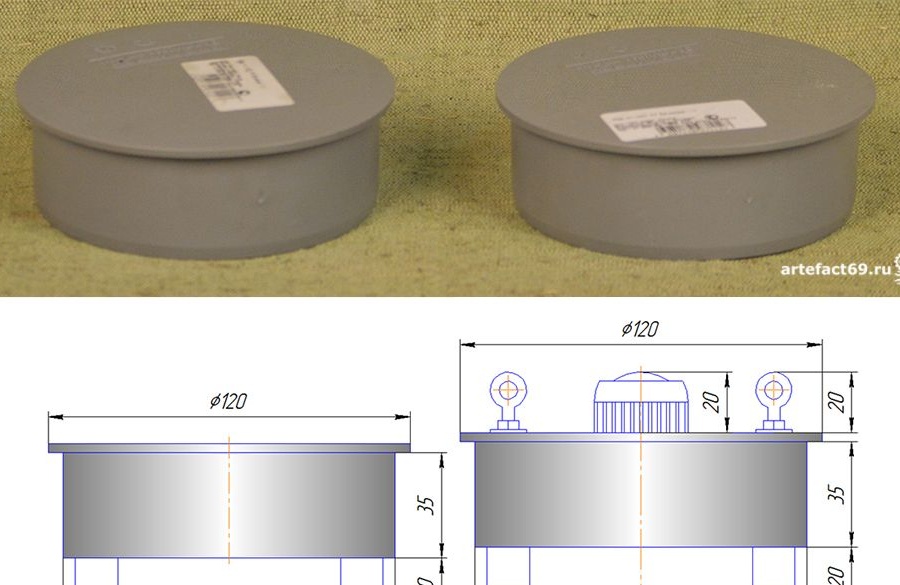
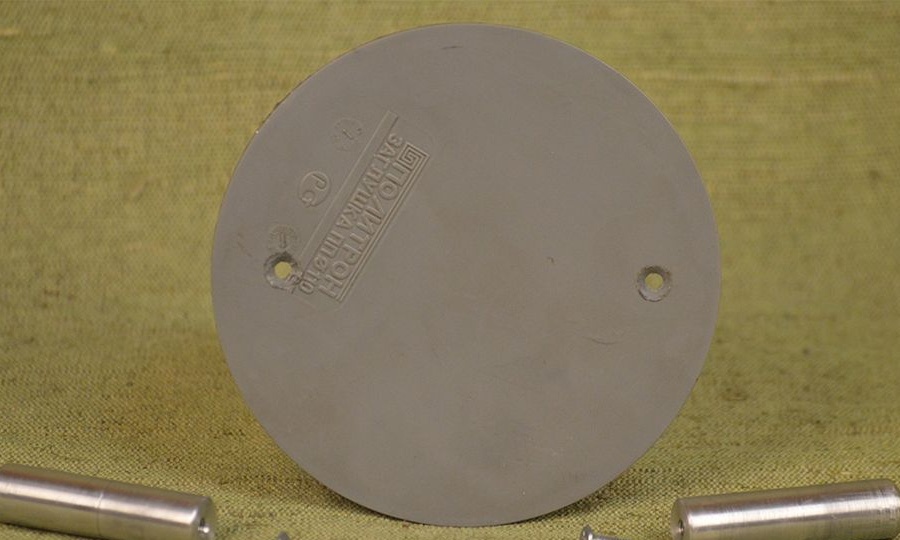
In the bottom cover drills two holes for the fingers of the blades of the drum.
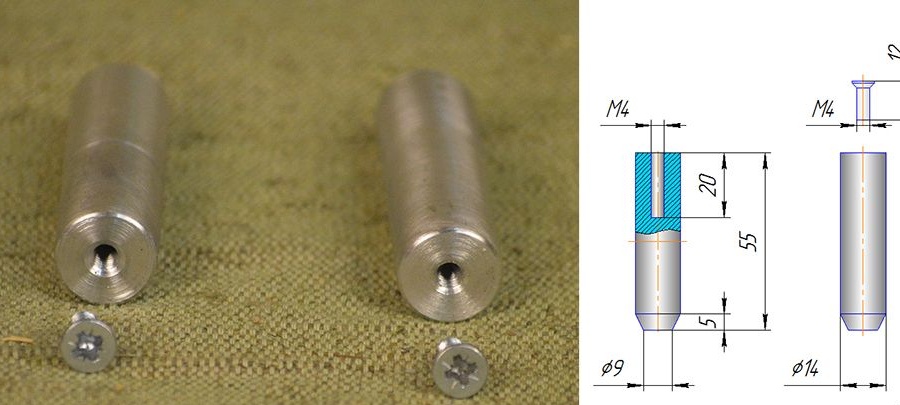
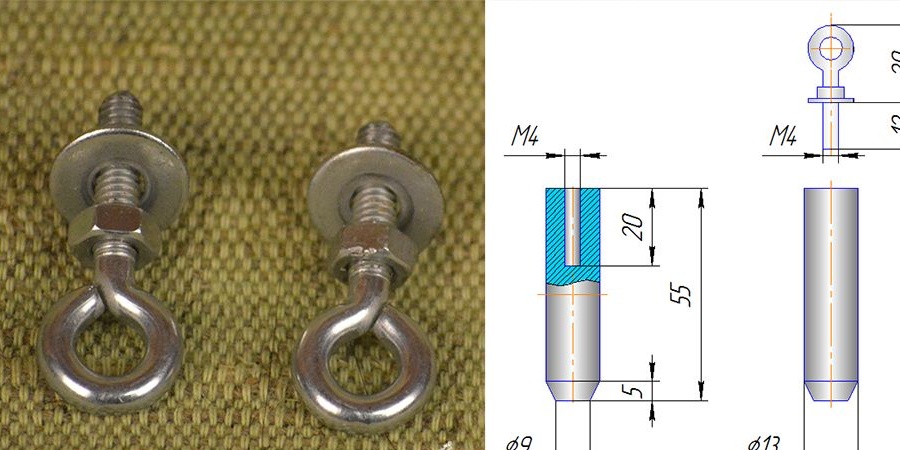
The author has carved fingers from an aluminum rod. I drilled a hole inside my fingers and cut a thread. The diameter of the fingers is such that they fit tightly on the tube-blades.
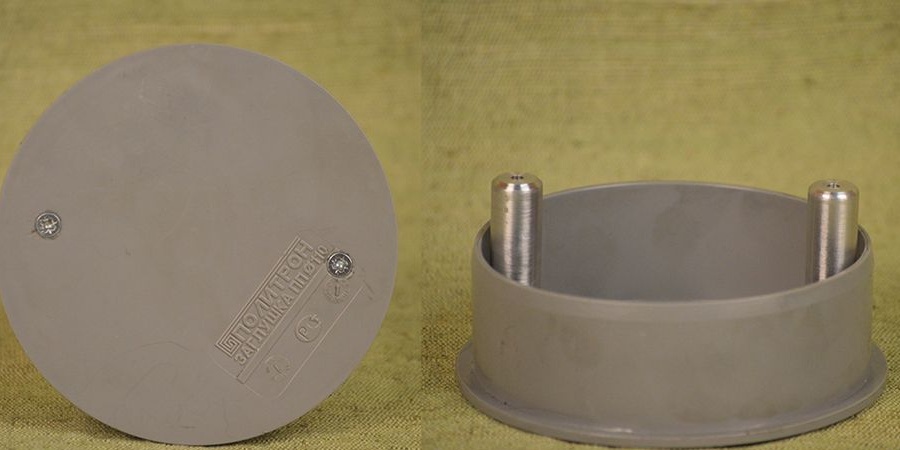
Screws fingers to the lid.
Cuts two tubes 330 mm long.

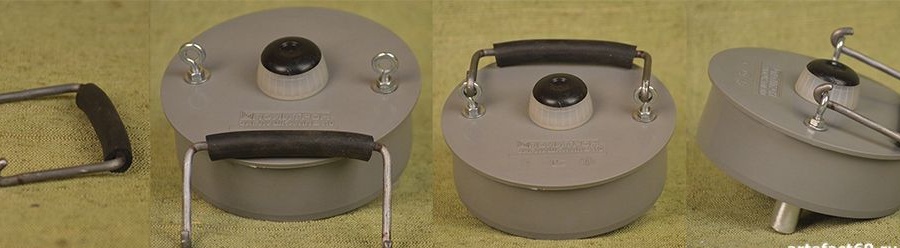
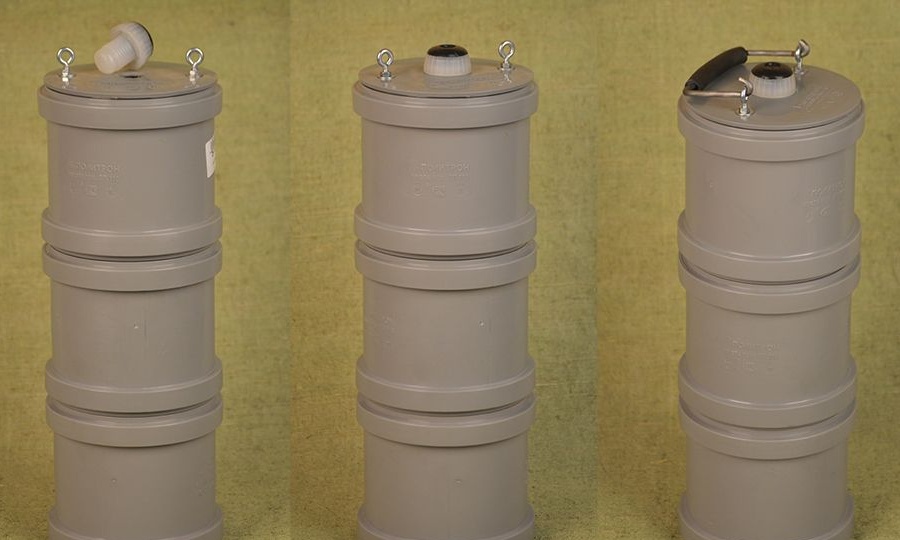
Goes to the top cover. The top cover must be removable. Drills three holes in it. Two under the fingers and one under the cork. A plug hole is required to relieve pressure when closing the lid. That is, after loading the drum, put in place the cover, and then the cork. The diameter of the fingers on the top covers is slightly smaller than the diameter of the tube. This makes it easier to remove and put on the top cover. When installing the fingers, both lower and upper, the author used sealant for the tightness of the drum.
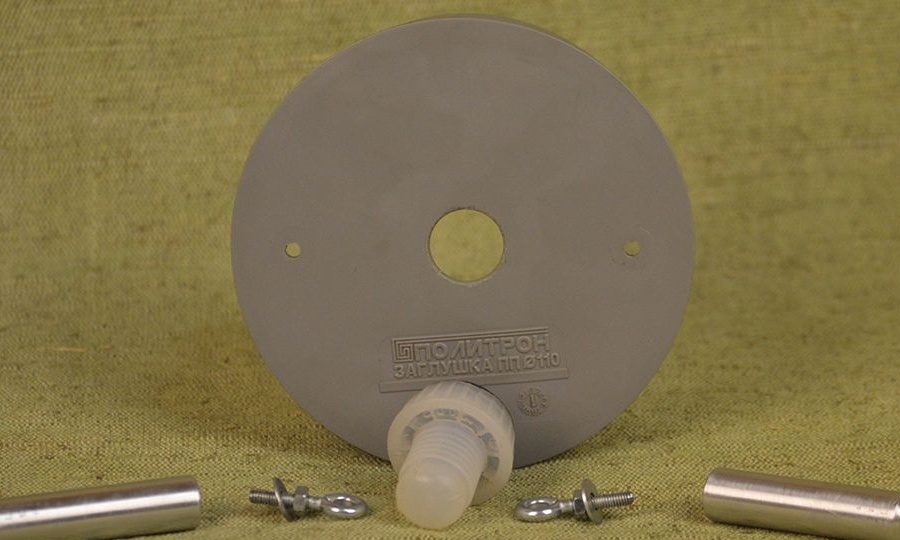
In order to make it convenient to open the lid, instead of standard bolts, the author used eyes, on which he fixed a handle made of wire. I put a piece of rubber tube on the handle. The author made the pen removable.
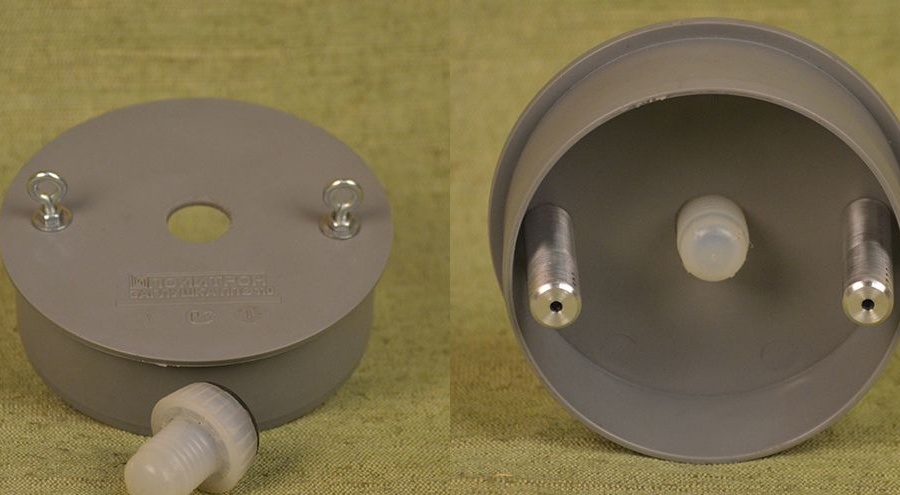
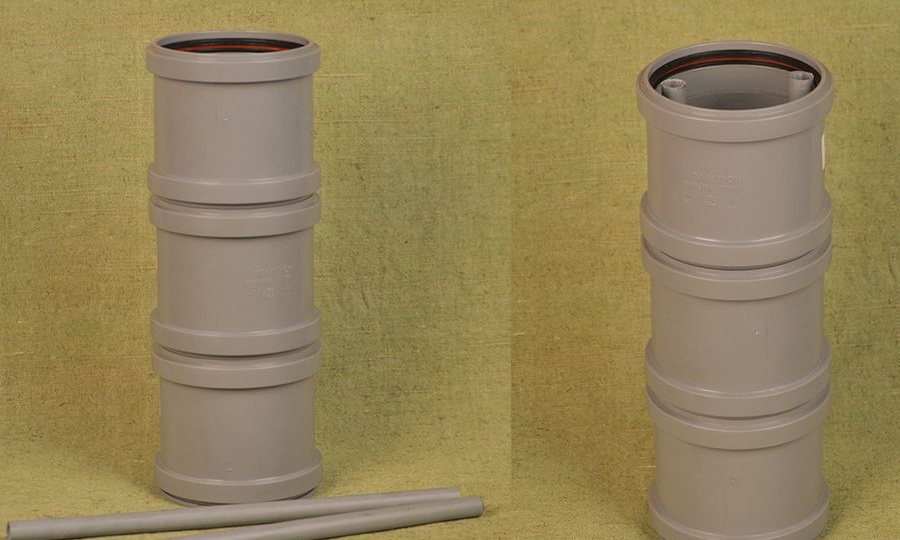
Next you need to assemble the drum. Installs the bottom cover on the coupling. Inserts the pipe into the sleeve until it stops. Installs a second and then a third sleeve on the pipe.
Pulls on the fingers of the lower tube cover. Installs the top cover, and the fingers of the top cover are installed in the tube.
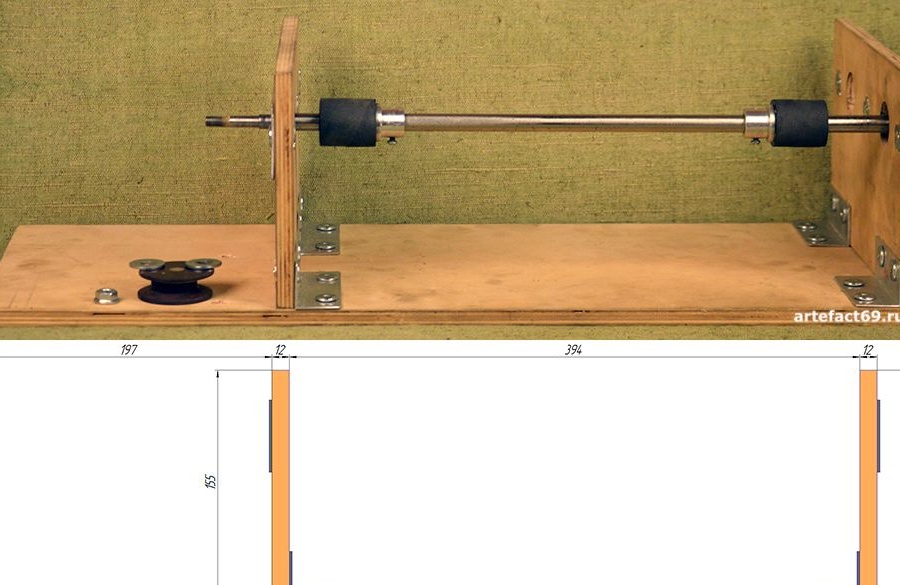
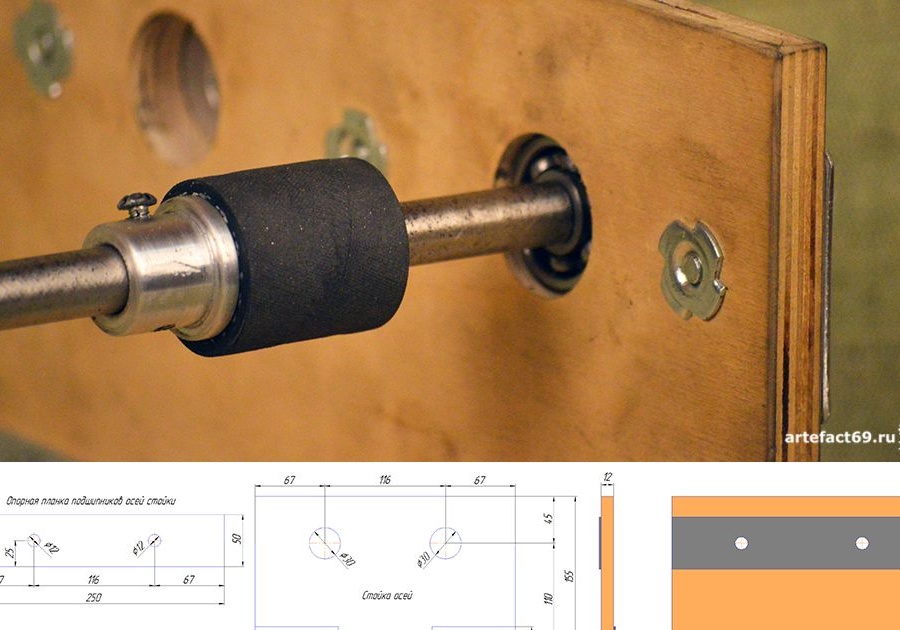
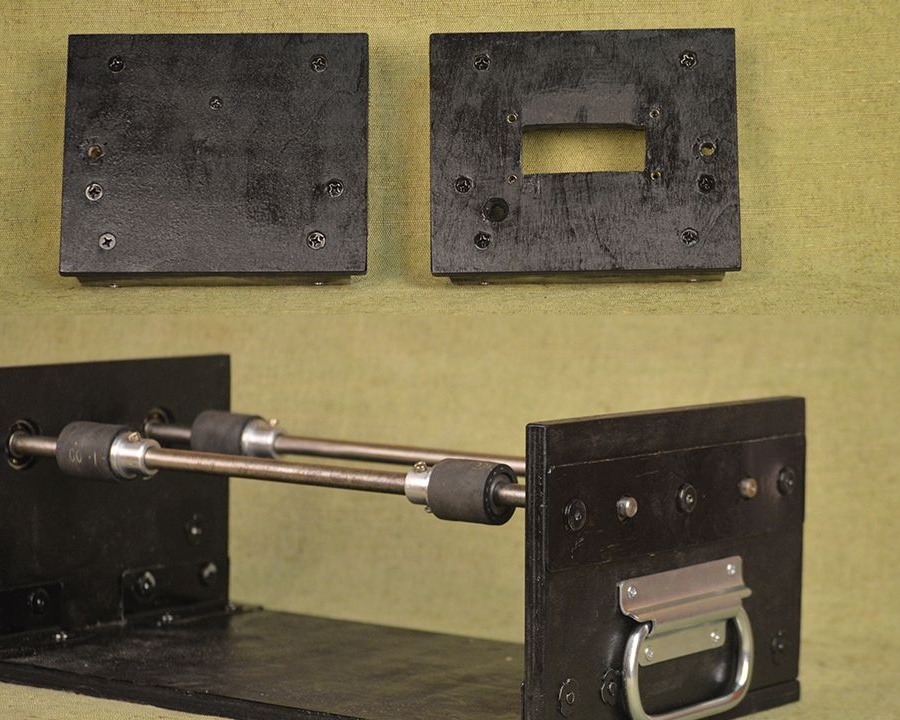
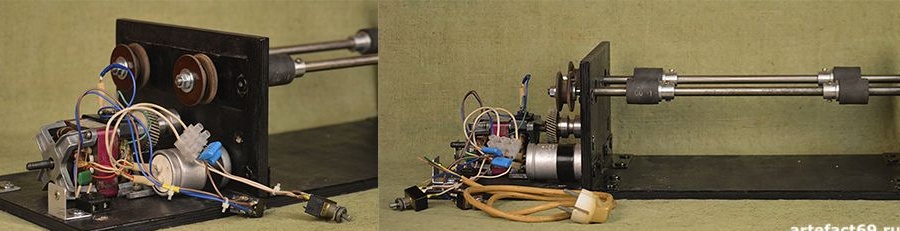
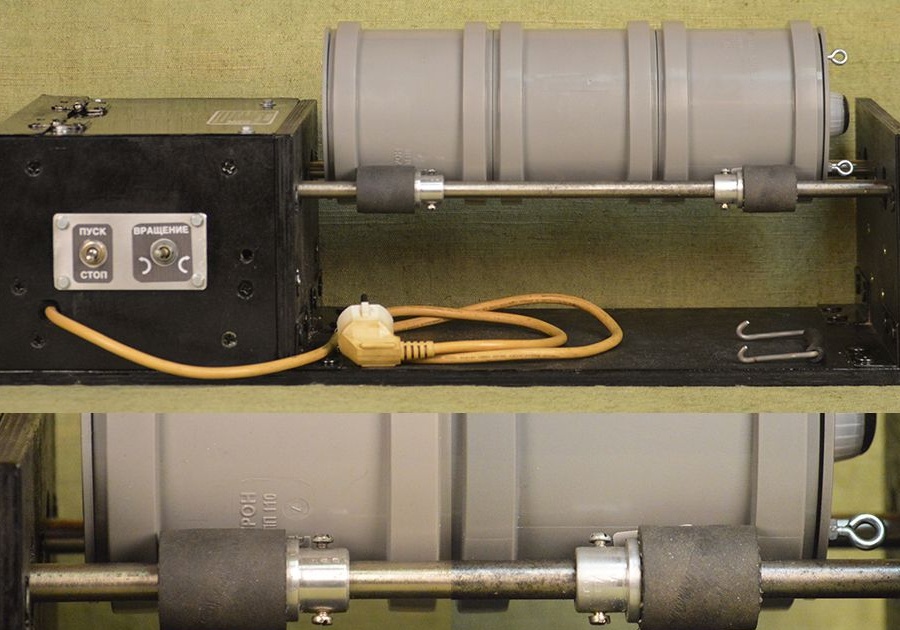
Second step: axles, shafts, pulleys
The author made the axes from a metal bar. Processed them on a lathe according to the drawing. On both sides, the axles are supported by bearings.
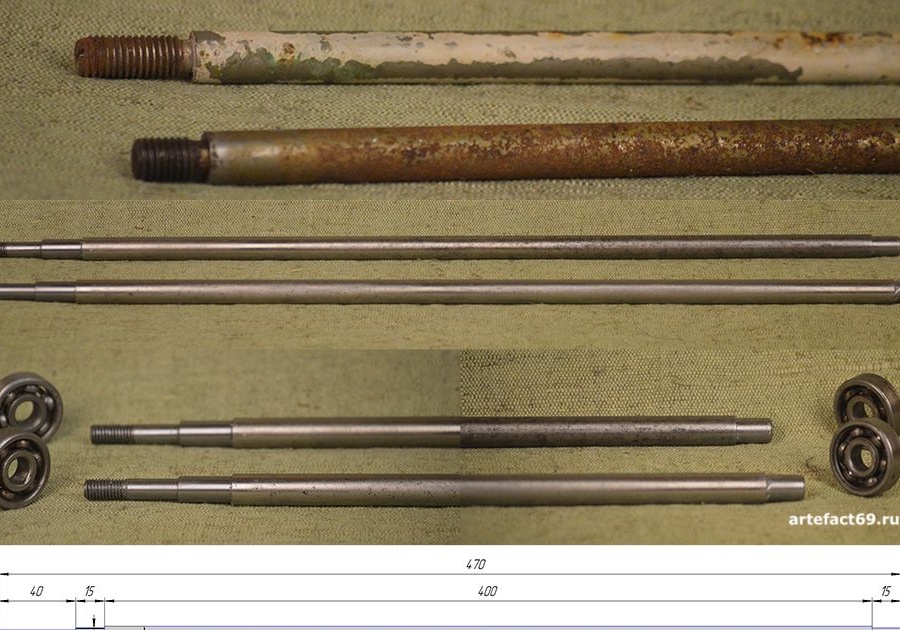
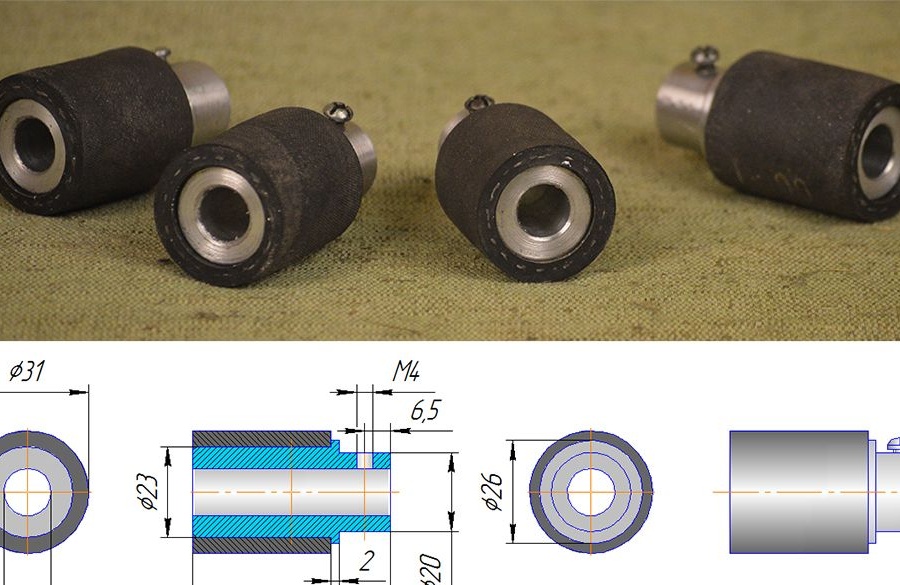
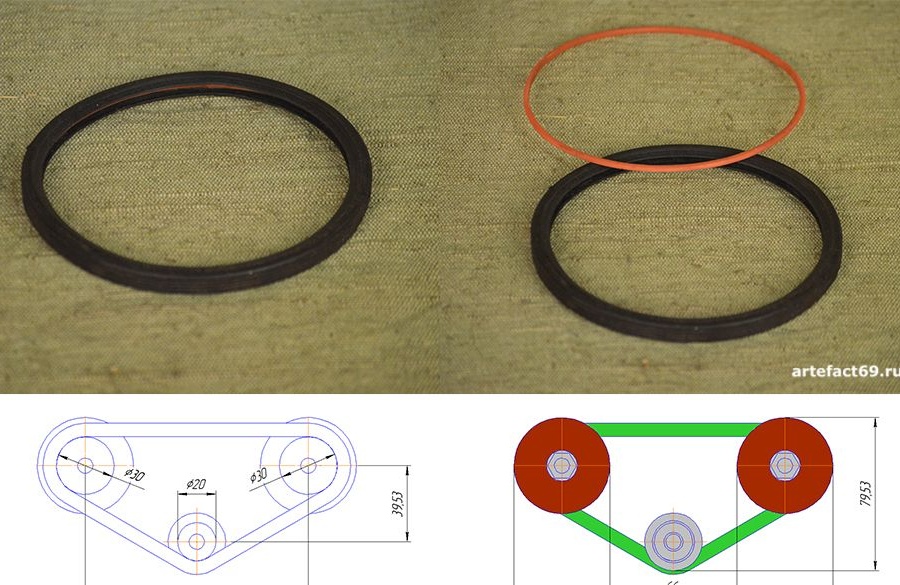
Drive shafts are mounted on the axis. The author machined the shafts from aluminum. All dimensions are shown in the drawing. To prevent slipping during rotation of the drum on the shafts, the author installed a dyurite pipe. Due to the fact that the outer edge of the nozzle is not a flat drum, it will also vibrate when scrolling.
He puts shafts on the axis, fastens.
Two pulleys are made from PCB.
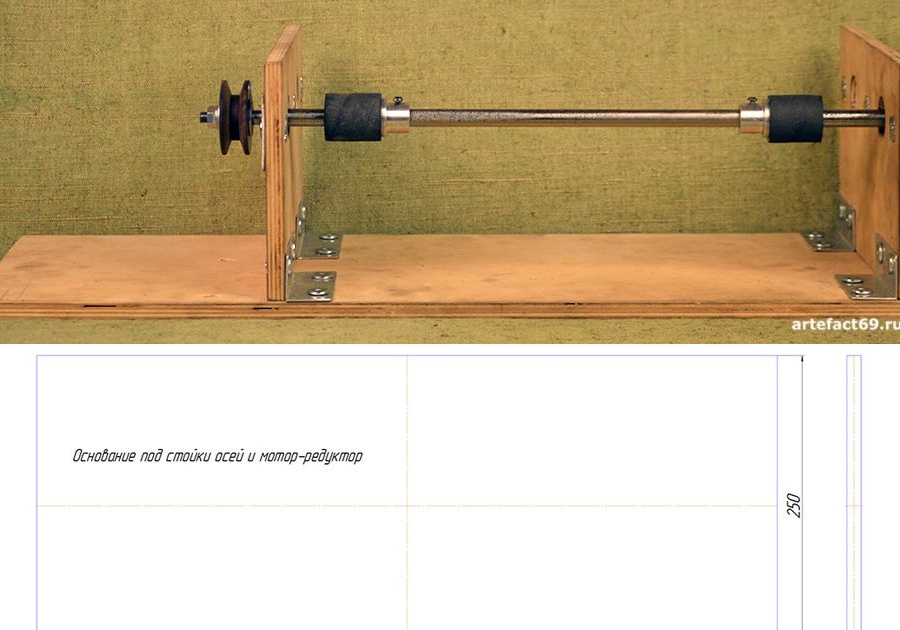
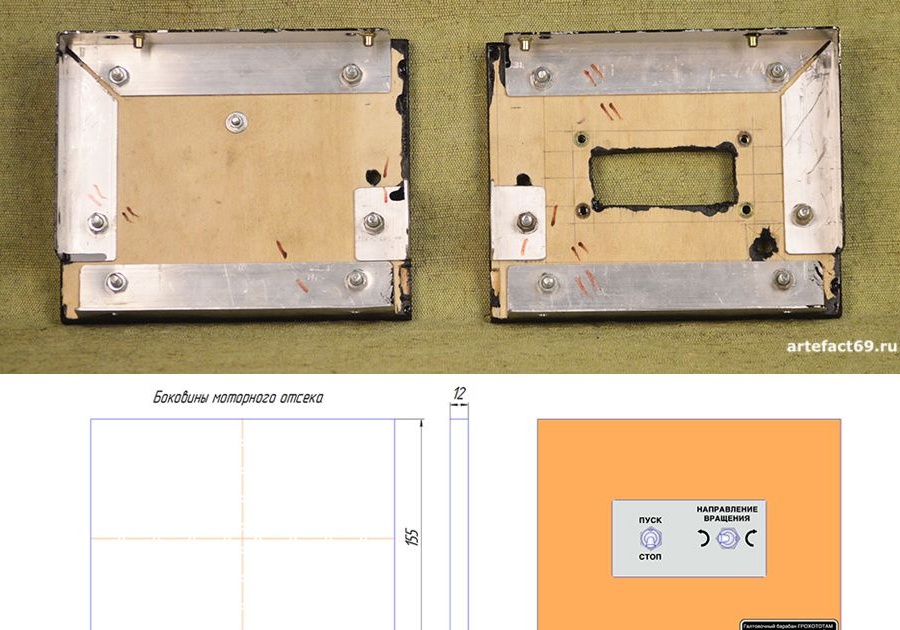
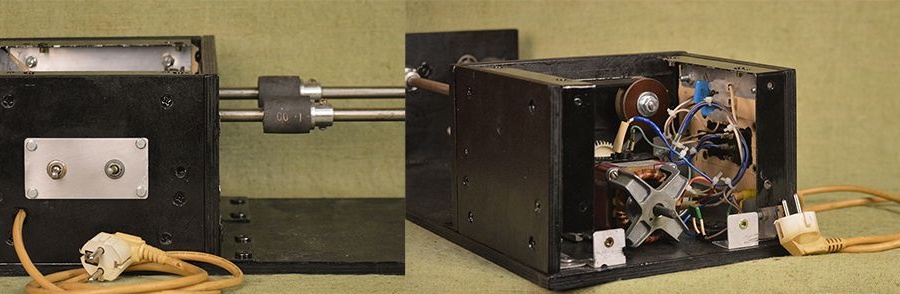
Step Three: Case
The author made a case from 12 mm plywood. Made through holes for bearings. On the one hand, covered the bearings with a metal plate.
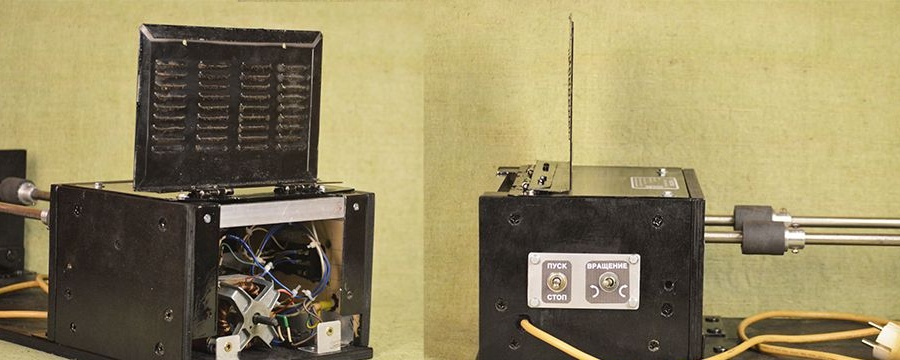
I also cut the sides of the engine compartment from plywood. In one sidewall cuts an opening for the installation of toggle switches.
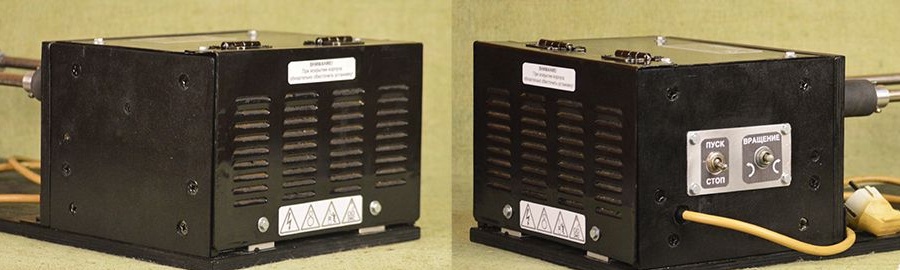
Disassembles the case and paints it. After drying, it reassembles the case. From the end fixes the handle.
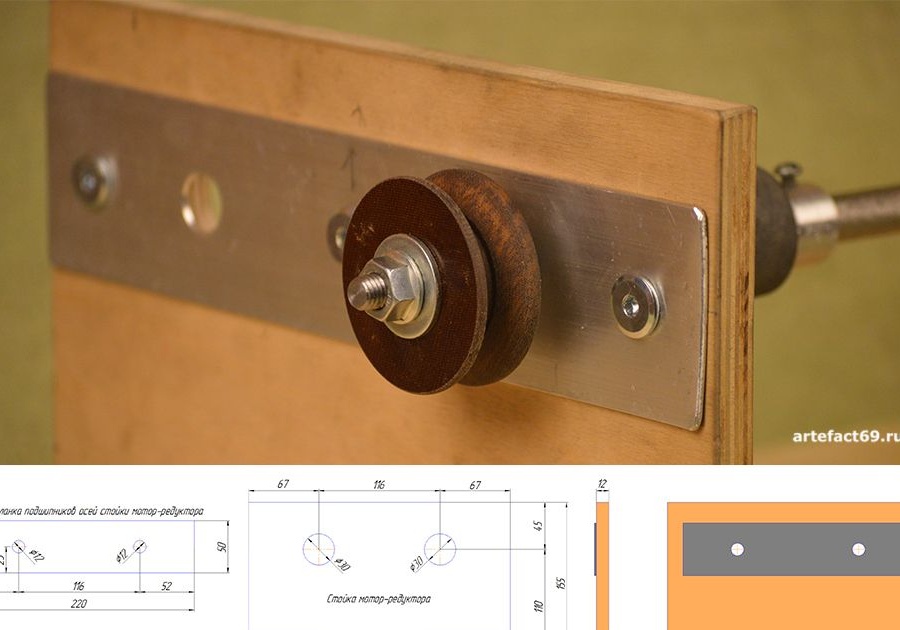
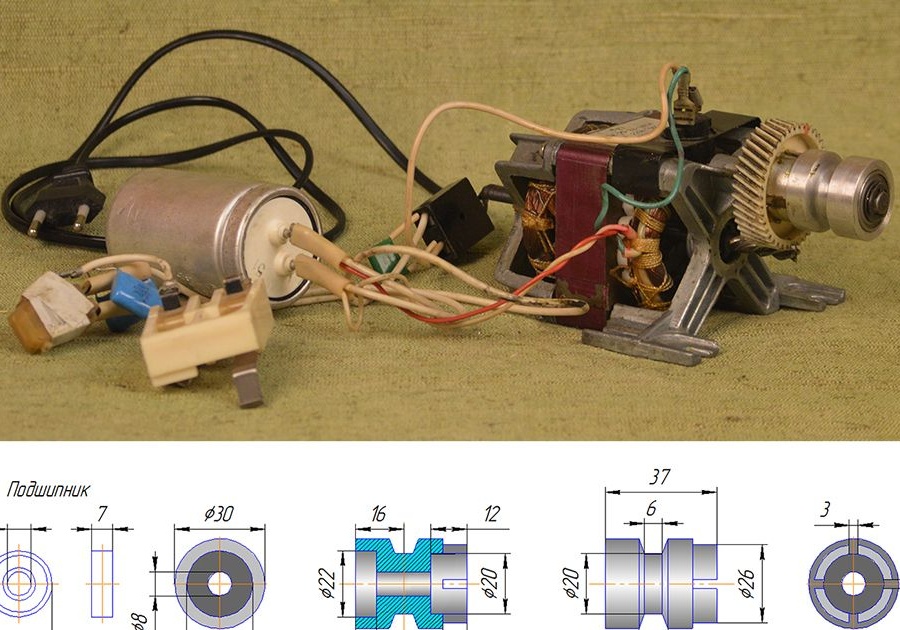
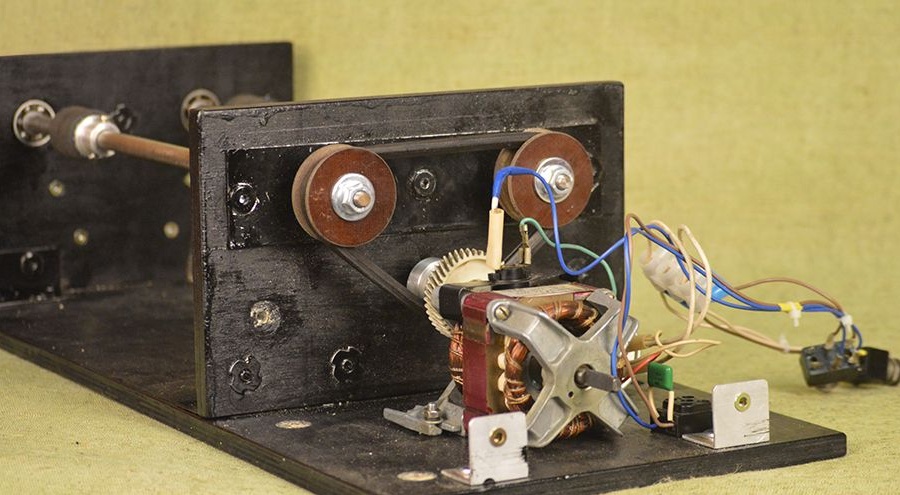
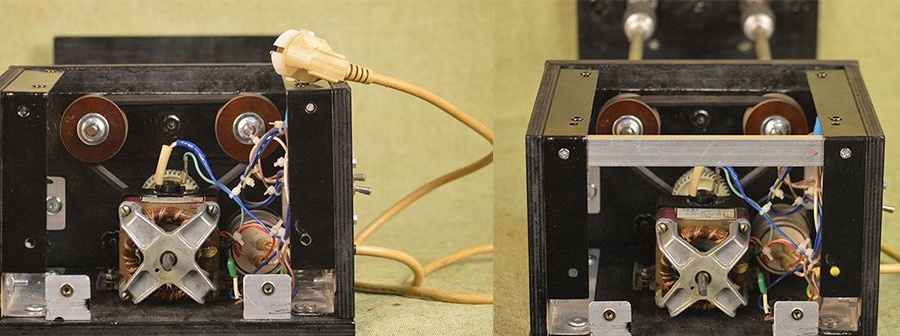
Step Four: Gear Motor
For his installation, the author used a gear motor from an old washing machine. The main requirement for the motor is low revving and hardy. DAK 25-2,6-UHL4 is just such a motor.
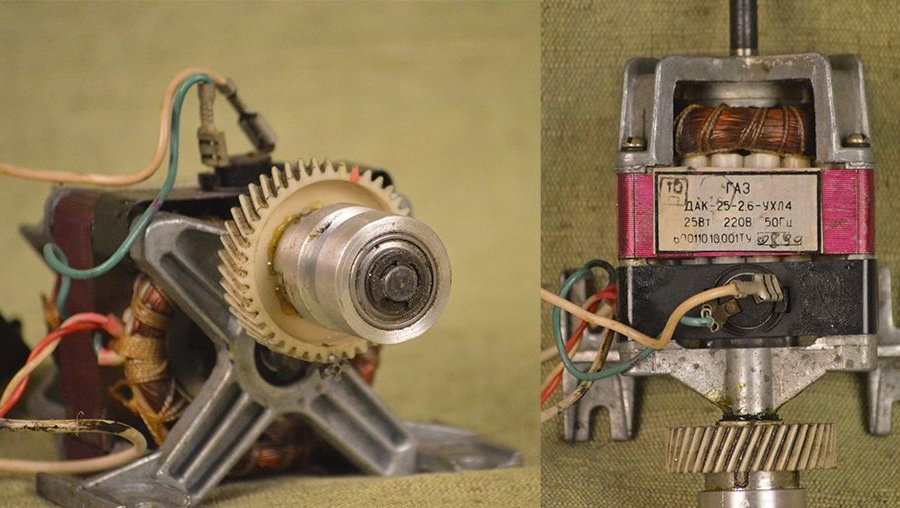
On a lathe, the author has honed a drive pulley. The pulley is mounted on the gear shaft through a bearing and connected to the gear gear.
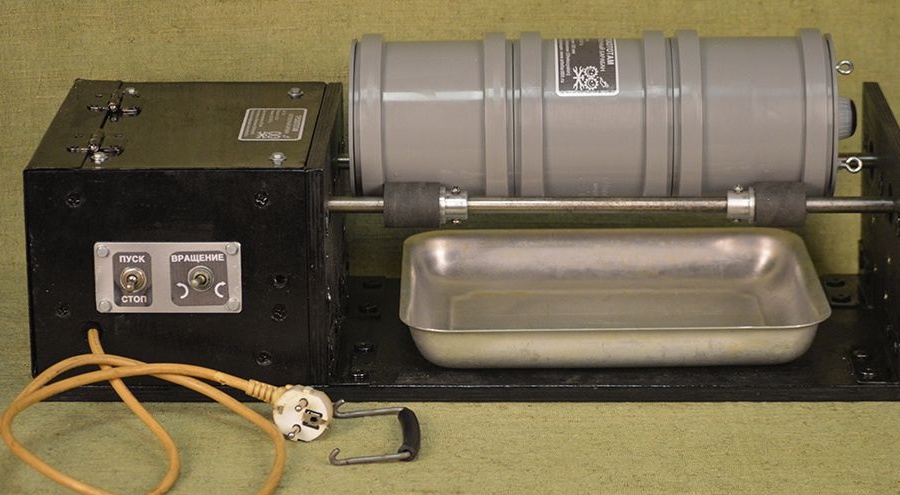
Step Five: Build the Device
Set the gear motor in a regular place. At installation it is necessary to observe alignment of pulleys.
Instead of a belt, the author used the cuff of a sewer pipe.
Installs the sidewalls of the engine compartment. On the metal plate secures the toggle switches. Installs a capacitor.
The author made a casing of the engine compartment from the body of an old microwave. Two halves of the casing are connected using loops. The author developed the tablets in a graphical editor and made them on a plotter.


Tumbling drum "Roar" is ready. It remains to lay the abrasive in the drum, the workpiece and conduct tests. For convenience, the author placed an aluminum tray at the bottom of the drum.
You can also read a short video about the "Roar".