

Using an inexpensive pyroelectric infrared sensor (PIR) Fig. 1 and Fig. 2, you can build a simple burglar alarm. Which will respond to thermal movement (of humans, animals) in front of the protected object.
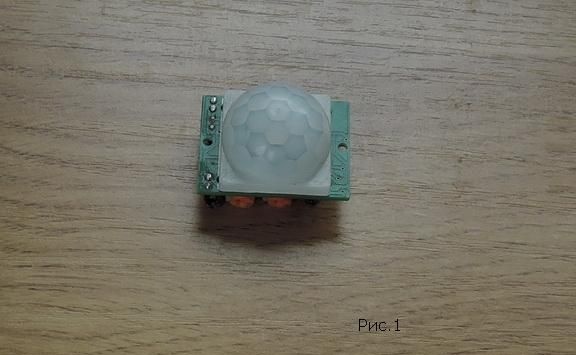

Figure 3 shows a diagram of one of the options for simple PIR activation. When the PIR sensor is triggered, the LED lights up. The supply voltage can be in the range of 5 ... 12v.
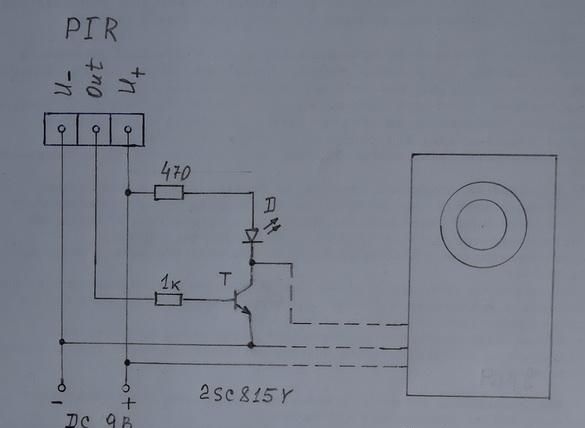
When connecting, as in the diagram, an additional sound tweeter, there will be a sound signal for penetration.
Everything would be fine, but when you turn on the power, the sensor turns on, turns off the output signal (gives a signal to output Out). When you turn on the guard at night, such an unforeseen SOUND can be annoying (scaring). That there was a "quiet" inclusion in the circuit is added Delay sound. The diagram is shown in Fig. 4.

According to this scheme, when the power is turned on, the sound is turned off by ~ 40 sec. After that, the LED lights up, indicating that the protection is on and has entered the protection mode. And now any thermal movement will include the sound of the secret police.
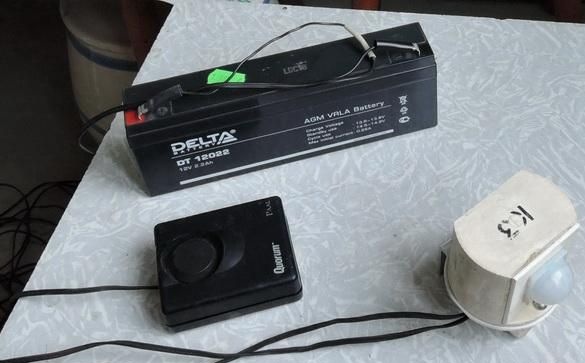
In the photo Fig. Figure 5 shows the parts for assembly according to the second scheme (Fig. 4)
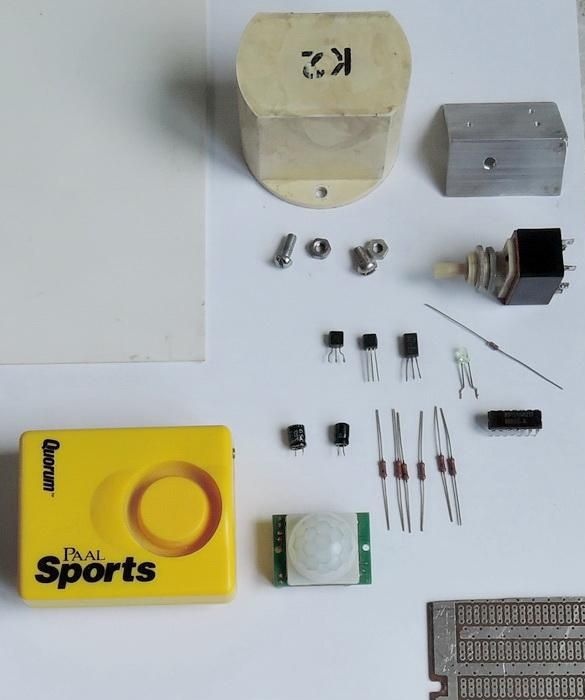
List of radio elements and parts:
Resistors R1 = 100kom R2 = 1MΩ R3 = 1kom R4 = 6.2kom R5 = 6.2kom R6 = 3kom
Diode KD522B
LED d = 3mm
Capacitors C1 = 22mkF x 16v, C2 = 100mkF x 16v
Transistors T1 - 2SC815, T2 - 2SA1286, T3 - BS170
Chip - K561LA7
Toggle switch (switch) 3-pin TP1-2
Universal scarf (turned out 45 x 25mm)
2 bolts with nuts M4
Duralumin mounting bracket
Piezo buzzer - Paal
Case (plastic)
Plastic plate (thickness 2 ... 3mm)
Mounting wire
2 core flexible wire in plastic insulation (~ 10m)
Tools and materials:
Tweezers, side cutters, soldering iron with a grounded sting (solder, flux)
Drill with drills, hacksaw, screwdriver.
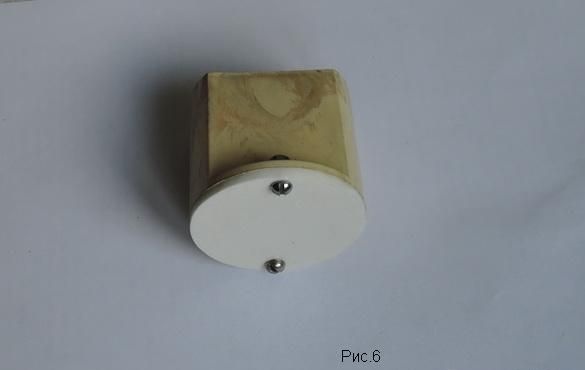
As the case used a plastic case for an inductor. A cover is cut out of the plate, which is attached from the bottom to the housing with M4 bolts (Fig. 6)
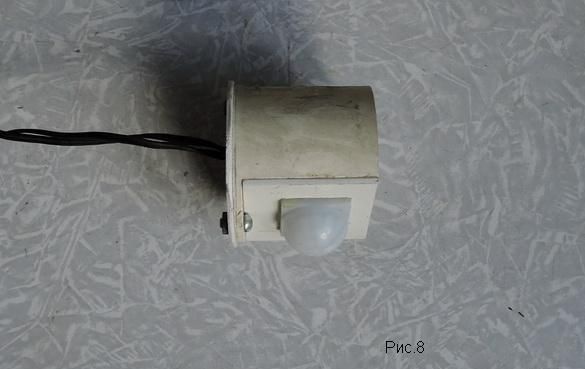
A rectangular hole is made in the side wall of the housing for the sensor headscarf. The sensor is glued through an additional plastic plate (Fig. 8).
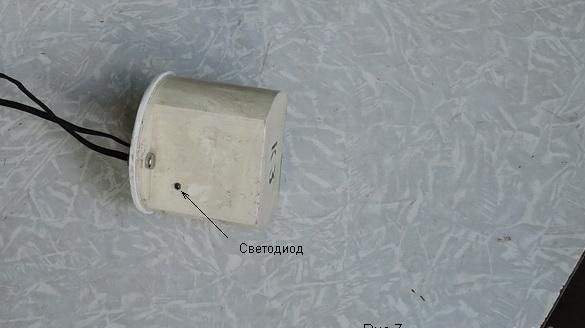
A hole is drilled in the opposite side wall into which the LED is glued (Fig. 7).
The security alarm assembly is shown in Fig. 9.
For greater stealth, the PIR sensor can be placed in a recess in a stick (thick branch) of a hollow type. Not a thick trunk is sawn off (from a tree) D ~ 7 ... 8cm, L ~ 140cm. From one end, the core is drilled to a depth of ~ 7 ... 8 cm. A side hole is drilled under the PIR sensor.Where he glued. A hole for the LED is drilled on the reverse side. From above, the hollow is closed (sealed) with a lid cut off from the same trunk. Everything is soldered according to the scheme and wires (2 pairs) are passed from the stick and go to the squeaker and the battery with the switch (in the tent). The stick is buried (stuck) in front of the tent. The capture zone of such a sensor is about 110 ° with a radius of ~ 5m.