In order to become the happy owner of a new soft sofa, there’s nothing at all to go to the furniture salon and spend a whole break of money. The modern world provides all the possibilities for a beginner furniture craftsman. The availability of specialized fittings and a variety of lumber, entire libraries with free plans and master classes - all this offers us endless possibilities.
If on top of that you are a fan of a simple rustic of furniture, so popular these days in the USA and Western Europe, don’t even think about it - feel free to start manufacturing home furniture and become a real master of furniture!
Start by using simple and affordable lumber - planed pine boards, timber and slats. They are the basis of most wooden furniture, and with their help you can create many home furnishings that are not inferior in quality and aesthetic value to industrial furniture.
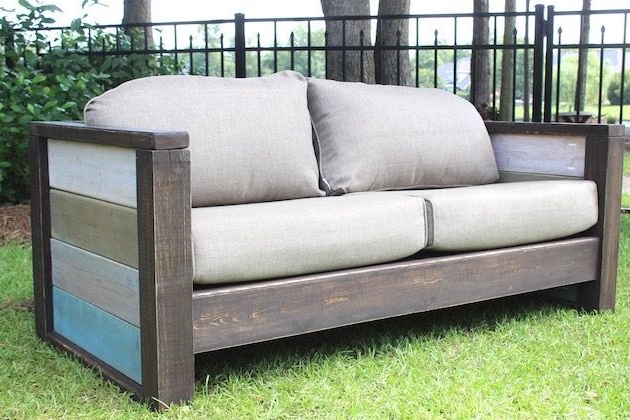
If you already have some woodworking experience, albeit a very modest one, pay attention to this original soft sofa made of natural wood. It is extremely easy to manufacture. At the same time, the cost of the finished product will seem ridiculous to you. If desired, the sofa can be supplemented with pillows and soft armrests, as this is a universal project.
In order to do it yourself To make a sofa out of wood, you will need:
Materials:
- natural pine board with a thickness of at least 30 mm for the manufacture of the frame, back and sidewalls;
- the pine board is thinner, for example, 20-25 mm for the manufacture of the base of the seat and back (can be replaced with slats)
- ready-made sofa cushions or fabric, foam and batting for their sewing;
- wood screws and furniture screws;
- glue for woodwork;
- paints with a loose translucent coating in different shades of the same color scheme;
- varnish for varnishing furniture.
Instruments:
- miter saw, circular or any other familiar tool for sawing boards, bars and rails;
- grinder;
- electric drill;
- screwdriver;
- wide paint brushes (5 pcs);
- construction tape measure;
- construction square;
- joiner's hammer;
- a pencil for marking;
- a sewing machine, if you plan to make sofa cushions yourself.
Step One: Prepare Everything You Need
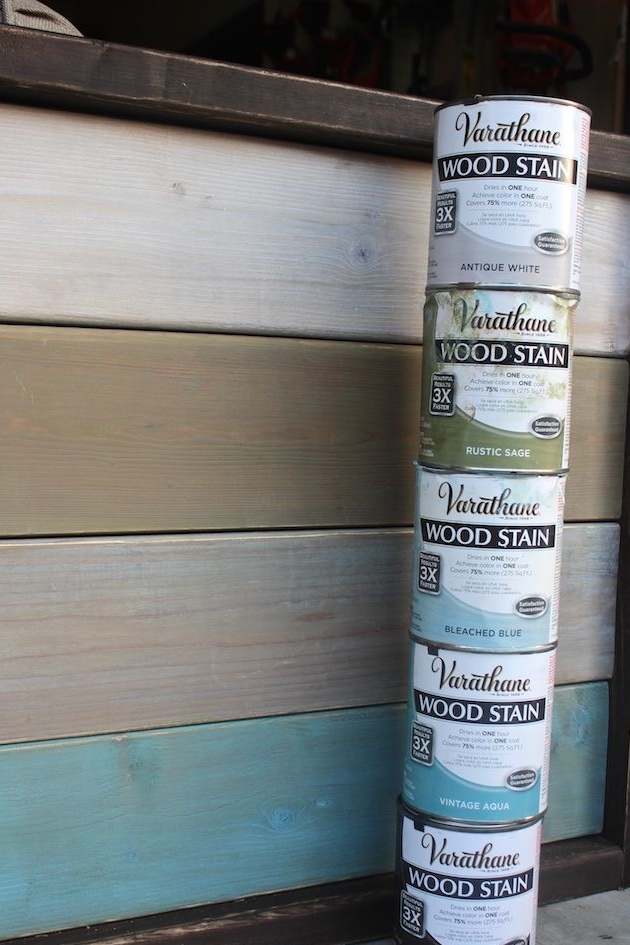
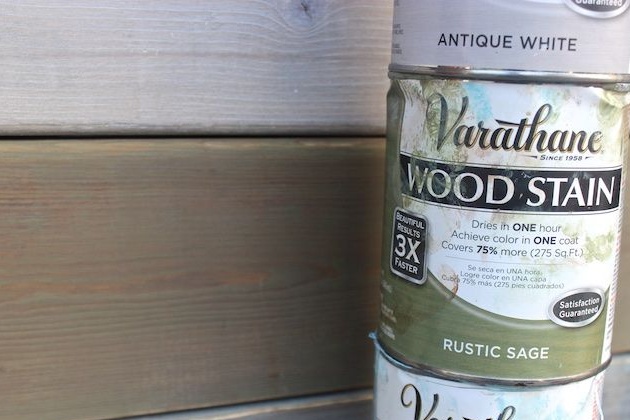
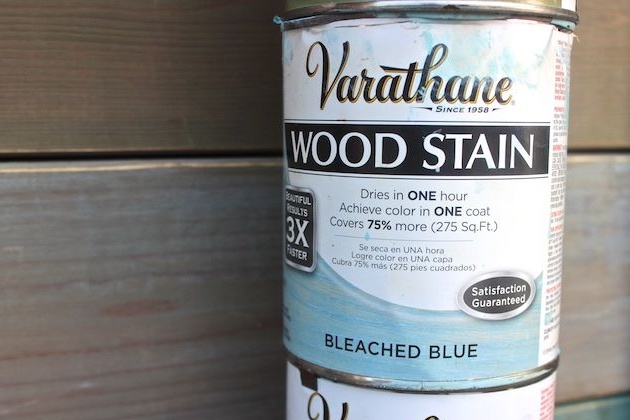
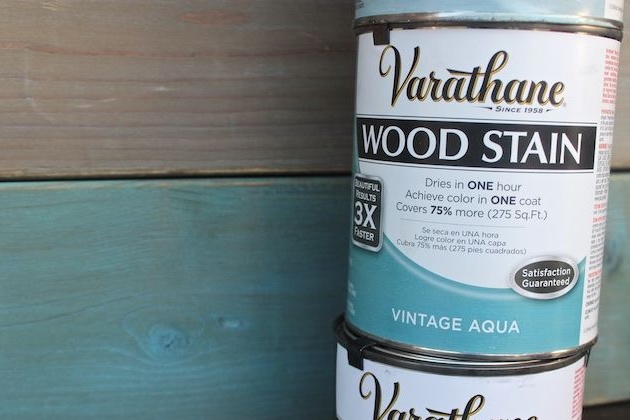
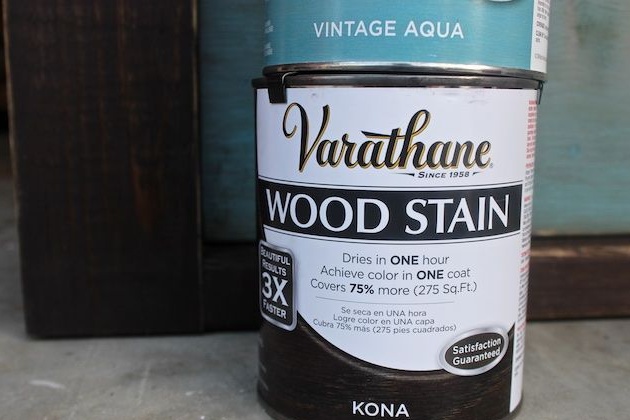
The author has done considerable work on the selection of colors. He used the funds of the well-known company Varathane from the Antique series. After drying, they all form a loose translucent coating that emphasizes the natural texture of wood. These paints are easily renewed and do not require preliminary grinding. For this they are appreciated in home production.
If you wish, you can replace this type of coating with agents such as "3 in 1". They are primers and toners for natural wood and wood-based panels. Among other things, such compounds are antiseptic and excellently protect wood from adverse effects.
All of the above funds can be used both independently and in pair with varnish. Remember that the furniture is actively used and any, even the highest quality paint can be washed, chipped and faded. Therefore, varnishing in furniture production is desirable. Choose only resistant varnishes with a hard coating, preferably profile - furniture.
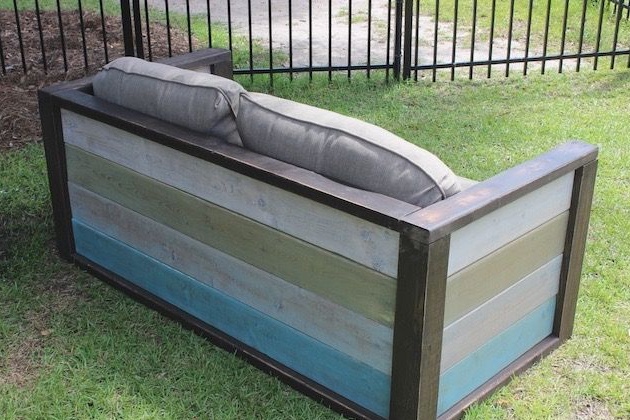
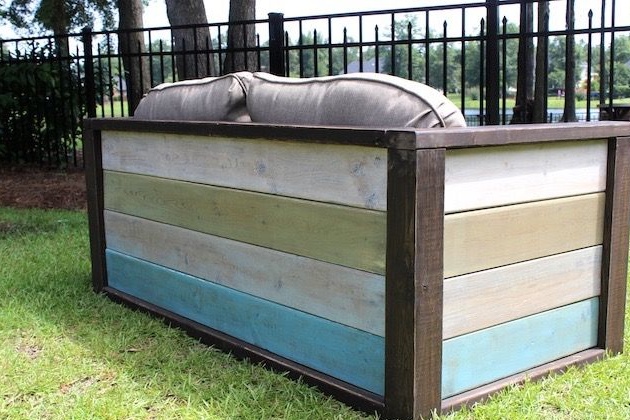
When choosing lumber, try not to bother with the quality of wood for a start. As a result, it will be painted and any blemishes regarding color or stains will not be visible. The photo from this master class shows that the author uses ordinary planed boards, sometimes of imperfect shape. However, the sofa came out great and looks very colorful and original, so you can draw your own conclusions.
Step two: manufacturing of parts, their processing and painting
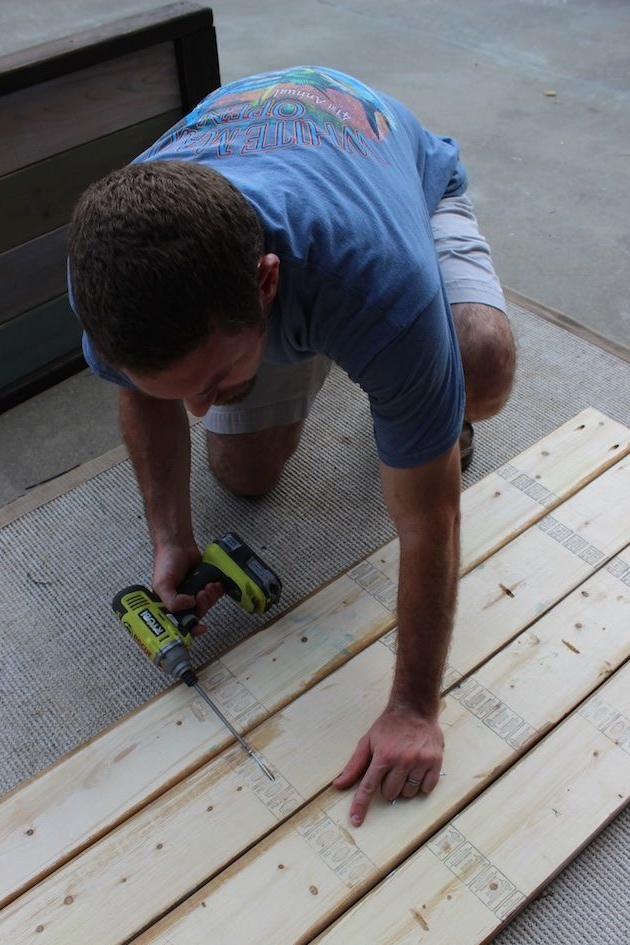
If your chosen lumber is well planed, it is not necessary to grind them. Consider the specific condition of the boards and individual parts in this regard. If the surface does not suit you, polish it. It definitely won’t get any worse, but this way you will definitely prepare the wood for high-quality painting.
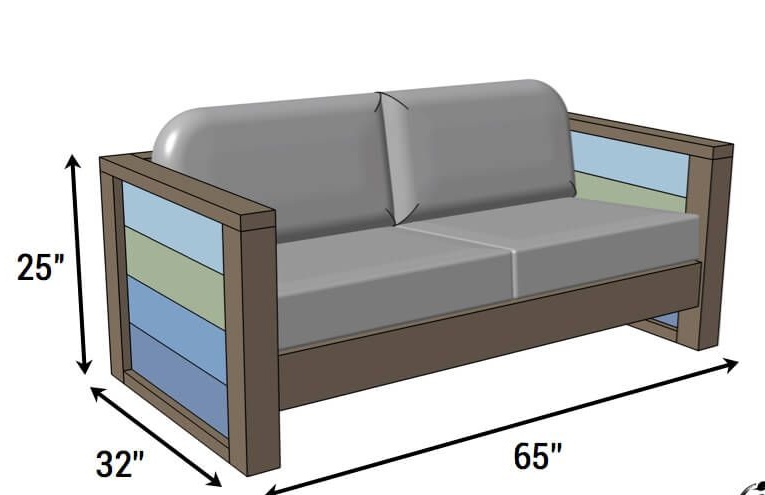
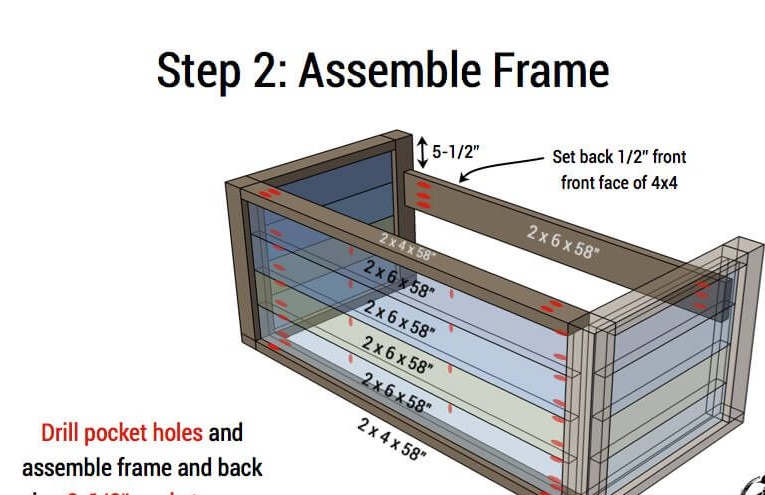
Determine the size of the sofa for your home, detail on paper, using convenient schemes from this master class. Check the size of each part in the course of their manufacture, as the design has many similar elements and the exact parameters will come in handy more than once.
The length of the sofa, which is shown in the photo, is not intended for use as a sleeping place and is approximately 162 cm. The total width of the sofa with the back is 80 cm. The height of its wooden structure is almost 63 cm.
When making each subsequent batch of parts, paint them with your chosen paint in two layers. To do this, use paint brushes. If you plan to varnish the sofa, leave it at the stage, after assembly.

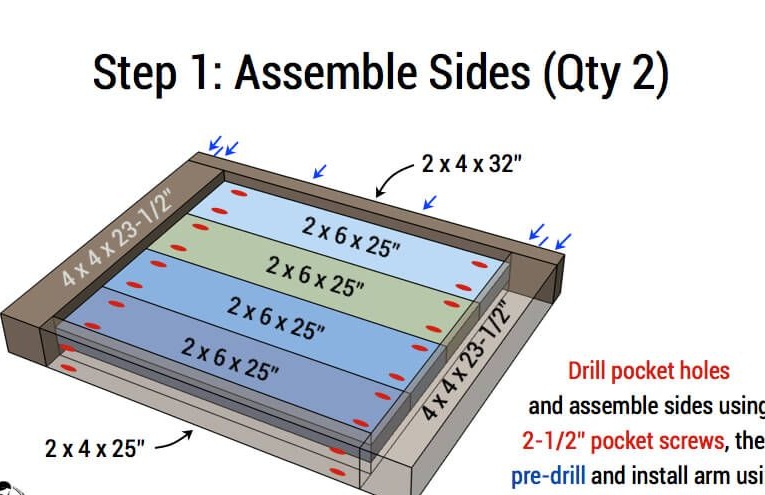
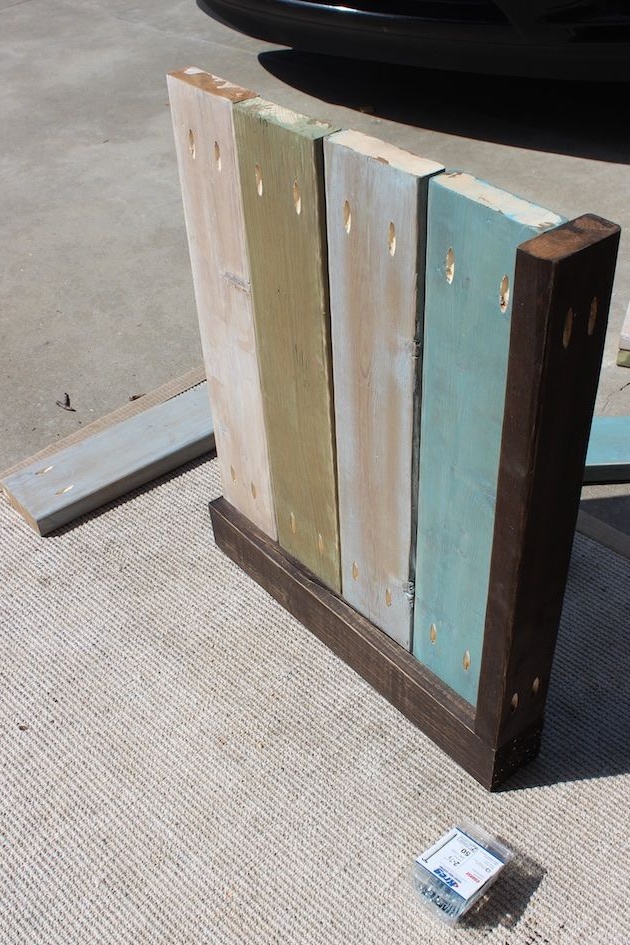
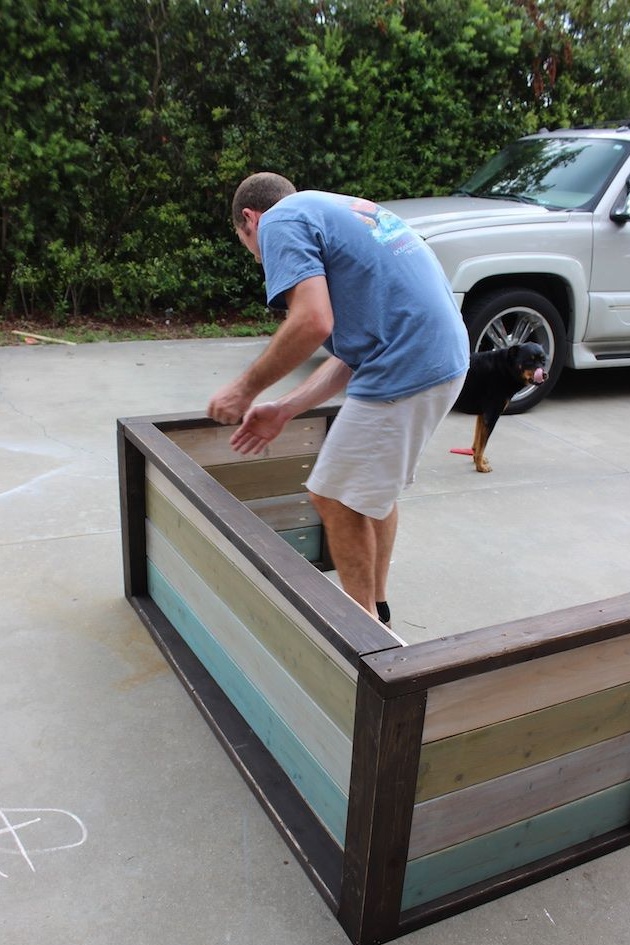
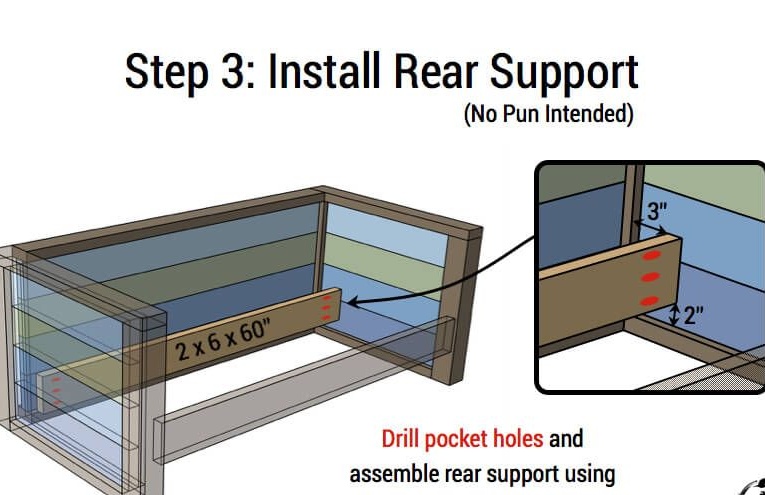
Step three: make the side panels of the sofa
When constructing such large products, it is easy to get confused, but the author describes the whole process of work step by step. He suggests starting the assembly from the side panels.
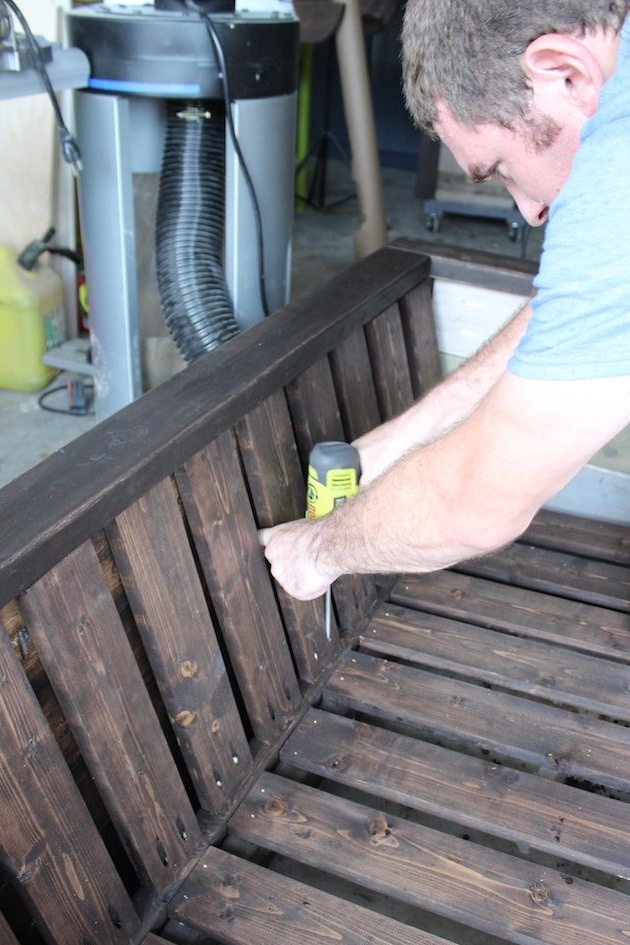
From a frame filled with boards approximately 30 mm thick. If desired, you can use thinner boards to facilitate construction. This will not affect strength. The main thing is that the thickness is enough to fix them inside the frame.
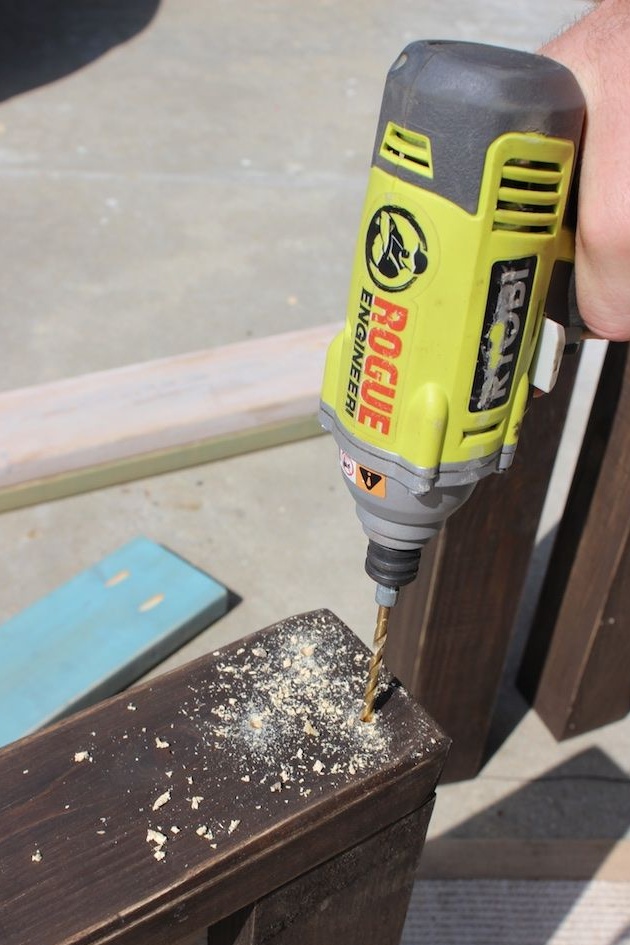
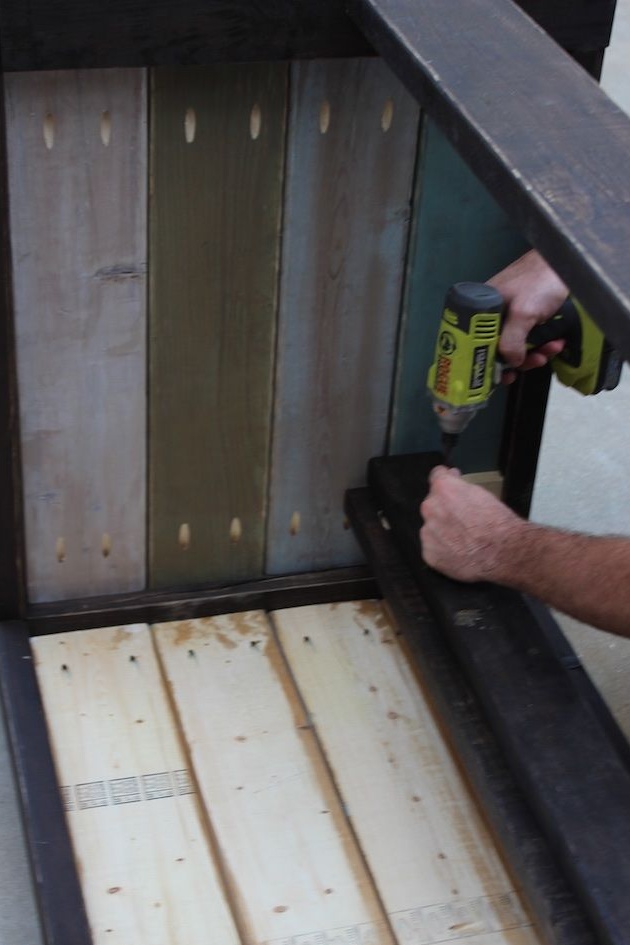
And for this, the author used pocket connections on the screws. Screw holes are drilled at an angle using a conventional drill. Often, for this purpose, use a special clamp with a device - a guide for drilling holes at the desired angle. But experienced craftsmen do without it. The main thing here is skill.
When connecting the individual parts, it is useful to use glue. Not even useful, but necessary. Although you can do without glue, the design will significantly lose in strength. Especially over time.
Assemble the two sidewalls as shown in the photo below. Before screwing in the next screw or self-tapping screw, be sure to make a hole, otherwise the fitted workpiece may crack.


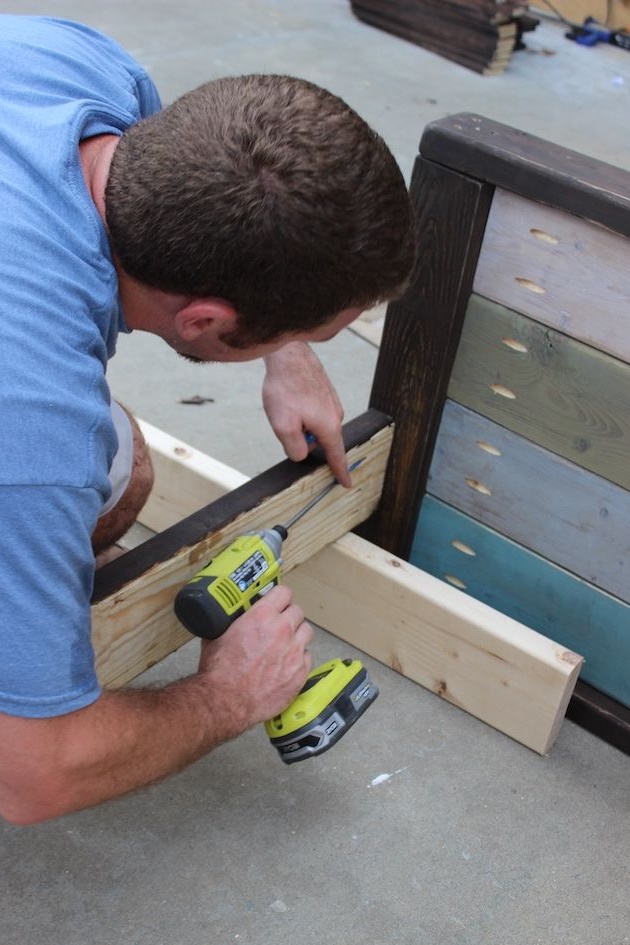
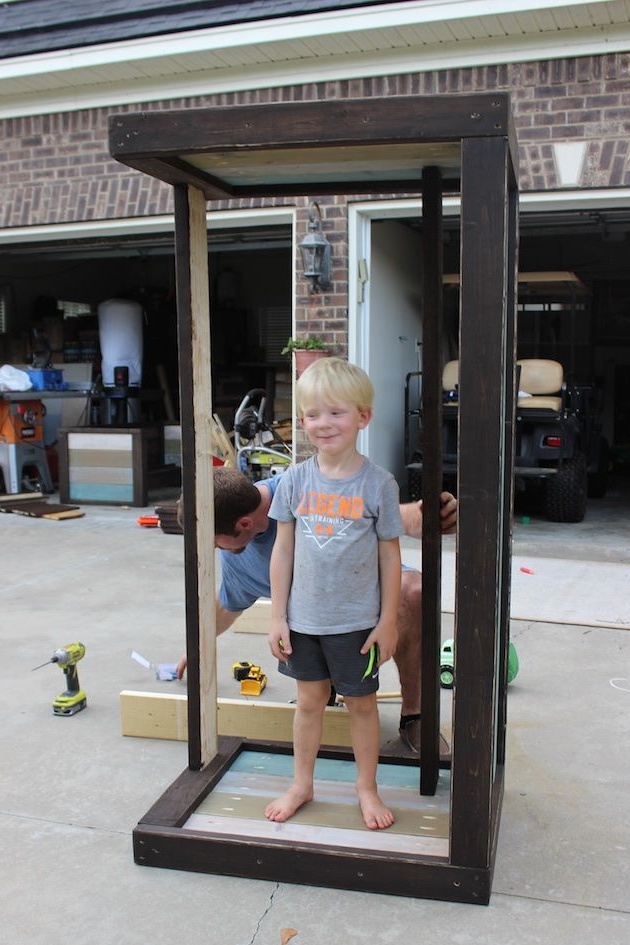
Step Four: Assemble the Sofa Frame
The first stage has been completed, and you have passed the appropriate training. All subsequent assembly of the frame will be similar to him, so the skill will be useful. Fasten the upper and lower parts of the frame, which are the base of the back.
As with the sidewalls, sew the backrest with painted boards. You can fix them one at a time, or you can take advantage of the author’s experience and first assemble a solid shield, and only then fix it in the back frame.
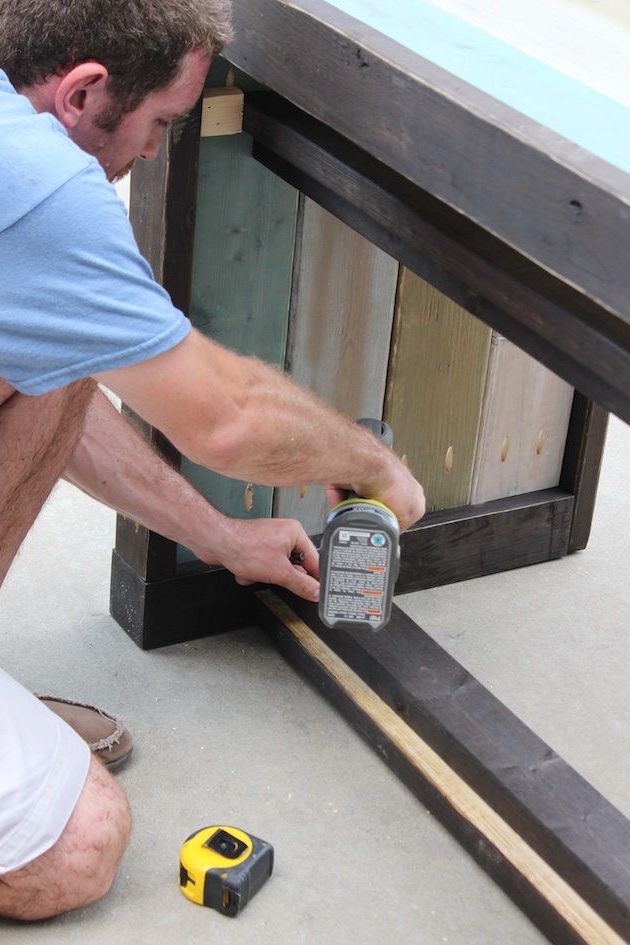
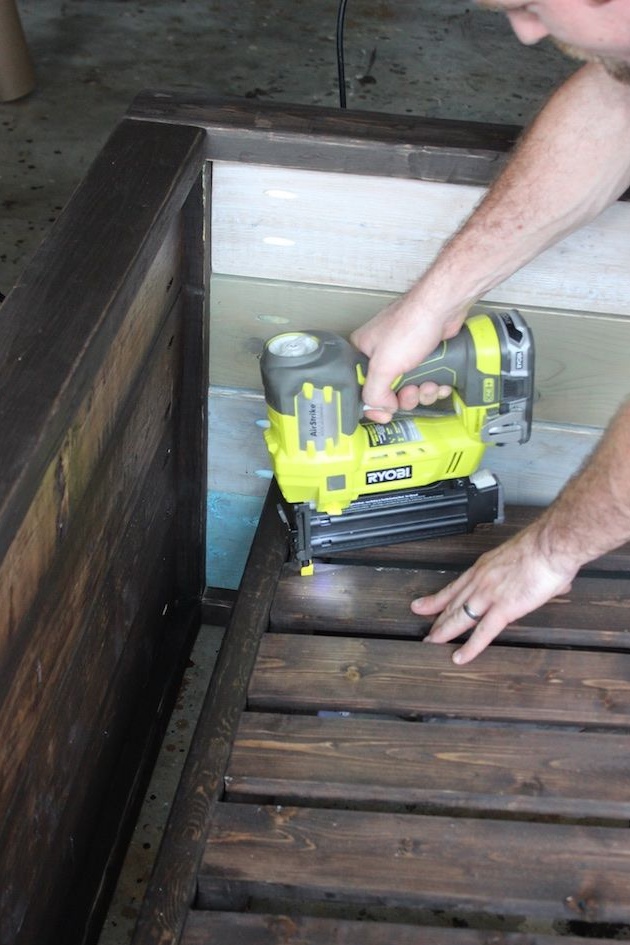
Determine the level at which the seat will be. Consider the thickness of the pillows in your calculations. Lock in front the bar on which the seat parts will lie. Screw the same bar on the back side, at the plane of the back at a distance of about 75 mm. On top of these slats on the inside, fasten the slats tightly tightened as shown in the photo. You can use nails for this.
Sew the seat and backrest with laths of small thickness. For both the first and the second, lamellas can be used. This will slightly increase the cost of the product, but will add to it comfort. Moreover, the details of the back are located at an angle due to the fact that you made the same indent from the back wall of 75 mm.


Step Five: Textile Additions
The author used ready-made pillows to make the sofa soft. However, he focuses on the fact that such pillows can be easily made independently. To do this, you will need furniture foam 50 mm thick, thin elastic foam to give extra volume (can be replaced with batting) and a suitable fabric. It is better to use furniture upholstery fabric, but any dense will fit for these purposes.
Foam rubber use in two layers. Under them, you can take foam of high rigidity, and apply softer material on top. This will extend the life of the pillows. To give additional volume, the resulting foam base is wrapped with a couple of layers of batting or thin soft foam.
The resulting filler is placed in technical covers and sutured. For ready-made pillows, decorative removable covers are made, which are easily removable and which can be washed at any time.