Today in the market you can find a huge variety of different lighting fixtures for bicycles. The bulk of them work on batteries, which, although not often, have to be charged. There are still dynamos, but their disadvantage can be considered that they wear out quickly, since there are friction units in them, and the efficiency of a bicycle takes a lot.
If you like tinkering with something do it yourselfcan make this simple homemade, which will illuminate your path on a bicycle forever, as it does not require recharging and it does not have friction units. And we will talk about such a generator as induction. In this homemade work, the author decided to make a taillight in order to secure transport in the dark. If you need a front lamp, then you need more magnets to ensure continuous burning of the lamp.
For assembly, you will need a minimum of materials, everything is done almost from junk. A couple of neodymium magnets and coils are enough, which are in bulk in modern and old technology.
According to the author, he drove 400 km on his homemade product and at times moved at a speed of up to 60 km / h. Despite the frost and rain, its generator continues to work to this day.
Bit of theory
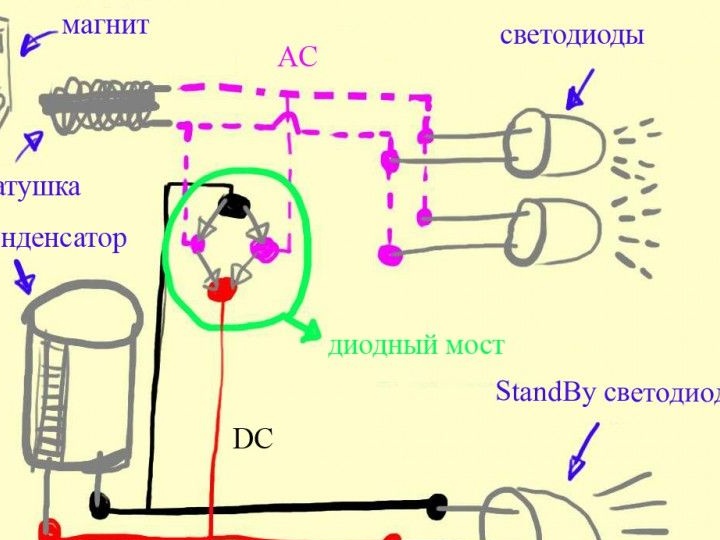
In simple terms, any generator works according to one principle, it requires an alternating magnetic field. In our case, such a field is created by moving permanent magnets. When a magnet passes near a coil, an electric current is generated in it. But the current turns out to be alternating and is not very suitable for LEDs, so we still have to align it. It is also important to accumulate current, so that the LED for some time burns continuously, here the capacitor comes to the rescue. Instead of a capacitor, you can even put a small battery, but the latter has a service life, which can not be said about the capacitor (of course, all this is roughly speaking, because nothing lasts forever).
Materials and tools for manufacturing the generator:
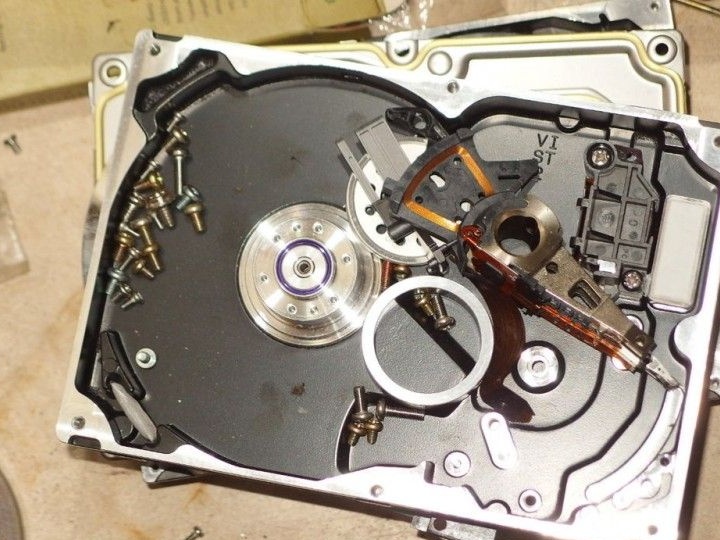
- a pair of neodymium magnets (these can be obtained from old hard drives);
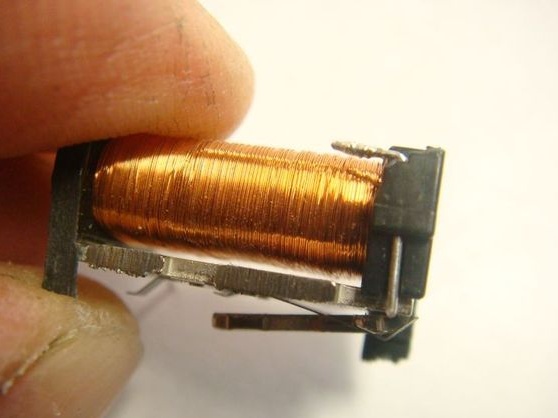
- several or one coil 12DC, 10A 250V (there are such in the relay, in old tape recorders and other equipment);
- shrinkage of different sizes;
- hair dryer;
- mastic;
- red LEDs 5mm, ~ 3V 20mA (if you want to make a taillight);
- coaxial stereo wire;
- cable ties;
- a soldering iron with all piers.
Generator assembly process:
Step one. Component preparation
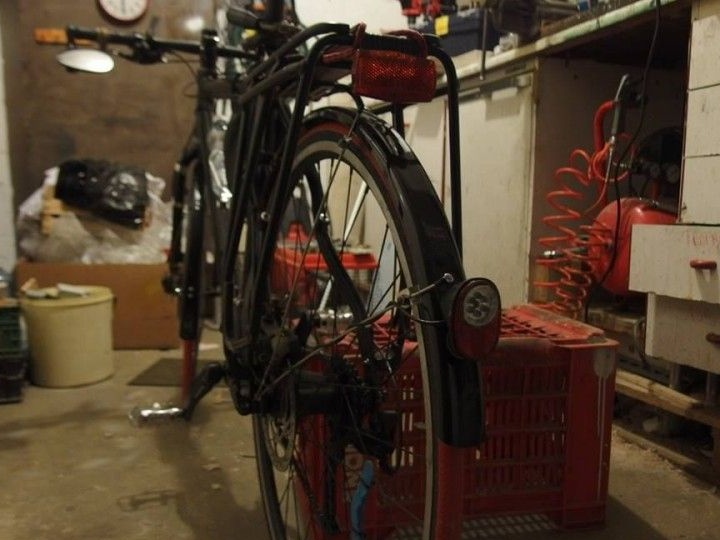
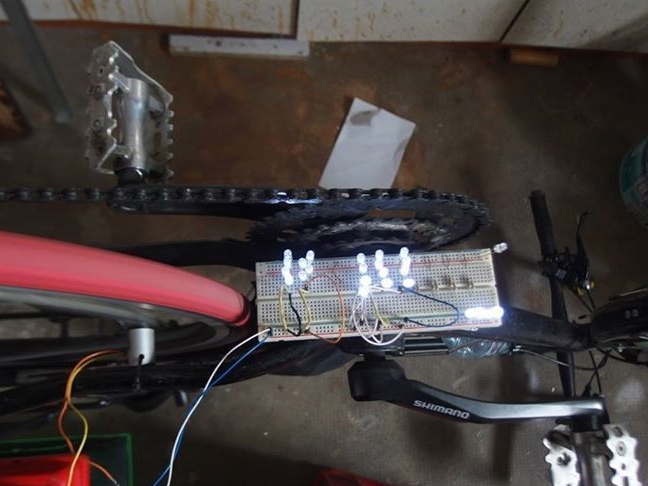
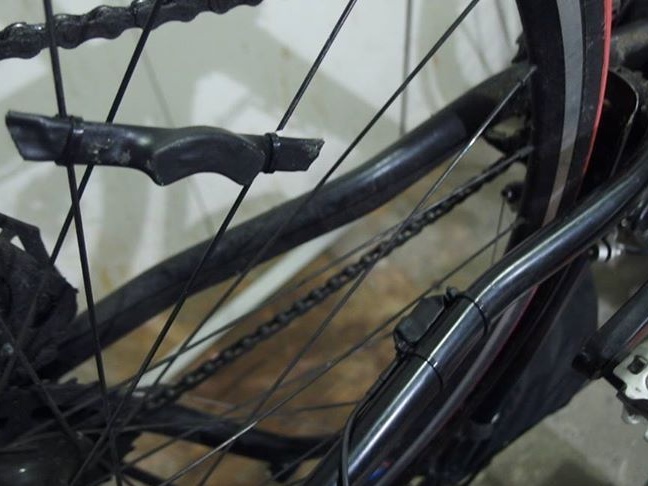
First of all, you need to collect all the components and already at this stage it will be possible to check the circuit. Neodymium magnets that you have to pull out of the hard drive need to be temporarily mounted on the bike matches. As for the coil, it is placed on the fork of a bicycle. As a result, the magnet should pass as close as possible to the coil. But there is no need to overdo it, because the slightest beating with too little clearance can knock you a coil, magnets or bend the knitting needles.

Next, you will need to experimentally select the optimal location of the magnet and coil. The further the magnet is placed from the axis, the less often it will pass near the magnet and the more speed will be needed for the flashlight to work. Well, if the other way around ... everything will be the other way around
 It is important to remember that at high speed LEDs can easily burn out if the generator is made too powerful.
Step Two We arm ourselves with a soldering iron and assemble a circuit
When you select the desired position of the coil and magnets, you can solder the circuit. The circuit contains a diode bridge and a capacitor. These elements are needed so that the diode burns more evenly. LEDs are soldered in parallel. All soldering spots must be well insulated so that they do not get wet in the rain. For these purposes, the author first lubricates the wires with mastic, and then pulls the heat shrink. The result is a well-insulated design.
The diode bridge and capacitor may not be used, but in this case the LEDs will burn worse. It is also recommended that resistors be installed in the circuit so as not to burn the LEDs.
Step Three We install accessories on bike
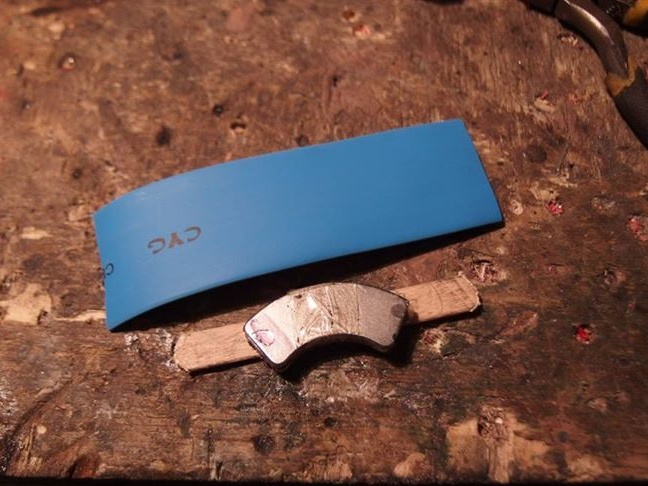
Elements are fastened with plastic ties. The coil is attached to the plug, and the magnets to the spokes. To mount the magnets you will need ice cream sticks, as well as extensive heat shrinkage. We put the magnet on a stick, and pull the heat shrink from above and heat it. The result is a "magnet on a stick", which can already be conveniently mounted on the knitting needles. Before pulling the heat shrink, the stick can also be glued with tape.

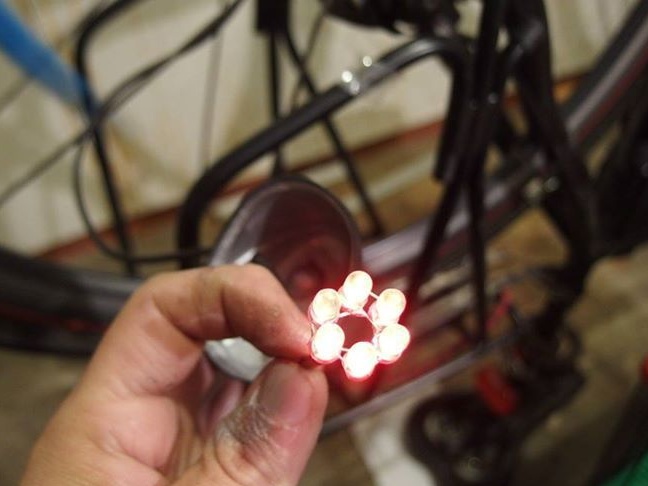
Step Four Testing homemade
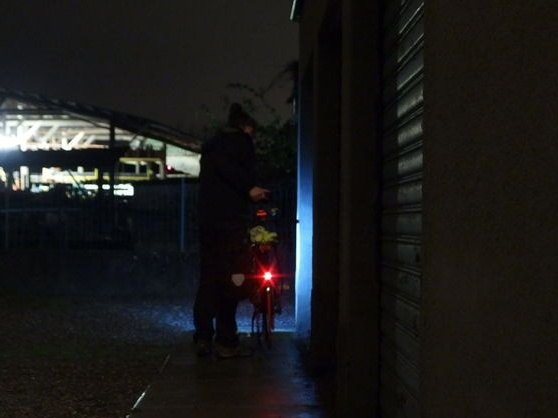
When the taillight is installed, home-made can be tested. We turn the bike over and turn the wheel, the taillight should start flashing. Now the bike has become more visible on the road in the dark.