
Some time ago I already posted an article on making a knife from a saw bladebut she was criticized a lot. Doubts aroused the material from which the disk body itself is made, they say it is not hard enough and generally can not be hardened. However, I continued to meet such knives on the Internet and found that they were made in large quantities, so the question arose, are all really so stupid?

After scouring the net for information, I realized that this steel is quite well tempered and has a high carbon content. Most often in the manufacture of such saw blades is used.
So it is possible and necessary to make knives from saw blades. True, no one is safe from getting a disc of not very high quality in his hands. The only drawback of this steel is that it rusts quite actively.
Specifically, in this instruction you will not need to bake, since the knife does not need to be tempered, it is simply cut and sharpened.
Materials and tools for manufacturing homemade:
Material List:
- saw blade;
- paper;
- brass;
- wood for the manufacture of pens;
- a large number of masking tape.

Tool List:
- grinder;
- a pencil;
- ruler;
- grinding machine;
- sharpened and more.
Also, do not forget to collect all the necessary protective equipment for work. You will need glasses, gloves, a respirator.
The process of making a knife:
Step one. Cut the main knife profile
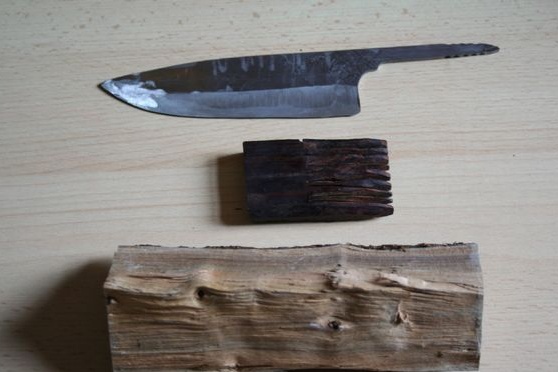
First you need to come up with a blade profile and then draw it on paper. You can still find a finished profile on the Internet and just print it on a printer, though then your knife will not be unique.
Next, cut out the template with scissors, take glue and stick to your source of steel, in our case it is a cutting disc.
Then a grinder comes to the rescue, with it you can cut the primary profile of the knife. You need to work slowly, you should have water at hand. The steel must not be allowed to overheat, for this the steel is constantly wetted with water. If the cut-off spot turns blue, then it is better not to use such a blank.
Of course, it will be safe to work with gloves on, but in this case you will not feel how much the metal heats up, so experts in this area recommend working carefully without gloves. At least when cutting.
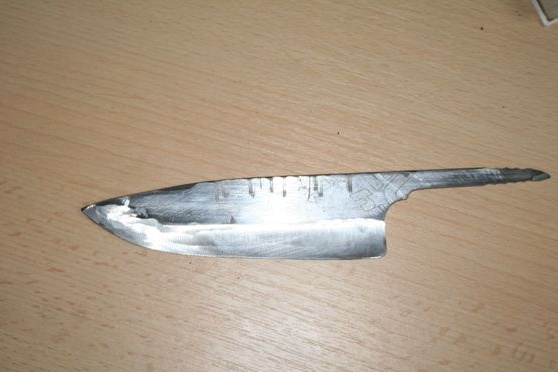
Step Two Workpiece grinding
The next step is grinding the workpiece.This can be done manually, but such a process is tedious, time-consuming, and the quality is poor. The professional approach here will be the use of a belt sander. We grind the resulting notches after cutting, and also form the bevels.
The formation of bevels is a very important event, since the cutting characteristics of our knife depend on this. And we need a sharp knife, which would easily cut vegetables, meat and other products. To do this, the blade must be thin, even in this case it will be easy to sharpen.
It is also important to remember that when working on a grinder, metal can be overheated and tempering will occur. If you do not plan to temper the blade at all, then the metal should strive to heat as little as possible. Use water to cool.
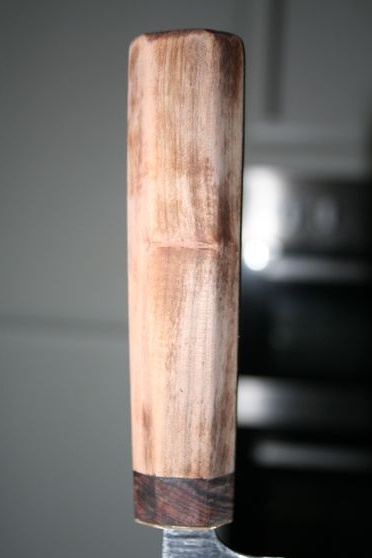
Step Three Pen making
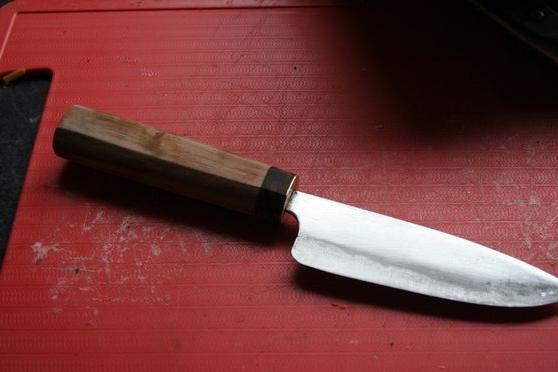
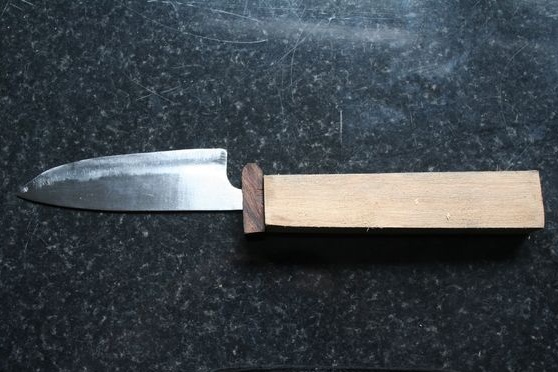
There are many ways to make a handle, the most popular, but not the easiest way, is to make a handle from two halves, and then gluing them and fixing them with pins. But in this homemade work, the author decided to do as simple as possible, but practical. The desired piece of wood was selected for the manufacture of the pen, and then a hole was drilled along it. As a result, the blade sits on the epoxy, which is almost under the top is poured into the installation hole.
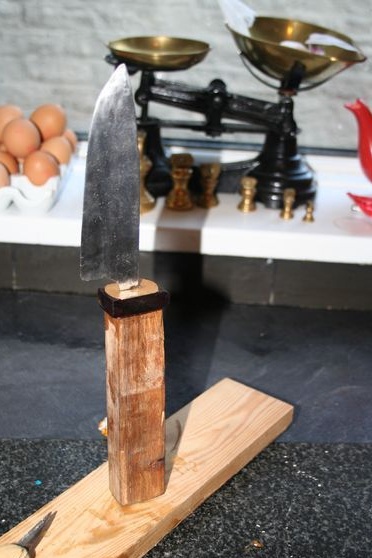
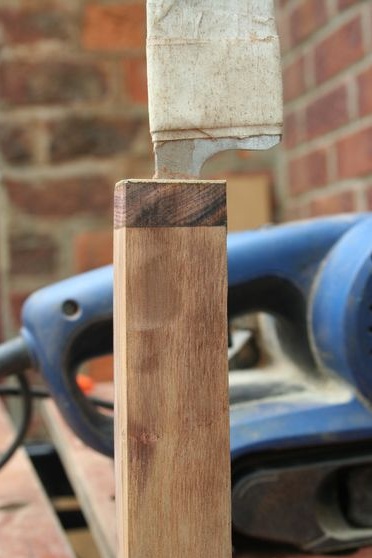
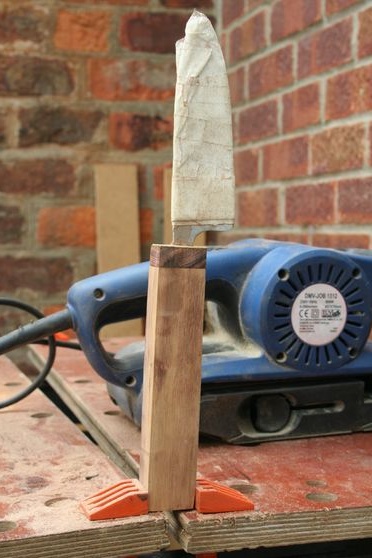
To decorate the knife a little and strengthen the handle, the author made a plate from brass, made a hole in it according to the size of the blade and glued it to the handle.
Step Four Final grinding of the handle
Now the knife is again processed on a belt grinder. We need to smooth the edges of the handle, form the desired profile and make it perfectly smooth. The author gradually changes the granularity on the machine to achieve the desired result. As a result, grain sizes of 60, 80, 100, 120, 180, 240, 400, 600, 800, 1200 were used.
After grinding, the handle must be impregnated with protective substances so that it does not absorb moisture and is not contaminated, which is always full in the kitchen. Various fats can be used for impregnation, including beeswax, which the author used.
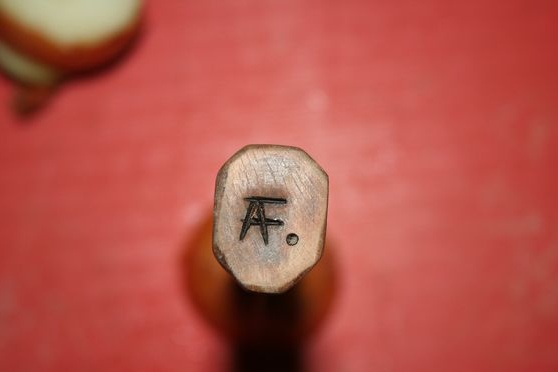
Step Five Mark on the knife
If you want to leave an inscription on the blade itself, then you will need a special reagent for etching or an engraver. The author decided to put a drawing on the handle of a knife. To do this, he took a bicycle spoke and bit off one side of it with pliers. Next, this edge must be flattened with a hammer and sharpened. As a result, the tip of the spoke heats up on gas and with this fixtures the desired pattern or inscription is burned, which is preferably applied in advance with a pencil.
Step Six Sharpening and testing
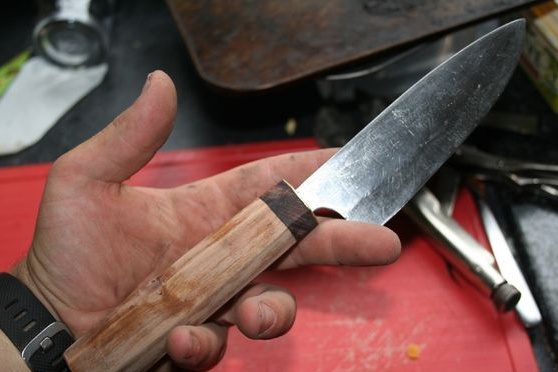
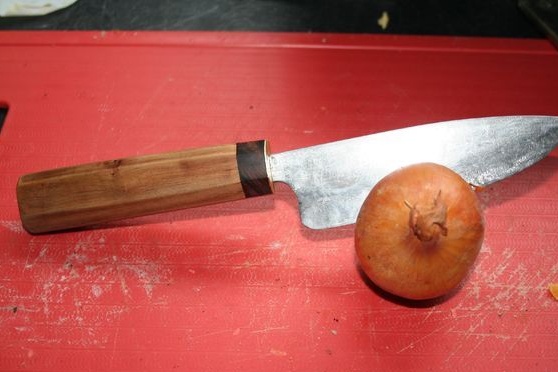
That's all, the wonderful knife from the saw blade is ready. As can be noted, a forge is not needed here, since the knife is simply cut out by a grinder and sharpened. It is not necessary to temper it. If during manufacture the metal was not overheated, then the steel should hold sharpening well.
The blade is brought to perfect sharpness with a water stone. It must be moistened with water and produced until the blade begins to sharpen evenly along its entire length. To do this, a line can be drawn on the blade with a marker. On it you can observe in which place you sharpened and in which you missed.
Such a knife requires careful storage and handling. You do not need to throw him in a sink with water so that he swims there for days. Immediately after cutting, the knife must be washed and stored in a dry place.
Since the selected steel lends itself to fairly rapid rusting, the blade must be treated with a protective substance during prolonged storage. It can be vegetable oil, for example, olive. It is better not to use sunflower, as it reacts with the metal and then it will be extremely difficult to clean it.