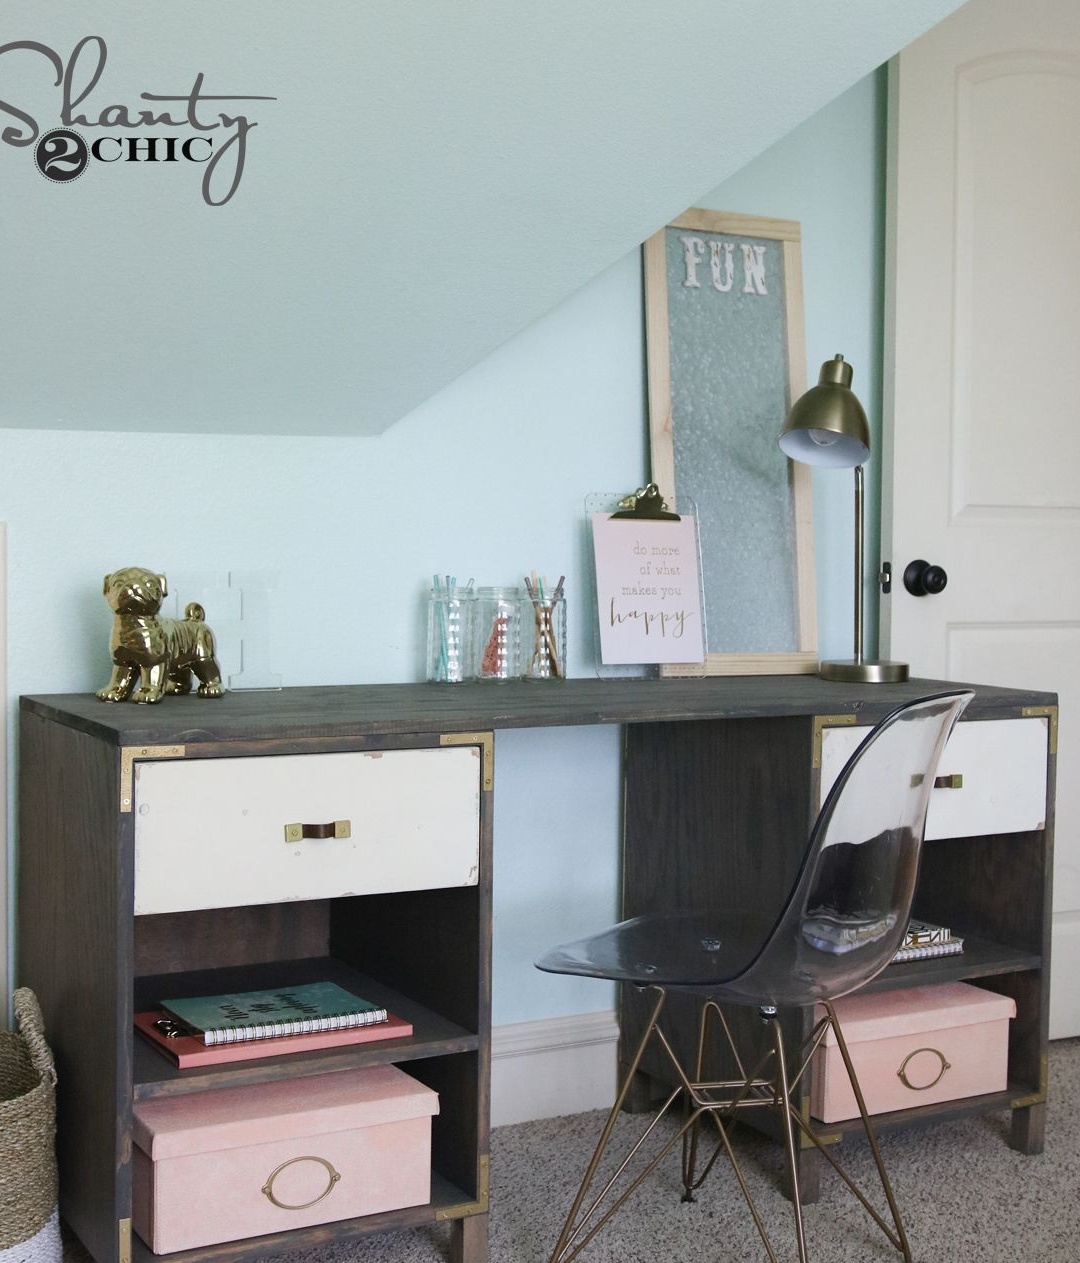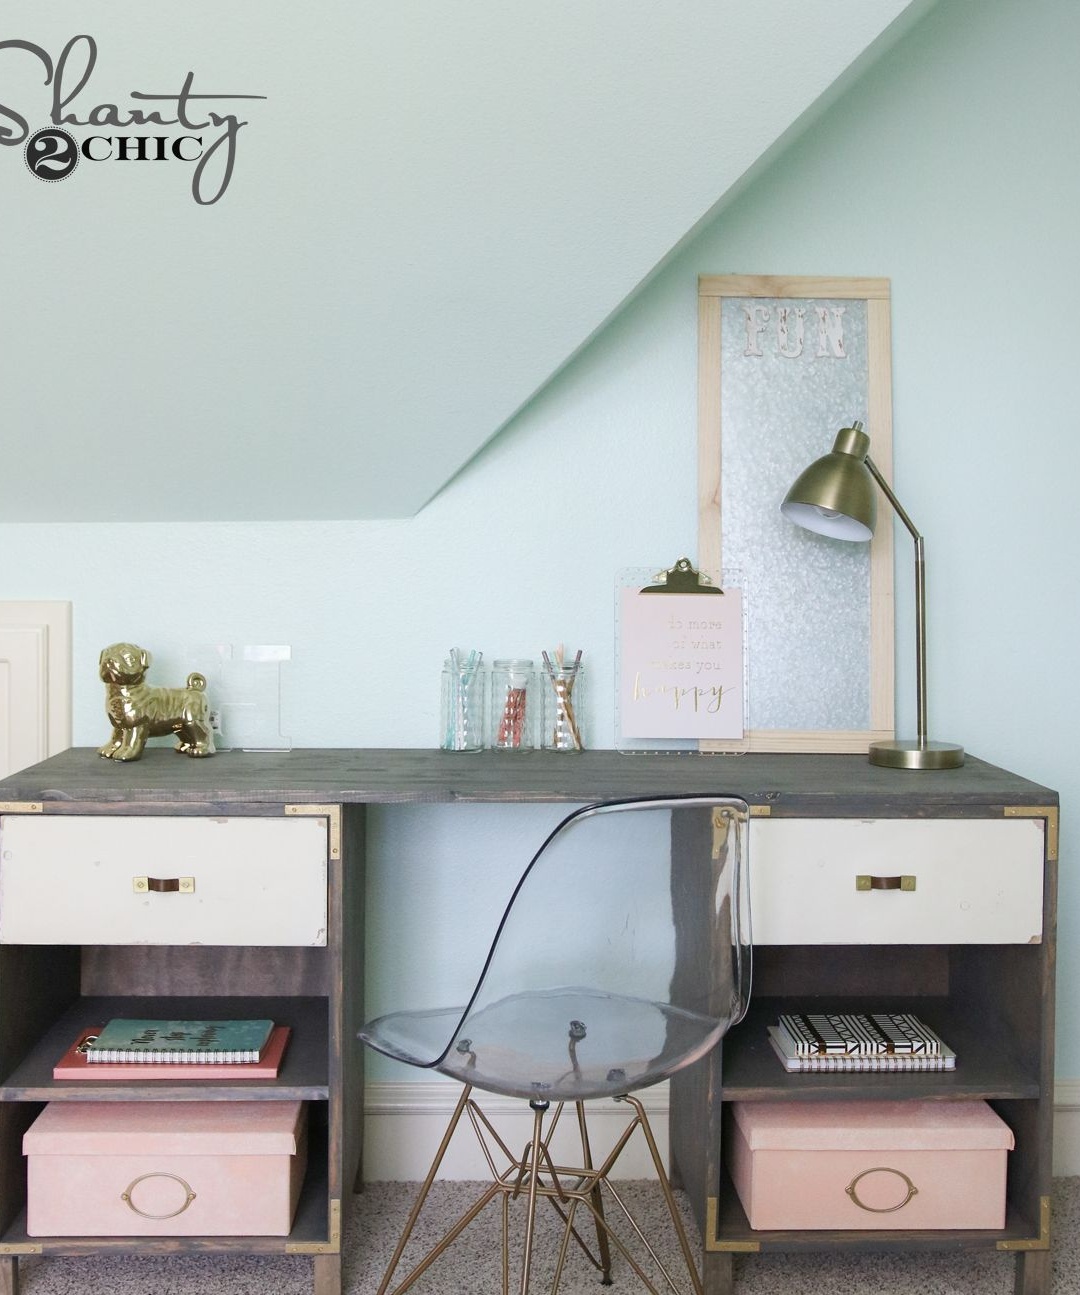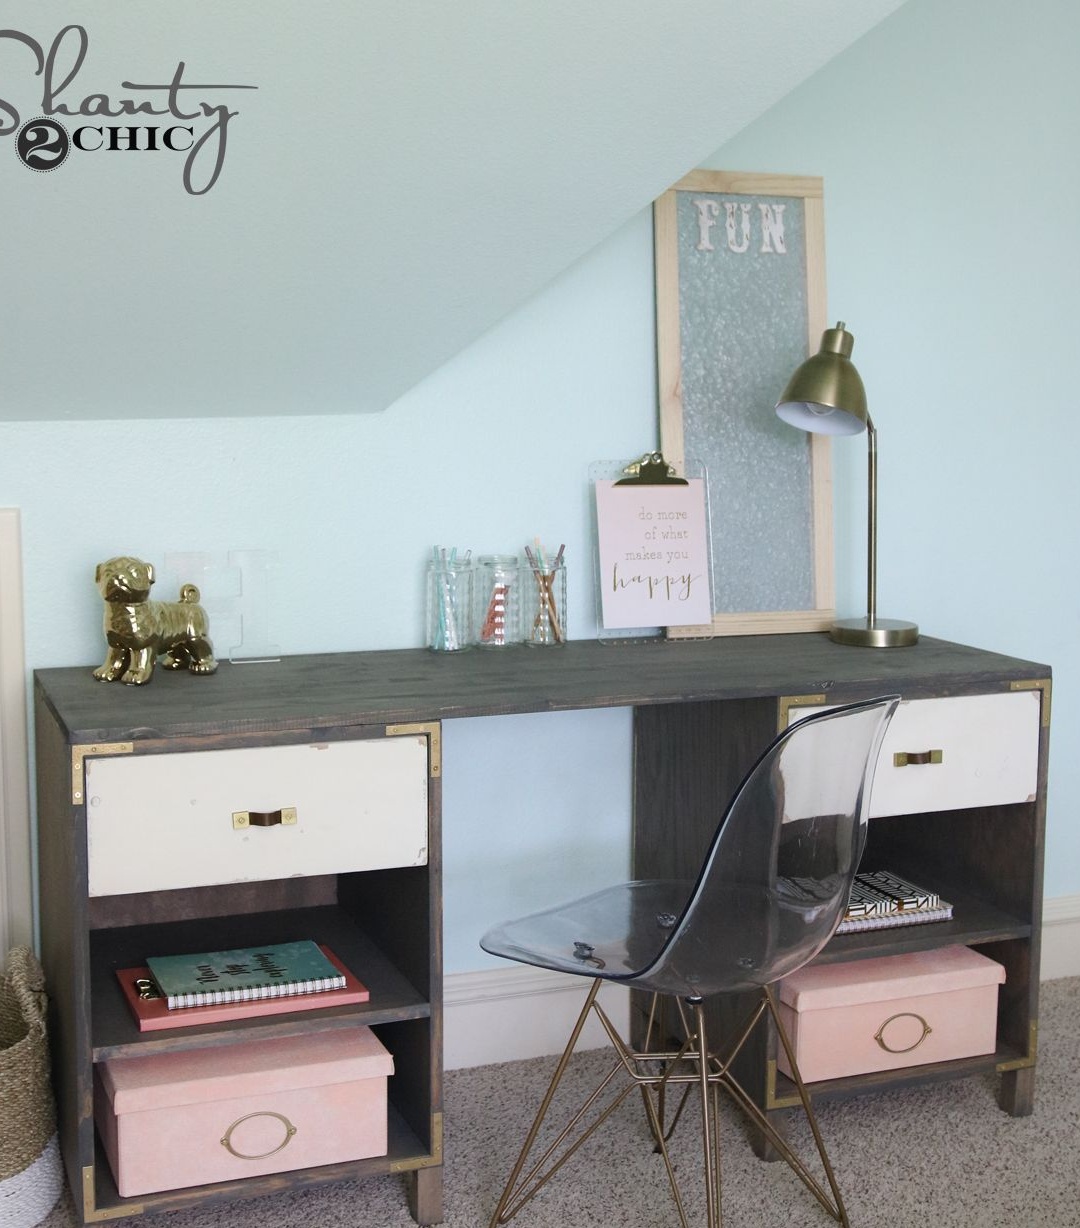

A convenient desk is a guarantee of comfort if you work at home or prefer to take work at home. Natural wood elements will add of furniture special charm and warmth. Using such a table is doubly pleasant if you make it do it yourself.
The basis of the work is the principle of constructing a table on two rack-shelves. It is very easy to assemble such a structure, and it is easy to understand. This means that instead of legs you use two open shelves in which it is convenient to store everything you need. The table top is laid on top of the racks.
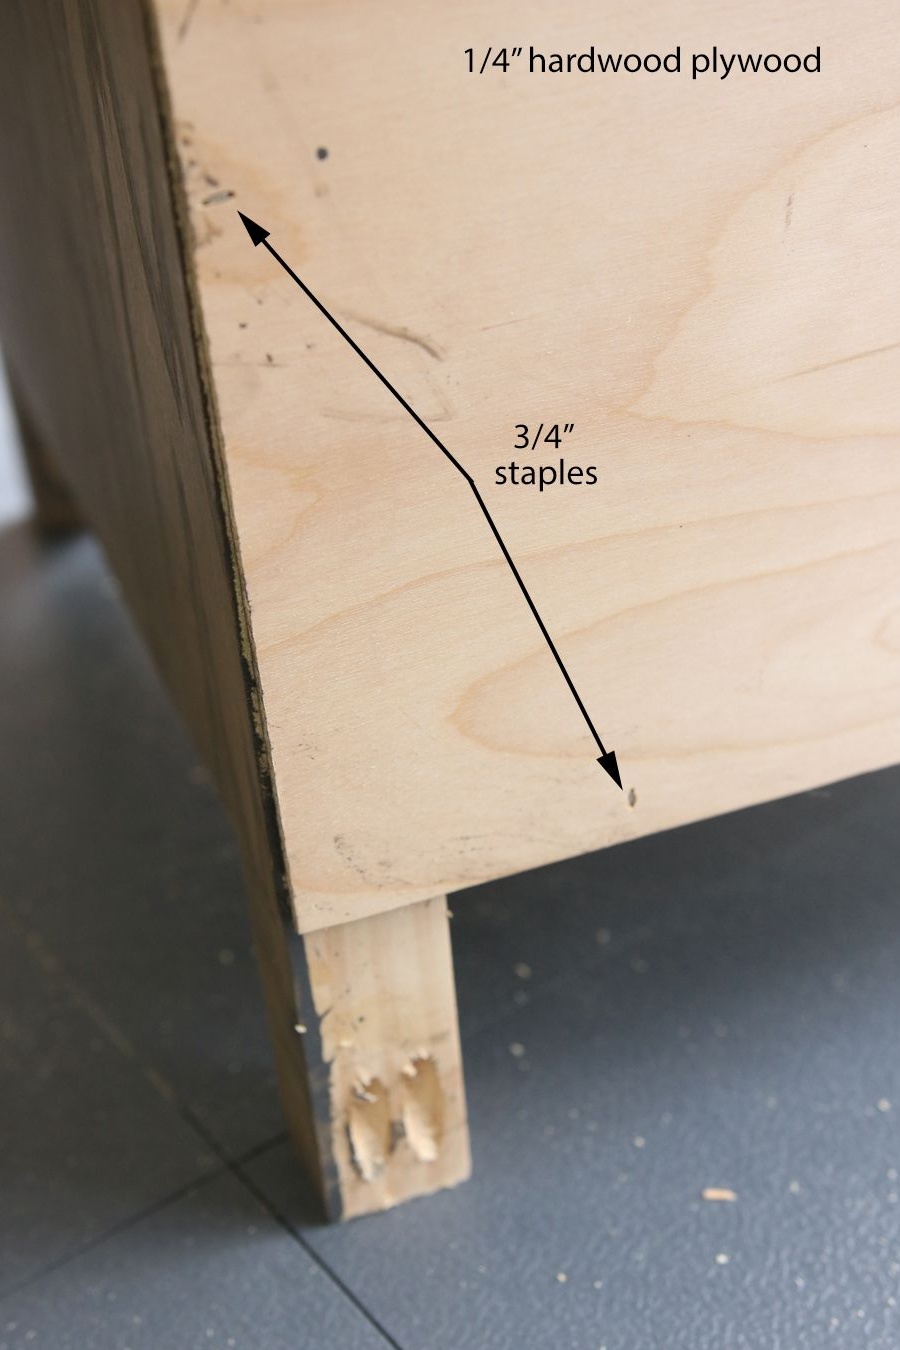
In this case, the shelves are made of plywood. This is very convenient because you do not have to glue the panels before you begin assembling. The use of plywood is a moot point, as many are convinced of its harmfulness. However, there is little evidence of this. Quality material has a certificate of quality and related properties. When choosing plywood, focus on the smell that comes from it. If it is pleasant and resembles a freshly sawn tree - feel free to order the material.
To make such a table in home conditions, you will need:
Materials:
- durable high quality hardwood plywood;
- planed boards for the manufacture of countertops;
- pine boards for the manufacture of drawers and plywood or fiberboard for their bottom;
- decorative wooden planks for decorating plywood edges;
- glue for woodwork;
- decorative toner oil or primer with a tinting effect;
- paint white or milky tint for coloring drawers;
- varnish suitable for varnishing furniture;
- metal-plastic accessories for drawers;
- furniture screws;
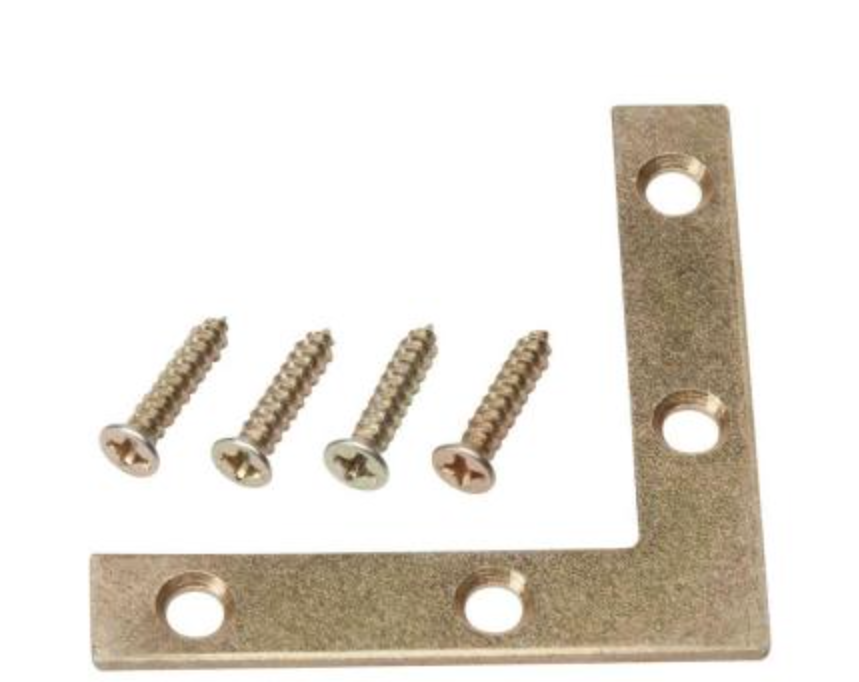
- decorative overhead metal corners under bronze or copper.
Instruments:
- jigsaw or saw machine;
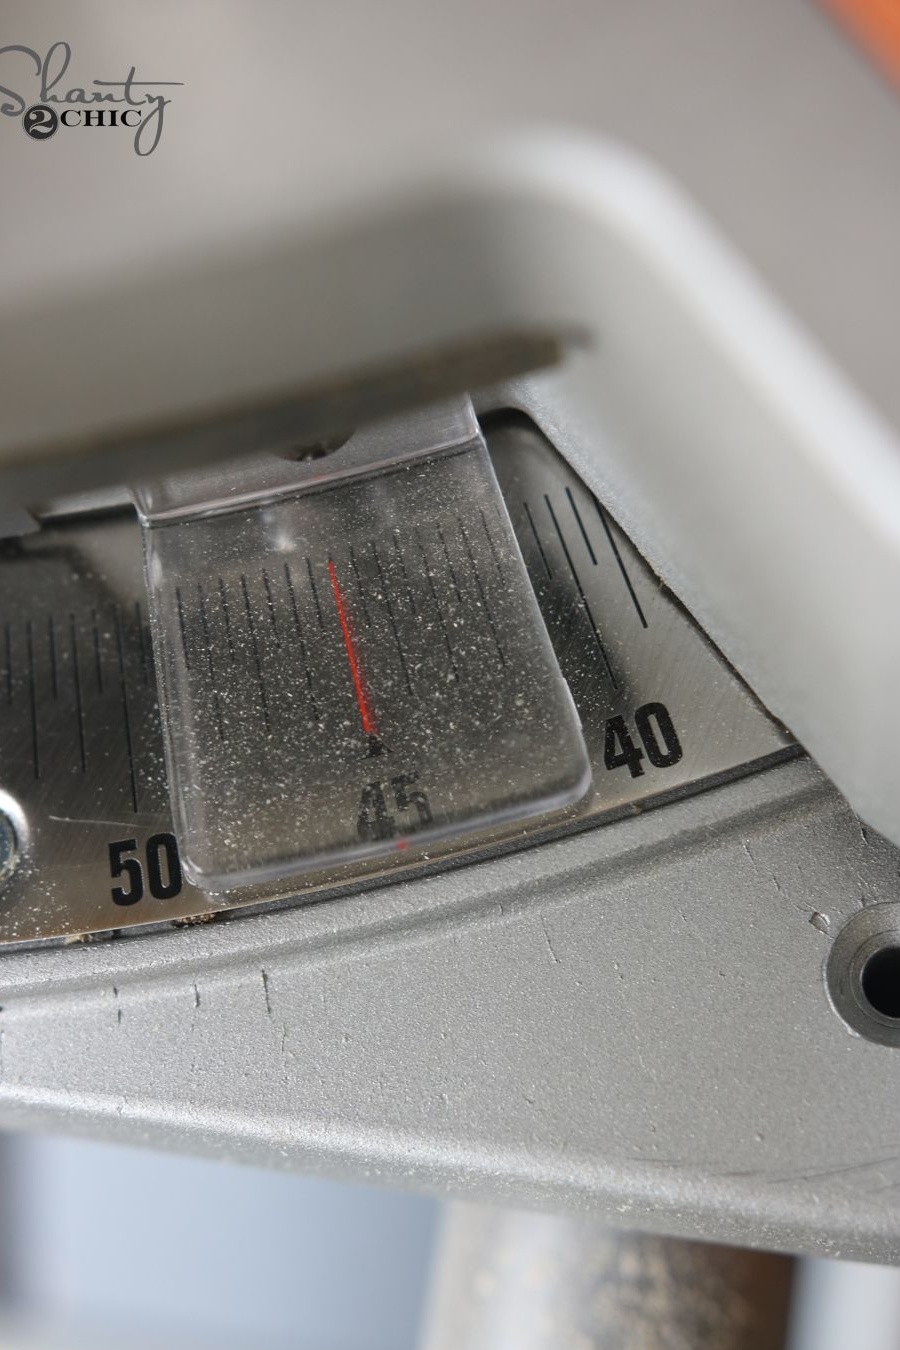
- a miter saw, if necessary, for sawing planks of the stethischina at an angle of 90 degrees;
- grinder;
- sandpaper for processing the edges of plywood elements;
- electric drill;
- screwdriver;
- soft, lint-free fabric for oil wood processing, painting sour for varnish and white paint;
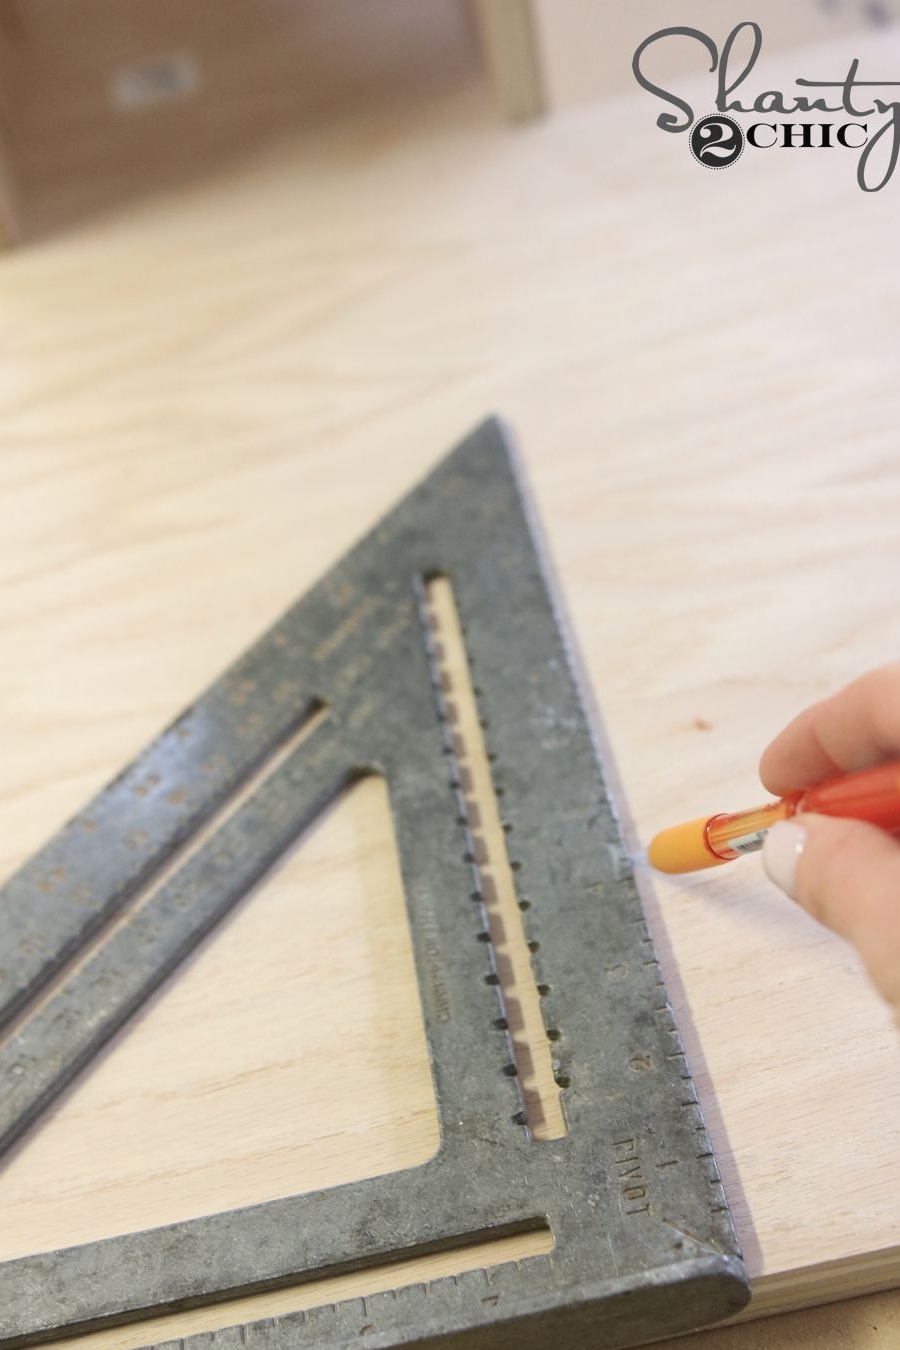
- building tape measure and square;
- a pencil.
Step One: Mark and Plywood Parts
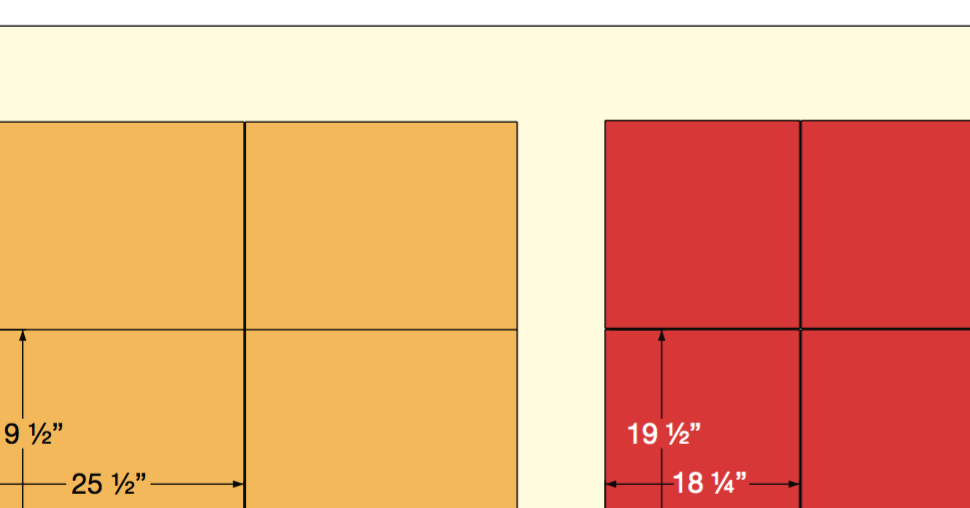
Table sizes from this workshop are in inches. Break the habit and make it a rule not to convert inches to centimeters. Use only the overall overall dimensions, otherwise you run the risk of getting into trouble.When converting units of measurement, there is an error that causes confusion in the size of small parts.
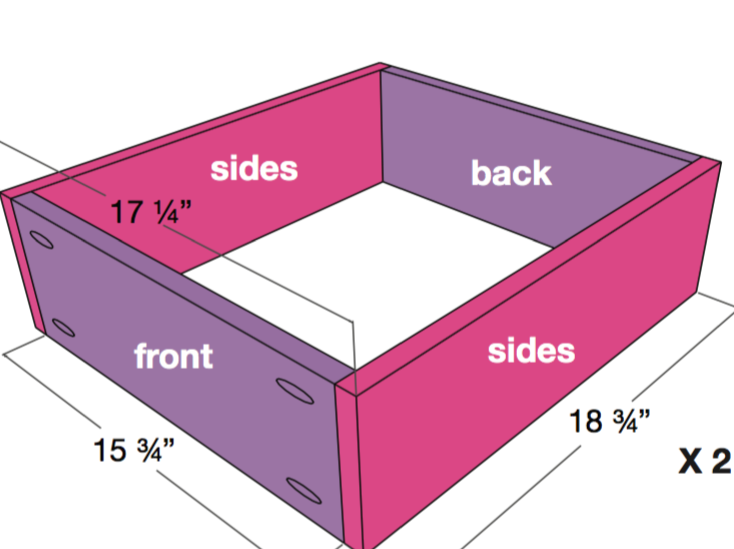
However, to understand the dimensions of this table, you still have to work with a calculator. You will need four parts for the bottom and base of the shelves under the countertop. Their sizes are 450 x 490 mm. Also prepare four vertical rack parts - 490 x 640 mm. In addition, you will need the rear walls of the shelves. After calculating the shelves frame, calculate and mark them up.
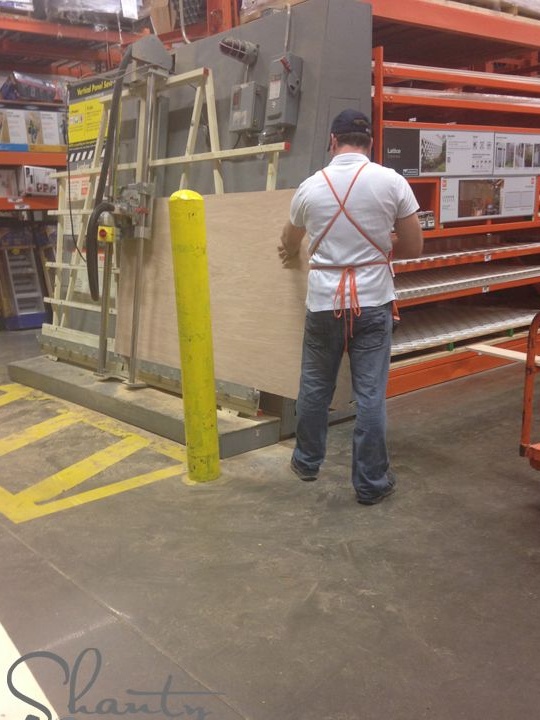
Order a sawing of these parts directly in the store or do it yourself in any way convenient for you. For example, using a jigsaw or a saw machine.
Step Two: Preparing Worktop Parts
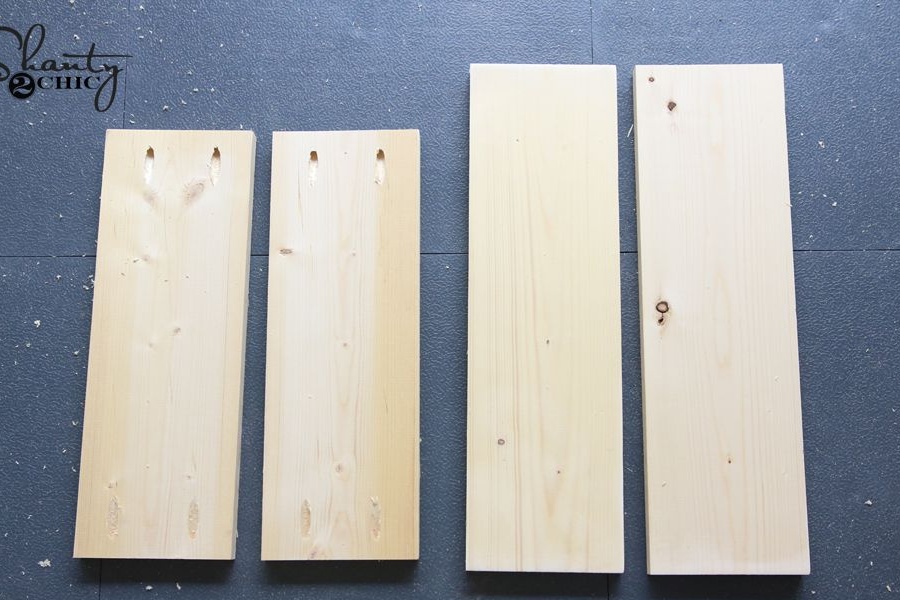
Pick up boards for countertops. They should be even and smoothly planed, have the same thickness and even straight edges. The author used pine, and this is a wonderful choice, since this species of tree is very easy to process.
If the wood surface does not suit you, sand it. For this purpose, it is convenient to use a belt sander, since it allows you to grind large flat surfaces. In extreme cases, you can resort to manual grinding with sandpaper.
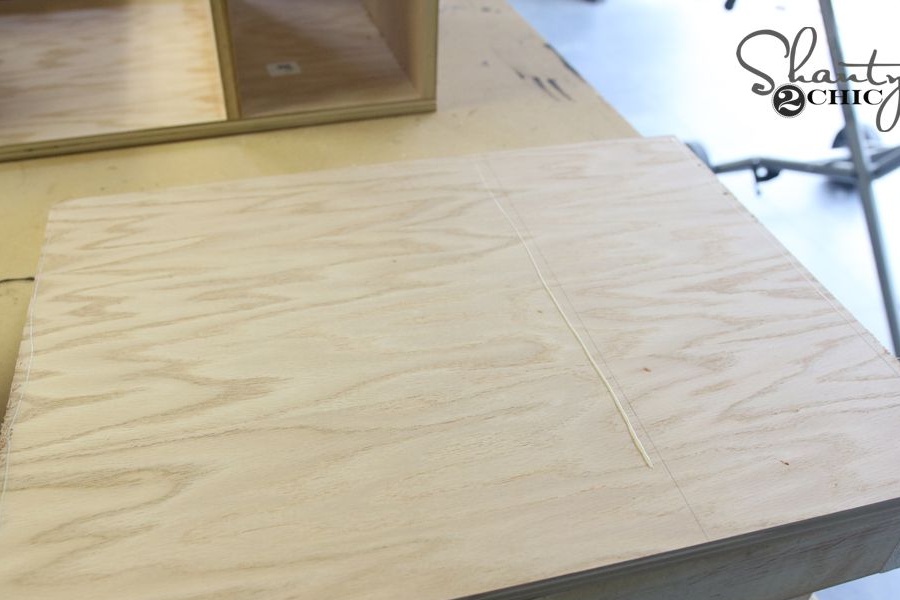
Decide on the dimensions of the countertop, which may go beyond the width of the shelves, and saw off the boards at a given length. Grind places also. However, you can return to this when the countertop is already assembled.
Its assembly can be carried out previously, fixing the parts of the joint in the joint using pocket holes using glue. And you can fix all the boards alternately on the rack-shelves at the end of the work. What to do, you decide.
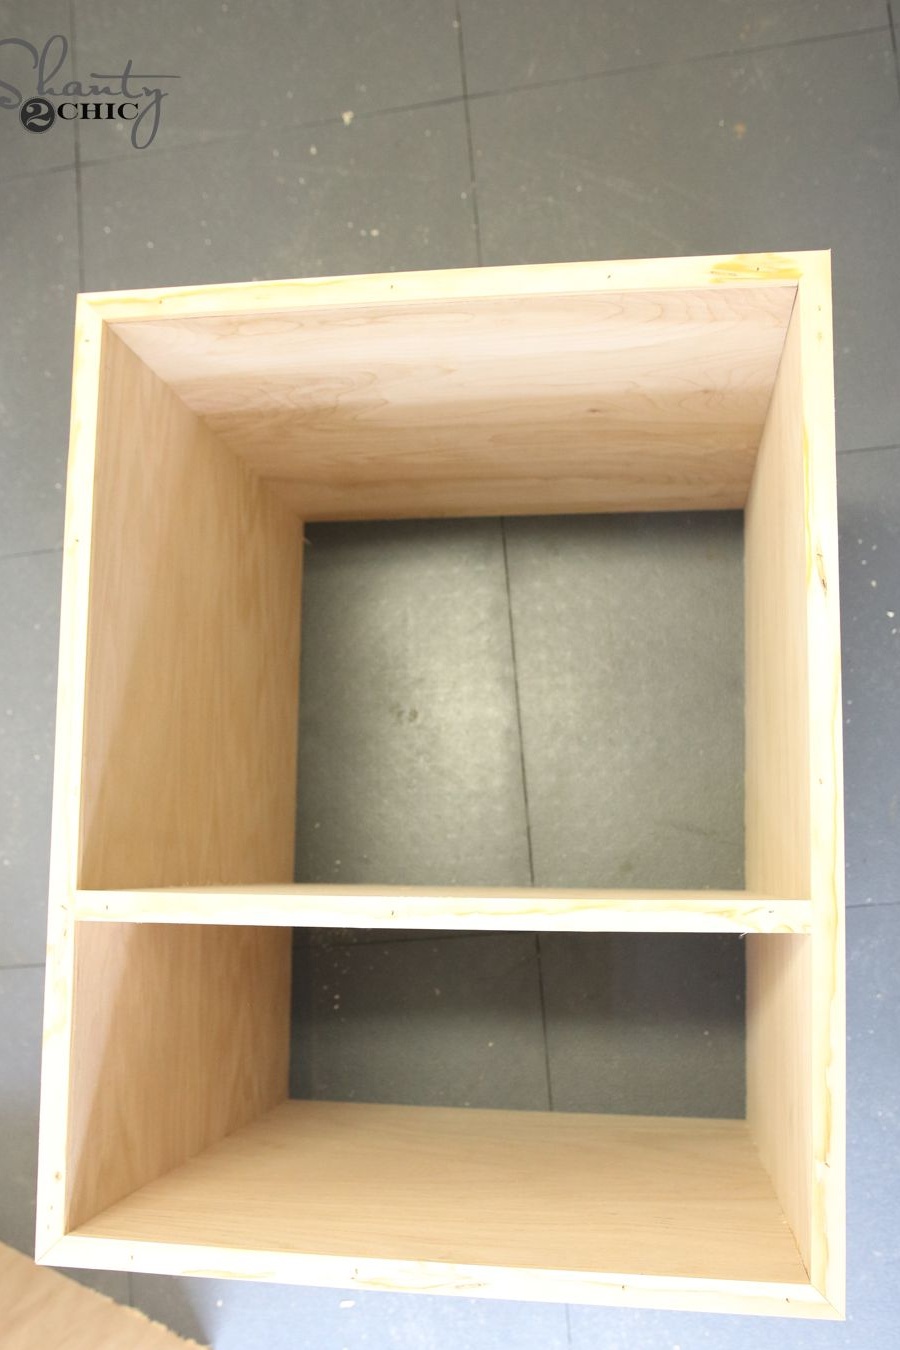
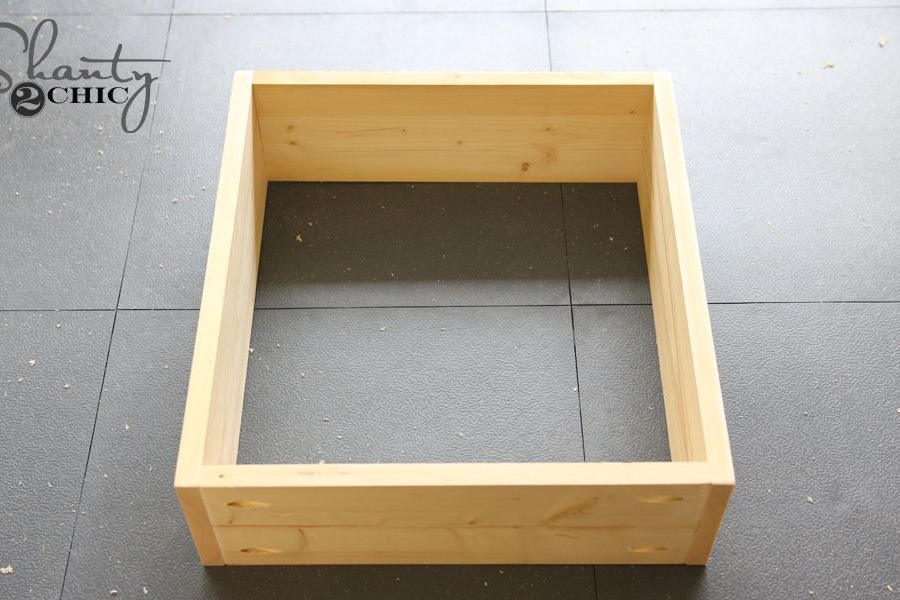
Step three: assembling racks with plywood shelves
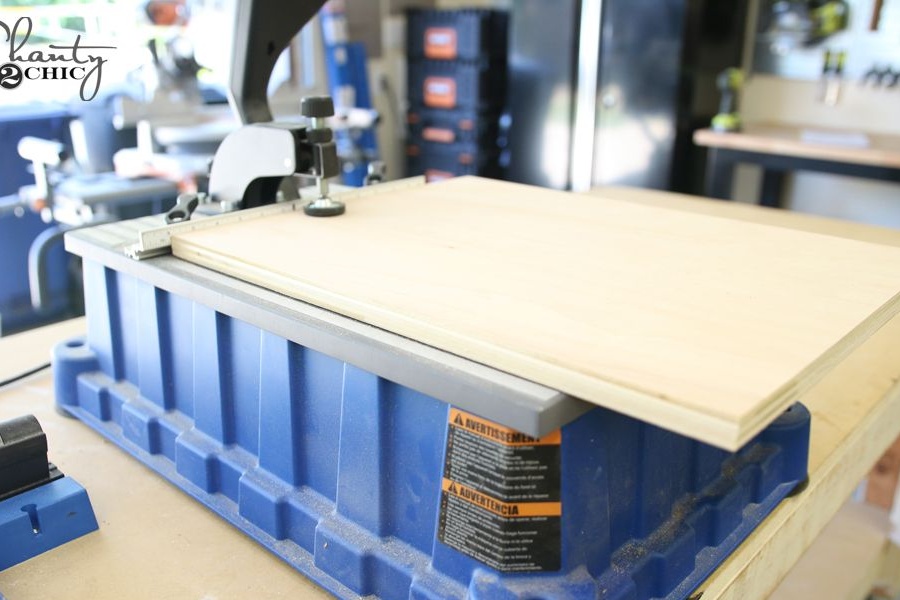
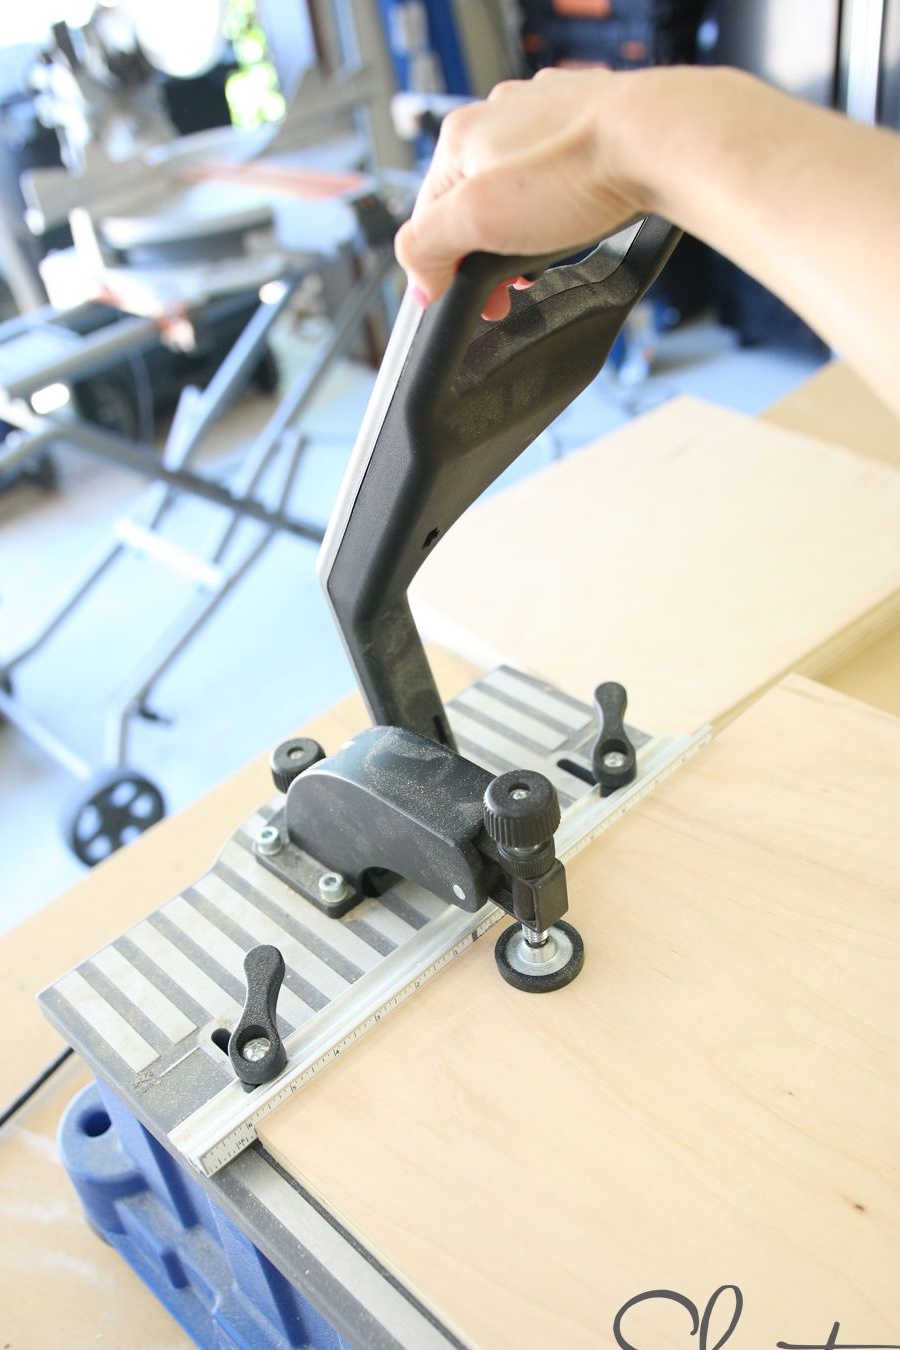
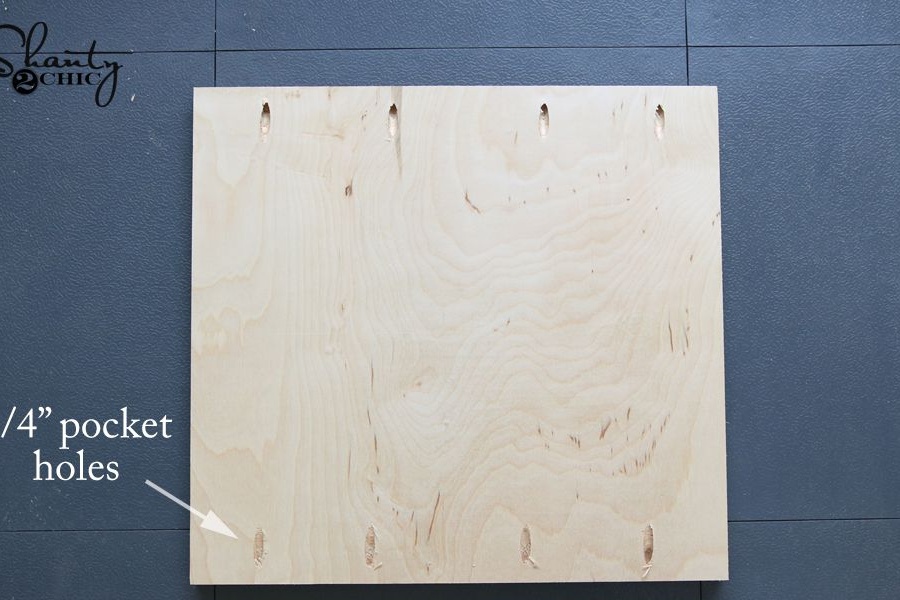
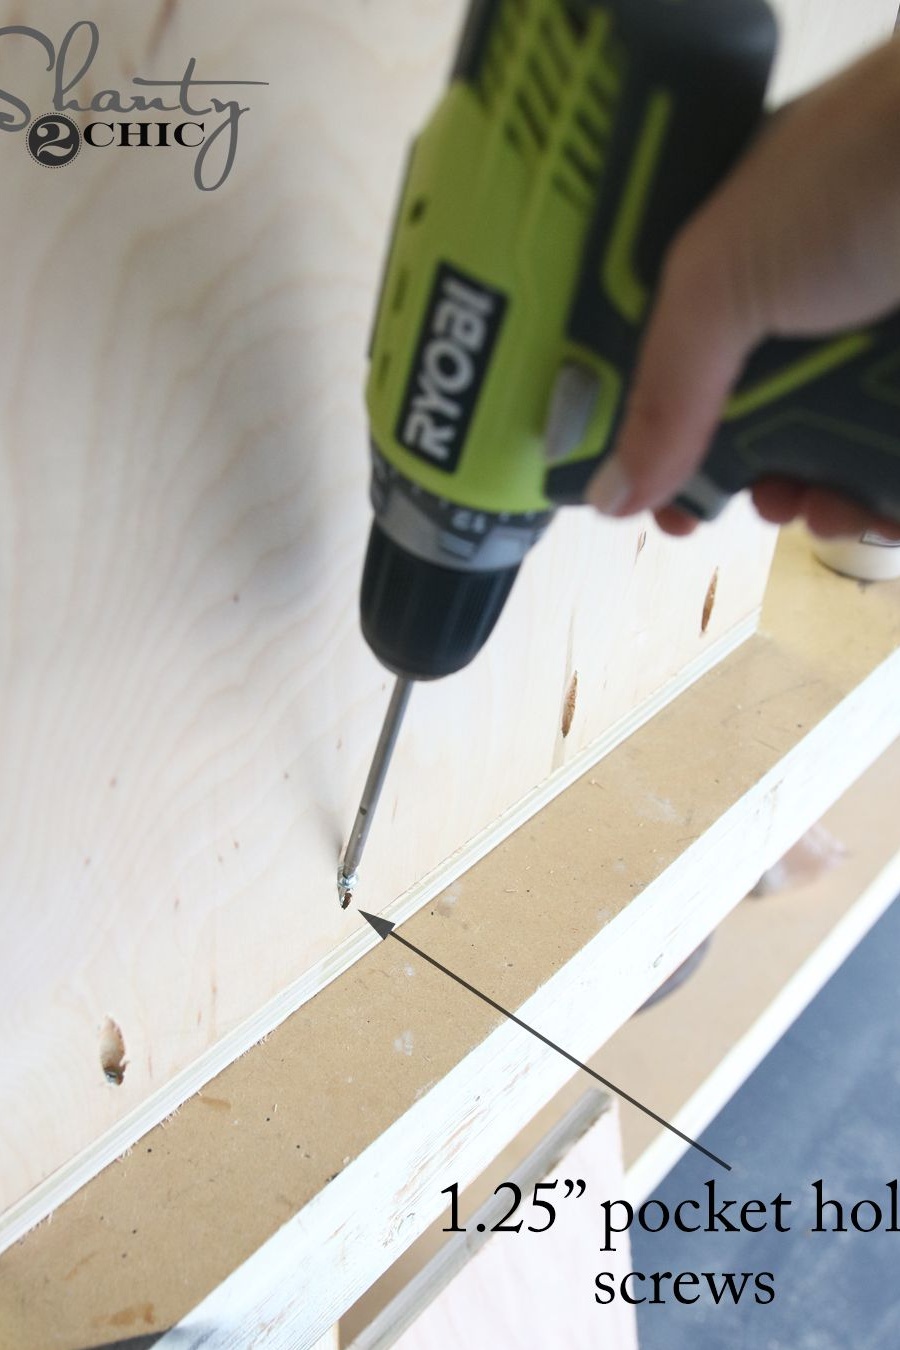
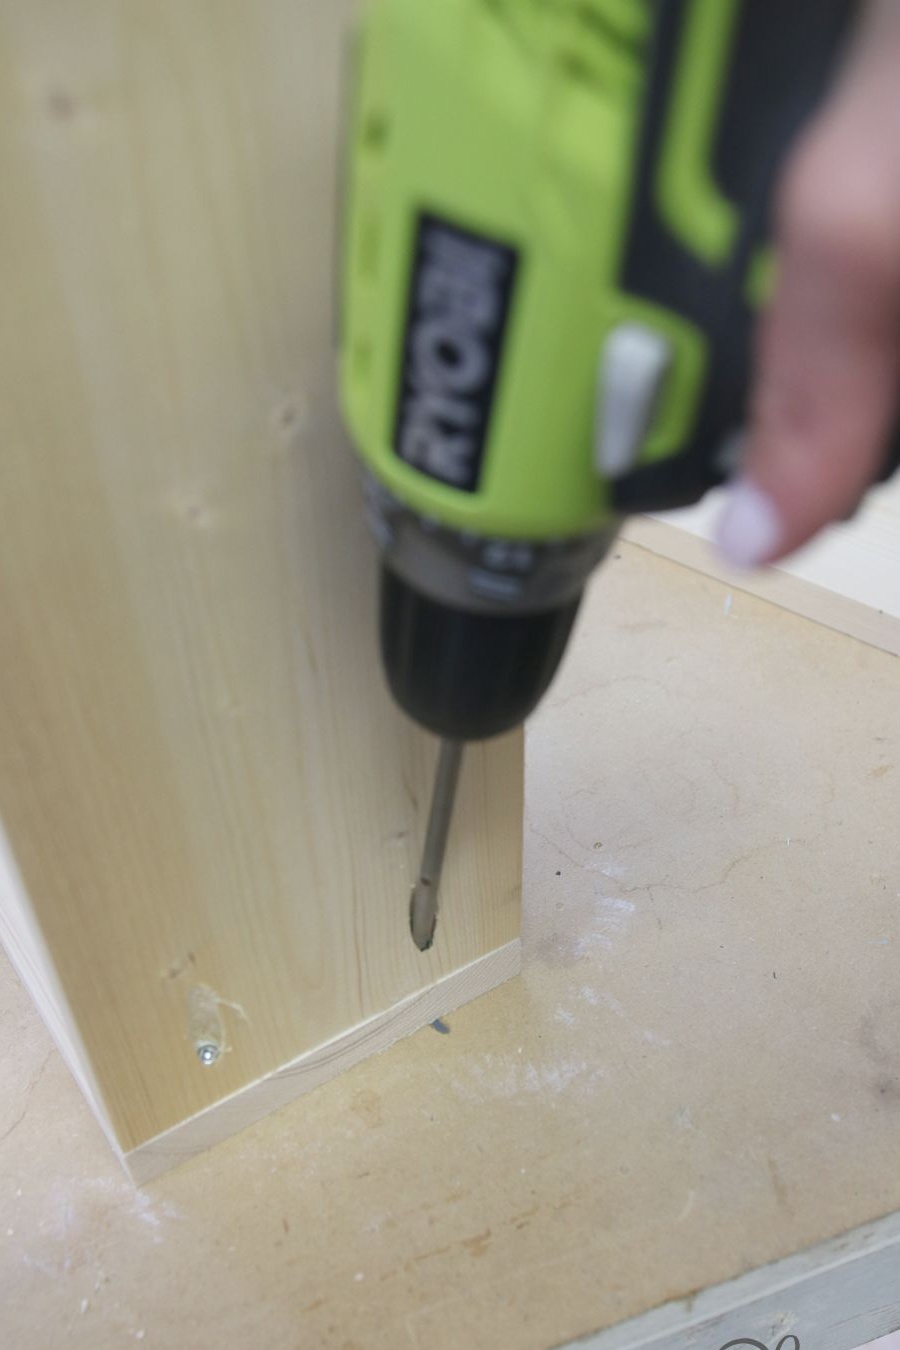
The author connected the parts using pocket connections. To do this, he used a special machine that allows you to drill holes for screws at the required angle. There are clamps with guides for smaller drilling. They are more affordable. You can find such a clamp in one of the online store. Although more often they are used in the USA.
Drilling inclined holes for screws is possible without any special tools. Practice on unnecessary material and develop the appropriate skill. So you will be sure that in the process of work do not spoil the workpiece.
Mark the joints with a pencil and make holes for furniture screws using an electric drill. At the same time, secure the workpiece in place.
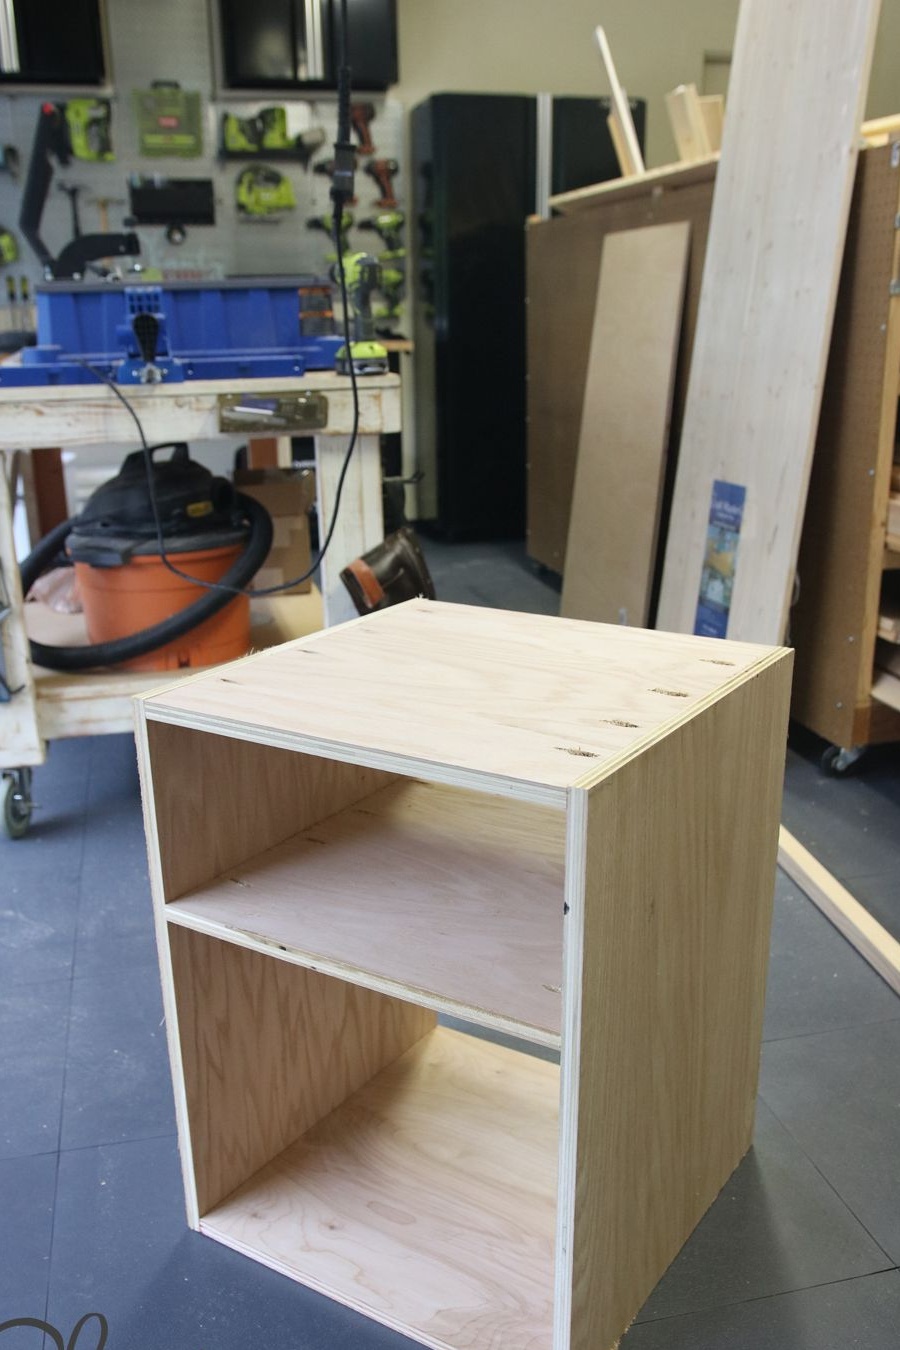
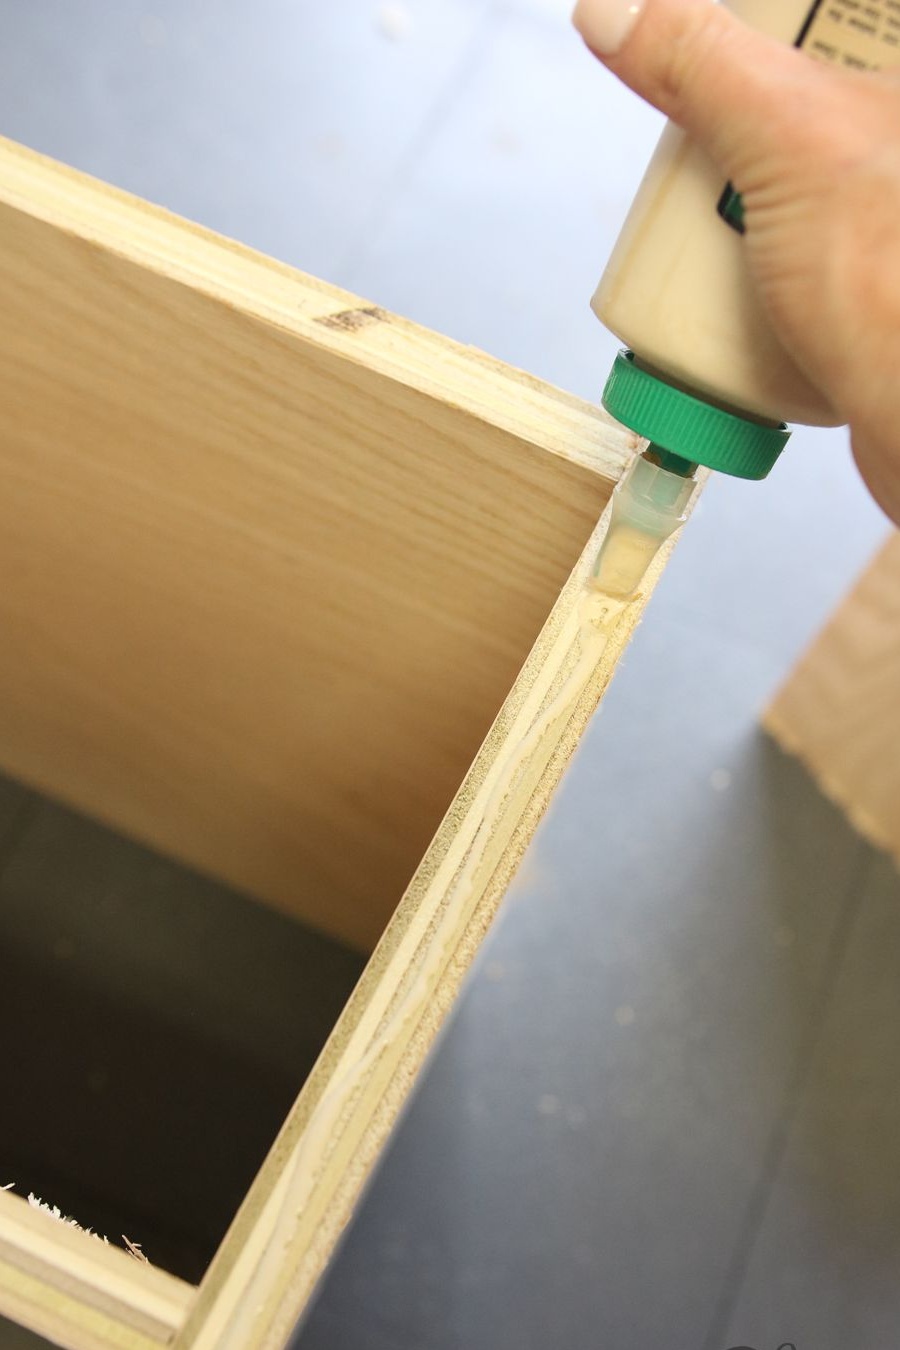
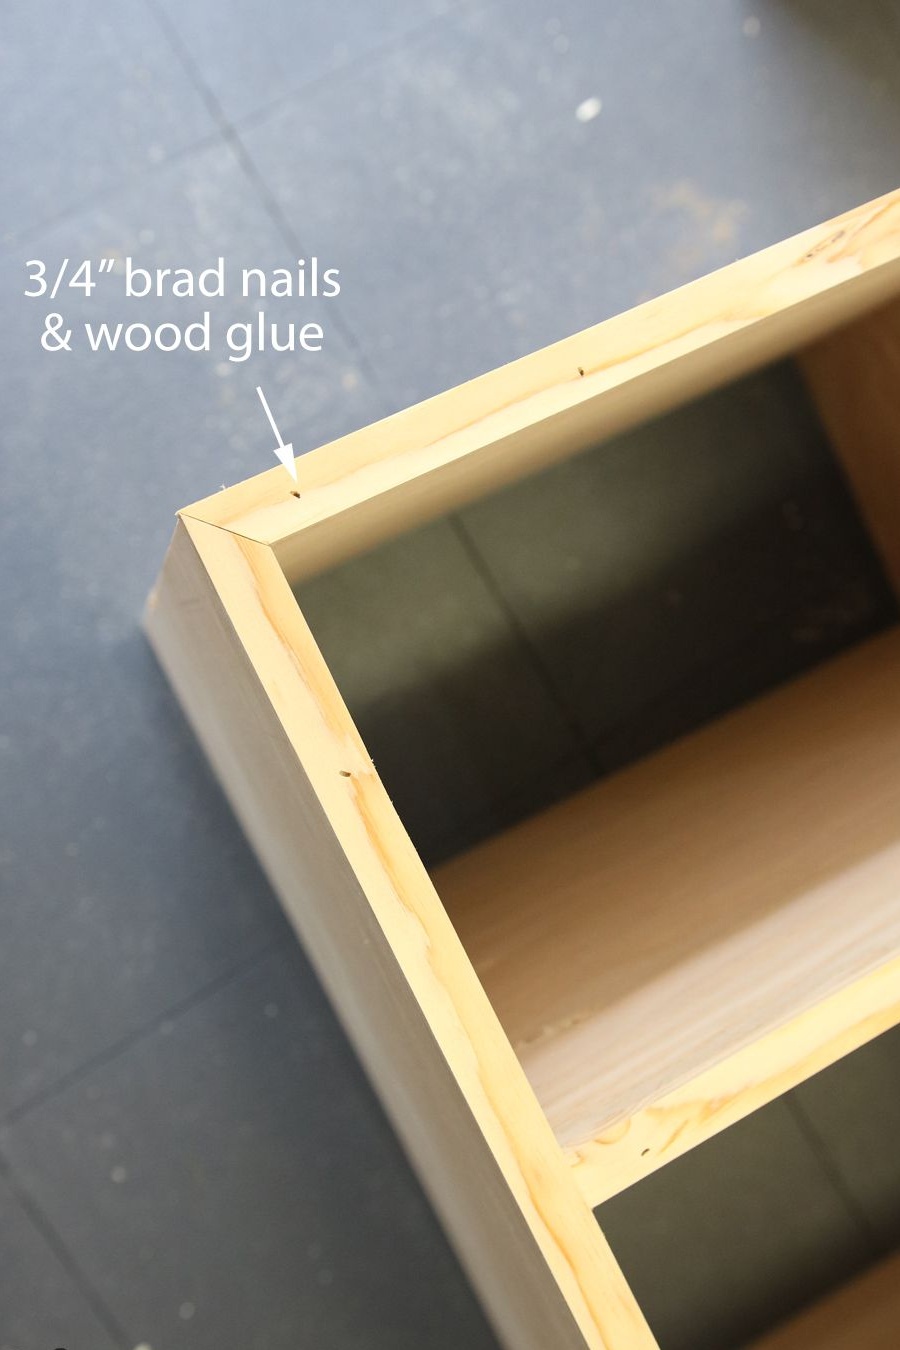
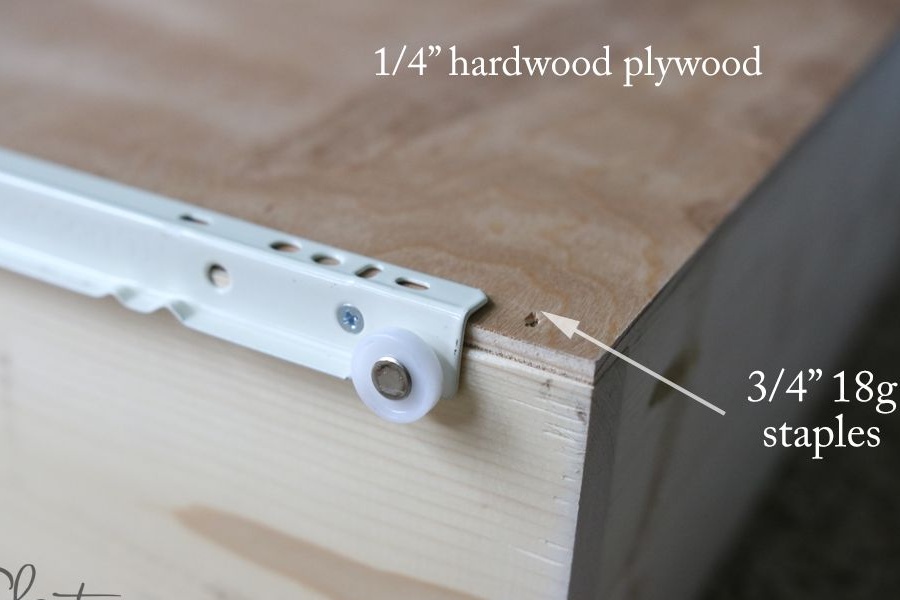
Connect the side parts of the racks to the bottom and base under the countertop. Use glue in the process. Place the partition shelf under the drawer inside the structure at the desired height and fix it with screws or using metal corners. Assemble the second rack in the same way.
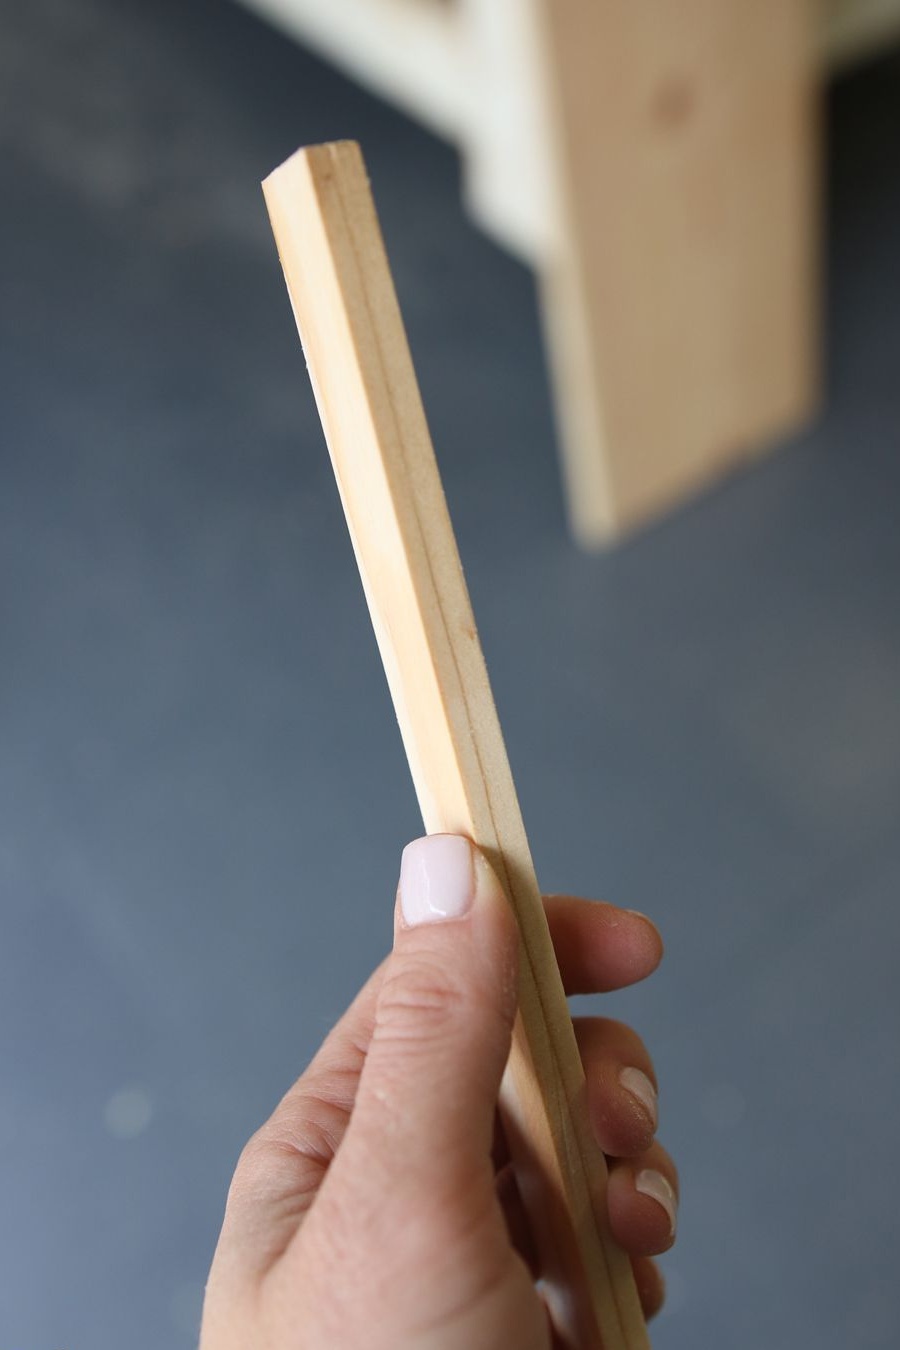
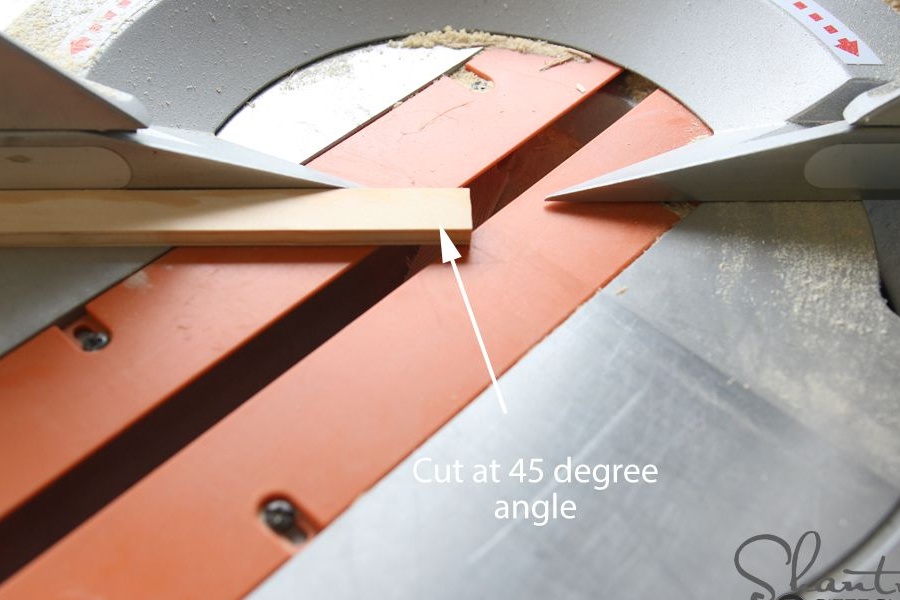
Prepare strips for decorating the plywood edges of the racks. Saw them at an angle of 45about. Fix the strips with glue and fix with small studs.
Fourth step: make drawers and install them
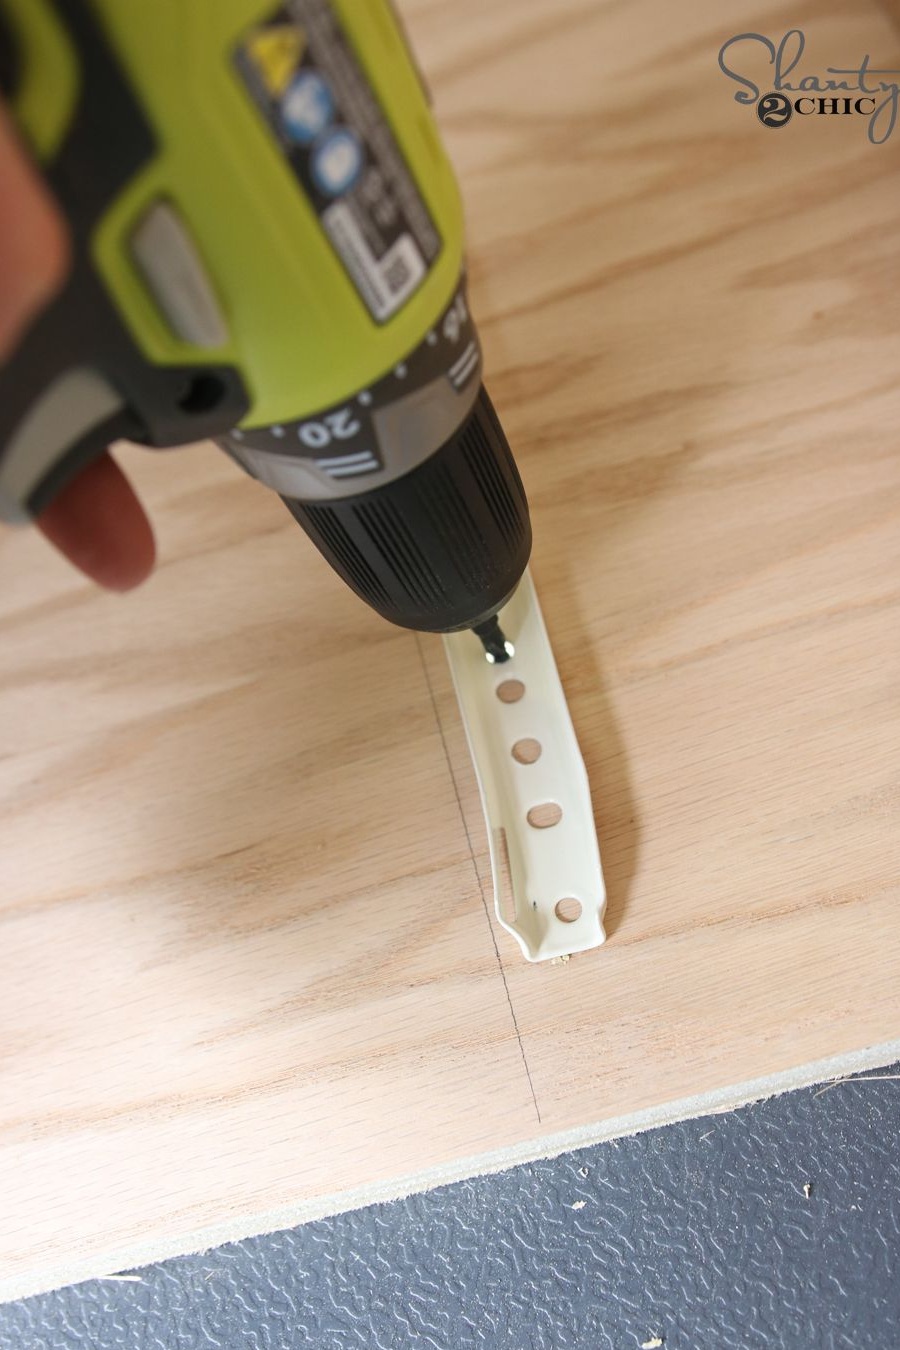
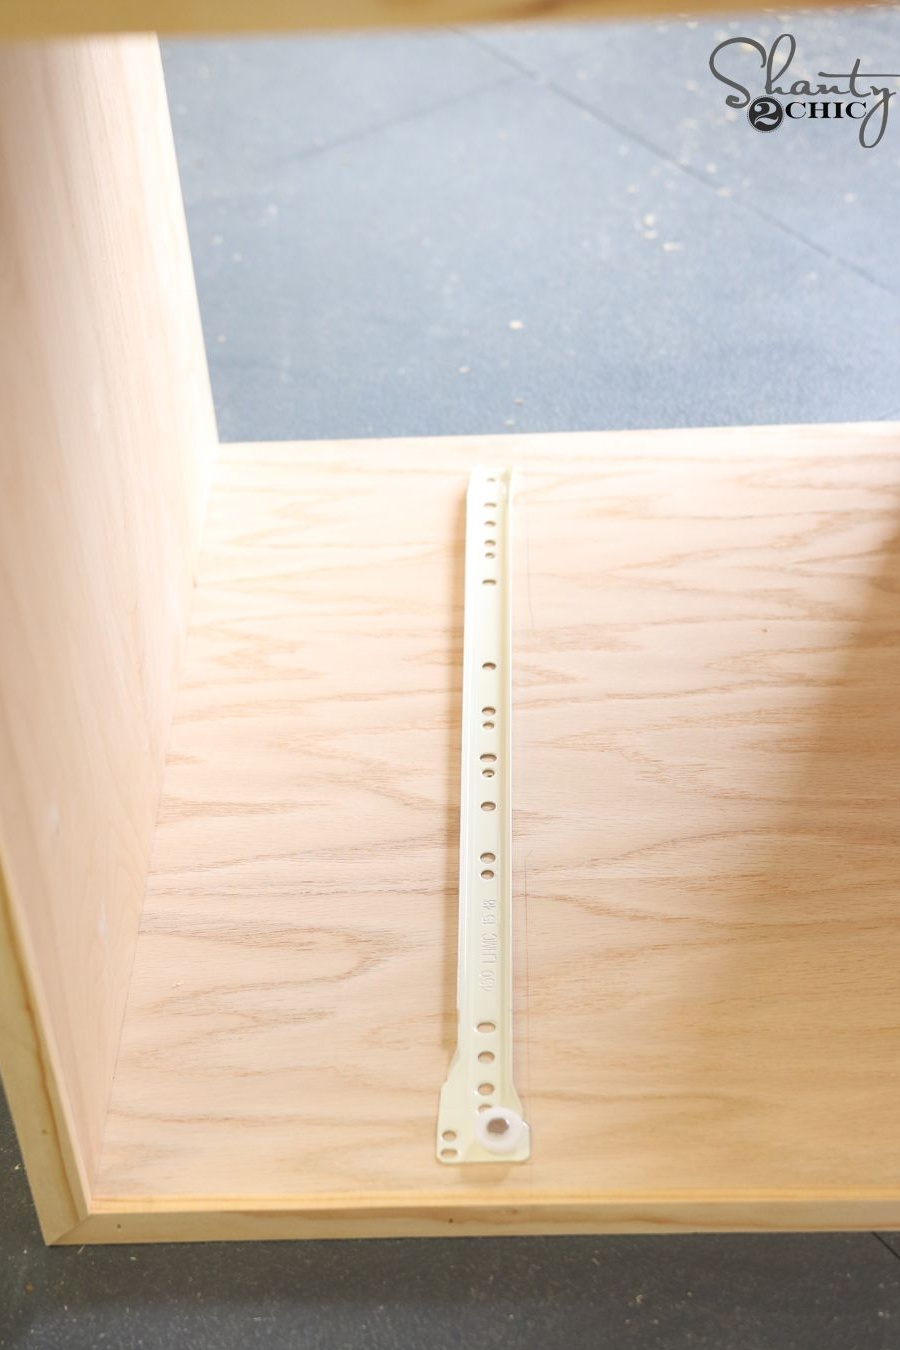
For the manufacture of drawers, the author used pine boards. The bottom can be arranged from plywood or fiberboard - choose what is closer to you. Be sure to use glue, since the boxes tend to become unusable very quickly.
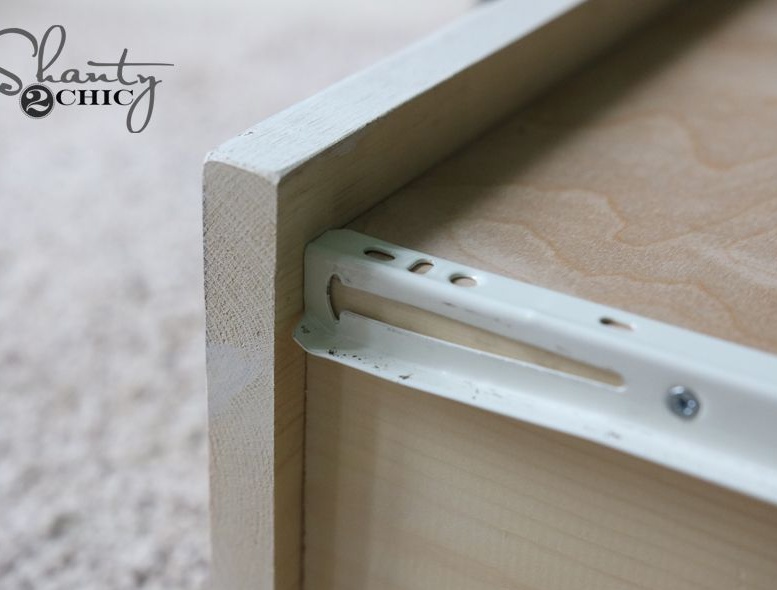
Fasten the metal-plastic fittings to the walls of the cells and the side walls of the drawers. Put the drawers in the cells and make sure they open and close freely. During the installation of accessories, use a level so as not to redo what has been started a hundred times.
Step Five: Install the tabletop and fix the legs
The table legs are made from the remnants of the bars. They have a small cross section, but this was enough to arrange two pocket holes here. However, it is more efficient to use metal corners.Especially if you plan from time to time to reinstall the table from place to place. Otherwise, the legs run the risk of breaking at the most inopportune moment. Although everything here depends on the correct implementation of pocket connections.
Also install the countertop: the whole, assembled in advance, or fixing each board in turn. Use glue for reliability. After painting, you will fix metal decorative corners on the corners, which will additionally connect the racks to the countertop.

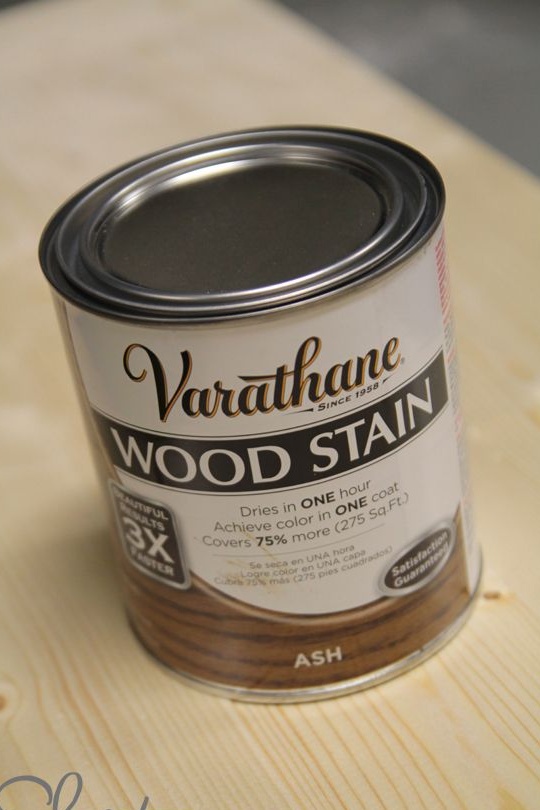
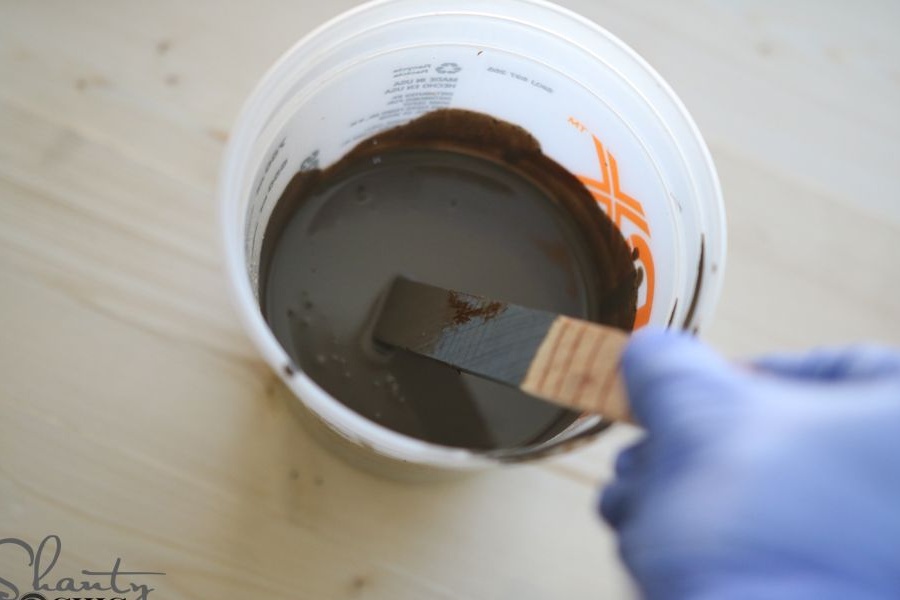
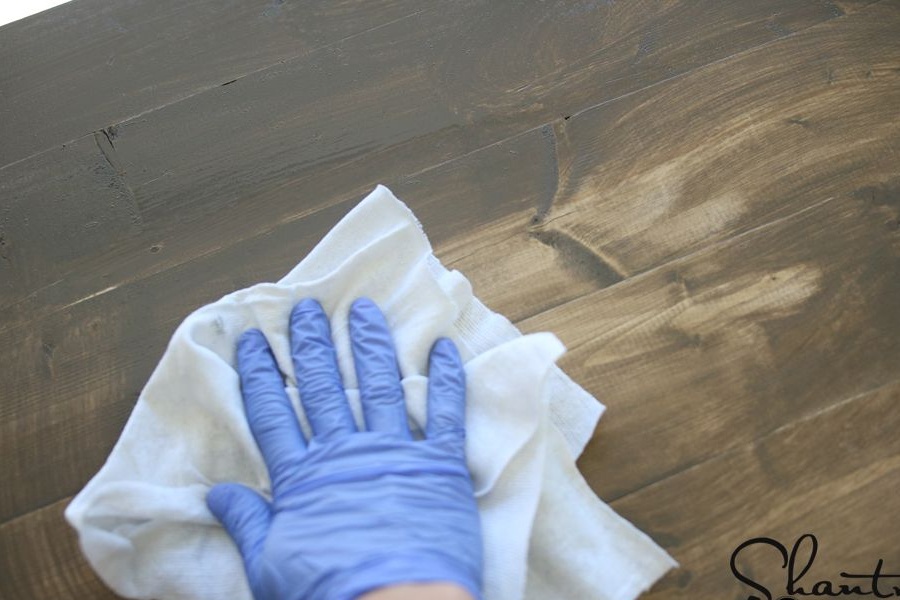
Step Six: Staining
The author used a decorative toner oil, which in texture resembles an oil-based primer. It should be applied with a soft, lint-free cloth until the wood acquires the desired shade.
Paint the boxes with light alkyd or nitro paint. The author picked up a spectacular milky shade. Apply the paint in several layers according to the instructions, but usually not less than in three layers.
Finally, the table can be varnished or left as is. High-quality furniture is always lacquered, as this significantly extends the juice of its service. However, be sure to choose only resistant varnishes, which, after drying, form a hard, non-scratch coating.

Step seven: finishing touches
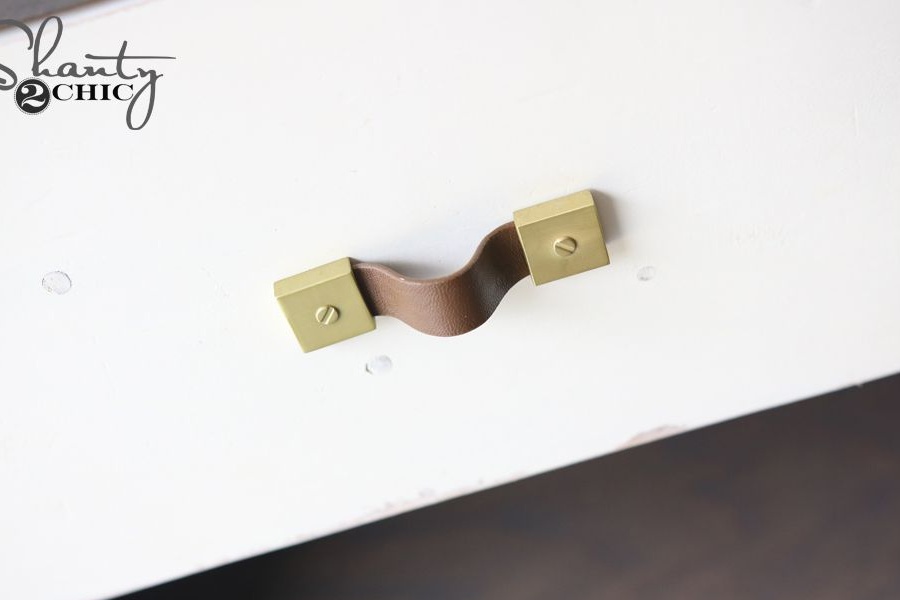
You are almost there. It remains to establish all conceived fittings and enjoy the result. The author settled on decorative bronze corners fixed on the facade and original leatherette handles.