
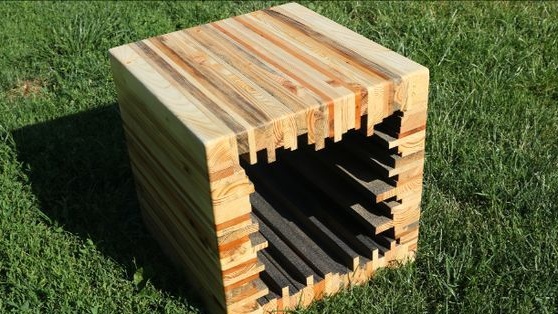
In this manual, we will consider an example of manufacturing a unique multifunctional of furniture, which can be used as a stool, a small table or even a large table if you put glass on it. Everything is made from improvised materials, the author used pallets to make them.

Materials and tools for manufacturing homemade:
Tool List:
- a hand-held circular saw (or other tool for cutting pallets);
- hand grinder (or other suitable tool;
- roulette;
- sandpaper;
- clamps;
In general, you will need to perform a lot of grinding work, the machines will greatly simplify this process. But, in a pinch, all the work can be done manually.
Material List:
- pallets, plywood or other suitable material;
- glue for wood;
- epoxy glue or hard putty on wood;
- linseed oil.
Homemade manufacturing process:
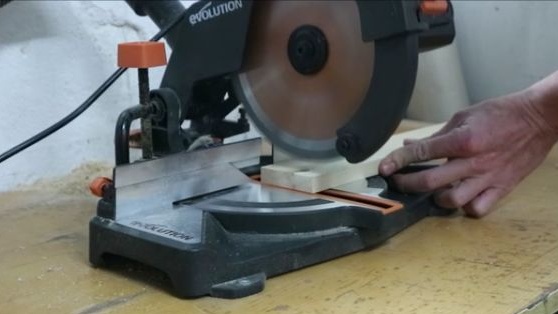
Step one. We cut pallets
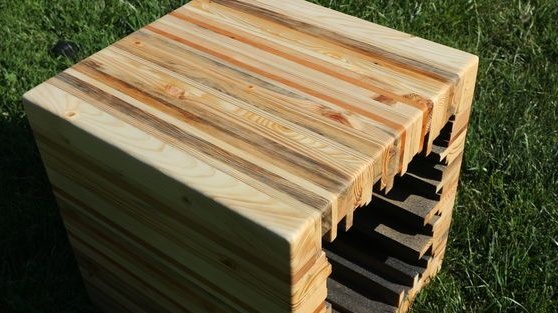
First of all, you will need to get the right amount of material to make the cube. It all depends on the required size. The author took 12 pallets to make the homemade product. The dimensions of the cube were 45X45 cm, and it weighs 40 kg.
Perhaps you need more pallets, as they will certainly come across unsuitable boards for manufacture.
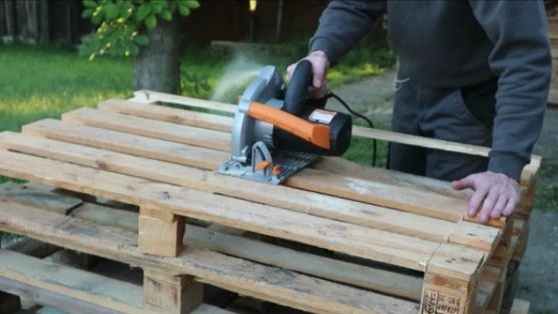
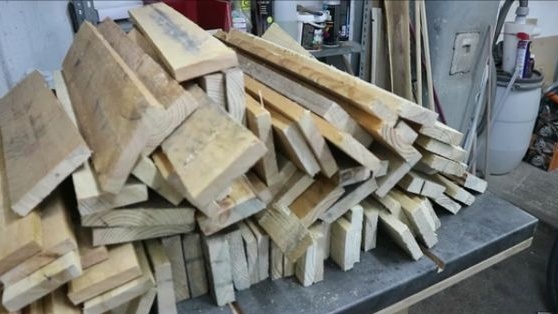
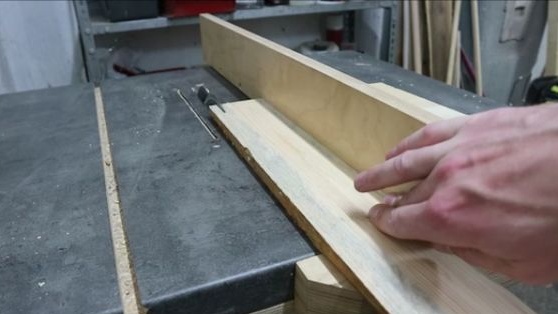
As soon as you cut the pallets into boards, you will need to select the required number of boards and align them to the same length.
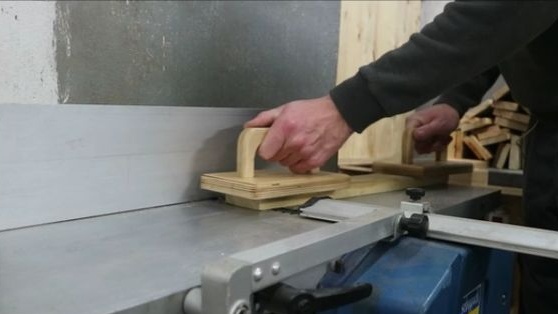
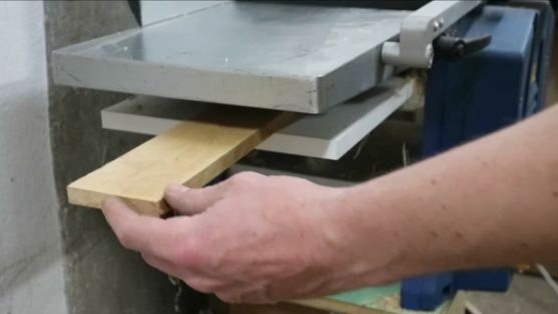
Step Two Sanding Boards
At this stage, the author polishes the prepared material. Manually doing this, of course, is pretty sad. Good sanding for boards is a must, since thanks to it, good bonding of the material is ensured.
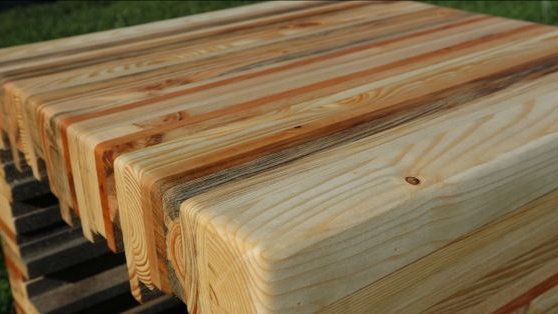
Among other things, in the process of work, the author adjusts the width of the boards, cutting off the excess on a circular saw. This is done in order to get different widths of the boards, as a result, such a unique pattern is formed inside as that of the author.
Do not throw away sawdust formed during grinding, they will come in handy at another step.
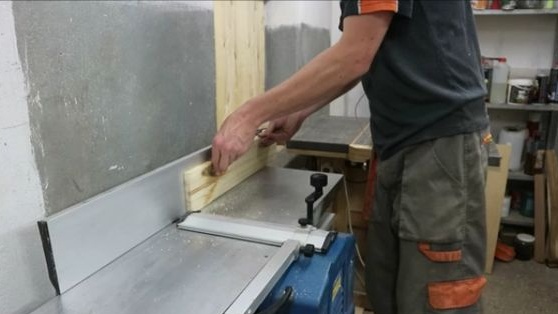
Step Three Glue boards
At this step, you need a little creative streak. When assembling the plates, you can combine different colors of the boards, as well as operate on their width. As a result, you can form such a geometric pattern and color as you need.
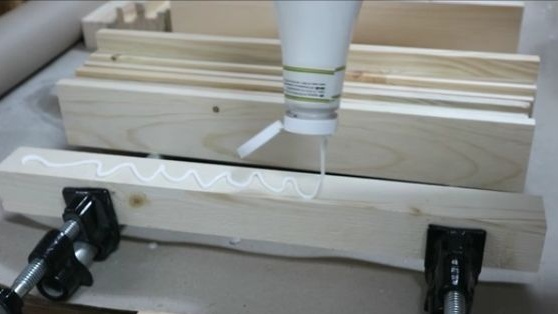
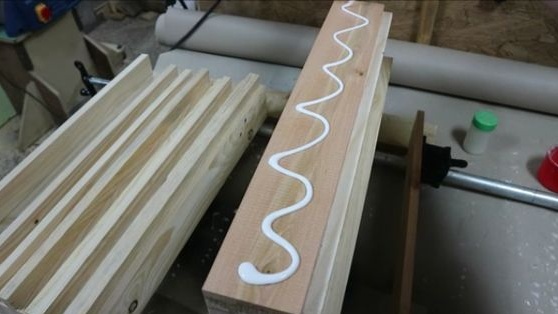
The author glues each wall of the cube separately, that is, 4 sides of 45 cm each. Glue should be used for wood, applying the right amount to each board. The glue that will be forced out must be cleaned immediately with a cloth so that there will be less grinding work. Having pulled the boards together with clamps, they must be left in such a state at night so that the glue dries well.
Step Four Final cube gluing
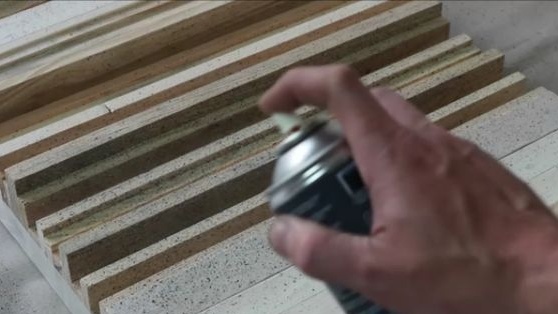
At this step, the author finally glues the cube, but before this work you will need paint in a spray can of contrasting color. Using it, you need to select the inside of the cube. You can paint it by hand, it just will be long, and the paint under pressure fits perfectly into all cracks. Just do not need to paint those boards that still need to be glued.
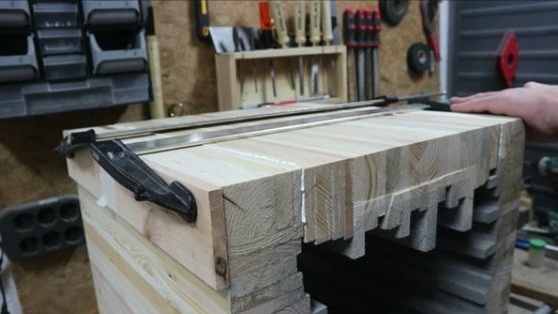
The next step will be the complete gluing of the cube. Here you will need accuracy, because you do not want to get a curved cube? Although, it will not be a cube. First, the author recommends collecting the cube dry to make sure that it is going symmetrically. Well, then take the glue for the tree, tighten everything with clamps and leave it overnight or day to dry the glue properly.
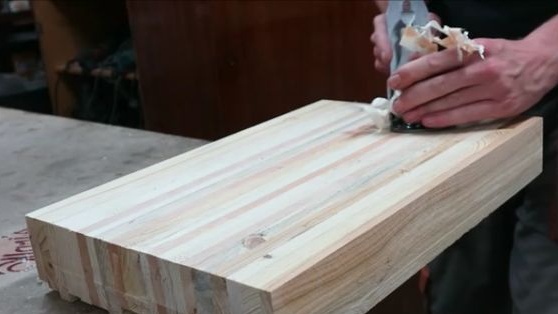
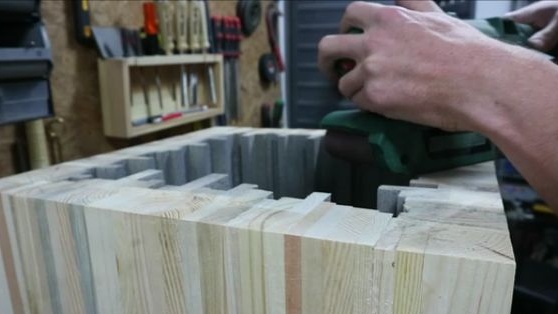
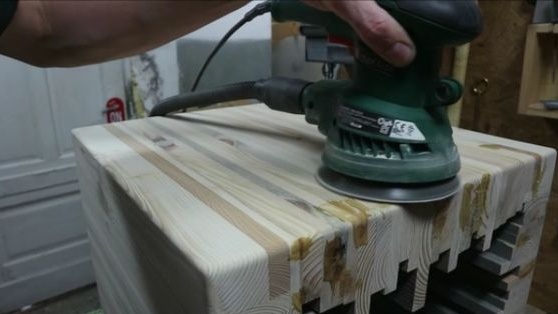
Step Five Grinding a cube
After the glue has completely dried, arm yourself with a hand-held grinding tool. Your task will be to smooth and smooth the surface of the cube. It will be necessary to align the protruding boards in one level. You will also need to smooth the corners of the cube a bit so that it is not too sharp.
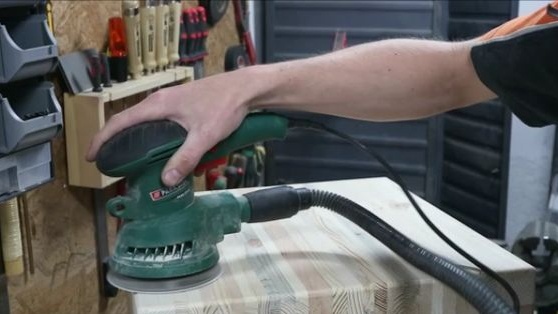
In conclusion, it will be necessary to bring the surface of the cube to a perfect smooth state. Of course, such work can also be done manually using sandpaper. But it will take a lot of time and energy.

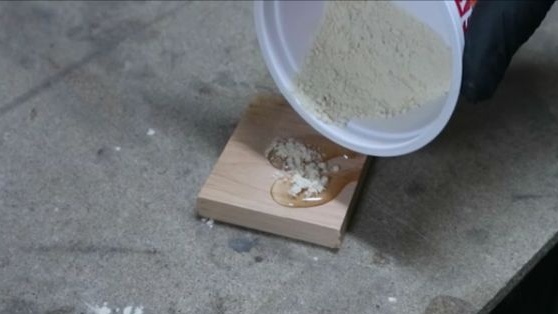
Step Six We eliminate defects using putty
After grinding the cube, the author found on its surface a large number of cracks and gaps between the boards. To fix them, you need putty, the color of which matches the color of the boards. It is best to make such a putty yourself, using sawdust that remains from grinding. They need to be collected and sifted out by large particles. Then mix the formed “flour” with epoxy glue or wood glue and close up all the bumps.

Next, wait until the putty dries. After this, the treated areas must be sanded again. And in the case of global work, it is better to polish the entire cube for the last time.
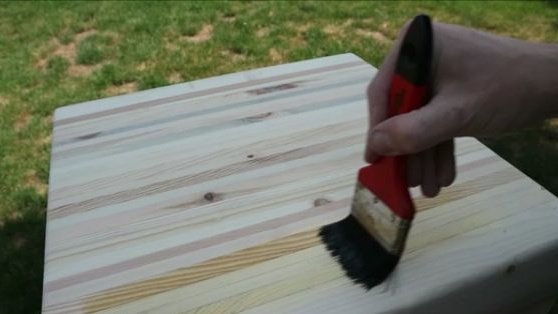
Seventh step. Completion. Impregnation
In the end, the cube must be thoroughly treated with impregnation in order to highlight its color and protect the material from environmental influences. For these purposes, you need to use natural drying oil, which is cooked linseed oil, although we are unlikely to find such drying oil.
You can also use varnish, various stains and other coatings at your discretion.
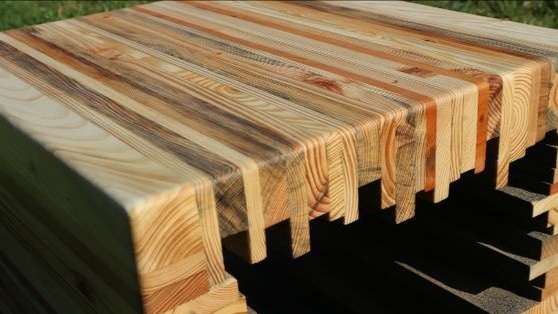
That's all, the cube is ready. As you can see, everything is going quickly, apart from grinding work. Perhaps this project will push you to create some of its own unique homemade products.