


I decided to make myself a flashlight on 18650 batteries, which were collected a lot from old laptops. I myself am a beginner in the field of working with LEDs and electronics in general, so this article will be useful specifically for the same beginners as me.
From the most useful information that you will find for yourself in this article, I can single out where I took the controller to charge lithium. I must say right away that you probably have it at home, but where it is, read the article.
I used a ready-made flashlight from the times of the USSR for 2p 50 kopecks of Vitebsk production as a housing for a flashlight. The difference is the aluminum reflector, as well as the housing, which is ideal for installing six 18650,
Materials and tools for homemade:
- an old flashlight (like a case);
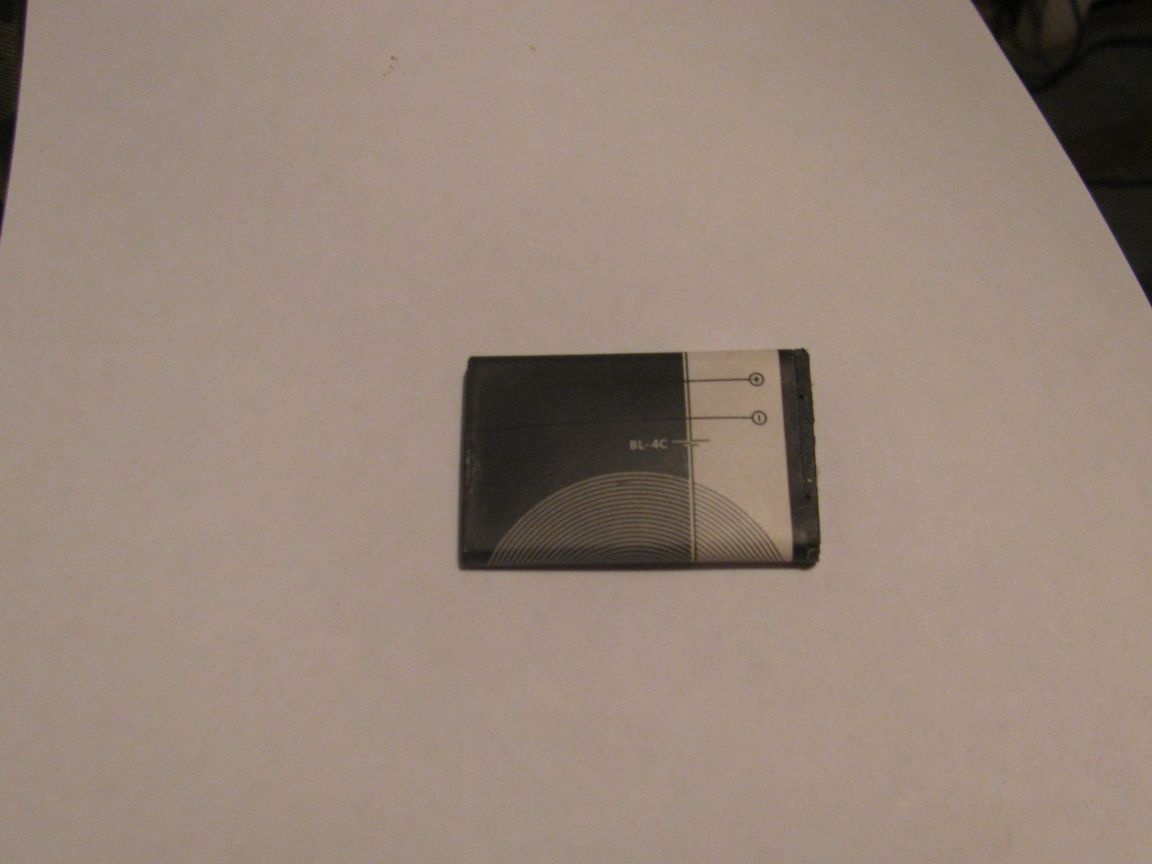
- An old battery from a mobile (you can inflate, any);
- batteries 18650;
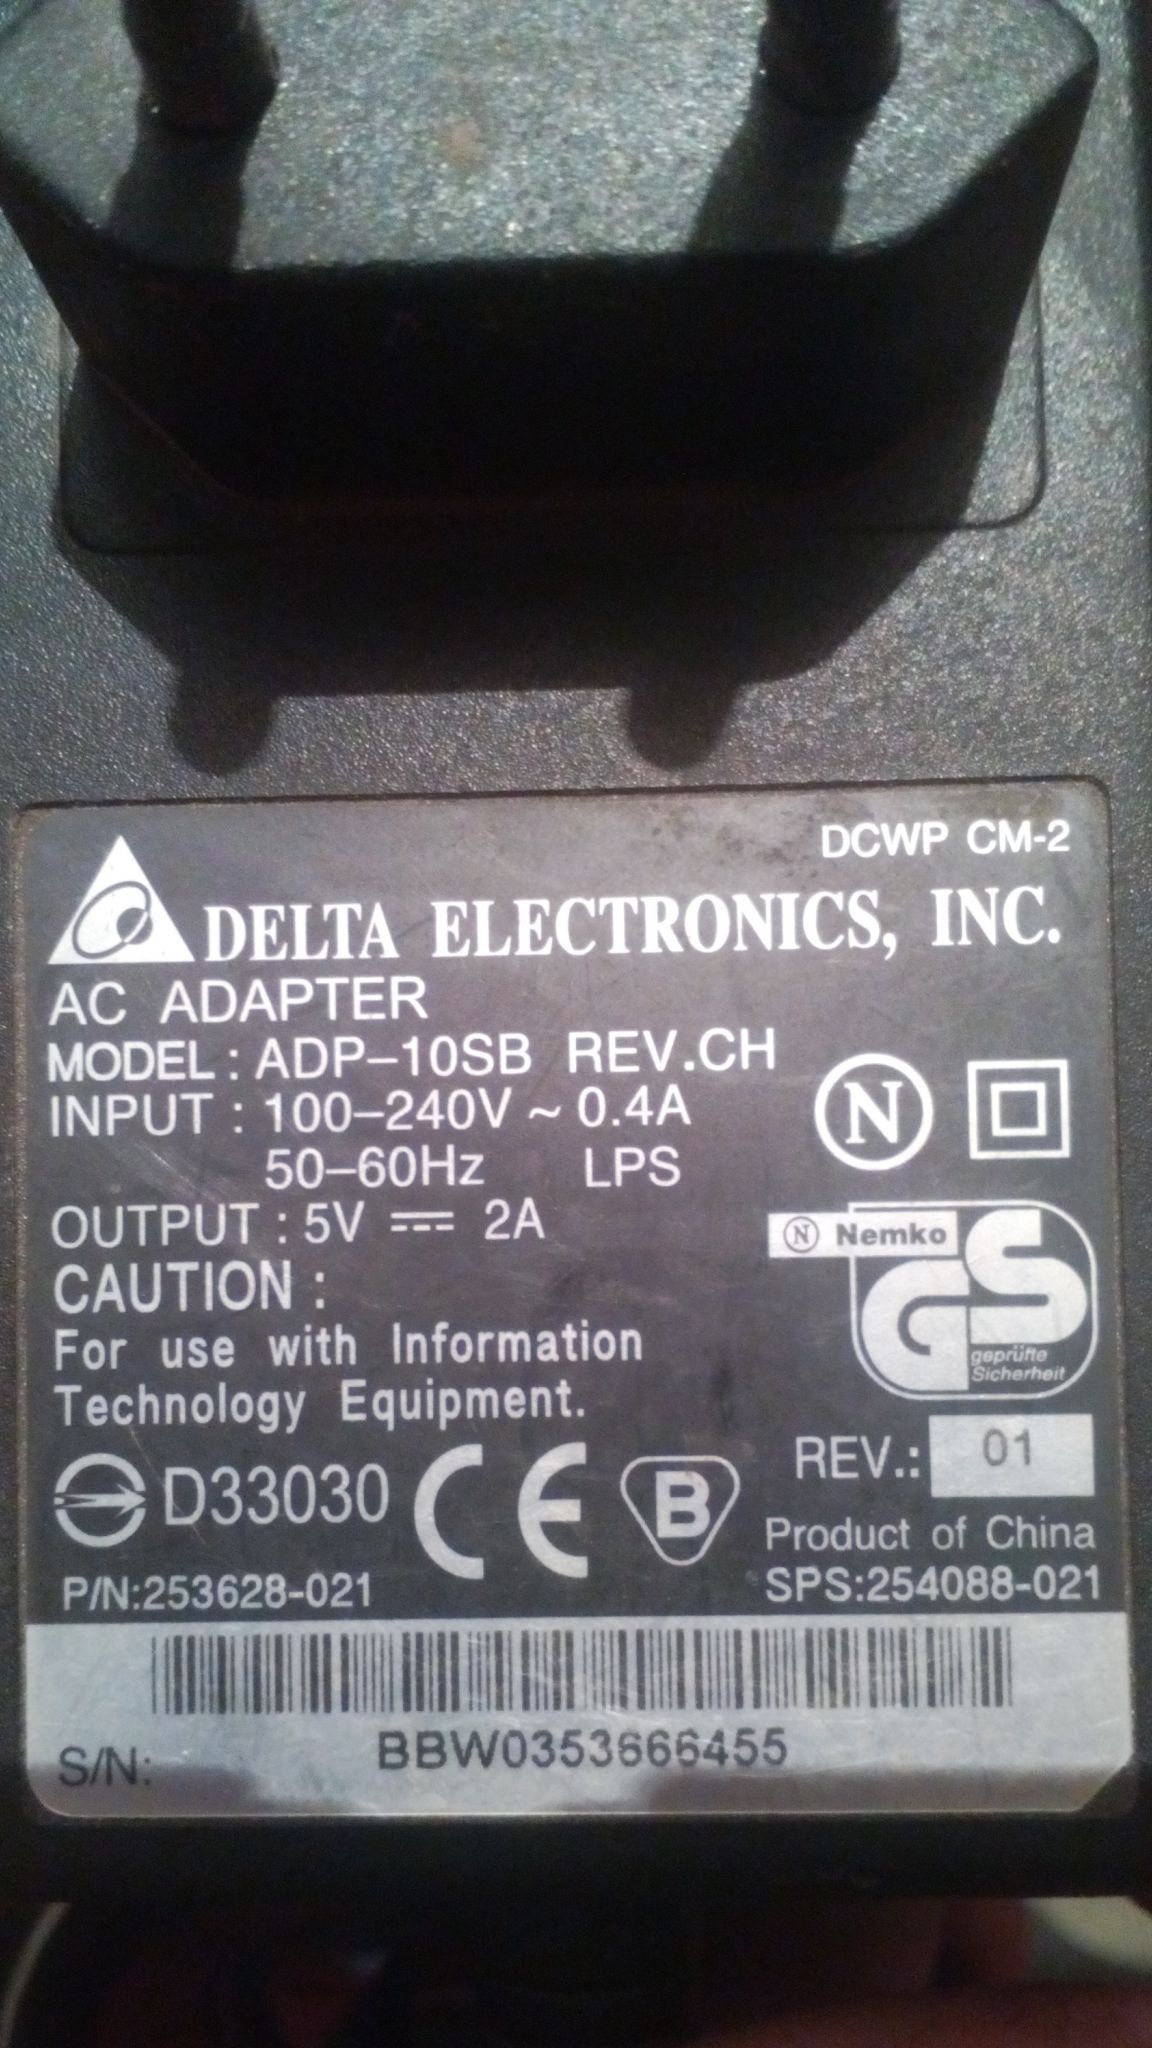
- 5V charger;
- LEDs (choose quantity and brightness);
- resistors for LEDs (each diode has its own resistor);
- button for on / off;
- wires, hot glue, soldering iron, scissors, pliers, etc.
Flashlight manufacturing process:
Step one. We disassemble the lamp
First of all, we disassemble the lantern and throw out all that is unnecessary from it. It was not a rechargeable flashlight, but on ordinary batteries. I also pulled out the bulb holder from the reflector and removed the native switch.
Step Two Install the LEDs
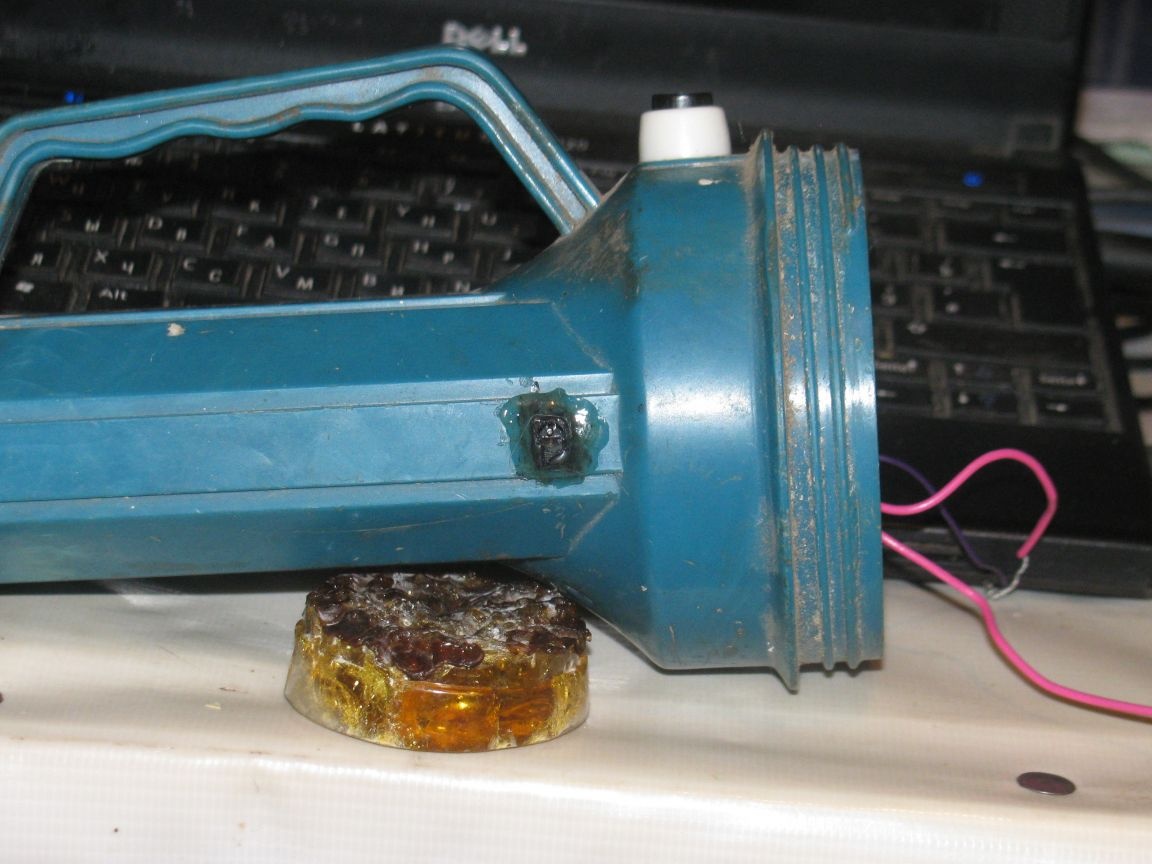
Next, I needed pliers and hot glue. With the help of pliers, I picked up the diameter of the hole in the reflector so much that 5 LEDs entered it. The cathodes or anodes need to be twisted together, and the other 5 conclusions should be left, as a result, 1 resistor can be connected to each LED, as required by the rule.
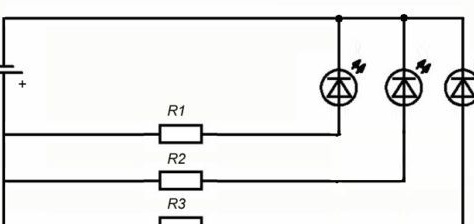
I searched for resistors for a long time, I could not find it, as a result I connected all the beams together, that is, the diodes are connected in parallel. Despite criticism, in almost any LED flashlight, LEDs are connected in this way, however, sometimes in series, with common resistors. However, it works great. In any case, I will not turn on my LEDs at maximum power.
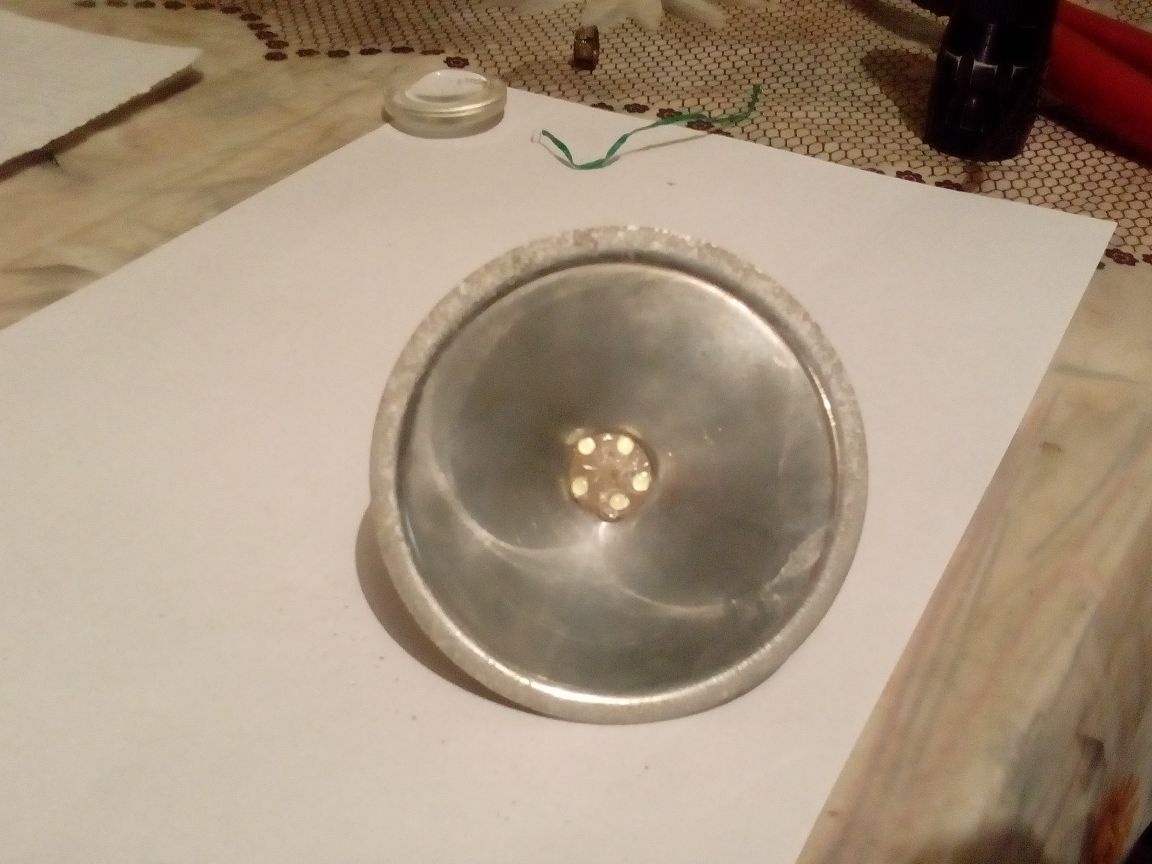
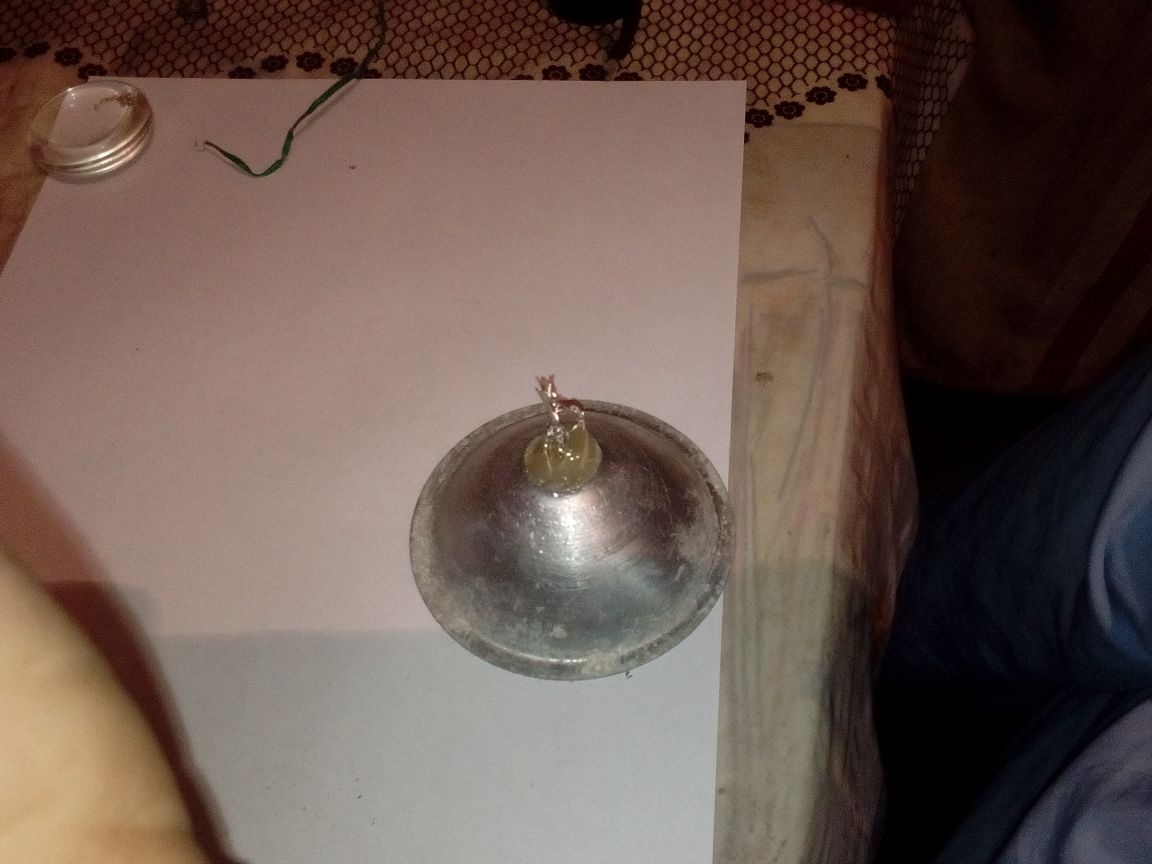
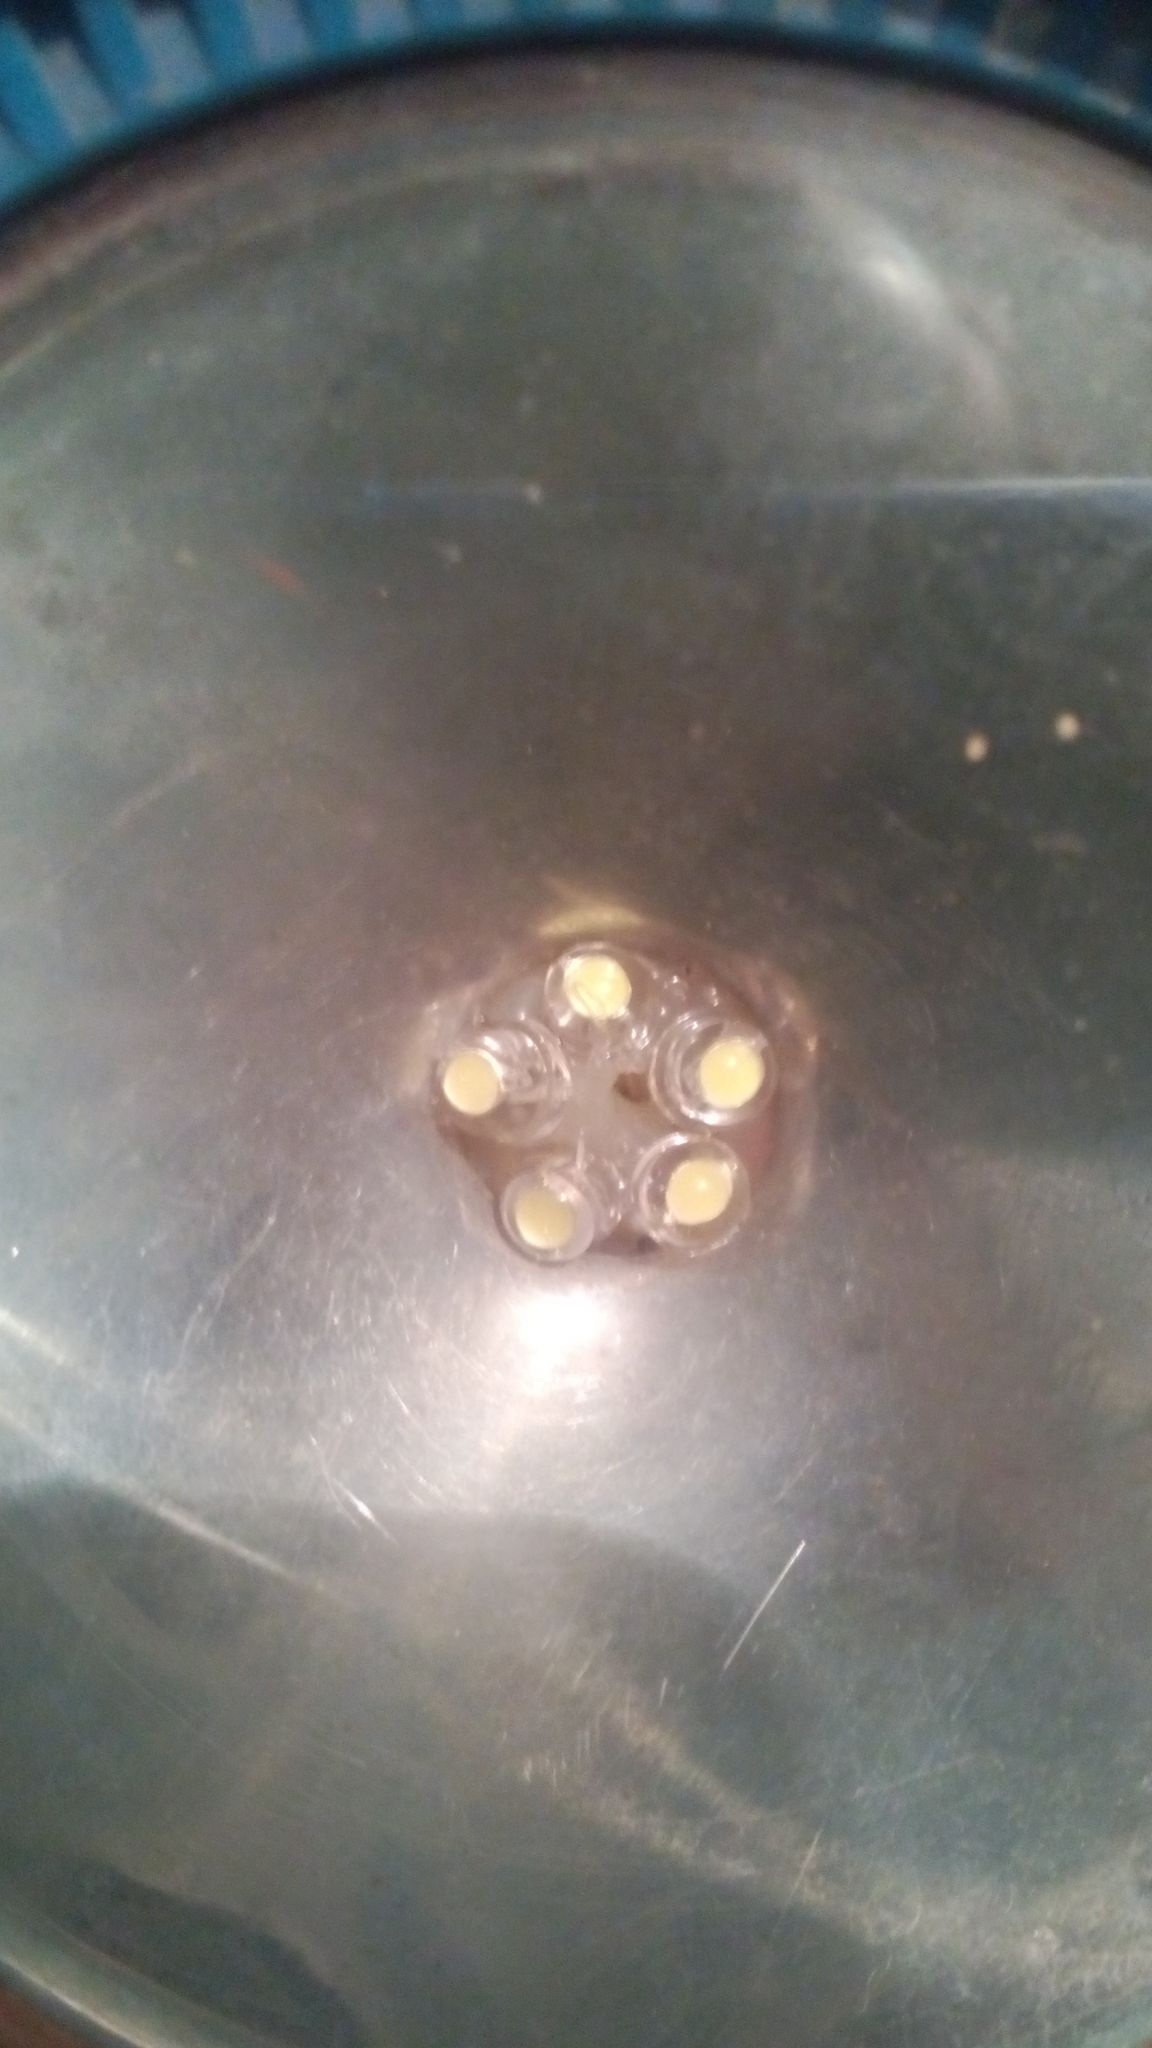
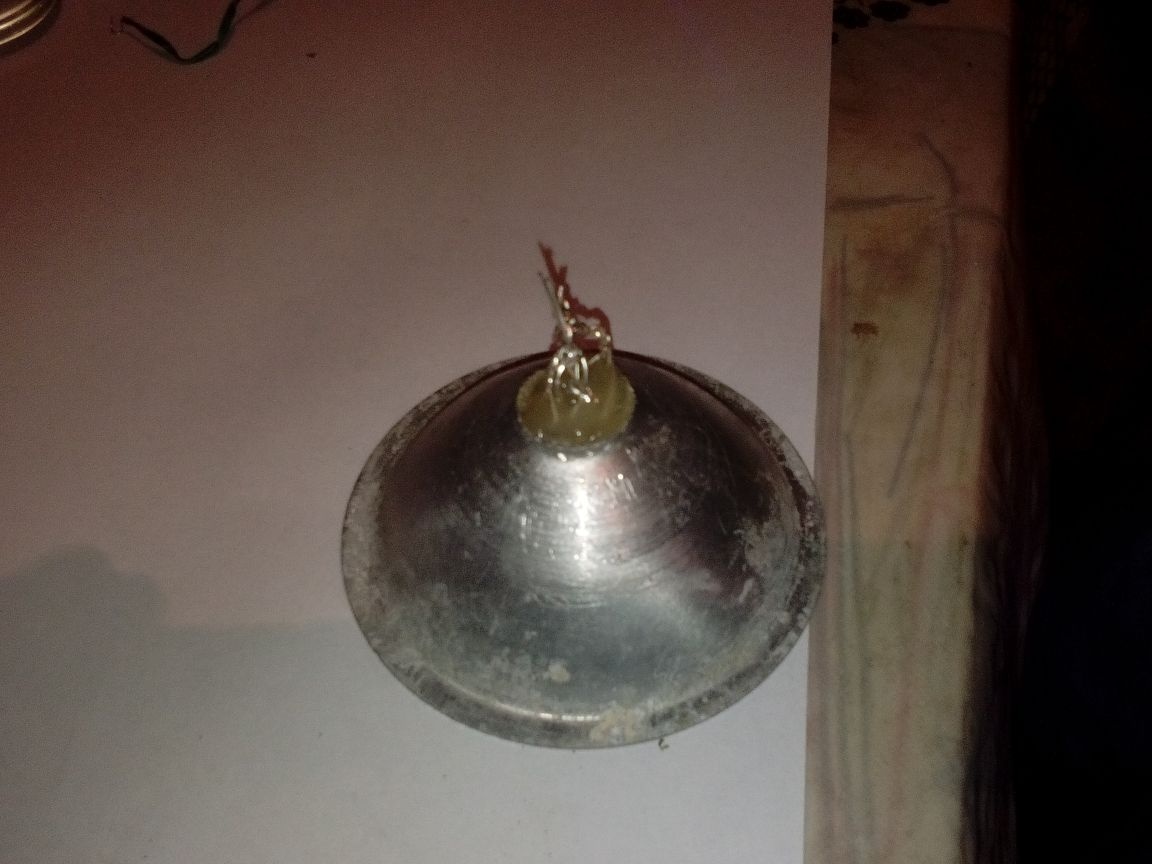
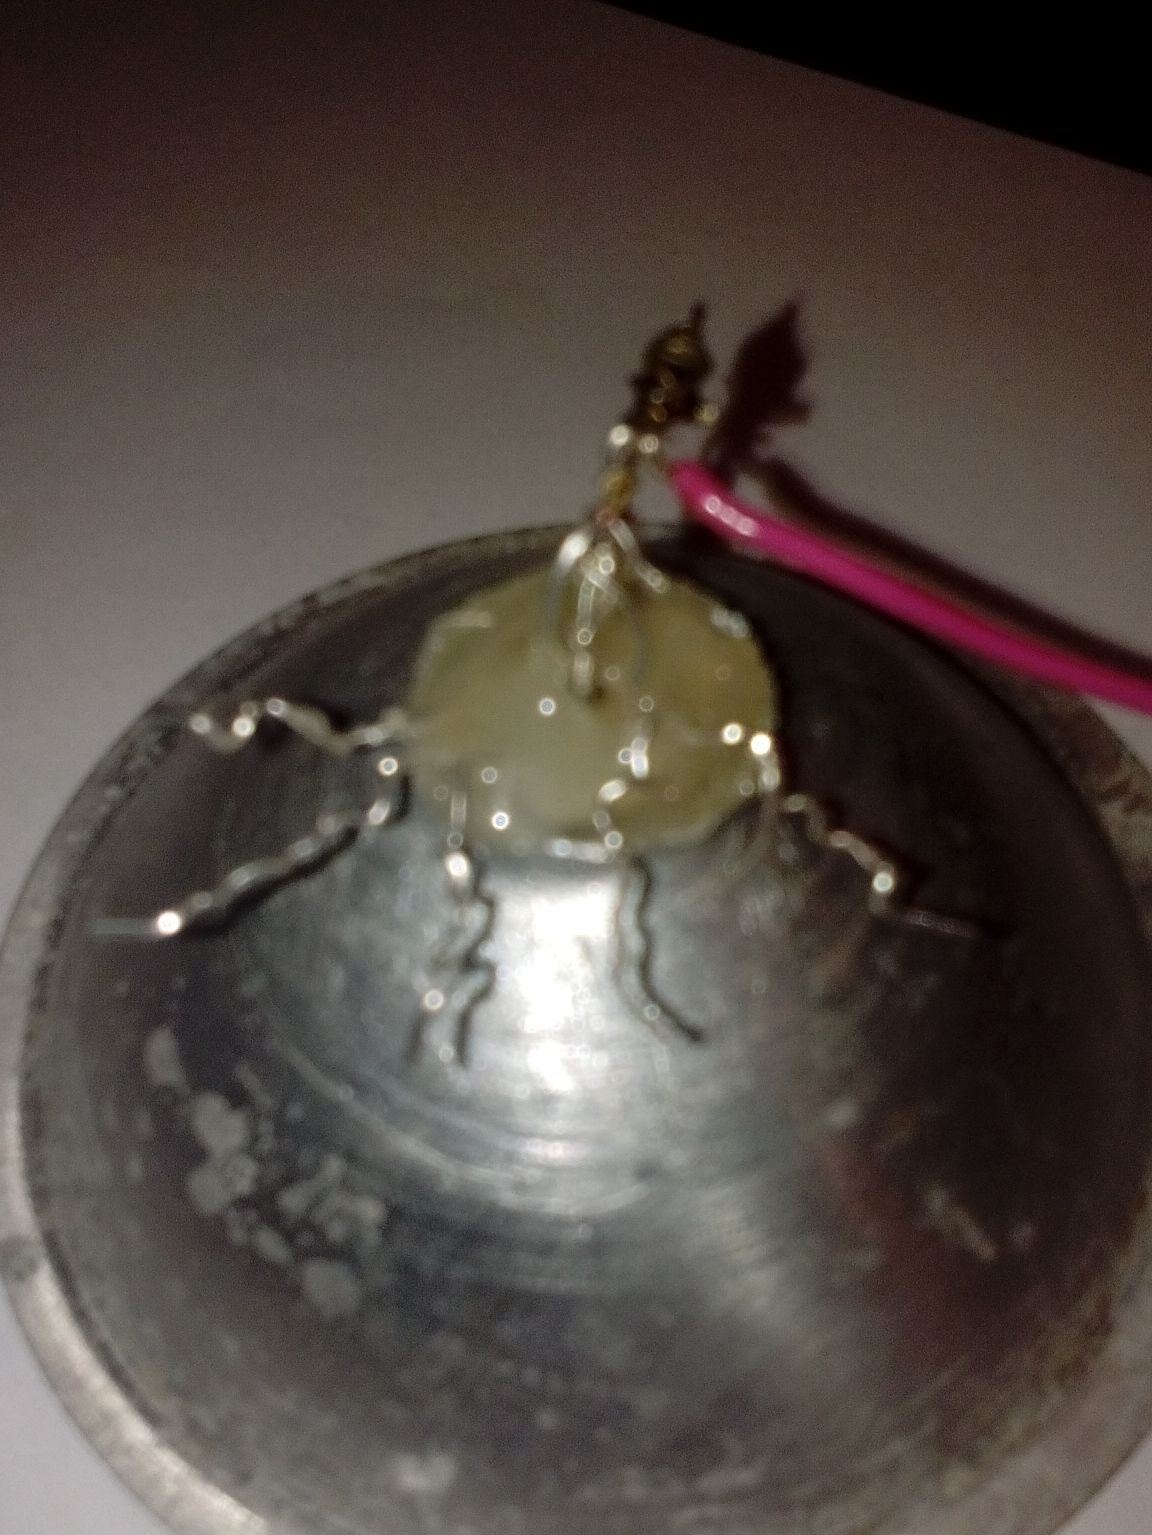
We align the bunch of LEDs and then fill in the reflector with hot glue. Aligning them is quite problematic.
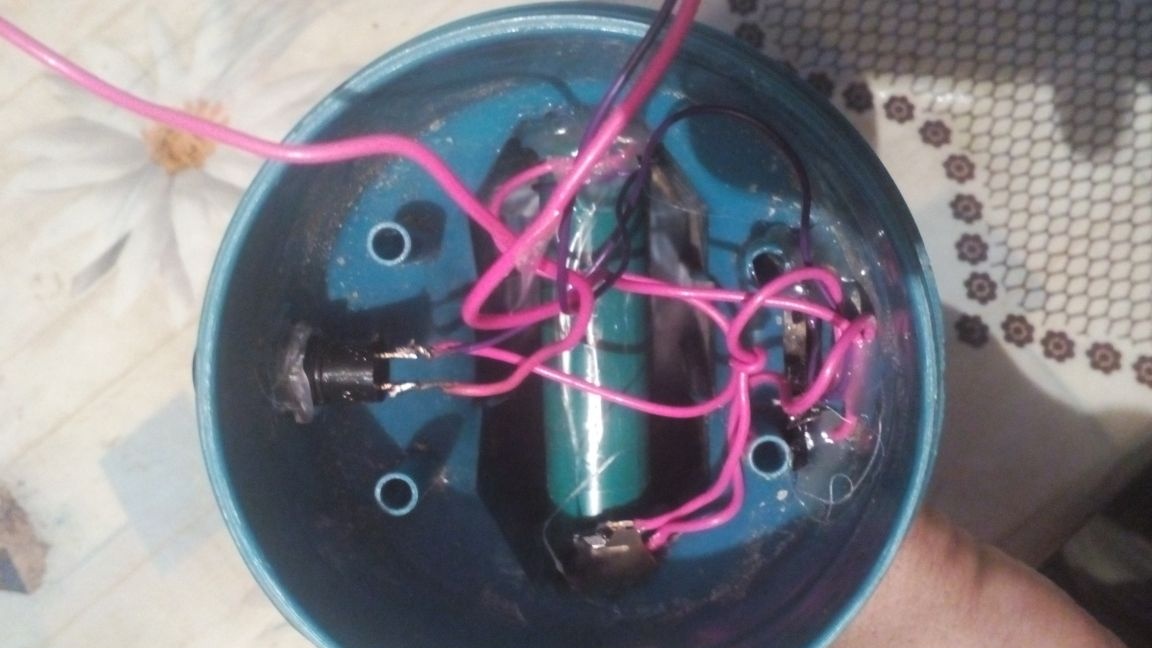
Step Three Installation in the battery case
6 batteries ideally entered my case, even a small gap remained, that is, it is mono to install longer batteries. I also note that I messed up a bit and instead of the 18650 I installed some others with a voltage of around 1.3V, two of these batteries give out a voltage of 2.6-2.8V, from such a power source my three-volt LEDs burn perfectly. That is, I got three pairs of series-connected batteries. In the future, I will put 18650, I will use these until I finish

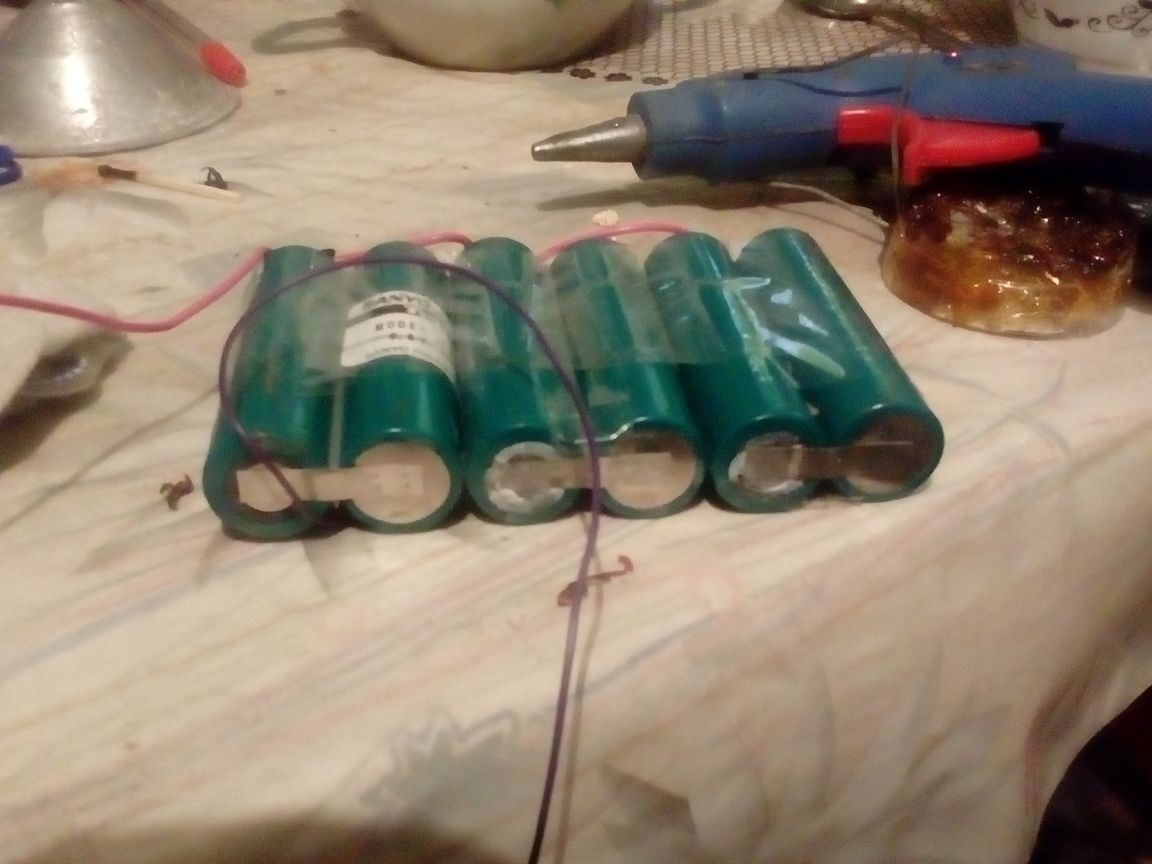
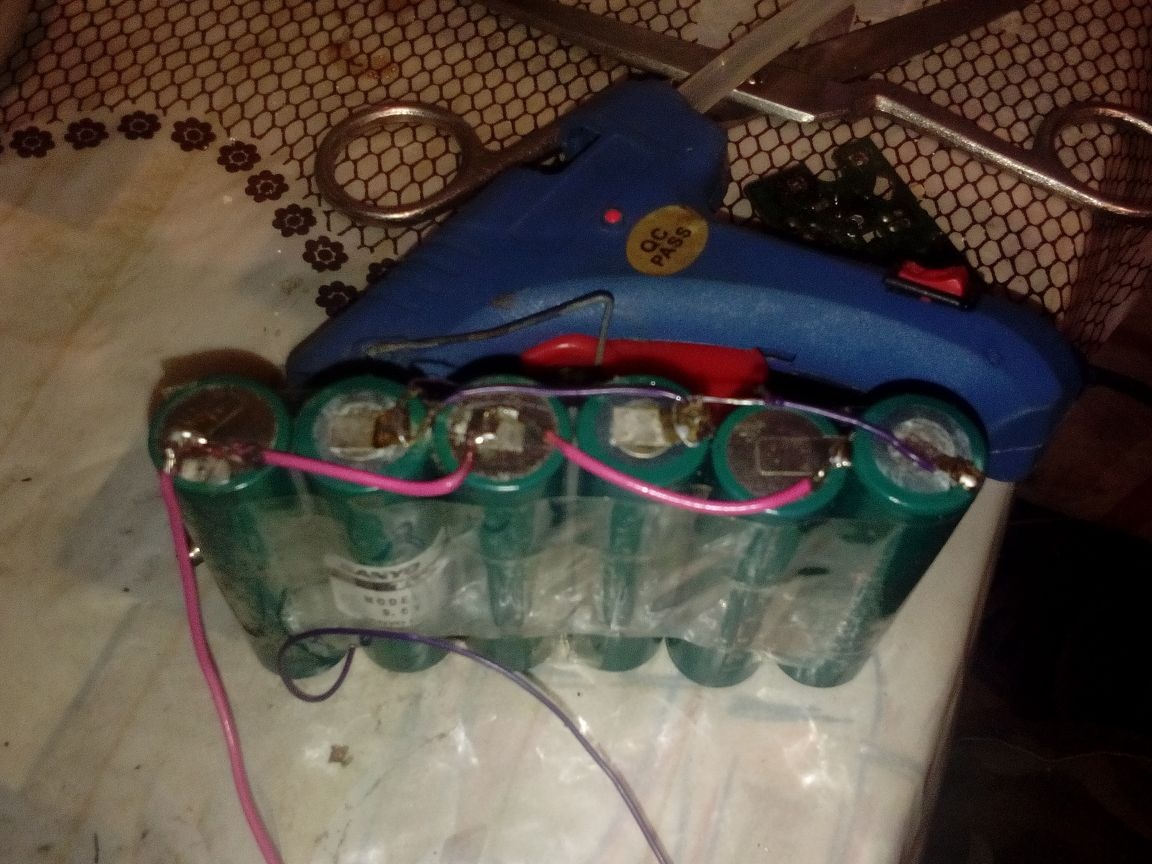
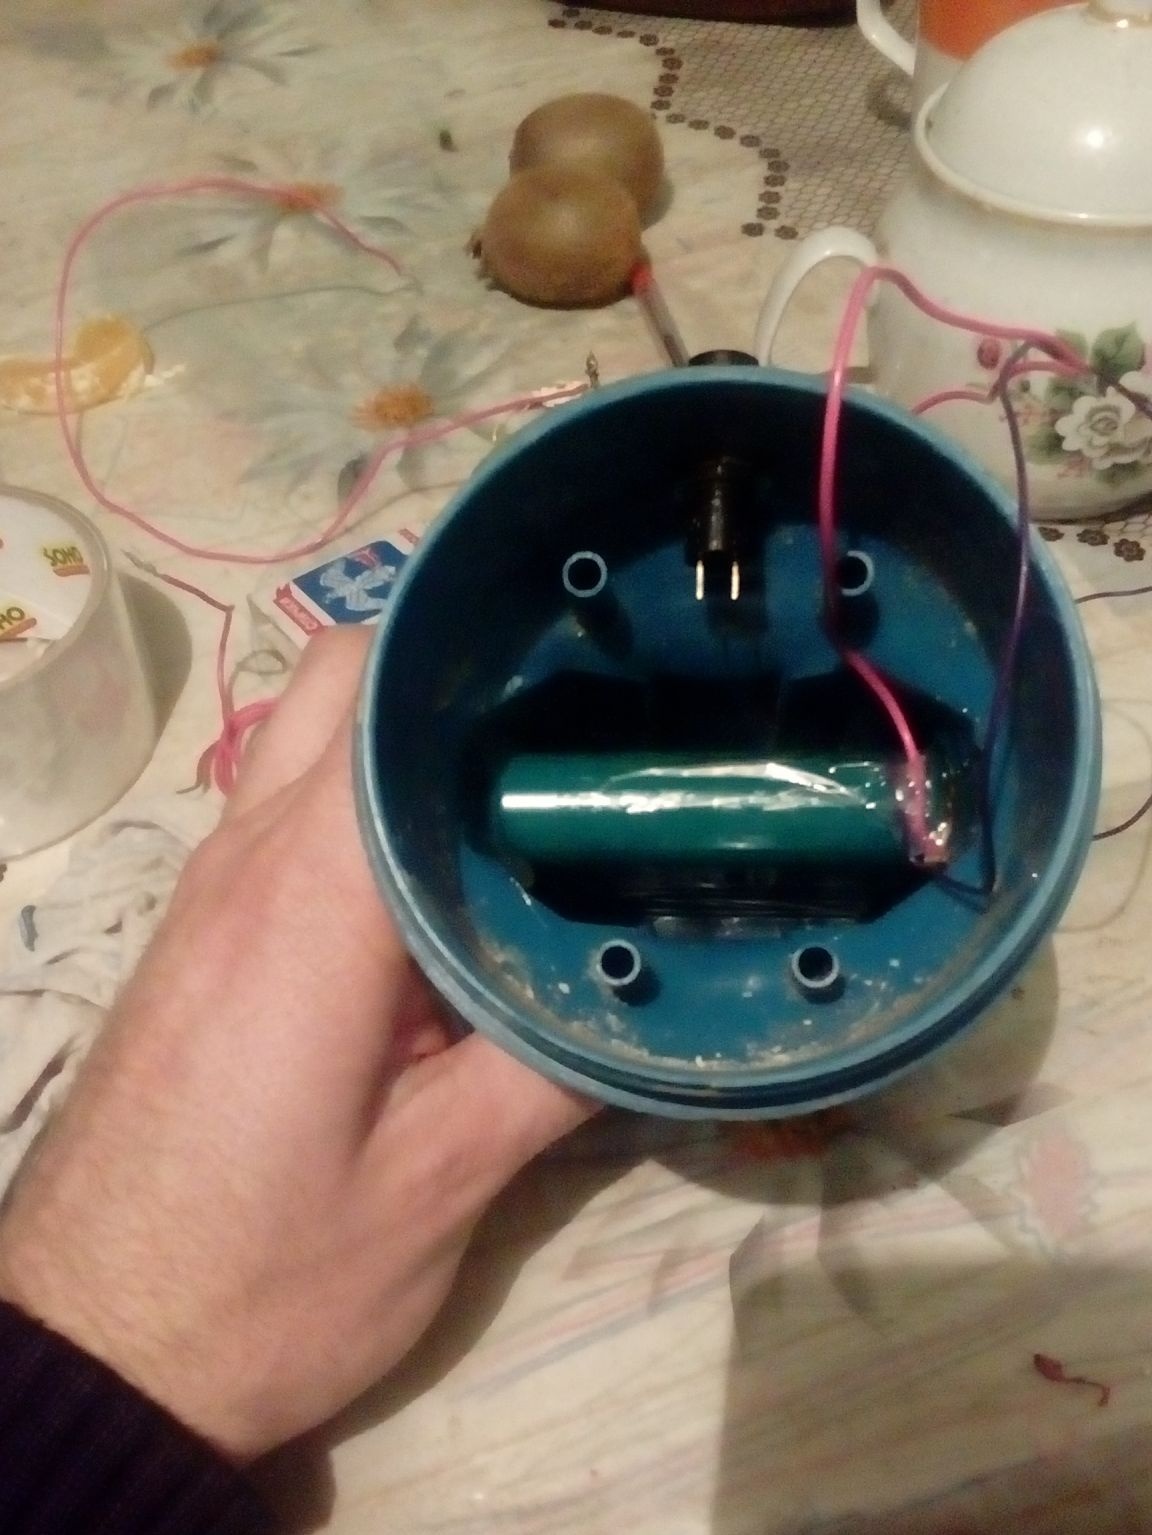
We solder all the pros and cons, thereby making the battery capacity common. We insert the battery into the case and fix it with hot glue.
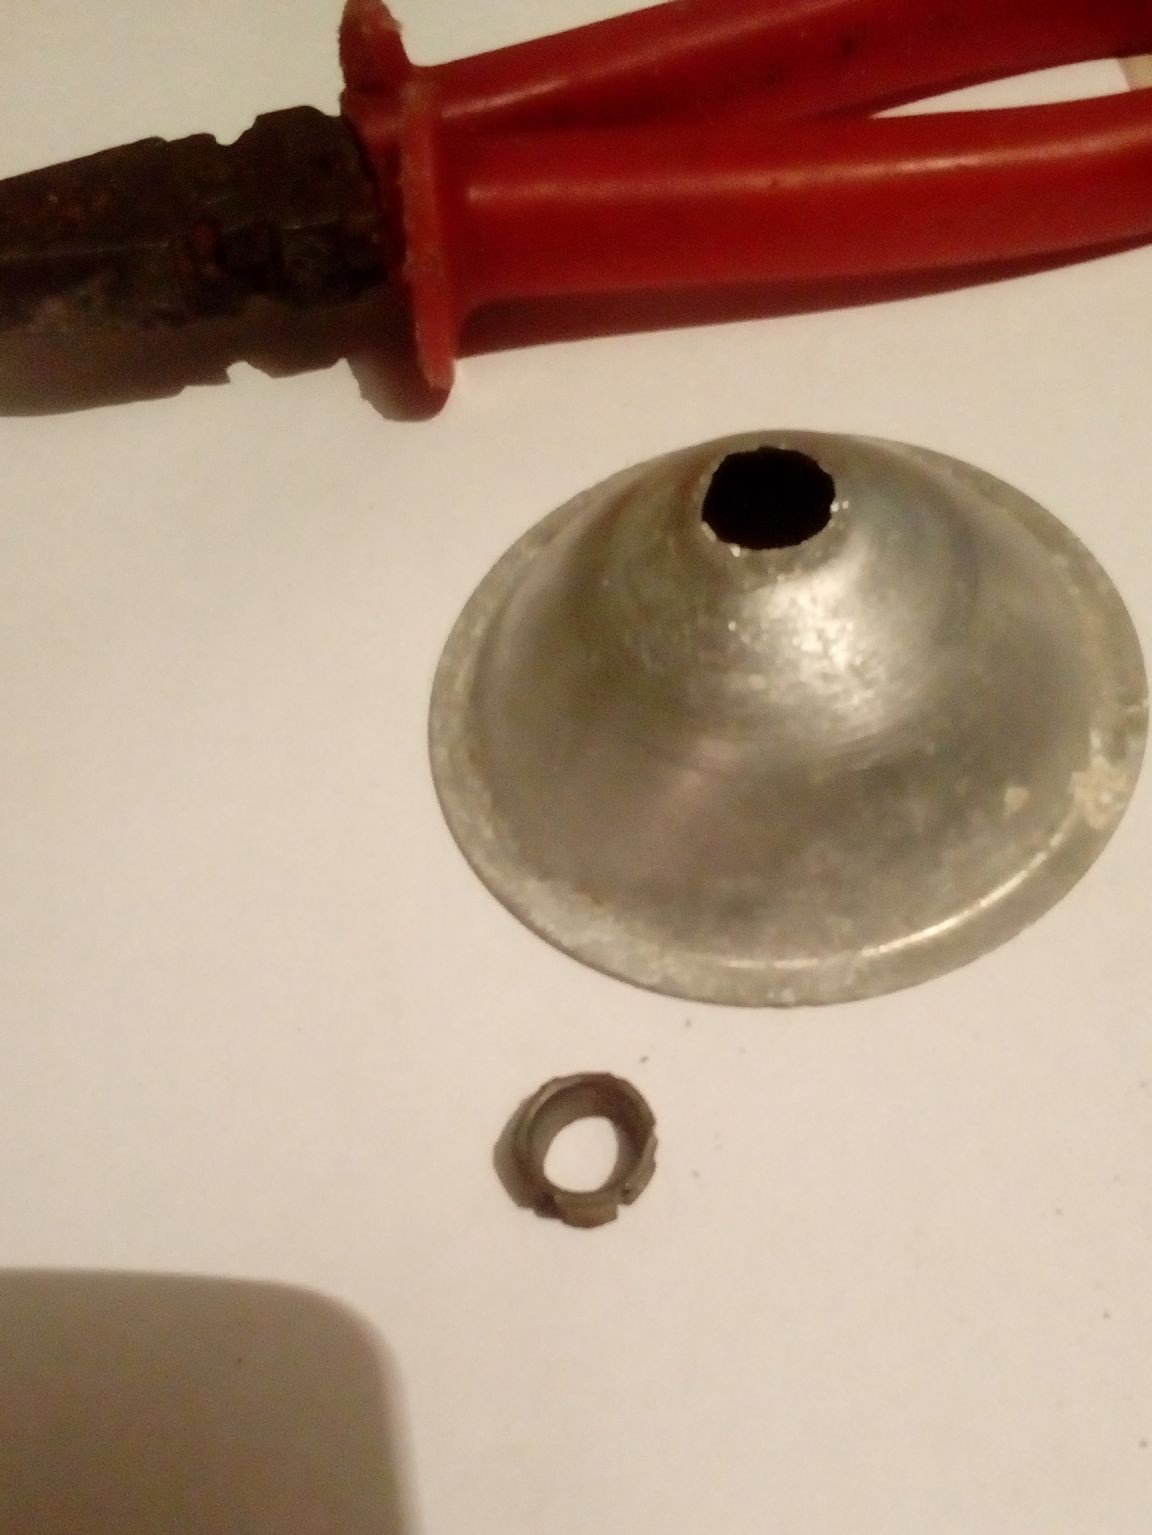
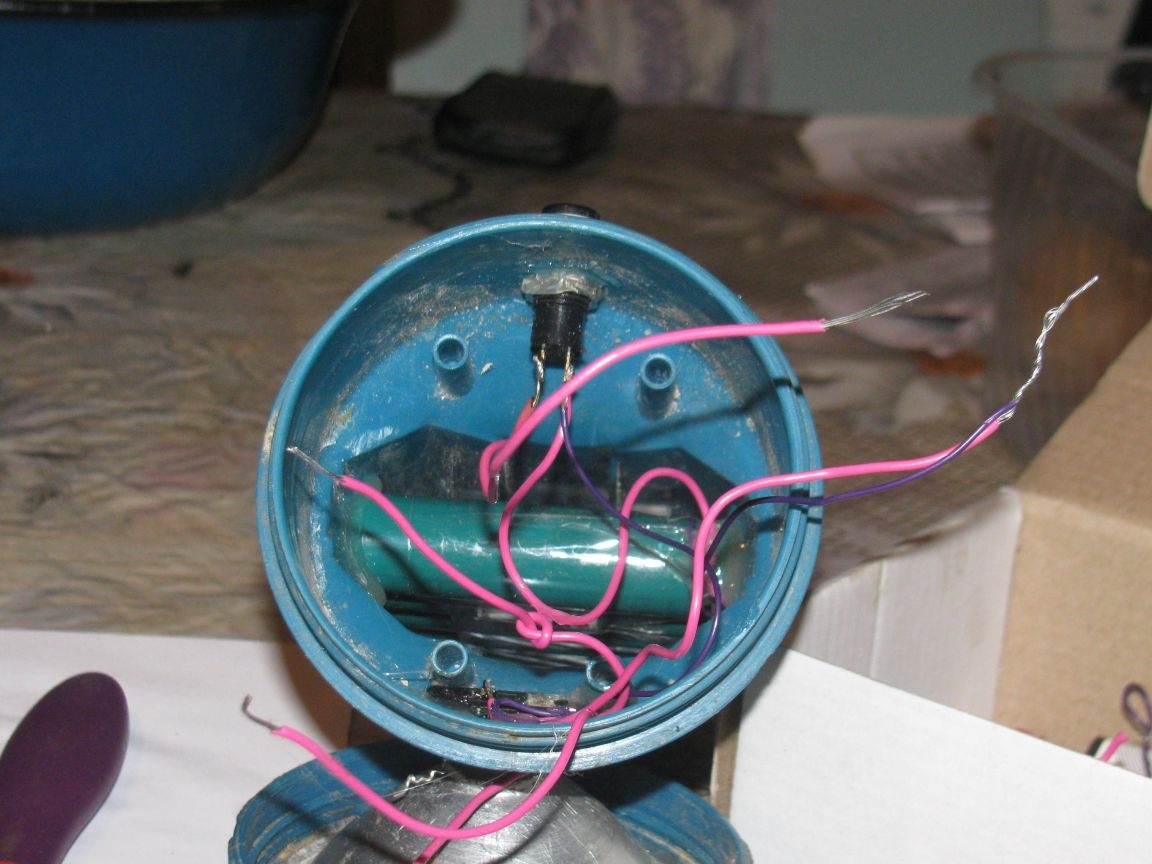
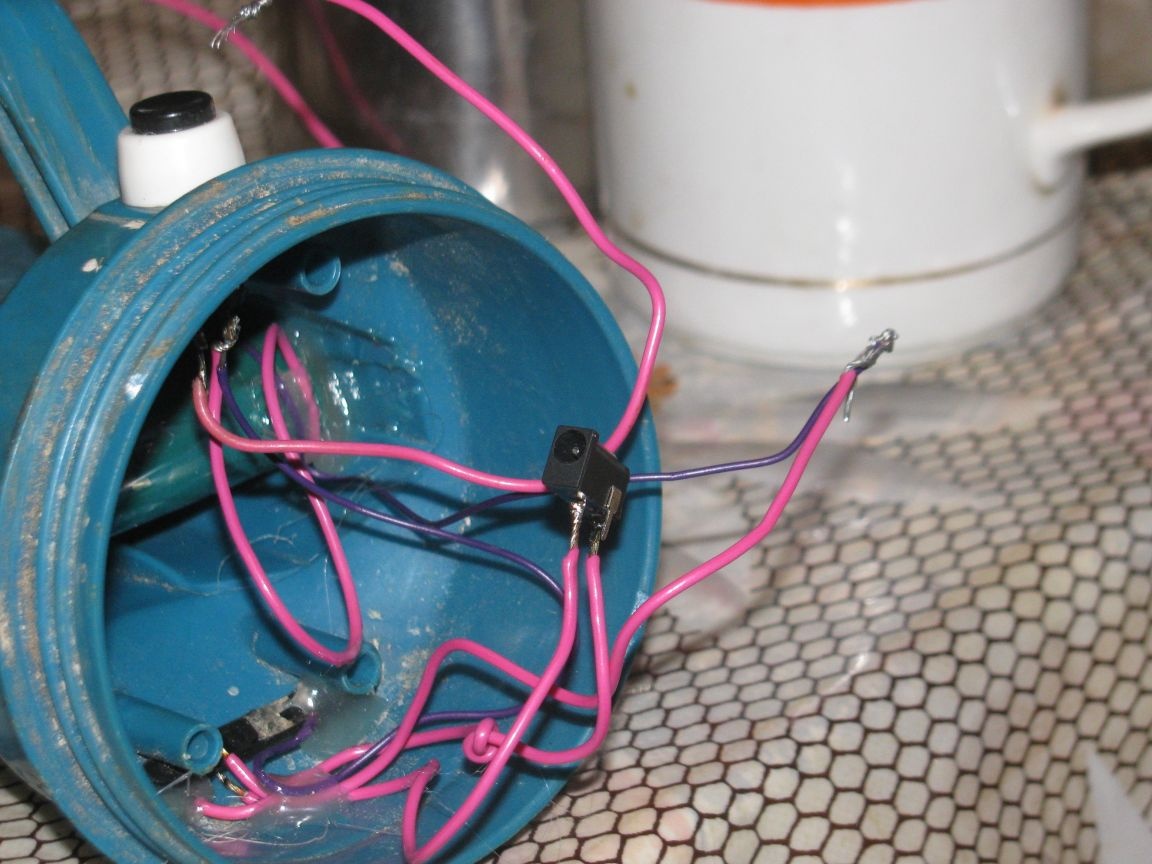
Step Four Charge controller
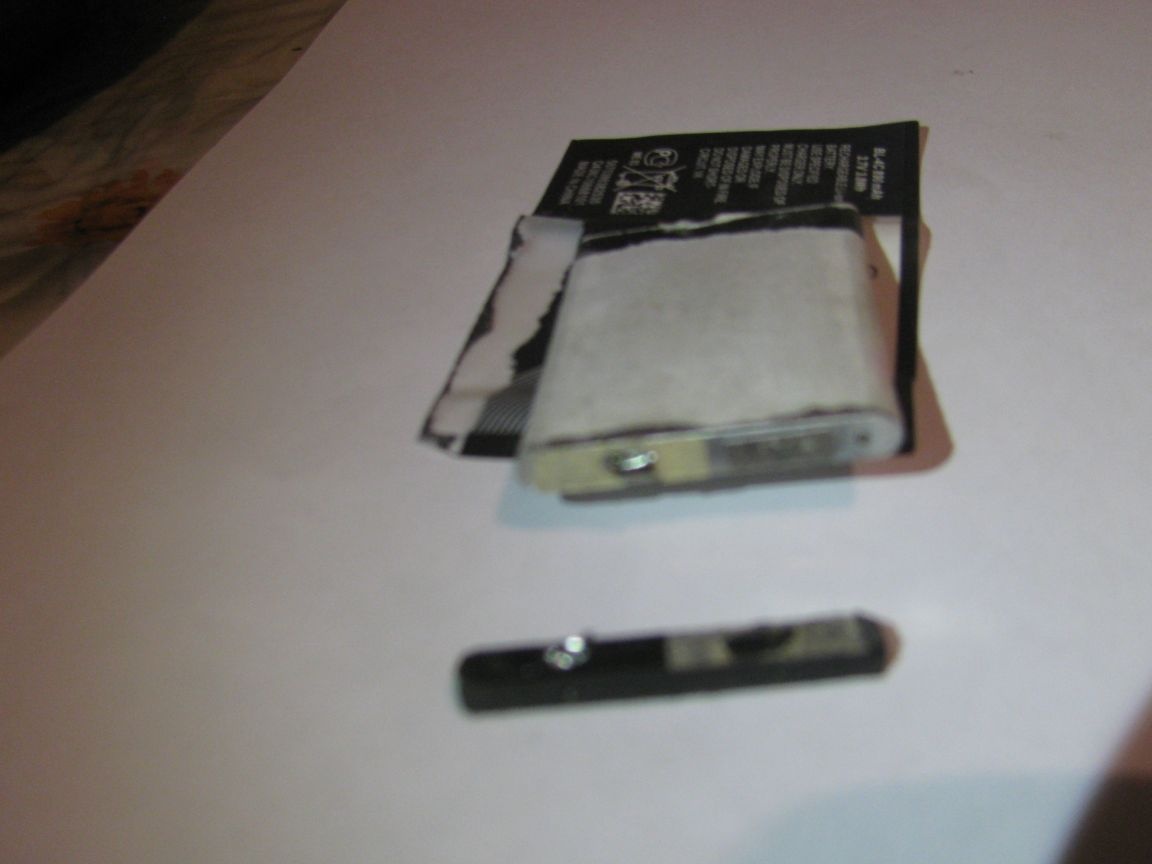
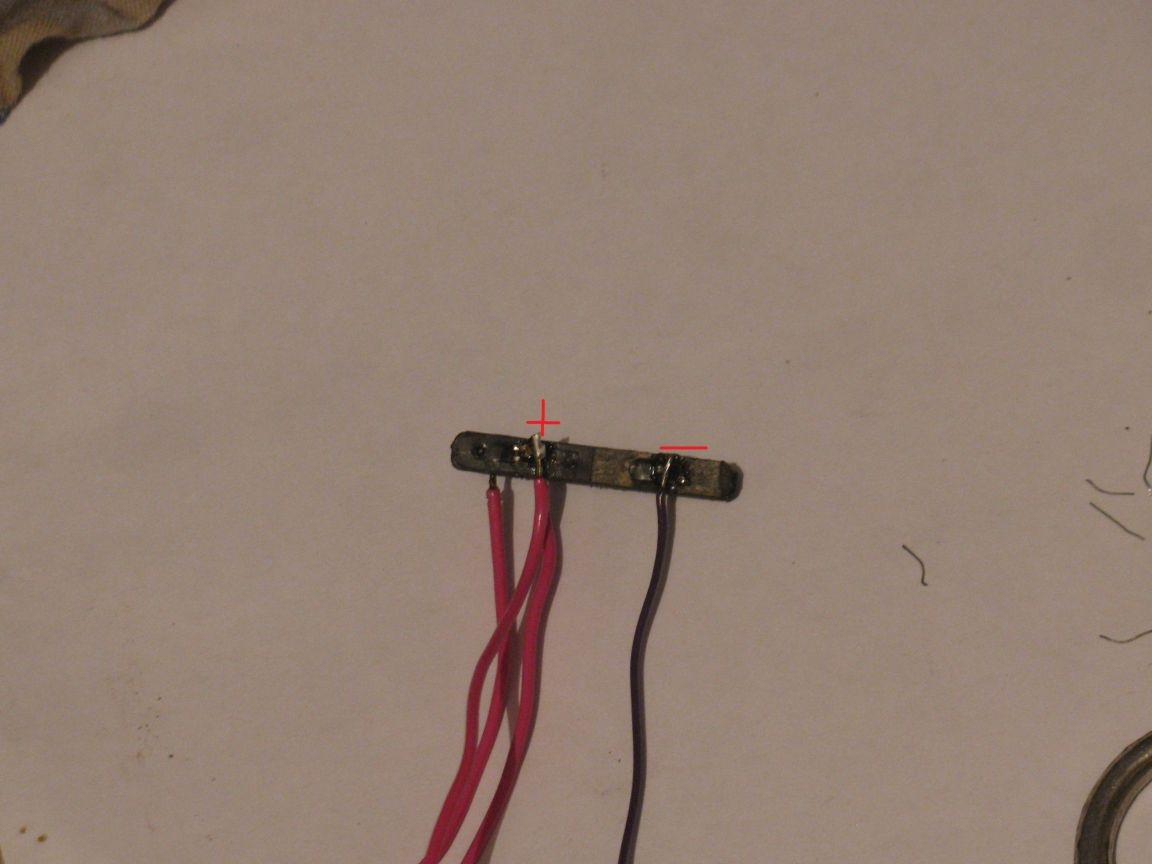
If you charge lithium directly from a power source, it can quickly become unusable due to overcharging. Here you need a controller, it is likely to be found in every home. Find any old battery from the phone, the controller we need is in it. Carefully pry off the top plastic, it contains the controller. Try not to break the two pins on the controller.
More details about this:
Next, we take a soldering iron and solder two wires to the outputs that go to the battery. The contact, which is located on the very edge, opposite the contacts of the battery for charging, will be a plus and another minus. But just in case, check with a multimeter.
Also solder the two wires to the battery terminals for voltage. We don’t need a central one, it’s a temperature sensor.
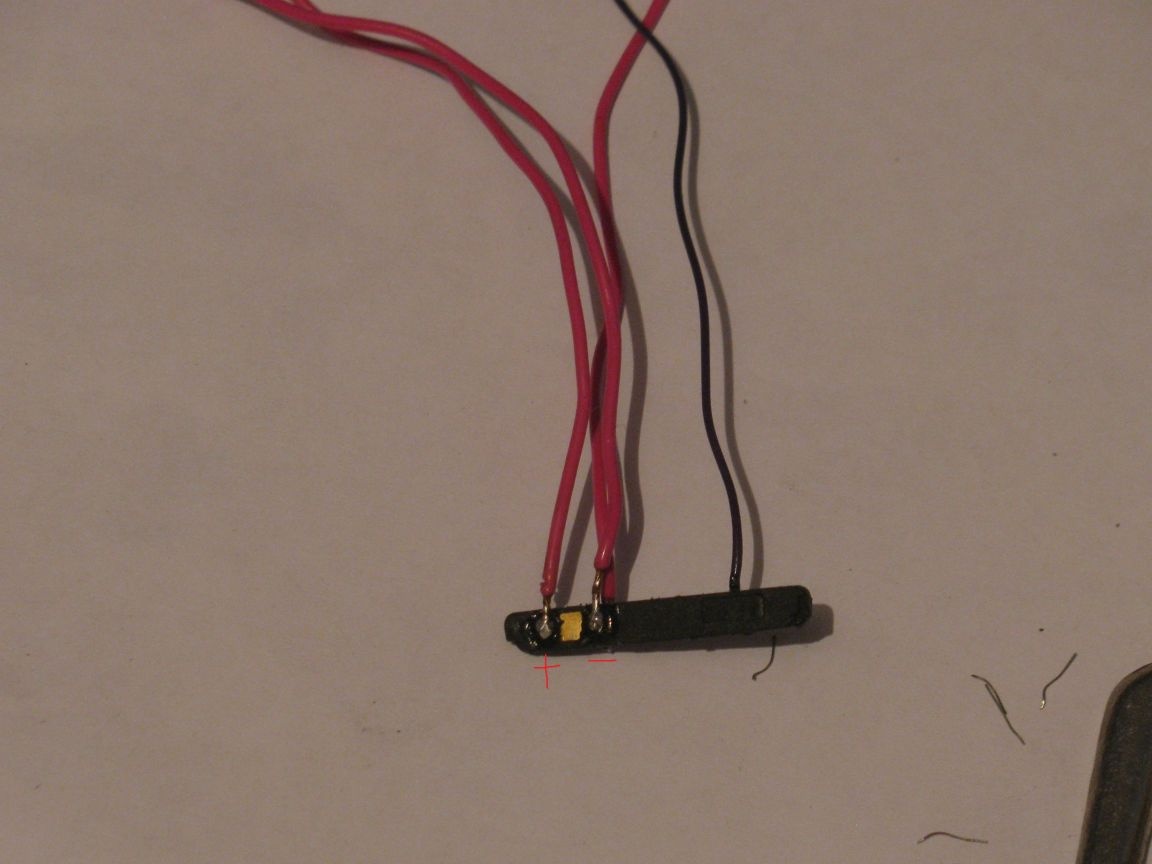
As a result, now the 18650 battery can be charged with a voltage of 5V. USB can be adapted for this, but I took charge for the phone (or something like that). Try applying voltage and turn on the ammeter in the gap with the controller and the battery. As charging, the controller should reduce the number of amperes, and then when fully charged, reduce them to nothing.
Soldering all the necessary wires, I fixed the controller in the case with hot glue. He also fixed the wires so that they would not be cut off in the future.
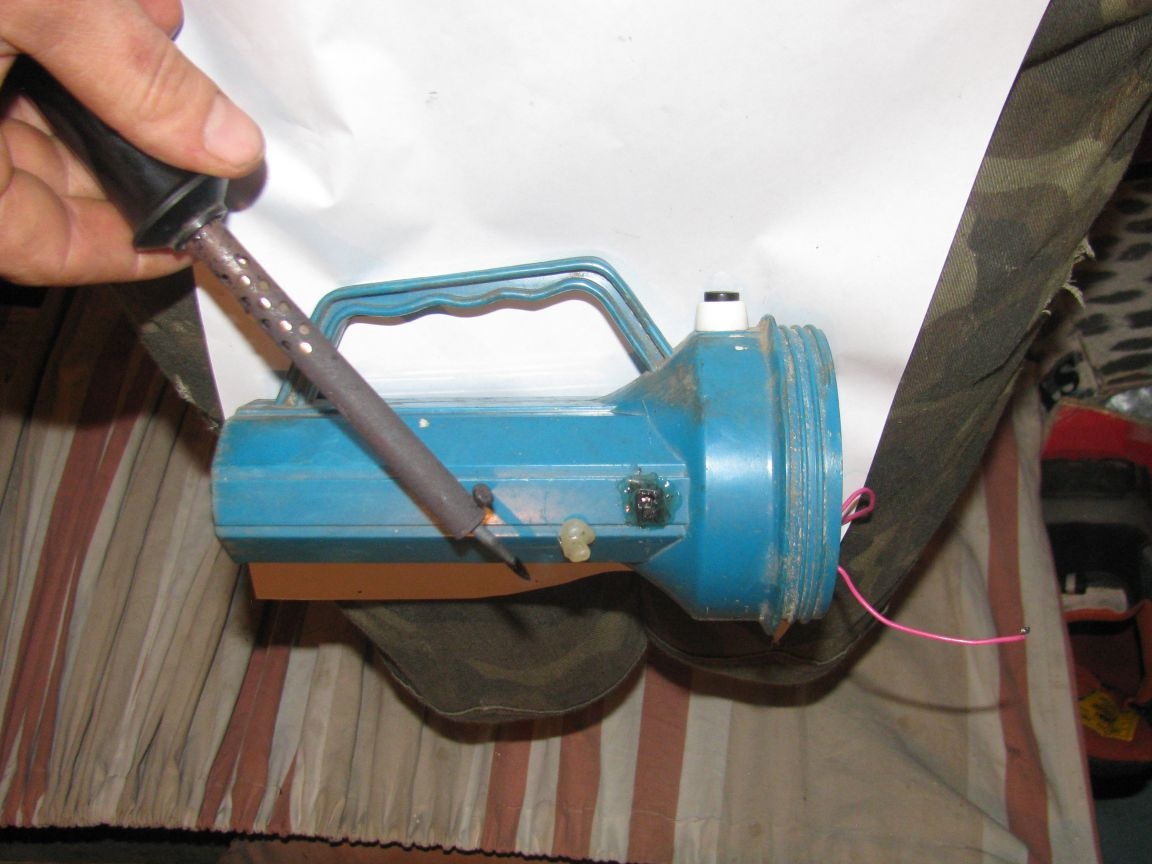
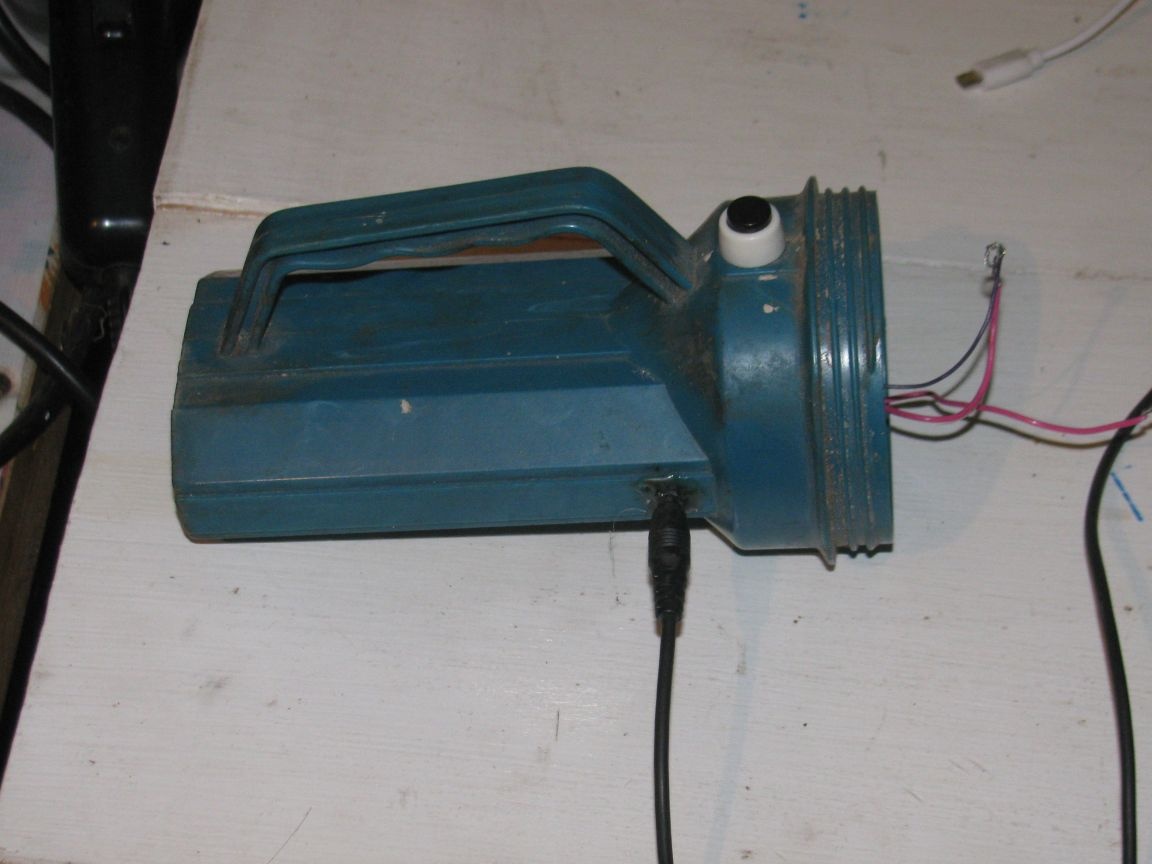
Step Five Charging input
To make it convenient to connect the charging, I found in the old phone a connector that perfectly fits the plug of my charge.
To install, burn a hole with a soldering iron in the right place and insert the connector. For fastening, I first soldered it outside with a soldering iron, and on the other hand, additionally fixed it with hot glue. Solder the inputs from the charging controller to the connector. It is also recommended to put a protective resistor in front of the controller just in case, but I did not.

Step Six Build completion
Since I did not find the necessary resistors for the LEDs, which, by the rule, should be one for each LED, I eventually connected all the LEDs in parallel. No matter how funny it sounded, under five LEDs I also could not pick up one resistor, so I spat and put a variable resistor. With it, I adjusted the LEDs so that they did not shine at their maximum brightness.
In the future, of course, I plan to do everything as expected. Here are the correct LED connection diagrams.
In the gap LEDs connect the switch. Do not forget to turn off the flashlight when charging. Since my batteries are not what I need, they are recharging, but there shouldn't be any problems with the 18650.
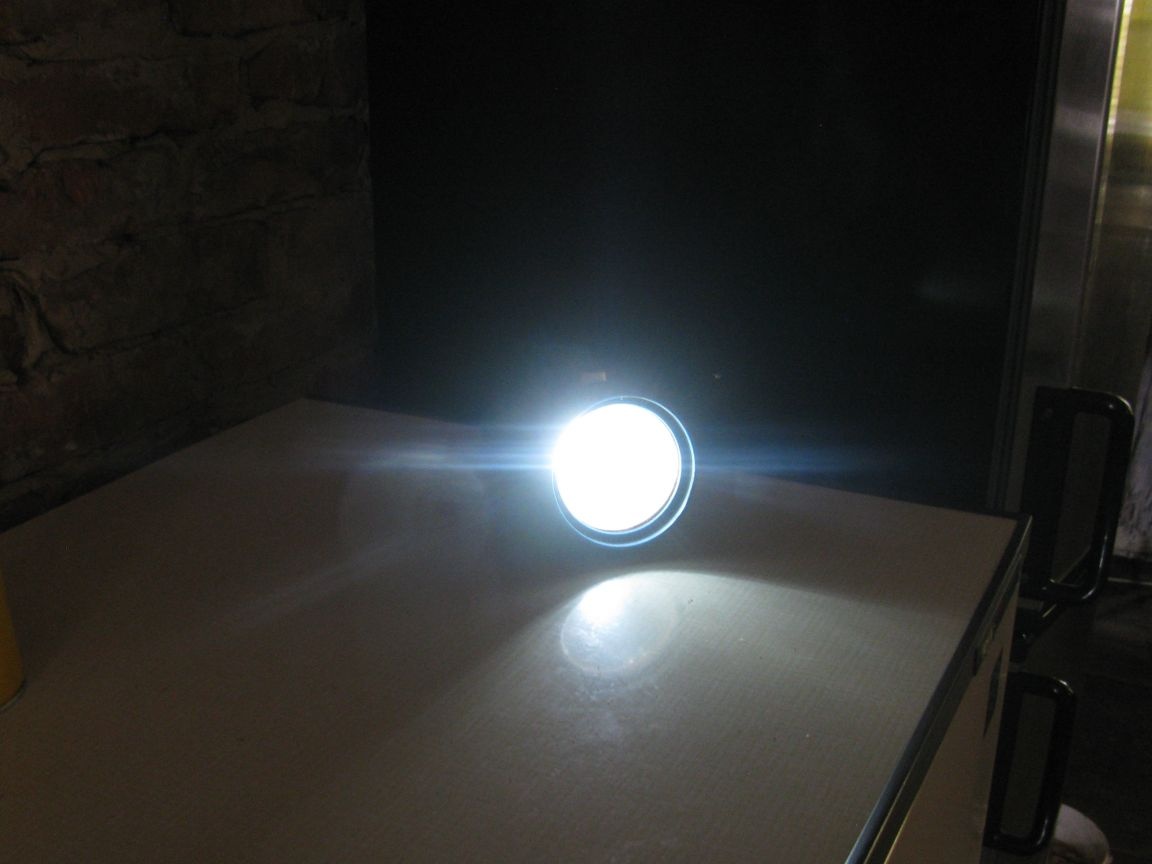
The flashlight works fine, the battery holds for a long time, while satisfied. The only problem is that you need to track the time so as not to recharge the batteries, but this is all temporary.