

Simple to manufacture, adjustable supports for the greenhouse, protecting the greenhouse from breaking under the weight of snow in the winter.
Nowadays, many gardeners and gardeners in the sites have various greenhouses. Moreover, they are very common, now greenhouses are coated with polycarbonate, having an arched shape. By the way, we also have a similar greenhouse, which looks like this.
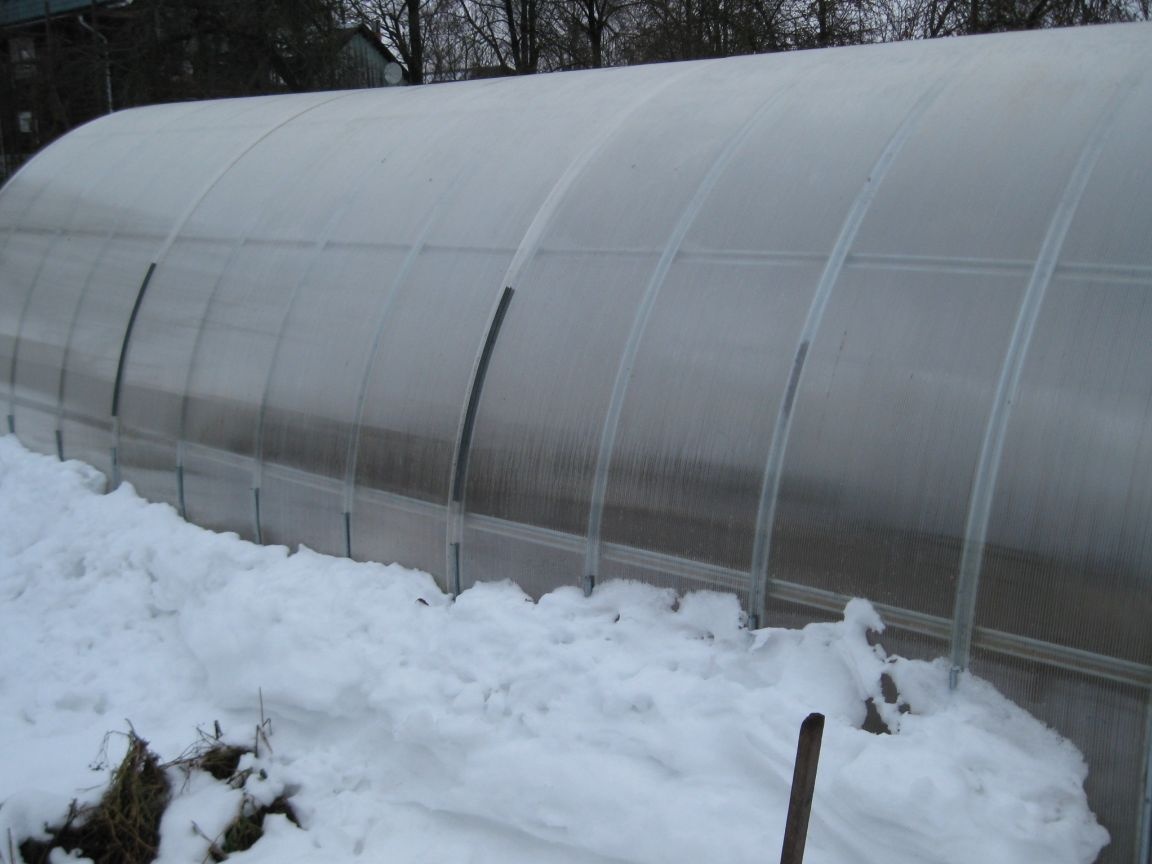
Such greenhouses have many advantages: they are relatively cheap, reliable and durable. In addition, such a greenhouse needs to be assembled and installed only once and then it no longer needs to be disassembled for the winter (for example, like a greenhouse covered with a film).
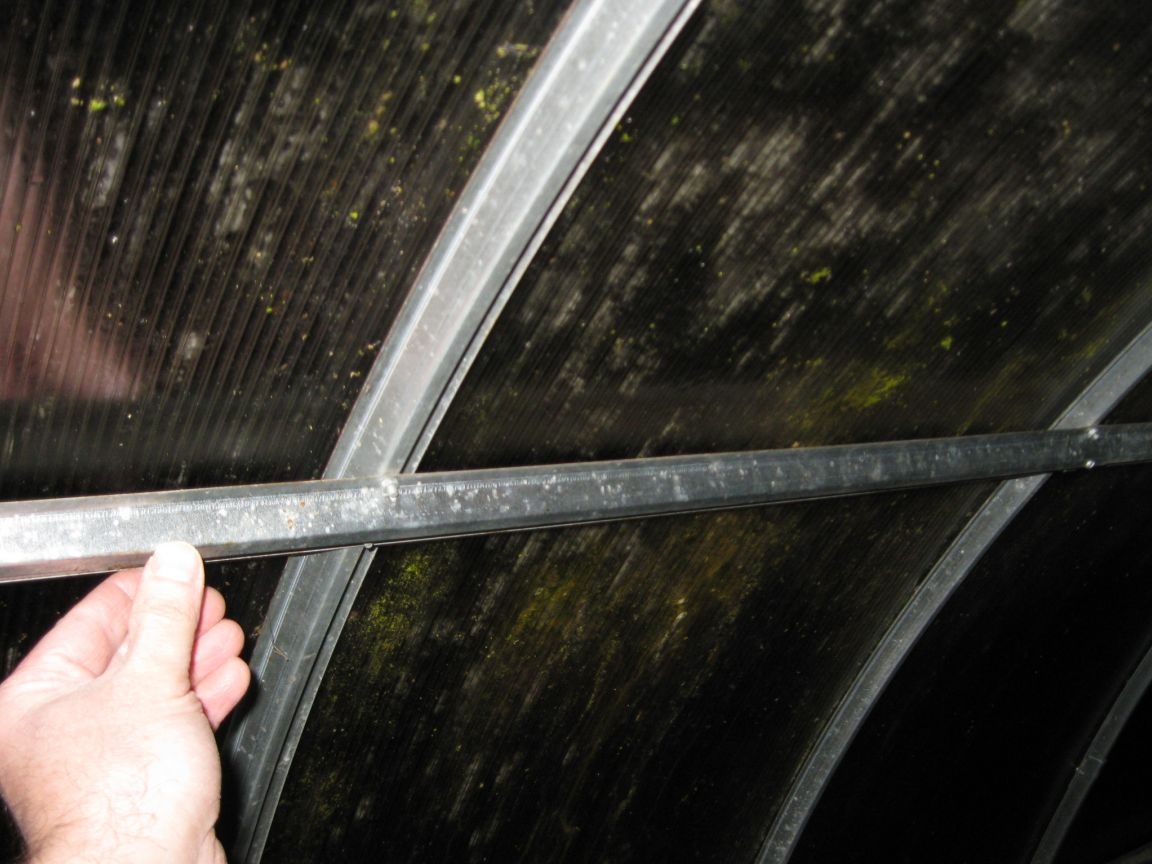
However, this advantage often turns into a significant drawback, since a large layer of snow accumulates on the roof of a non-separable greenhouse in winter, because of which the greenhouse may simply not be able to withstand its weight and break. Moreover, often, even the arched form of the greenhouse does not save. Moreover, the frames of many greenhouses for polycarbonate are made of a thin galvanized profile of this type.
Therefore, already at many of our familiar summer residents, similar greenhouses broke in the winter, unable to withstand the weight of snow.
The only way to prevent such a greenhouse from breaking in the winter is to regularly clean the snow from its roof at least three, four times during the winter. For example, I clean snow from my greenhouse about five or six times a winter.
However, far from all summer residents have the opportunity to often come to the cottage in the winter to clean the snow from the greenhouse. And in this case, the installation of supports in the greenhouse can help, thanks to which, the greenhouse can withstand significantly more snow. True, you need to remember that even with backups, the greenhouse can break, so during the winter, you still need to at least two times, come to the cottage and clear the snow from the roof of the greenhouse.
And recently, on this occasion, one of our elderly neighbor, a summer resident, turned to me. Last spring, she just bought and installed a similar greenhouse on her plot and even managed to grow something in it.However, now in the winter, just before the New Year holidays, she is finally leaving with cottages and will be able to come only once or twice during the remaining winter to clean his greenhouse from snow.
That is why she asked me to make some backups for her greenhouse, though with the condition that she herself could easily cope with their installation.
Having thought it over, I decided to make rather simple supports for it, the height of which could be easily adjusted using ordinary threaded elements - bolts and nuts. And for starters, I will make one such support to show her, and then, if she approves such a design, I will make two or three of the same support.
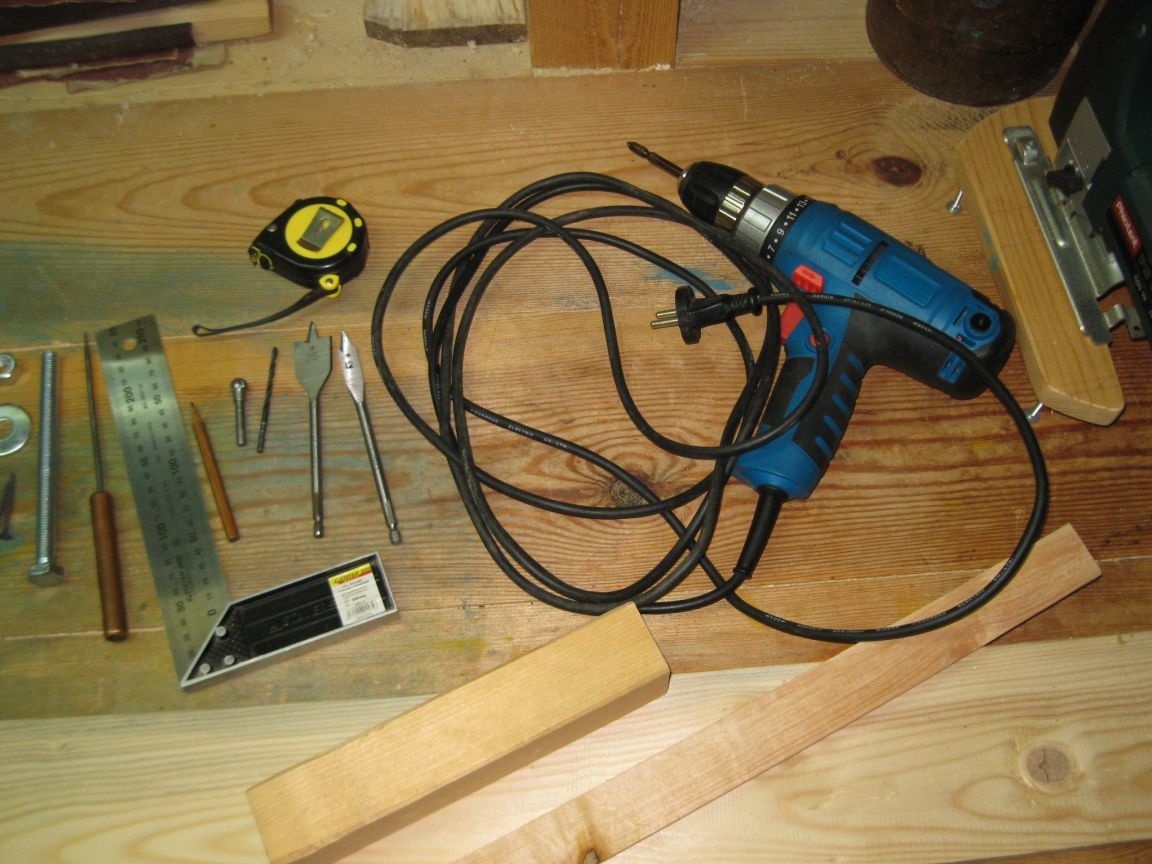
To make such a support, I need the following accessories:
Materials:
• Wooden board 2.5 cm thick, 12 cm wide and about 2 m long.
• Wooden bars 3x4 cm, and 4x4 cm, as well as a plank 1.5x3 cm.
• Four wood screws 4x50 mm.
• M12 bolt 160 mm long, with nut and washer.
Instruments:
• Drawing and measuring tools (pencil, tape measure and square).
• Awl.
• Electric jigsaw with a file for a figured cut.
• Electric drill / screwdriver.
• Drill for metal with a diameter of 4 mm.
• Spherical wood milling cutter.
• Hole drills on wood with a diameter of 12 mm, and 25 mm.
• Screwdriver bit PH2, for screwdriving.
• Sandpaper.
The procedure for making backups.
The design of the support I had in mind will consist of two main parts: the lower support in the form of a solid board with a length of about 180 cm, and the upper adjustable retaining part with a bolt and nut. To start, we will make the lower part.
Stage 1. Production of the lower support.
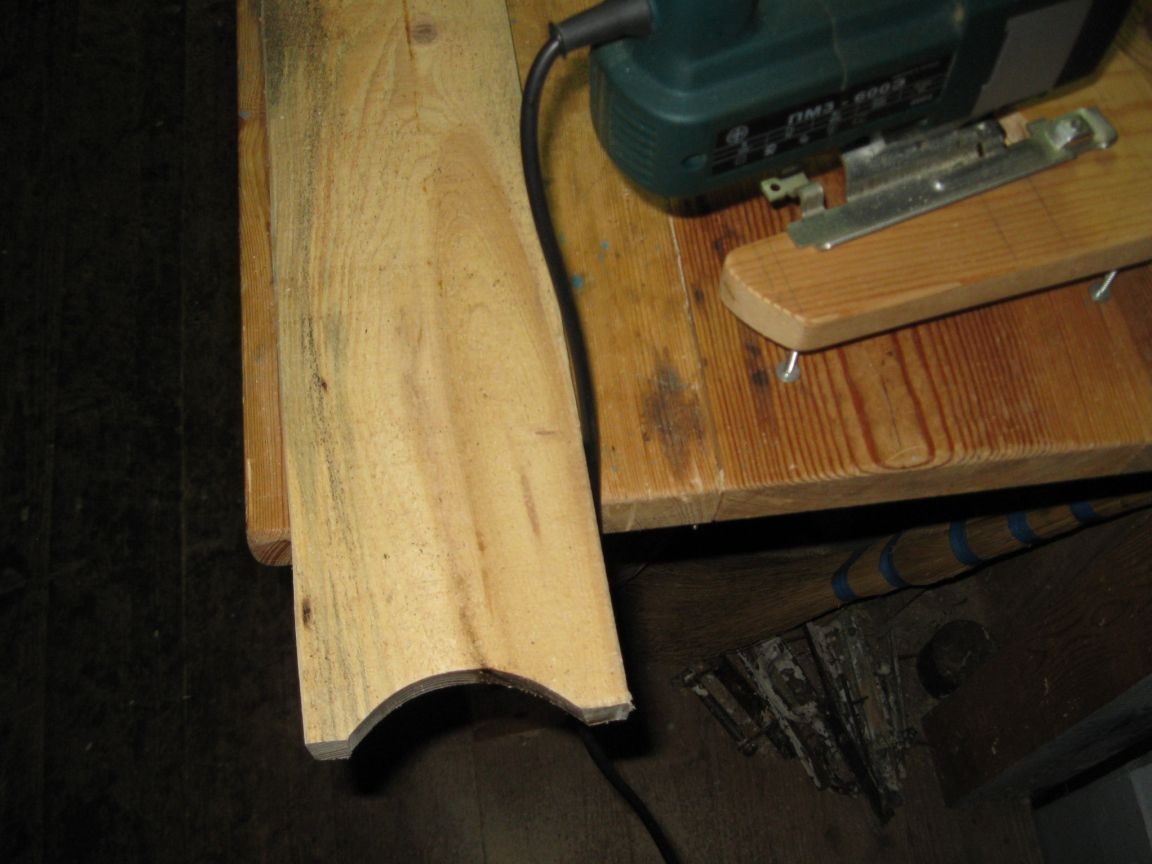
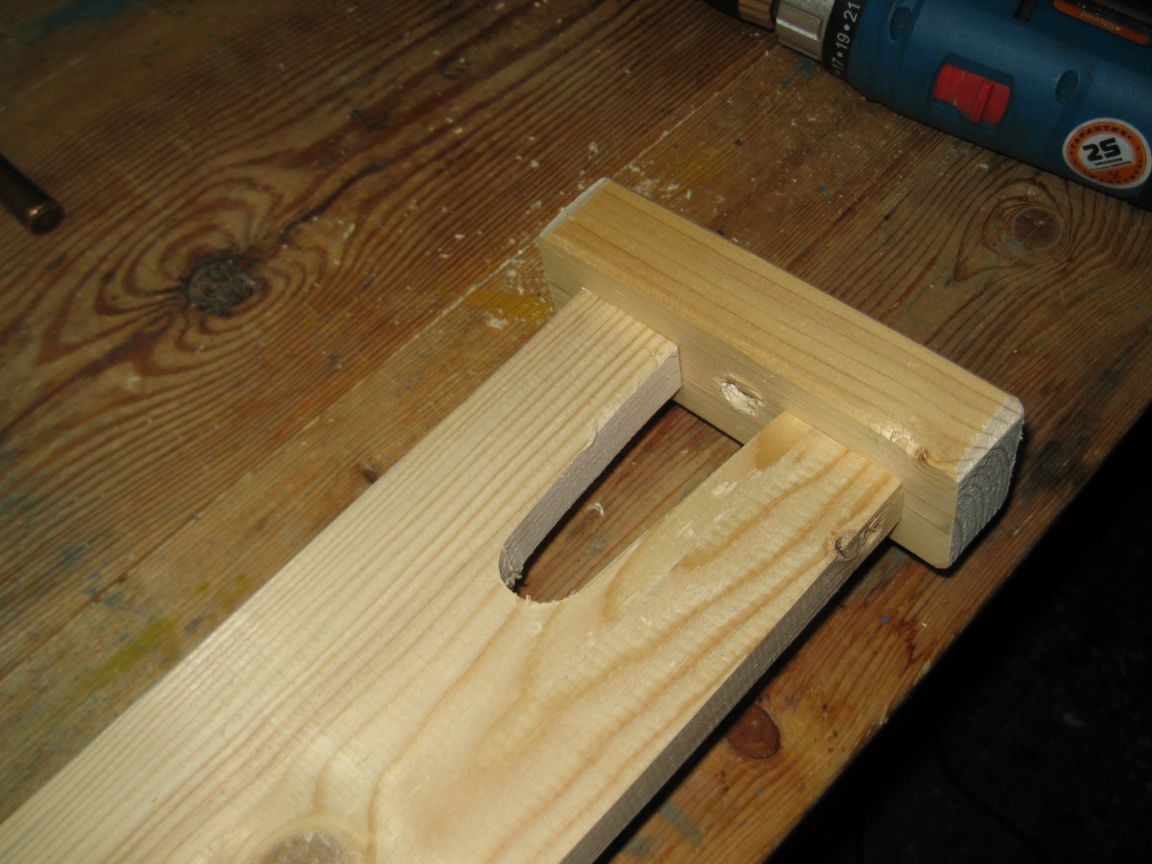
Step 1. Sawing a notch.
Using an electric jigsaw, we cut out such a recess in the bottom of the board so that the load is distributed evenly, and the board itself is more stable.
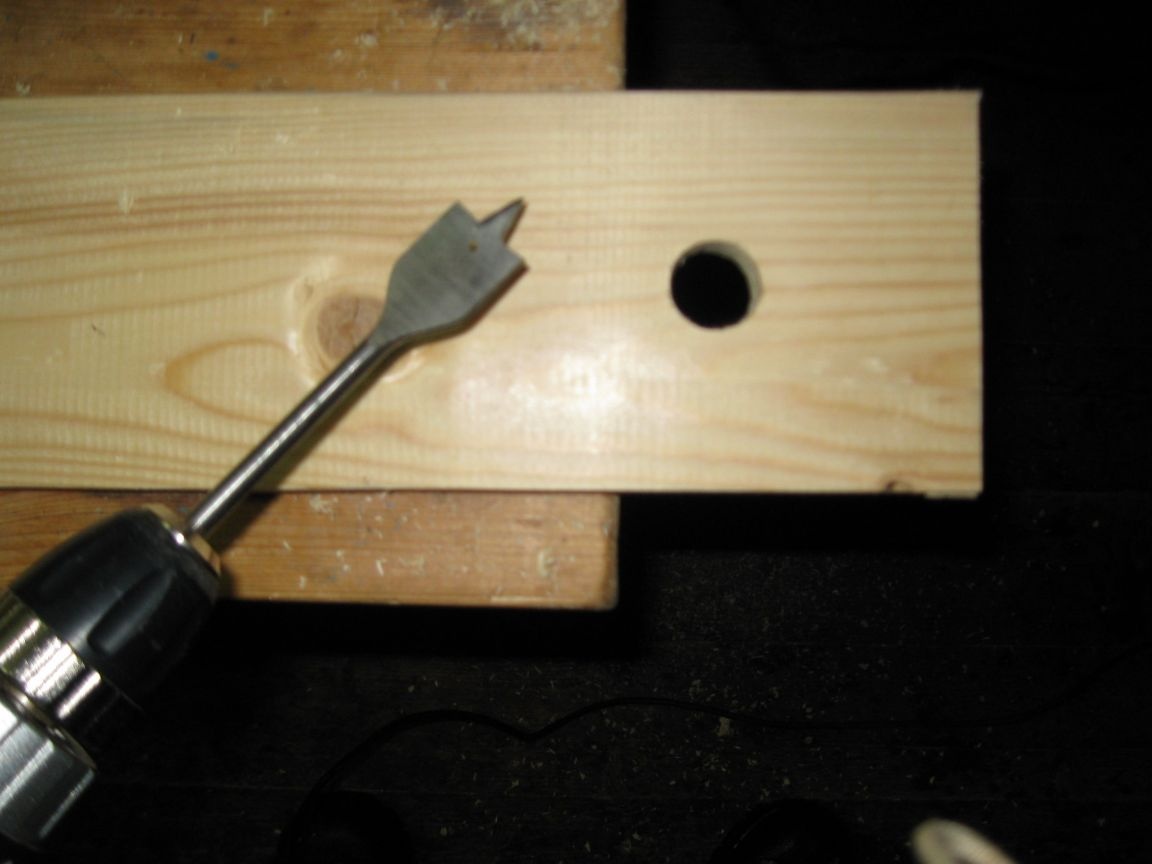
Step 2. Drilling a hole.
Having retreated about 12 centimeters from the upper end of the board, we drill a hole with a diameter of 25 mm.
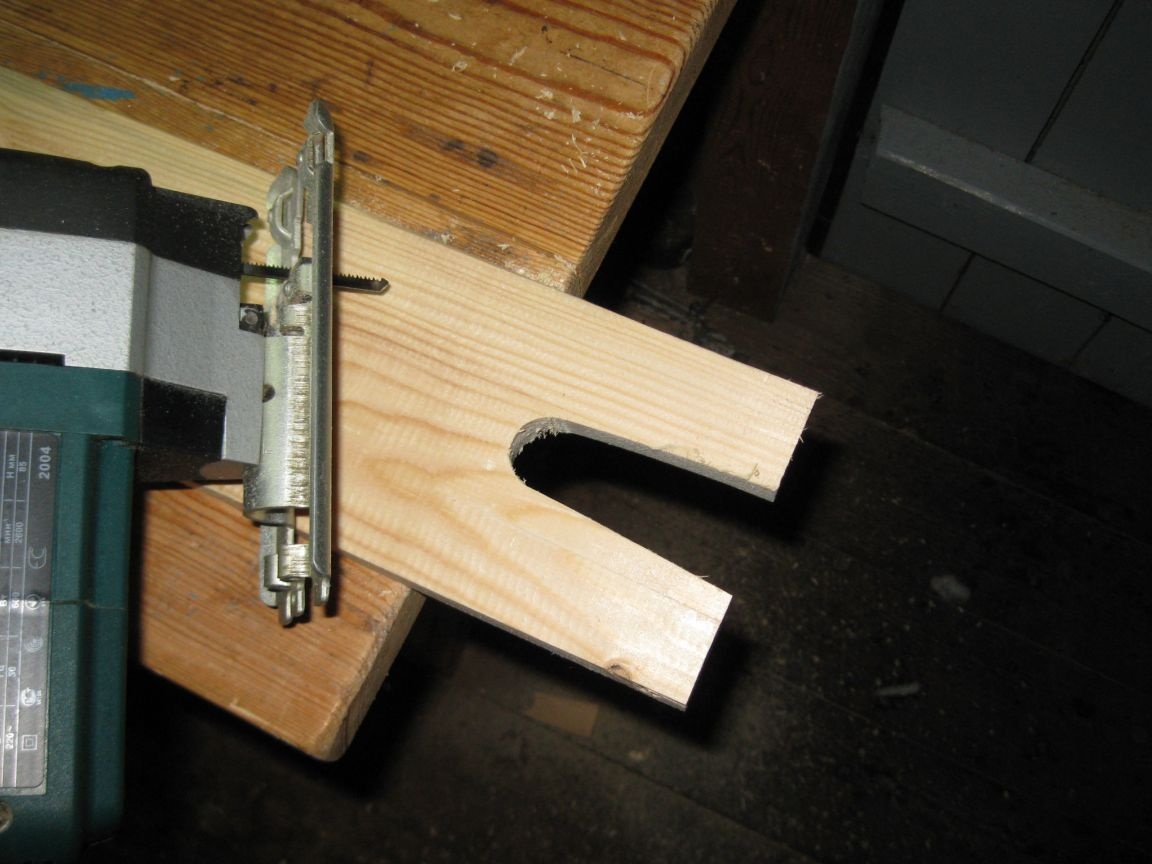
Step 3. Sawing a slot.
Using a jigsaw, we cut such a slot in the upper part of the board for the bolt to enter.
Step 4. Drilling a hole in the bar.
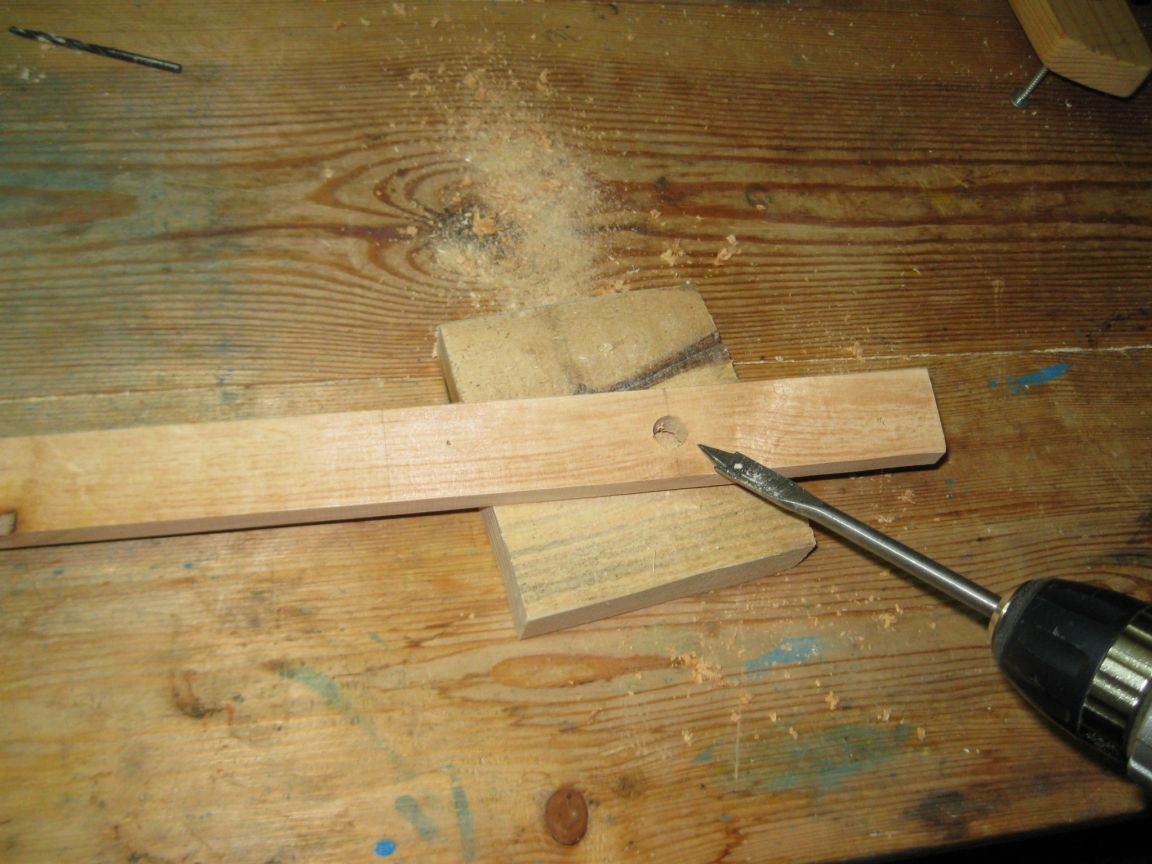
In a bar 3x4 cm, we drill a hole with a diameter of 12 mm.

An M12 bolt should pass through this hole freely.
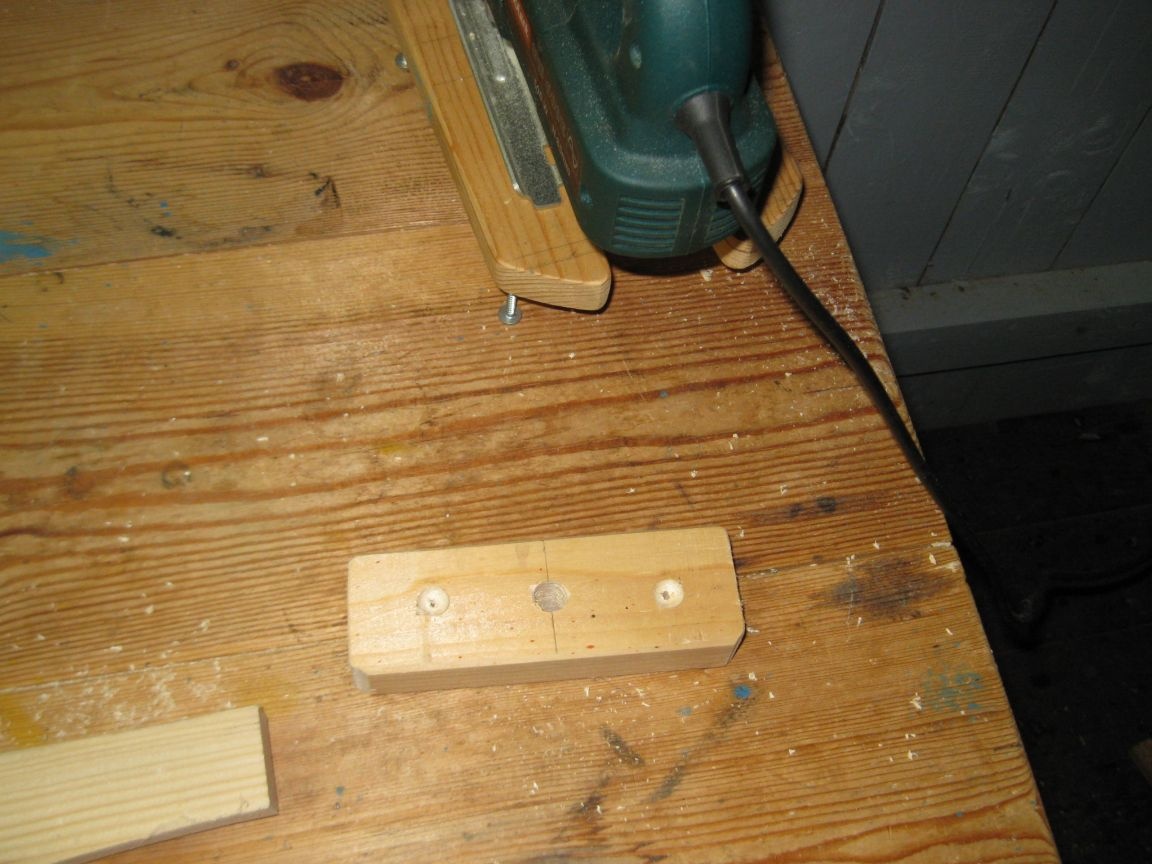
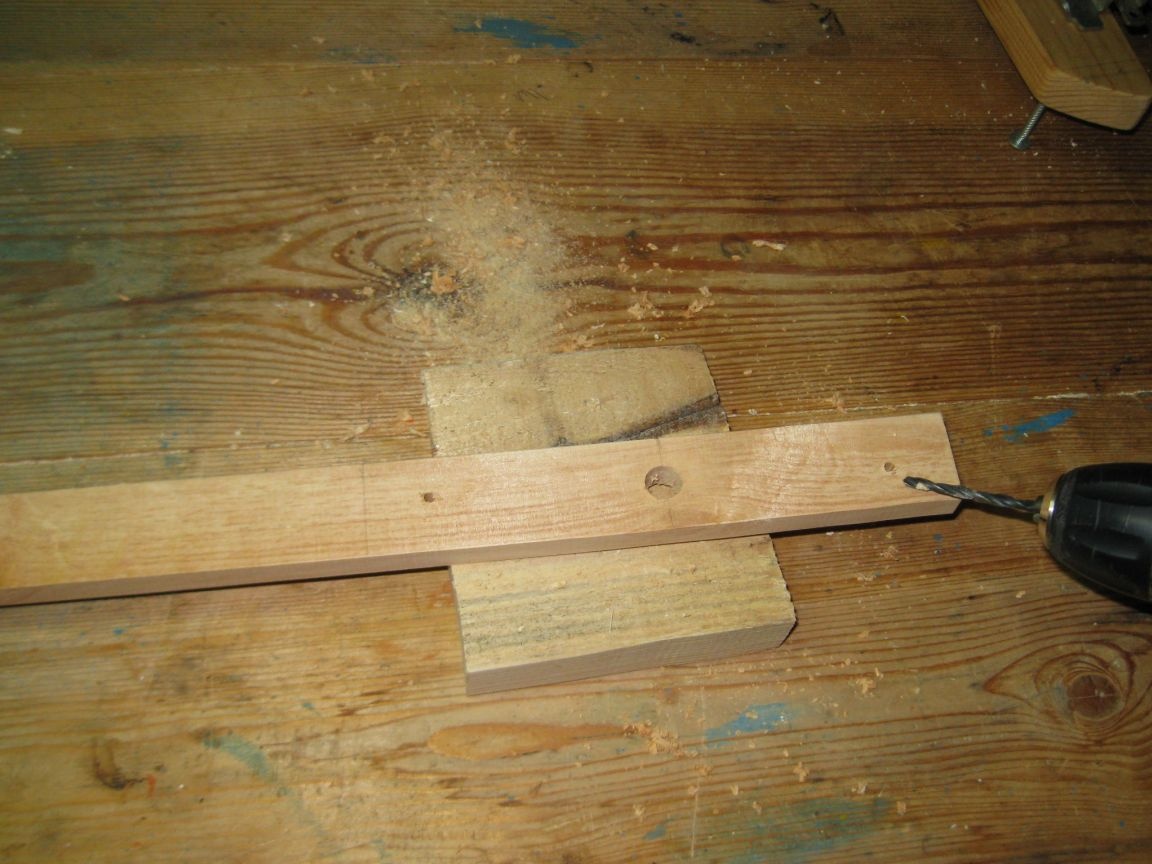
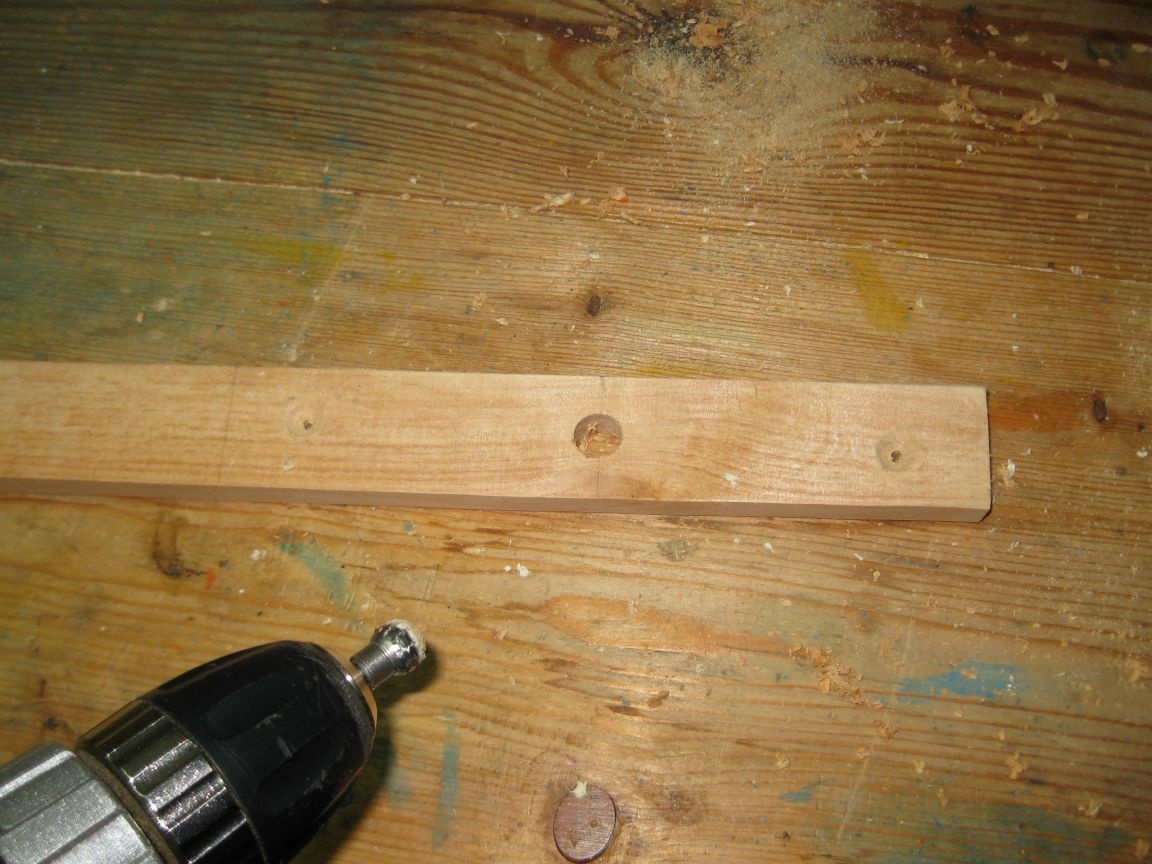
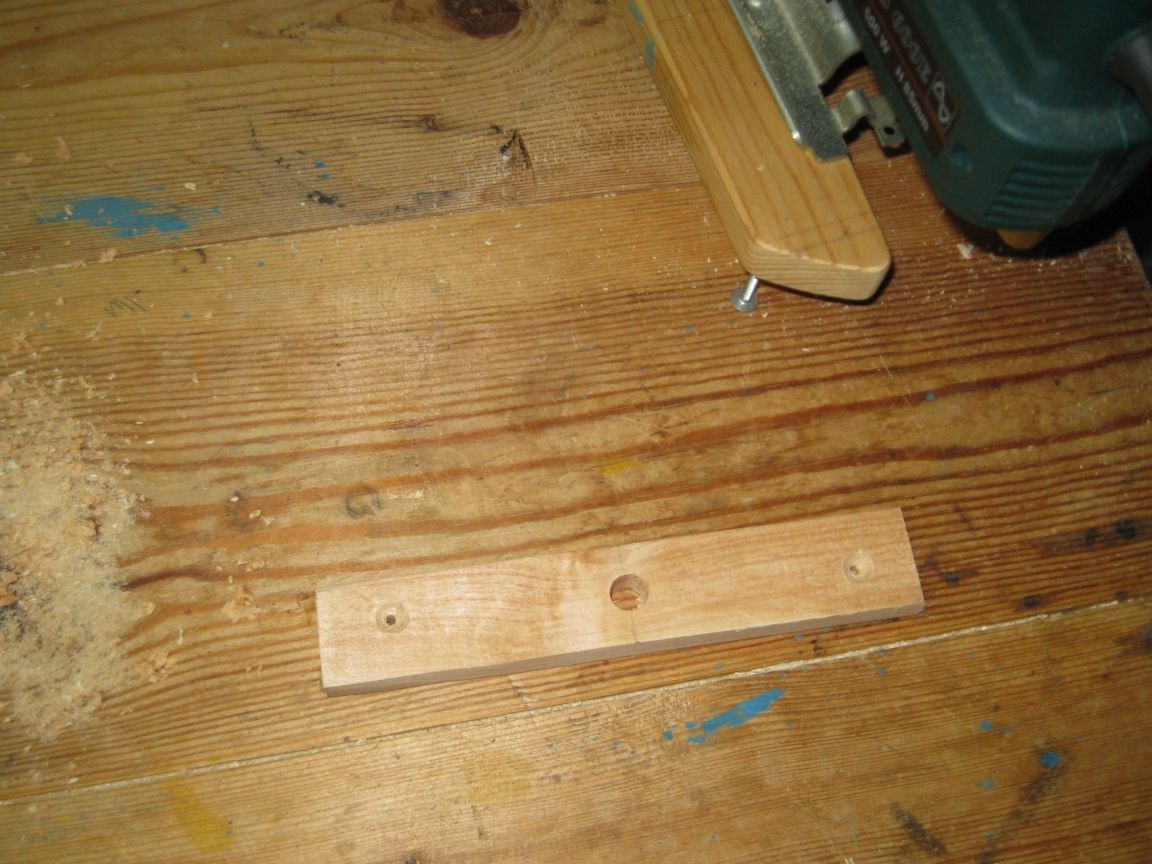
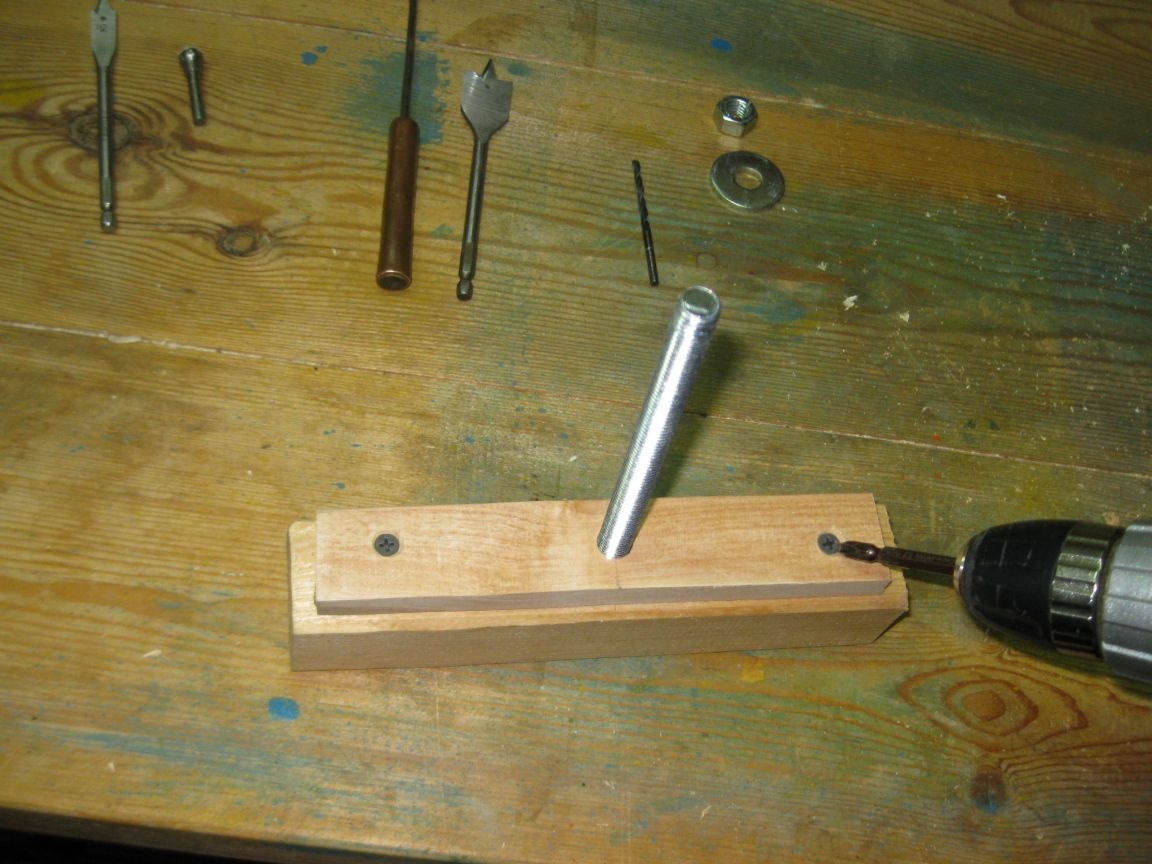
Step 5. Drilling and countersinking holes for screws.
On both sides of the previously drilled hole in the bar, we drill two holes with a diameter of 4 mm, for screws, and then countersink them using a spherical mill on a tree.

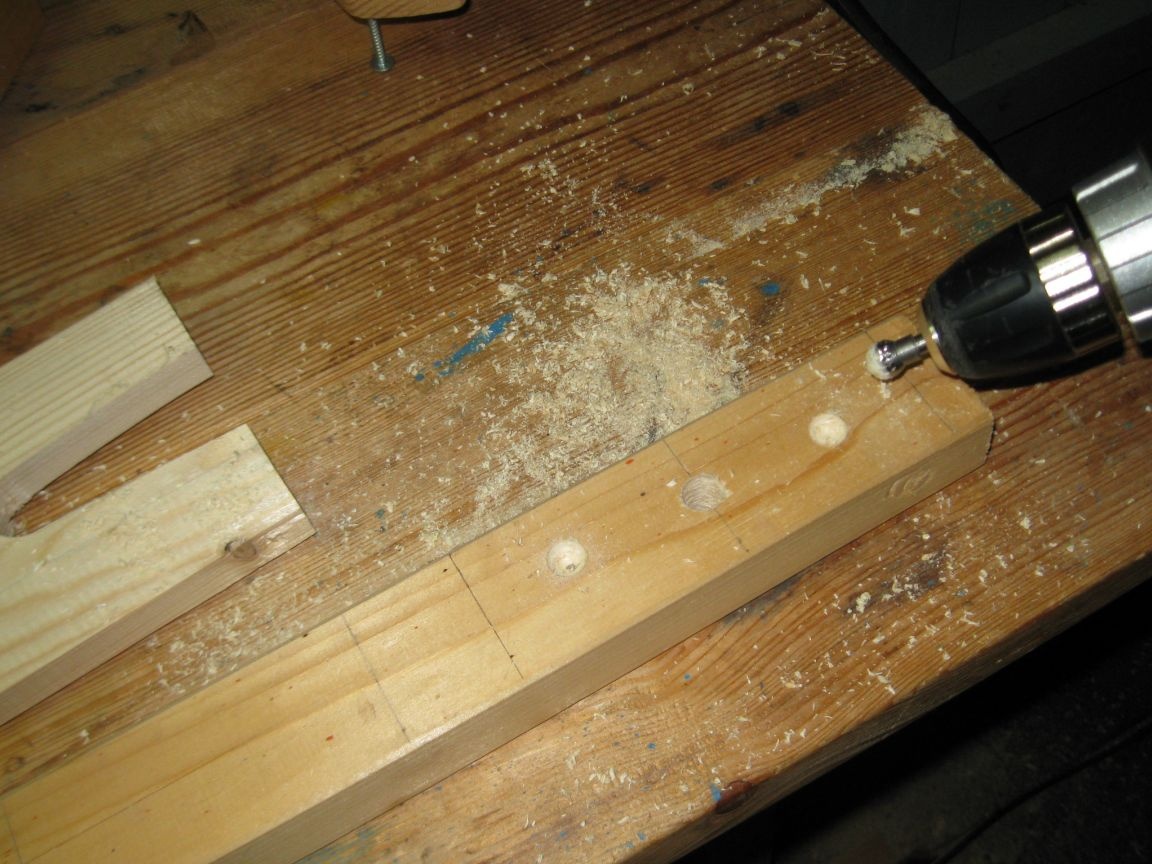
Step 6. Sawing off the bar.
Using an electric jigsaw, saw off a bar with holes.
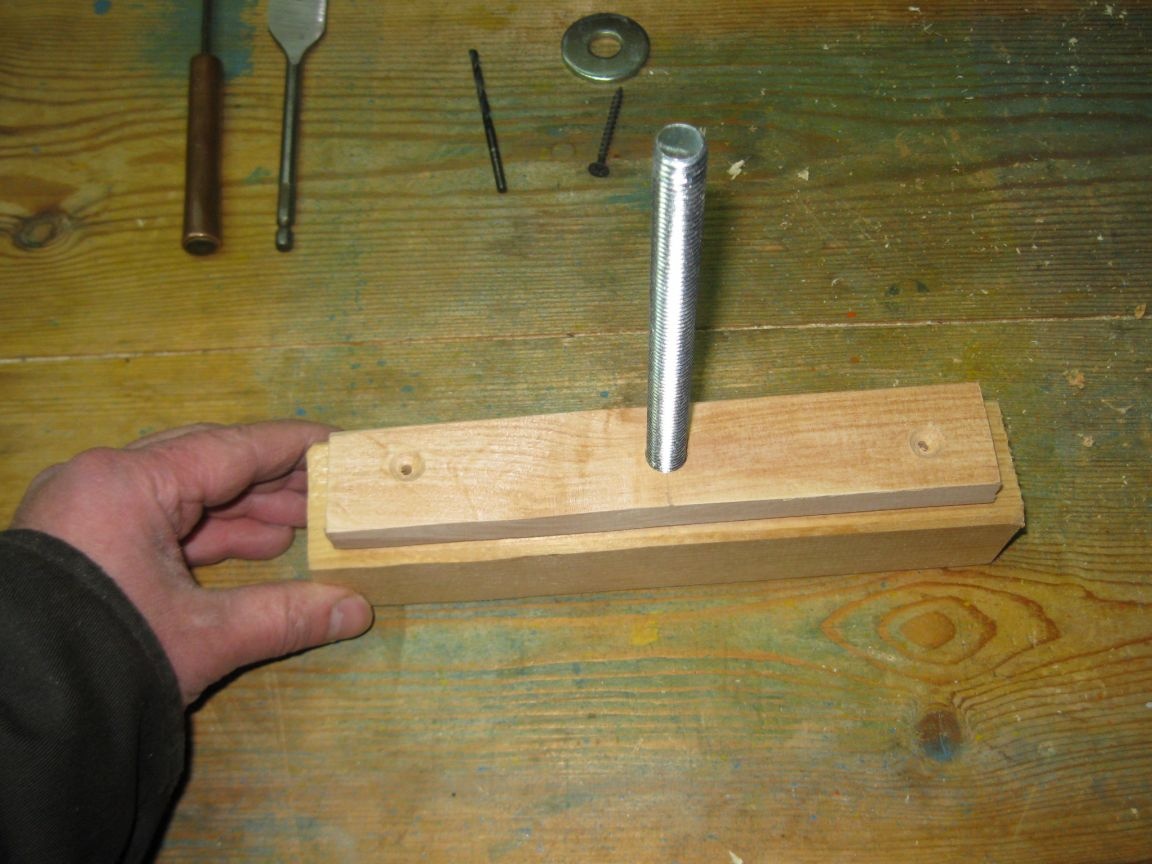
Step 7. Fastening the bar to the end of the board.
With the help of wood screws, we wrap the bar to the upper end of the board.
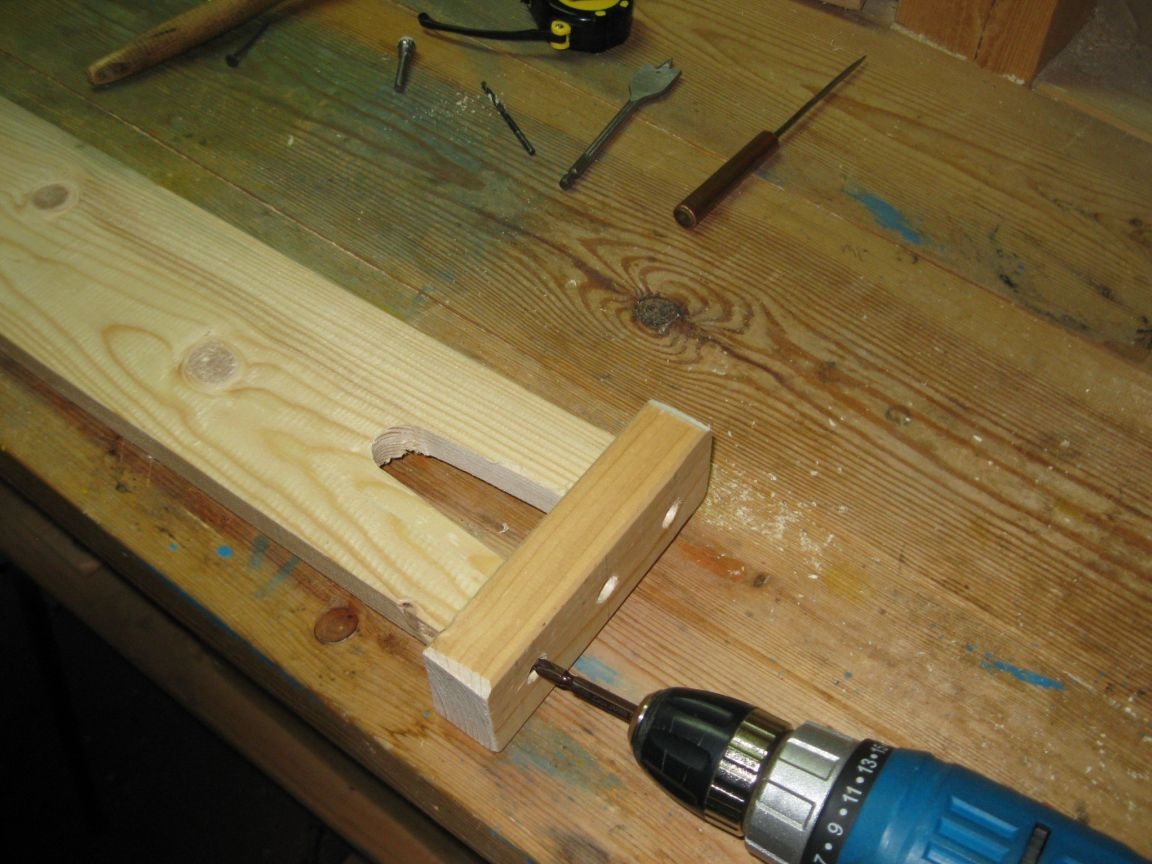
Thus, our lower support is ready.
Stage 2. Making the top of the backup.
Step 1. Drilling a hole in the bar.
In a bar 4x4 cm, we drill a blind hole with a diameter of 25 mm. At the same time, I took a finished section of the bar, 20 centimeters long, and drilled a hole in its center.
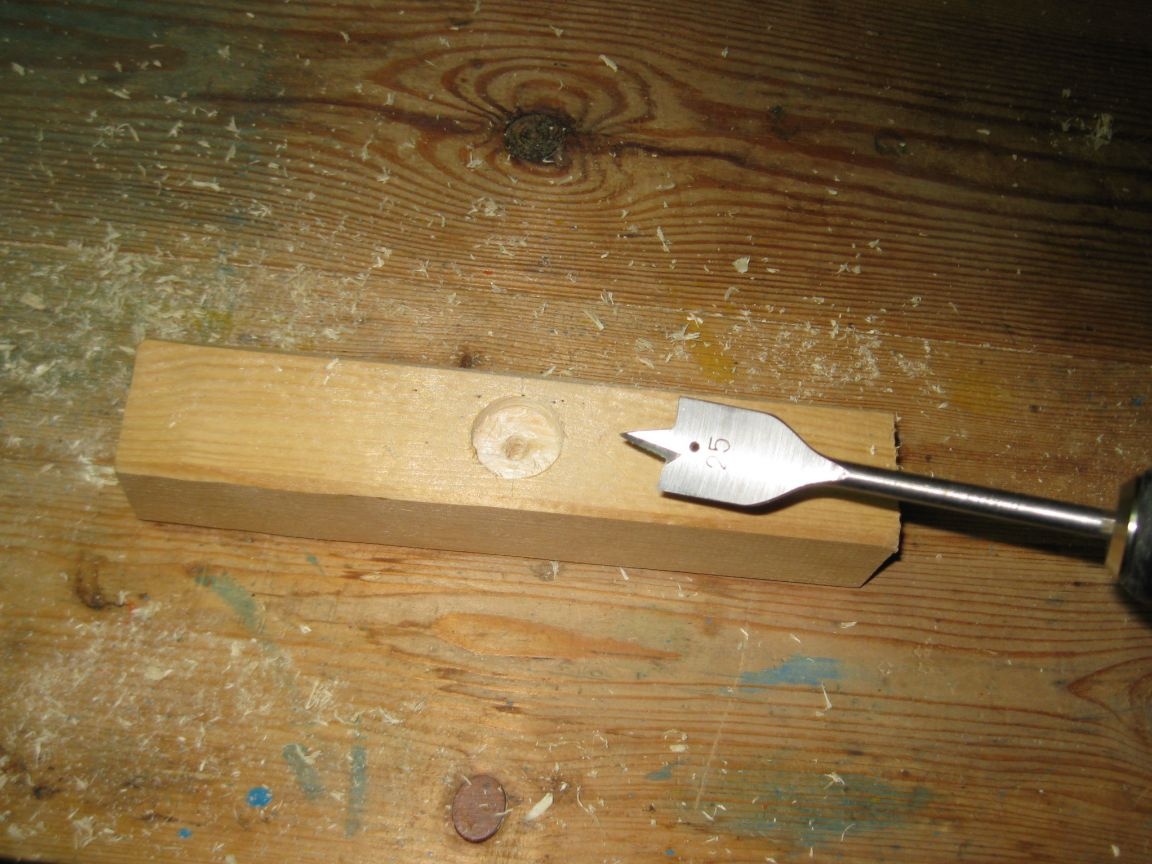
The depth of this hole should be such that the head of the M12 bolt fits completely into it.
Step 2. Drilling a hole in the bar.
In the bar 1.5 × 3 cm, we drill a hole with a diameter of 12 mm.
Step 3. Drilling and countersinking holes for screws.
On both sides of this hole, we drill two holes with a diameter of 4 mm, under the screws, and then countersink them using a spherical cutter on a tree.
Step 4. Sawing off the bar.
Using a jigsaw, saw off a section of the bar with holes.
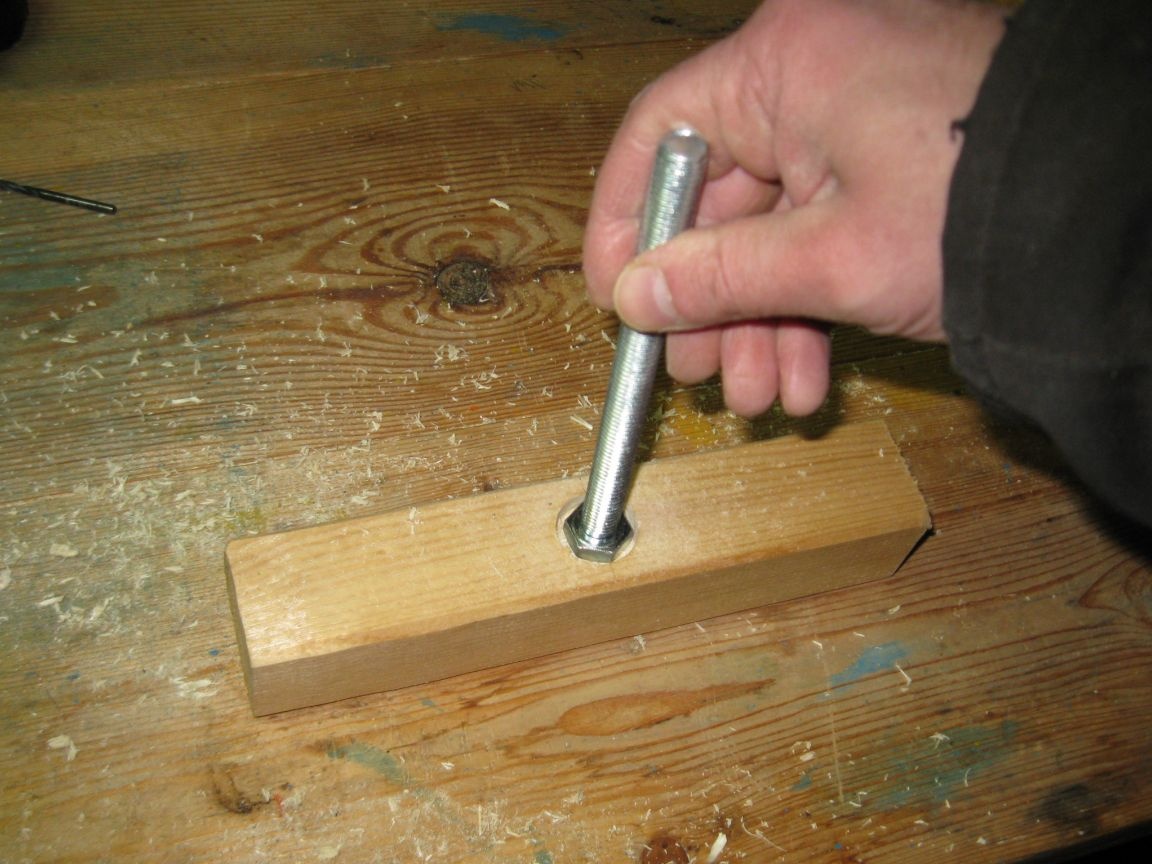
Step 5. Fastening the M12 bolt to the bar.
Insert the bolt into the center hole of the bar.
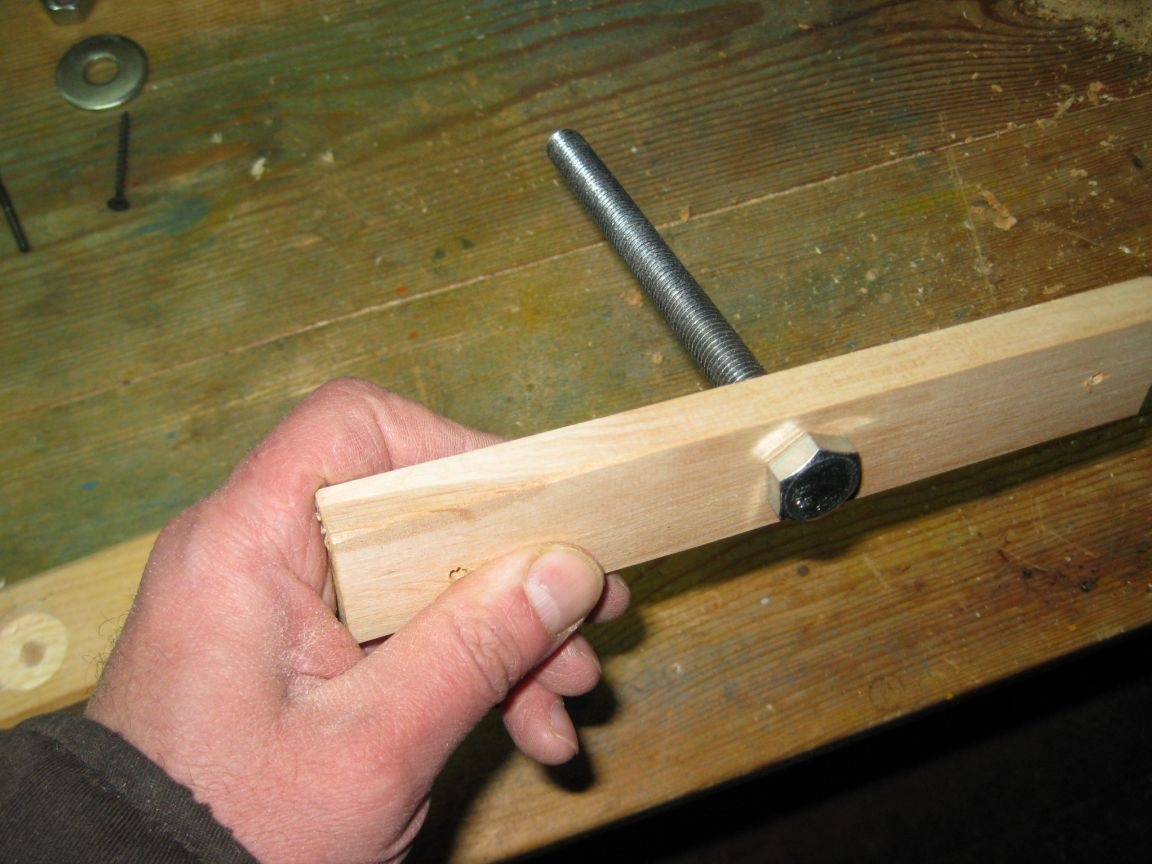
And we put the bar itself with the bolt inserted, on the bar so that the head of the bolt fits into the blind hole of the bar.
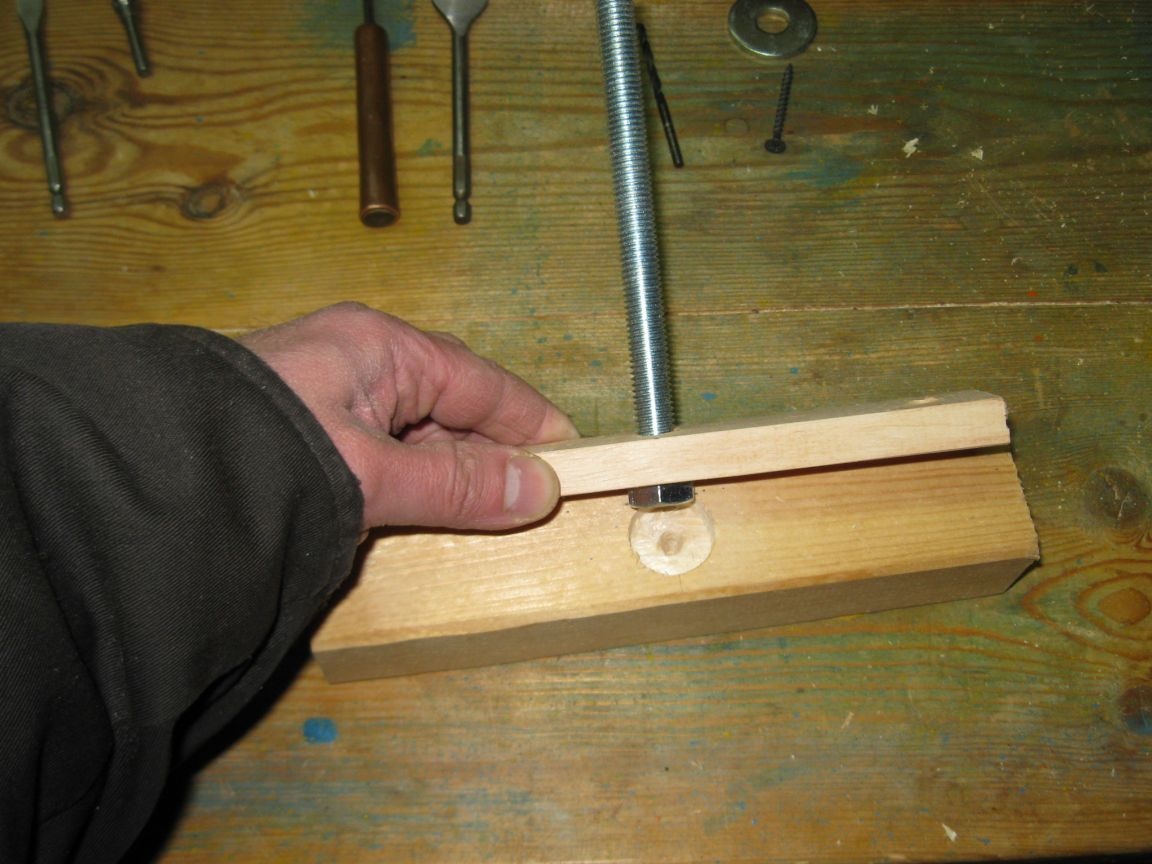
After that, we fasten the bar to the bar with the help of wood screws.
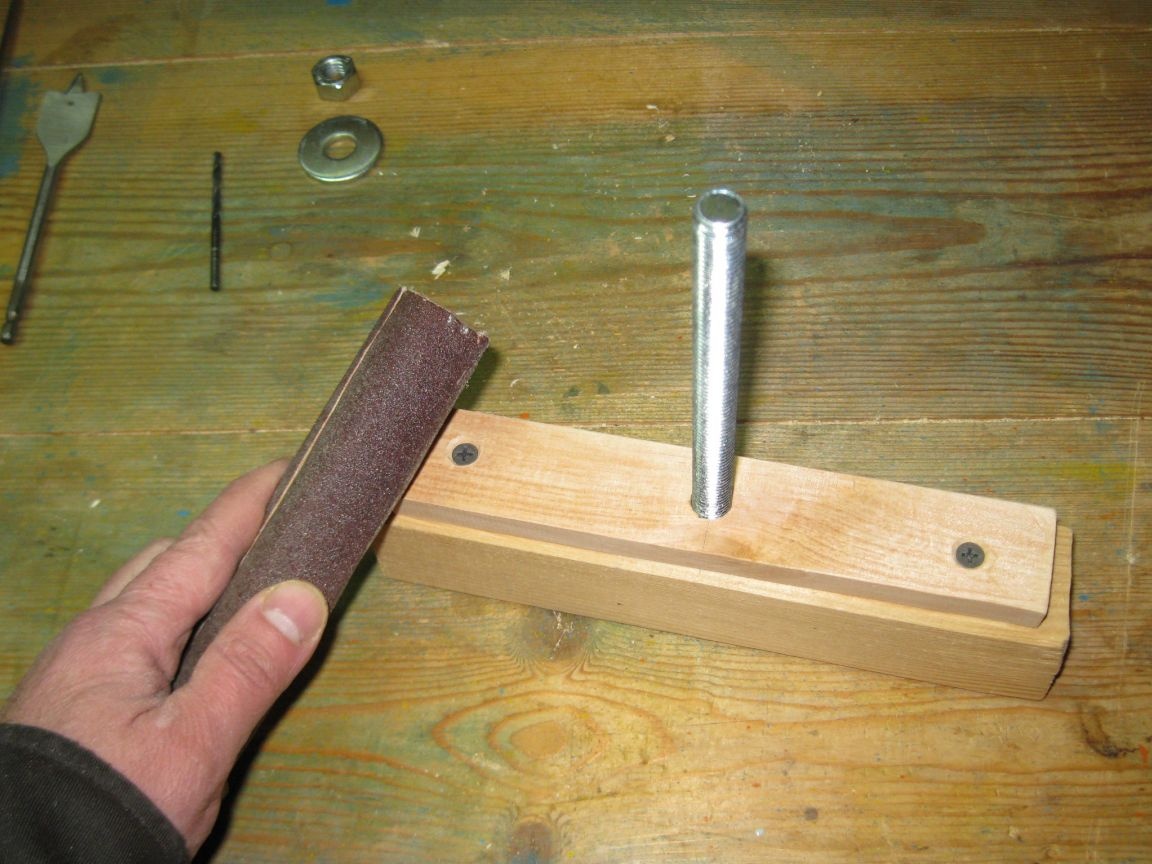
Step 6. Finishing.
We process the ends of the parts of our support with sandpaper.
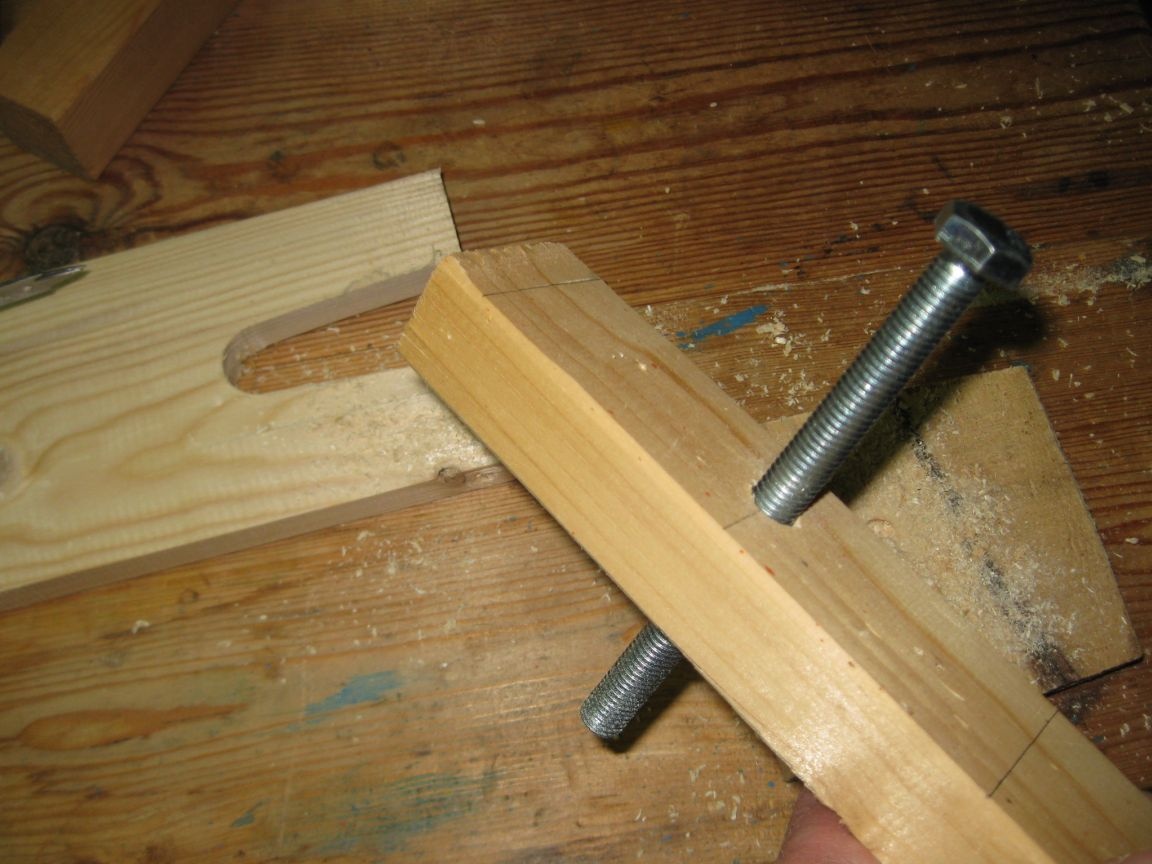
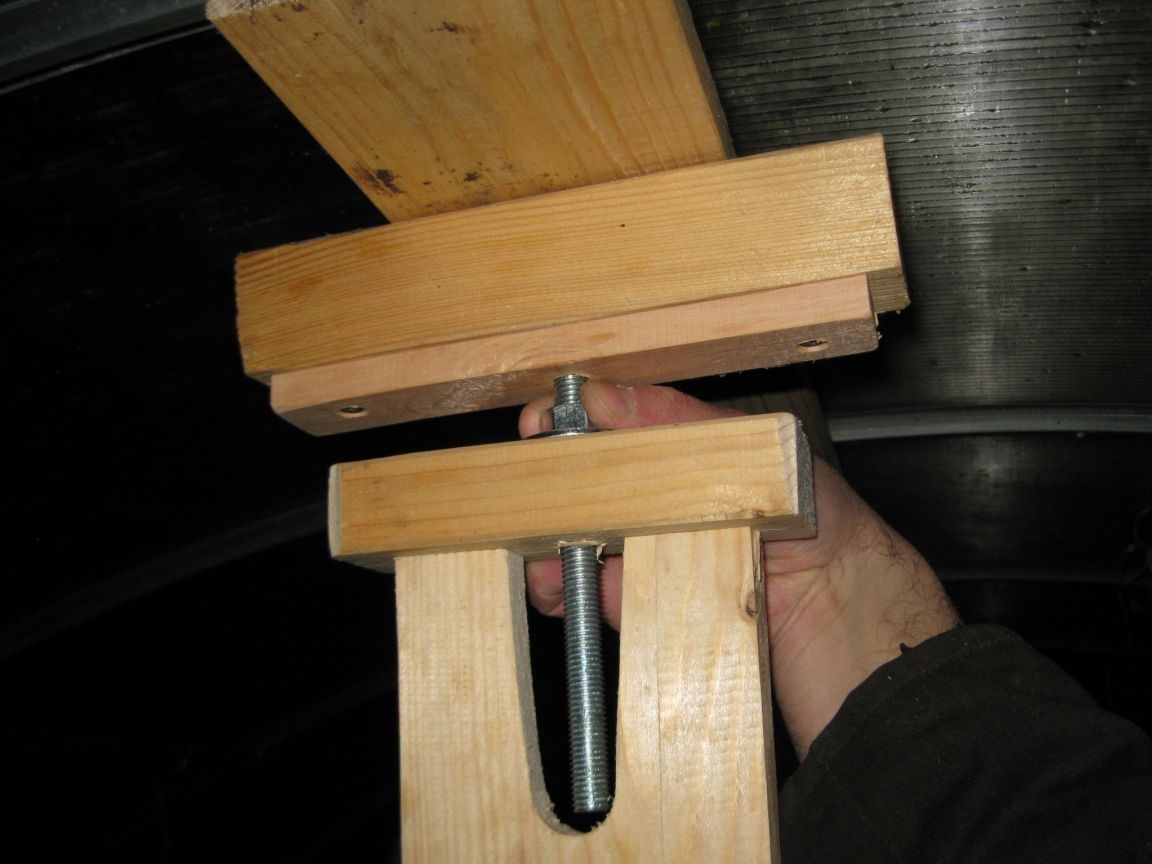
Stage 3. Final assembly of the backup.
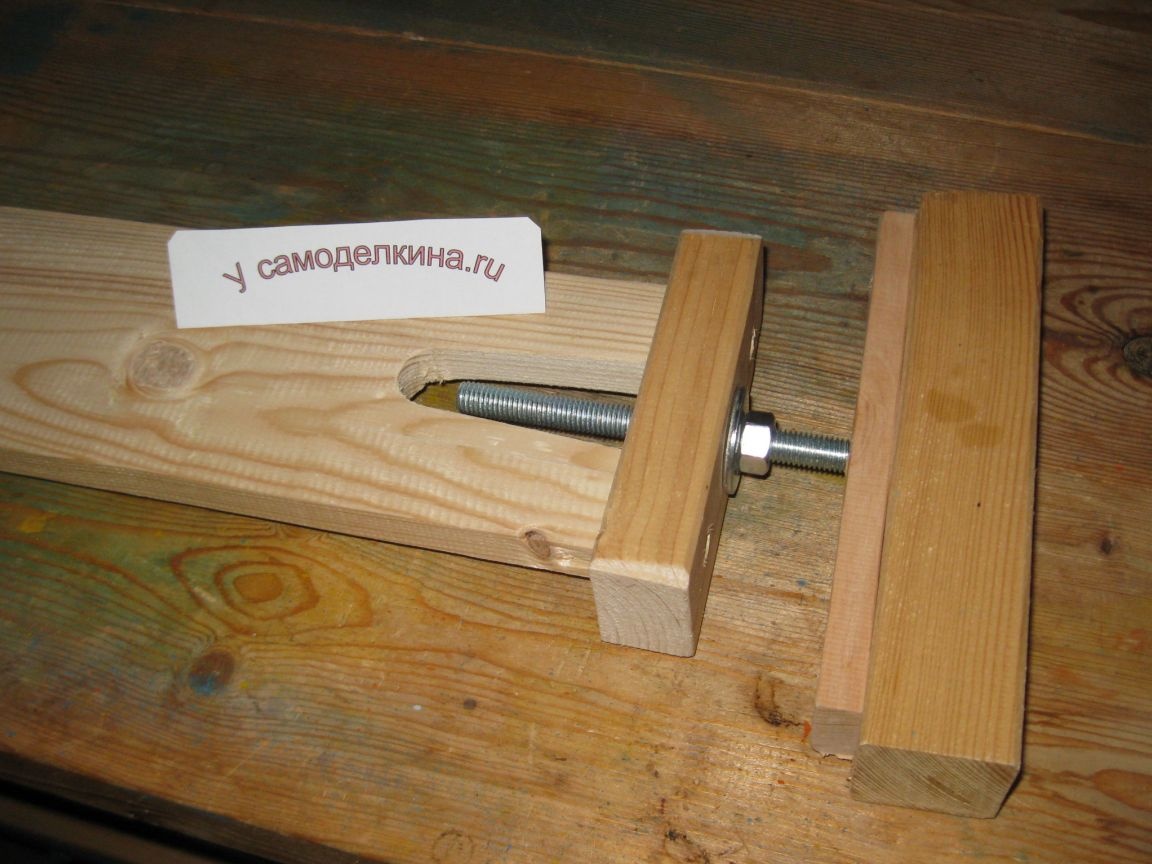
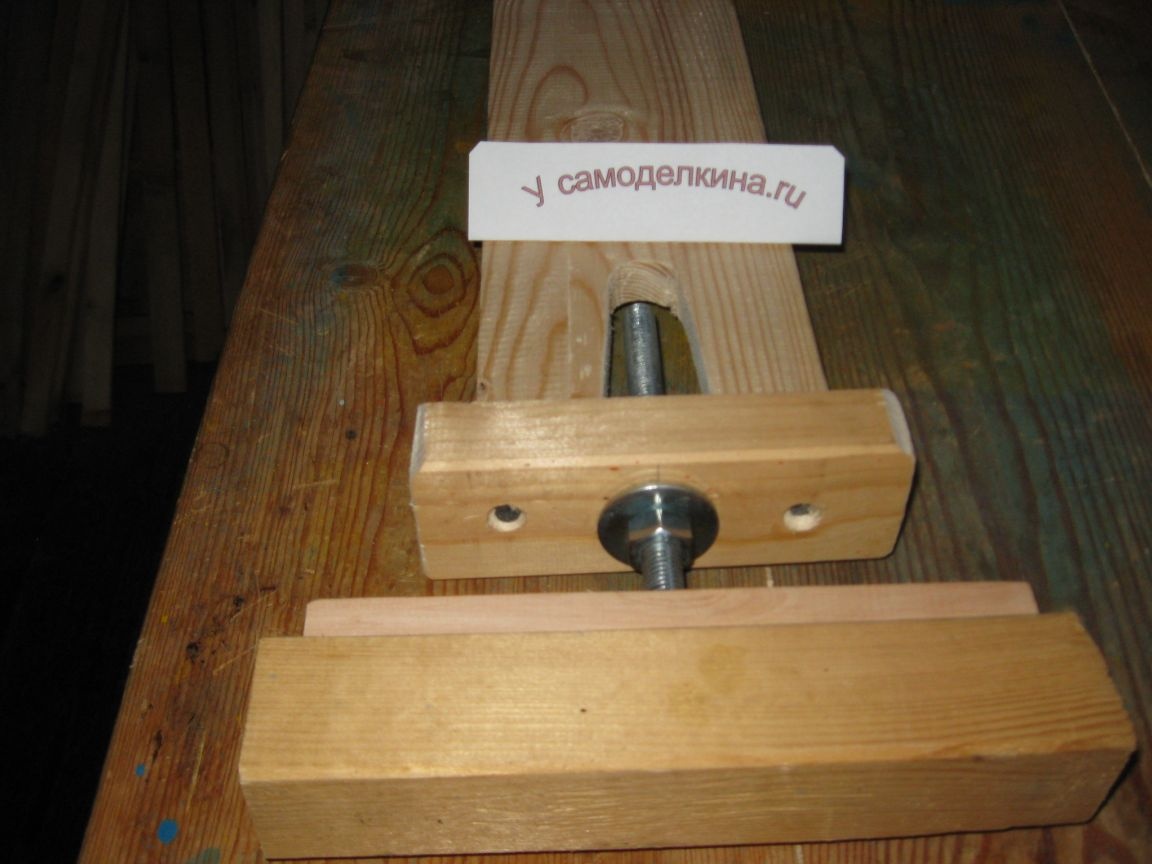
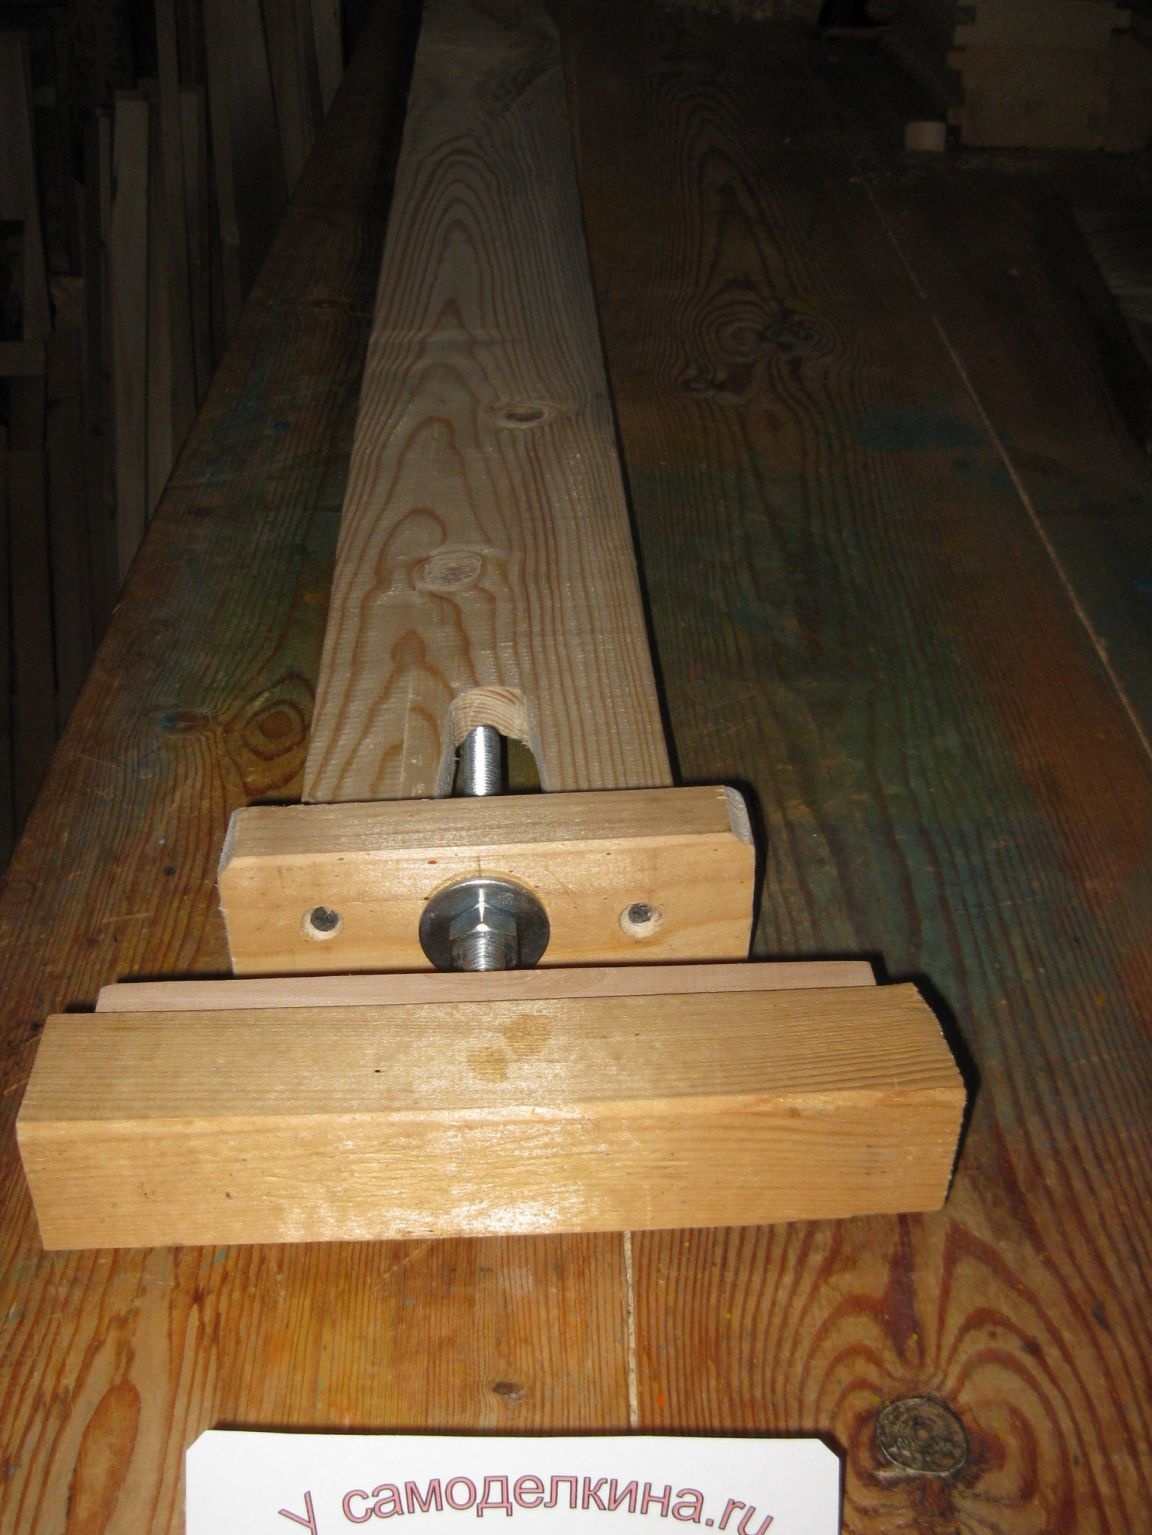
For the final assembly of our support, we screw a nut and washer onto the M12 bolt.
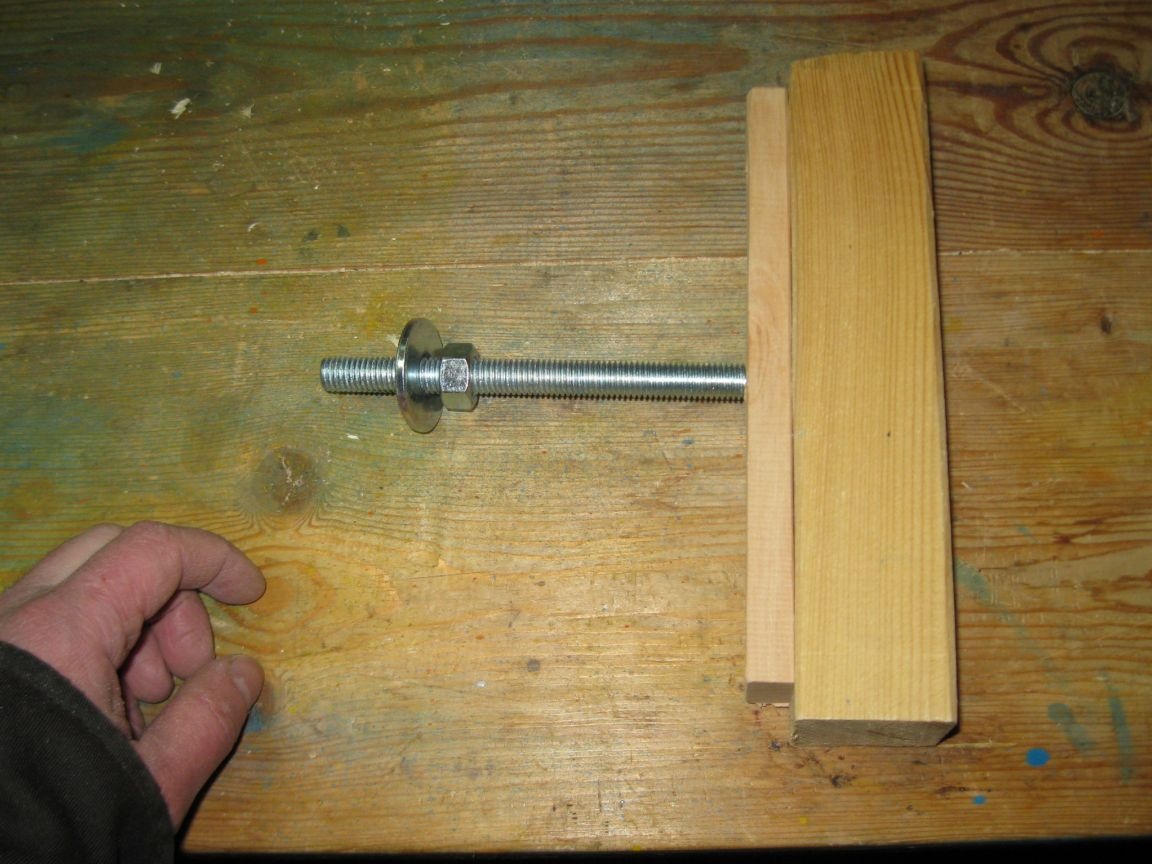
And then, insert it into the hole of the bar of the lower support.
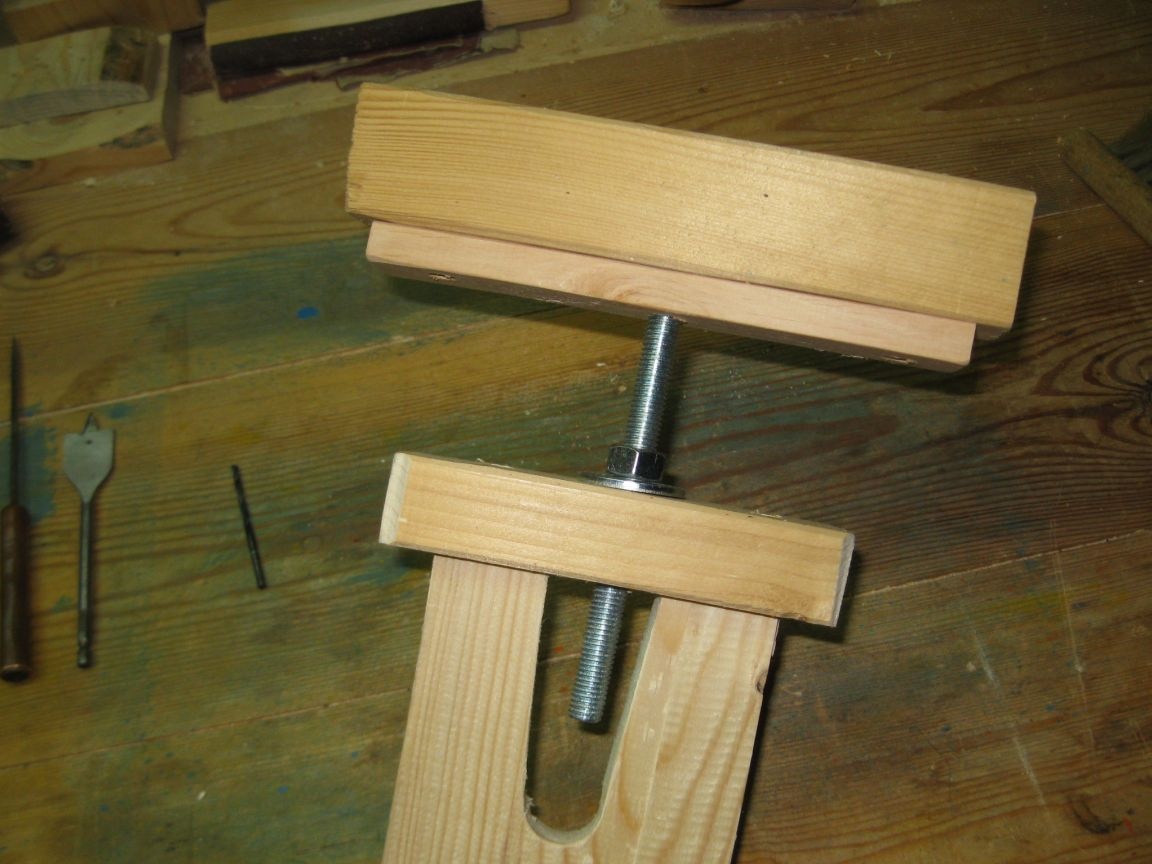
And now our backup is finally assembled and ready.
Backup test.
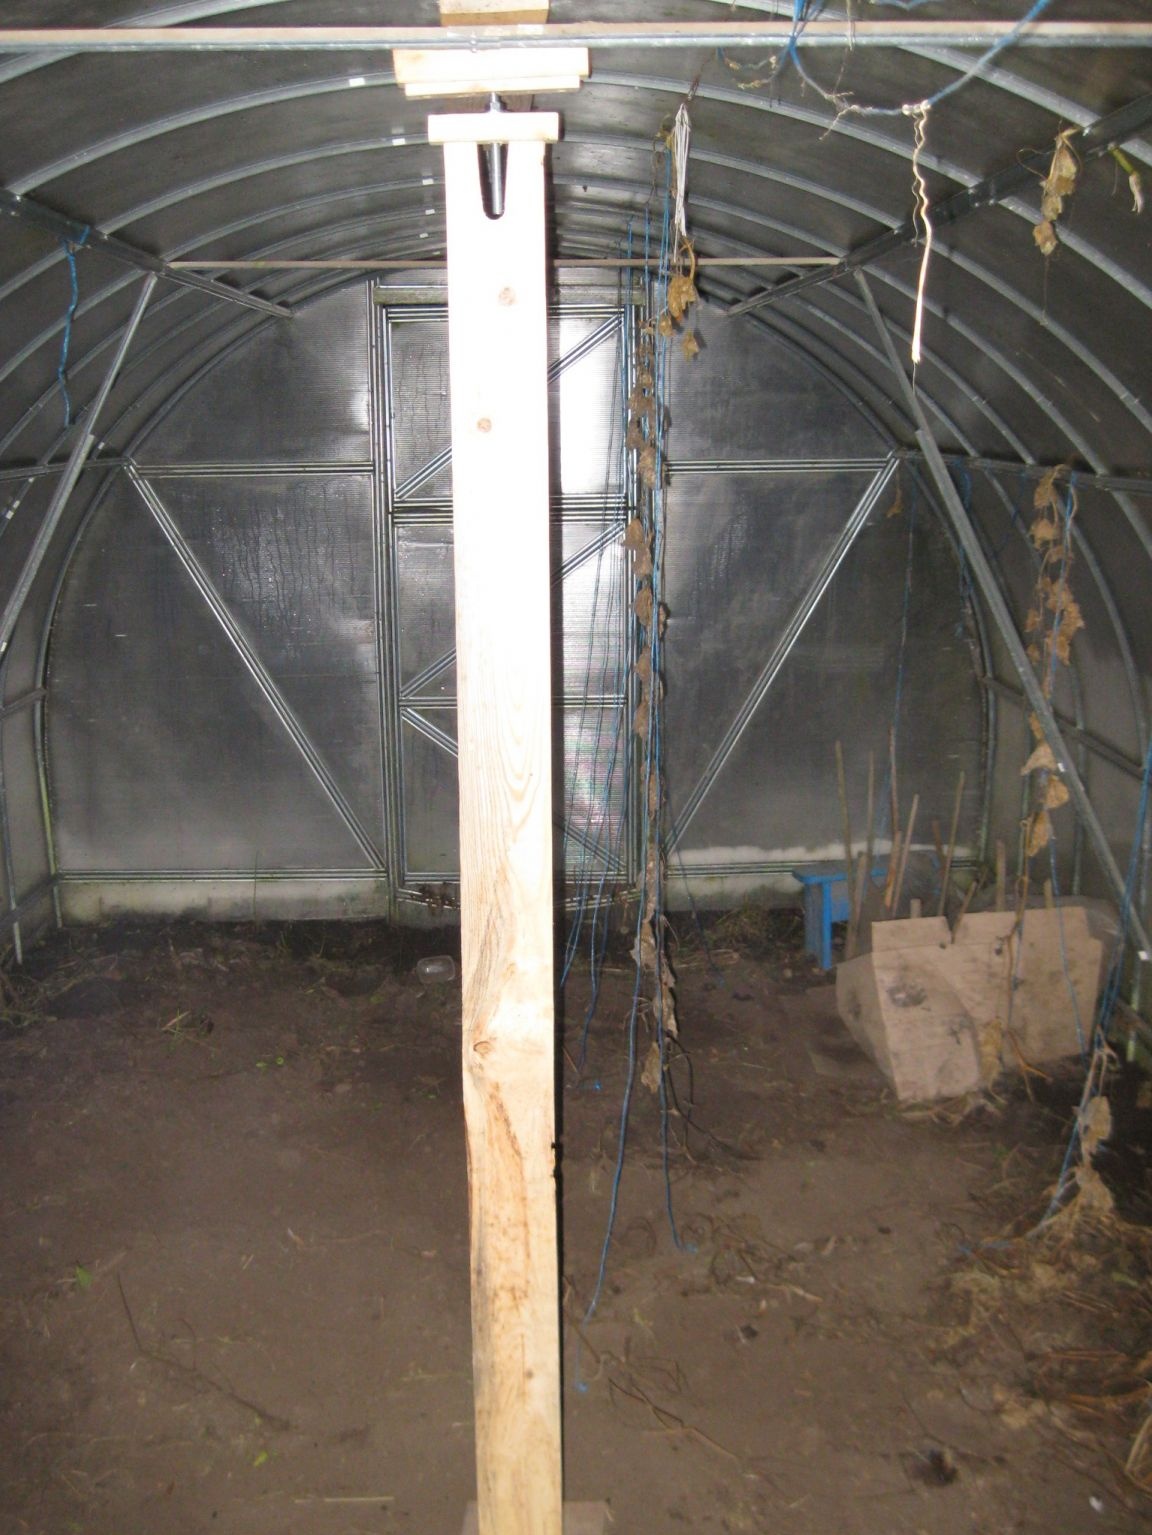
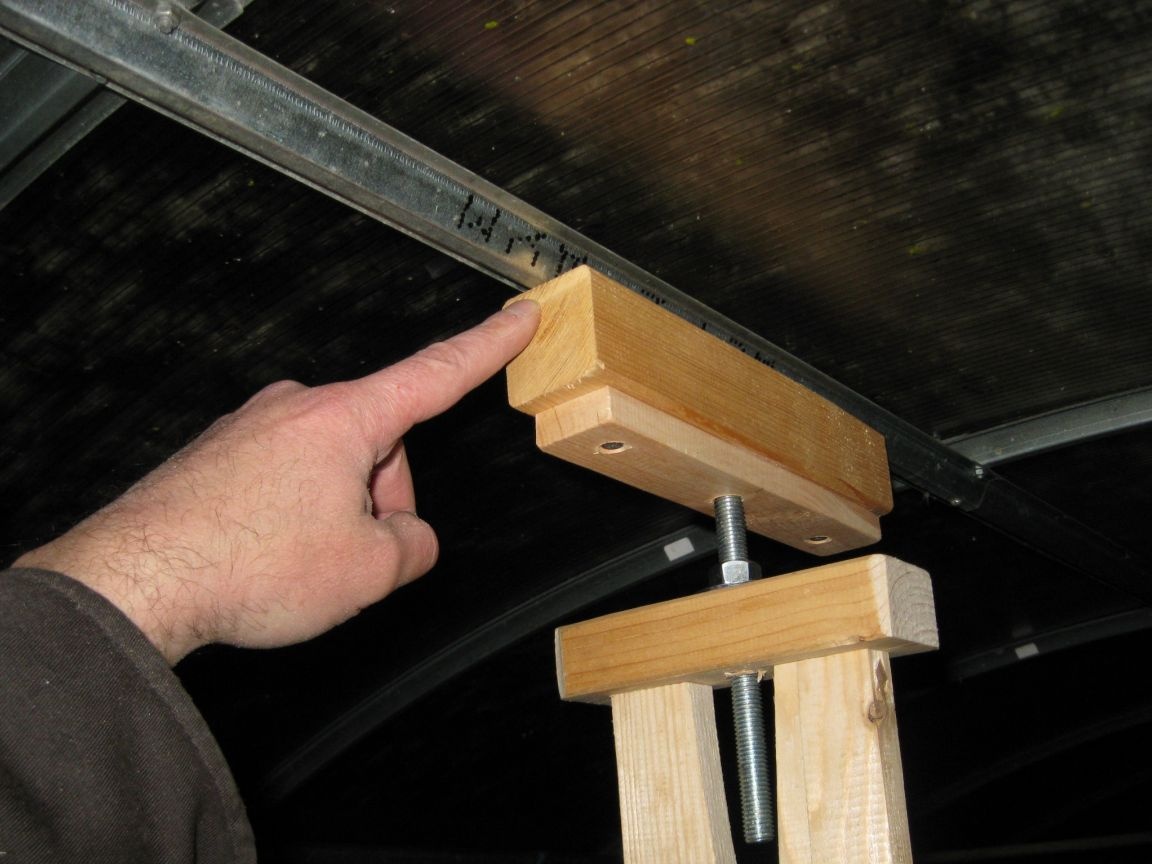
For testing, I will install this backup in my greenhouse.
To install a support, you first need to put a piece of thick board on the ground and then put a support on it, adjusting its height by rotating the nut in the upper part.
It should be noted that there are two options for installing such a backup.
The first option is that the upper block should rest against the ridge of the greenhouse, that is, the uppermost longitudinal element of the frame.
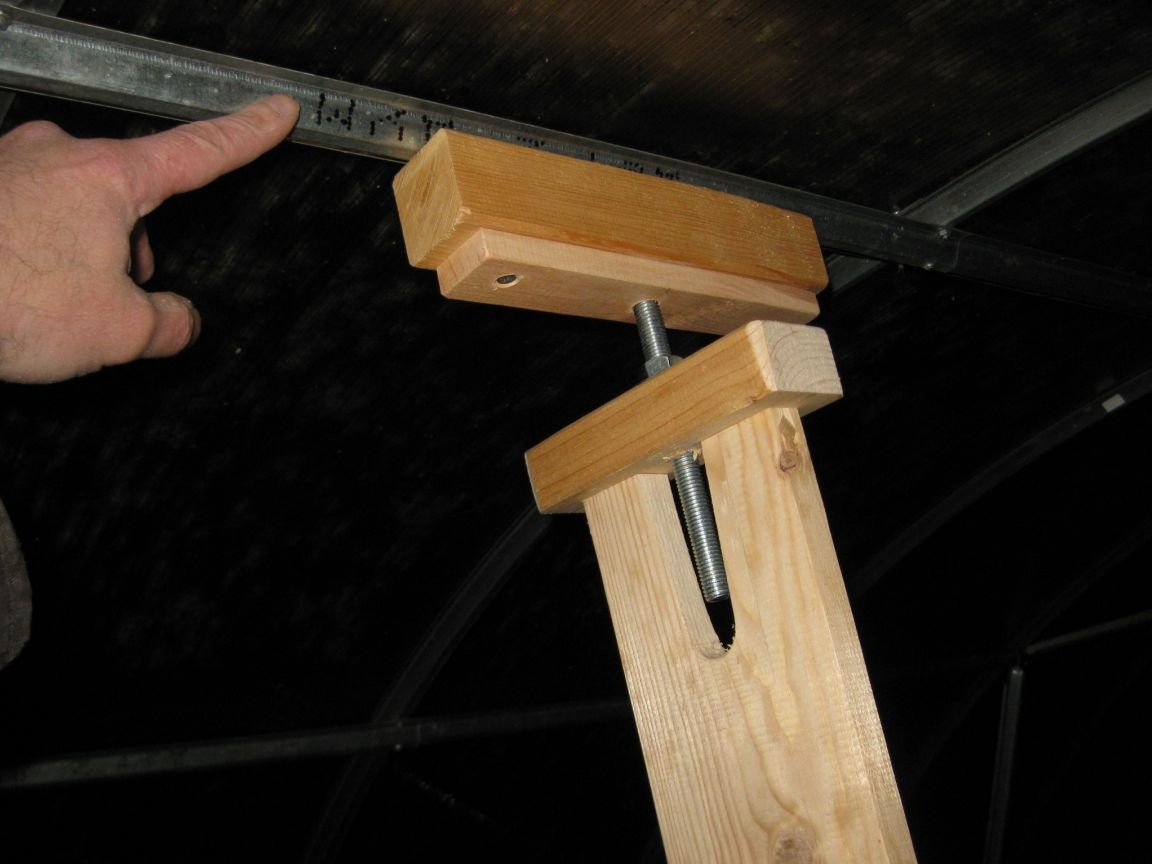
Moreover, in the bar itself, you can even cut out a longitudinal groove for this frame so that the bar does not come off it.
Although I think that it would be best to have another option, when the support is placed in this way, and between it and the ridge of the greenhouse a thick durable board is laid.
Such a board will make the hothouse’s skate much tougher, and under the board itself it will be possible to put two or three props. Thus, along the entire ridge of the greenhouse, it will be possible to lay two long boards and support them with, say, four similar supports. I think this will be enough to protect the neighbor’s greenhouse from damage under the influence of a thick layer of snow.
Well, in conclusion, I want to note that this support, in my opinion, turned out to be quite convenient. It is installed quite easily, quickly adjusted with a nut, and also quickly it can be removed if necessary. Moreover, in order to reliably support the greenhouse ceiling with this support, a wrench is not required at all, since it is quite enough to turn the nut by hand. Although of course, if necessary, you can apply the key.
But the main advantage of such a support, in my opinion, is that it is adjustable in height over a rather large range (about 10-12 cm). This means that even if next year, the height of the soil in the greenhouse changes and, thus, the height from the soil to the ceiling of the greenhouse changes, then the supports of this design can be easily adjusted to a new height. And if necessary, it will be possible to use such supports in other greenhouses, since the height of greenhouses of this type is approximately the same.