I always wanted such a thing. A metal lathe is, nevertheless, something more utilitarian, but with wood ... of course there are also options, but still, it’s device for the manufacture of something like that, decorative and artistic. When we settled in the Perm region, in the village, I assembled this unit. I brag.
Innocent looks at the lathe,
Admired by the rotation of the part.
Sparkling chips fly between the legs
The screech of steel is heard.
"Innocent at the factory" BG
Admired by the rotation of the part.
Sparkling chips fly between the legs
The screech of steel is heard.
"Innocent at the factory" BG
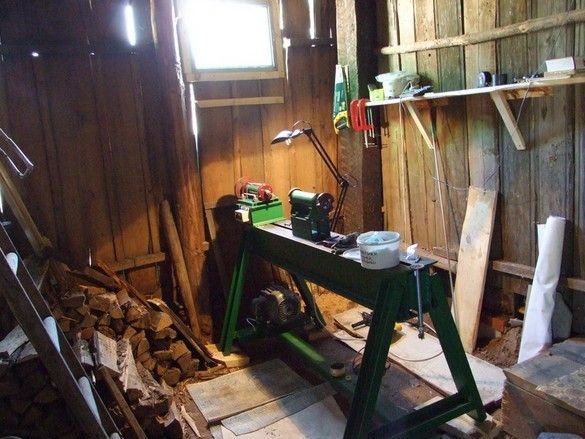
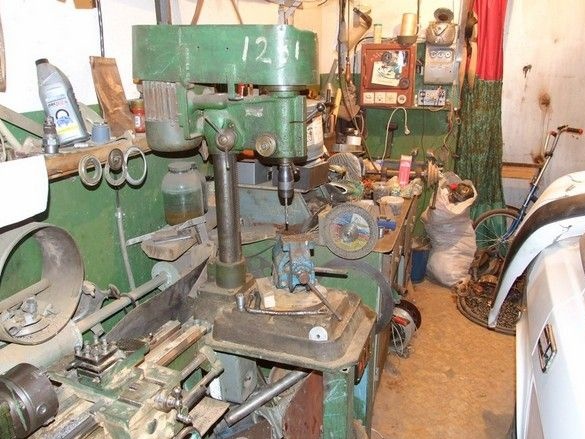
I was lucky, a friend let me work in his heated garage (and it was winter) and promised to help with welding. In the garage there was a school lathe for glands and a drill. Portraits of heroes below.
In the neighborhood there was a construction base trading, including metal rolling. First of all, having studied the assortment of glands, I sat down for the study of analogues and outline design. I had to tinker with it, some parts and even nodes suffered small changes in the manufacturing process, but this is the case in any production - assembly according to the “licked” drawings, lot of lots.
What was used.
Instruments.
A set of bench tools, tools for threading, greatly facilitated the work of power tools - drill, cutting machine. Used a small (school) lathe for metal, several large parts had to be sharpened on the side - they did not fit into the cartridge. Welder with accessories. A medium power soldering iron with accessories and a set of tools for wiring, often had to “ring” the circuit - you could not do without a probe or multimeter. Hand tools for wood. Used hot melt adhesive.
Materials
We used standard metal rolling, threaded rods, hardware. An electric motor was purchased. Bearing bearings with a shaft and some other pieces of iron from scrap metal. A bit of felt for stuffing boxes. Sheet textolite. Bearings.Plywood for electrical boxes. Electrics for starting the motor, wires, cables. Sealant. A bit of galvanized steel for cable fastening when laying on structural elements. Varnish-colorful materials, brushes, rags. Lamp for local lighting.
Found and purchased suitable electric motor. I was lucky - the motor got old, but in factory lubrication, from storage. 1kW, 800 rpm. The venerable age of the engine is also good, in those days they saved much less on steel and copper, the dimensions of the motor completely confirm this. He sought for relative quietness. It is more pleasant to work without fear, but to get a clean surface, not with high revs, but with the correct turning technique. Engine turns can be switched, throwing a belt of a V-belt drive.
Three of its provisions are foreseen - the spindle speed is equal to the engine speed, one and a half times more. Practice has shown that for normal work this is enough. A significant reduction in speed is only necessary when "fooling" very large workpieces, the size of a good stump. But such a slowdown is usually done with an additional pulley and belt. You may need to install them in the future.
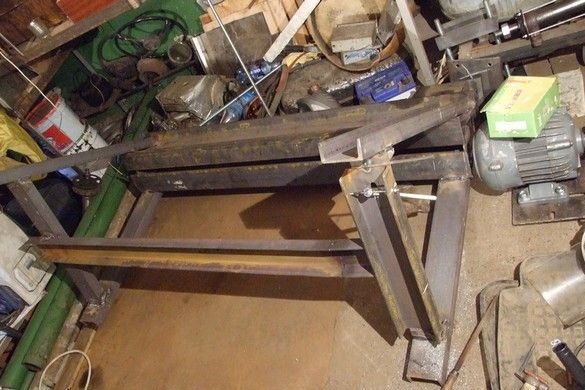
Ramu, I wanted to make it as massive as possible - I came across similar light aggregates, nothing comforting. The rental shop was very close to the assembly place, so there were no hired transport and rigging. He brought two pieces of a powerful I-beam, from which the base of the machine is made, simply on a sled. The rest is even simpler.
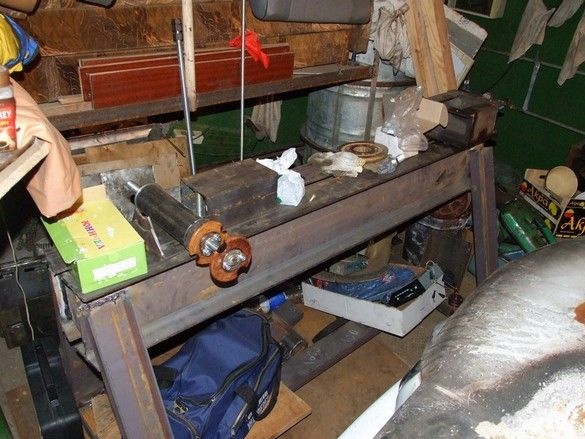
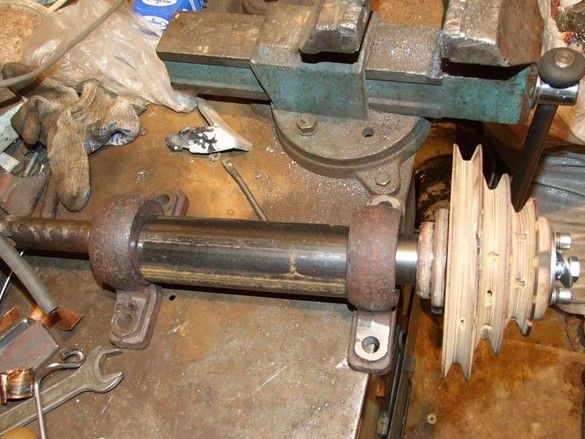
Here in the photo the frame of the machine and some smaller elements and blanks. A sort of "shell" with glands around it, this is a potential tailstock. Made, according to the simplest scheme, from a standard "store" stud with metric thread. It is screwed into two corresponding nuts at the ends of the "shell", it is fixed by locking it with another nut from the outside with the handle-handwheel.
Upside down, mounted belt tensioner. This is the hinge pin sticking out in the oval hole. Above is an electric motor on a rotary platform, the pin will pull this platform by the edge.

The hinge is slightly larger. Nut at the end of the stud - for easy hole drilling.
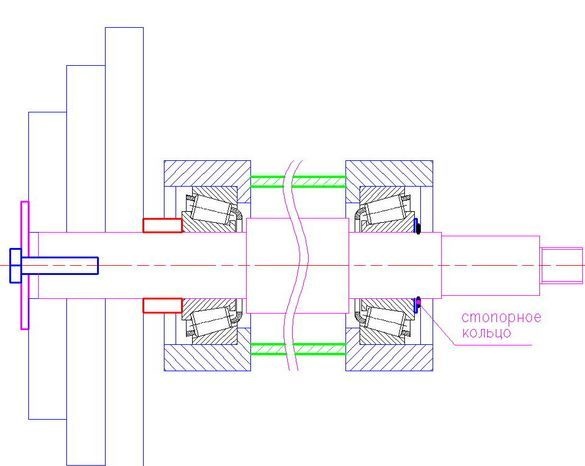
Front headstock. Responsible and perhaps the most accurate machine assembly. I had to make scrap metal - I found a slightly bent shaft in two bearing bearings. It seems from some kind of combine. The unit was washed and cleaned, the shaft was aligned at the very least, everything was redone for tapered bearings, and since they require axial tension, a number of auxiliary parts and their adjustment were required. But mastered.
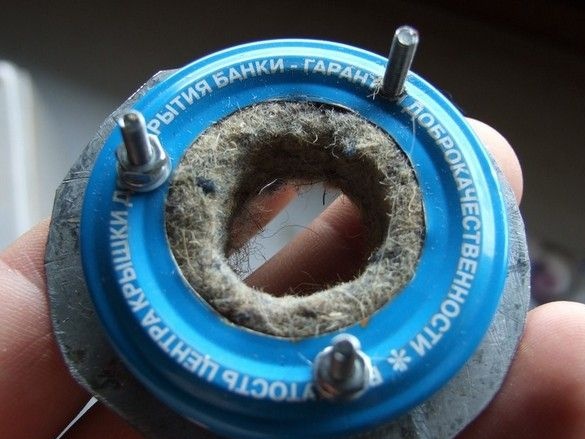
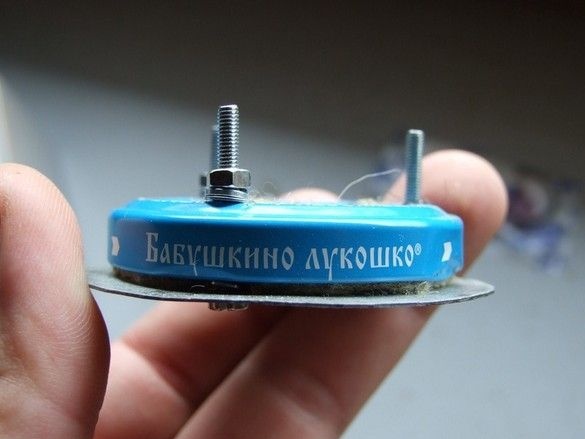
Oil seals- anthers. Wood dust, which is much more unpleasant than metal dust, because, unlike the first, is much lighter and brings it to the most remote corners of the mechanism. Particular attention should be paid to dust protection, especially where bearings and grease are. Option one. It is fully functional, but was rejected for aesthetic reasons.
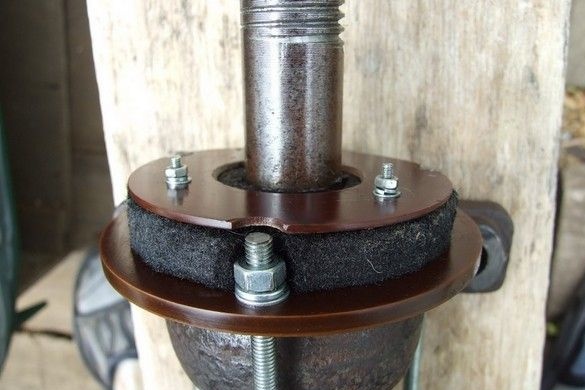
Option two, current. The seal itself is made of dense felt impregnated with grease, the shaft surface under it is polished.

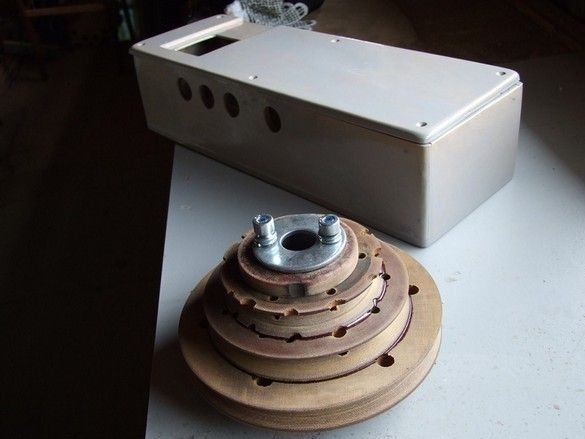
Pulley block. A friend found a number of large gears, for some reason from a PCB on a metal sleeve. Here is one of them, cut, glued, honed.
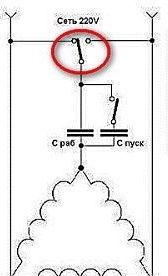
Turning on the three-phase electric motor into a single-phase network - a textbook, “capacitor start-up”.

The capacitance of capacitors C1, C2, are calculated according to well-known formulas, depending on the motor data, I got 100 microfarads and 150 microfarads.
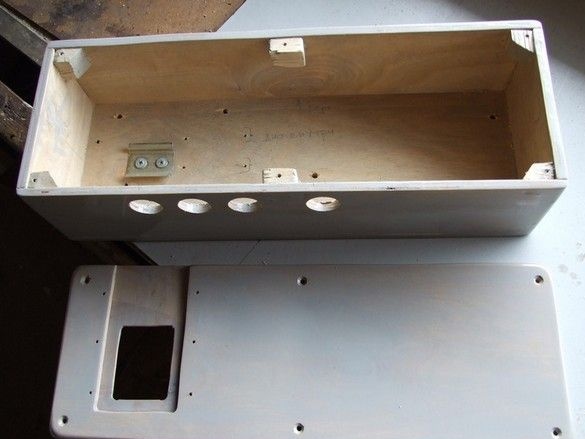
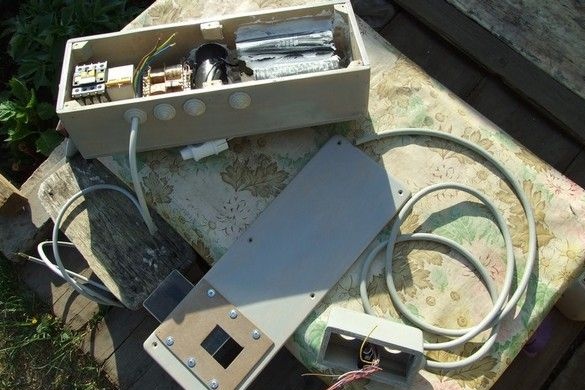
Billet electric locker. From plywood and wood.
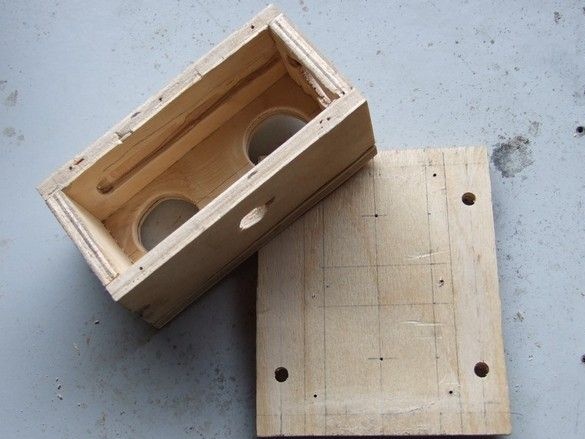
Billet remote control. From the same.
It is a bit crowded, therefore, the installation needs to be thought through rather carefully, in steps, otherwise, then you can not get to something.
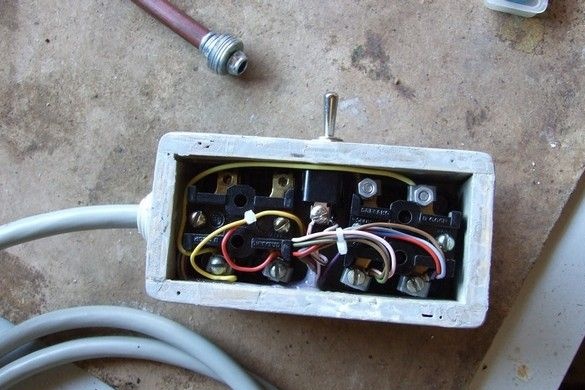
ABOUT.Victoria! It all worked out.
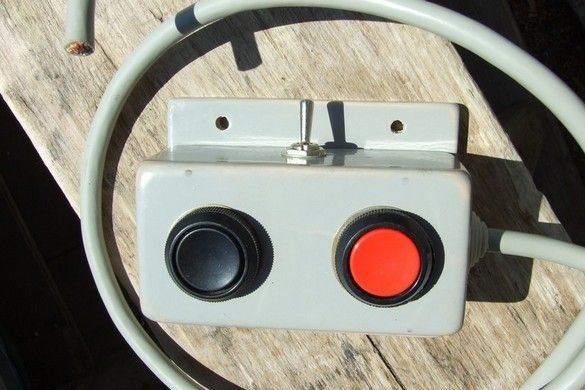
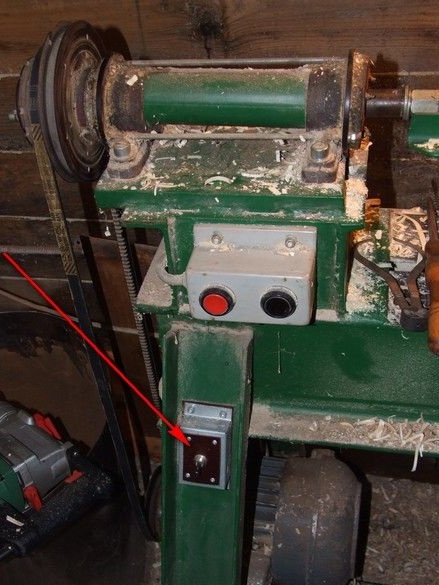
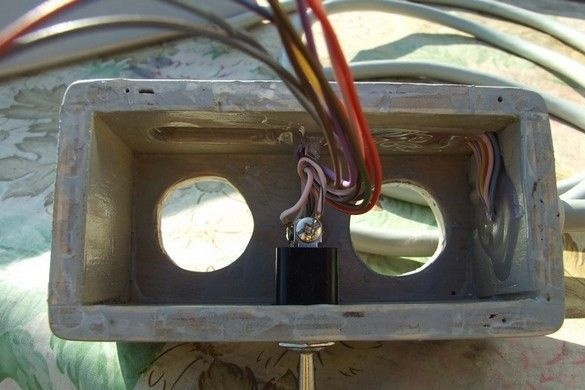
By the way, the toggle switch is for light.
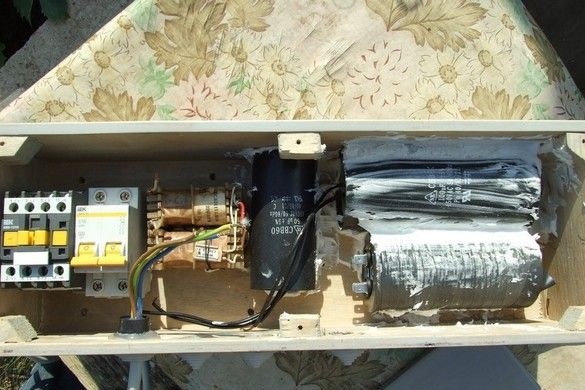
Electric cabinet during installation. The transformer is for a "local lighting" halogen bulb, capacitors for a three-phase motor from a single-phase network, see diagram. In the village there is also a three-phase network, but the phases here are often “skewed” and break off, you can overlook that threatens to rewind the electric motor. Need cumbersome protection. Again, the current power is enough.
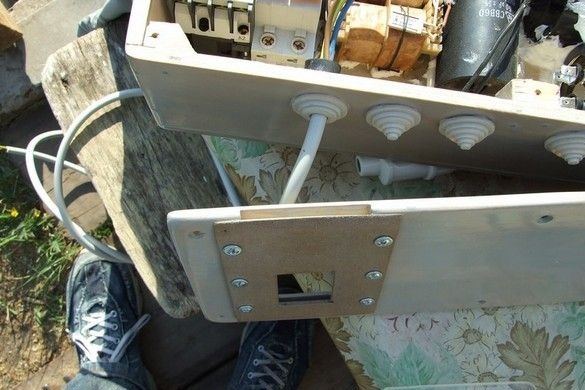
Window for the machine. So that it can be turned on and off without removing the front wall of the cabinet. Well, just see what position he is in.

He dulled the sharp edges with a grinder and a magic file, walked with a wire brush and then the sandpaper on rusted places, wiped it with gasoline, painted two layers of PF-115 green enamel. After drying, I was engaged in the installation and wiring of electricians.

By the way, why I had to make my own locker for electricity - so that it fits elegantly into the I-beam gutter.
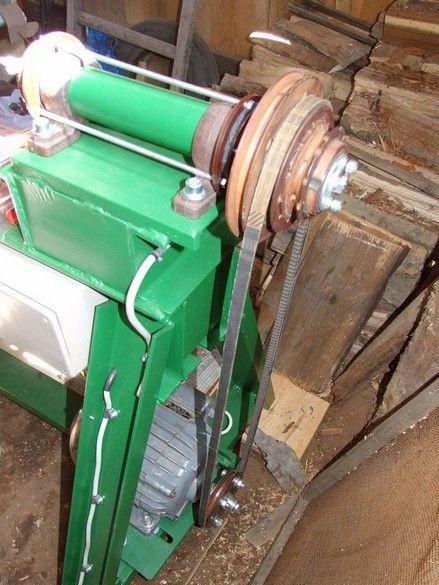
Assembly of the mechanical part - assembly after painting and installation of the headstock, installation of the motor, its electrical connection.

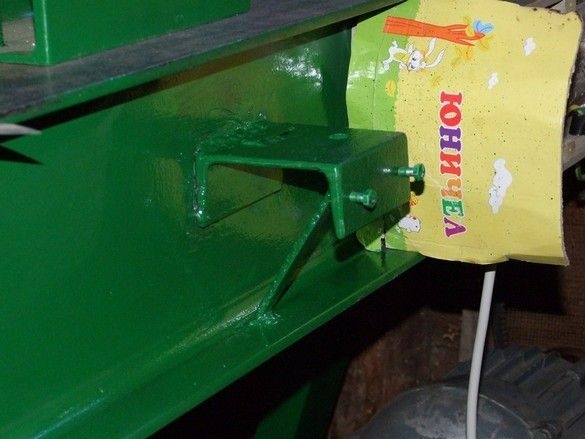
But what I forgot - the bracket for the lamp! This is my practically first welding experience - the acquaintance helped me with the basic welding work, then he became bored with messing with me, I had to learn “this thing” on my own.
Halogen lamp - from a broken desk. 12V A transformer in an electric cabinet is nearby. Use energy-saving lamps, in this case, you should not - when rotating the part under such lighting, a stroboscopic effect may occur, the rotating parts look motionless, this can cause injuries, which we would not want to.
As they say in the technological process ... "after completion, restore the paintwork"
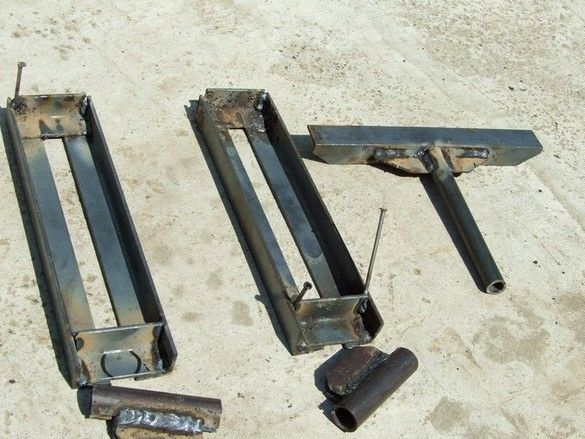
Uh, second experience in the welding business ... Hand-made manufacturing. Two at once. From the same standard rental.
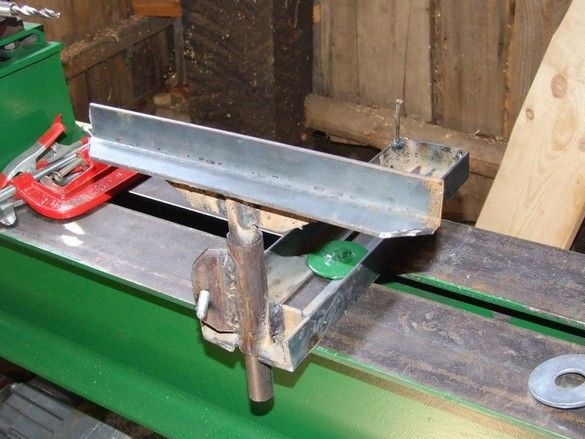
That's where it is. Fitting. It should be said that the handcuff turned out to be not the most successful - the vertical cut tube was not fixed very securely and the cutter vibrates when turning at the edges of the handcuff. But bearable. I won’t get to strengthen everything a little - to weld a couple of braces.
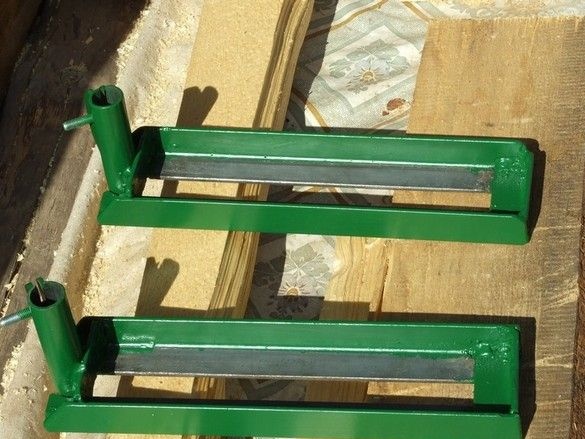
Thoughtfully ... if painted, it’s not so scary.
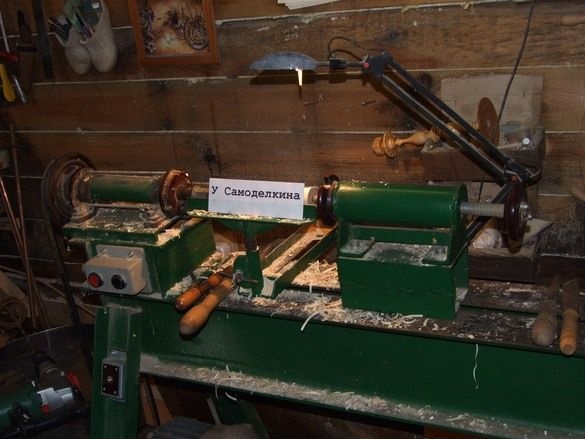
Almost assembled, the final touches are the adjustment of the exact alignment of the stop of the tailstock and the front spindle, the rotation planes of the pulleys. In relation to the moment, it looks charming, caught in the frame of a sledgehammer, on the floor near the stairs.
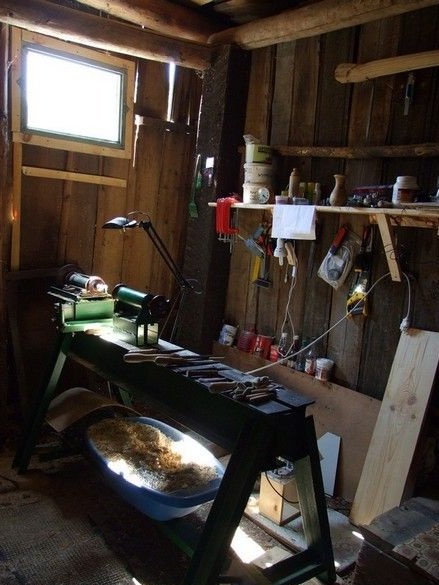
As Yuri Alekseevich said - let's go! There is already a whole trough of wonderful shavings ground, not in vain, not in vain did!
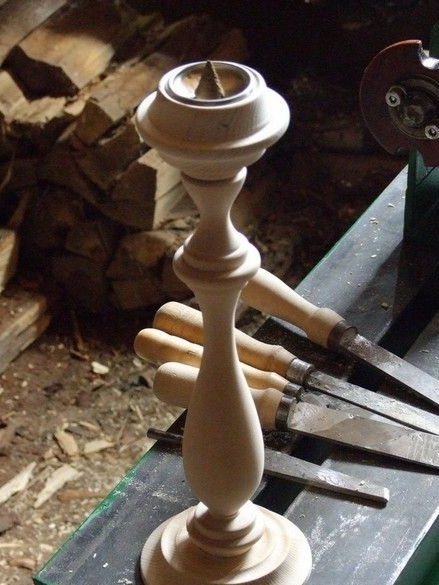
The first experiments - a stand for incense-pyramids (by the way, also homemade).
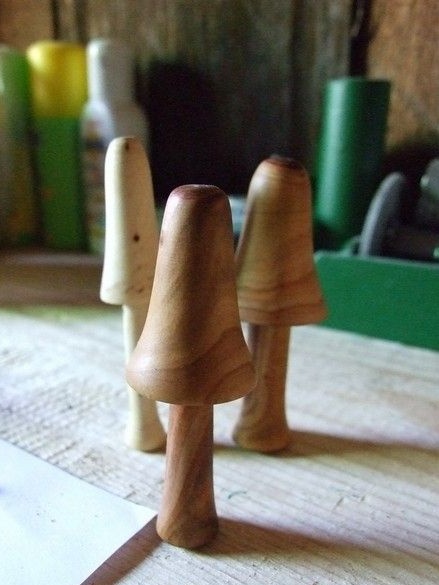
Mmmm ... White?
A few years later, when I made the grinding wheel on the machine shaft to grind the cutters, there was a need for spindle reverse. I made a small revision of the electrical part of the machine, fortunately, for this inclusion, to make the motor rotate back - a couple of trifles.
In addition to safe sharpening, the possibility of reverse rotation of the workpiece has improved the quality of grinding of finished parts, especially with transverse turning (plates, candlestick soles, etc.).