I took 18 volts as a standard for connecting diodes and arrays, i.e. all panels with 3 volt diodes and mini 6v arrays. 9th century 18th century And already at the first stage of the project, you can begin to audit the wiring in the house. It must be done for two reasons:
1. There should be no connection between the lighting line and the line of outlets.
2. If the wiring is old and an aluminum wire was used, then the oxidizing film on it will not provide reliable contact with low-voltage power.
This is strictly necessary to consider. Next, we connect the lighting line to the DC-19V power supply. (for verification, you can use the unit from the laptop). We install modernized lamps with lamps in each room and check for operability. There should be no ripple. Well, at the end of this topic, if you know Ohm’s law and that there is no current without voltage and power without resistance, I’m sure that already at this stage, lamps and bulbs will no longer burn out. But this is not perfect lighting in the house.
The fact is that all people have different perceptions of light, both in brightness and in shades of color. On a personal example, as before, I will try to explain. In the morning I wake up at 4 o’clock. 44m., Daughter and spouse are sleeping. To see something, I turn on the light and hear disappointing words in my address ... then I go to my daughter’s room, turn on the light, straighten the blanket and she also expresses displeasure. Now there is no such thing.In all the rooms, the corridor, the kitchen, and even ..... I installed light controls. All this allowed each of us to create our own comfort. In addition, as you all understand, there is a saving on electricity. Therefore, the second stage of the project is perfect lighting in the house, I present to everyone the main unit of the lighting system - TOP. It will allow for the regulation of light.
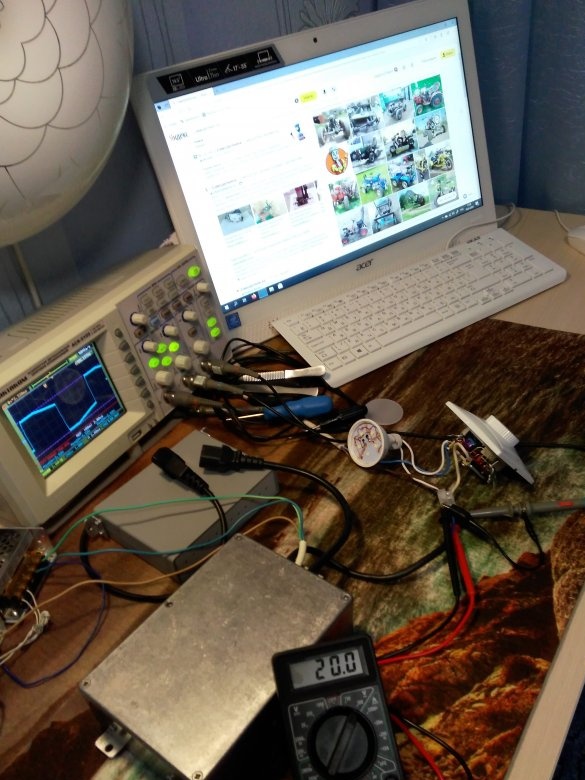
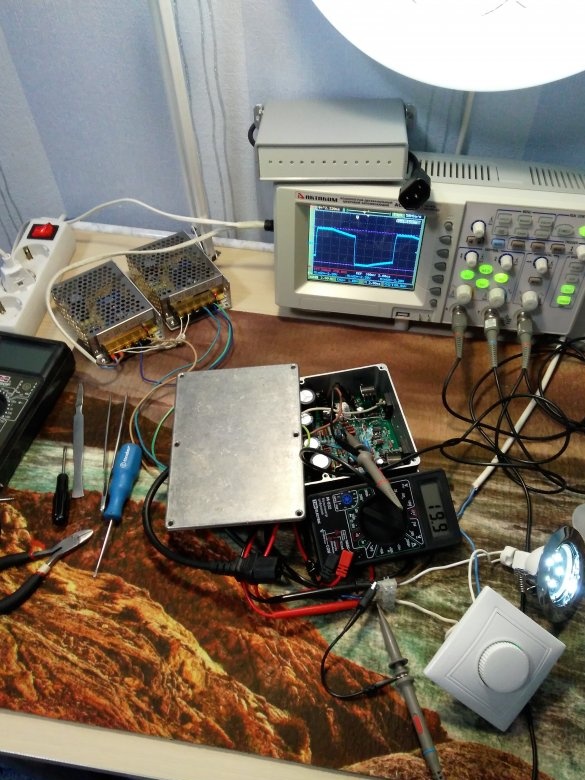
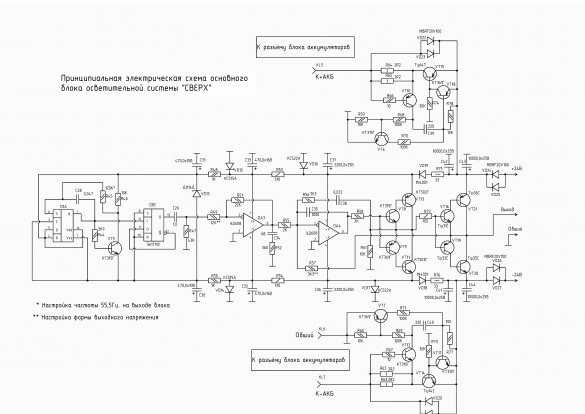
A workplace for tuning and adjustment, and of course the circuit diagram ...
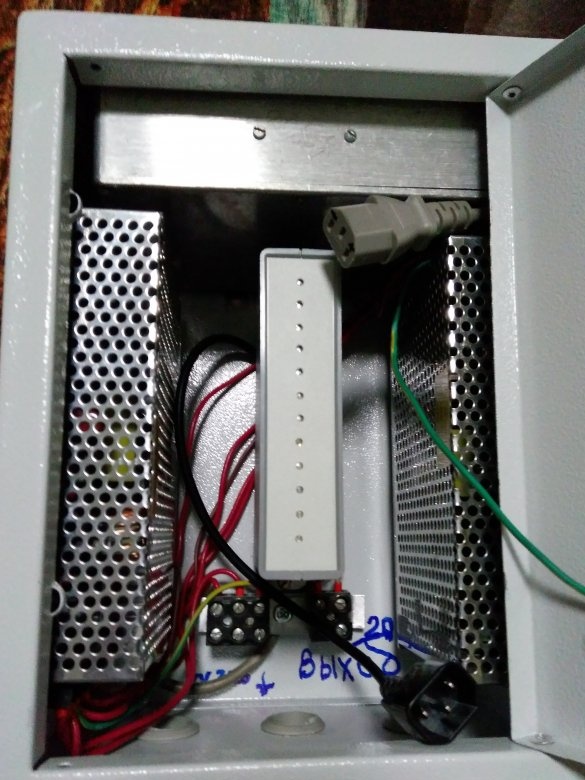
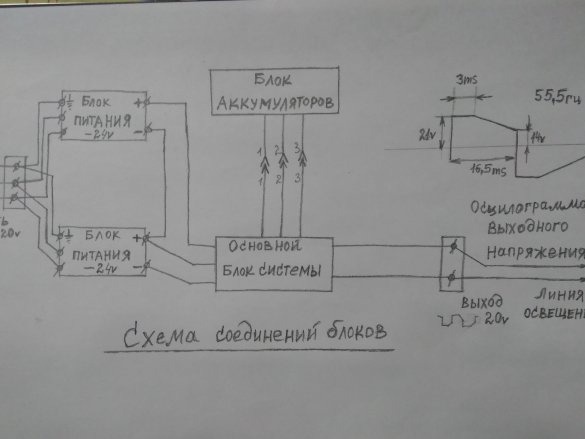
The circuit board of the main unit is installed in an aluminum case - 171/121/50, bought in Chip and Deep, along with accessories. The main unit of the system is mounted on the top wall of a metal box measuring 290/220/160, two pulse sources are also fixed in it - 24v / 8A and the battery pack in a plastic box of size 140/110/35
I bring the connection diagram of the blocks to each other and please do not ignore the ground wire connected to the power supplies and the box body. I’ll tell you where and what to connect it to, if necessary.
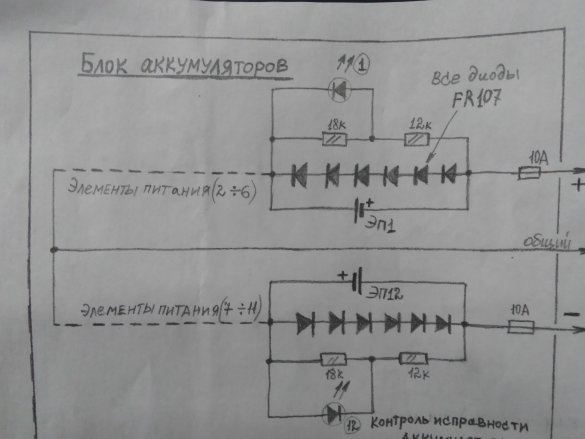
The battery pack has 12 built-in elements of 3.7v lithium-ion batteries. 3.5A / h At the same time, an LED is connected to each element to monitor the health of the element, as well as 6 diodes in the stabilizer mode.
I also want to finalize this circuit with an audible warning device reporting a battery malfunction, but this is in the future ...
Now I will answer the question asked to myself - why do you need Yuri Alexandrovich all this?
I answer, my main goal is to transfer my knowledge, skills and also to warn against making mistakes that are sometimes irreparable.
In the comments, one character from the Mowgli cartoon thinks I'm doing everything for profit. Yes, taking into account the crisis in the country, I make these systems and install them, but only to friends and friends of friends, so let's put an end to this and will not offend anyone. Next week I will publish the circuits of the dimmers and give tips on the system.

