
This article will cover an example assembly. do it yourself a powerful metal detector called Pirat. The device is capable of catching underground coins at a depth of 20 cm. As for large objects, work at a depth of 150 cm is quite real here.
Video of working with a metal detector:
This metal detector got its name due to the fact that it is a pulse, it is the designation of its first two letters (PI-pulse). Well, RA-T is consonant with the word radioskot - this is the name of the developer’s site, where it was posted homemade. According to the author, the Pirate is going to be very simple and fast, even basic skills in working with electronics are enough for this.
The disadvantage of this device is that it does not have a discriminator, that is, it does not recognize non-ferrous metals. So to work with him in areas contaminated with various kinds of metals will not work.
Materials and tools for assembly:
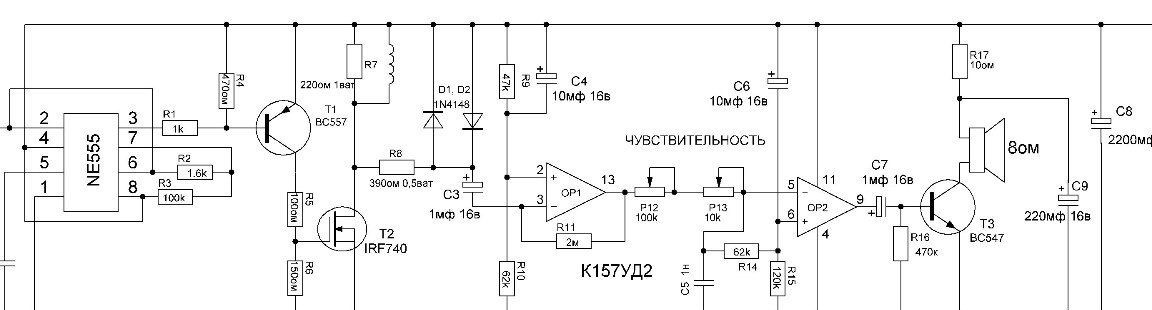
- chip KR1006VI1 (or its foreign counterpart NE555) - a transmitting unit is built on it;
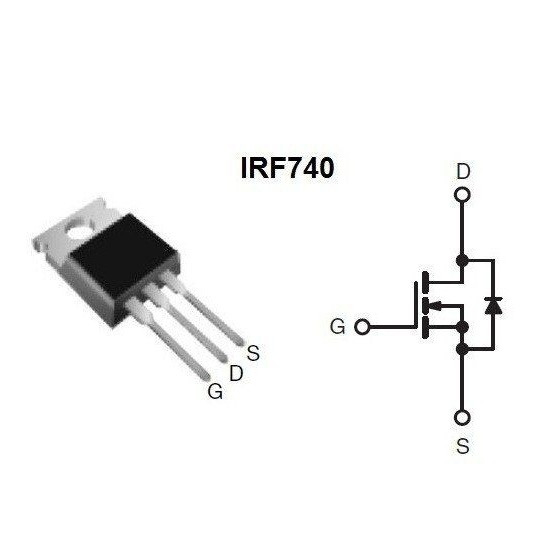
- transistor IRF740;
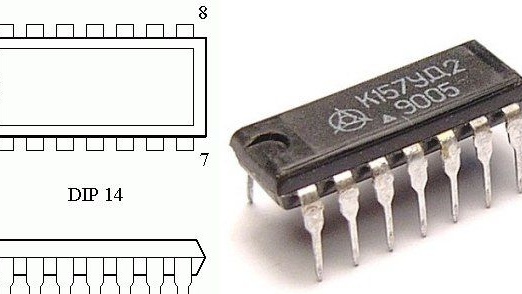
- chip K157UD2 and transistor BC547 (the receiving unit is going to be assembled on them);
- PEV wire 0.5 (for winding the coil);
- NPN transistors;
- materials for creating the body and so on;
- electrical tape;
- soldering iron, wires, other tools.
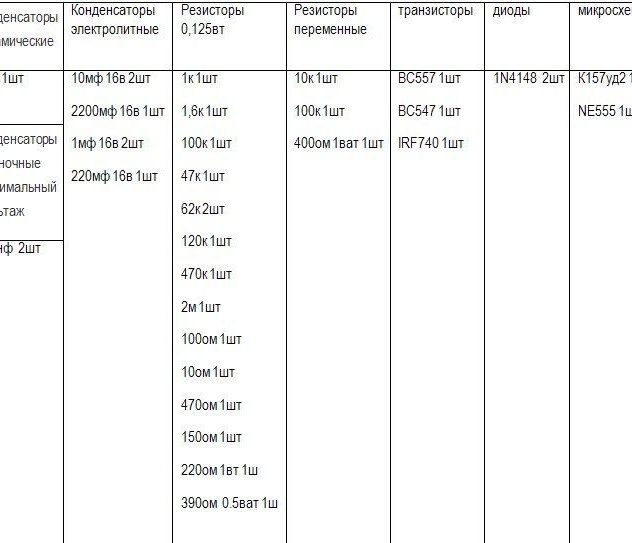
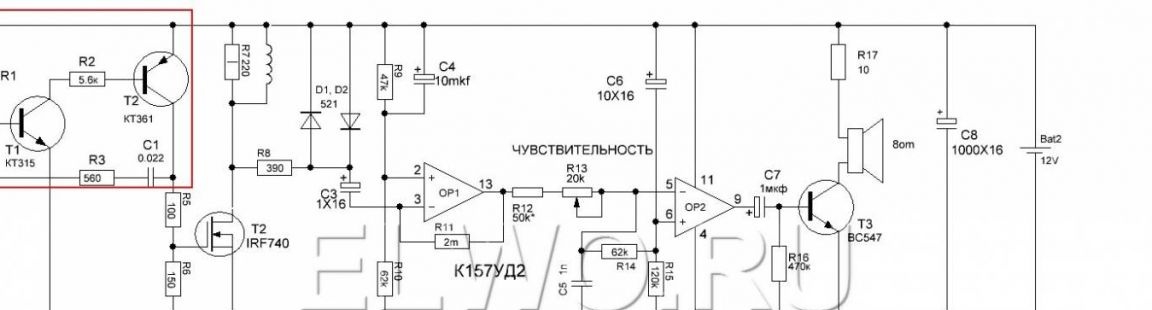
The remaining radio components can be seen in the diagram.
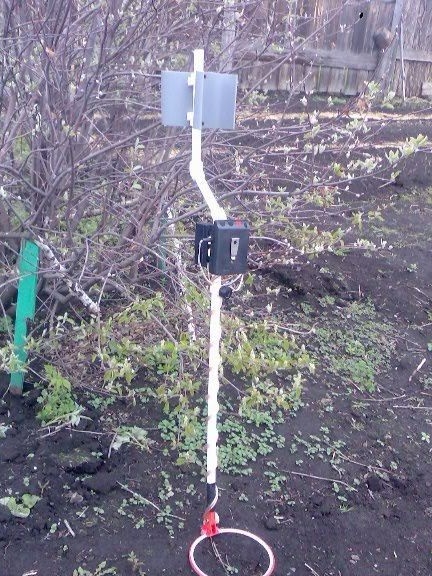
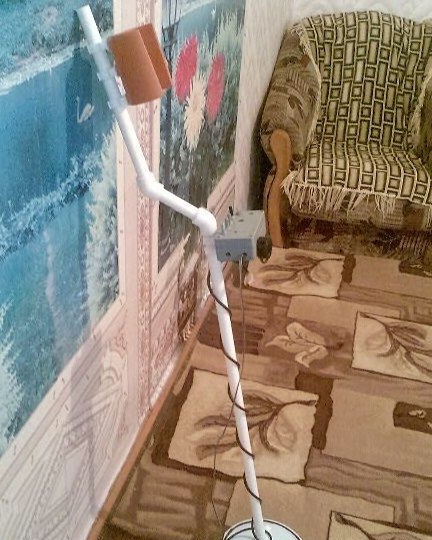
Still need to find a suitable plastic box for installation e schemes. You will also need a plastic pipe to create a rod on which the coil is mounted.
Metal detector assembly process:
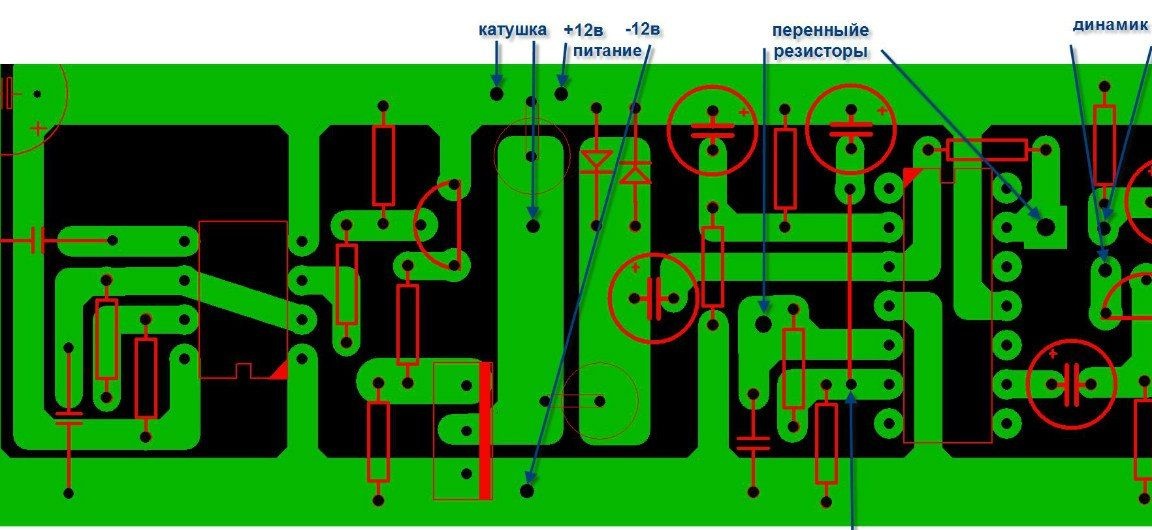
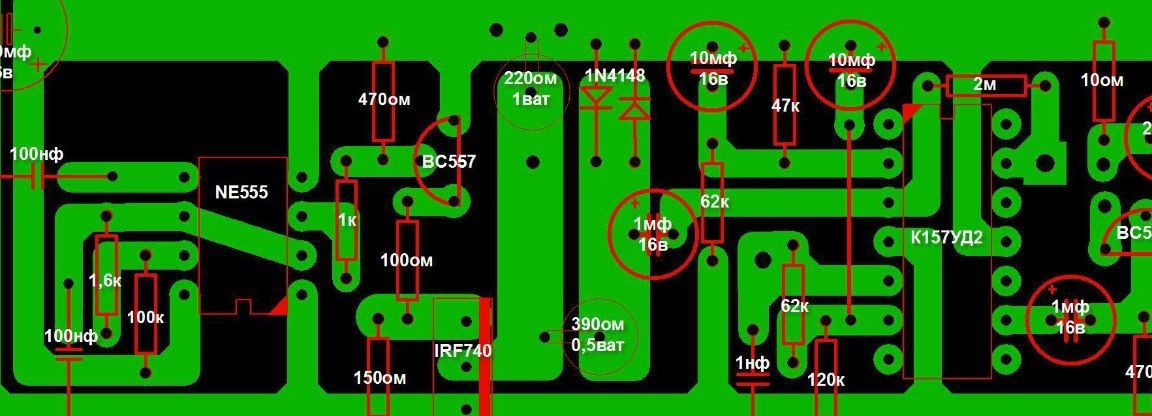
Step one. Create a circuit board
The most difficult part of the device is, of course, electronics, so it is advisable to start with it. First of all, you need to make a printed circuit board. There are several board options, depending on the radio elements used. There is a board for NE555, but there is a board on transistors. All the necessary files to create a board are to the article. Also on the Internet you can find other board options.
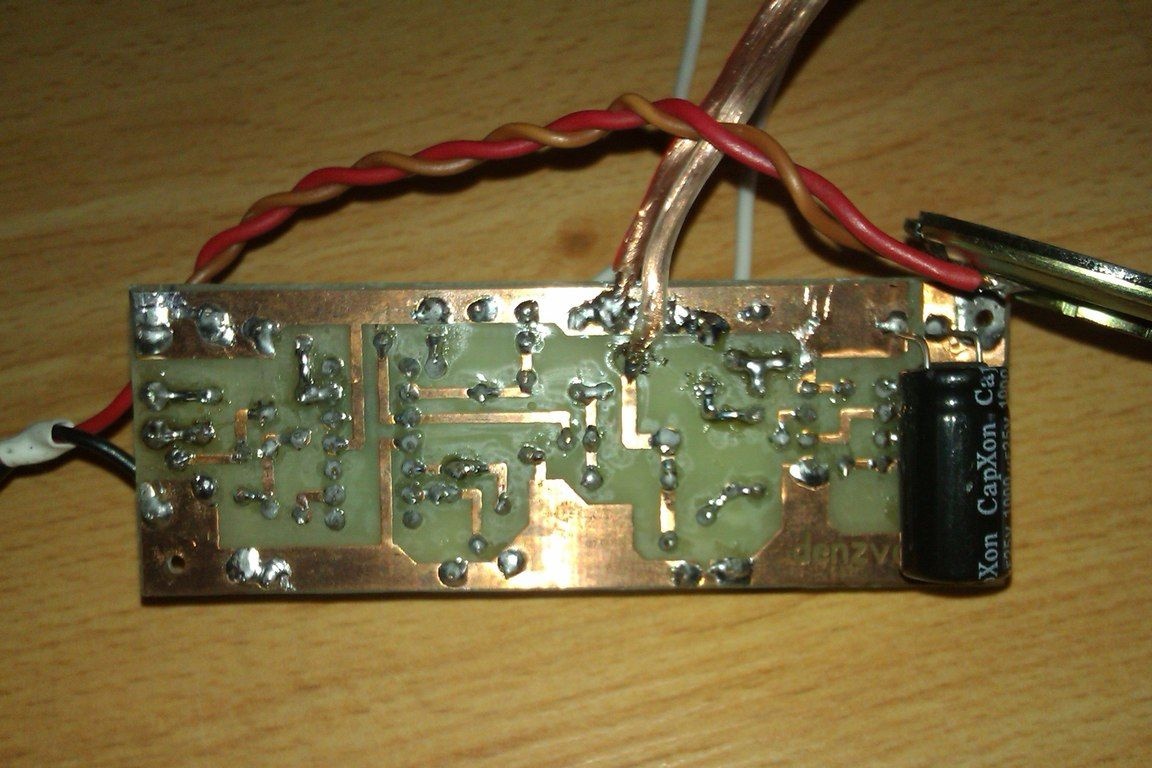
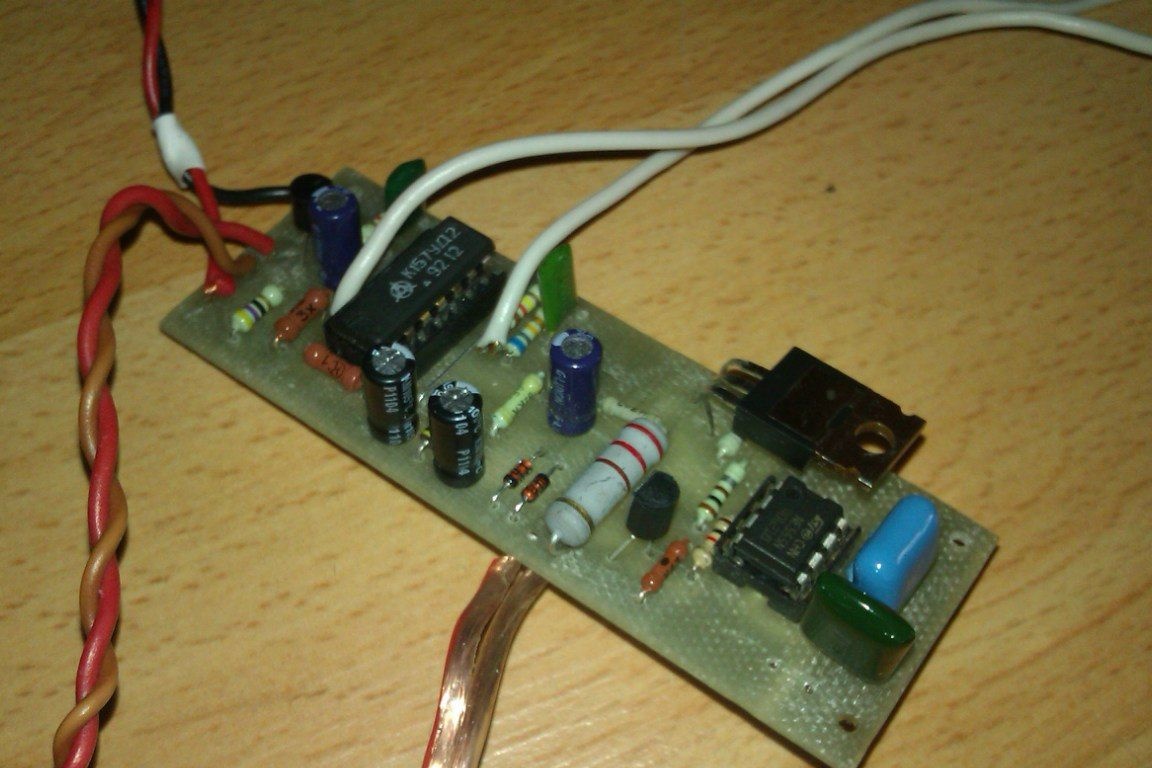
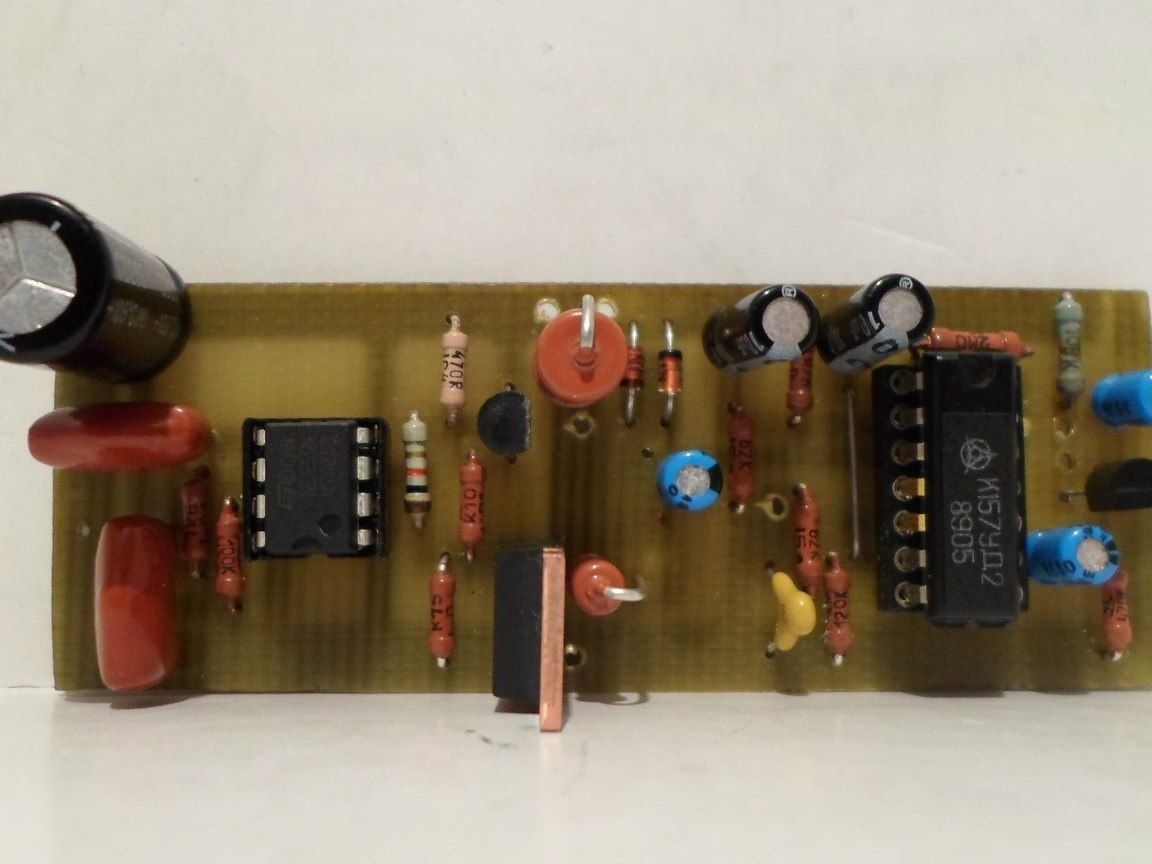
Step TwoWe install electronic elements on the board
Now the board needs to be soldered, all electronic elements are installed exactly as in the diagram. In the picture on the left you can see the capacitors. These capacitors are film and have high thermal stability. Thanks to this, the metal detector will work more stably. This is especially true if you use a metal detector in the fall, when the street is sometimes quite cold.
Step Three Metal Detector Power Supply
To power the device, you need a source from 9 to 12 V. It is important to note that the device in terms of energy consumption is quite voracious, and this is logical, because it is powerful. A crown battery here is not enough for a long time, it is recommended to use immediately 2-3 batteries, which are connected in parallel. You can also use one powerful battery (best rechargeable).
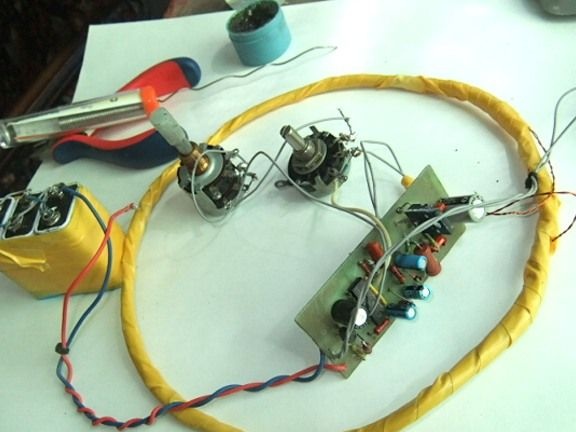
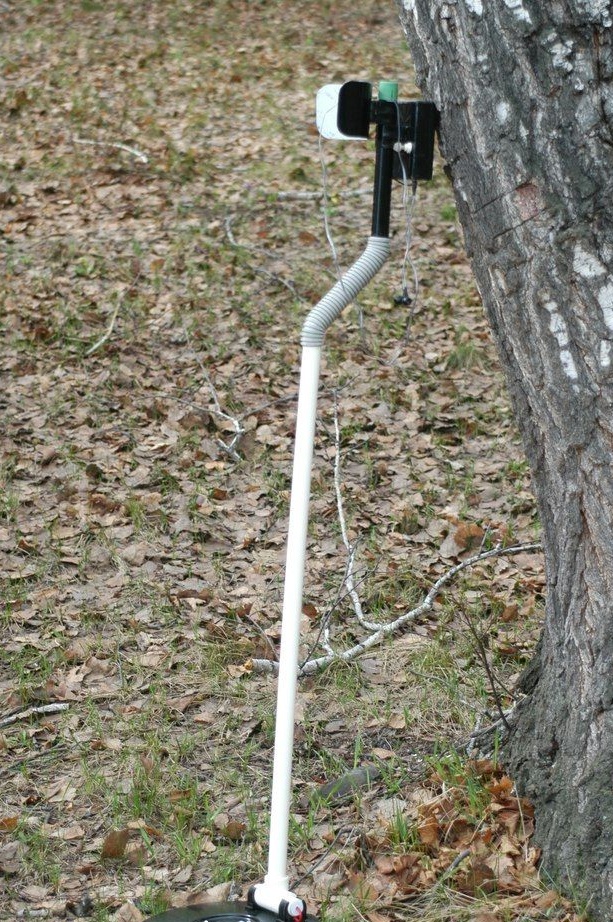
Step Four Assembling a coil for a metal detector
Due to the fact that this is a pulsed metal detector, here the accuracy of the coil assembly is not so important. The optimum diameter is a mandrel of 1900-200 mm, in total 25 windings need to be wound. After the coil is wound, it must be properly wrapped on top with tape for insulation. To increase the detection depth of the coil, you need to wind it on a mandrel with a diameter of about 260-270 mm, and reduce the number of turns to 21-22. The wire is used with a diameter of 0.5 mm.
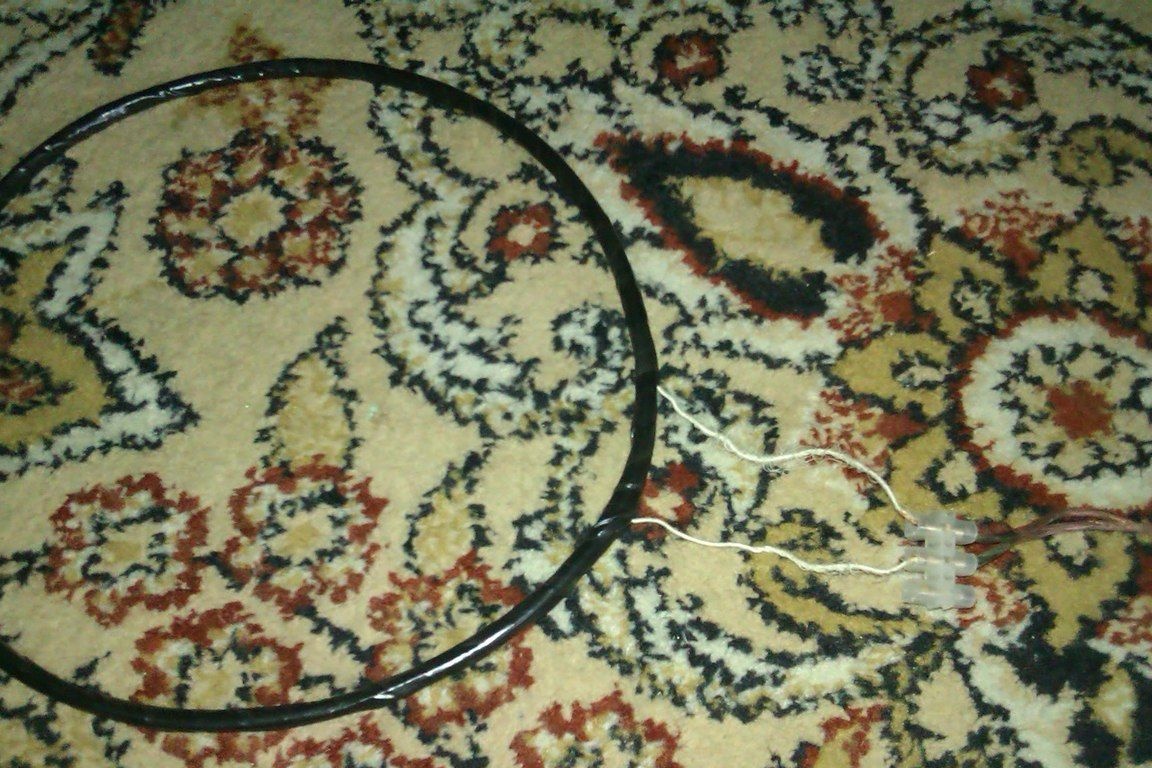
After the coil is wound, it must be installed on a rigid case, there should be no metal on it. Here you need to think a bit and look for any suitable size case. It is needed in order to protect the coil from shock during operation with the device.
The conclusions from the coil are soldered to a stranded wire with a diameter of about 0.5-0.75 mm. Best of all, if it is two, twisted together wires.
Step Five Customize the metal detector
When assembling exactly according to the scheme, it is not necessary to adjust the metal detector; it already has maximum sensitivity. For finer tuning of the metal detector, you need to twist the variable resistor R13, you need to achieve rare clicks in the dynamics. If this is achieved only at the extreme positions of the resistor, then it is necessary to change the value of the resistor R12. A variable resistor should adjust the device to normal operation in mid-positions.
If there is an oscilloscope, then using it you can measure the frequency at the gate of the transistor T2. The pulse duration should be 130-150 μs, and the normal operating frequency is 120-150 Hz.
How to work with a metal detector
After turning on the device, you need to wait about 10-20 seconds to stabilize the operation of the metal detector. Now you can twist the resistor R13 to adjust. After that, you can start the search.