
The heat came, the trees bloomed, which means that the time has come for outdoor recreation and barbecue. But what if you do not have time to break out into the nature, and you want to try kebabs? There is a way out of this situation, it is a miniature barbecue grill. With the help of this ingenious fixtures You can make kebabs or fry sausages without leaving your home! This can be done even on the balcony, observing all safety precautions, of course.
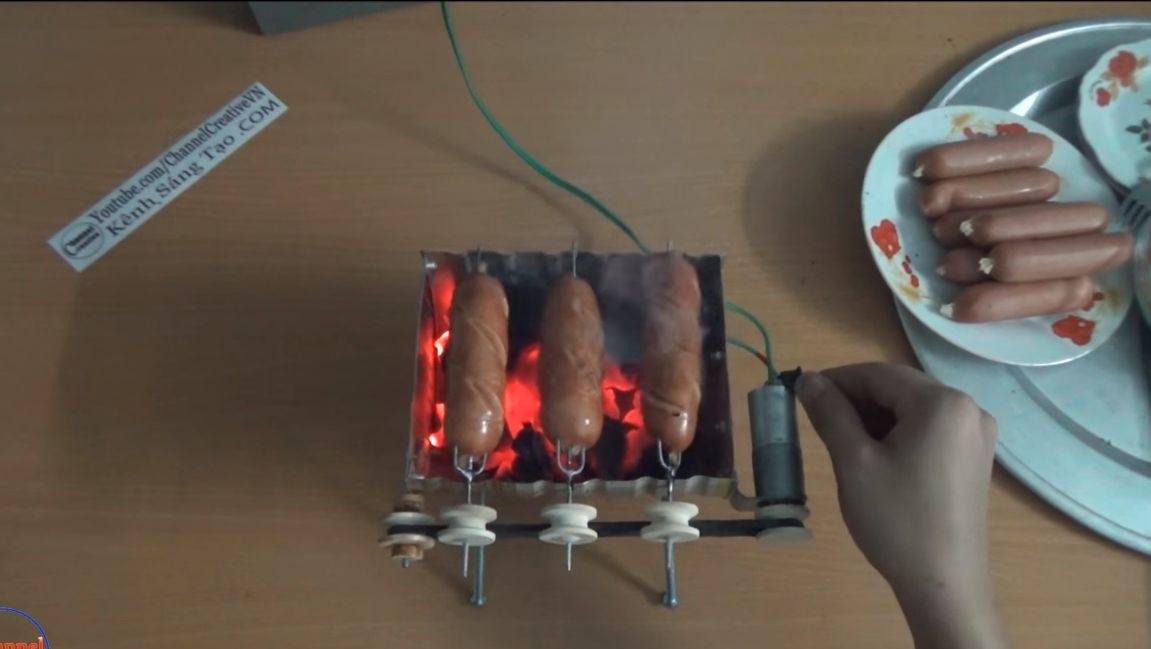
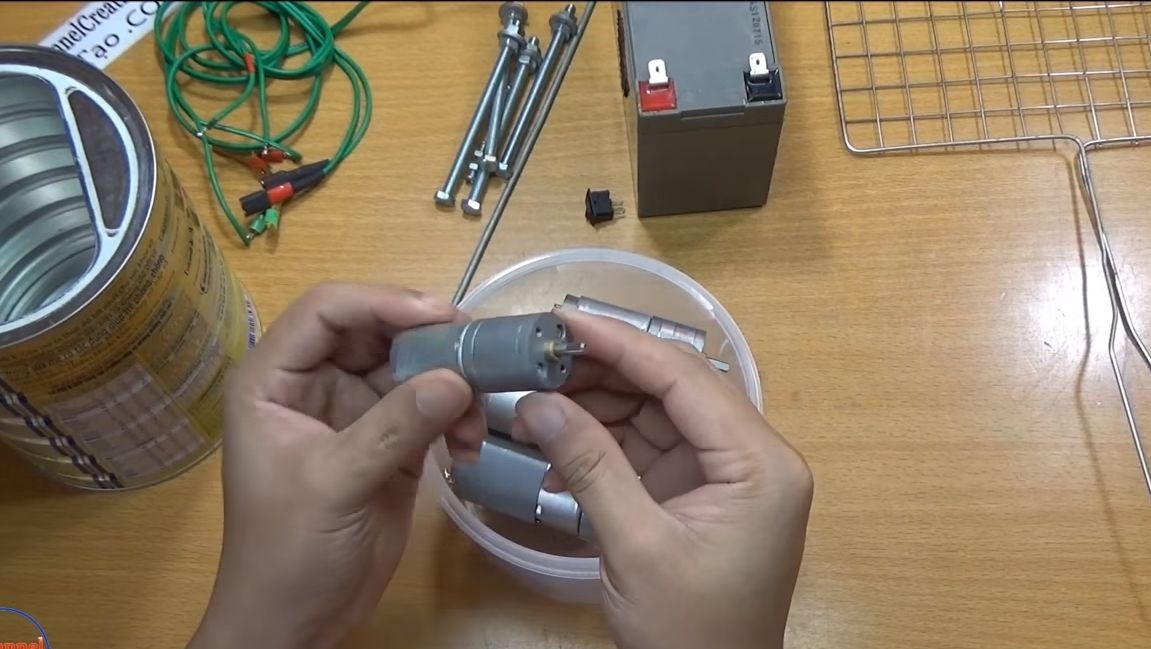
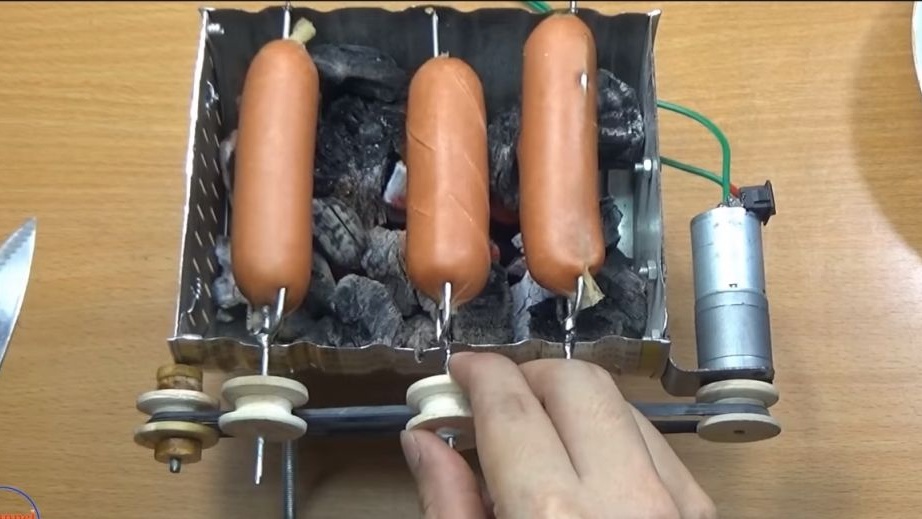
The device works on coal, it is very simple, a can is used as the basis. Homemade equipped with the function of automatic rotation of barbecue, that is, the skewers rotate during the frying process. For this, the author adapted a small motor with a gearbox, which can even be powered by a battery. Although the portions are small here, everything is prepared pretty quickly, you can not only eat yourself, but also treat your friends. Especially good homemade will be for evening gatherings in the yard. Using this method, you can make a larger oven. So, we will consider in more detail how all this is done.
Materials and tools used by the author:
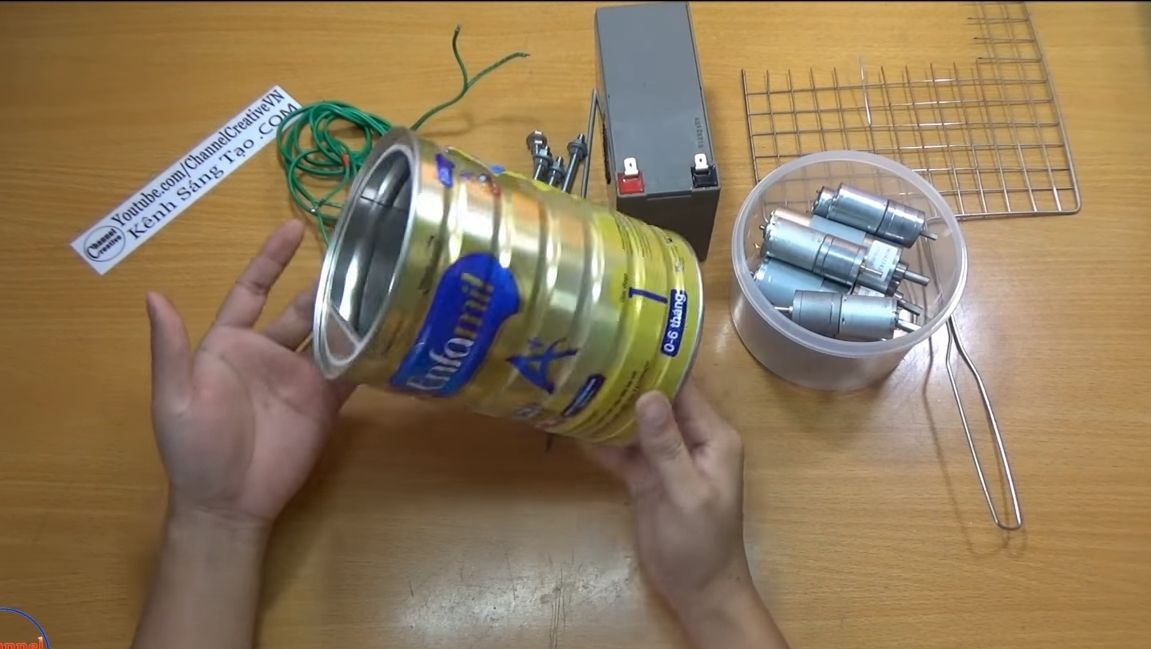
Material List:
- a can of suitable size;
- steel bars (suitable electrodes);
- ;
- switch;
- wires;
- An old car camera (to make a belt);
- four bolts with nuts and washers (for making legs);
- plywood or board (for the manufacture of pulleys);
- steel wire;
- sheet steel (the case will fit from the computer's power supply);
- epoxy adhesive.
Tool List:
- welding machine;
- drill;
- scissors for metal;
- ;
- drilling machine with bits;
- jigsaw;
- a grinder or grinder with a grinding disc;
- a rivet gun.
Homemade manufacturing process:
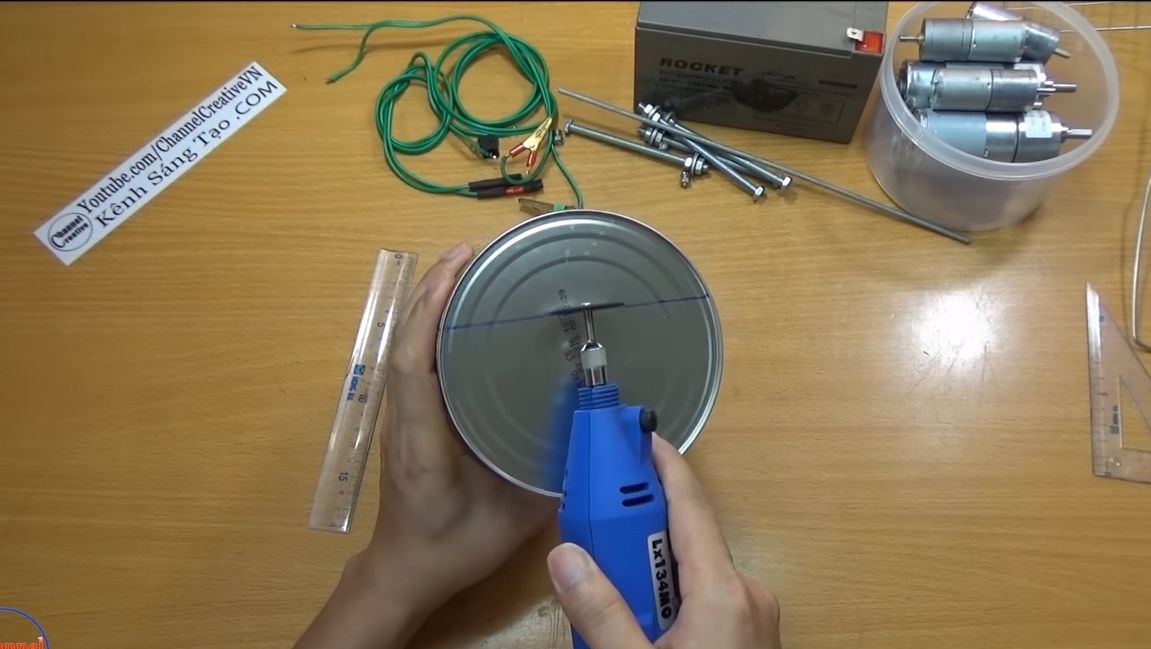
Step one. Cut out the base
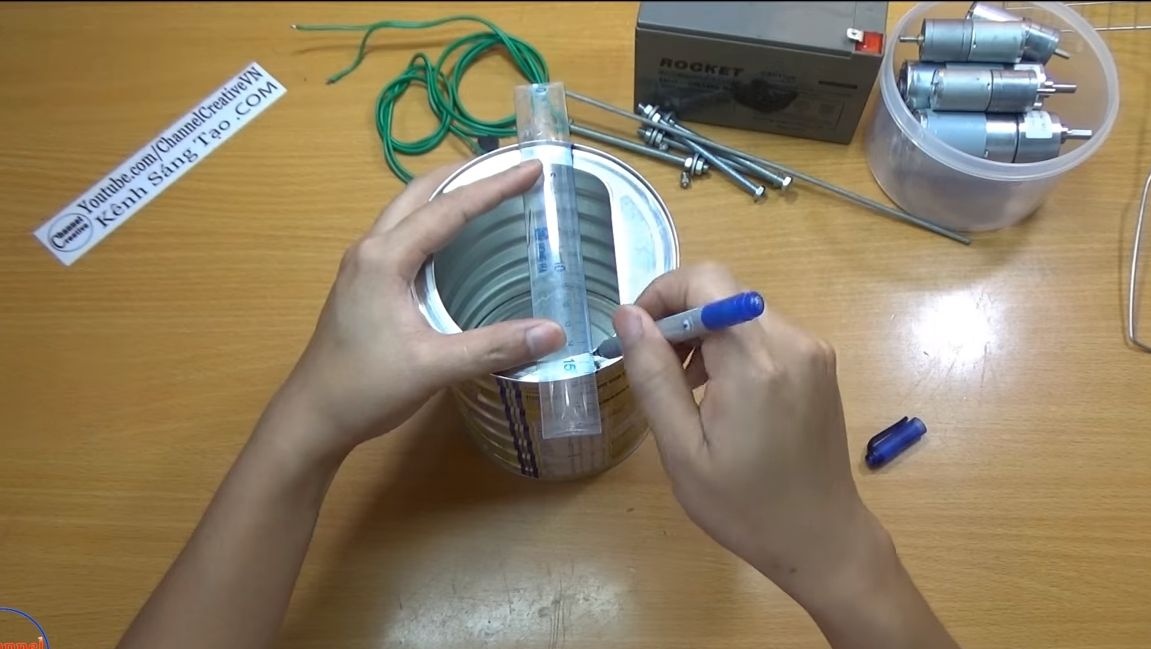
As a basis, you will need a tin can. For these purposes, you can adapt a can of canned food. The author decided to use a can of baby food for these purposes. We take a marker and mark it out, and then cut it out. A drill with a cutting nozzle is perfect for such work.
Next, we install a nozzle for grinding on the drill and process the edges of the can. They must be smoothed out, otherwise when using the oven there is a risk of cutting into sharp edges.

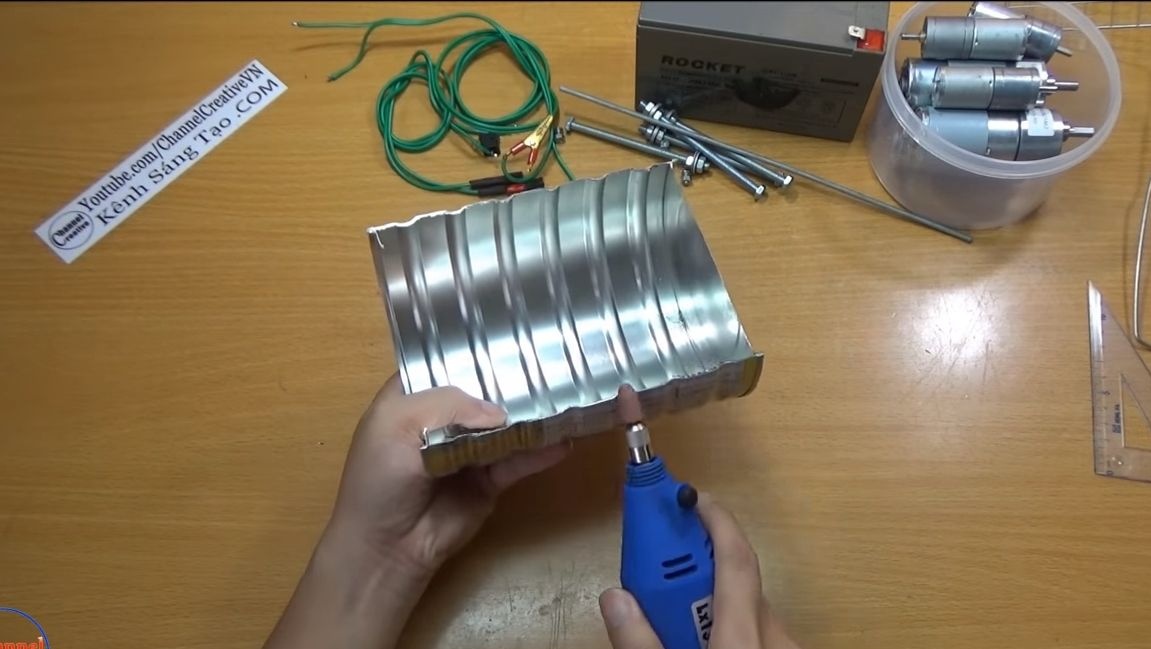
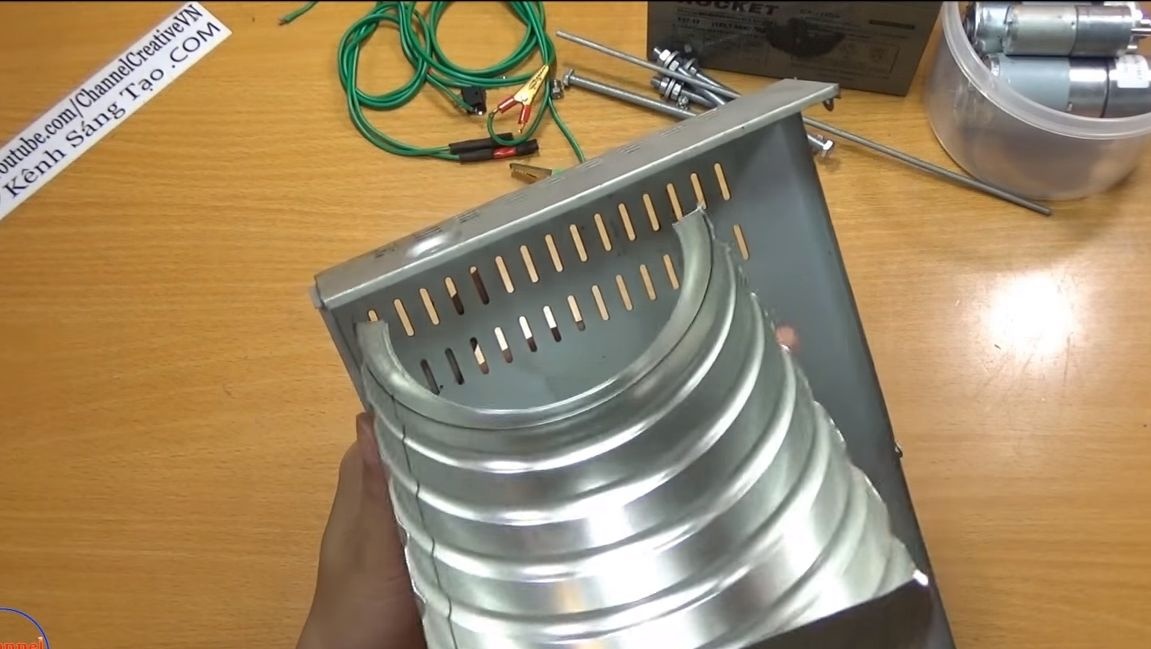
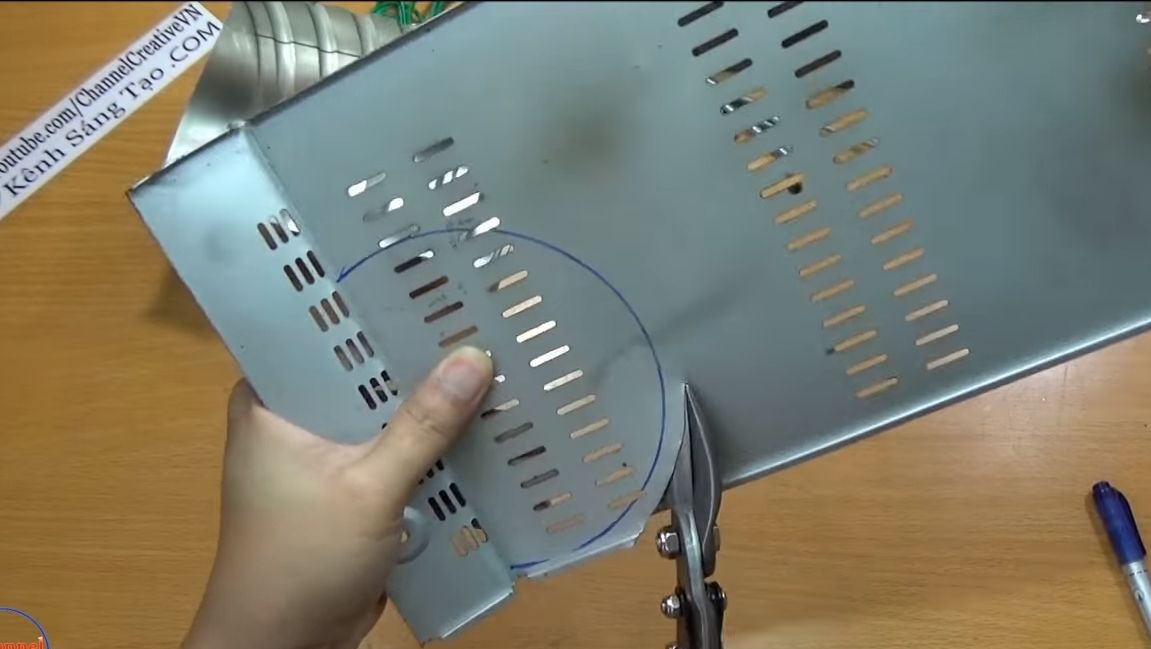
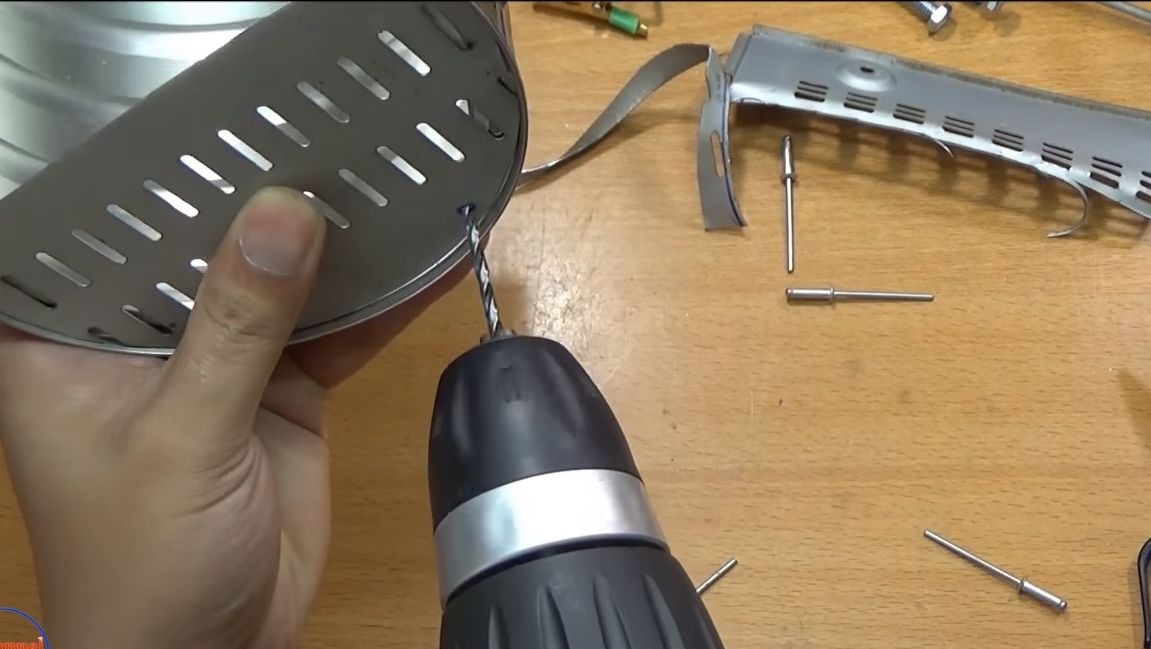
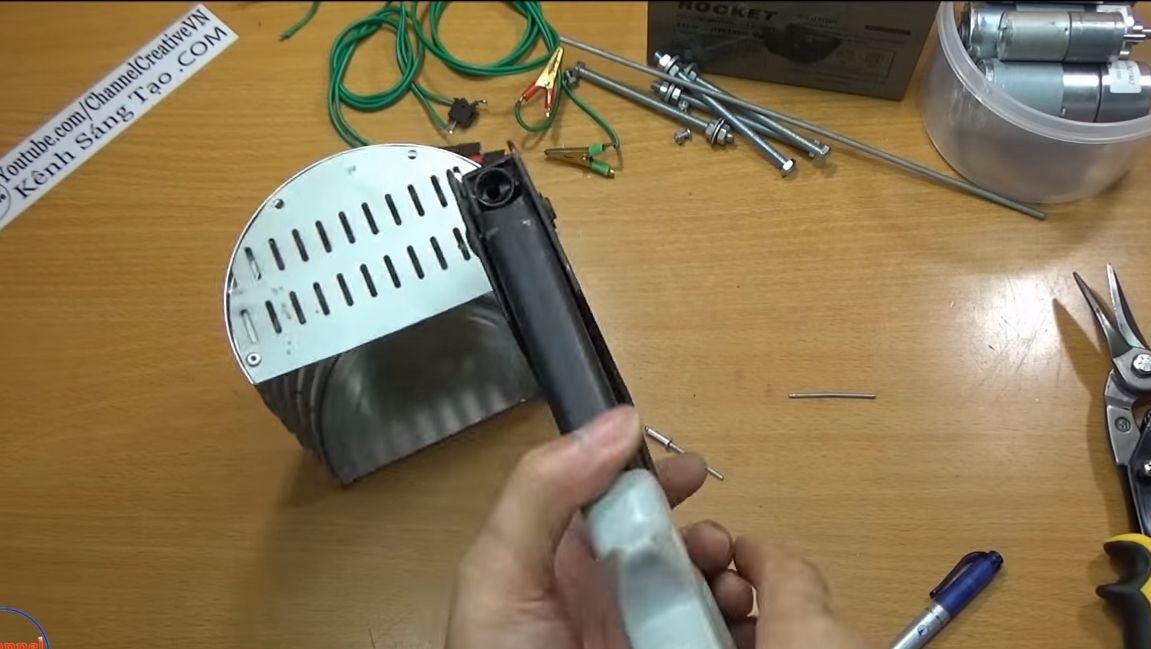
Step Two Side wall installation
Where the jar had a neck, a hole will remain by itself. We have to close it.At this point, the author decided to install a plate with holes, air will enter through it, and will support the burning of coal. As a material, the author used a piece from the case of a computer power supply. Install it with rivets. It is convenient to use a rivet gun. You can also use small screws with nuts.
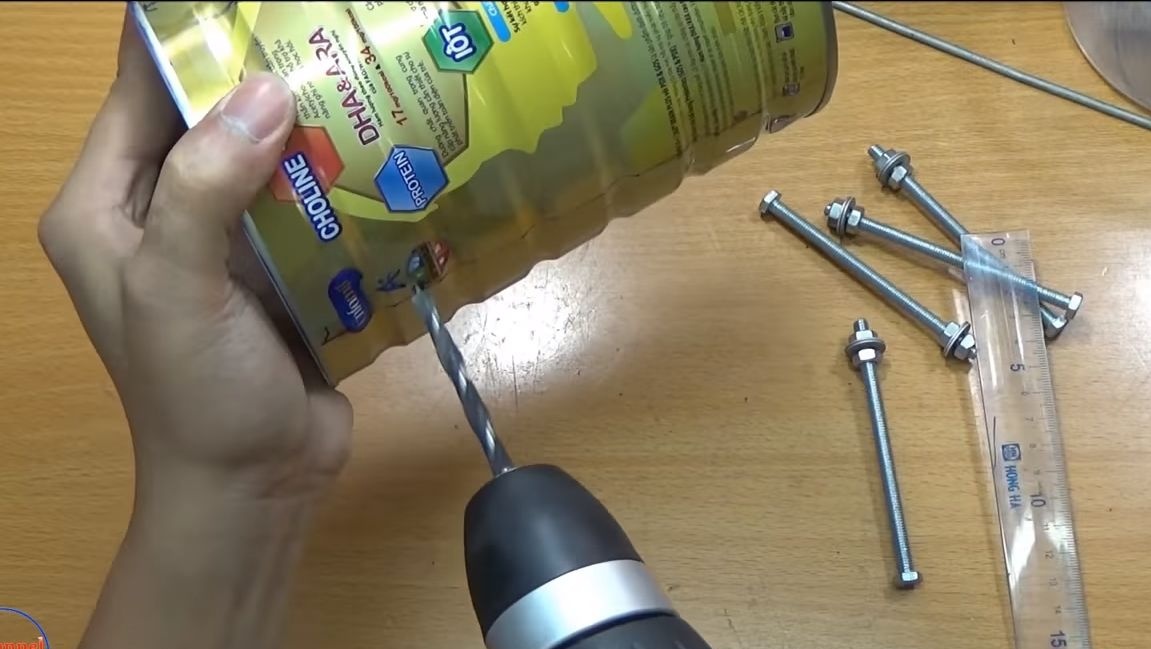
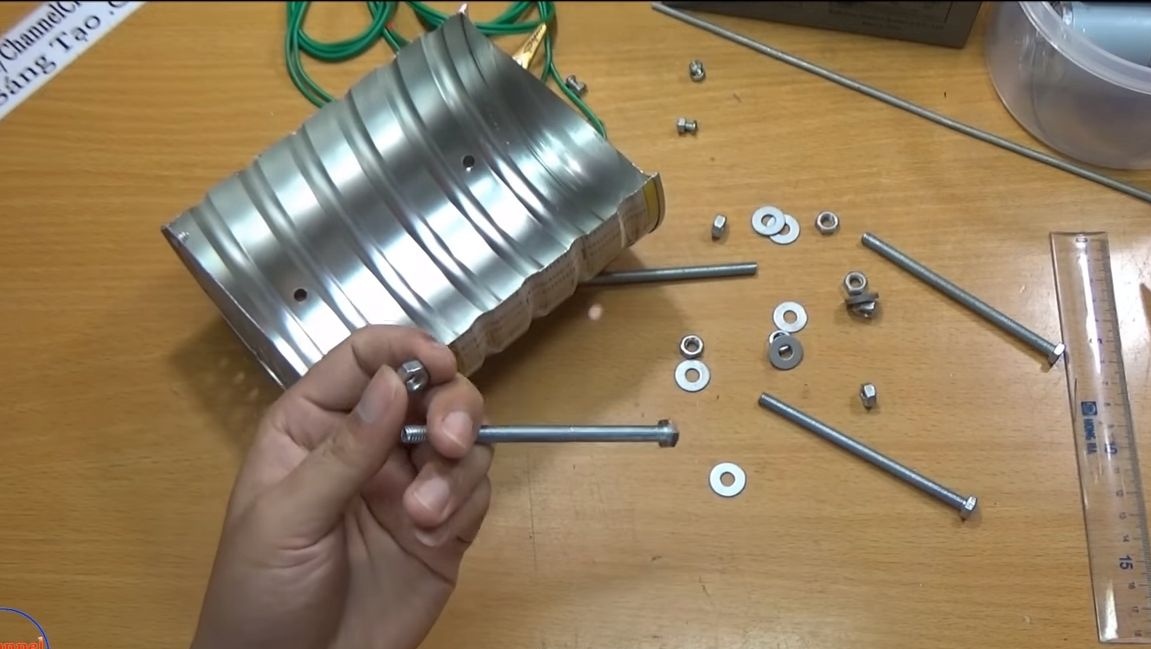
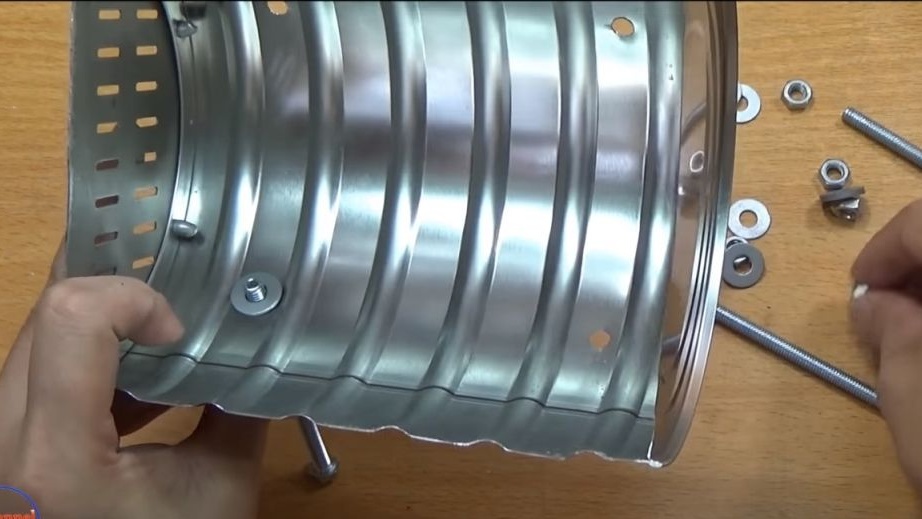
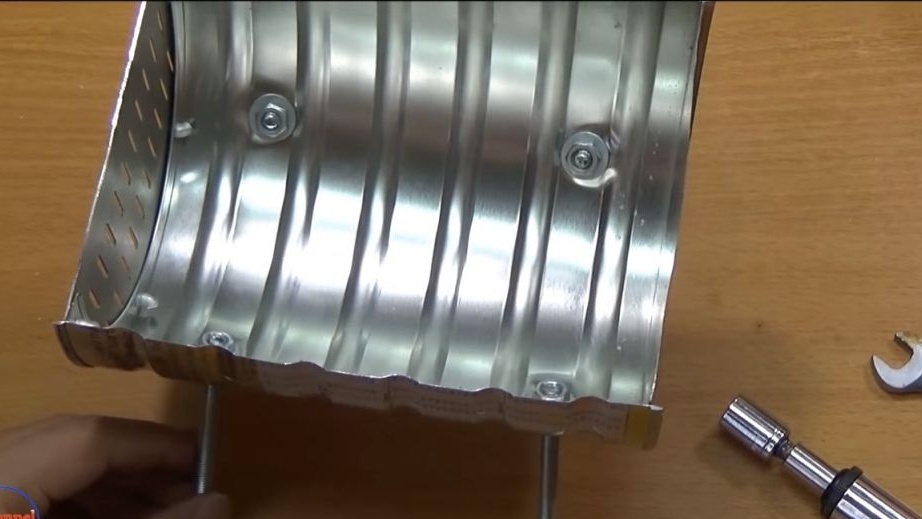
Step Three Make the legs
The furnace must have a reliable support, in addition, it must be at some distance from the floor, since the bottom will be very hot. The author used four bolts as legs, we fasten them with nuts and washers. We tighten the nuts well so that the legs do not fall off during use.
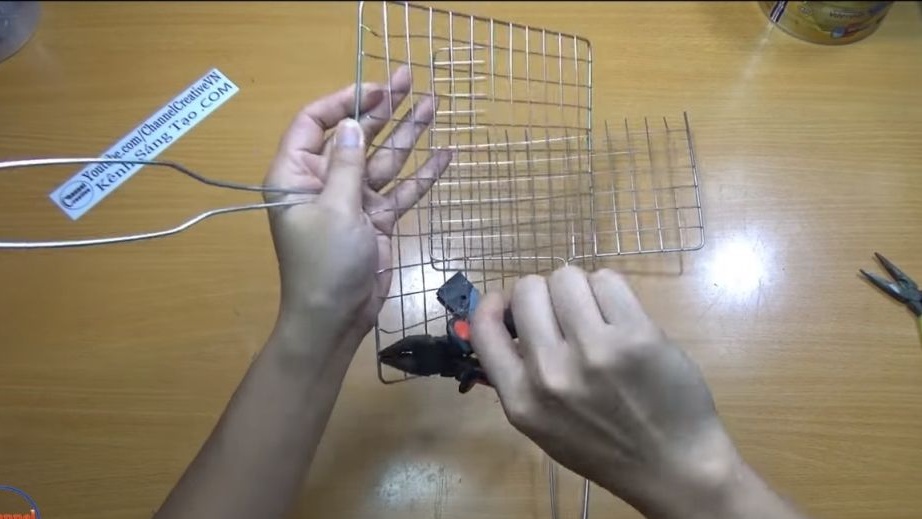
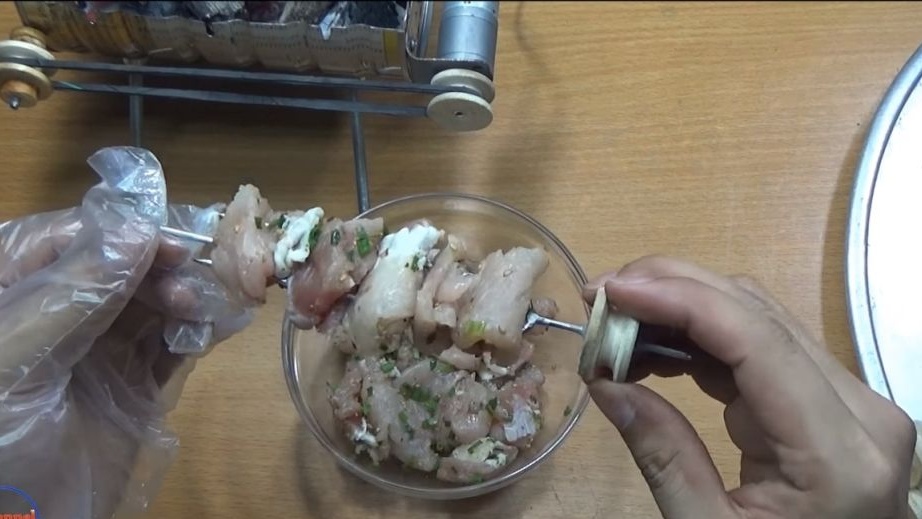
Step Four Skewer blanks
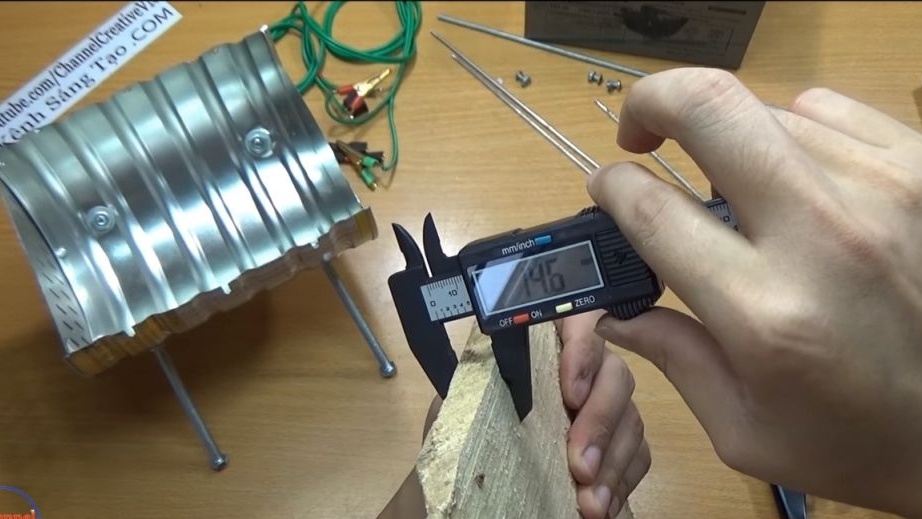
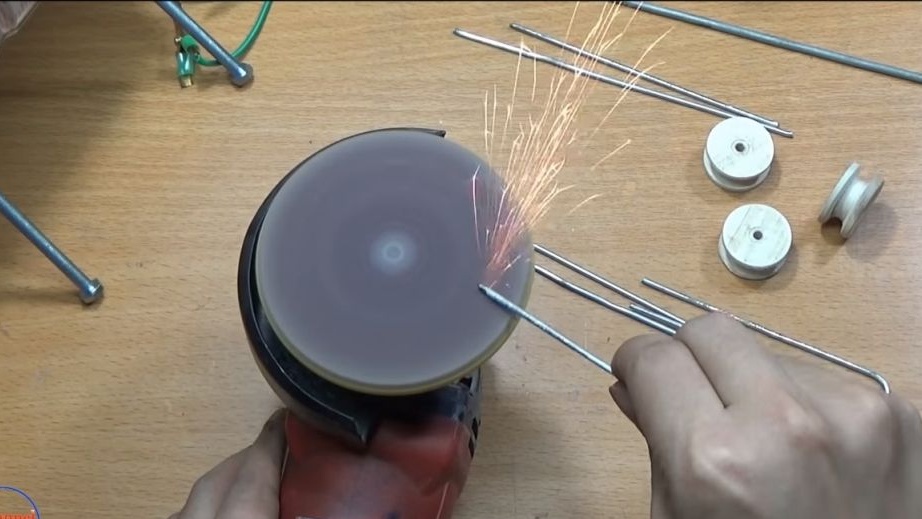
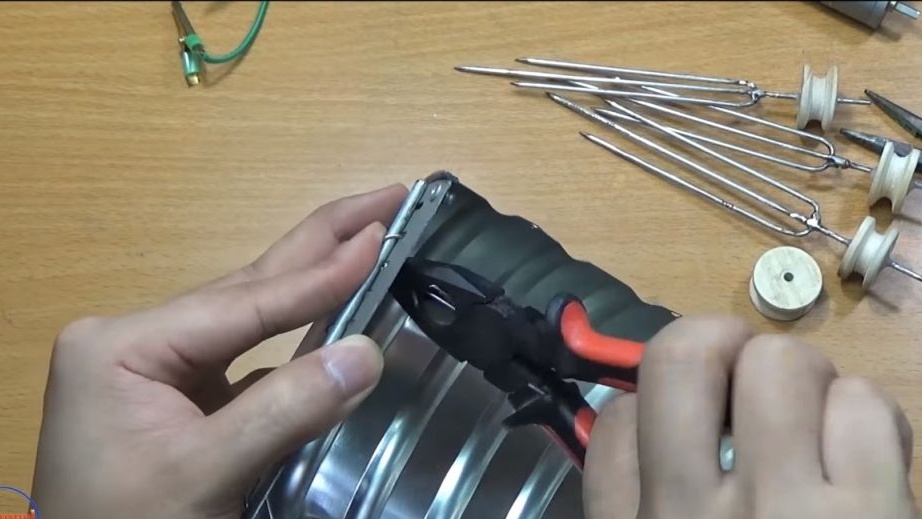
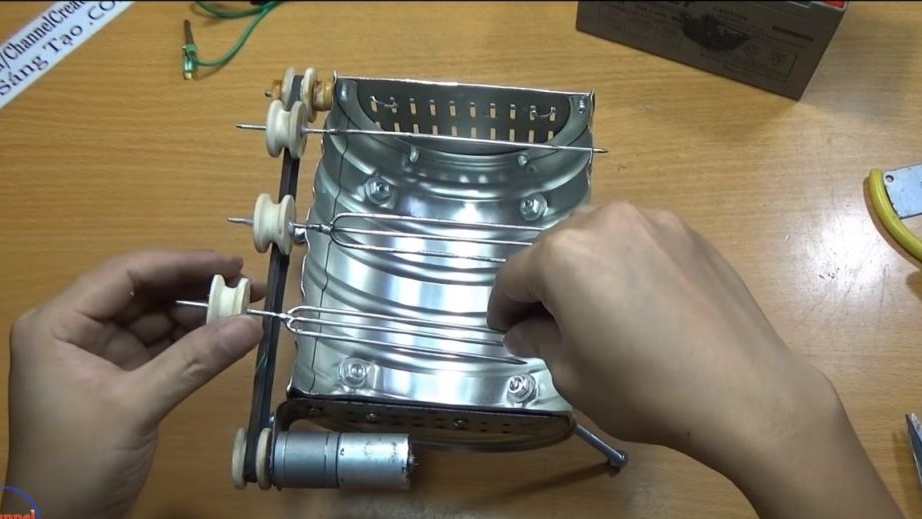
For the manufacture of skewers and driven axles, you will need steel bars. In principle, ordinary black steel can be used for these purposes, but it can rust, which is not very pleasant. Although over time, a patina will appear on it, which will protect the metal from oxidation. The author decided to use stainless steel for these purposes, so skewers will never rust and will always be shiny. A metal grate was used as the starting material, and the author cut off the excess with the help of wire cutters.
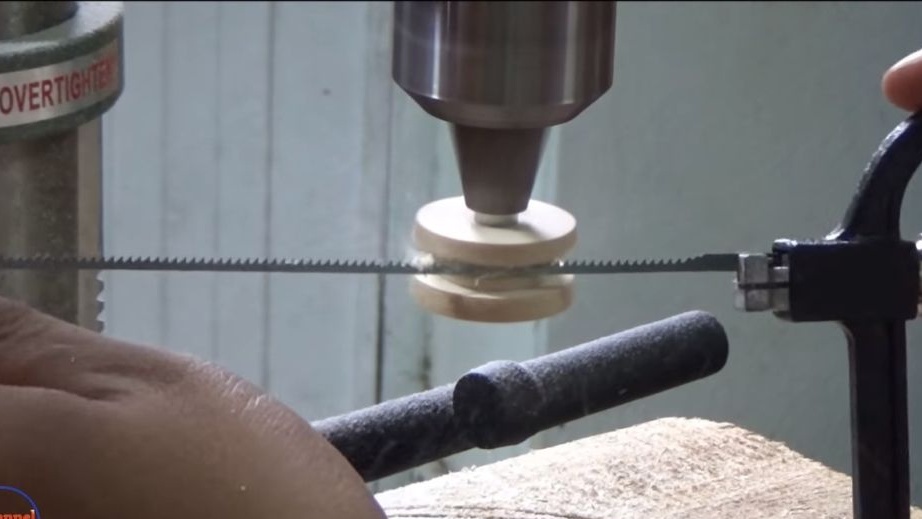
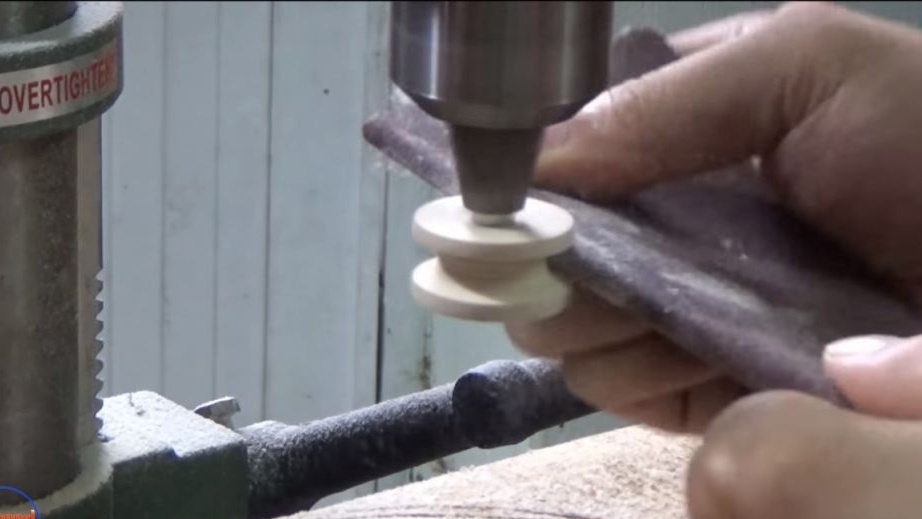
Step Five Pulley making
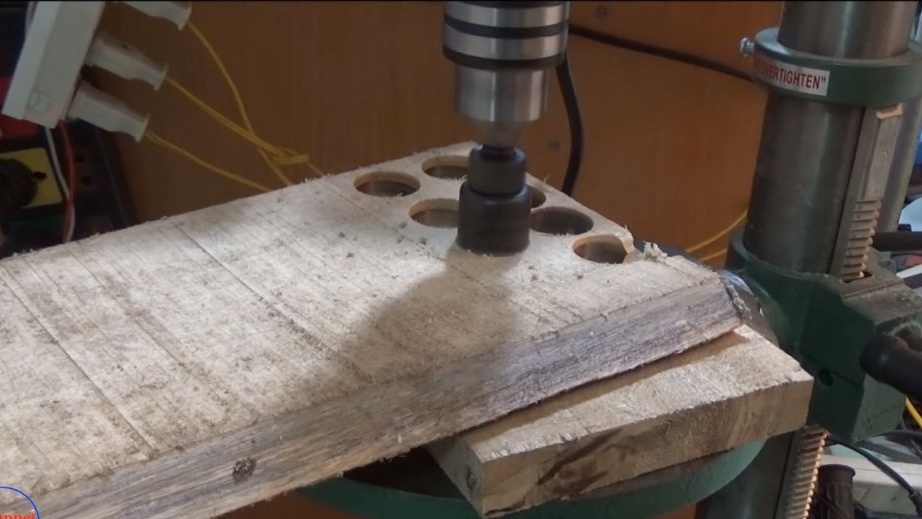
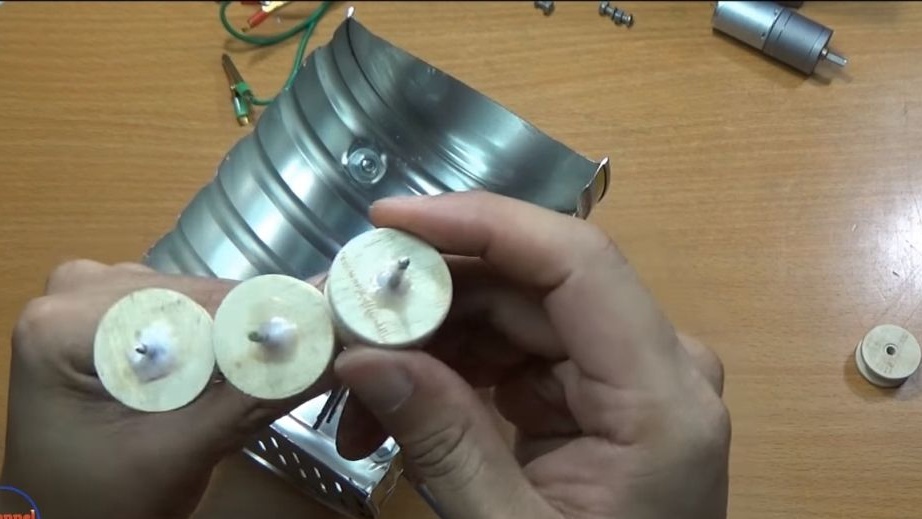
For homemade work you will need five pulleys, they will be needed to transfer movement from the belt to the skewers. Pulleys are the easiest to make of wood, for this plywood or just a piece of board of suitable thickness is suitable. First you will need to cut the wheels, for these purposes you will need a drilling machine with a bat of the appropriate diameter.
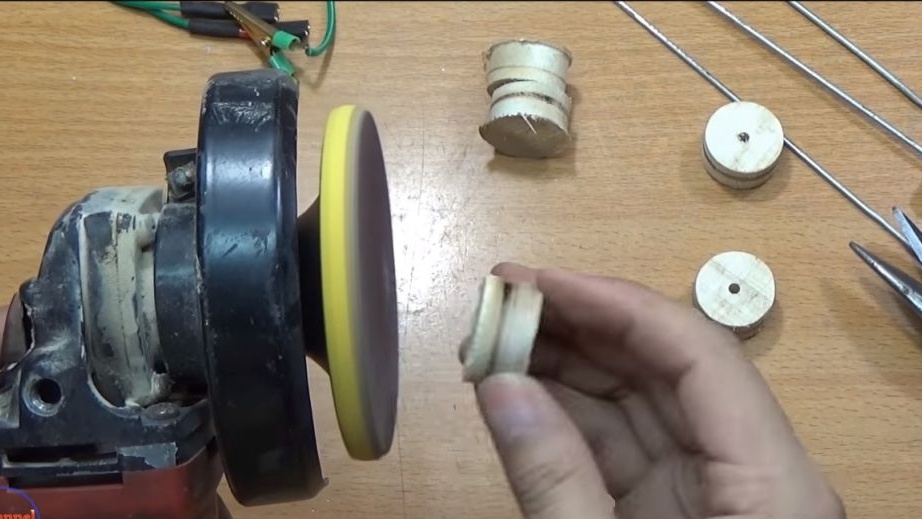
Next, we install bolts inside the wheels and fix them with nuts. We clamp the wheel into the drill chuck and form grooves. For these purposes, the author decided to use a jigsaw, a blade from a hacksaw for metal and so on is also suitable. When the main profile is formed, modify it using sandpaper. First we take large, then small, thanks to which we get excellent smooth pulleys.


Step Six Production and installation of skewers
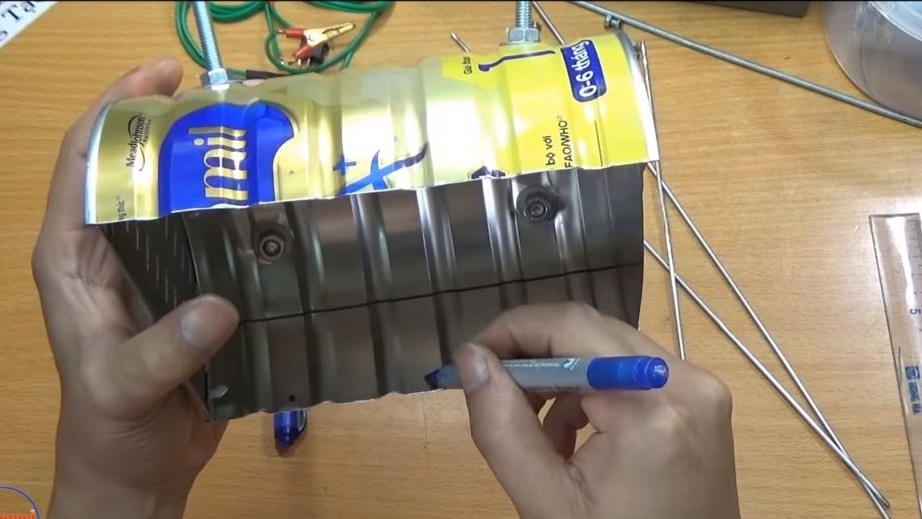
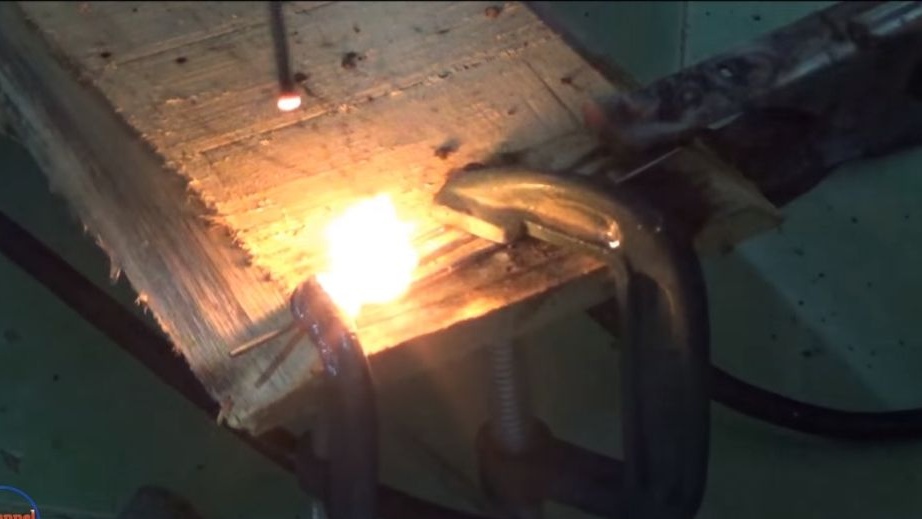
To make skewers, we take metal rods and weld them, as the author in the photo. The result is a kind of forks that will not allow the meat or sausages to turn. We grind the ends so that it is convenient to string the meat.
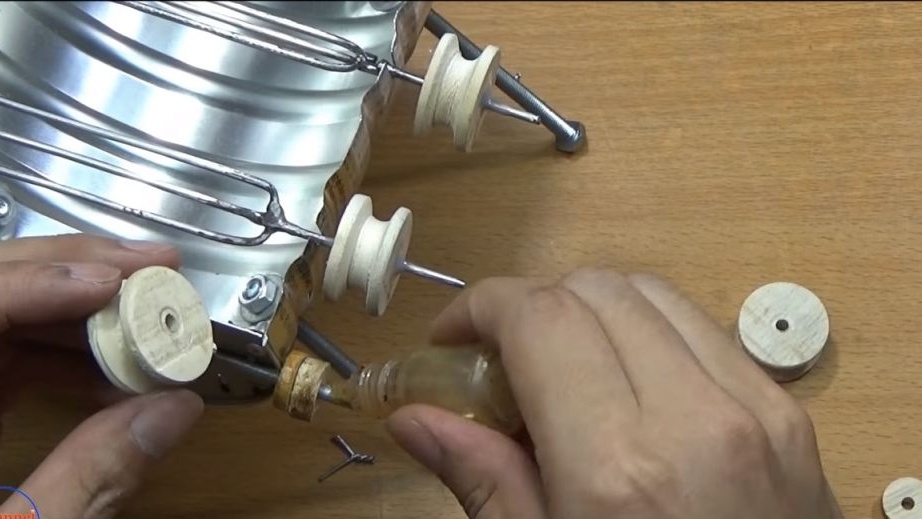
In addition to the skewers, another rod will be needed, a driven axis is made from it, which is used as a thrust, thanks to which a belt is pulled.
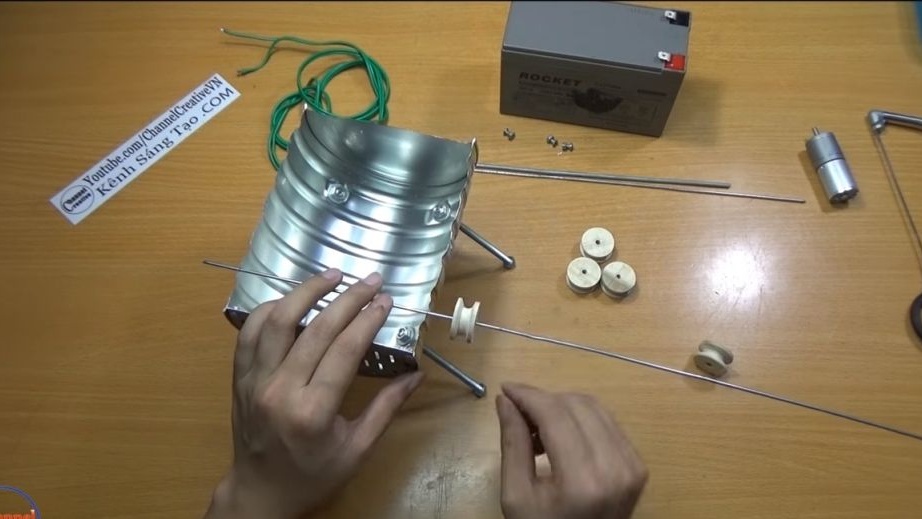
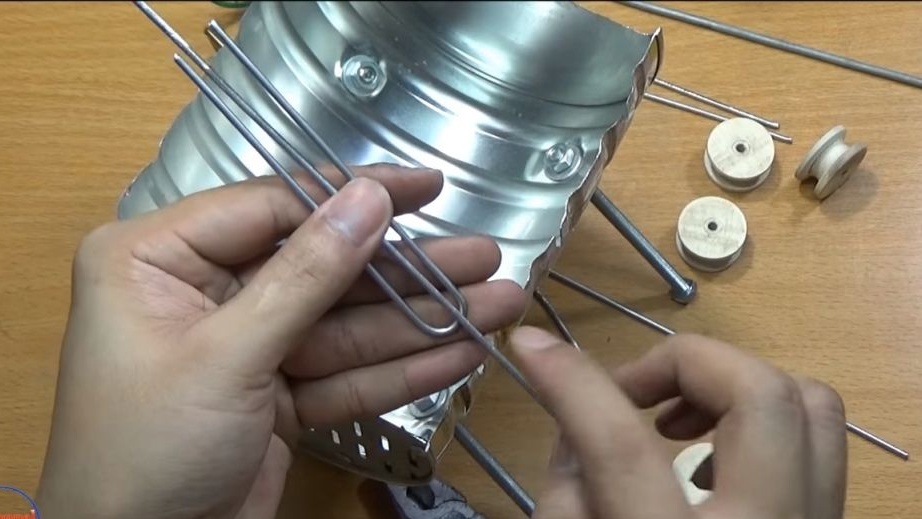

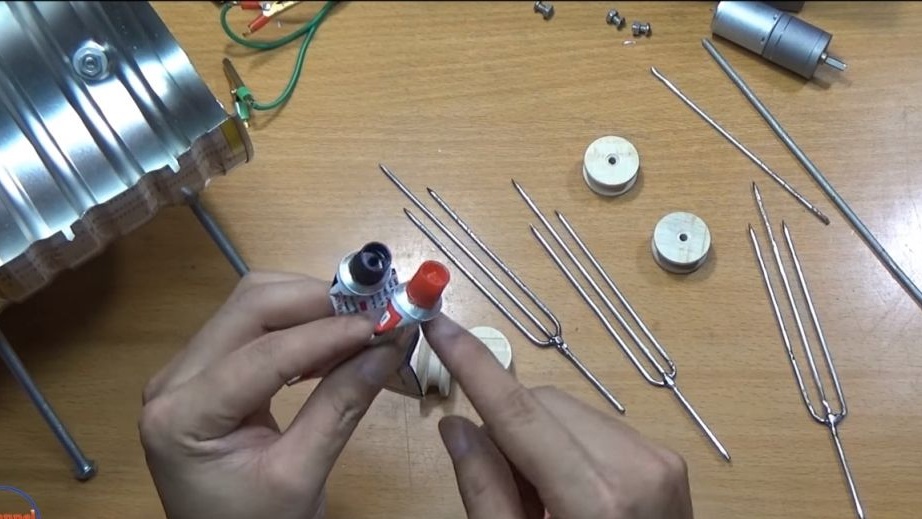
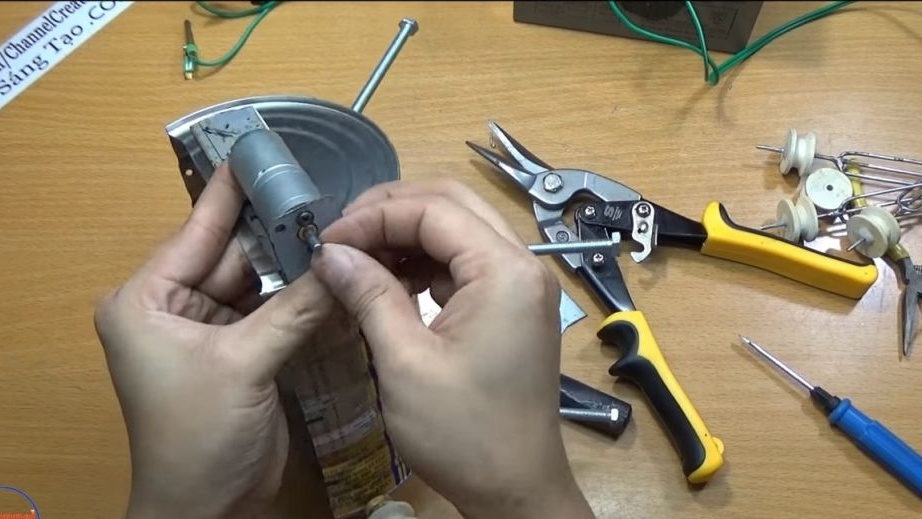
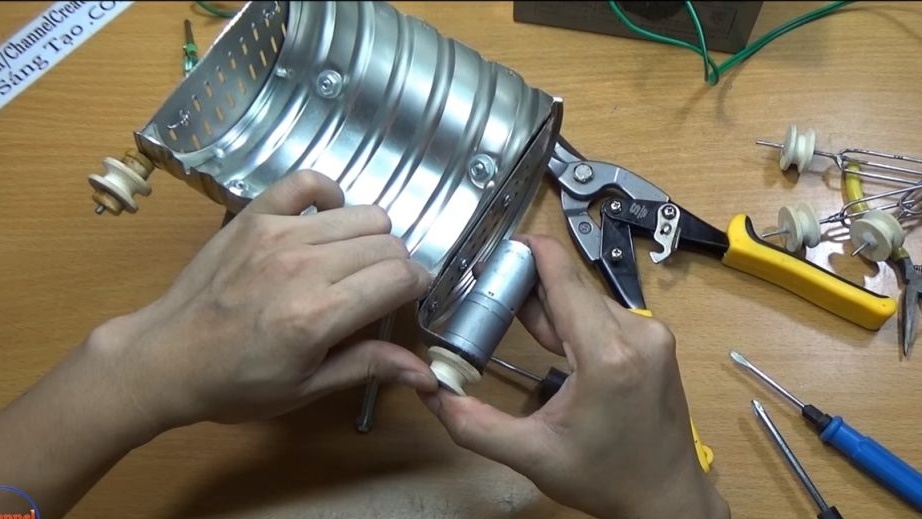
Fix the pulleys on the axles, for this purpose the author uses epoxy glue. Strip the surfaces of the rods well with a large emery cloth, so the glue will stick as tight as possible. We install a pulley in the same way on the motor shaft.
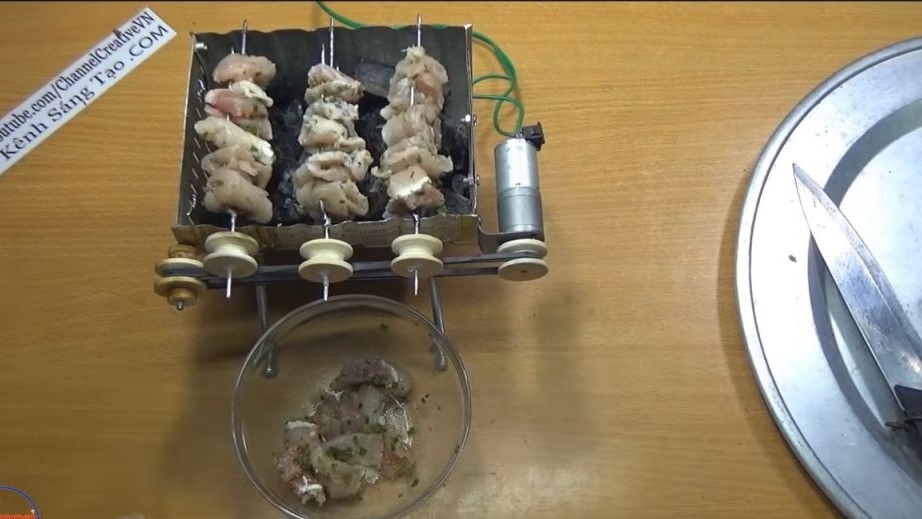
Fix the driven axis on the furnace body, for this the author used a metal wire. You will also need stops for the axis, the author used wooden wheels for this. The wheel is not glued to the driven shaft, it is simply put on and rotates on the axis. The author lubricated the axis to reduce friction.

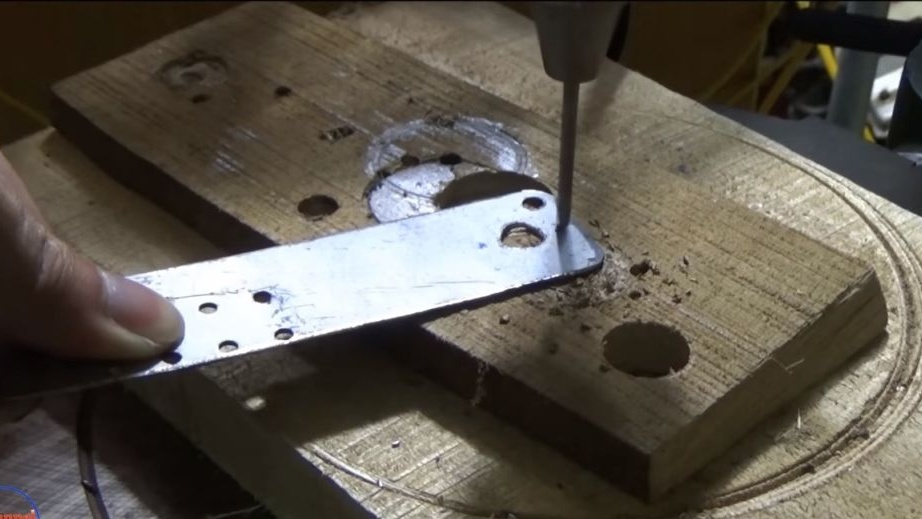
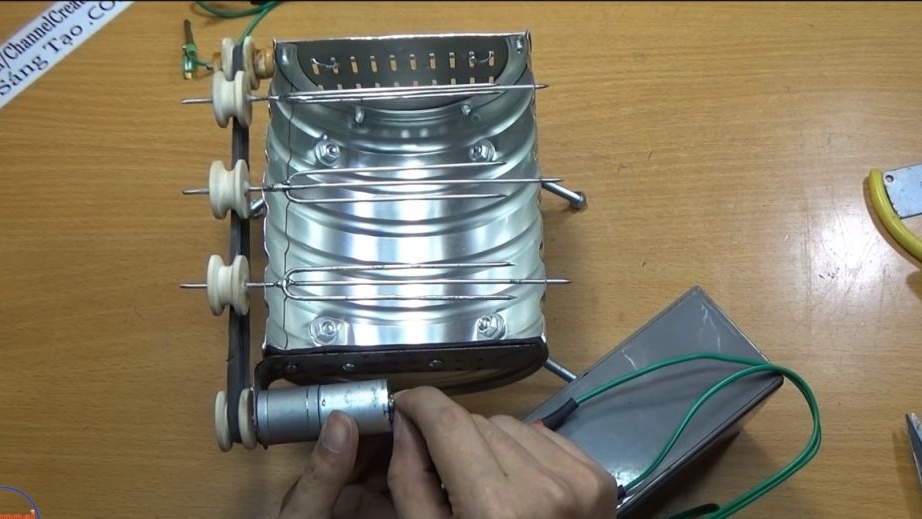
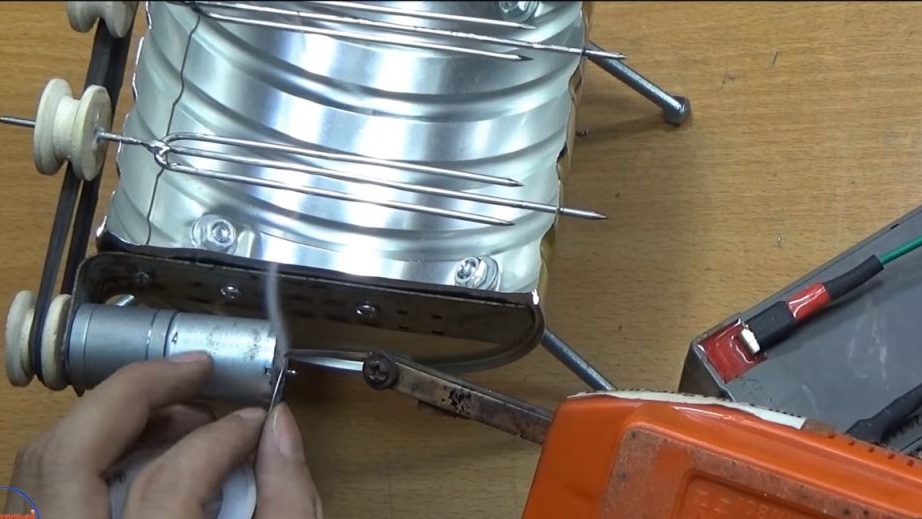
Seventh step. Motor bracket
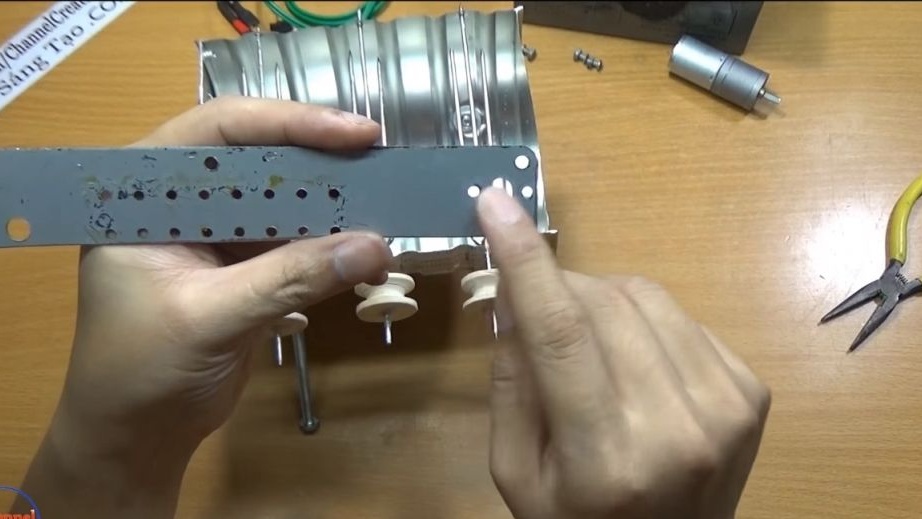
To fix the motor, make a bracket under it. For these purposes, elastic sheet steel will be required. We bend it in the form of the letter "G", and then drill three holes for the screws and motor shaft. We fasten the bracket to the furnace with screws and nuts, or using rivets. The motor itself is also attached with two screws.
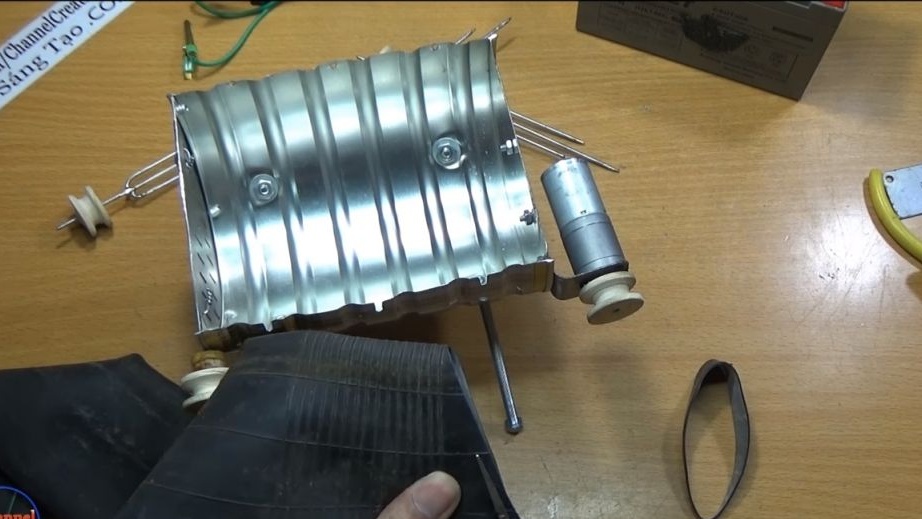
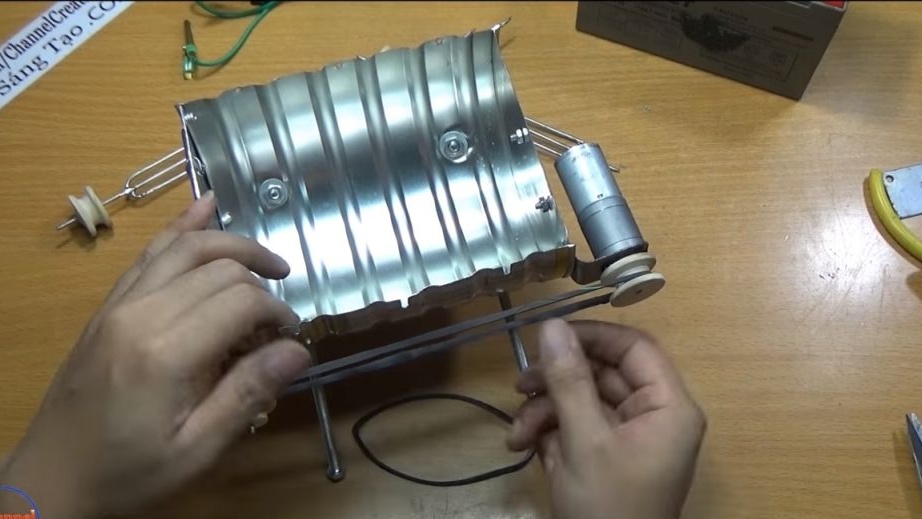
Step Eight. Production and installation of a belt
The author makes a belt from an old car camera. The distance between the driven and drive shaft was selected in accordance with the width of the chamber. Just cut two strips and put on the pulleys. If you need to tighten the belts harder, they can be cut and then glued. Skewers with pulleys are simply laid on top of the belt, this is enough for the device to work. Under the skewers in the furnace body, you need to cut out the grooves.
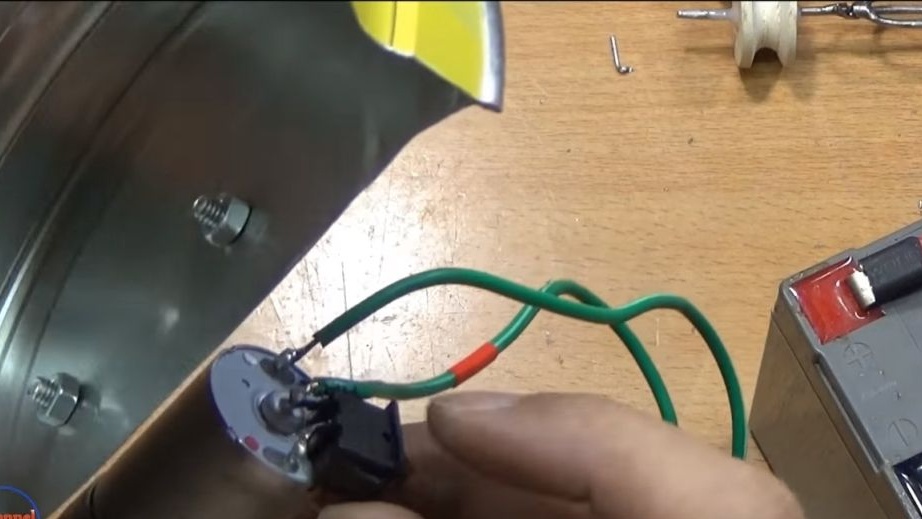
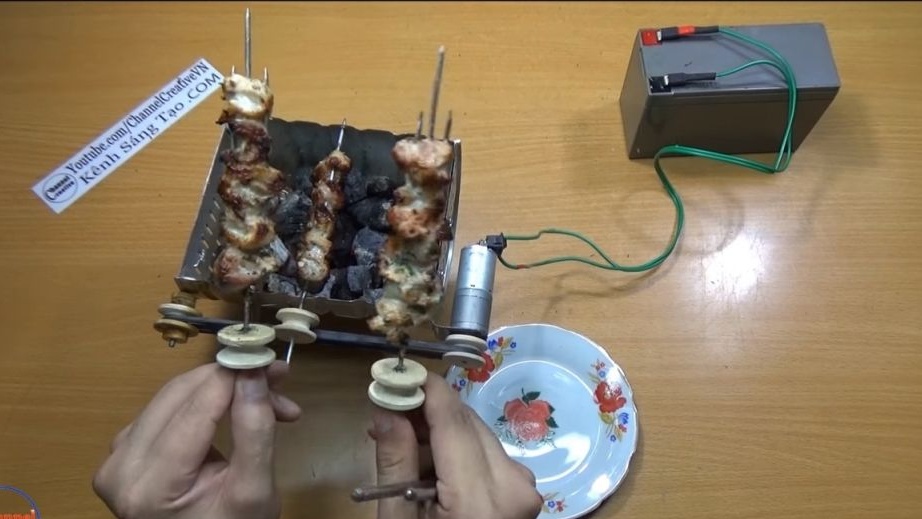
Step Nine. We connect the motor
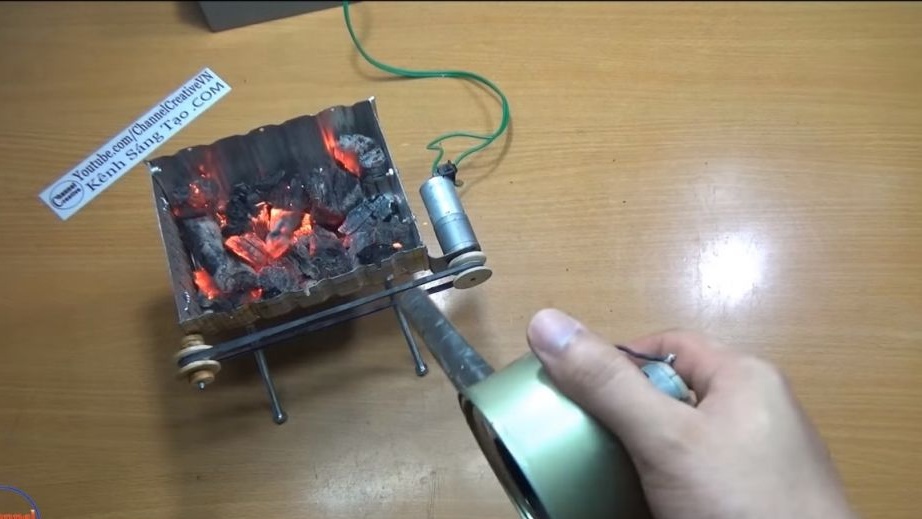
Now you can connect the motor and check how everything works! Solder the wires to the motor contacts, and also install the switch. Connect the battery and check the operation. The direction of rotation does not matter much here.
Step Ten Testing the device!
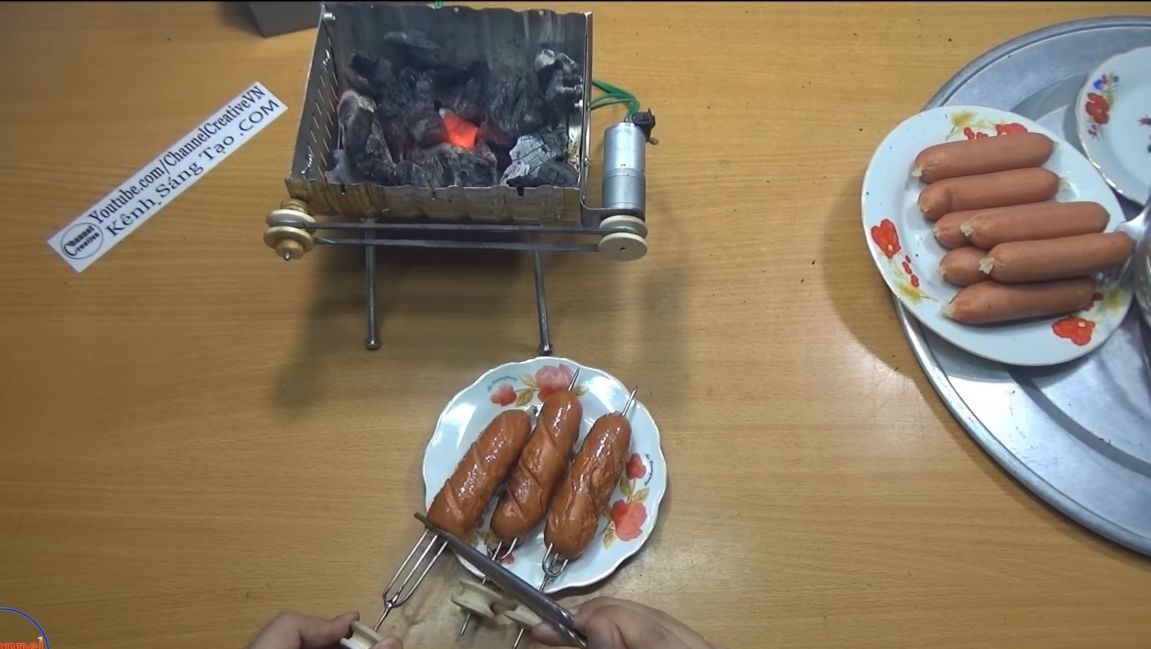
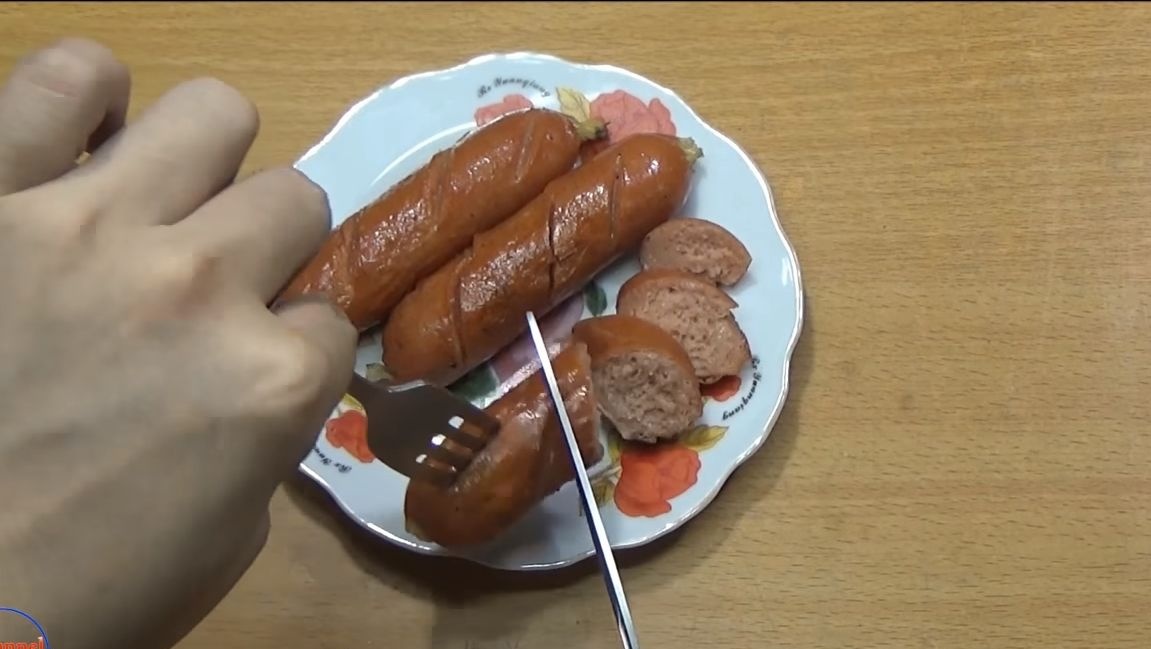
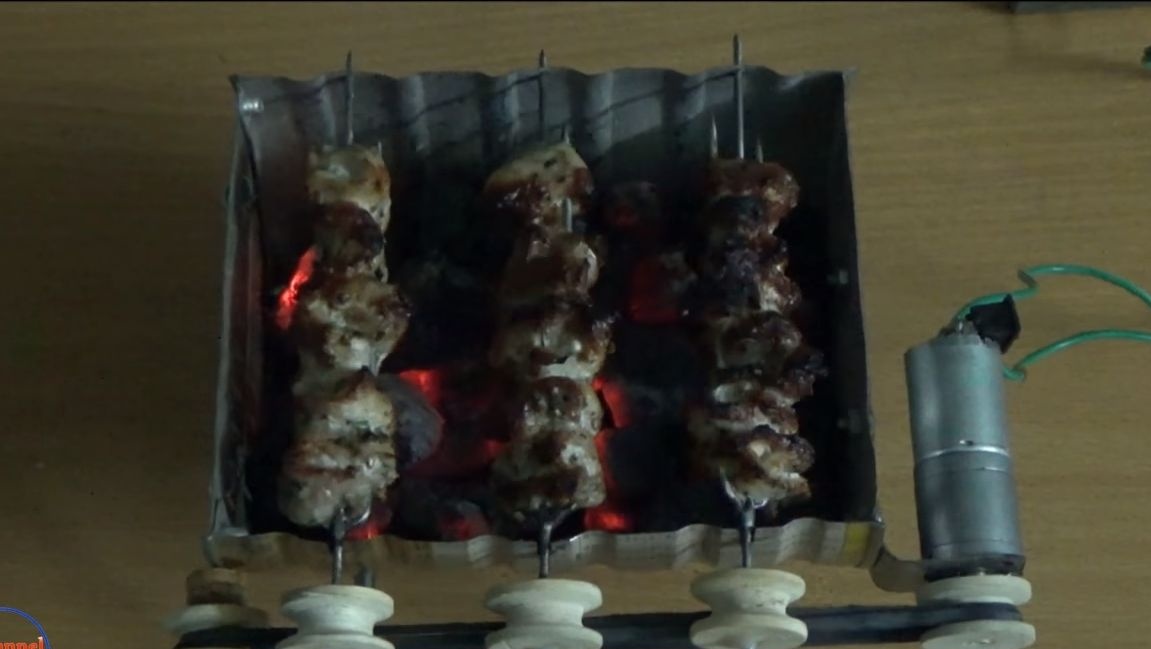
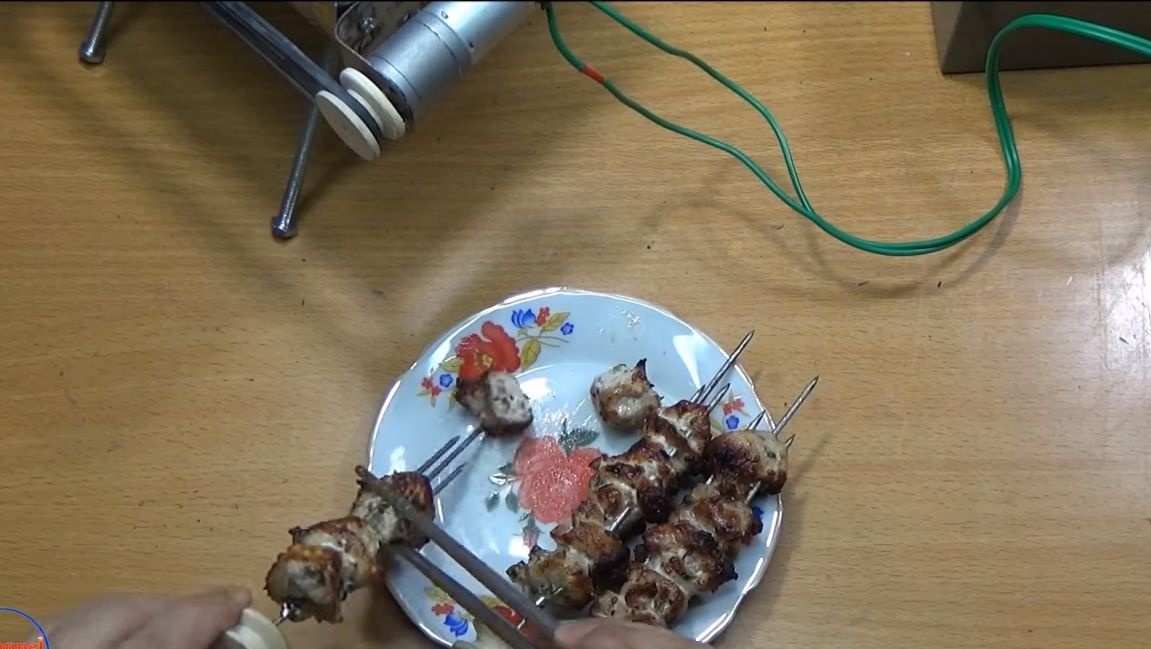
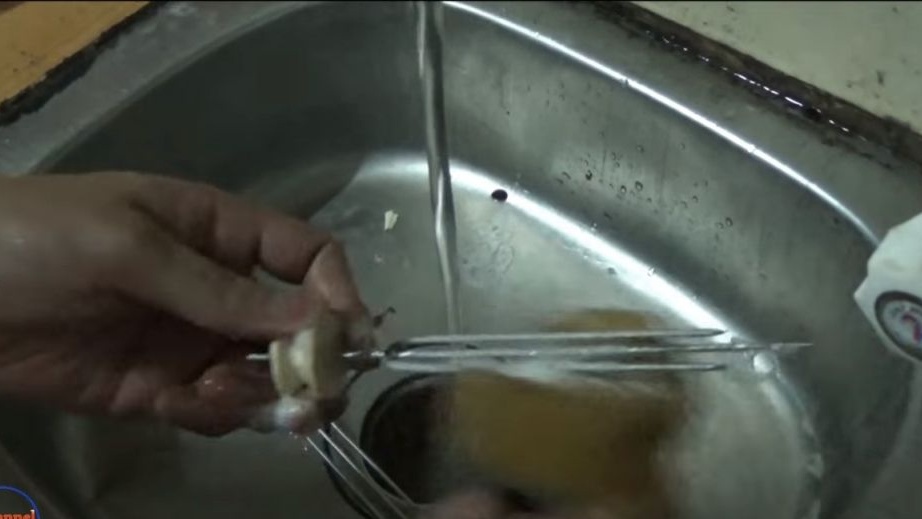
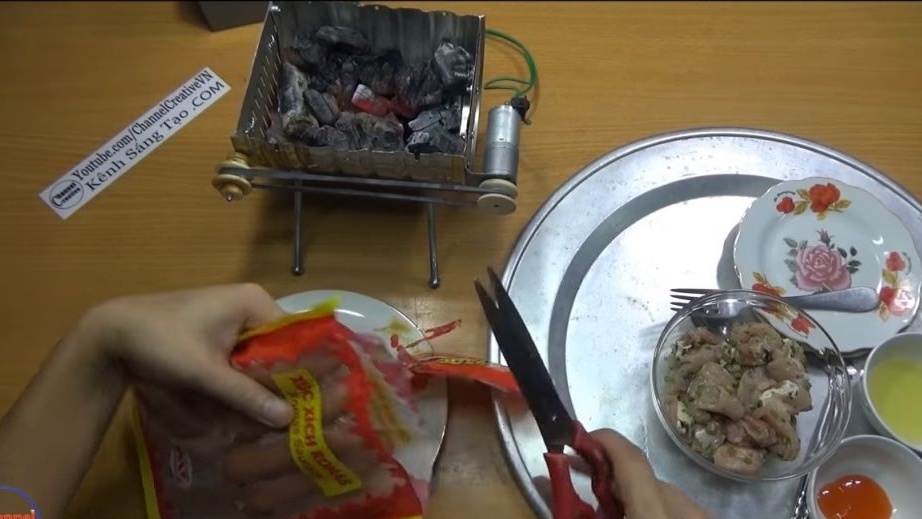
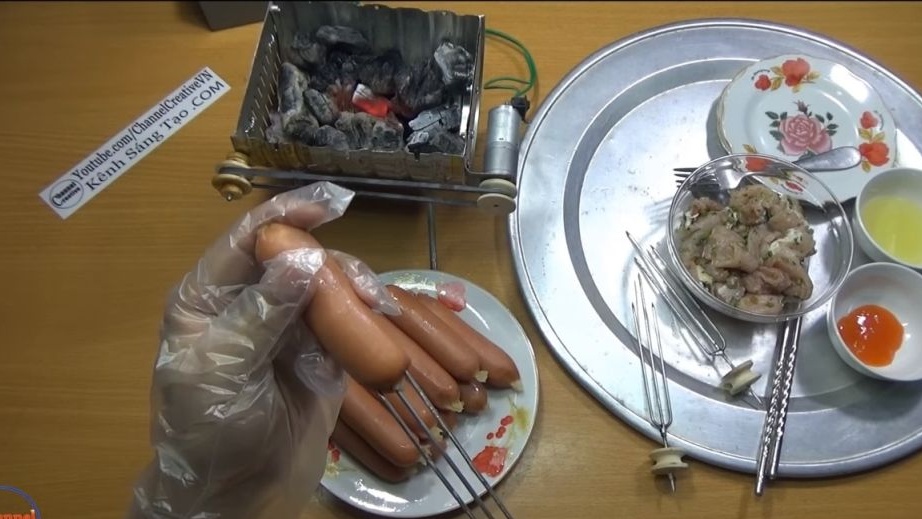
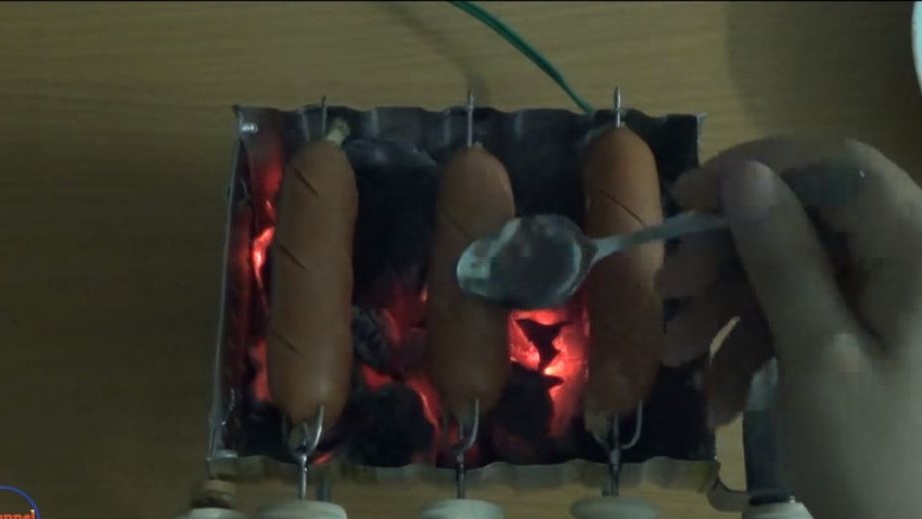
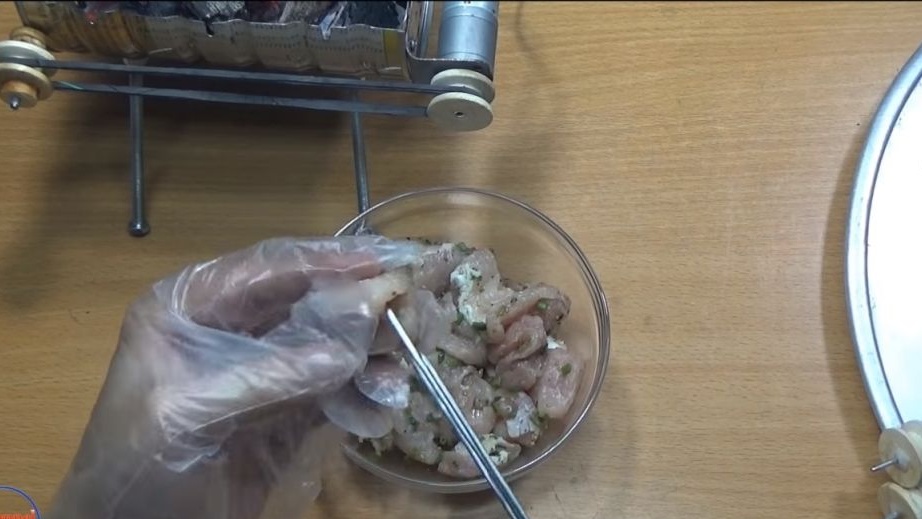
Before using the grill, wash the skewers with detergent thoroughly. Well, then you can start testing. We string meat or sausages at your discretion. We pour coal into the furnace and set it on fire. The author inflates the coals with a homemade miniature blower, which is very convenient. Well, then install the skewers, turn on the motor and monitor the process! Everything works fine for the author, the barbecue was fried without any problems.
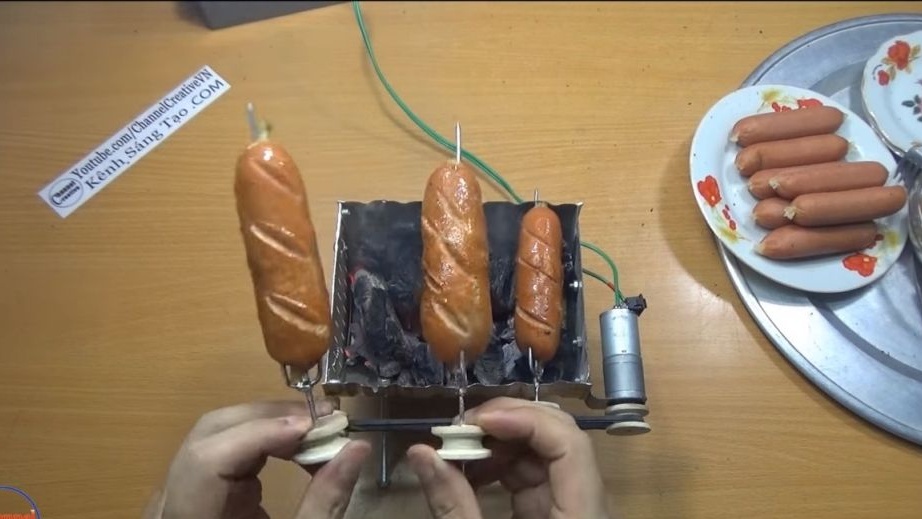
That's all, I hope you liked the project, and you found something new for yourself. Good luck and creative inspiration in the manufacture. Do not forget to share your best practices with other site visitors!