

A fairly simple to manufacture, collapsible device for splitting chips of different thicknesses, in which the main working tool is a machete.
Now already in full swing is another country season. At the same time, many summer residents come to their sites on weekends, and some spend almost the entire summer at summer cottages or in country houses.
Naturally, in a country life it is impossible to do without kindling a fire. Indeed, many summer residents, houses have stoves or fireplaces. And who does not have a stove in the house, as a rule, there is a bath with a stove. Well, and those who have not yet managed to get a bath, always have a barbecue for cooking barbecue and barbecue. Therefore, almost all summer residents or owners of country houses have to make a fire.
Well, in order to easily light a fire, you must have the means to light it. Perhaps the best option for such a tool is wood chips. This is an environmentally friendly material, and in addition, wood chips can be easily prepared do it yourself, for example, pricking it from scraps of boards, which in our time, are available in almost every country house.
However, if there is no problem with the material for the production of wood chips, then with the methods for its production, things are not so smooth.
I must say that the traditional and easiest way to manually harvest wood chips is to chop it with an ax.
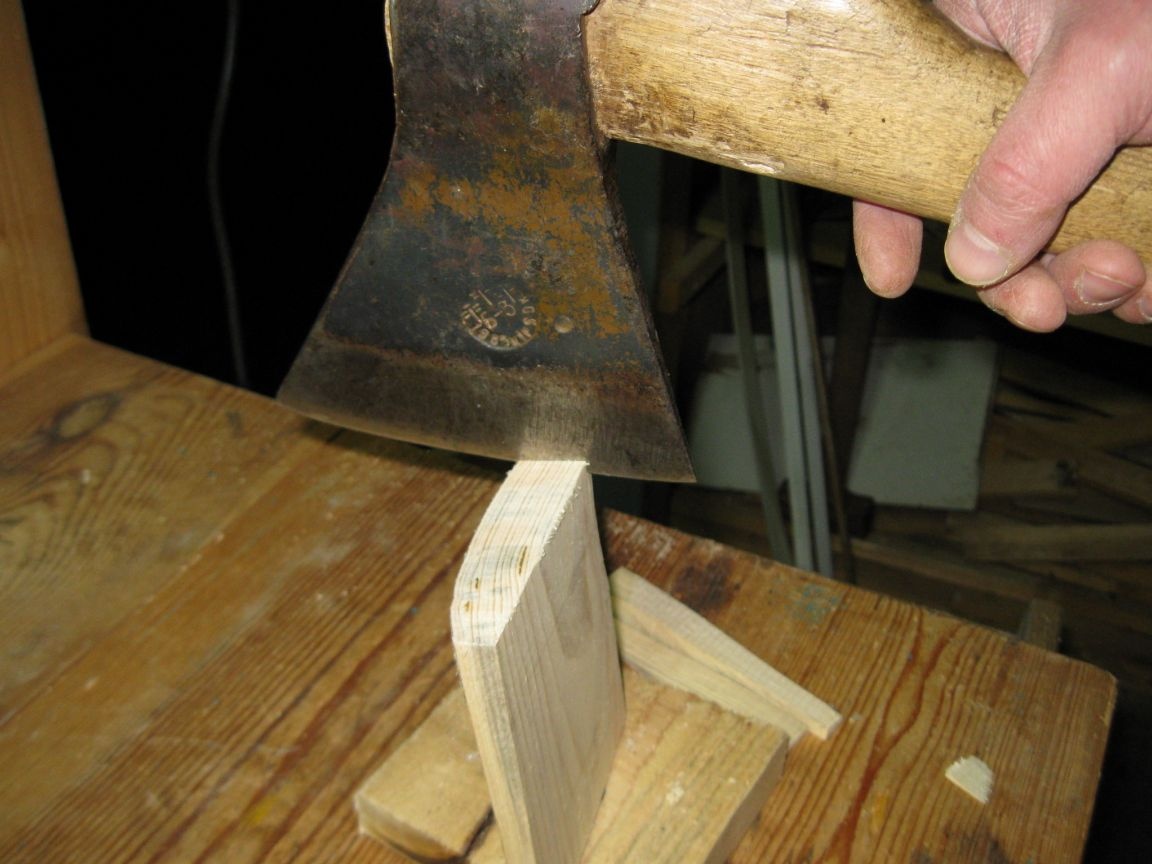
However, in this method, there are two significant drawbacks. The first drawback is very low accuracy, since it is very difficult to get chips of the required thickness when chopping with an ax. The second drawback is the great trauma of this method, since an ax can be very injured, especially if a person does not have good skill and practice.
These shortcomings are connected with one essential point. The fact is that when chopping with an ax, there is always a swinging moment, that is, when the ax rises slightly higher than the workpiece to be cracked, in order to stock up more energy and then lowers with force. It is this swing that lowers the accuracy of the hit.
Moreover, despite the fact that when splitting chips, the backswing is very small, but it also significantly reduces accuracy. As a result, the thickness of different chips can vary by several millimeters.
That is why, I decided to abandon the ax when chopping chips, and instead make a simple device in which the machete would serve as the main tool for chopping.
I must say that in my household there is such a machete.
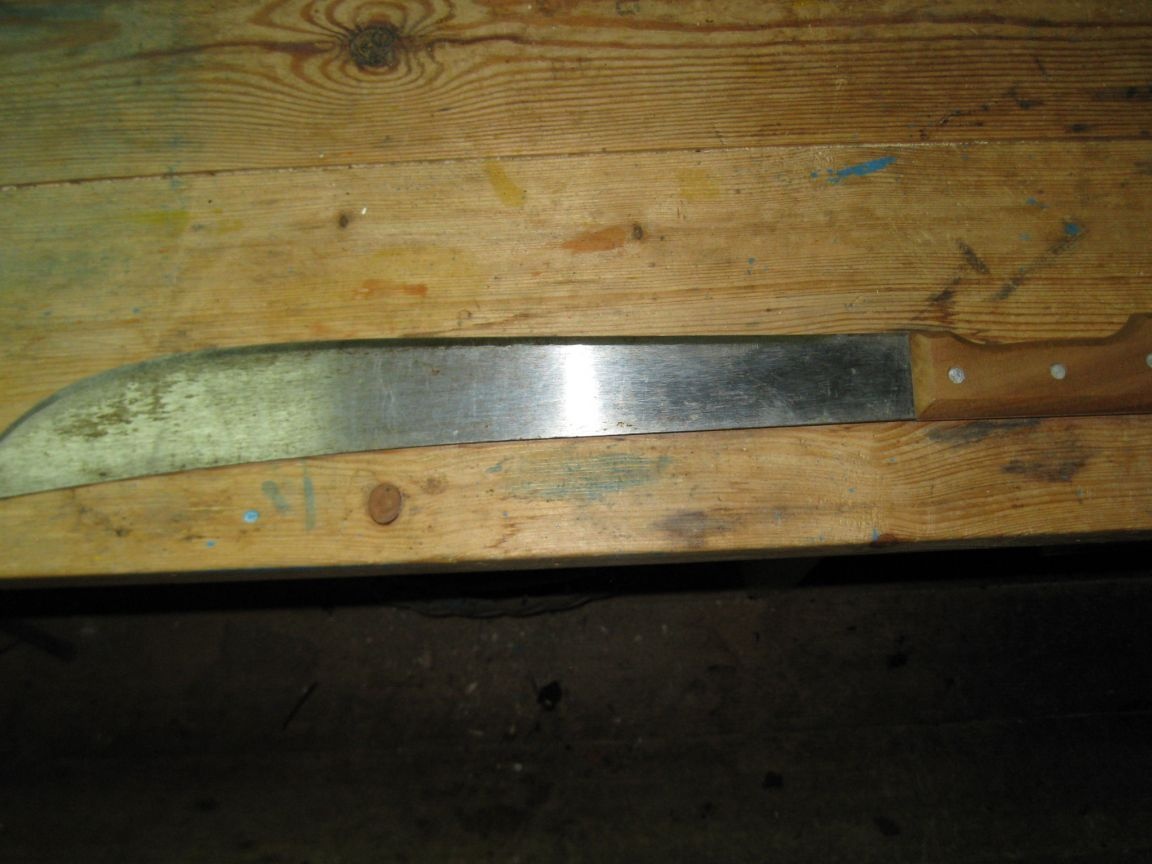
And as it turned out, the machete is a very good tool for many summer cottages. For example, I have been using a machete for many years in gardening.
So, in spring and autumn it can be used as an additional and very effective tool for pruning trees and shrubs. In summer, they can chop down the thick stems of some plants (sunflower, Jerusalem artichoke, stalks of cabbage, etc.), chop the greens for home birds, as well as easily and quickly cut cabbage, pumpkins, zucchini, as well as watermelons and melons. In general, as I was convinced, the machete is a very necessary and useful tool in the summer cottage.
And now, it can also be used for the production of chips.
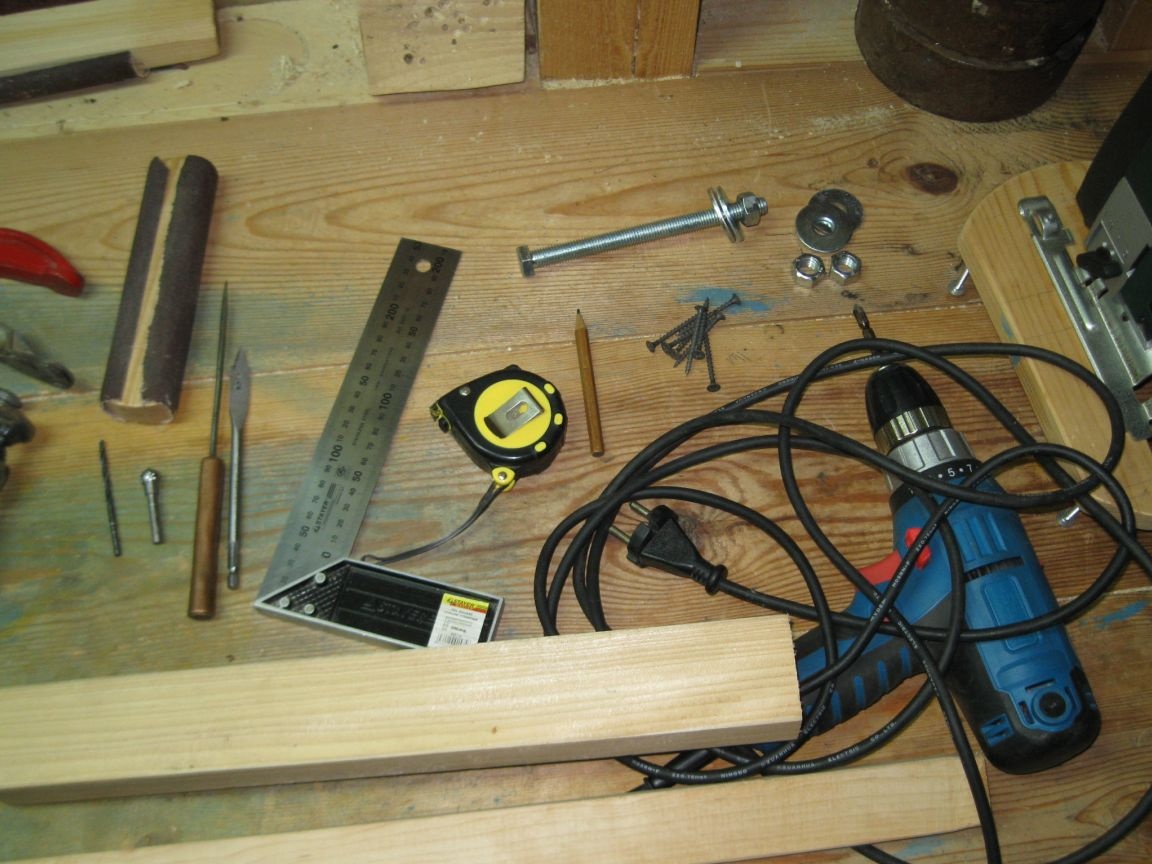
Naturally, in addition to the machete itself, for the manufacture of this device I needed other accessories:
Materials and fasteners:
• Wooden block 4 cm thick, 5 cm wide, and 30-40 cm long.
• Wooden plank 1.5 cm thick, 4 cm wide, and 80-100 cm long.
• Wood screws 4x45 mm.
• M12 bolt, 160 mm long, with four washers and three nuts.
Instruments:
• Drawing and measuring tools (pencil, tape measure and square).
• Awl.
• Electric jigsaw with a file for a figured cut.
• Electric drill / screwdriver.
• Drill for metal with a diameter of 4 mm.
• Feather drill on a tree with a diameter of 12 mm.
• Spherical wood milling cutter.
• Screwdriver bit PH2, for screwdriving.
• Clamp.
• Two 21 mm spanners.
• Sandpaper.
The manufacture of the device.
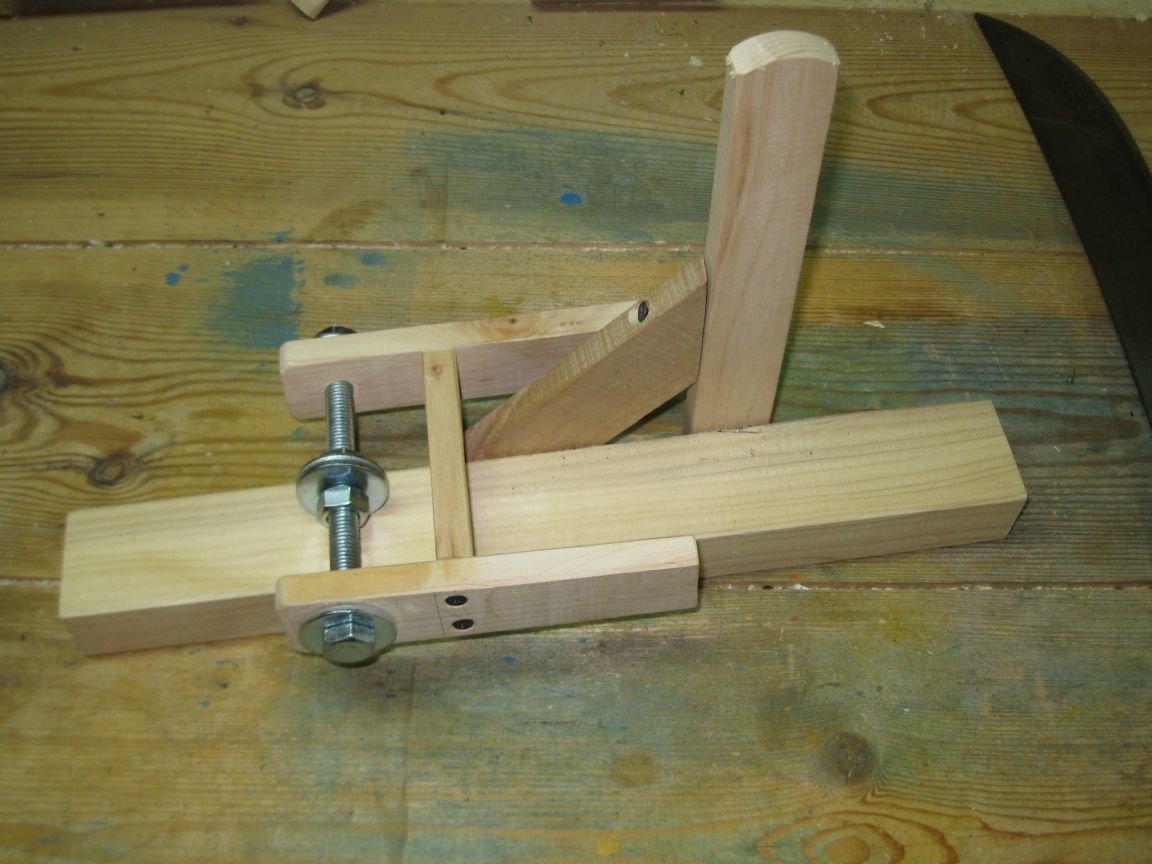
I decided that this device will consist of two main parts: the machete holder and the guide part. These parts can be easily and quickly mounted on a workbench using clamps.
Stage 1. Making a machete holder.
This holder will serve to secure the tip of the machete blade on the rotating axis.
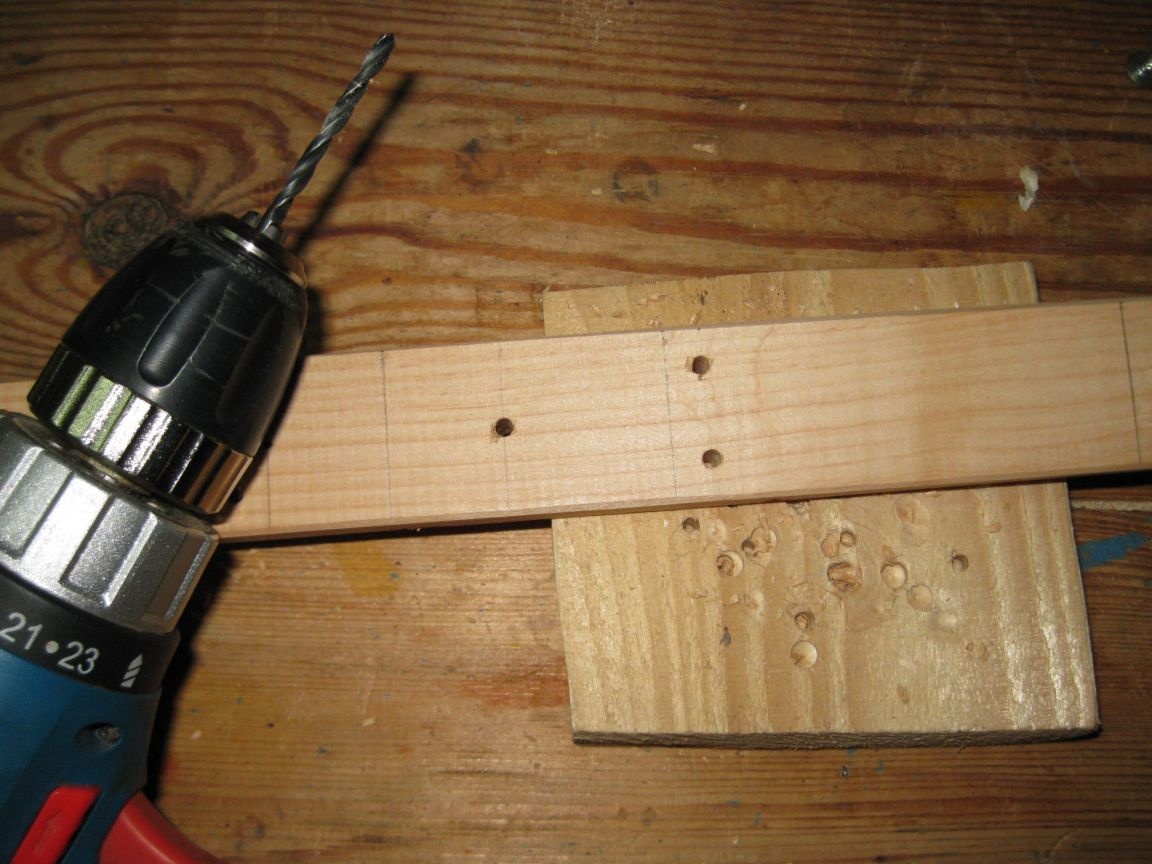
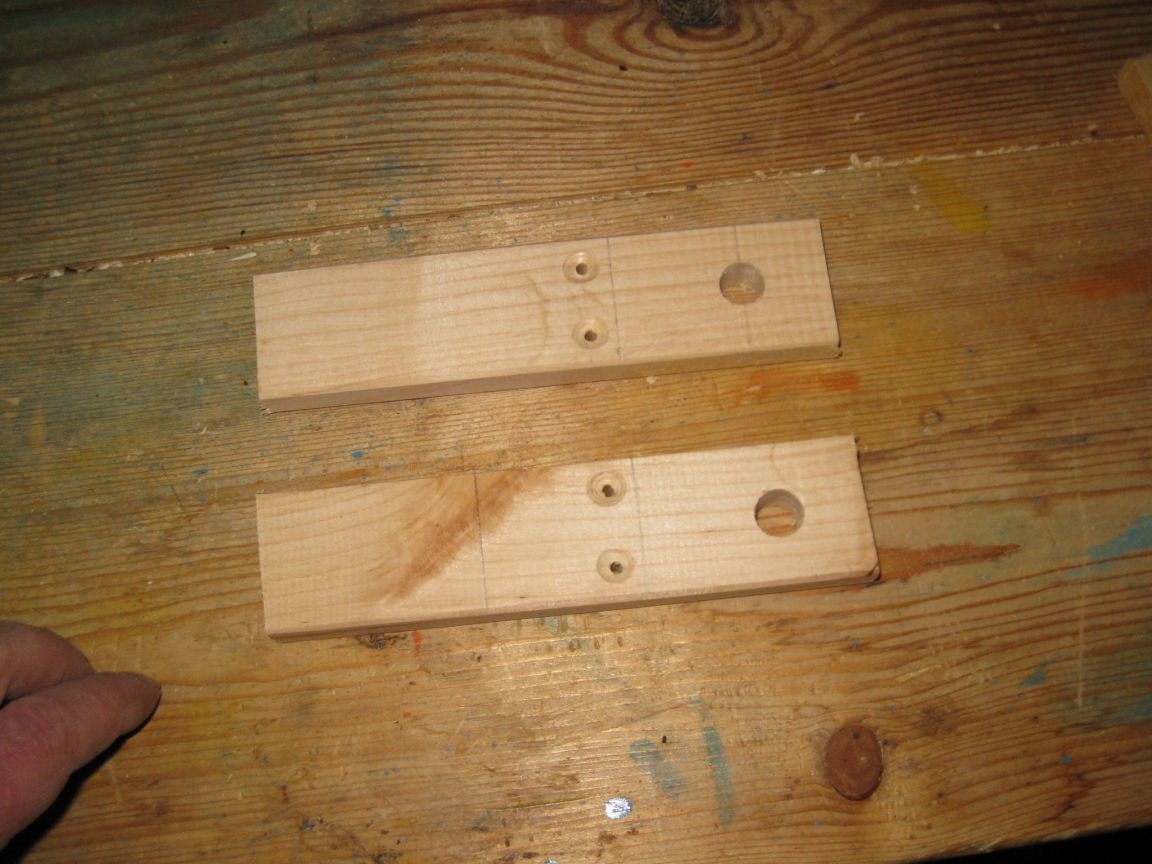
Step 1. Drilling holes.
We mark the workpiece on a wooden plank and drill three through holes in it with a diameter of 4 mm.
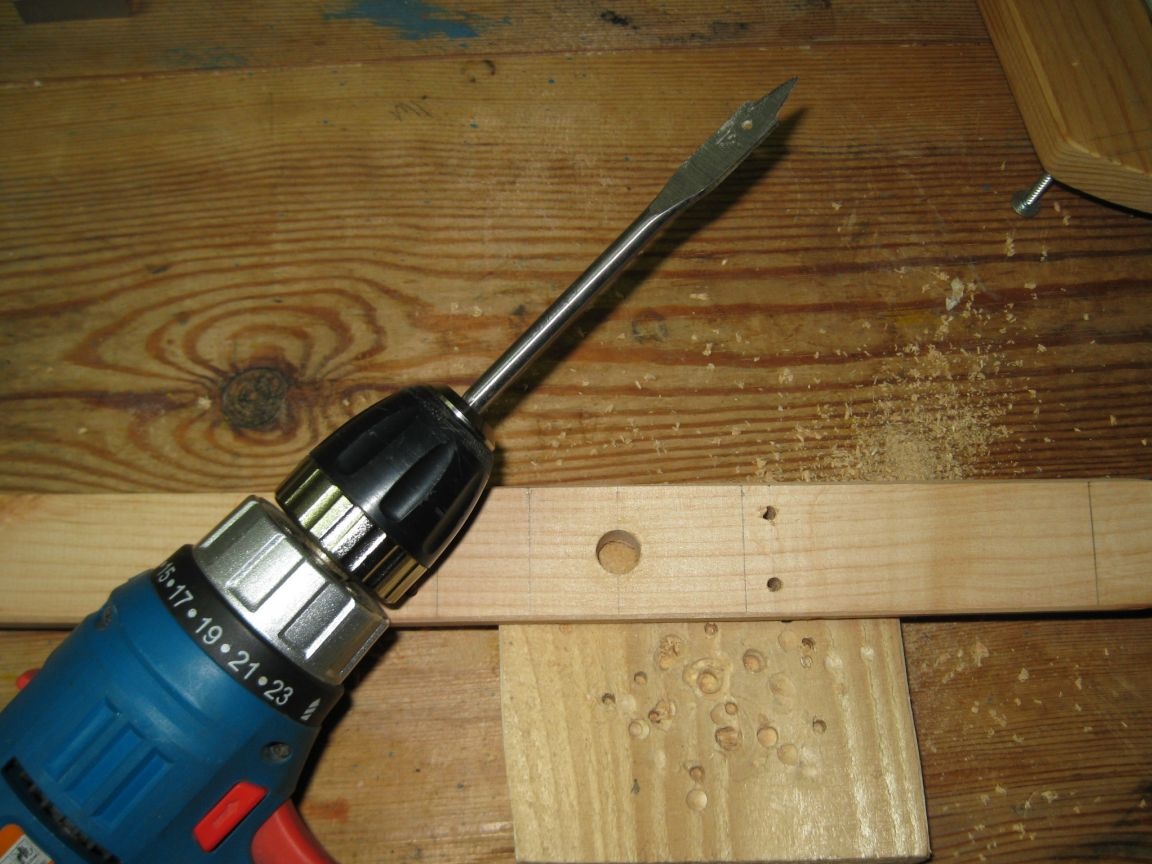
Step 2. Drilling a hole for the M12 bolt.
Using a feather drill on wood, drill a central hole with a diameter of 4 mm, up to a diameter of 12 mm.
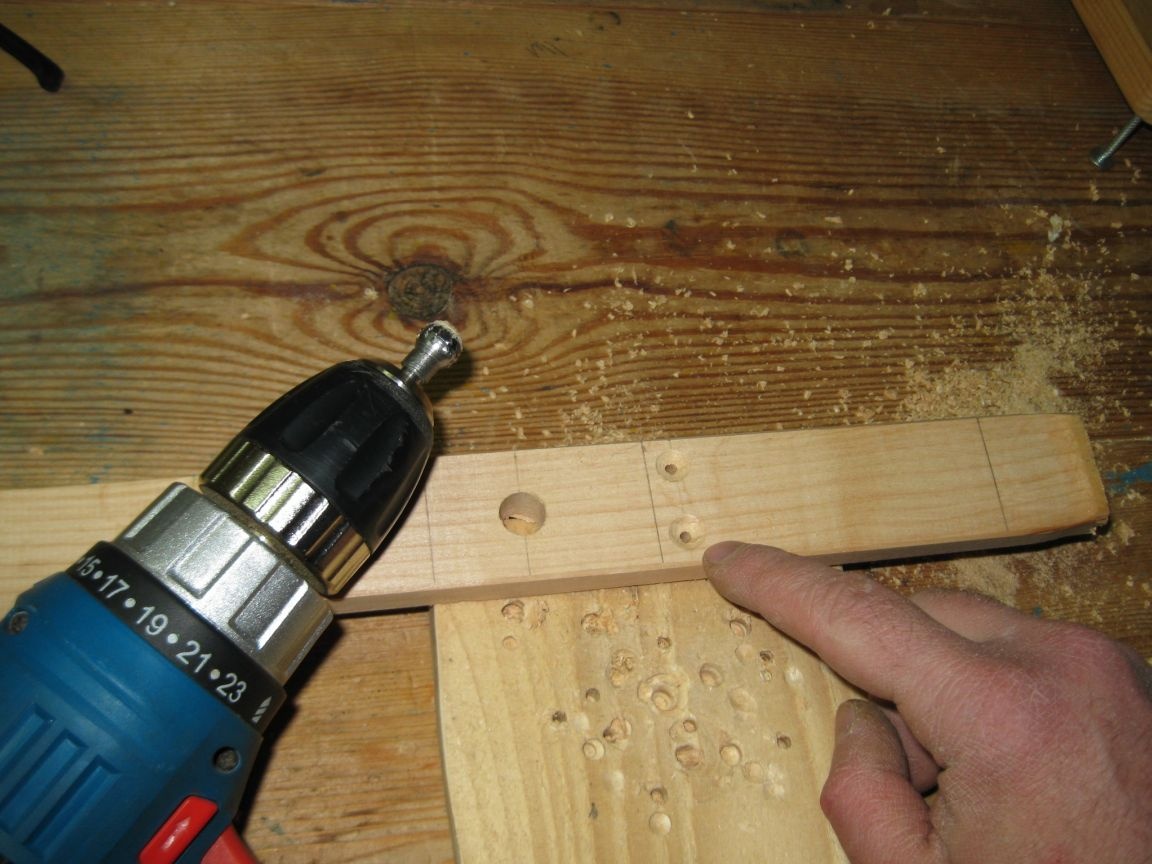
Step 3. Countersinking of holes for screw heads.
Using a spherical mill on a tree, countersink the ends of two holes for countersunk heads of screws.
Step 4. Sawing off the finished part.
Using a jigsaw, saw off the finished part.
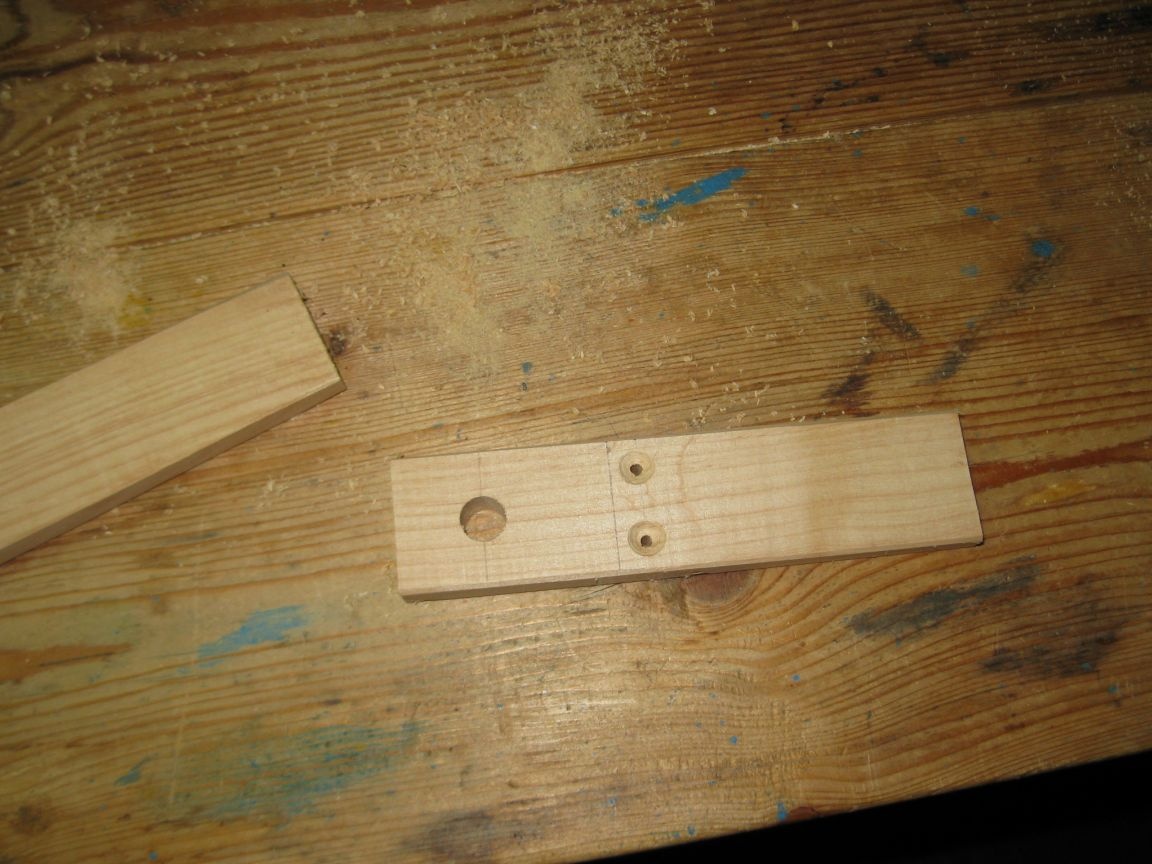
In the same way, repeating in order all the previous steps, we make the second same part.
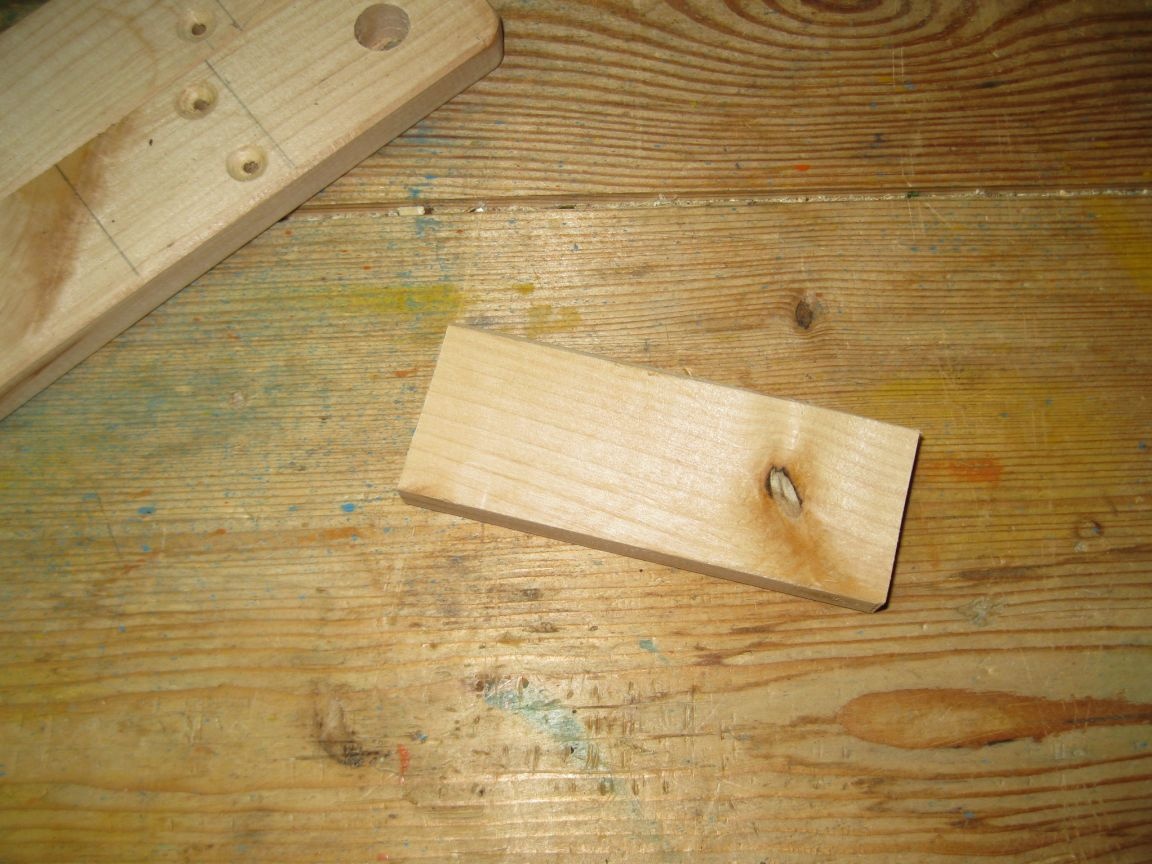
Step 5. Sawing the jumper.
Using a jigsaw, we cut out another part that will serve as a jumper.
Step 6. Assembling the machete holder.
Using a screwdriver, we fasten the first part to the jumper with wood screws.
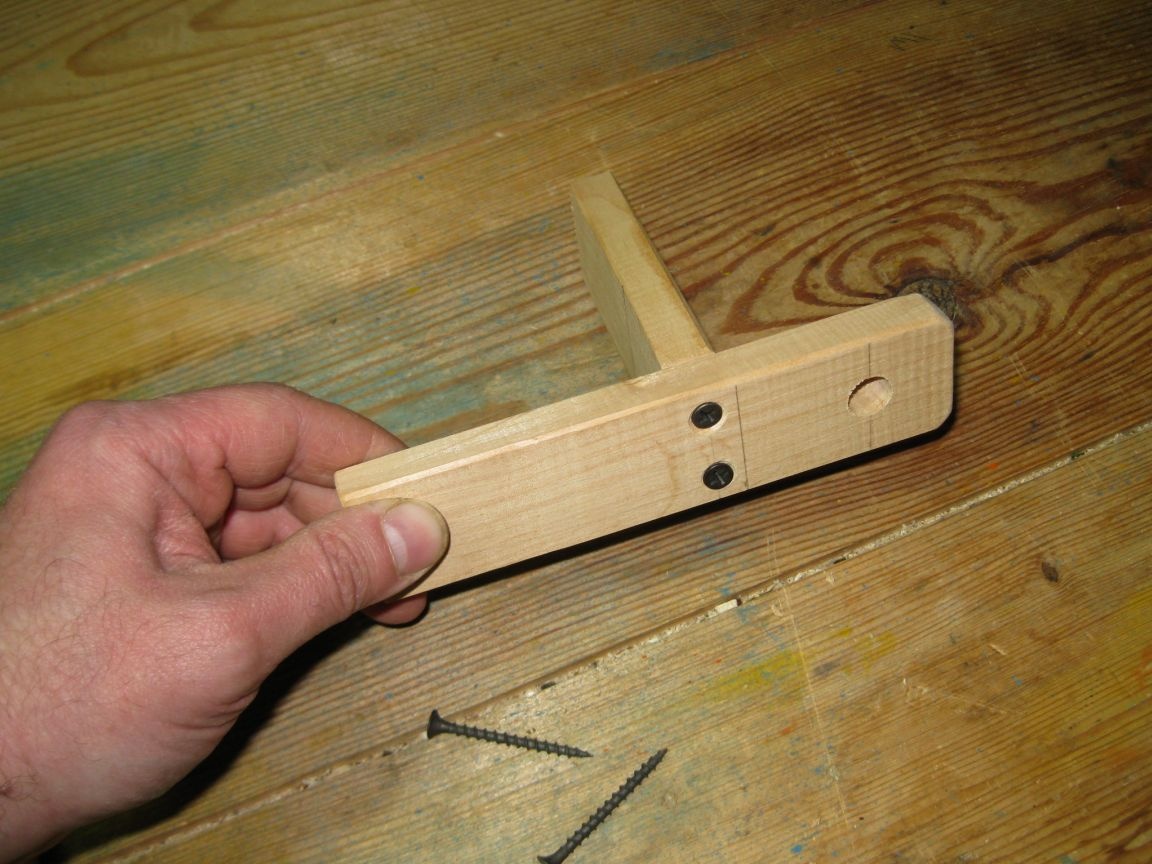
And then, we also fasten the second part, getting a finished holder.

This holder will then be mounted on a vertical beam above the workbench.
Stage 2. Production of the guide part.
The guide part will serve to install the trim board, from which we will chip chips.
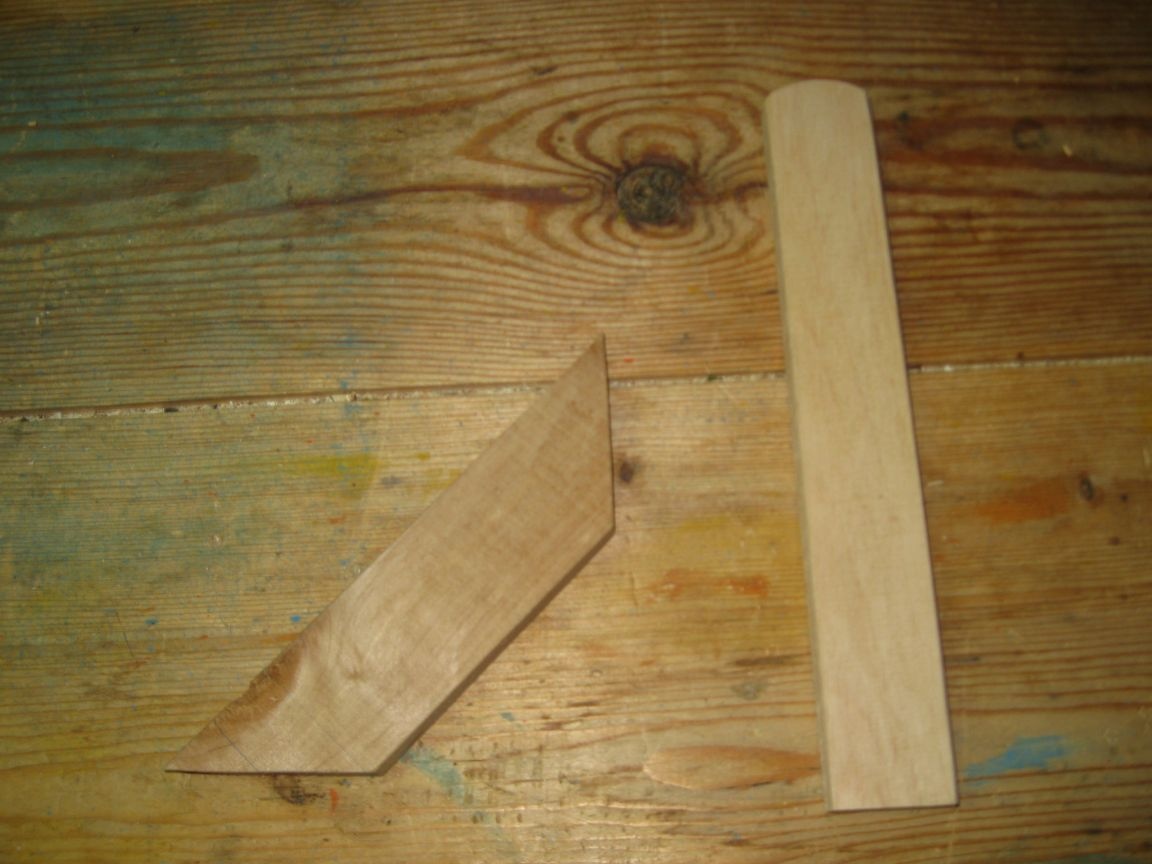
Step 1. Sawing blanks of the guide bar and mowing.
Using an electric jigsaw, we cut out the workpieces of the guide bar and the mowing.
Step 2. Drilling holes for screws.
In the above blanks, we drill holes with a diameter of 4 mm, for screws.
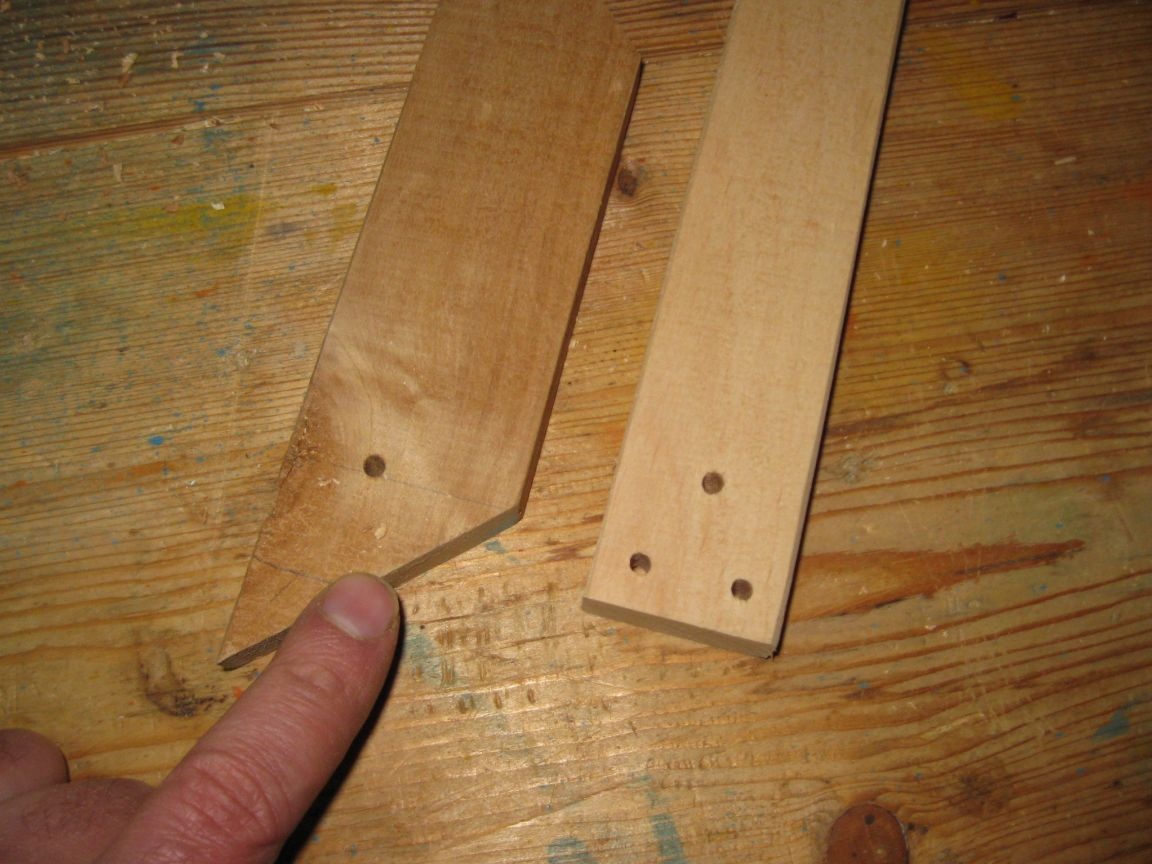
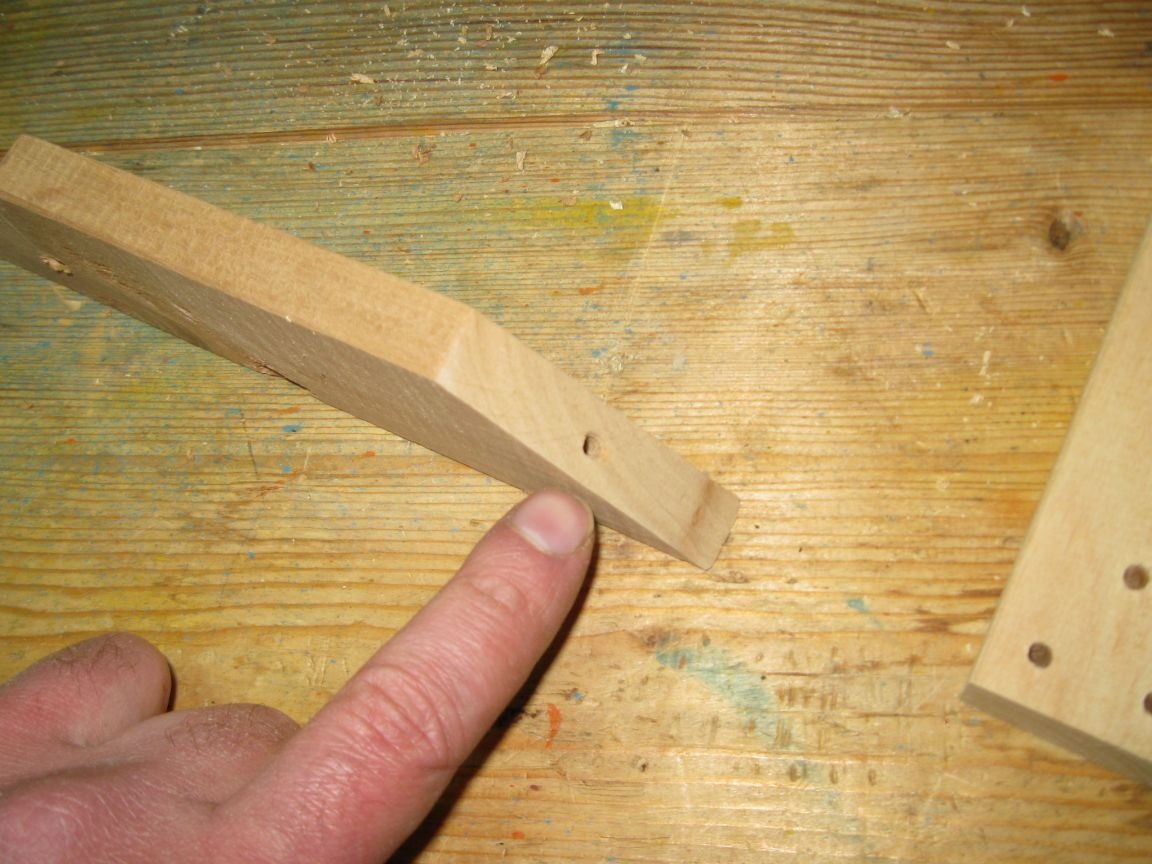
Step 3. Countersinking of holes for screw heads.
Using a spherical milling cutter on wood, countersink holes in our blanks for countersunk screw heads.
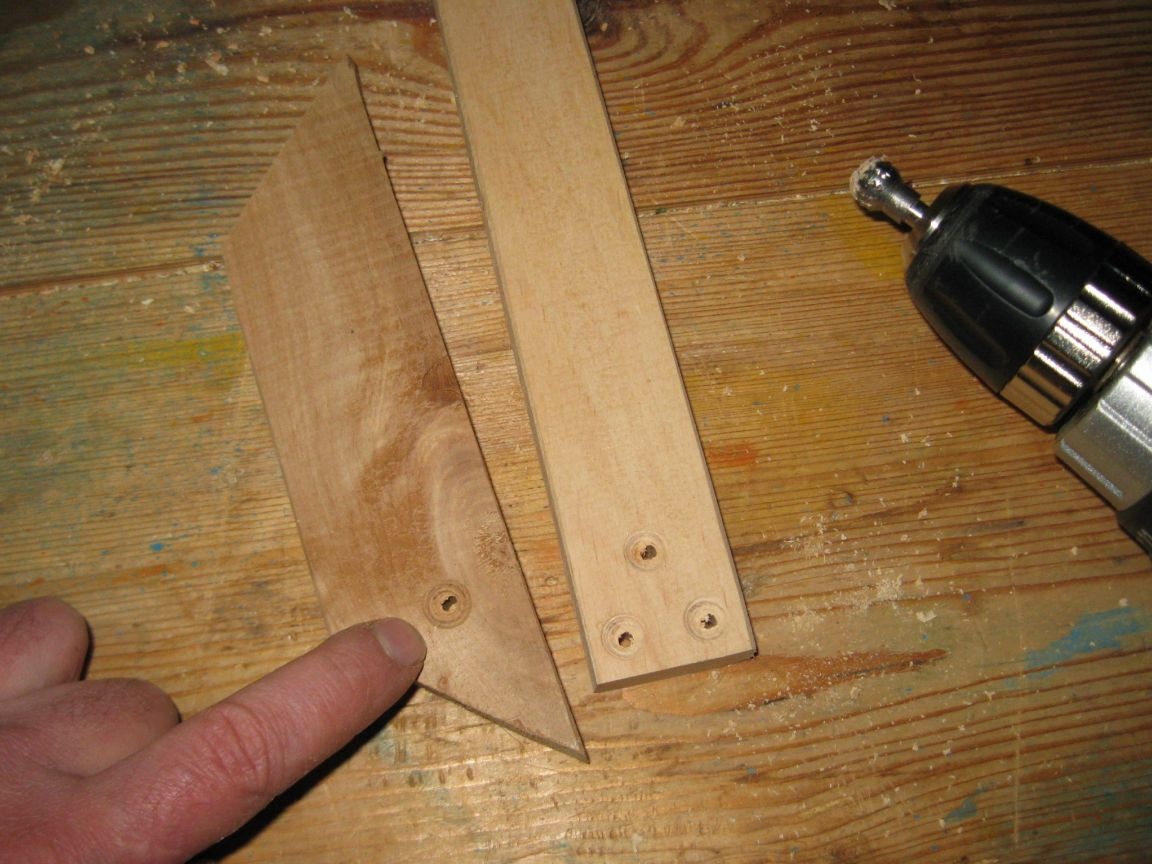
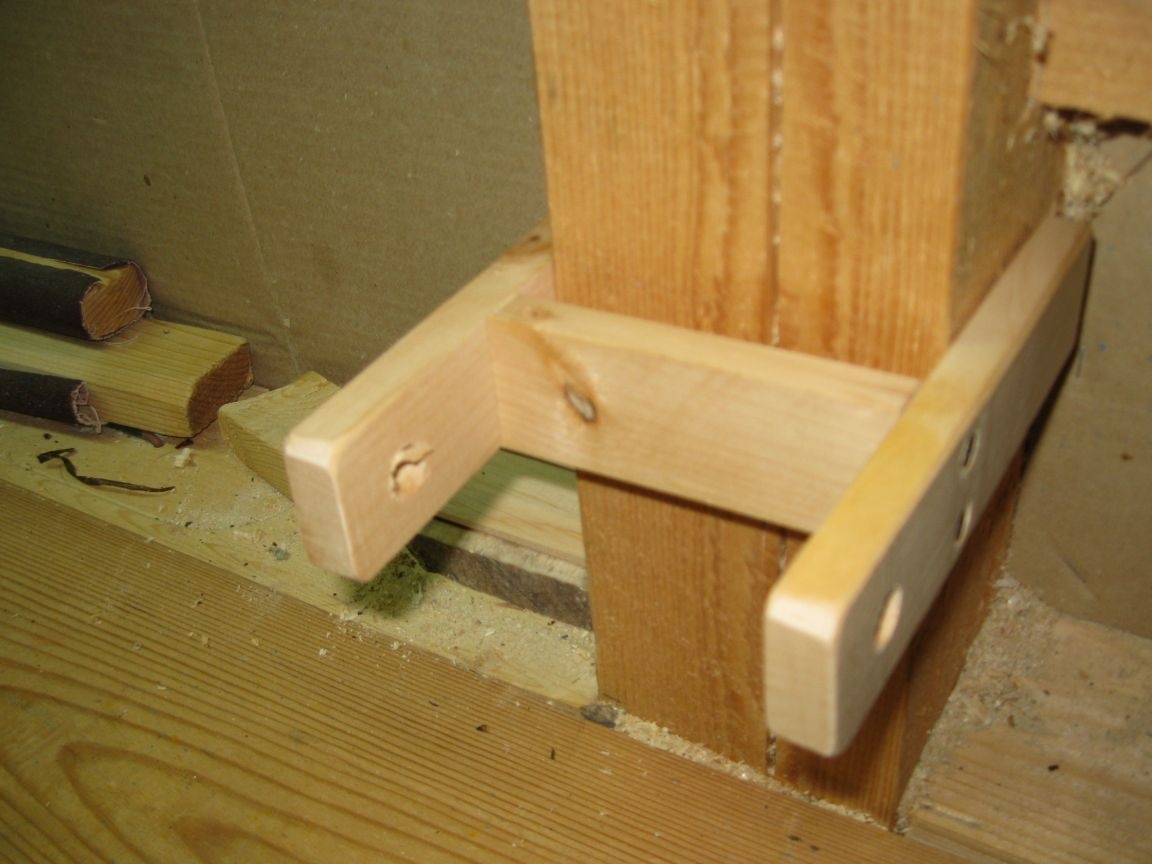
Step 4. Assembly of the guide part.
Using a screwdriver, we fasten the guide rail perpendicular to the bar with wood screws.
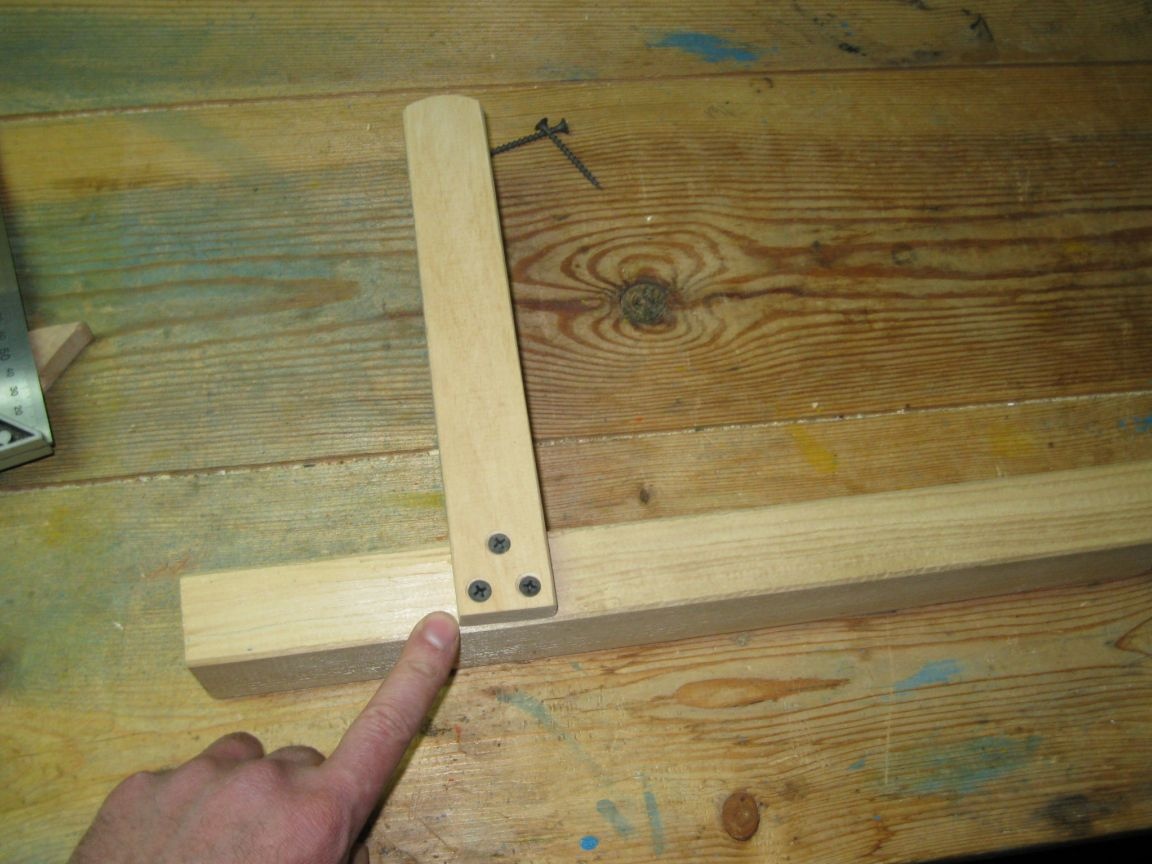
And then we fasten the mowing, one end to the bar, and the other to the guide bar, giving it, thus, additional rigidity.
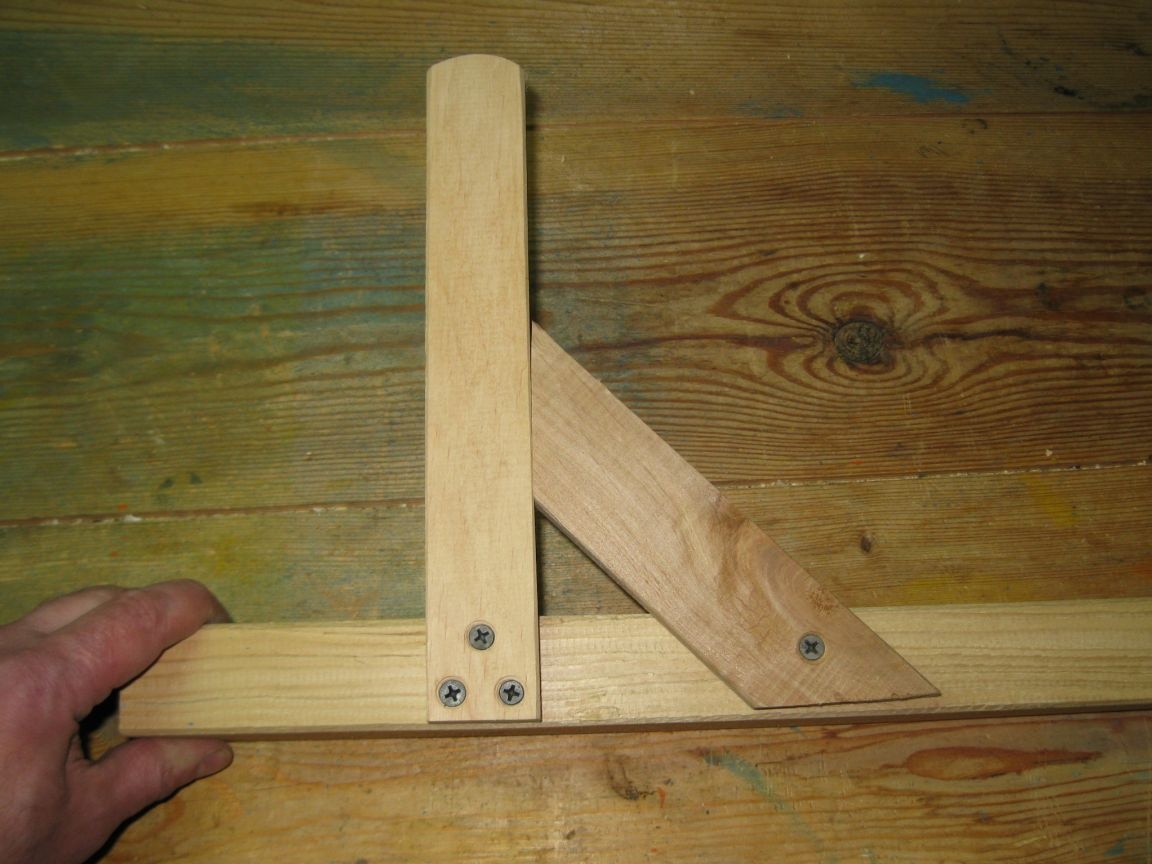
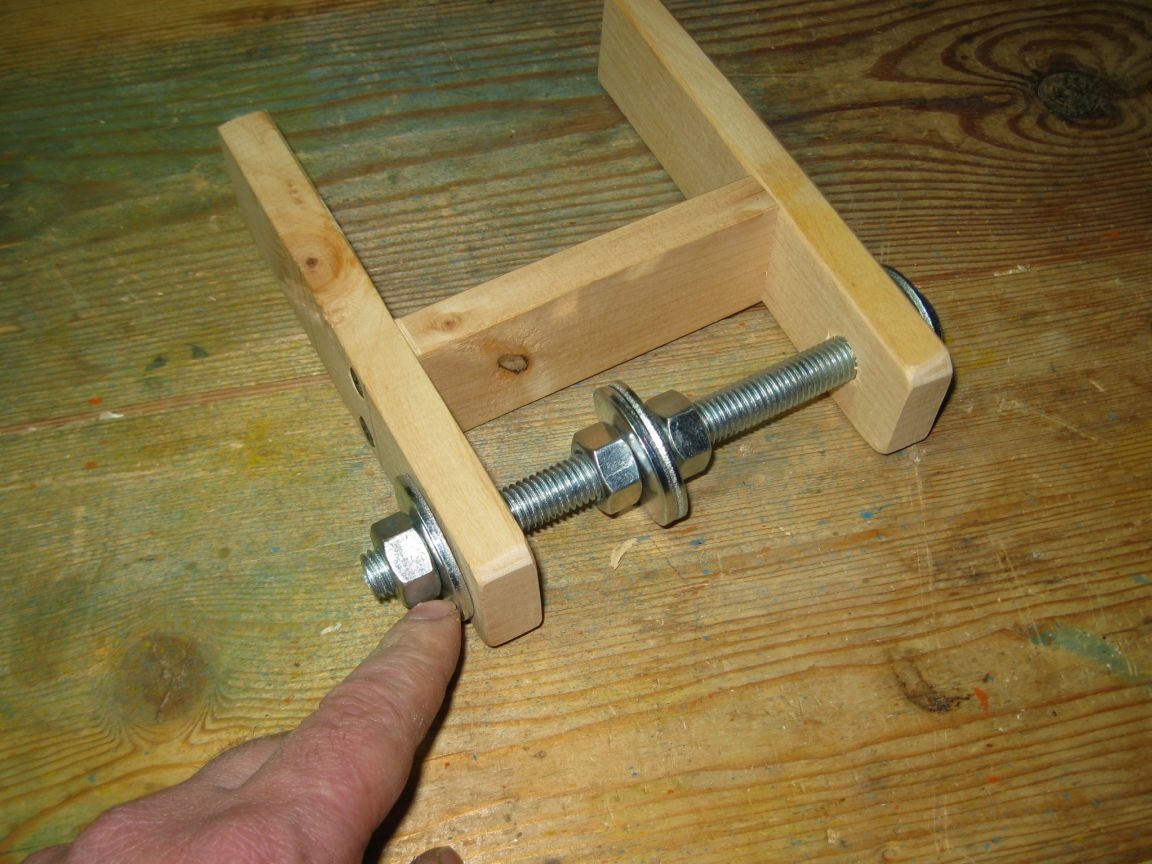
And now, both of our parts are ready!

Now you can finish the sharp corners and chamfers of these parts with sandpaper, and insert the M12 bolt with nuts and washers into the machete holder.
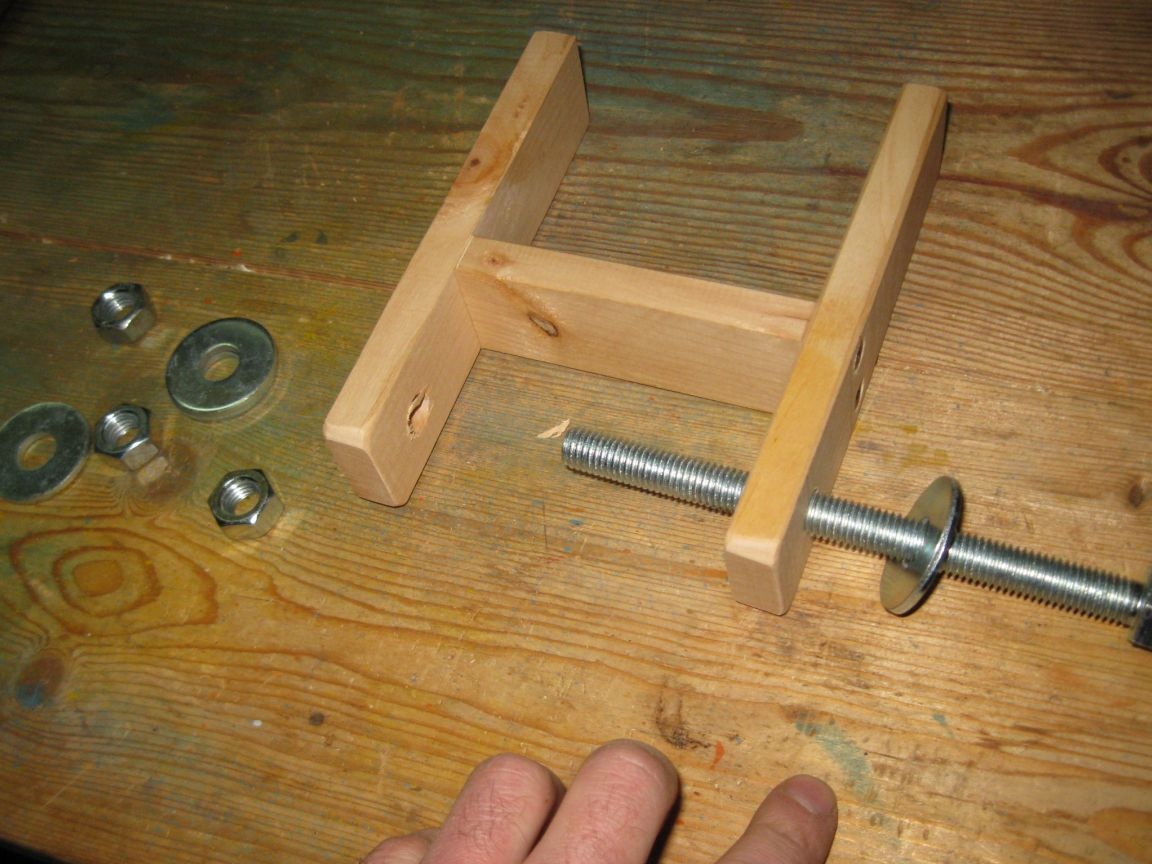
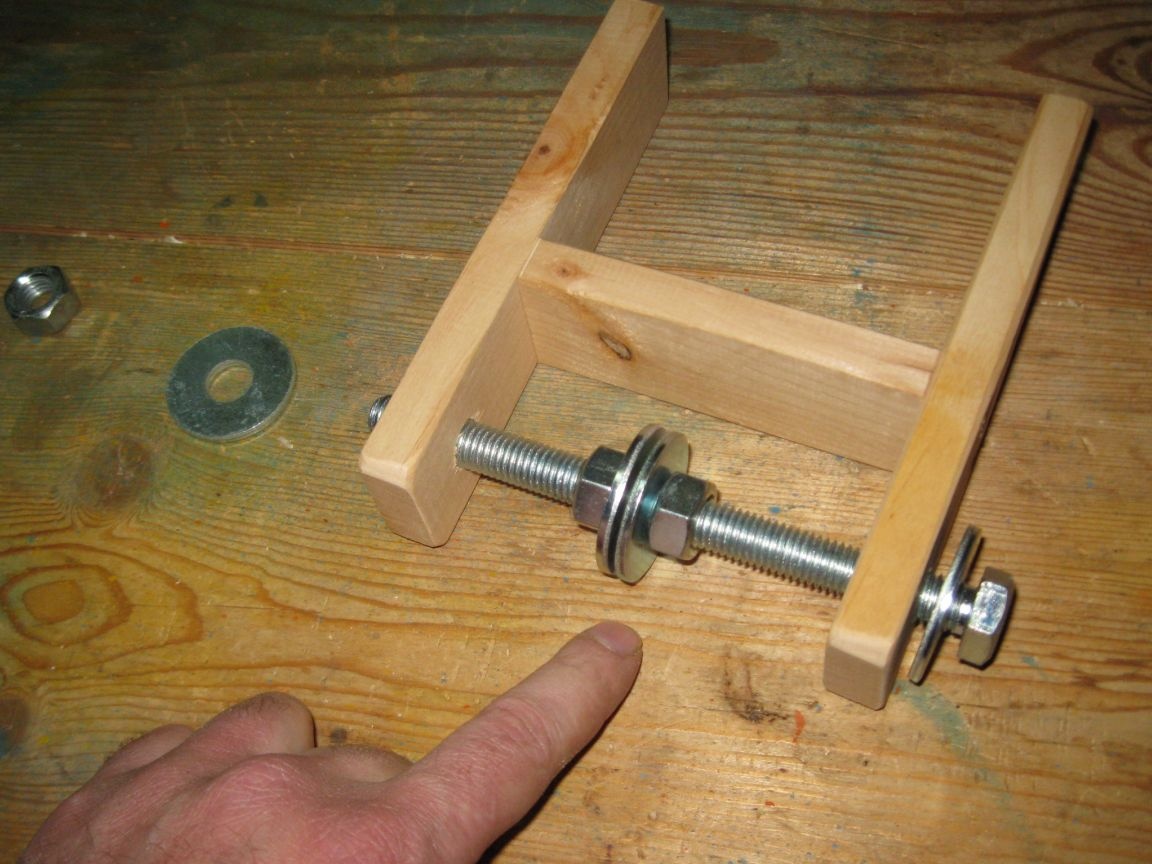
We screw a nut with a washer onto the end of the bolt, but do not tighten this nut strongly, since the bolt should rotate freely in the holes of the holder.
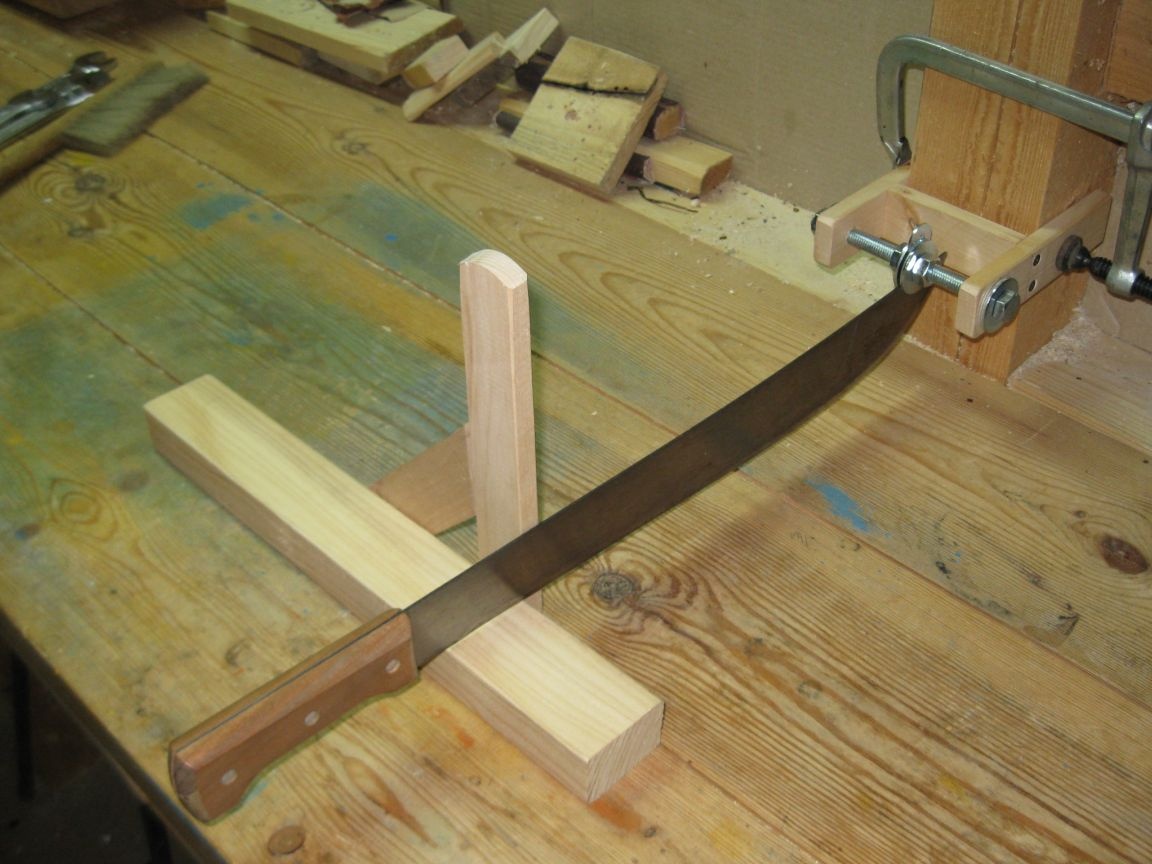
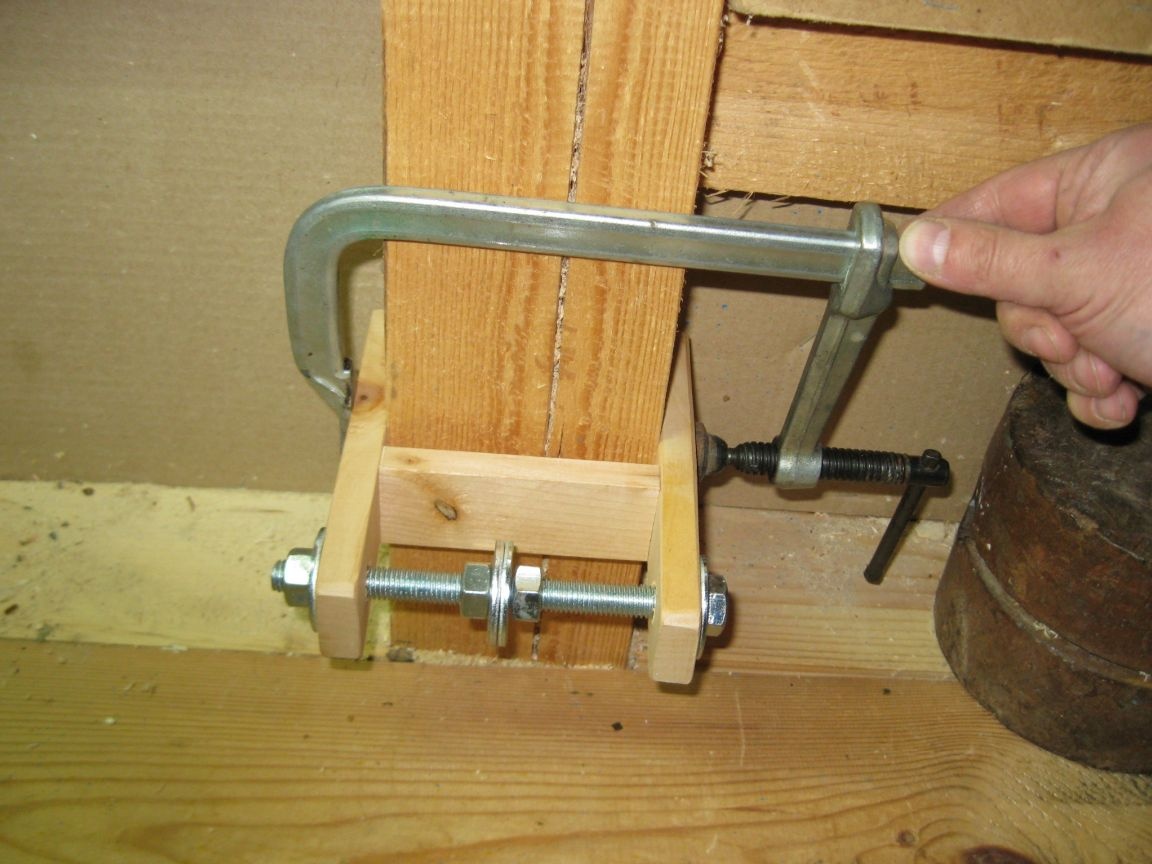
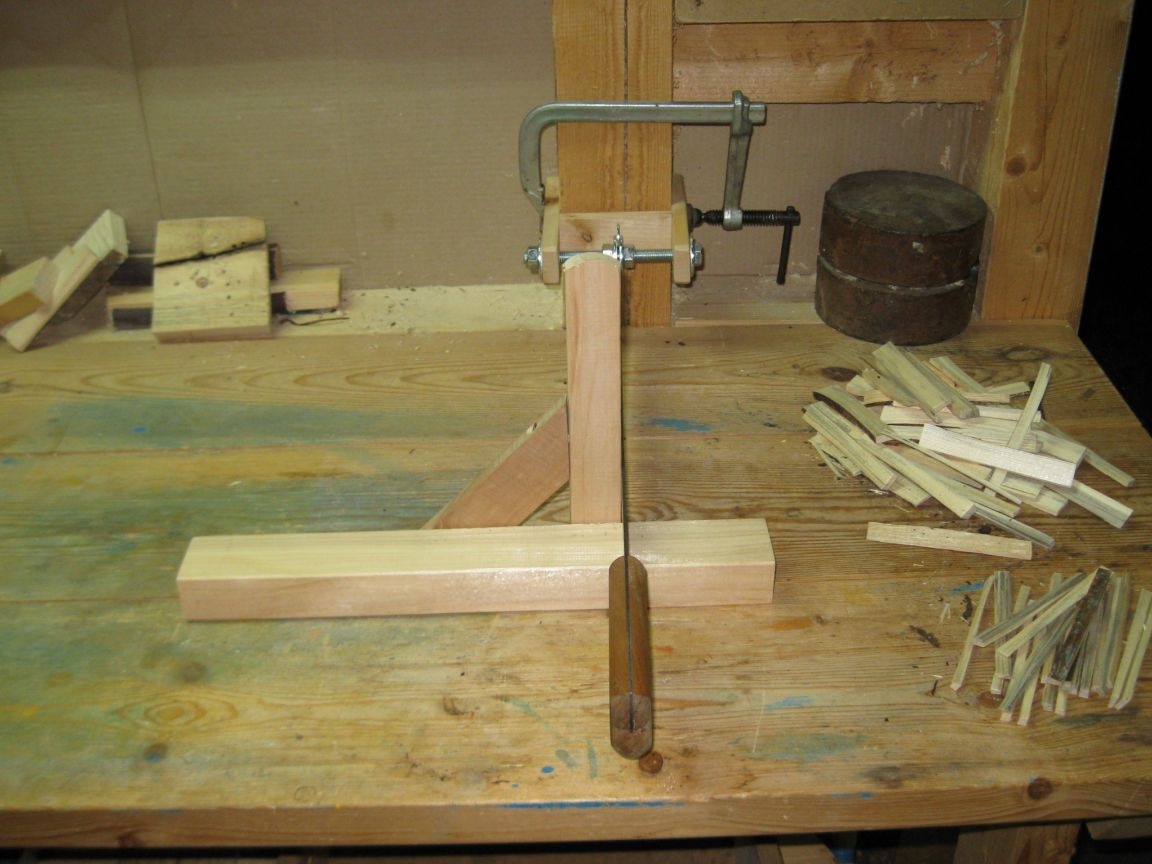
Now it remains to finally mount our device for work, securing both parts with clamps and securing the machete.
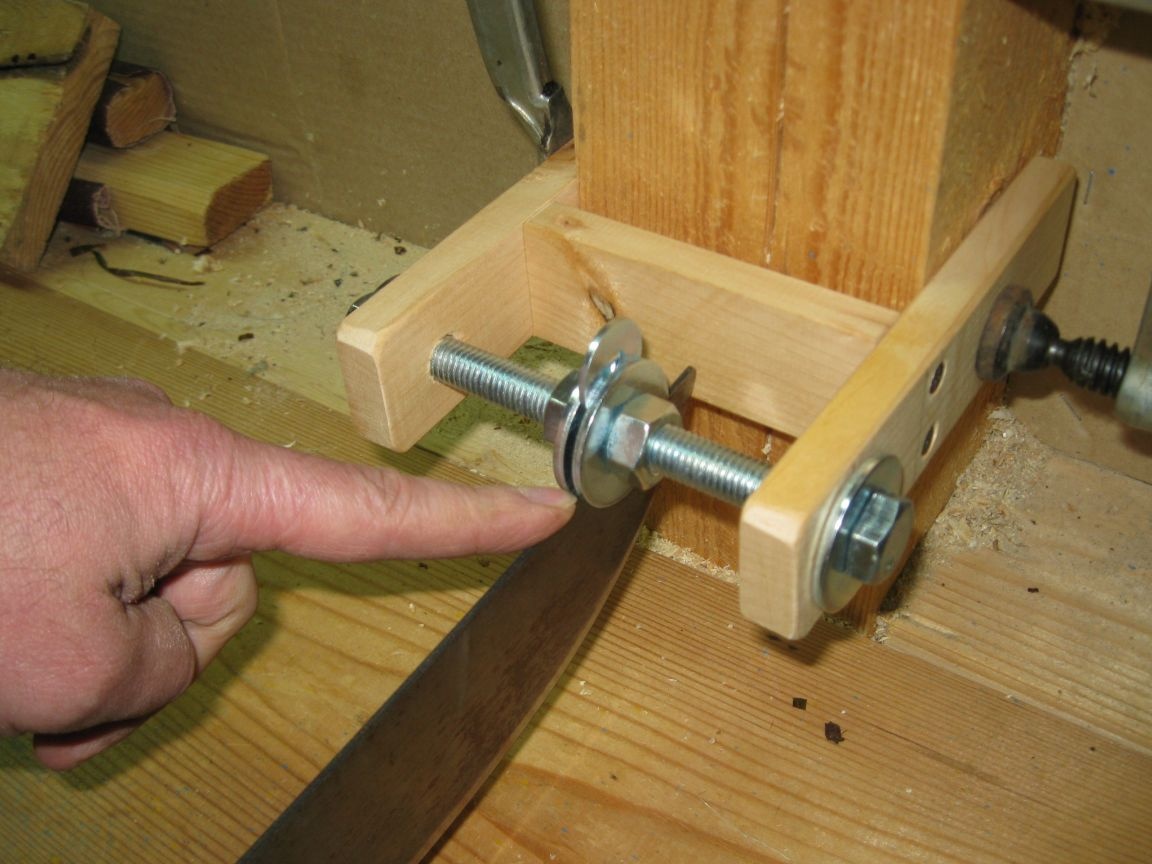
We mount the machete holder on a vertical beam above the workbench, at a height of about 10 cm, and firmly fix it with a clamp.
Then, on the holder bolt, we fix between the two nuts and washers, the tip of the machete blade, directing it with the blade down.
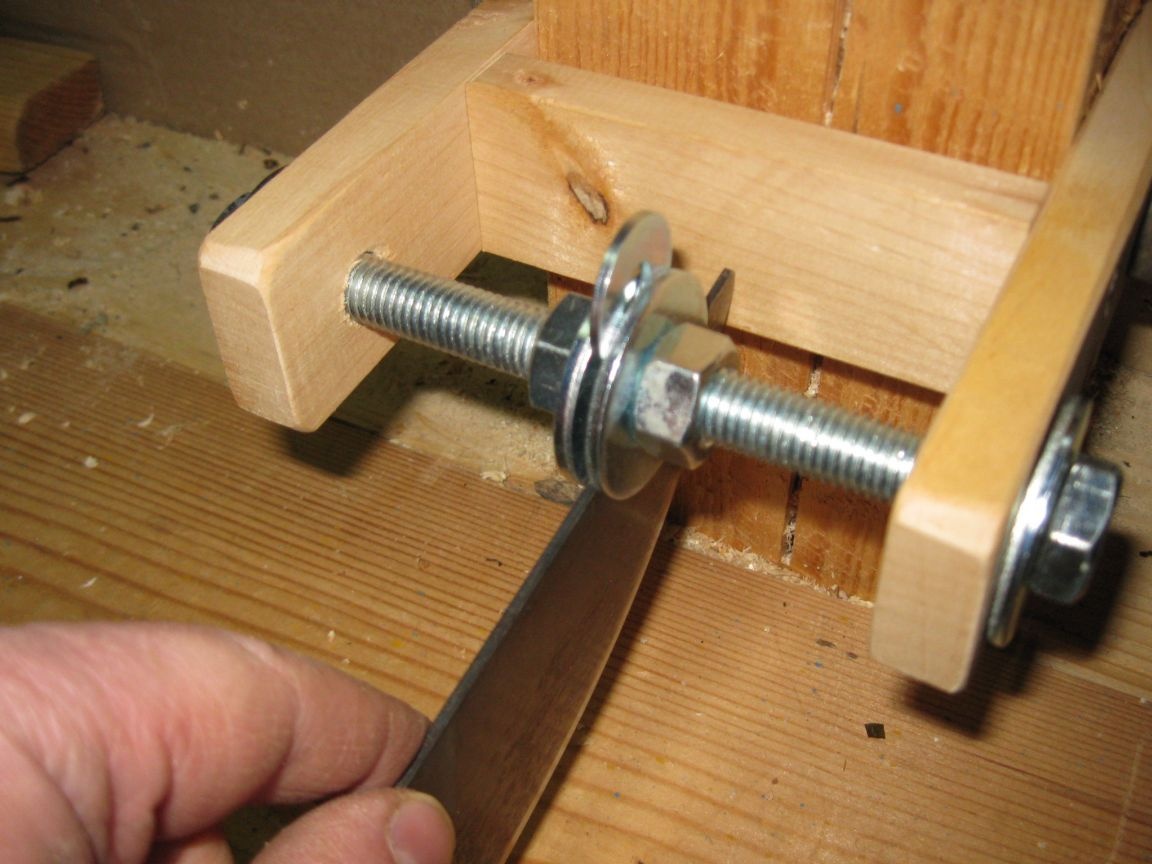
Departure of the tip should be such that it does not touch the jumper of the holder.
By the way, so that the washers on the bolt do not warp and the machete blade is clamped more tightly, I squeezed on top between the washers, one smaller washer (from the M8 bolt).
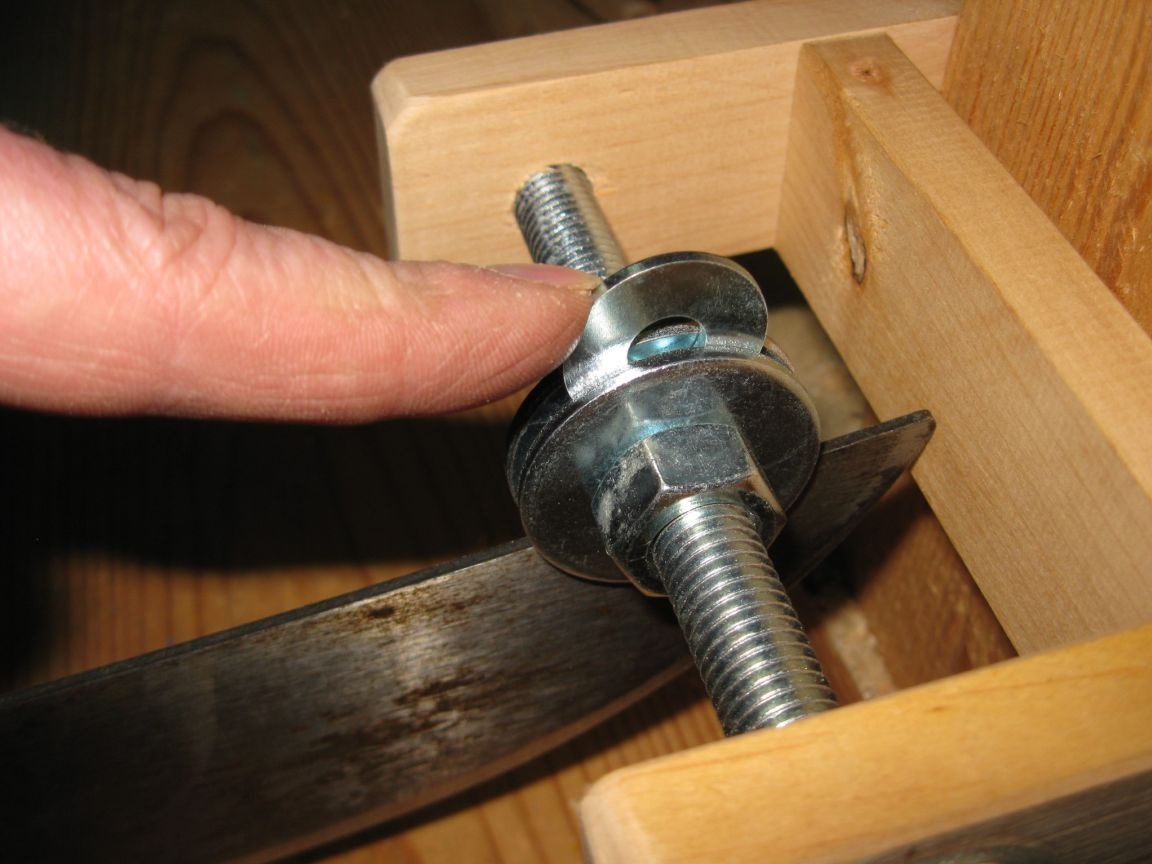
Although instead of such a washer, it is quite possible to use a small steel plate of suitable thickness or even a regular carnation.
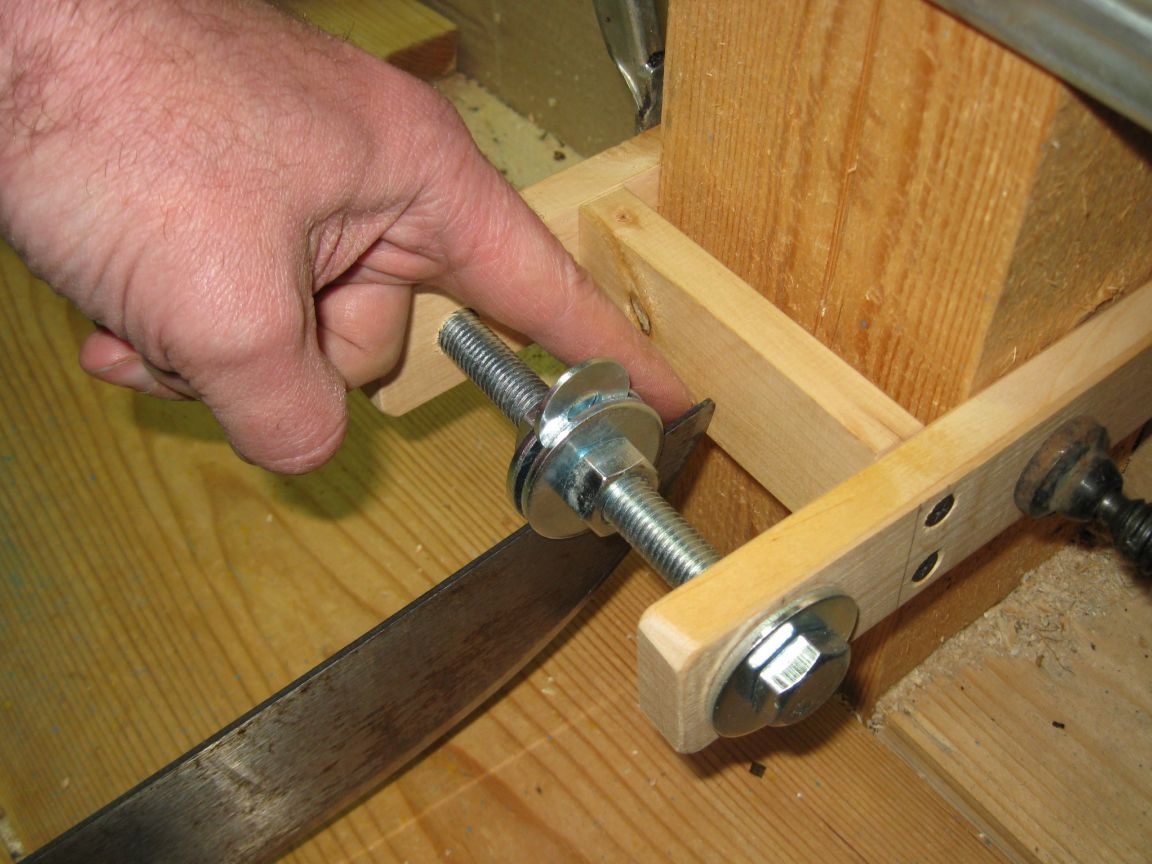
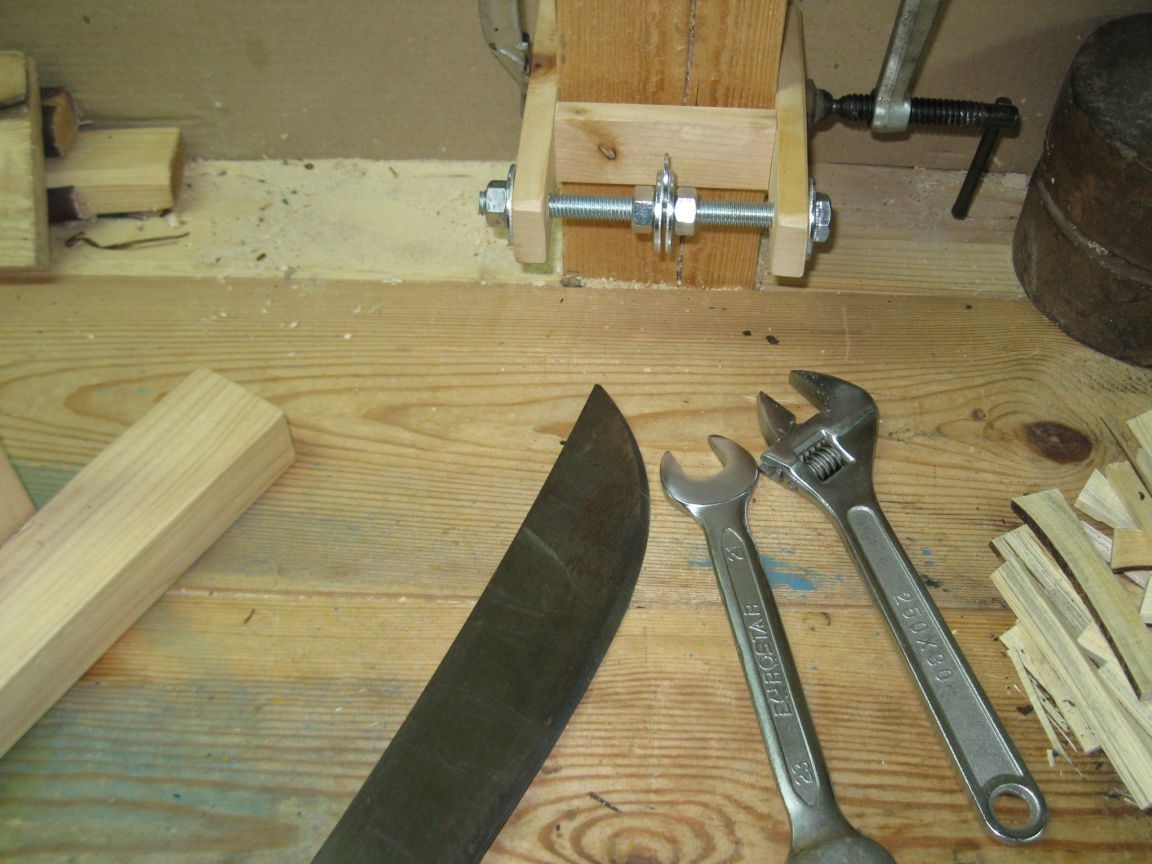
After that, it remains to tighten the nuts firmly with two 21 mm spanners.
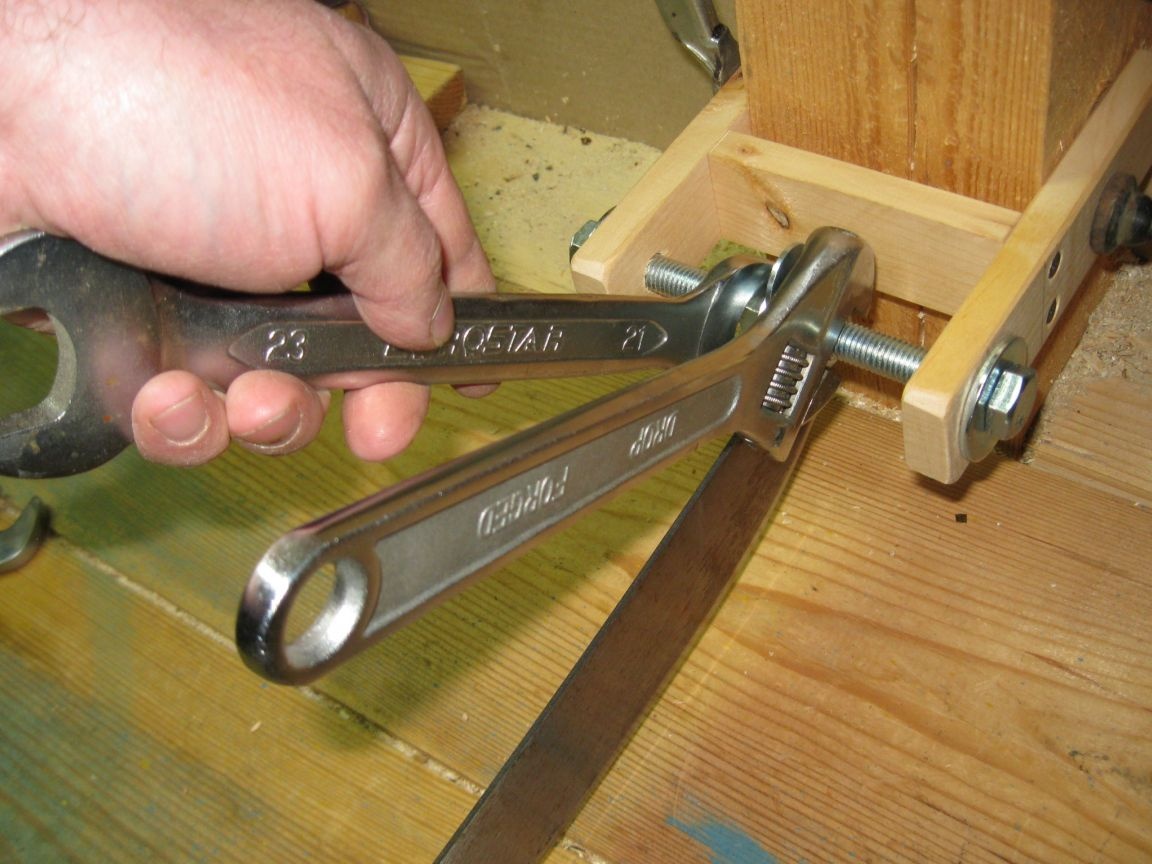
Thus, the tip of the machete blade was firmly fixed, and the machete blade itself can be raised and lowered by the handle.

Now we substitute a block under the machete blade on which the guide bar is fixed, pressing the machete blade to it.
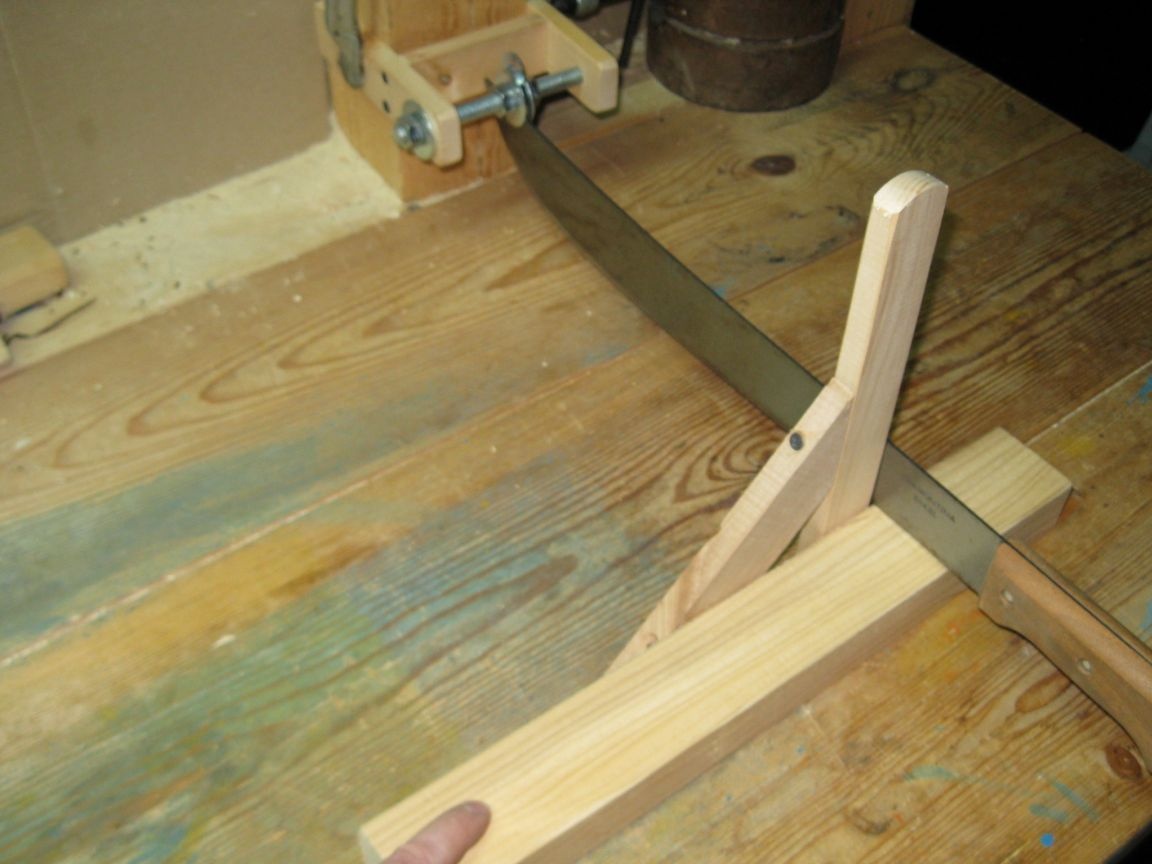
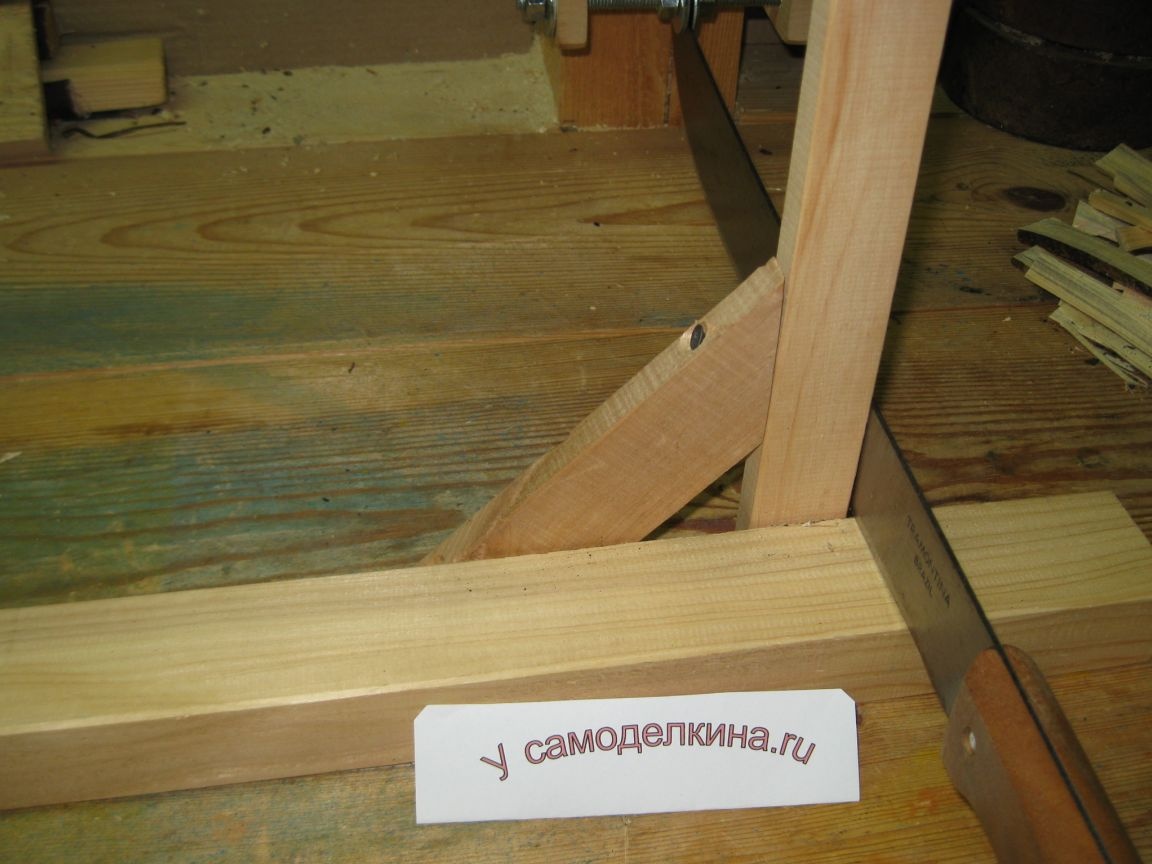
Thus, our device is finally ready for use!
The operation of the device.
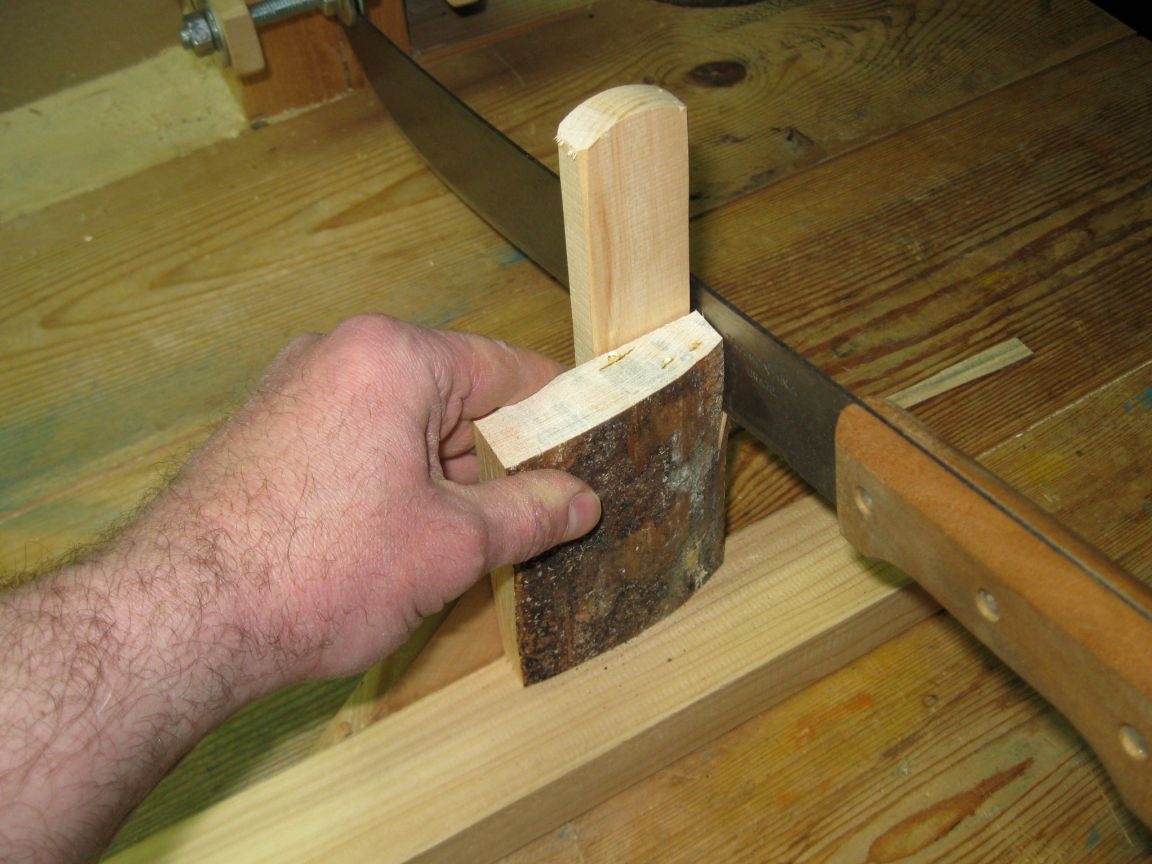
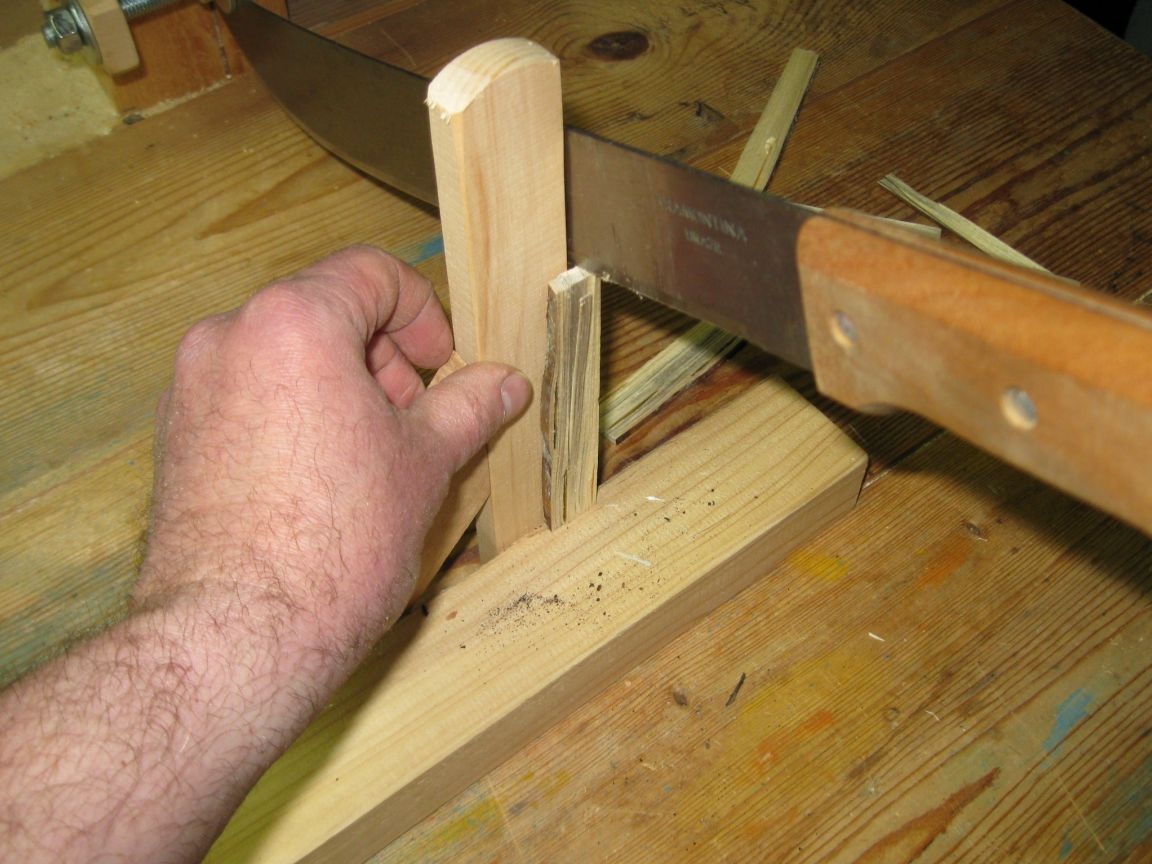
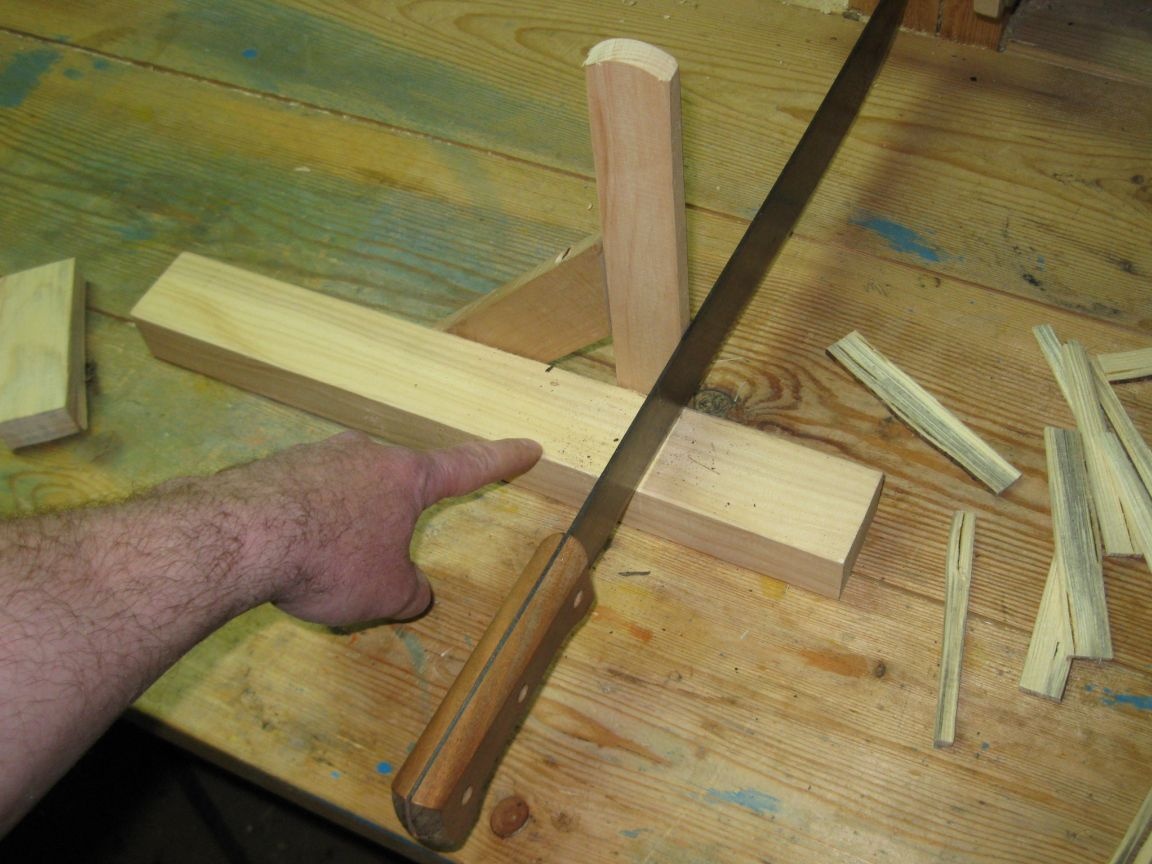
For the production of chips, we put a piece of board on the bar, pressing it with the finger of the left hand to the guide bar. At the same time, we make a small overhang, trimming beyond the guide bar, to the width of the chip to be split.
After that, we raise the machete with the right hand by the handle up, about a centimeter 2-3 times higher than the cut board (for a small swing). In this case, the machete blade is pressed to the guide bar. And then with some force we lower the handle of the machete, striking the edge of the blade with the blade of the blade to cut off the chip.
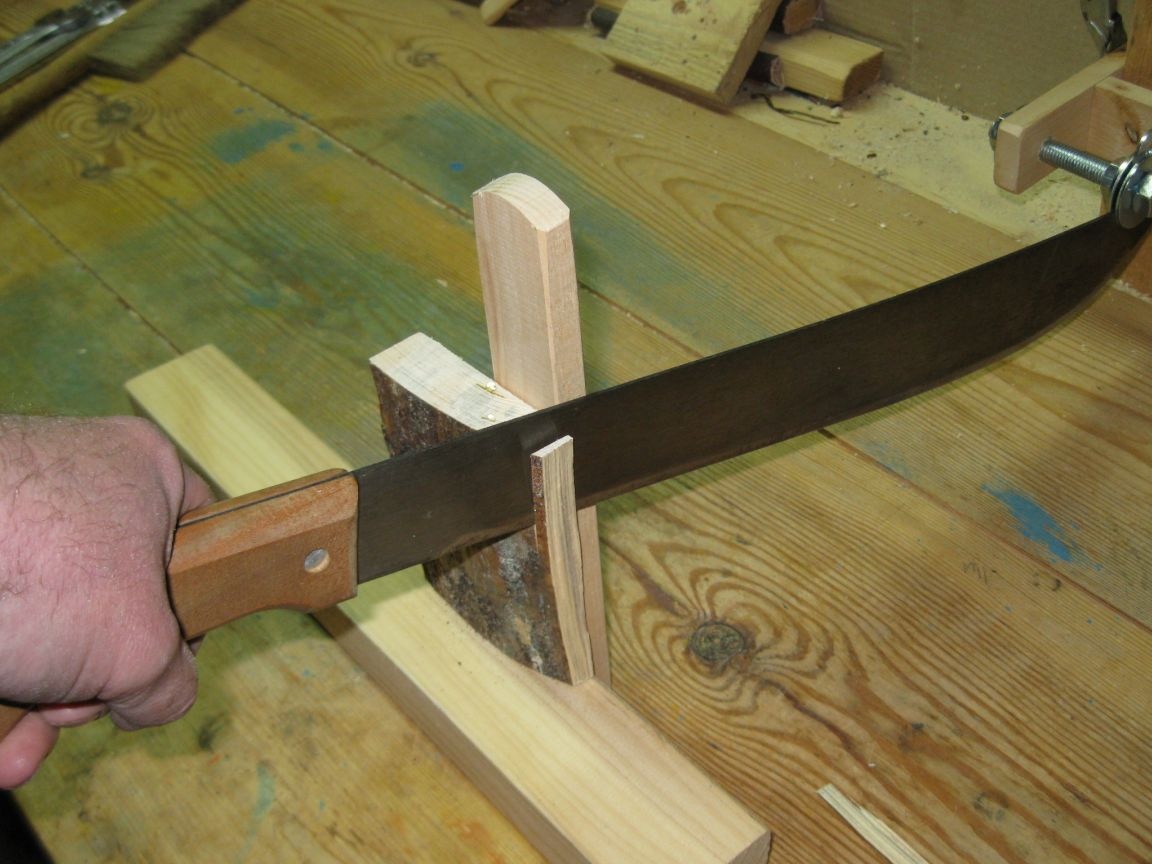
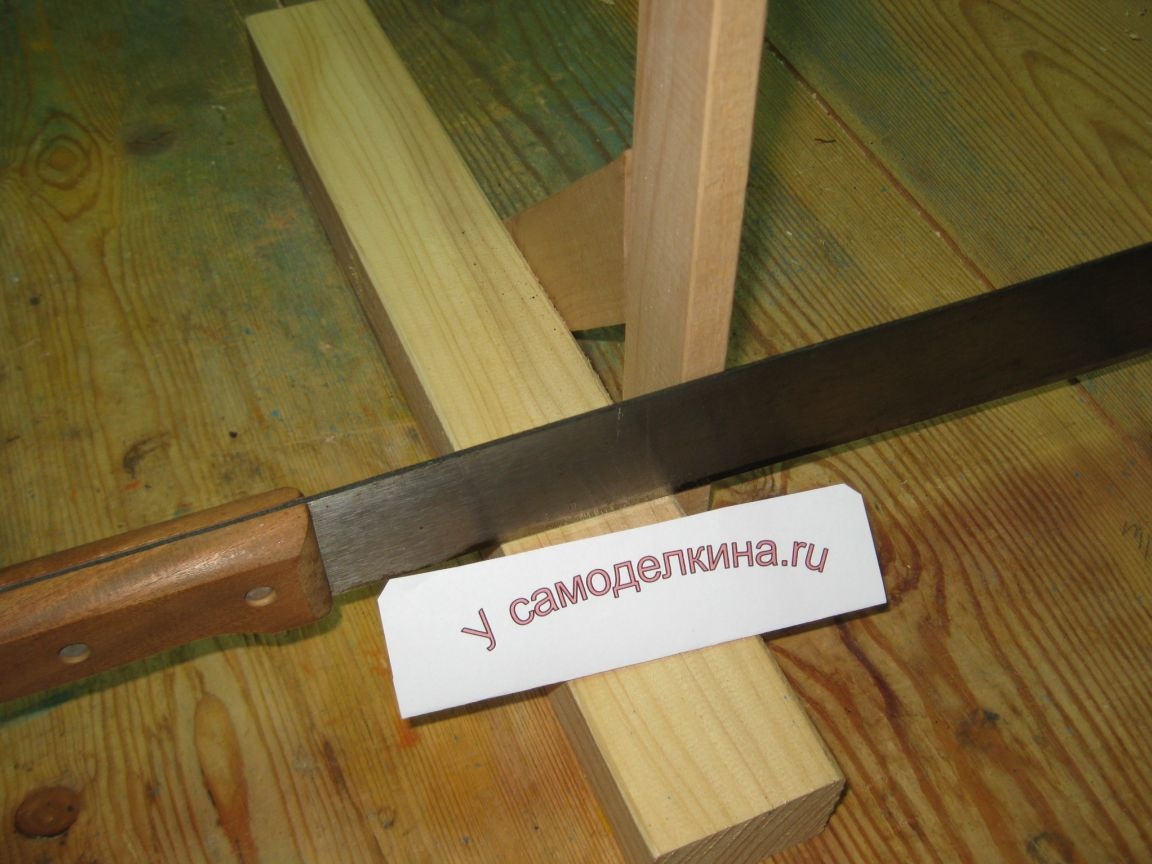
I must say that chips are broken in this way, very quickly and easily. So in a few seconds I have already chopped a few chips.
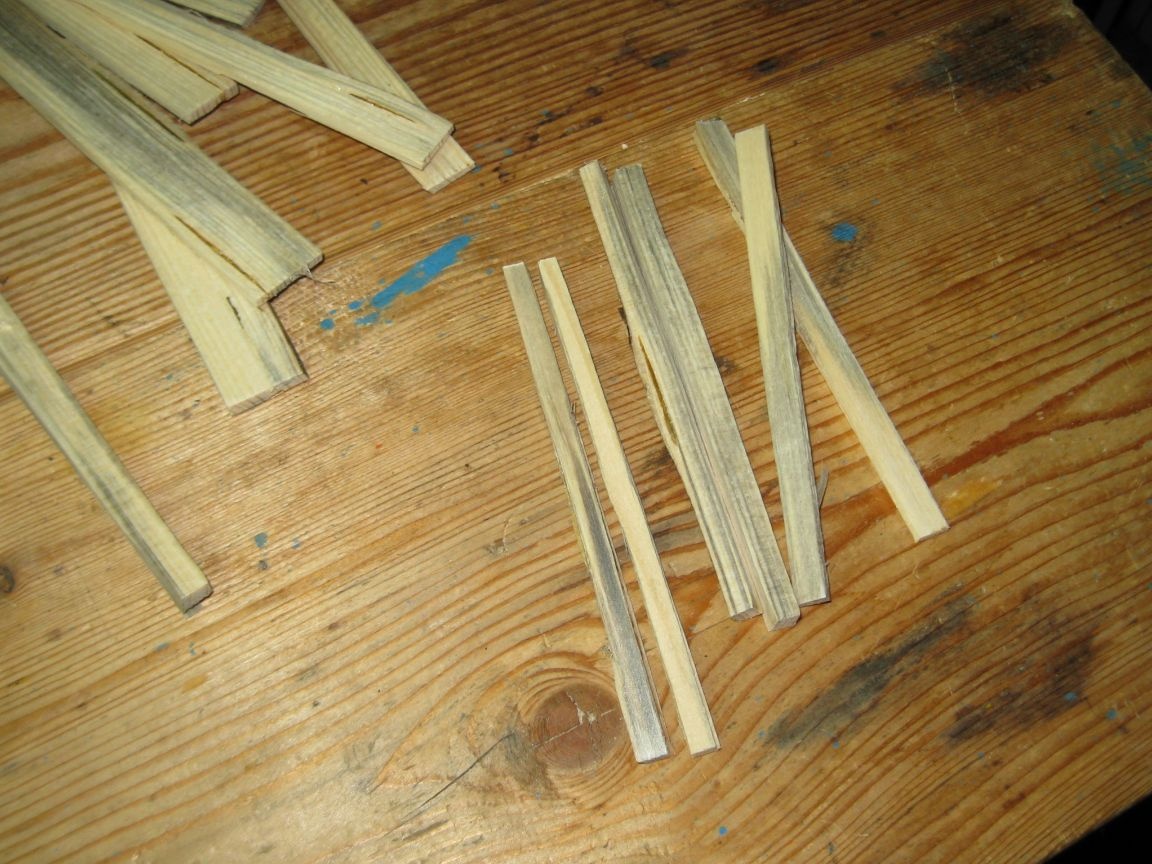
It is worth noting the accuracy of chipping. With this device, we can chip chips of exactly the desired thickness (as opposed to chopping with an ax).
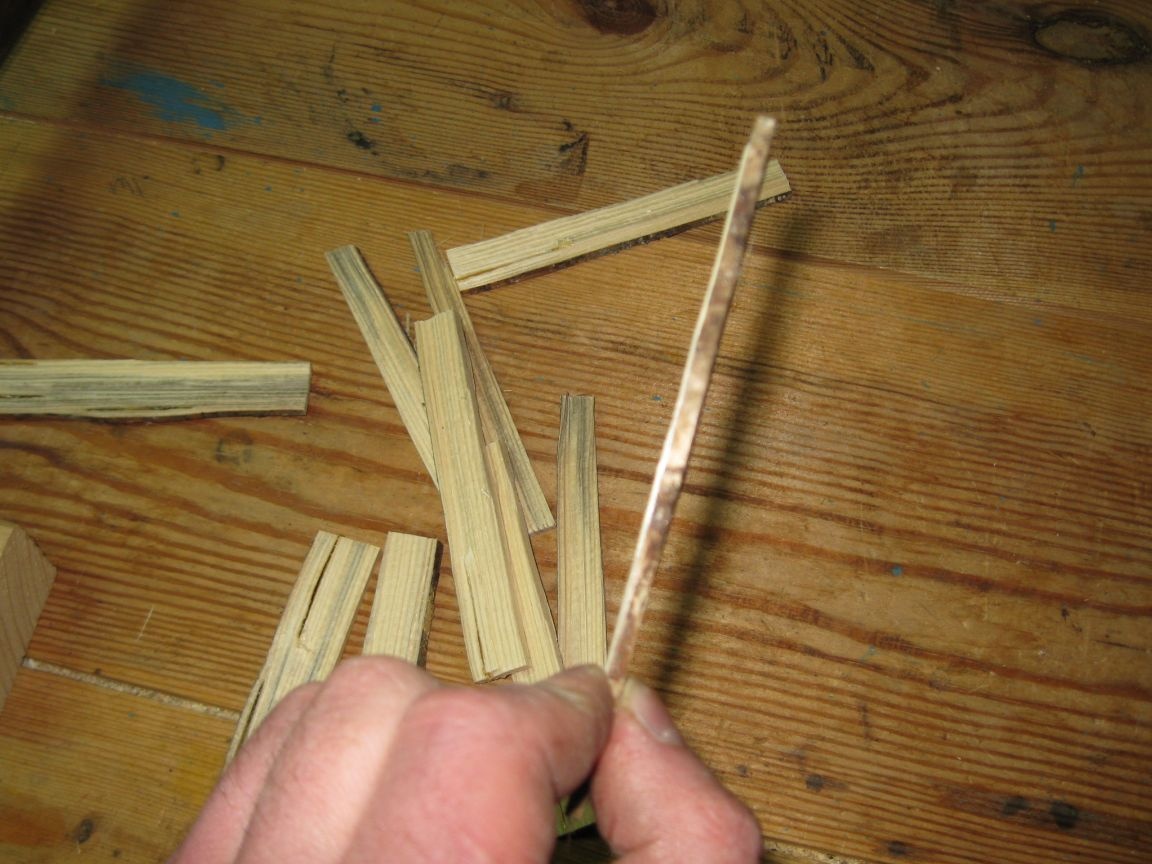
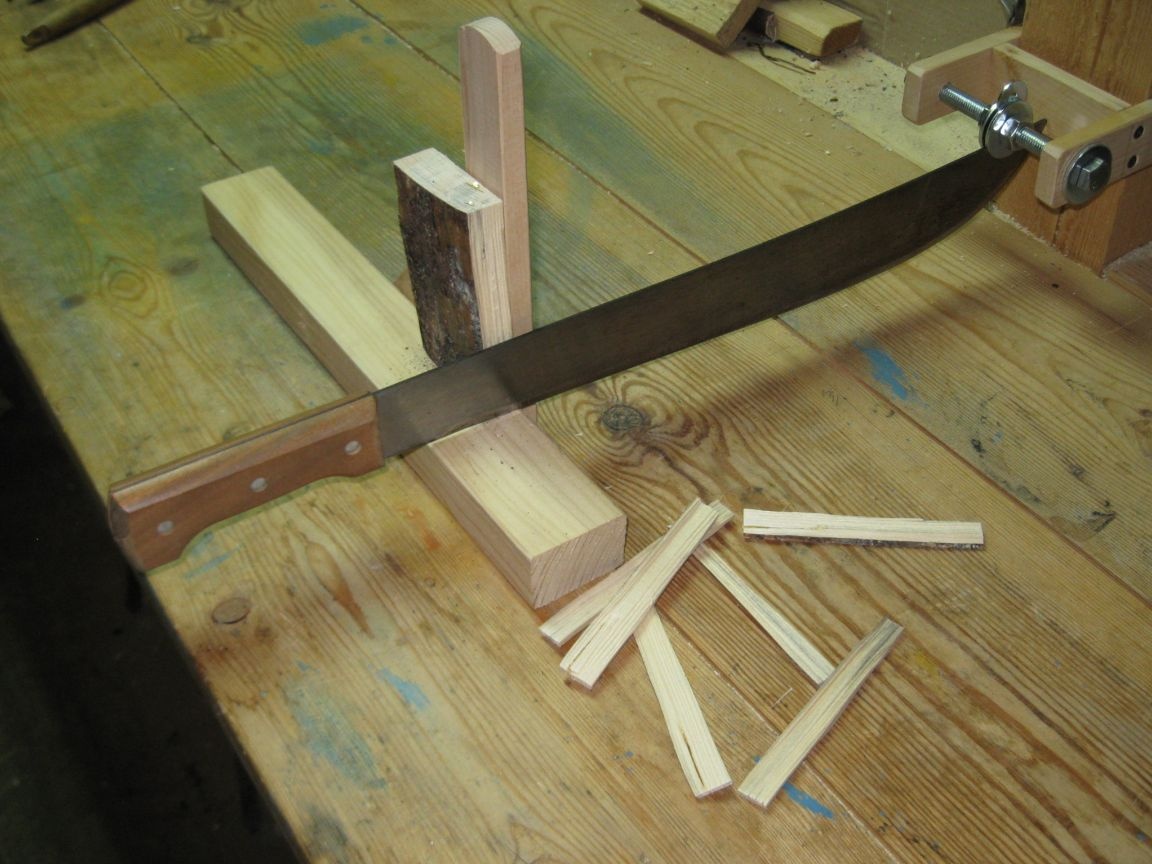
By the way, the chip itself can be easily and quickly split into several thinner chips.
That's how many slivers more and less, I chopped literally in one minute.

In general, I must say that I was very satisfied with the operation of this device. It was really much faster, easier, more accurate, and safer to chop wood chips than with an ordinary ax.
By the way, it should also be noted that the bar itself with the guide bar, I originally planned to attach to the workbench using a clamp.
However, it turned out that this is not particularly necessary, since the guide part is perfectly held even without fixing. Moreover, it’s even more convenient, since it can be slightly moved forward or backward, thus regulating the machete blade extension.
In addition, initially I had doubts about the strength of the fastening of the tip of the machete blade between the two washers on the holder bolt. I was afraid that such a mount would become loose very quickly.
However, it turned out that even after work, the machete blade was still firmly fixed to the bolt and its clamp did not loosen at all. Thus, it must be recognized that this method of connection proved to be quite reliable.
At the same time, the machete can be removed very quickly by unscrewing the nuts with the keys.
A few more seconds are needed in order to unscrew the clamp and remove the holder itself. And now our device is already completely disassembled.
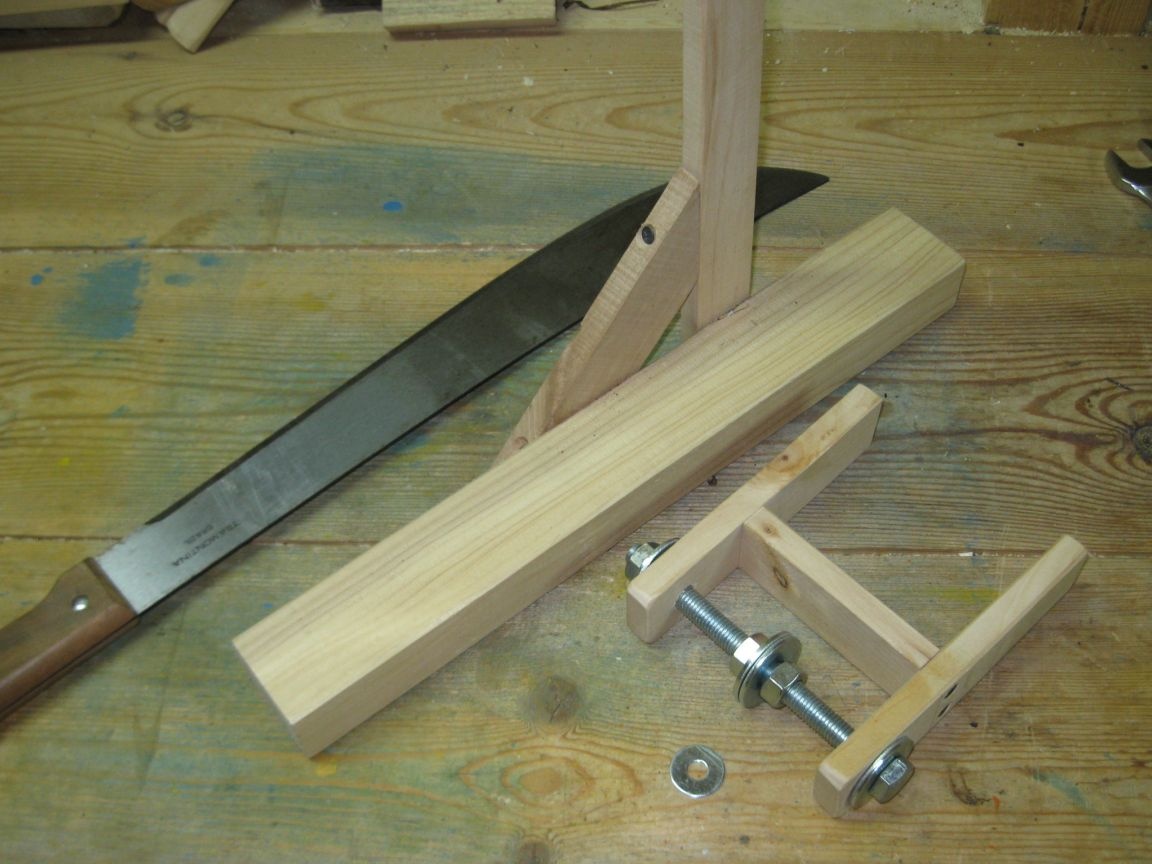
It can be folded more compactly and stored in this form.
At any time, this device can be reassembled by installing the holder and fixing the machete on it. And it will take no more than a minute. So this device, with all its simplicity, turned out to be quite effective and convenient.