

A drill or engraver is a great help in "desktop" work. In fact, there are a wide variety of nozzles and their sets on sale that allow you to cut various materials, peel, grind, engrave, drill again, all sorts of little things, often in very remote places. The drill can be successfully used in jewelry, amateur radio practice, modeling, small metalwork and carpentry, when working with glass. This is a truly universal tool that greatly contributes to the integrity of the fingers and with small work, it would be nice to always have it ready, at hand.
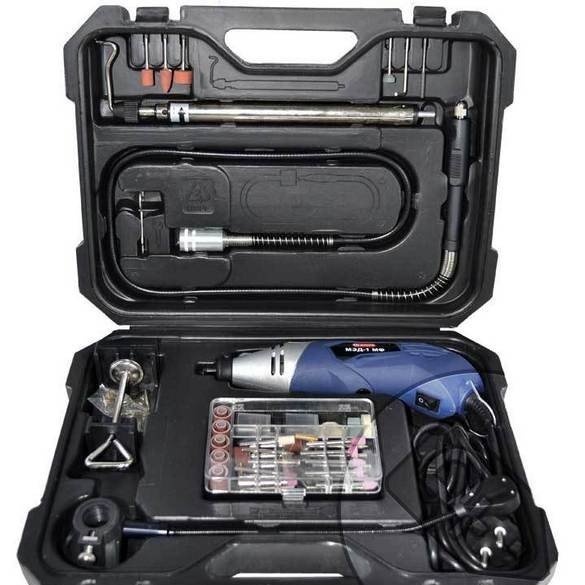
There are engravers of "wide consumption" - reminiscent of a reduced electric drill, 3-4 cm thick. The collector motor allows you to get high revolutions without any special effort, the collet clamp with a set of several collets is light and simple. Despite only a few hundred watts of power, the machine in this form is not particularly convenient for work, therefore, kits often include a flexible shaft and an arm for hanging the machine.
Despite the additives that increase convenience, the preferred design of the drill sees a jewelry option, originally designed for hanging and working with a flexible shaft.
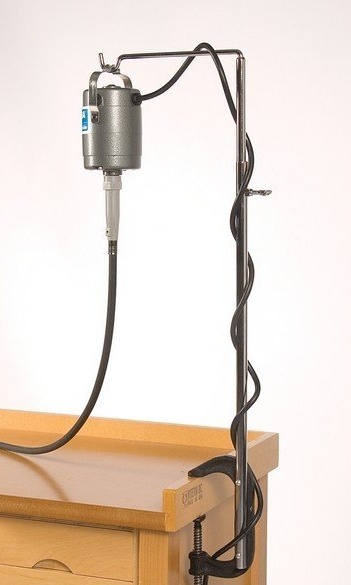
The inclusion and regulation of the speed of such a machine is carried out by the pedal, which also seems to be very convenient.
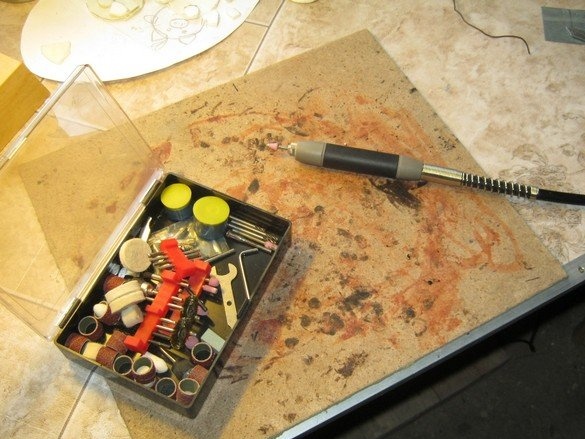
So. Here we consider the manufacture of a homemade drill such as jewelry, from ready-made knots, mainly from failed equipment. You can say - from the accumulated trash. Specially acquired, only a flexible shaft - on the beloved and native Ali Express. The reason was the failure of the factory engraver - mini-drills. His set of flexible shaft was not expected, but he could not get the corresponding one. I had to wield a "carcass" - not particularly convenient, but there was no way out. Nevertheless, the use of the machine was undoubted, and with some work, the tool was simply irreplaceable. From the engraver, a hefty tool kit remained in the inheritance.
What was required to work.
Instruments.
The usual set of small bench tools, a set of tools for electrical installation, angle grinder.
Materials
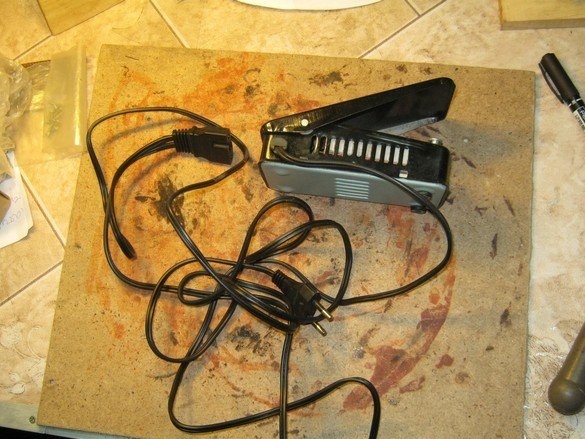
Flexible shaft with Ali Express, a broken blender and a pedal from the electric sewing machine came in handy. Fasteners, adhesive tape.
From a failed kit for electrifying a sewing machine, there was a foot pedal with wires and connectors. The pedal, after research, was recognized as satisfactory performance - a ceramic switch - a regulator inside, a metal case that is not afraid to step on, wires and connectors of sufficient power, even a mating connector was found.
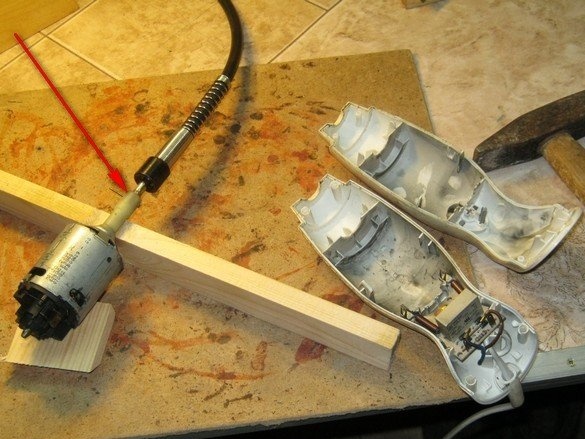
The protagonist of the design is, of course, the motor. Here, practically unchanged, a “manual” blender is used - its metal attachable shaft with knives is stuck in a plastic sleeve. Irreparable design, did not allow to restore the site, and the kitchen contraption had to be comissed. The blender motor, however, remained as Vladimir Illich - livelier than all living ones, and quite suitable for our application - a high-speed collector, 300 W, works very quietly for its type.

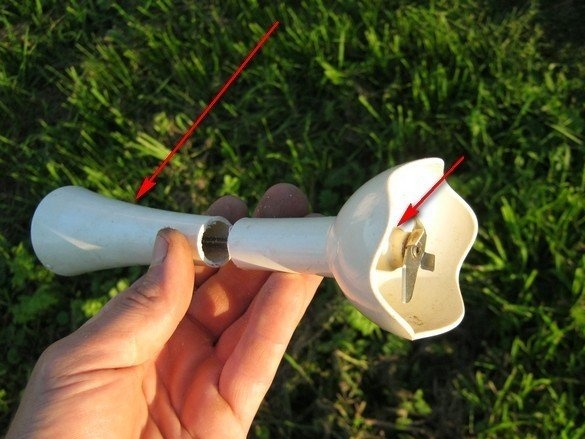
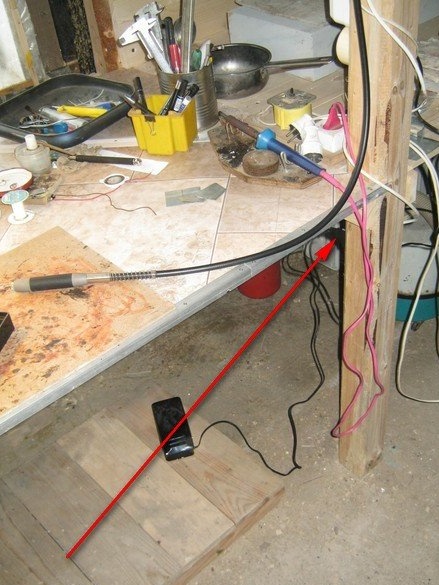
I cut off the upper part of the attached plastic “leg” (long arrow) so that the handle of the existing flexible shaft passes through its narrow part. A small arrow shows a jammed knot.
An essential task in the manufacture of the machine is to attach a flexible shaft to the motor - the speed is large, good alignment and lack of eccentricity are required. On the same Ali Express, you can purchase any desired diameter couplings, here, however, I decided to do with the standard parts.
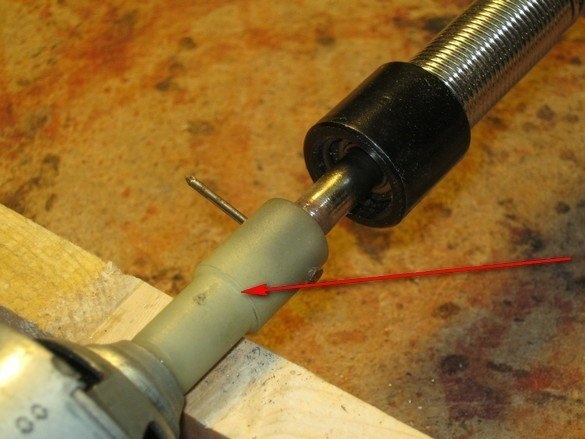
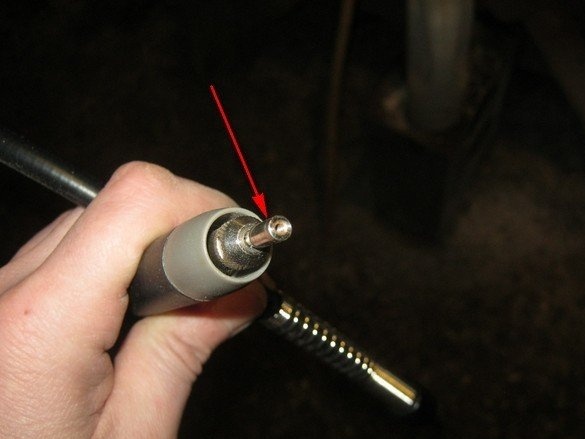
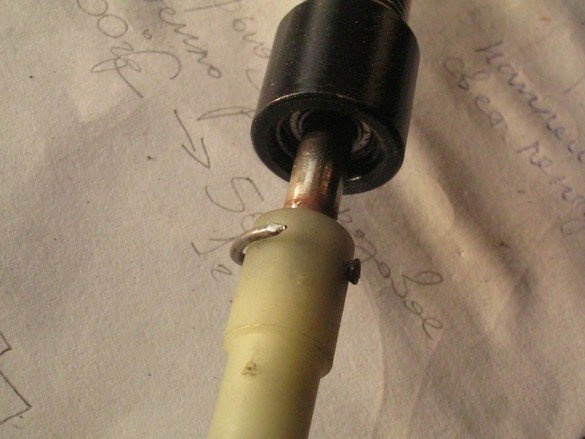
On the axis of the motor, a transitional sleeve, for attaching a standard blender knife, is made of durable viscous plastic. It was not possible to remove it by simple means, it was decided to leave and apply. The inner diameter of the sleeve was slightly less than the connecting diameter of the flexible shaft. It was decided to slightly sharpen his tail, for a snug fit into the sleeve. I did too much on a rotating shaft, turning it on the other way - twisting the side with the handle, holding the opposite side in my hands. As a drive, I used a drilling machine tuned to 3000 rpm.
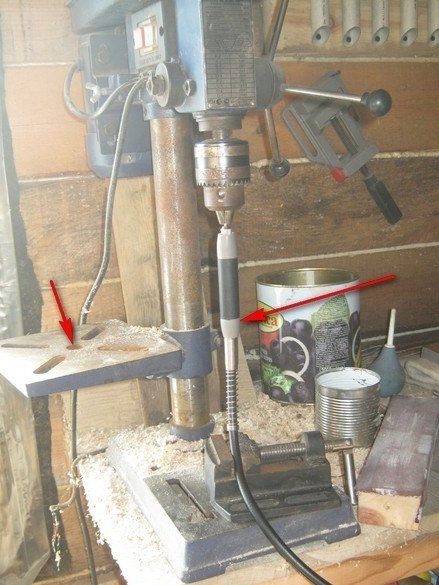
The lower part of the handle should be fixed, otherwise, it will be a lot of talk - until the collet is damaged. In the drilling machine, it was quite simple to fix the handle - it passed through the central hole in the bearing surface, its diameter turned out to be close. In the collet of a flexible shaft, an abrasive disc holder was installed, its protruding part and clamped into a drill chuck.
I had to grind about 1 mm. It turned out to be unproductive to do this with a rotating shaft on a stationary abrasive bar, I had to remember turning of rotary glands. It was like this - next to the drilling machine, I put a little “grinder” comfortably, so as to hold it with one hand. I tried on, turned on the drilling machine, turned on the grinder, and with a rotating shaft, made such sliding movements along the edge of the abrasive disk. Be sure to use headphones and a protective shield for the eyes. Try more often!
After adjusting the diameter of the shaft, I put it very tightly into the sleeve - the surface after grinding turned rough and the friction was enough for normal operation, and it worked for some time. To install the pin, I carefully drilled the sleeve together with the shaft with a ø0.5mm drill and hammered a thick clove into the hole. Entered with an interference fit, the protruding edge, with pliers bent onto the sleeve.
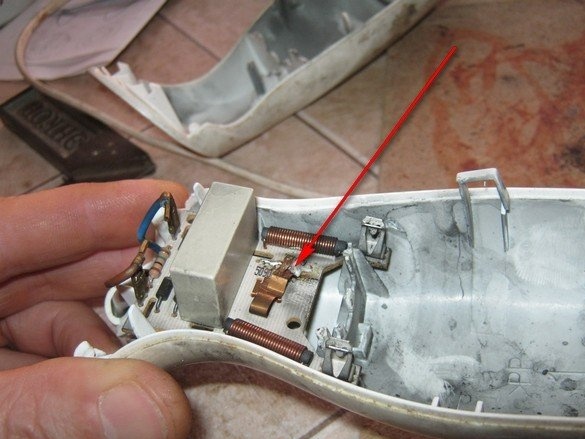
The motor with a pin bush has been tried on in the case, made sure that nothing catches anywhere. You can try turning it on. Yes, before assembling the case, I shorted the standard button - here the plastic pusher on the case presses a flexible bronze strip to the protruding "jumper" on the power filter board. He stomped them and soldered them to death - the inclusion of our car will be external - the pedal.
After assembling the case, you need to fix the fixed end of the flexible shaft, otherwise, when the motor is running, it shakes a lot, here, I used the standard part of the blender - a piece of the attached leg with knives.
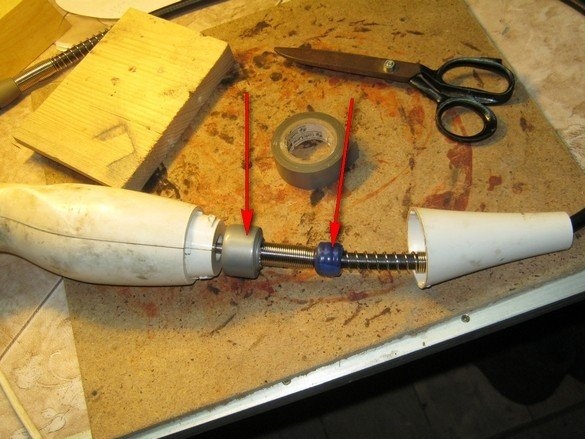
Tight coaxial fixation was provided by the favorite material of masters of all times and peoples (although this is probably with adhesive tape). Even there was a blue color - a classic.I compacted it like this - made the winding a little more necessary - the cone did not “sit” in place, then unwound it one layer at a time until the plastic part was firmly seated. Started from the bottom. It turned out a miracle as well. No vibration.
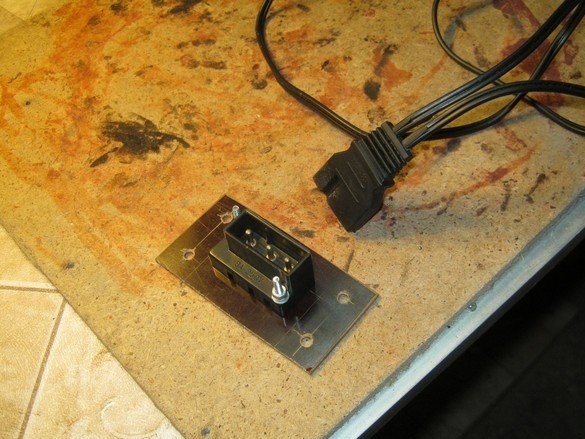
I decided to attach the plug from the motor part of the drill from below to the desktop, therefore, supplemented it with a textolite base - fortunately, there were mounting holes in the plug, the M3 screws fit well.
With the suspension of the motor, I was tormented - I made and cut several options from homemade tin clamps - I did not like it. A simple and cheap option made of metal, you should recognize a clamp with a worm screw clamp. On the sides of it you can solder a wire loop. It would be nice to put something elastic under the collar - a rubber band or wrap material of all times and peoples.
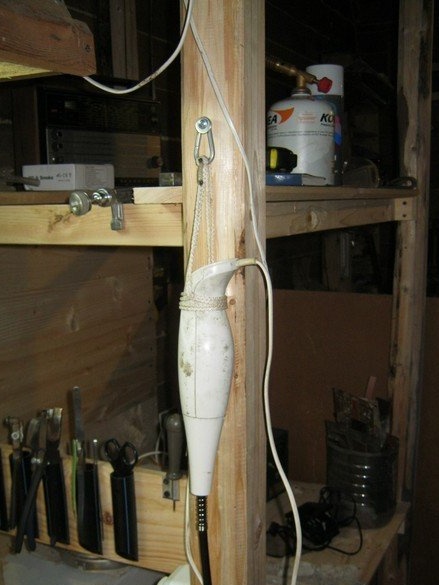
A collar of the appropriate diameter was not found at hand, so that the machine would not lie around, made temporary fastening of the ropes, but it turned out to be so simple and successful that it left it for good. In fact, this is a rope ring, on the opposite sides of which two self-tightening loops are formed. For hanging, to a wooden post desktop shelving screwed with a wide head screw, for sheet materials. Under the hat is an enlarged, "body" washer M6.
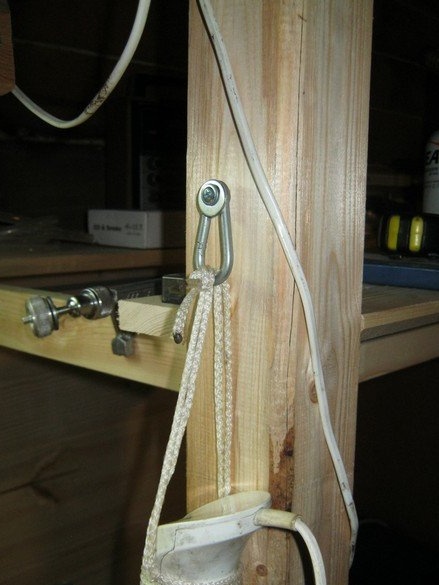
It turned out, something like an ear for hanging, sort of like a bookshelf on the "reverse". The machine, with its weight, holds the carabiner in the right position, if necessary, remove the motor from the carnation, it must be lifted, and the carabiner with washer, unfastened in the manner, buttons in the coat - this gives additional insurance against jumping off. The rope allows the motor to deviate unimpeded, following the flexible shaft.
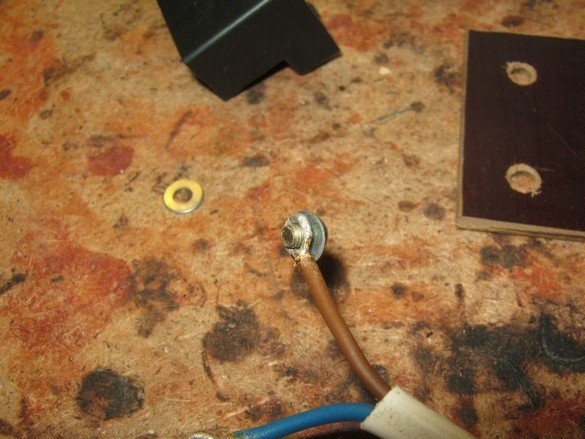
I cut the network plug of the blender, cut the end of the wire to connect to the plug - formed a loop on a 3 mm drill, soldered it, crimped it with pliers, removed the remaining flux, but what about.
The pedal connector was screwed under the table, so as not to kick it with the knee, on the right side - so that the pedal was under the right foot, it seemed more convenient to me.
It turned out very well - the tail of the drill in the "transport position" hangs freely, without reaching the floor, reaching out, it is possible to easily reach the handle, finding the foot under the table with the foot is also simple. Having included the drill in the network before work, you can use it at any time, while it is at hand, but it does not take up useful space at all.
Babay Mazay, December 2018