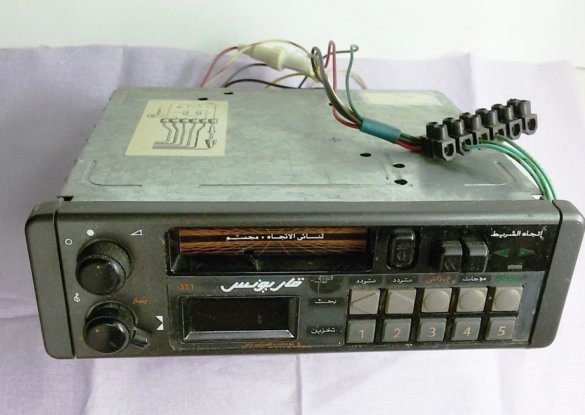
The old car radio has retired. She had SV, DV and full FM bands with auto search, built-in cassette recorder. Flew a "small" period of time. The plastic parts of the tape drive are out of order, and there is no longer any need for it. The century of laser discs in car radios has also passed. And the receiver, in the remaining and developing FM band, works perfectly to this day. Having high-quality amplifier and speakers, it produces excellent stereo sound throughout the power range. And in other matters it is not surprising, since the device has a noble origin to its birth. The radio tape recorder was made from original PHILIPS parts and assembled away from China.
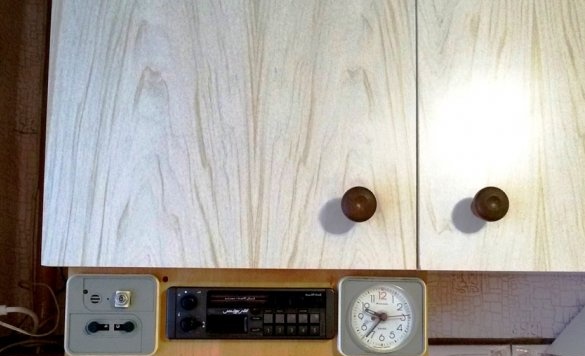
Since the car radio still has some kind of “life expectancy”, I hope it’s not small, I decided to give her a warm and peaceful life in retirement by arranging it in the kitchen. Such a place was found, in one block with frequently used kitchen utensils - a clock and a timer. Now in the kitchen, where we spend most of the time, you can hear any of the 24 various channels of the radio.
If you have a desire and a similar situation with old, but working equipment, I propose to consider the proposed option for installing a car radio in home setting.
1. Preparation of the device.
We clean the existing car radio from dust and dirt. We clean and tighten all the contacts in the power and speaker circuits.
2. The manufacture of the housing.
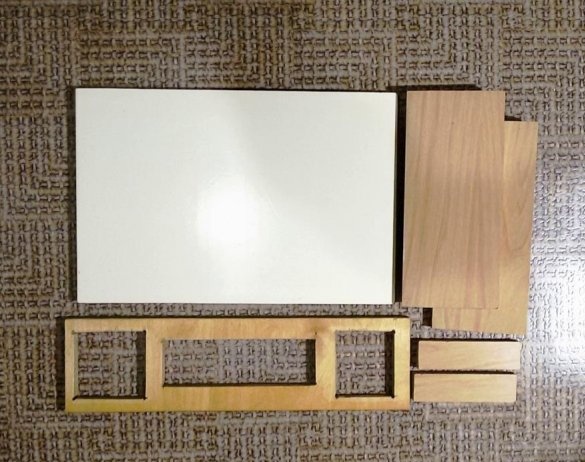
We select the material for the manufacture of the body homemade. It all depends on your tastes, capabilities and color preferences. In this case, the parts of the furniture plate made of chipboard remaining after the repair were used.
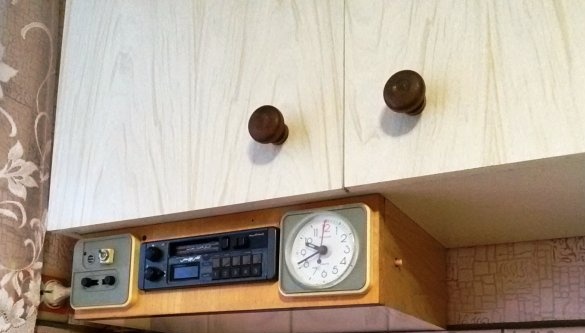
The type and size of the case will be determined by the front panel of the musical and kitchen unit being manufactured. At the edges of the panel we place a clock and a timer, in the center of the car radio. Having decided on the location, carefully mark and draw the outline of the windows for installing the devices. Having drilled the corners of the marked rectangles of the windows, holes with a diameter of about 6 mm, for the sawing plant, we cut the contours of the windows.
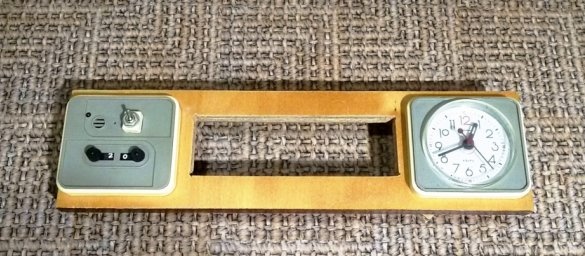
Depending on the size of the front panel, cut out the rest of the body. In this case, the height of the front panel and two side walls was 110 mm. The length of the side walls depends on the size of the kitchen section and here is 250 mm.For ease of use, it is advisable to move the front panel deeper into the door of the section. The back wall of the body is supposed to be excluded, its function will be performed by the wall of the kitchen. Between the wall and the side walls of the casing we leave a small gap (about 5 mm) for ventilation. Depending on the resulting dimensions of the frame of the case, cut out its bottom.
3. Assembly of the housing.
We select from the availability, or produce from the corner, steel or aluminum squares. We drill holes in them with a diameter of 4 (5) mm and assemble the case using 4 x 16 (5 x 16) mm screws. The use of classic screws involves pre-drilling holes for their screwing.
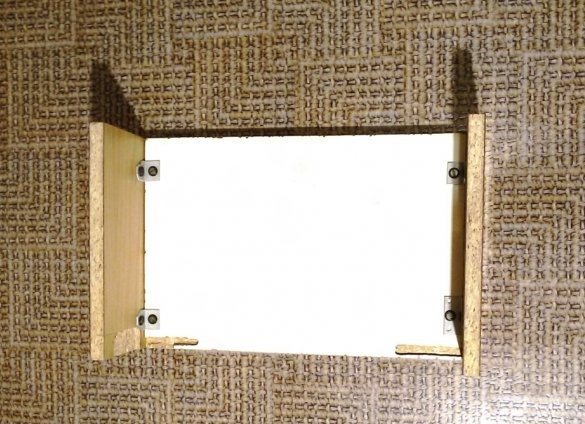
The front panel, which carries the main load, is attached by two squares inside to the bottom. And additionally, with two screws from the outside, drowning the heads flush with the plane.
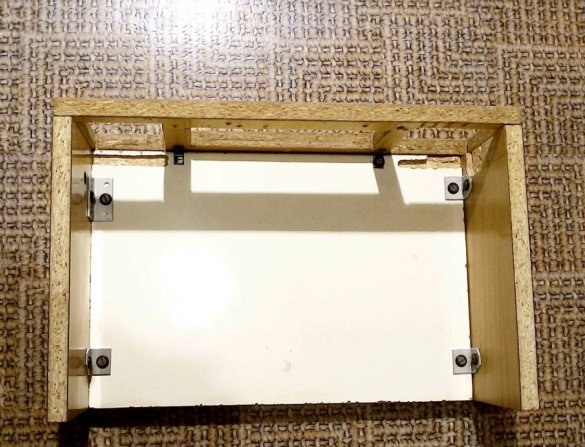
The assembly showed some miscalculations. As a result, I had to disassemble the case and mill the discharge in the side wall, for the free installation of watches. In addition, in the bottom of the case, it was necessary to mill the grooves for the location of the fixing plate springs at the clock and timer.
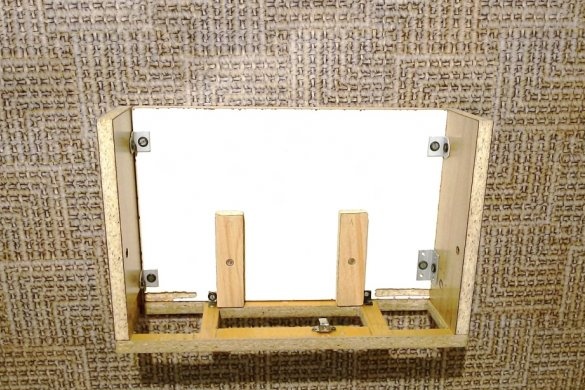
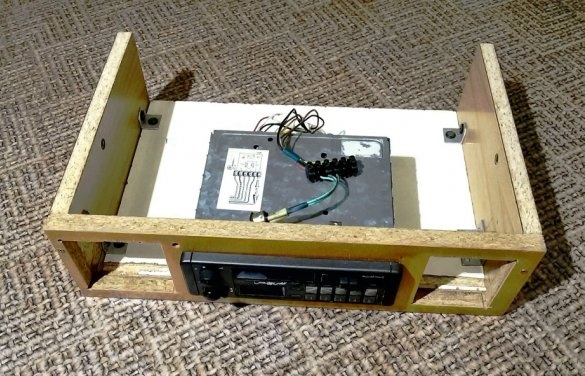
Flush with the bottom side of the window under the radio, at the edges of the window, install two guide bars. On them, during installation, the car radio rests. The gap under it is necessary for natural ventilation and cooling in the radio casing.
To fix the installed radio in the case and prevent its accidental removal, a door latch is installed inside the case above the window. When installing the radio in the working position, the latch ball enters the hole in the metal housing of the device and fixes its position.
The fixing of the manufactured block is supposed at the bottom of the kitchen section, on two steel furniture squares. To do this, the center of the mounting holes are marked inside, on the side walls in the upper part of the housing. The height of the center from the upper edge of the side wall is determined by the size of the square used. Usually this size is 18 mm. According to the marking, two blind holes with a diameter of 9.5 mm are drilled. Furniture threaded inserts for screw M6 are screwed into the holes.
The case of the musical - kitchen block is assembled. Install a car radio in it.
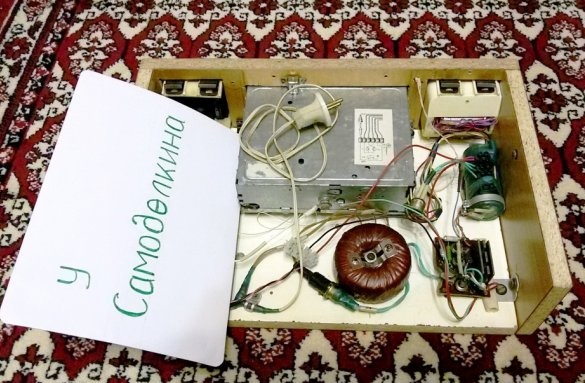
4. Production of power supply
We will power the car radio from a 220 volt mains using a simple power supply. The radio receiver in various modes consumes a current of 0.3 to 0.9 amperes. And since the car radio is designed for the on-board network of the car - 12.0 ... 14.5 volts, we will manufacture a 220/14 volt power supply with an output current of 1.0 ... 1.5 amperes.
Power supply circuit
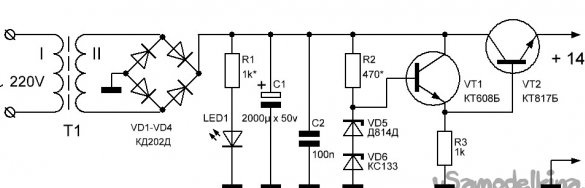
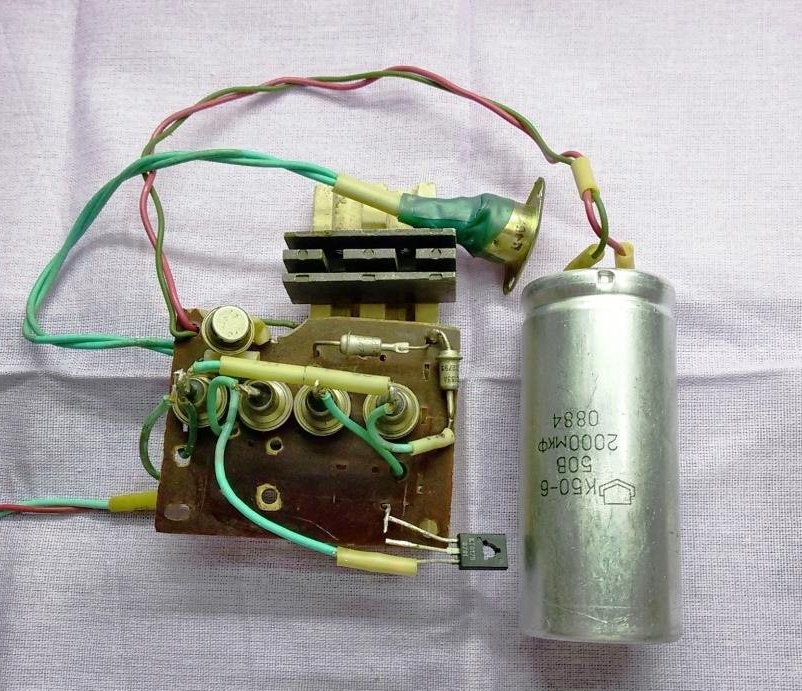
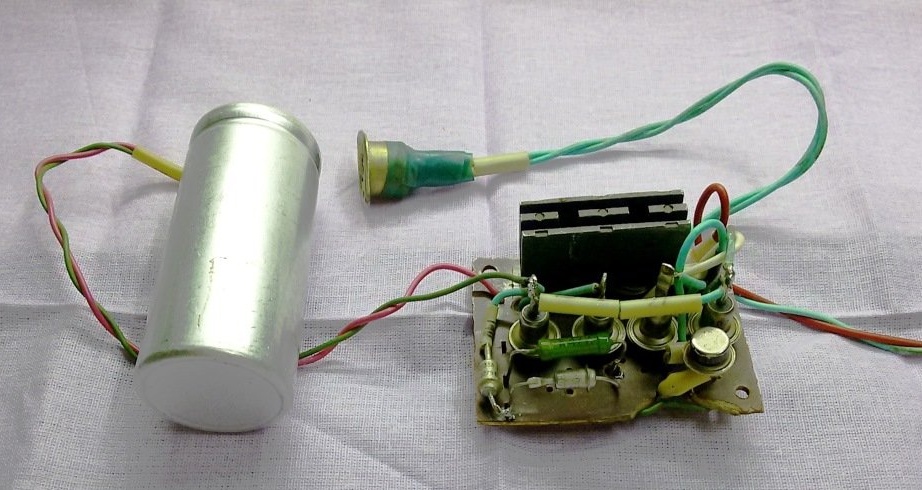
The basis of the power supply unit (PSU) will be a transformer, which can provide the PSU output voltage (taking into account losses on diodes and a transistor) with a sufficient output current. In our case, this is a toroidal transformer with an output of 17 ... 18 volts.
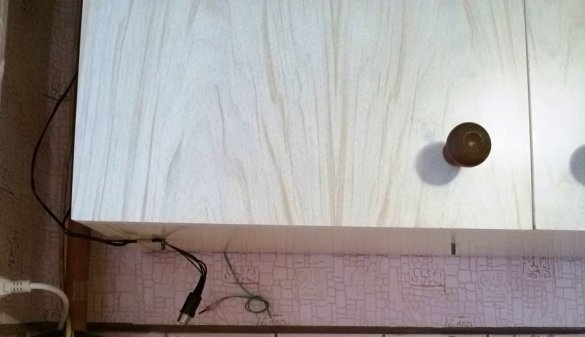
To simplify operation, testing and tuning, we will connect a power cord with a plug and a power switch to the primary winding of the transformer. To the secondary winding we attach a standard connector, for example, as in the photo. To the entrance e part of the PSU we will connect the mating part of the connector.

We complete the circuit with the details indicated in the circuit. For the rectifier bridge, we choose diodes of medium power, they must withstand a current of up to 1.5 amperes and a voltage of up to 30 volts. Similar requirements for the transistor VT2. In addition, it must be installed on a radiator to remove heat. There are no special requirements for the control transistor VT1, its choice is extensive - from KT315 to low-power imported ones. It is advisable to choose with a high current transfer coefficient.
We select a suitable board size and install the parts of the circuit by hinged installation. There is enough free space in the case of the unit, so the dimensions and age of the parts, as well as the mounting density are not limited.A free installation will also facilitate the thermal regime of parts.
BP setup
The resistance of the resistor R1 is selected according to the brightness of the LED used, and the resistance of the resistor R2 is selected according to the stabilization current for the applied zener diodes. For the zener diodes indicated on the diagram, the stabilization current is regulated within 4 ... 10 mA.
After assembling and checking the correctness of the installation, we connect the transformer and adjust the output voltage. Since zener diodes with one designation in a group have a relatively large scatter of parameters, it may be necessary to select them to obtain the desired output voltage.
5. Assembly and installation of the radio in the home version
In a free place, at the bottom of the case, we position and fix the BP elements from moving. On contact wires from the radio (power, speakers), we install a block with a screw mount. We form wires to the speakers into a connector for quick connection. In a convenient place, on the side wall of the case, drill a hole and install a power switch. We fix furniture squares to prepared places. We measure the coordinates of the mounting holes in the squares, relative to the dimensions of the assembled housing.
We try on the manufactured block to the kitchen section. The location of the unit is optimally close to a power outlet and away from a gas stove or sink. Having decided on the installation location, we transfer the measured coordinates there and mark on the lower shelf the section of the center of the holes for the fixing screws. We drill holes for the M6 screws and countersink the chamfers under the screw heads, flushing them flush with the plane of the shelf.
We place the regular speakers of the car radio on top of the corners of the room (above the kitchen sections) to create the maximum stereo effect. We collect wires from the speakers in one connector and output to the installation location of the unit. Do not forget to bring the antenna wire with the plug there.
We install the assembled musical - kitchen unit in its place and fix it through the elbows, M6 nuts to the screws installed in the section.